Benq MP780ST Digital Projector User Manual MP780 ST MW860USTi en
Benq Corporation Digital Projector MP780 ST MW860USTi en
UserManual.wiki
>
Benq
>
MP780ST User Manual
>
UserMan_JVPMP780ST
Contents
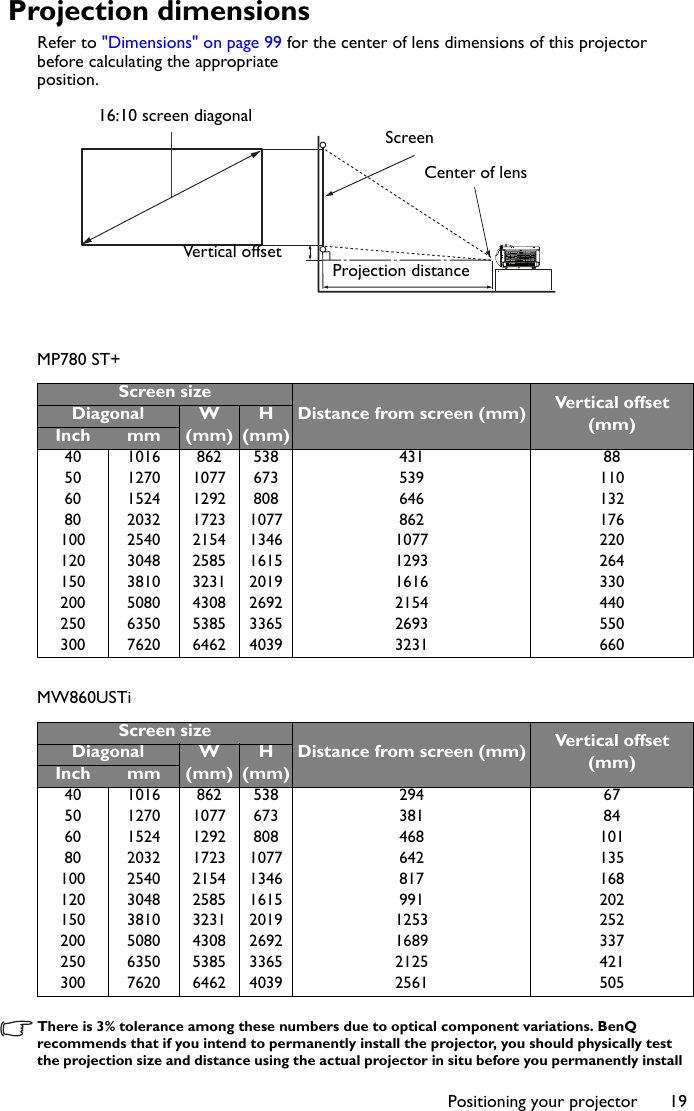
1.
User manual
2.
UserMan (statement)_JVPMP780ST
3.
UserMan_JVPMP780ST
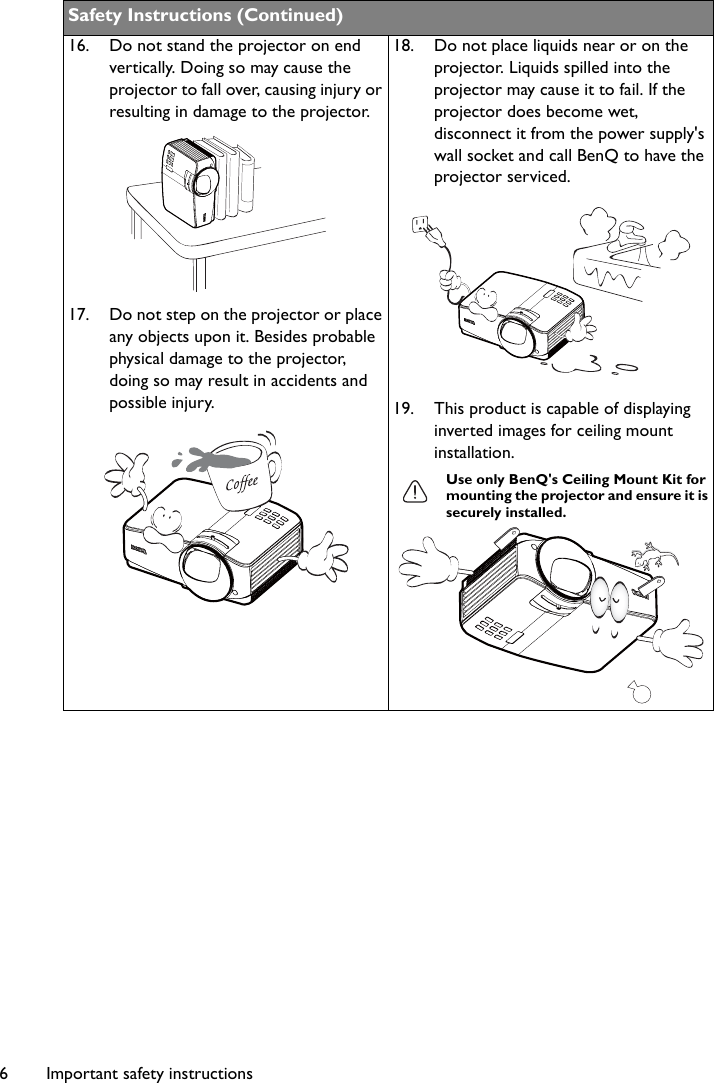
4.
UserMan_JVPMP780ST 2
5.
UserMan_JVPMP780ST 3
UserMan_JVPMP780ST
Navigation menu
Upload a User Manual
Namespaces
Wiki Guide
HTML
PDF
Info
Views
User Manual
Discussion / Help
Navigation