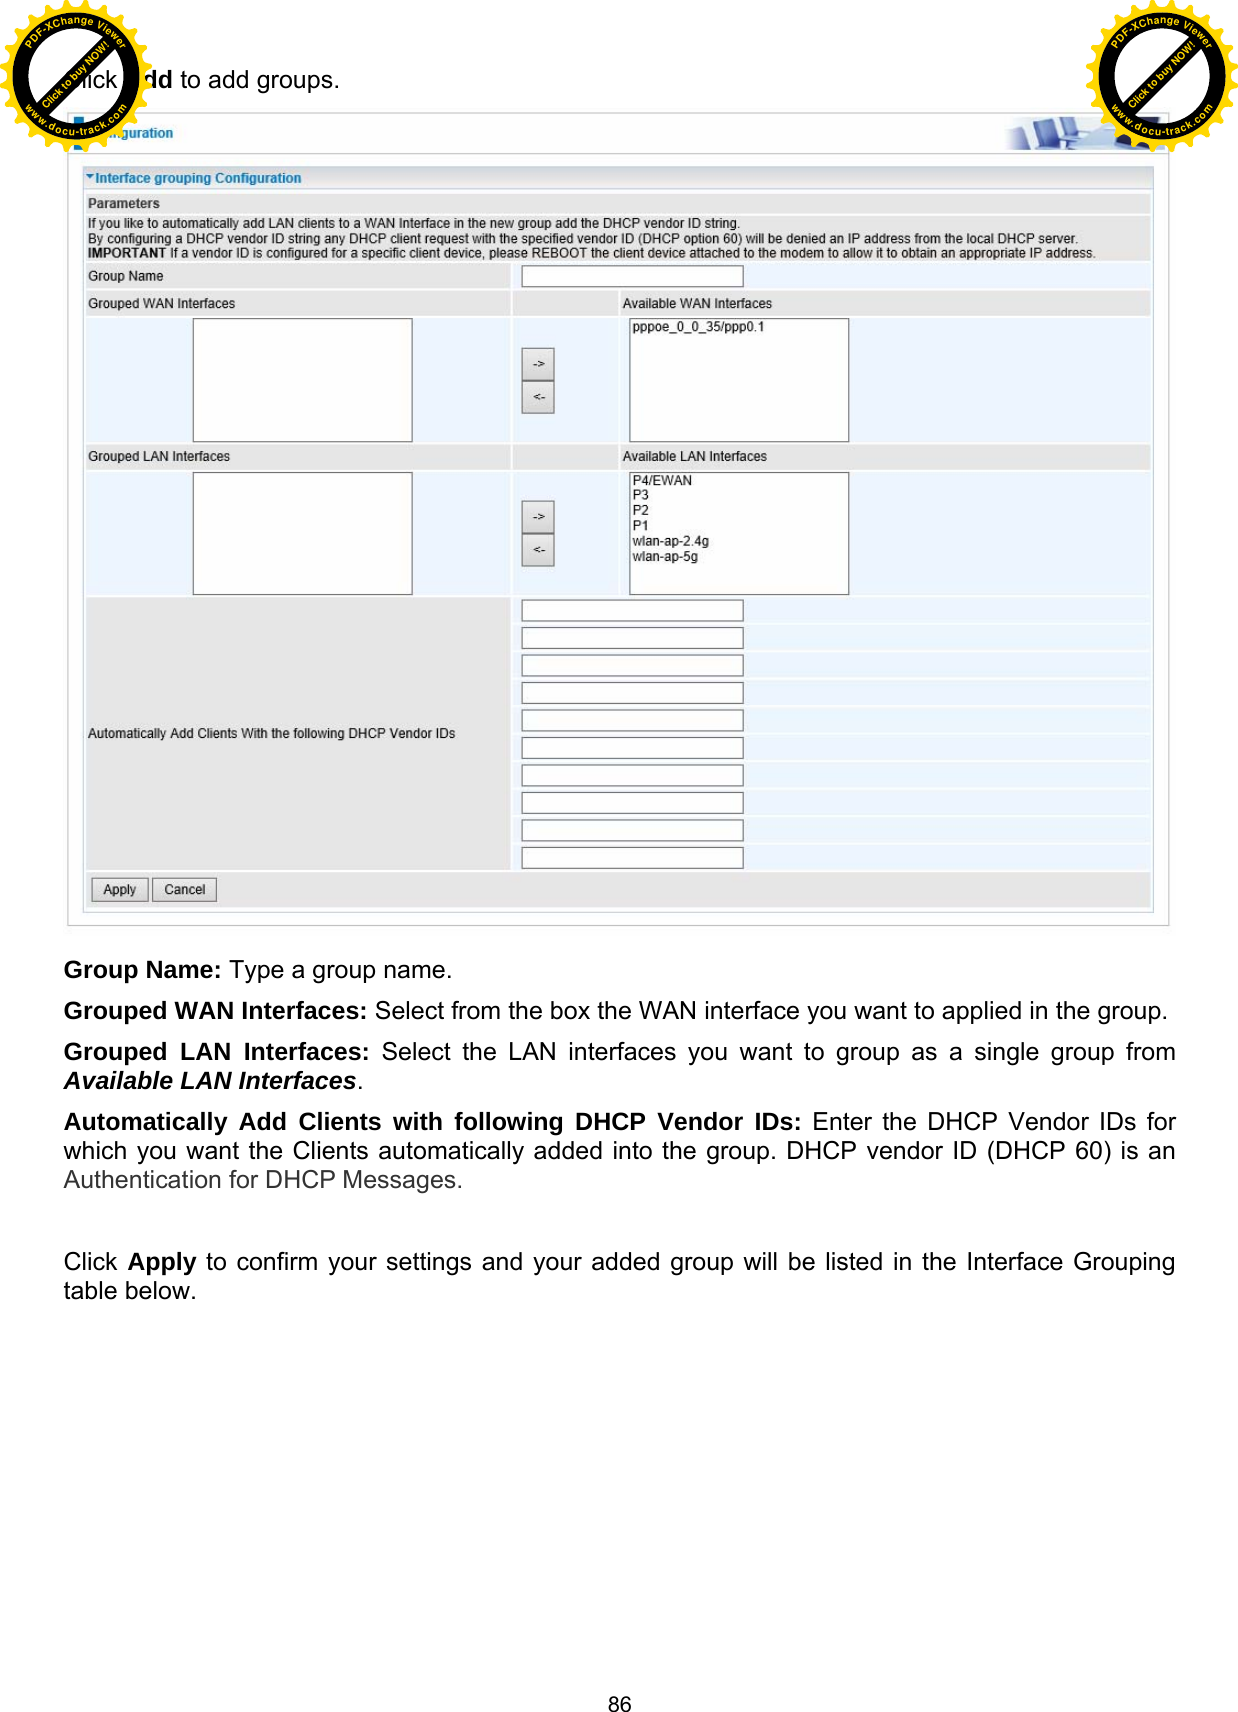
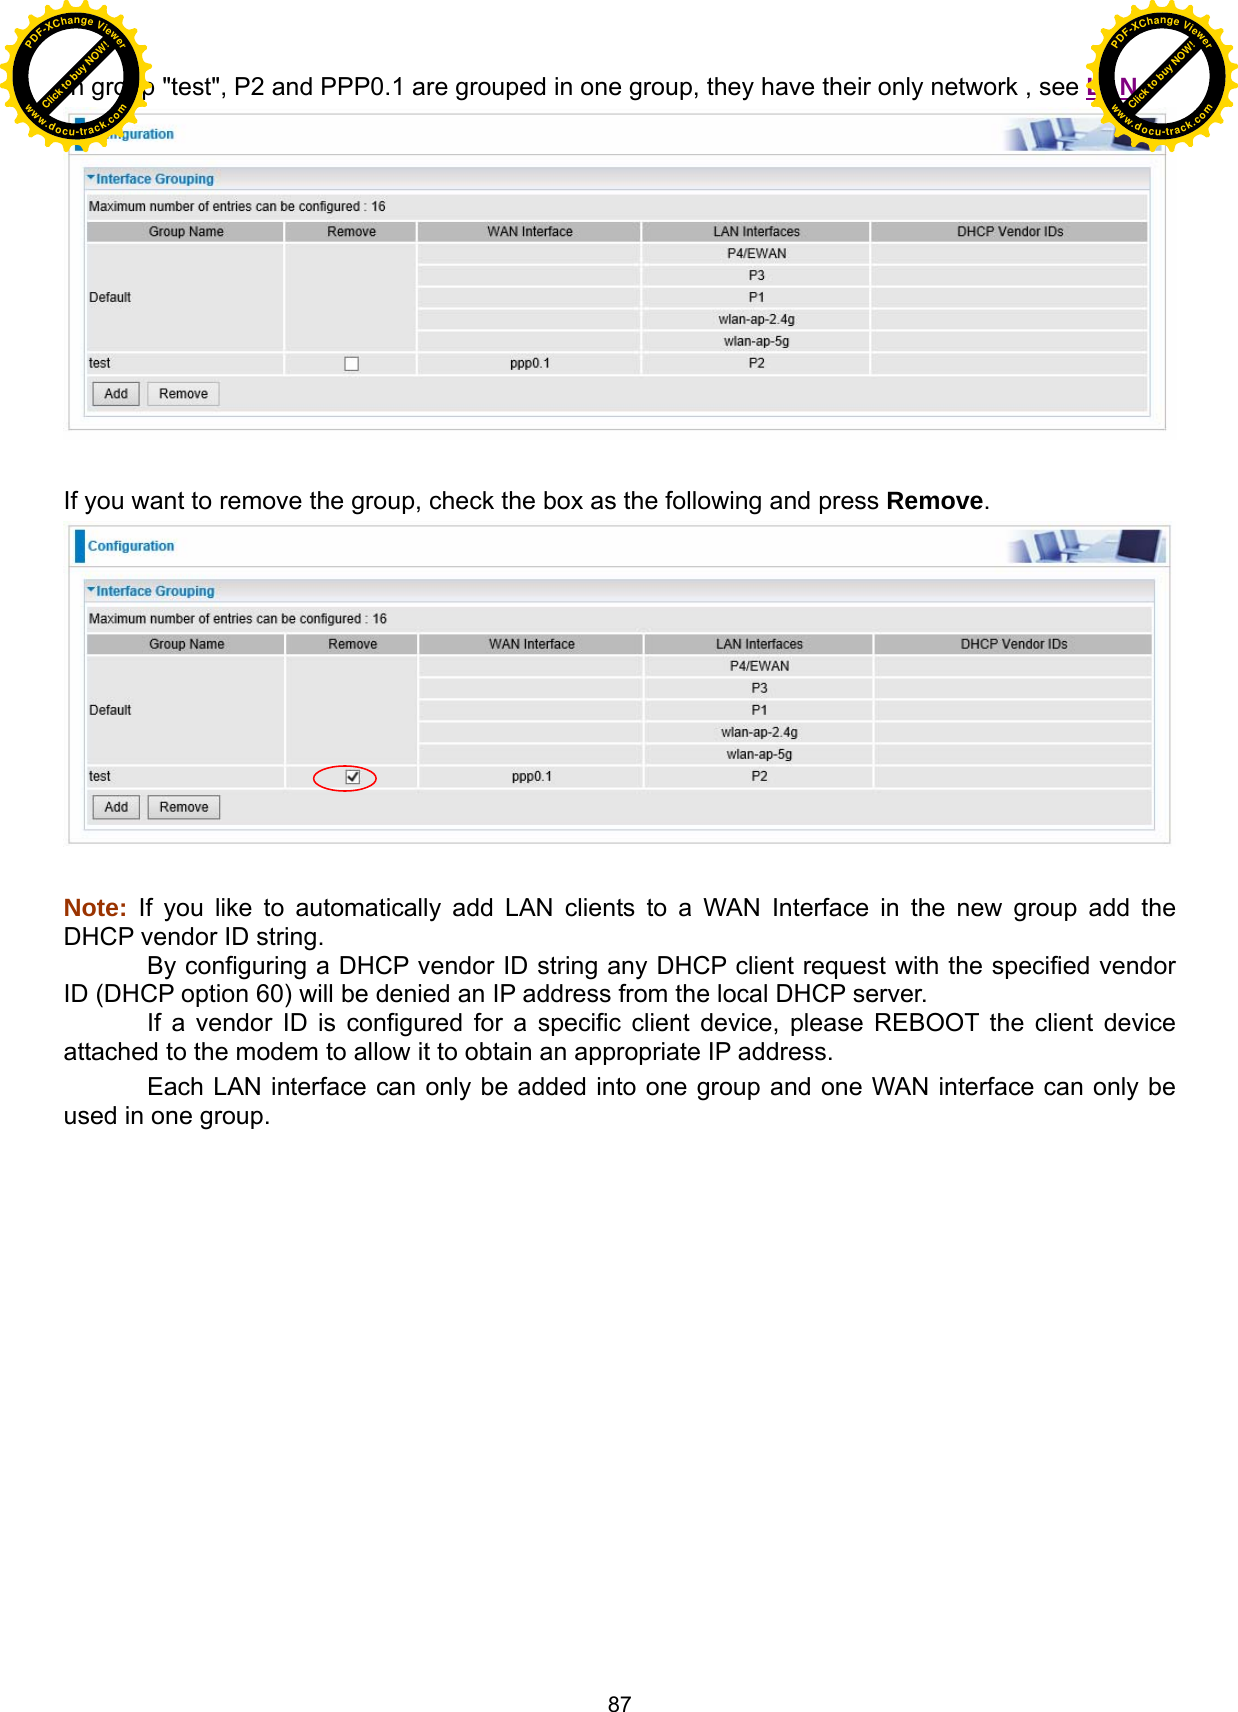
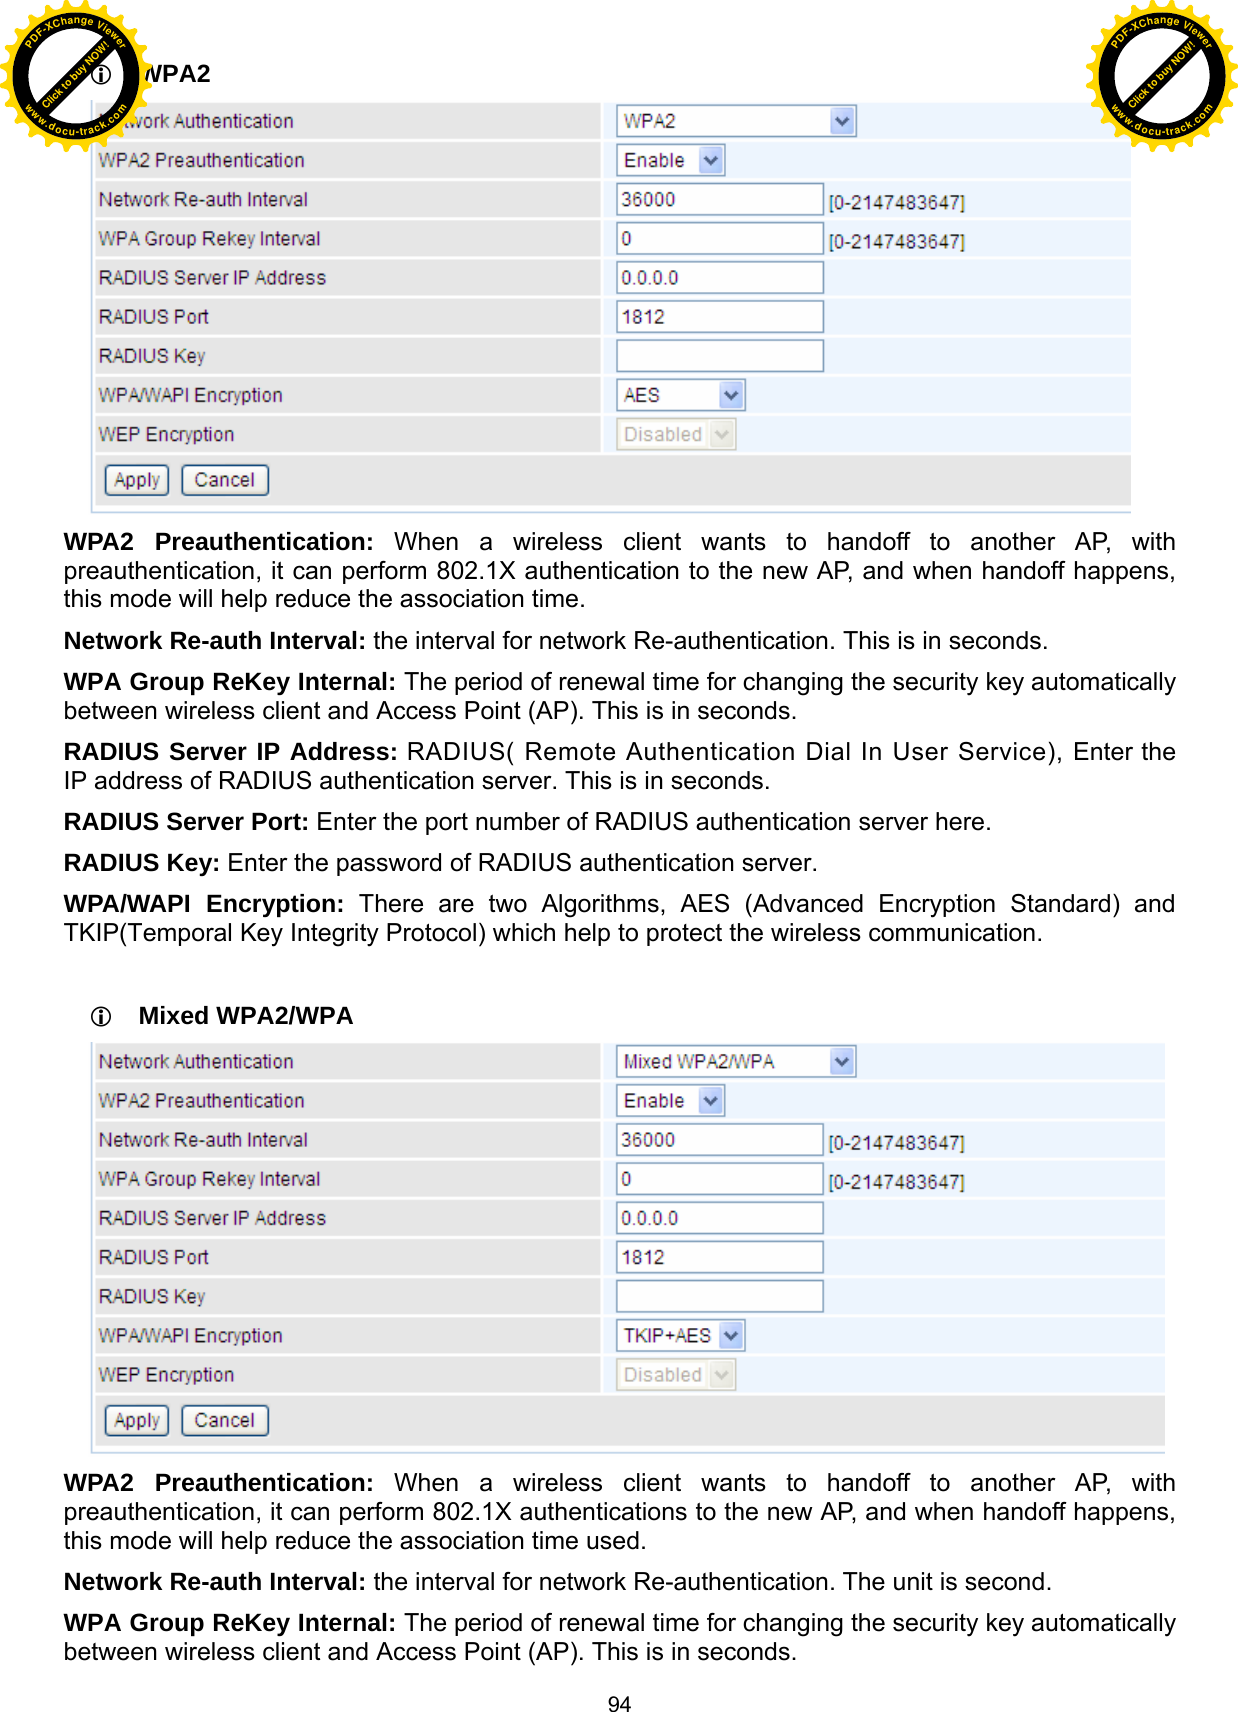
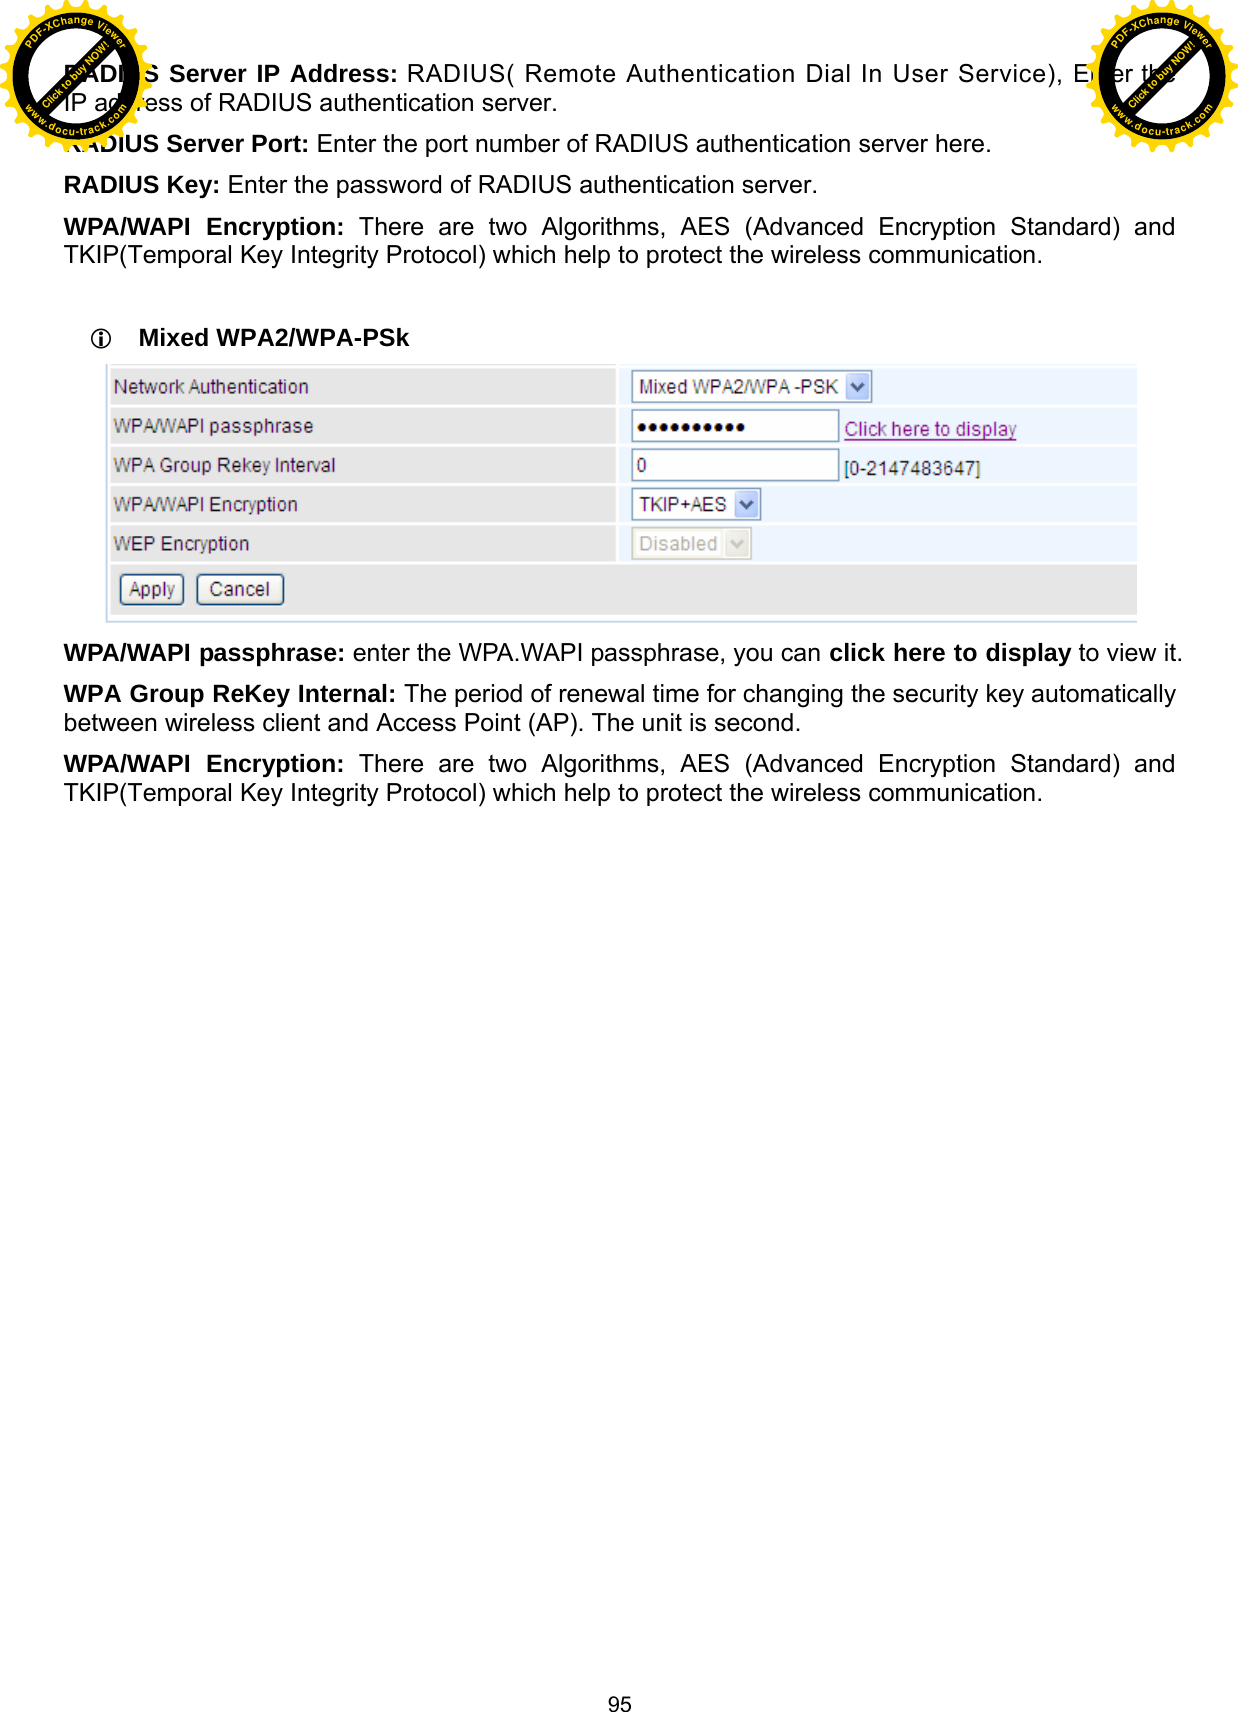
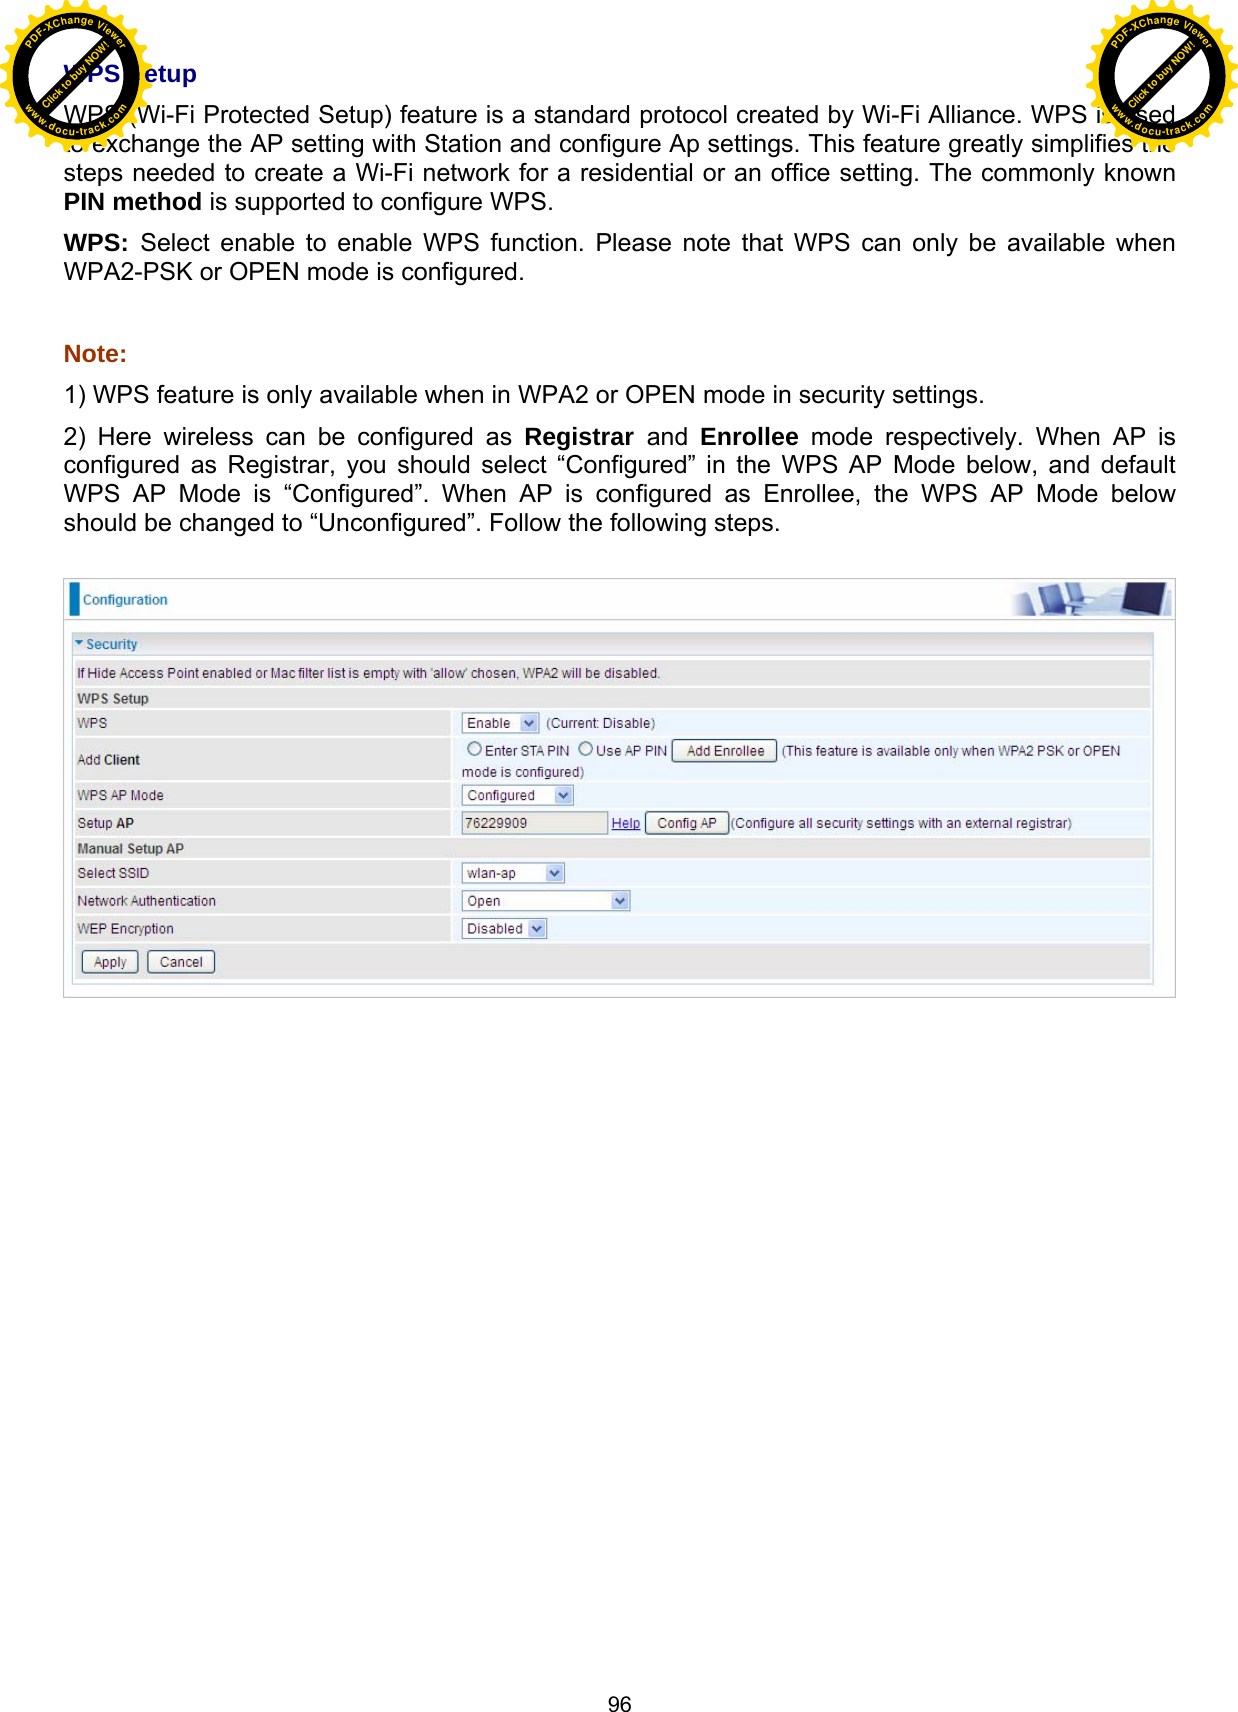
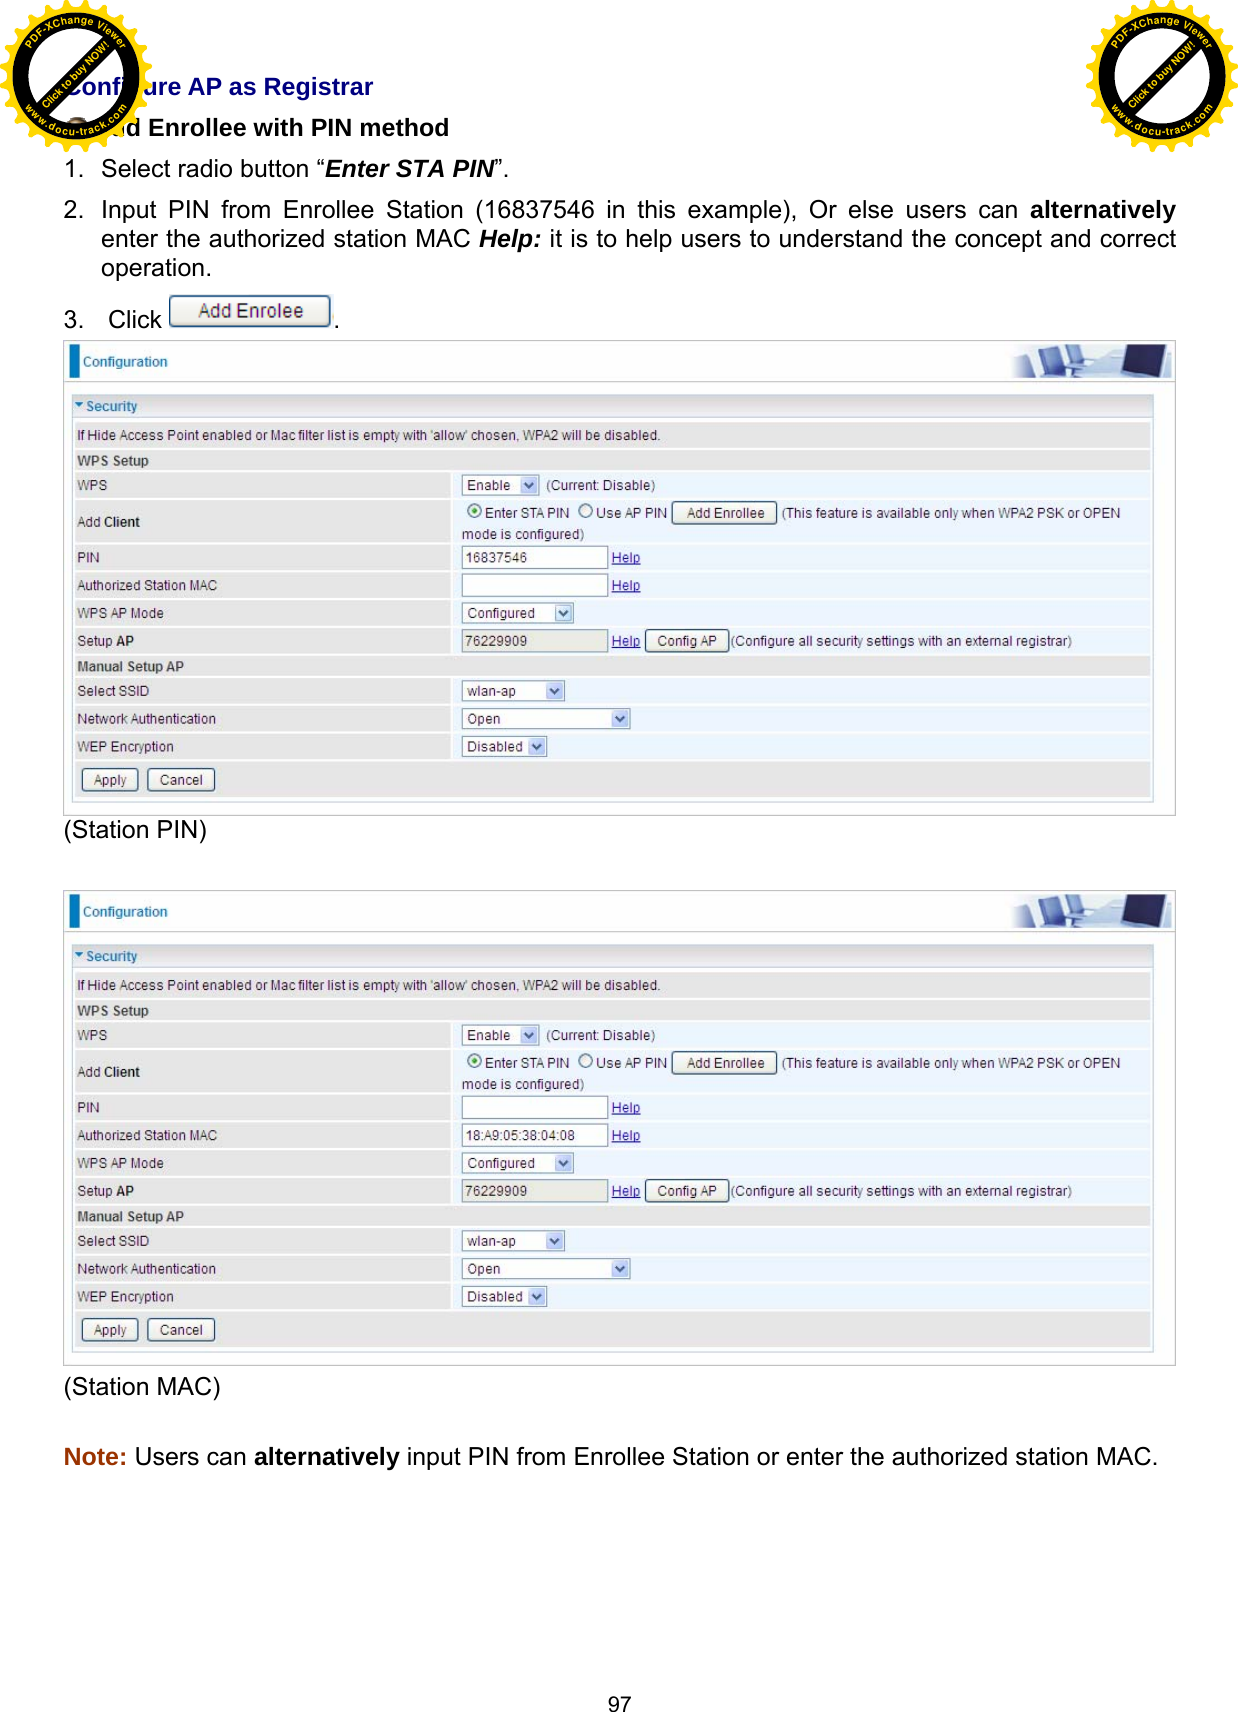
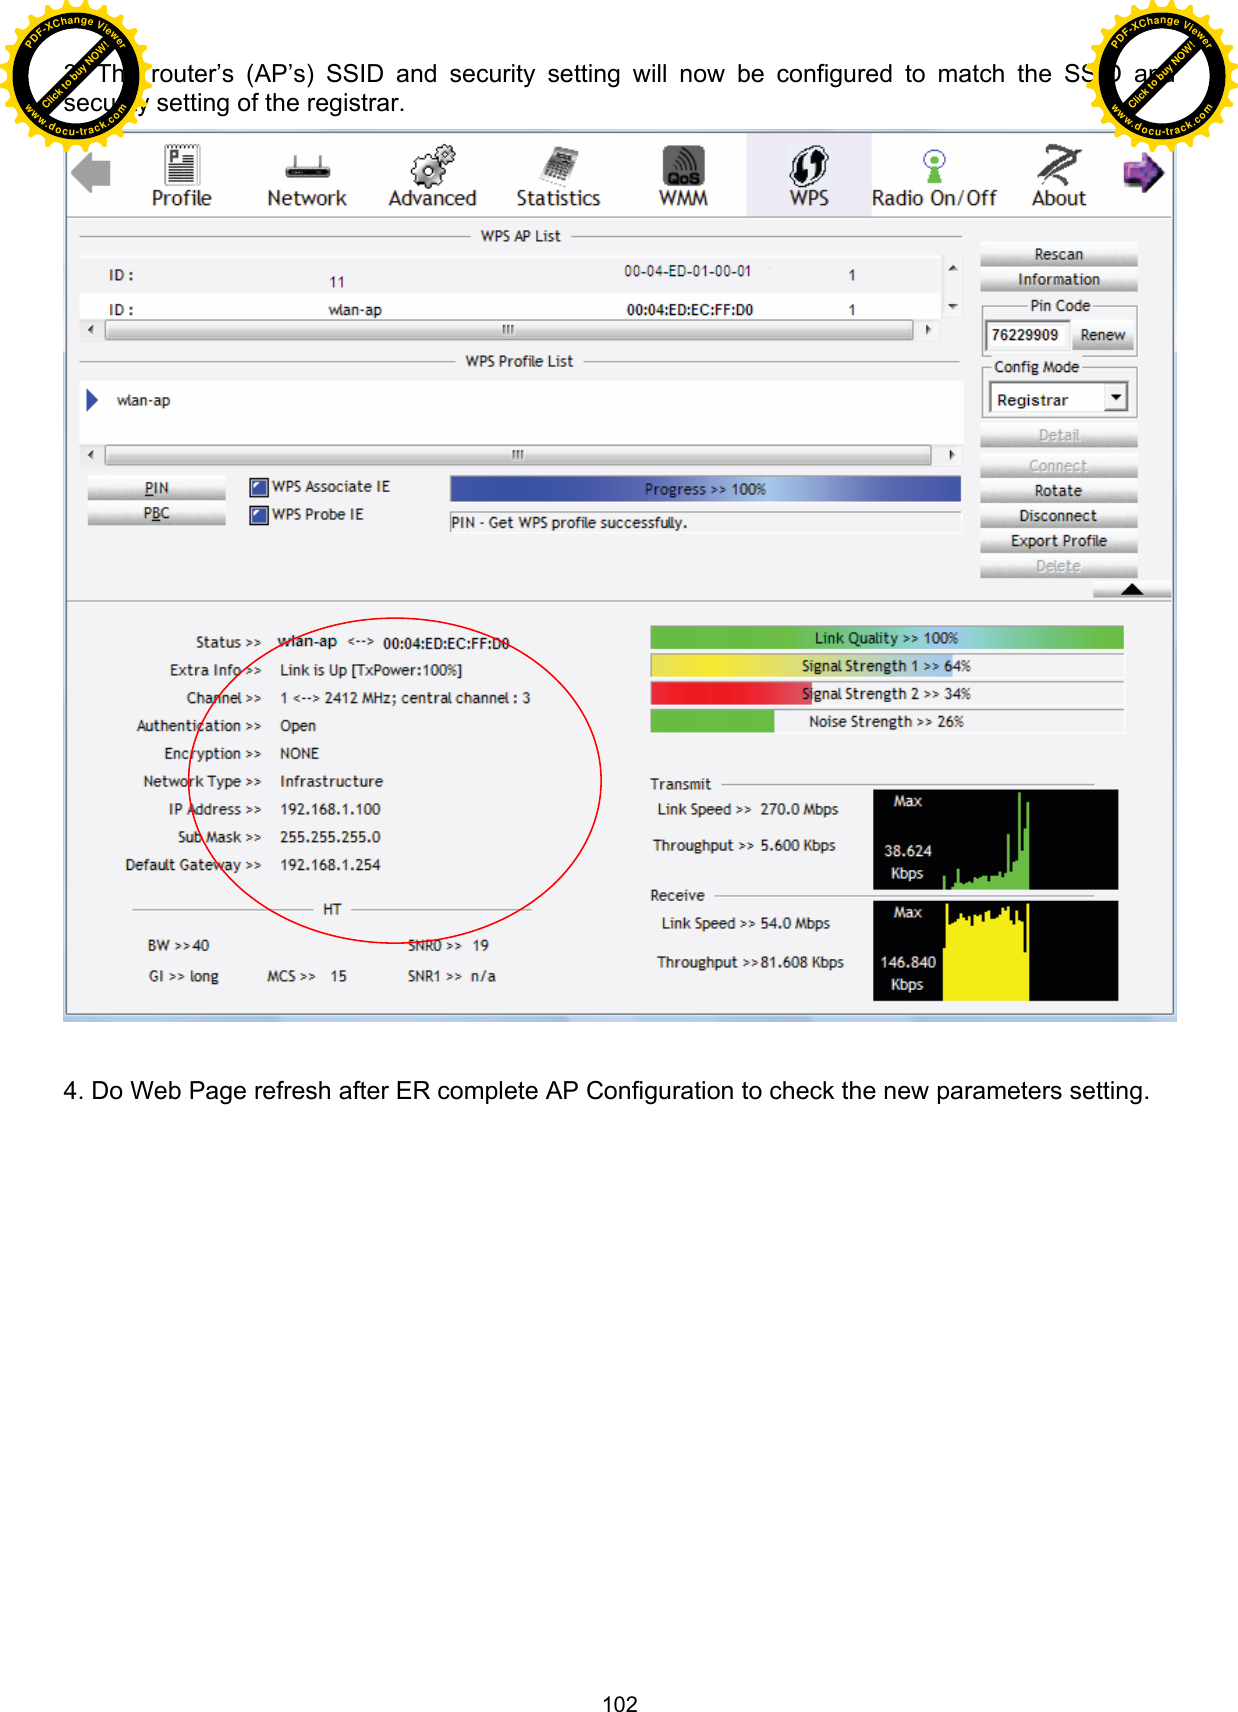
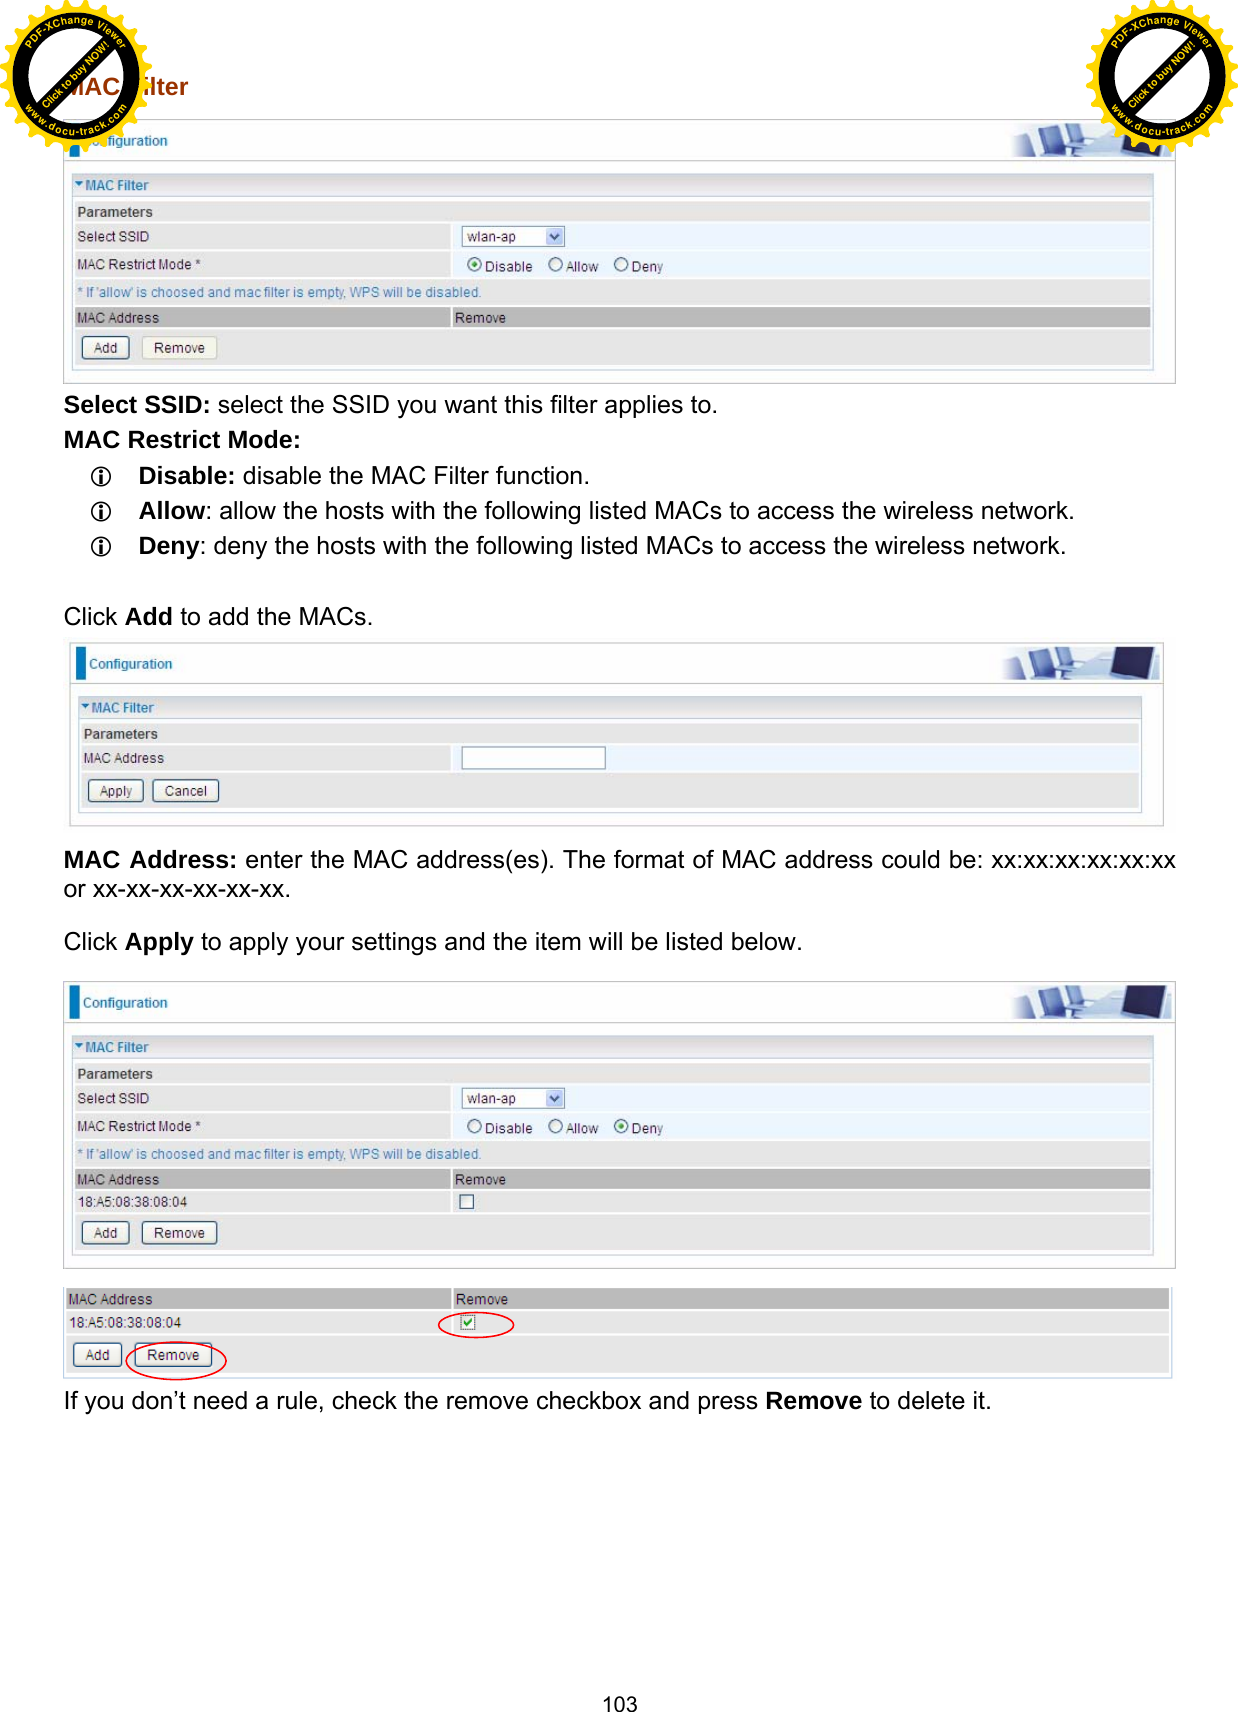
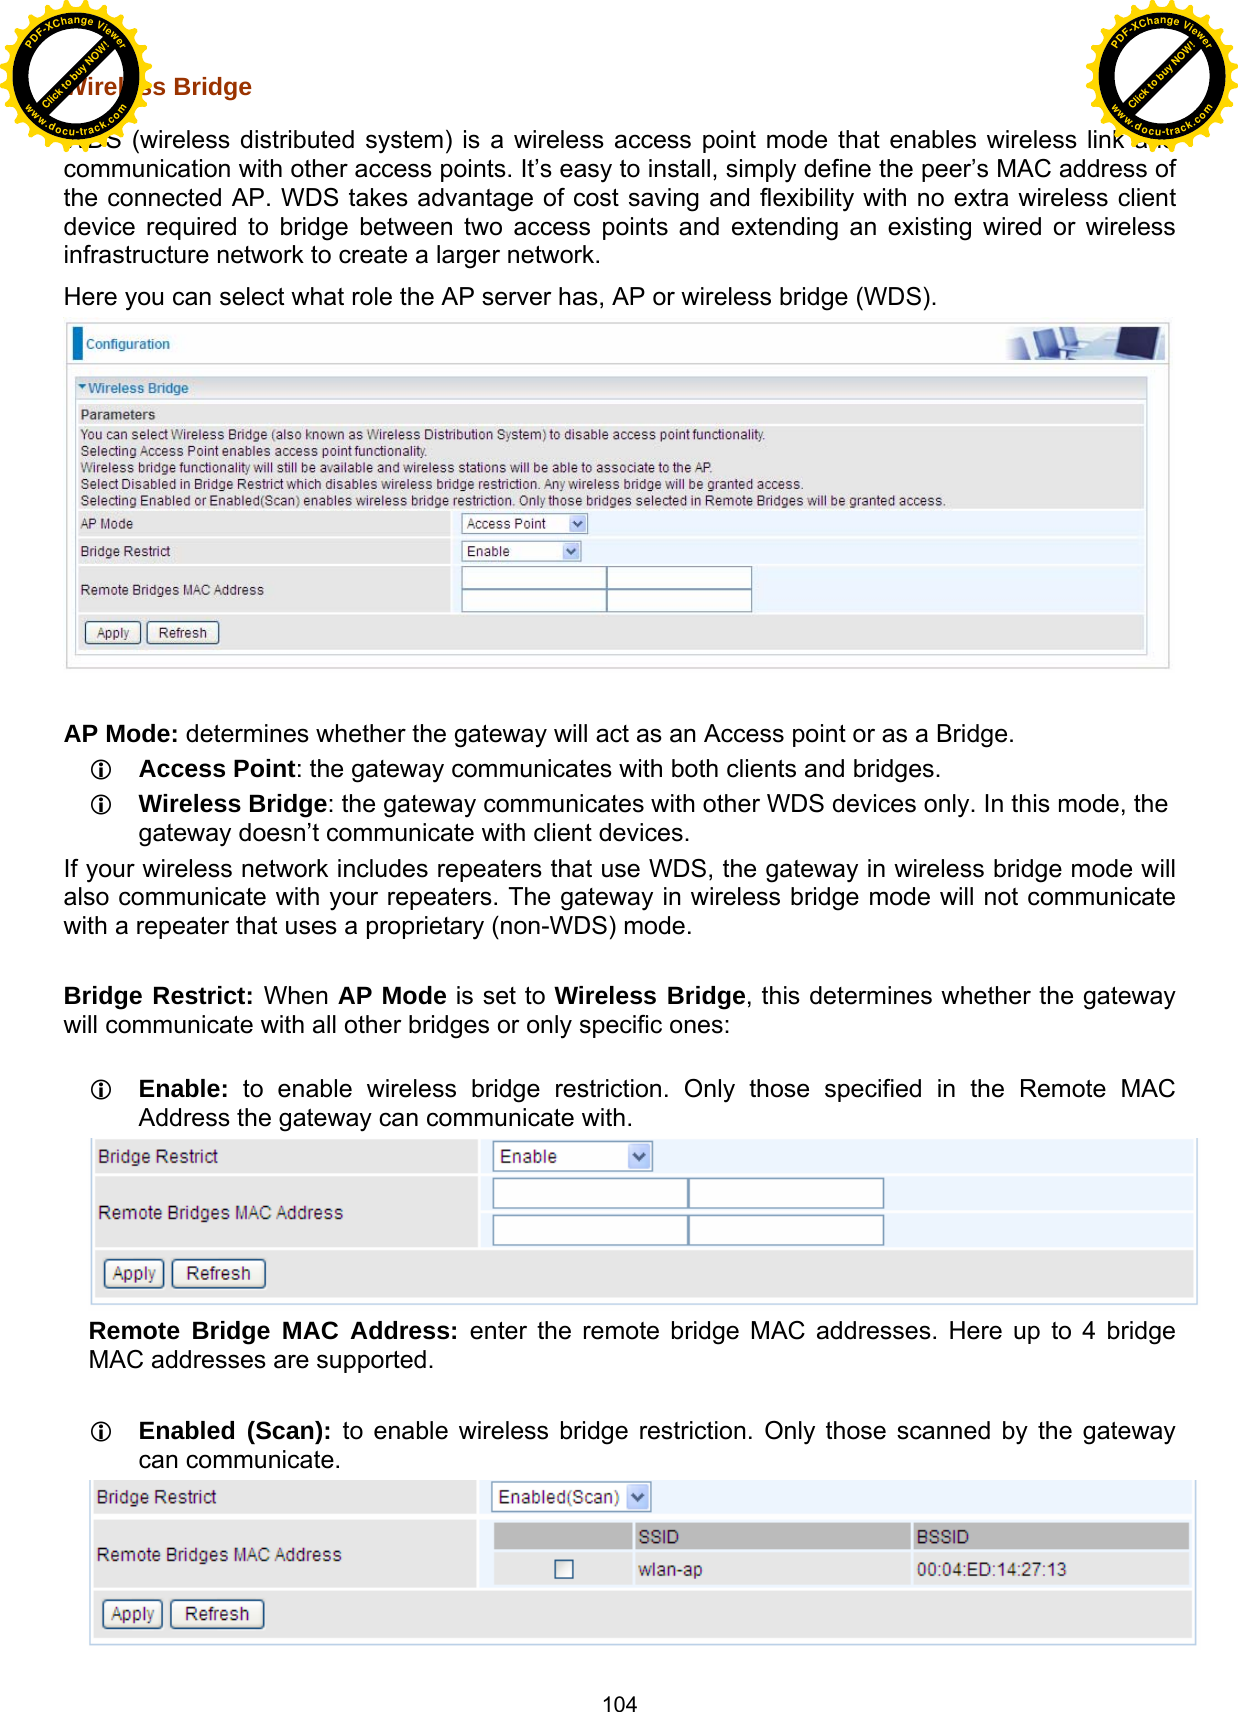
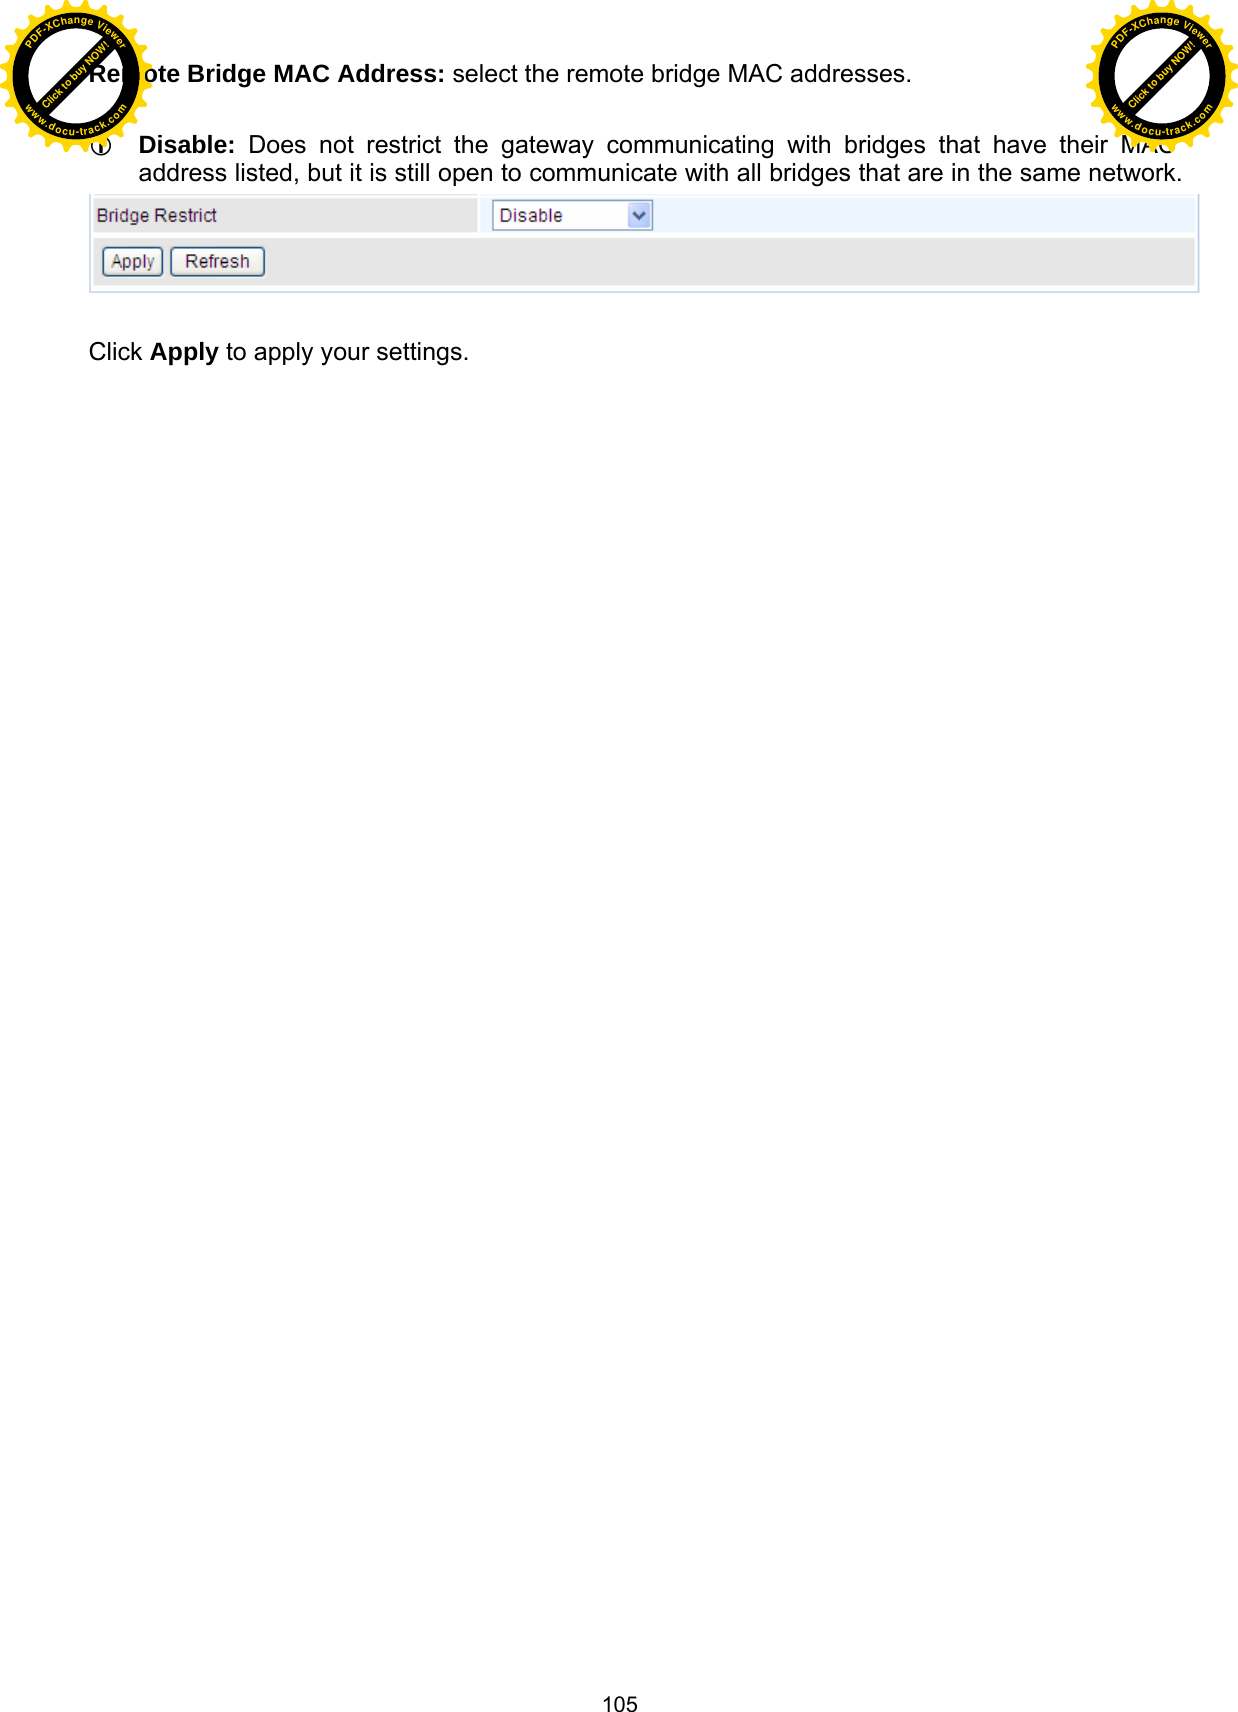
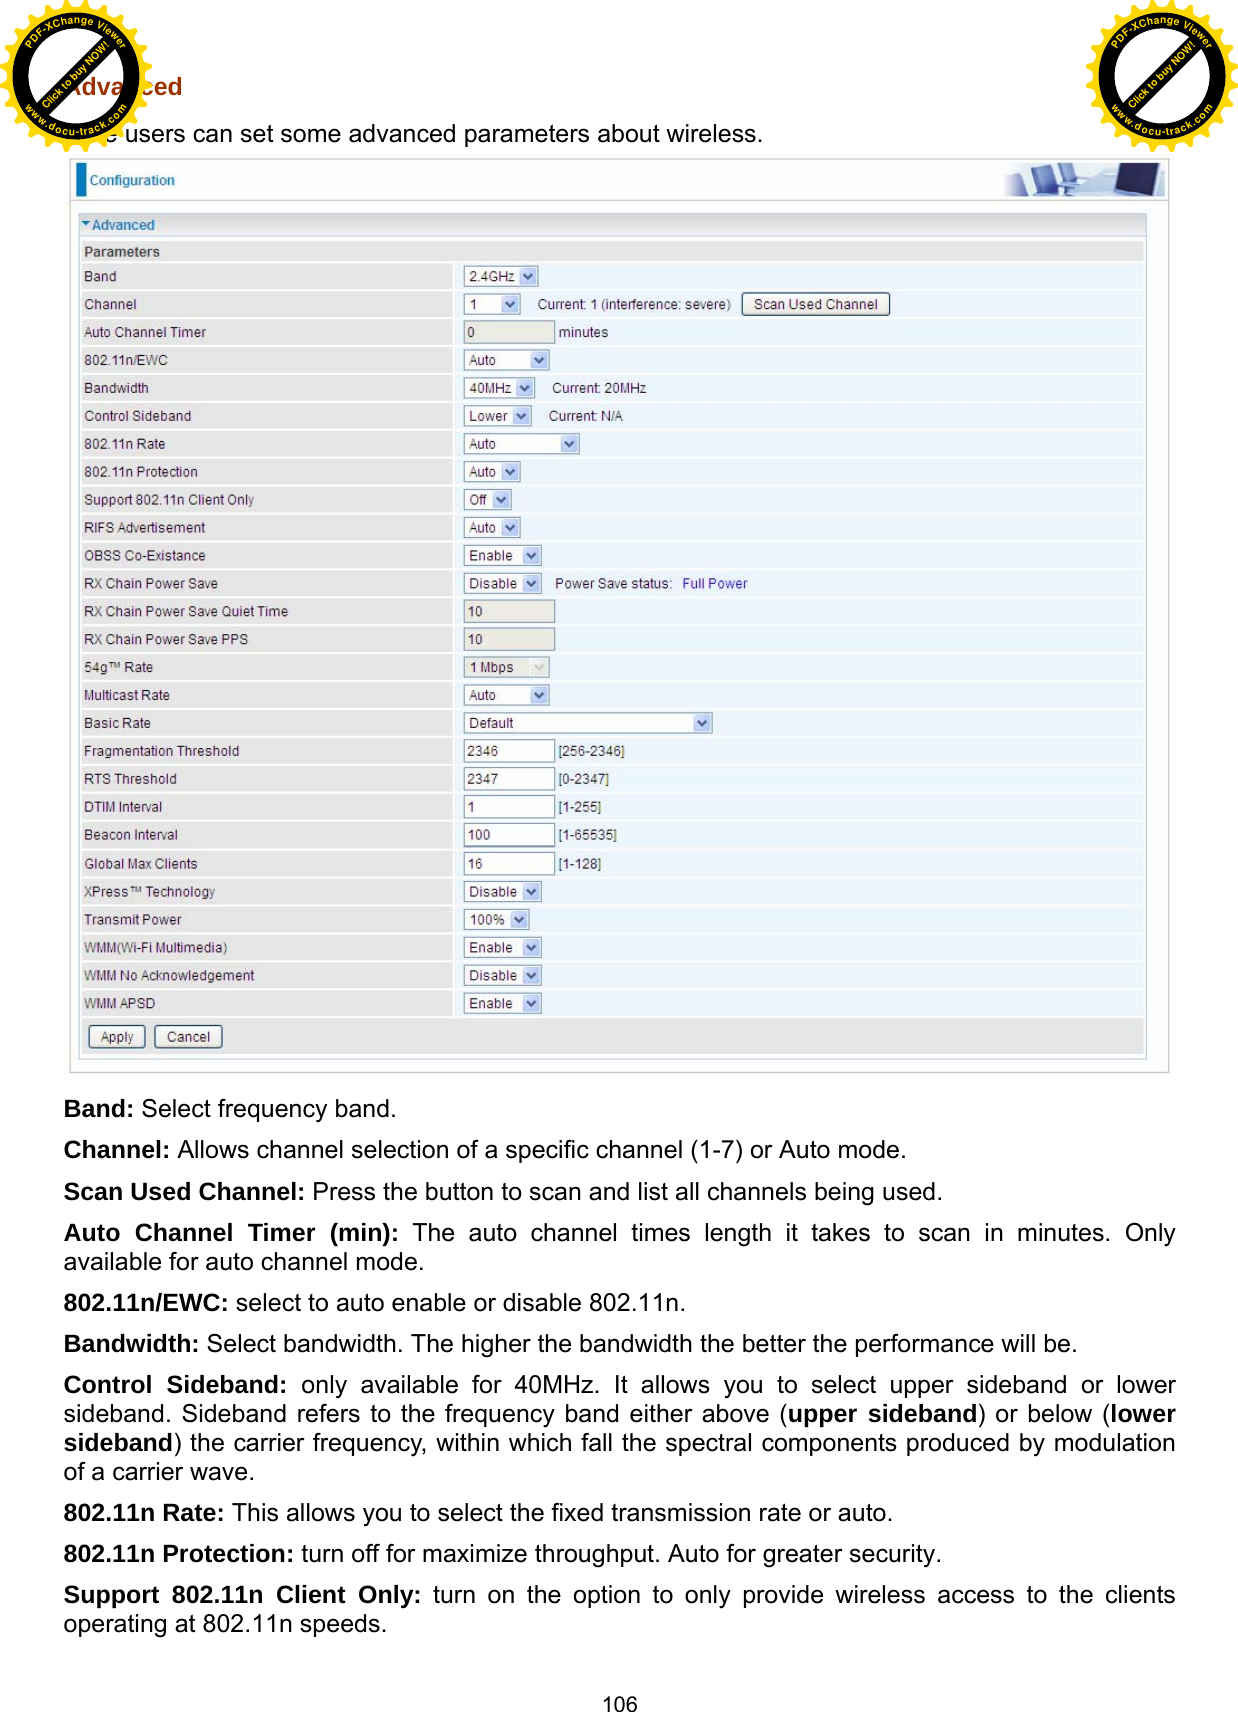
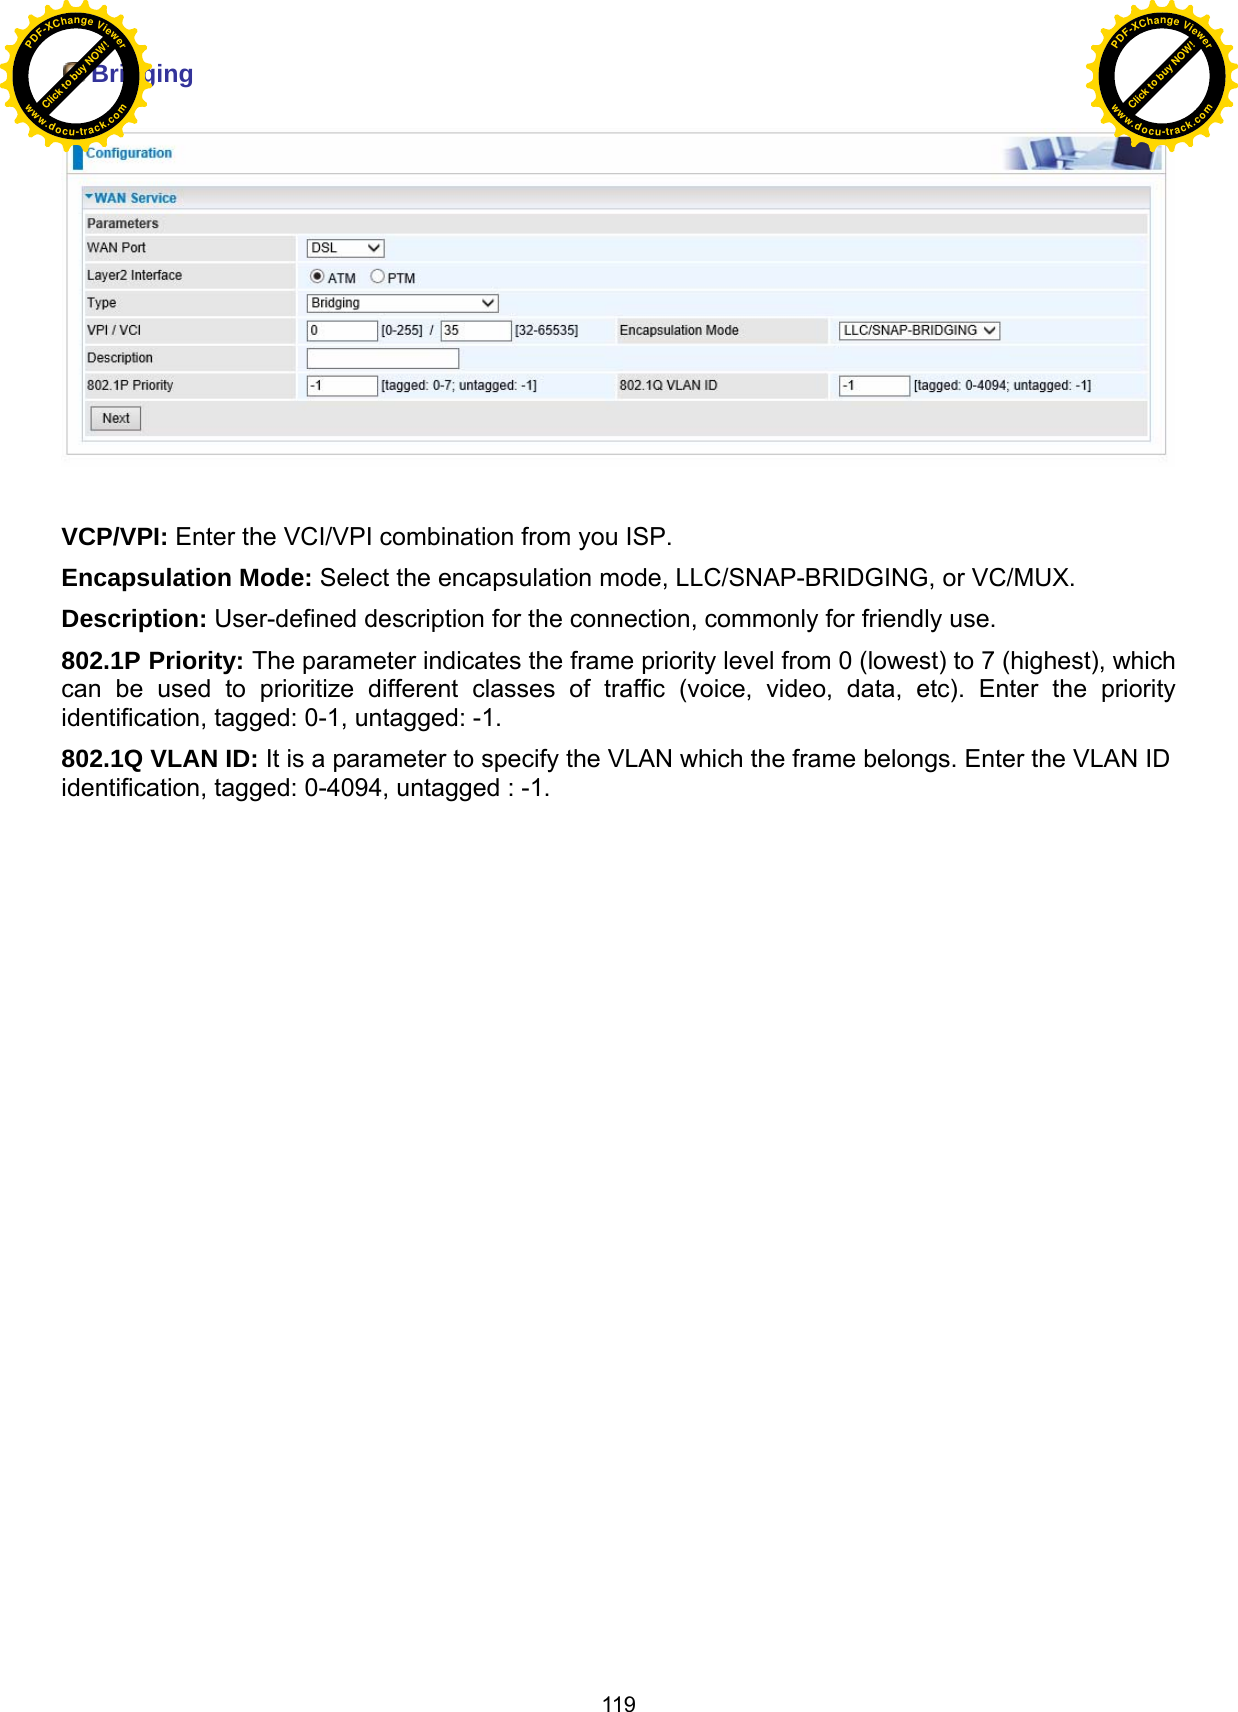
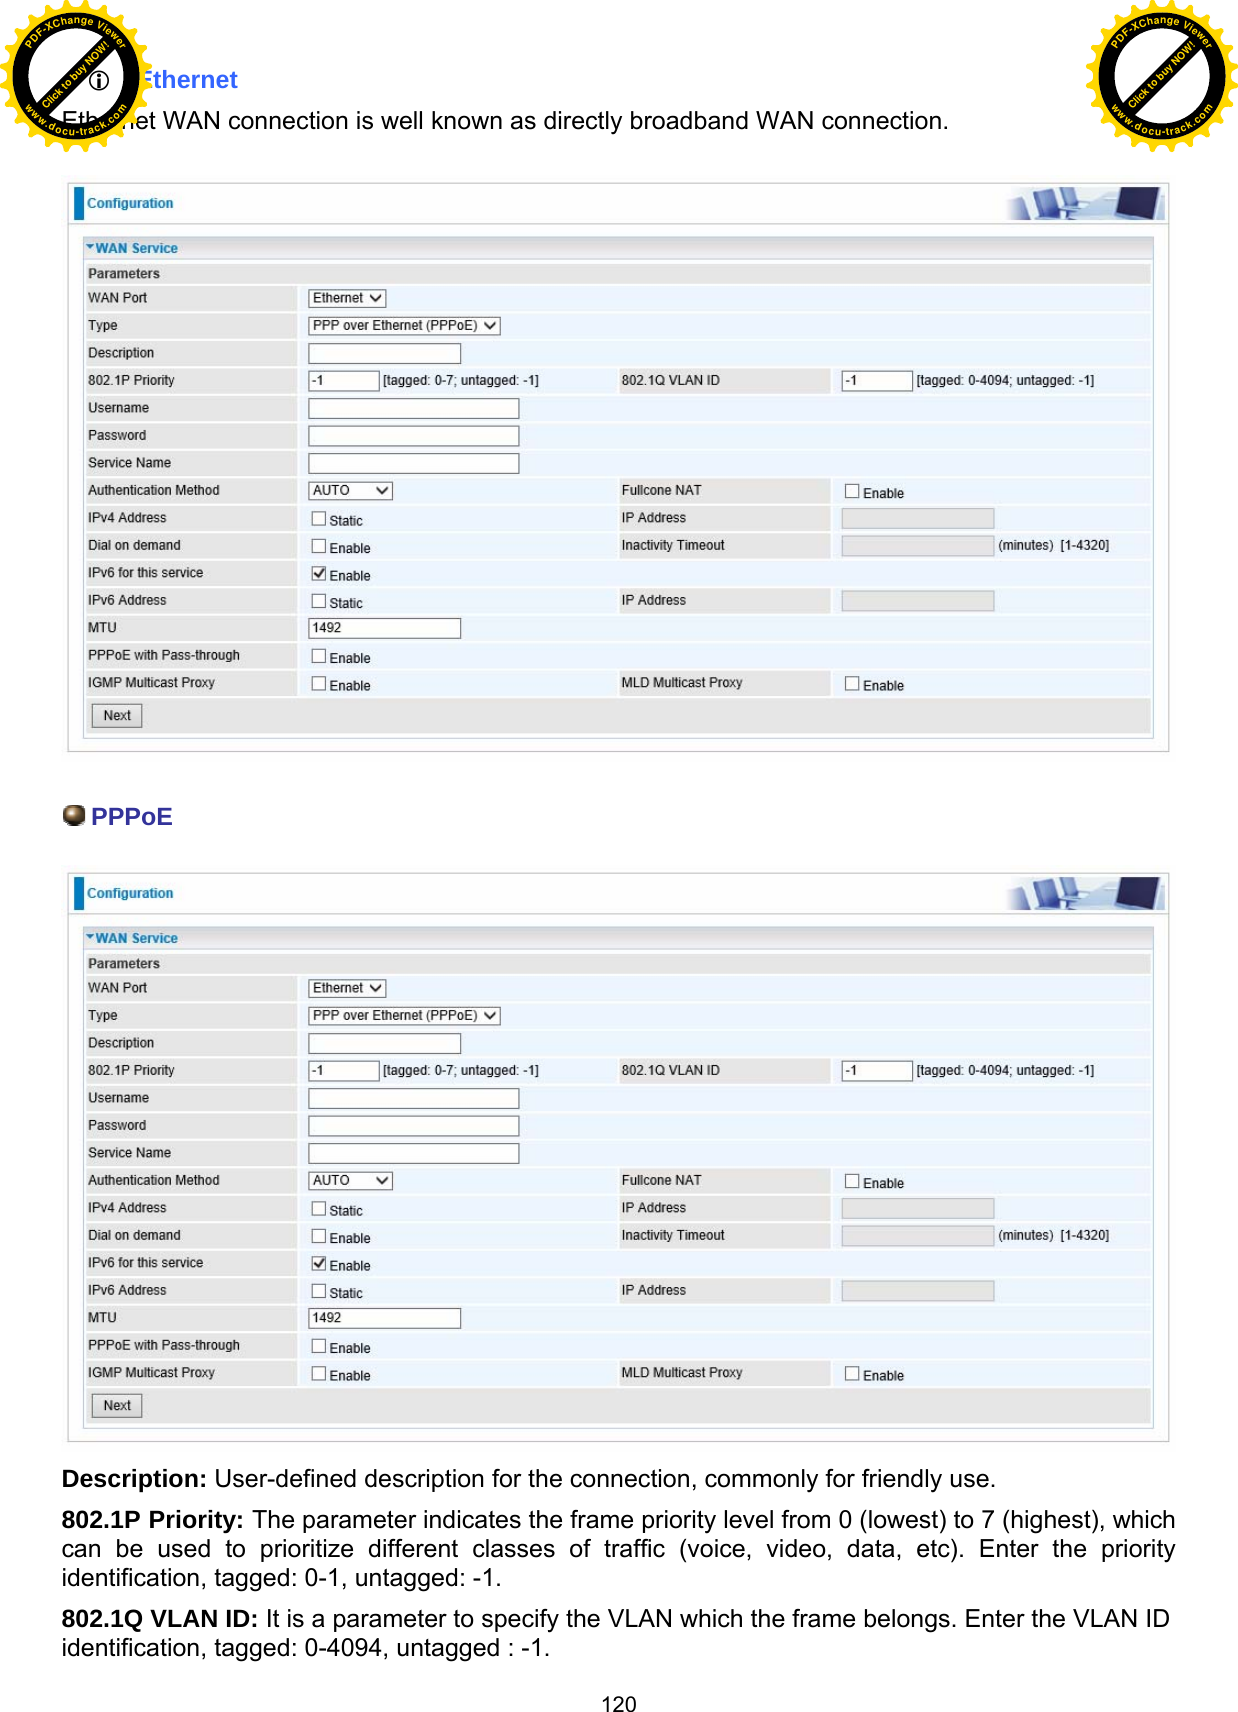
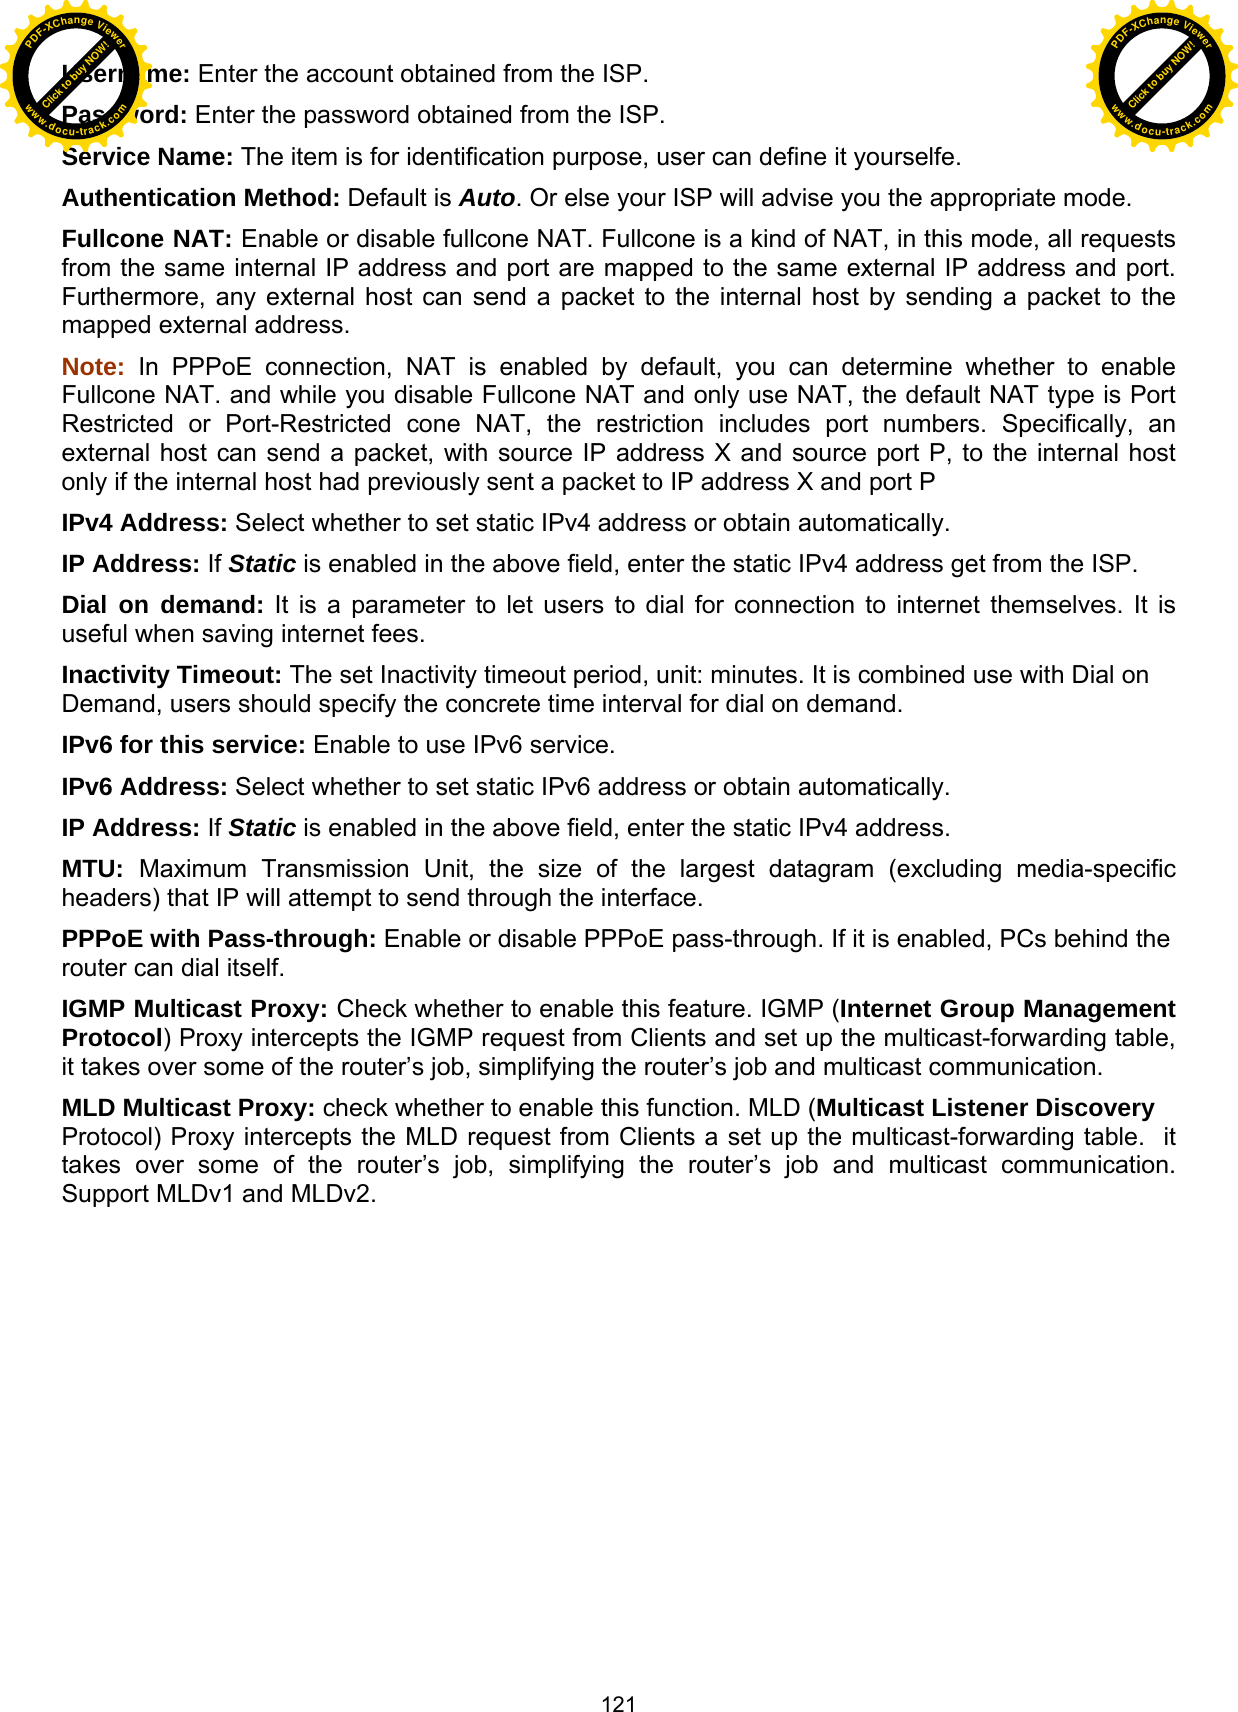
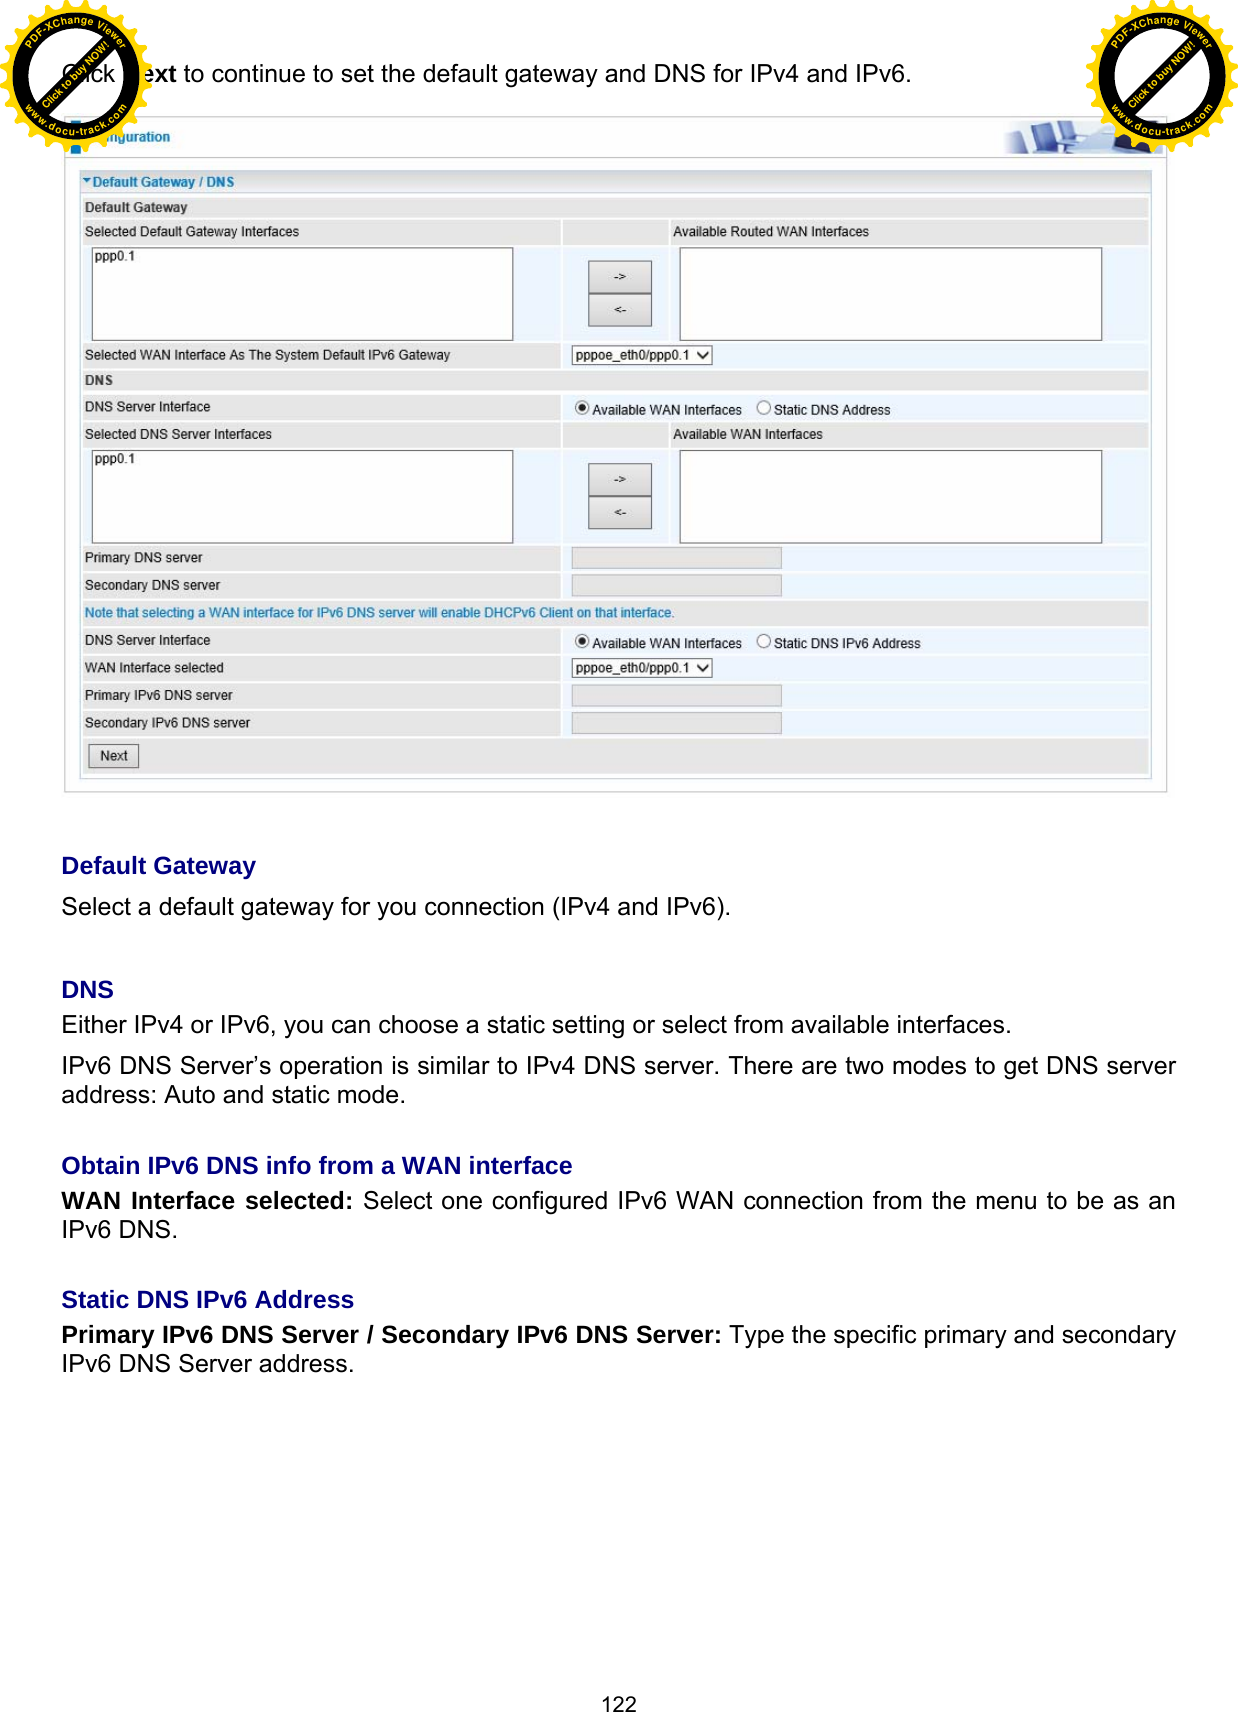
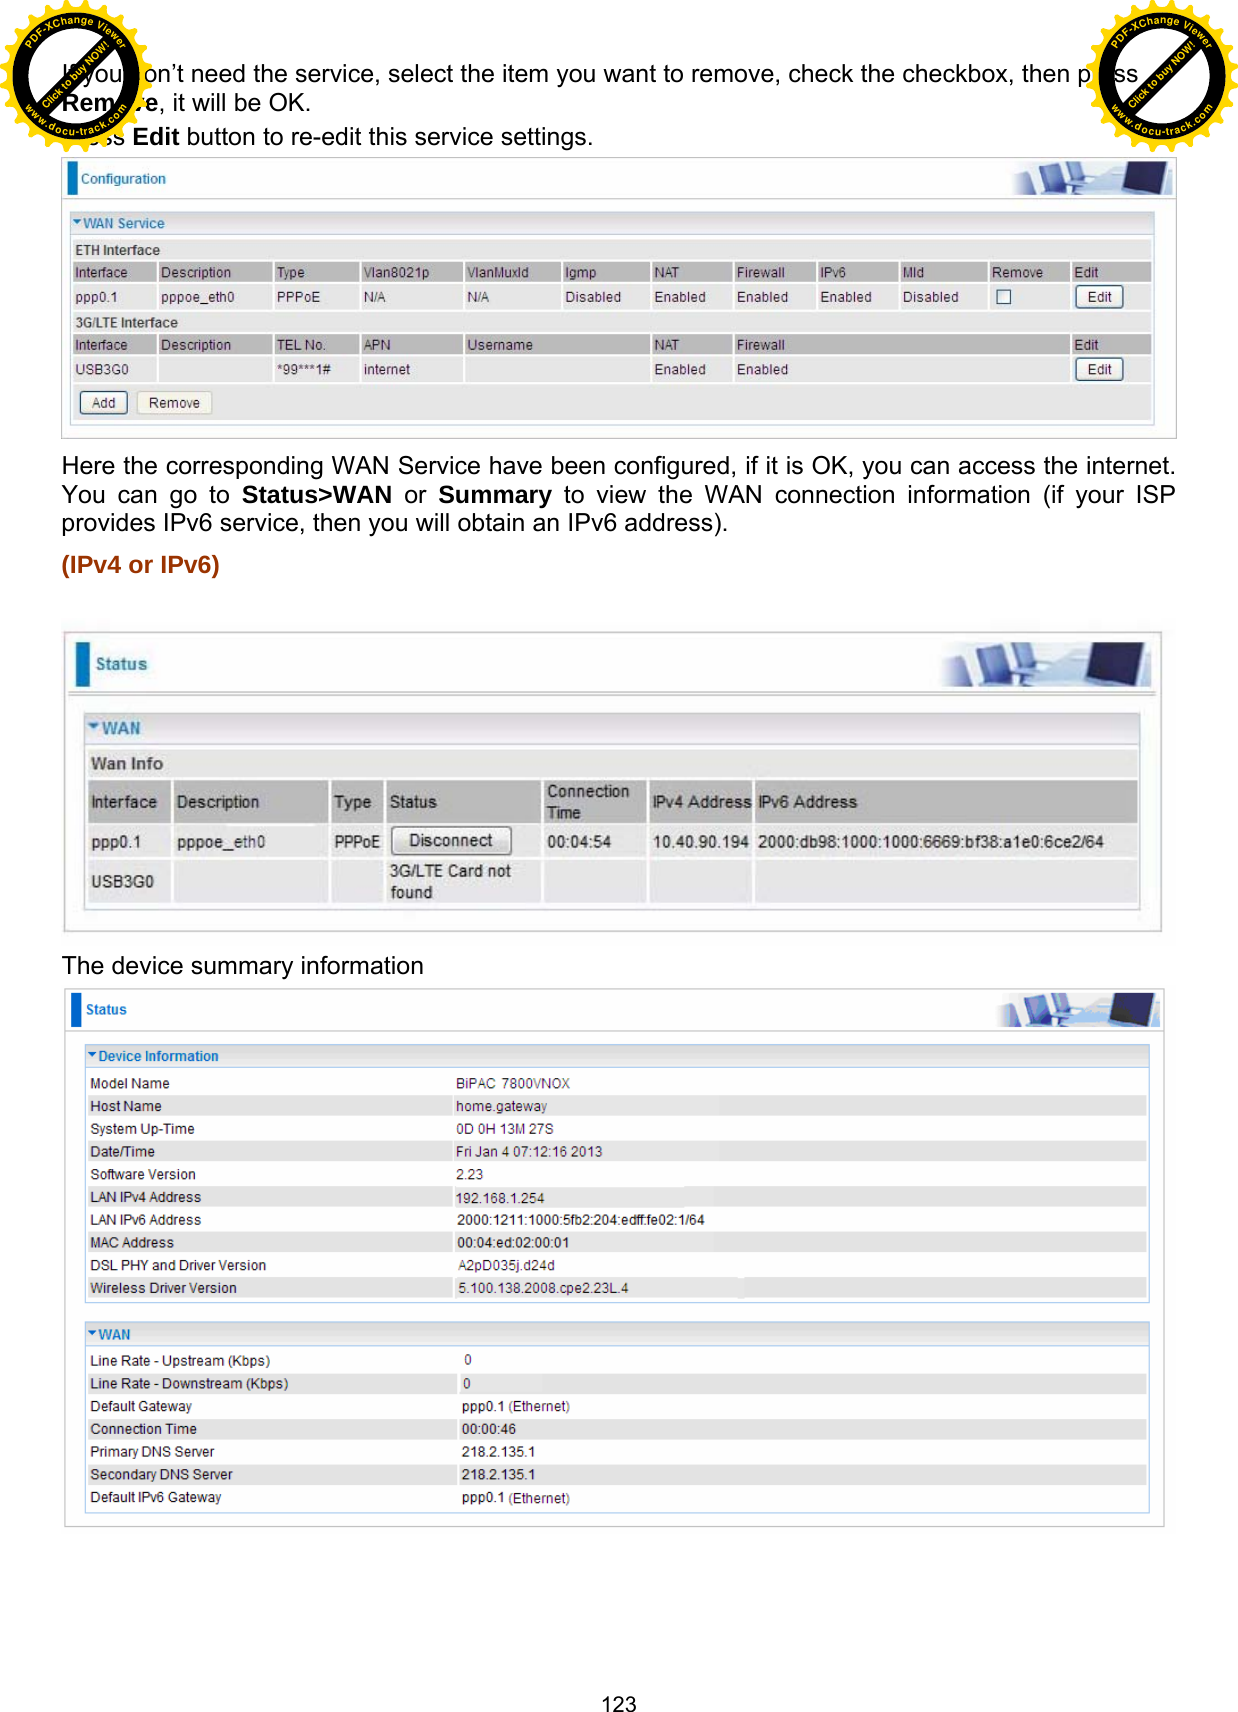
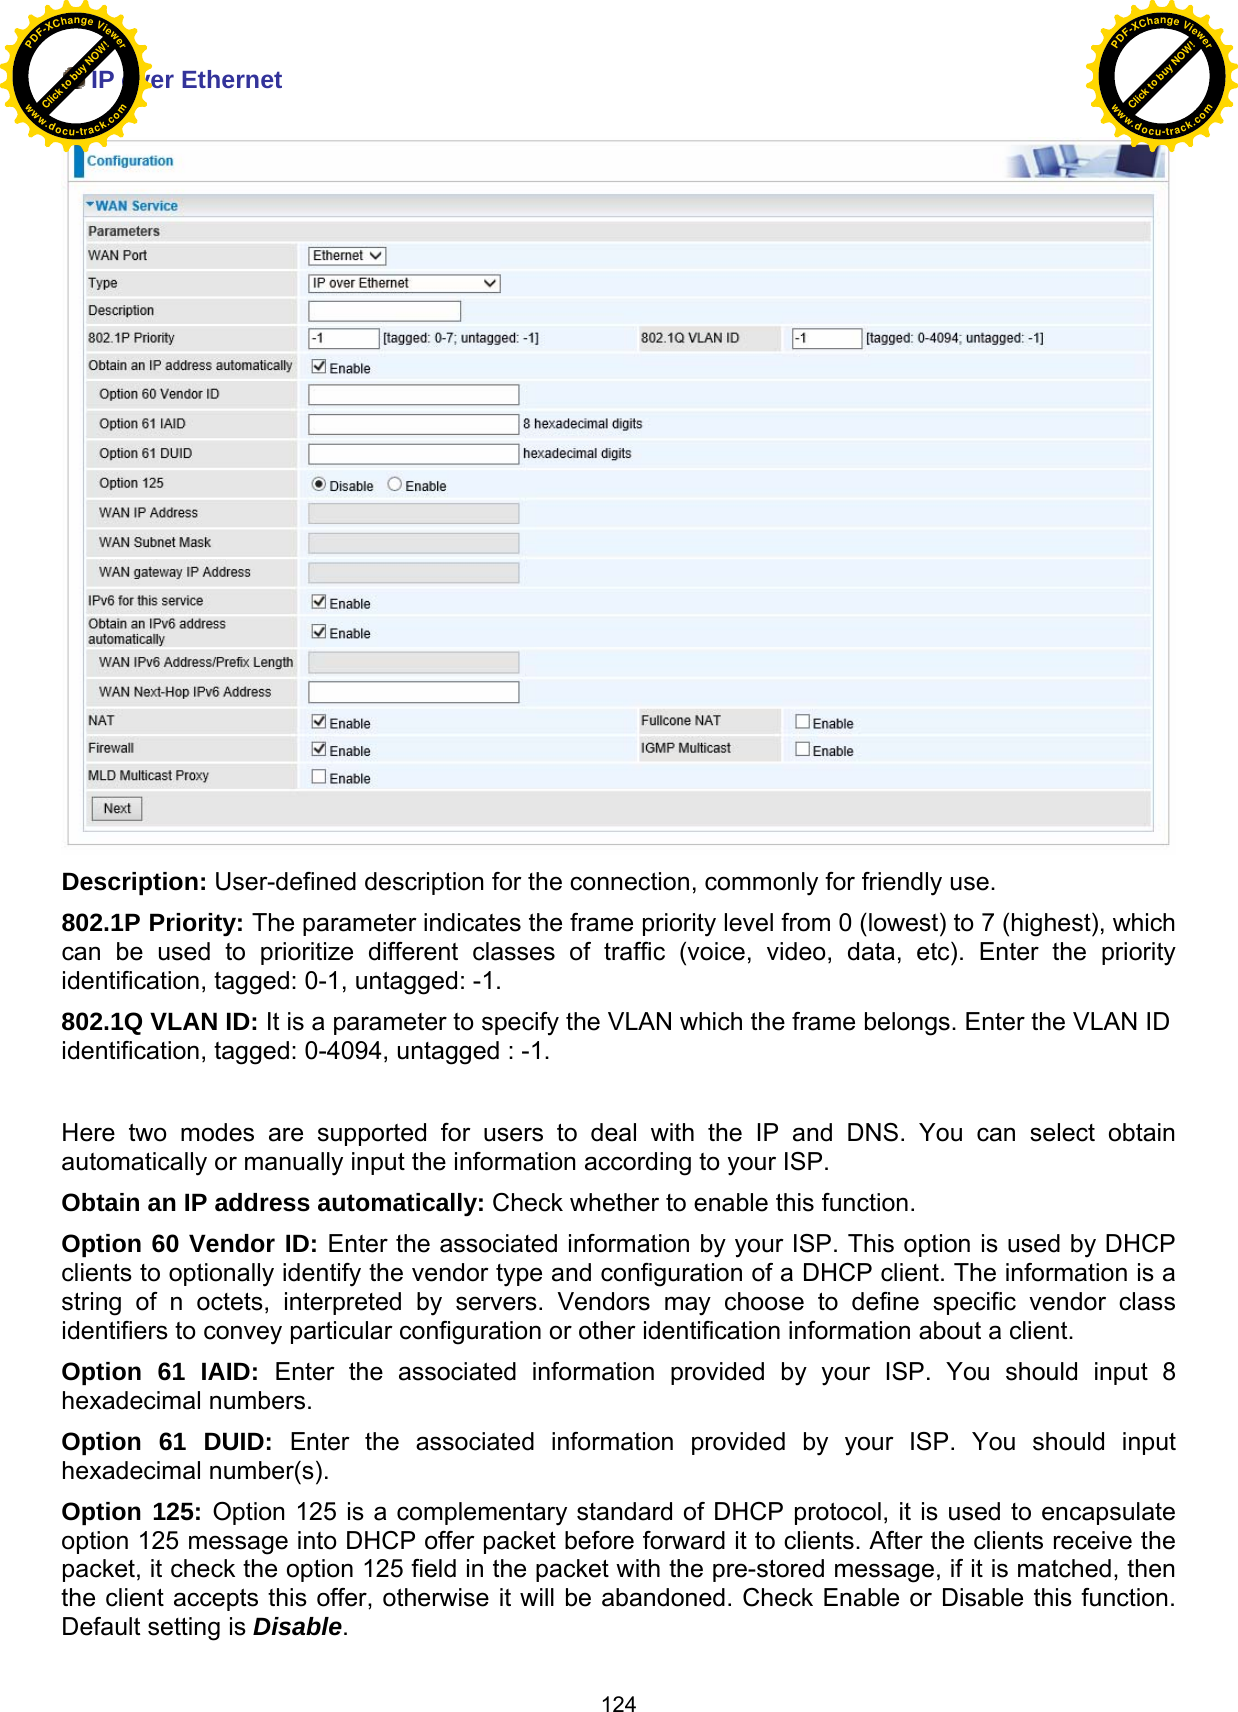
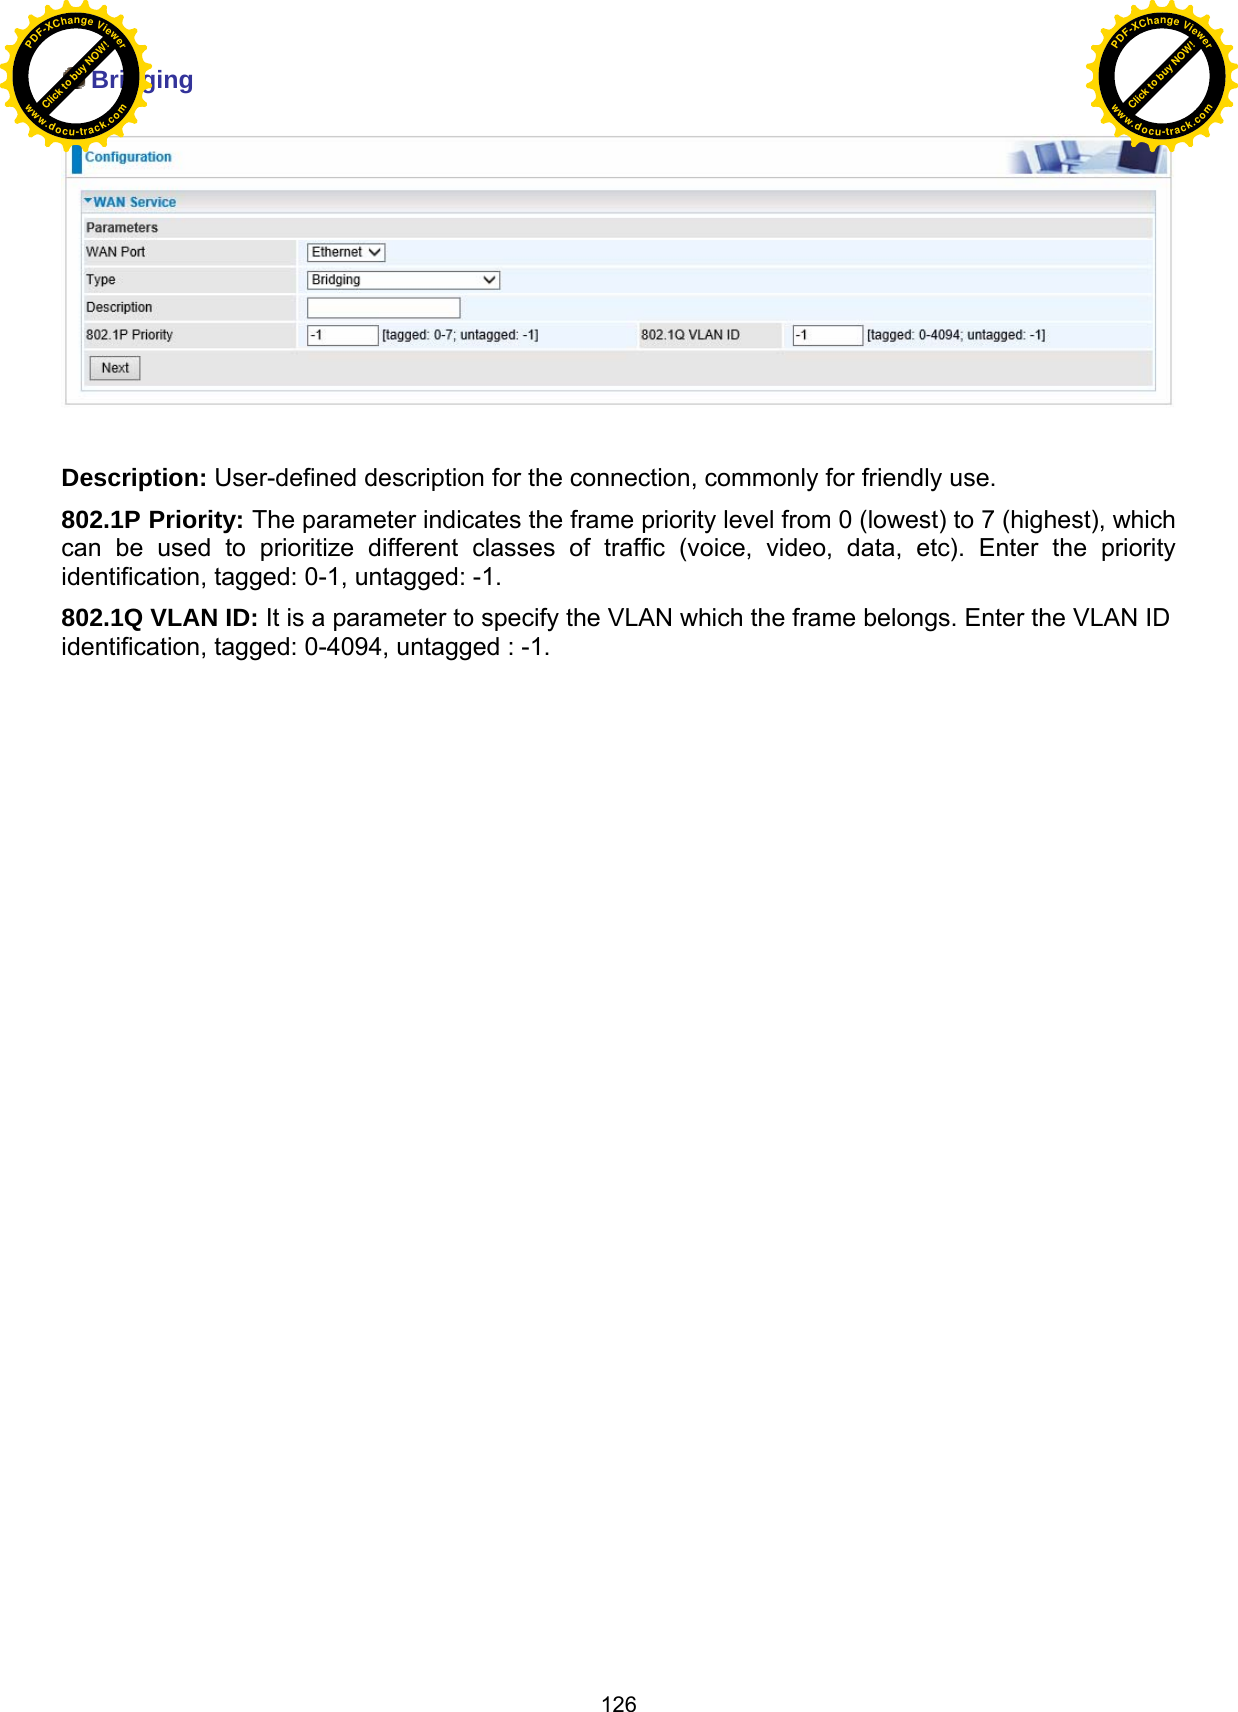
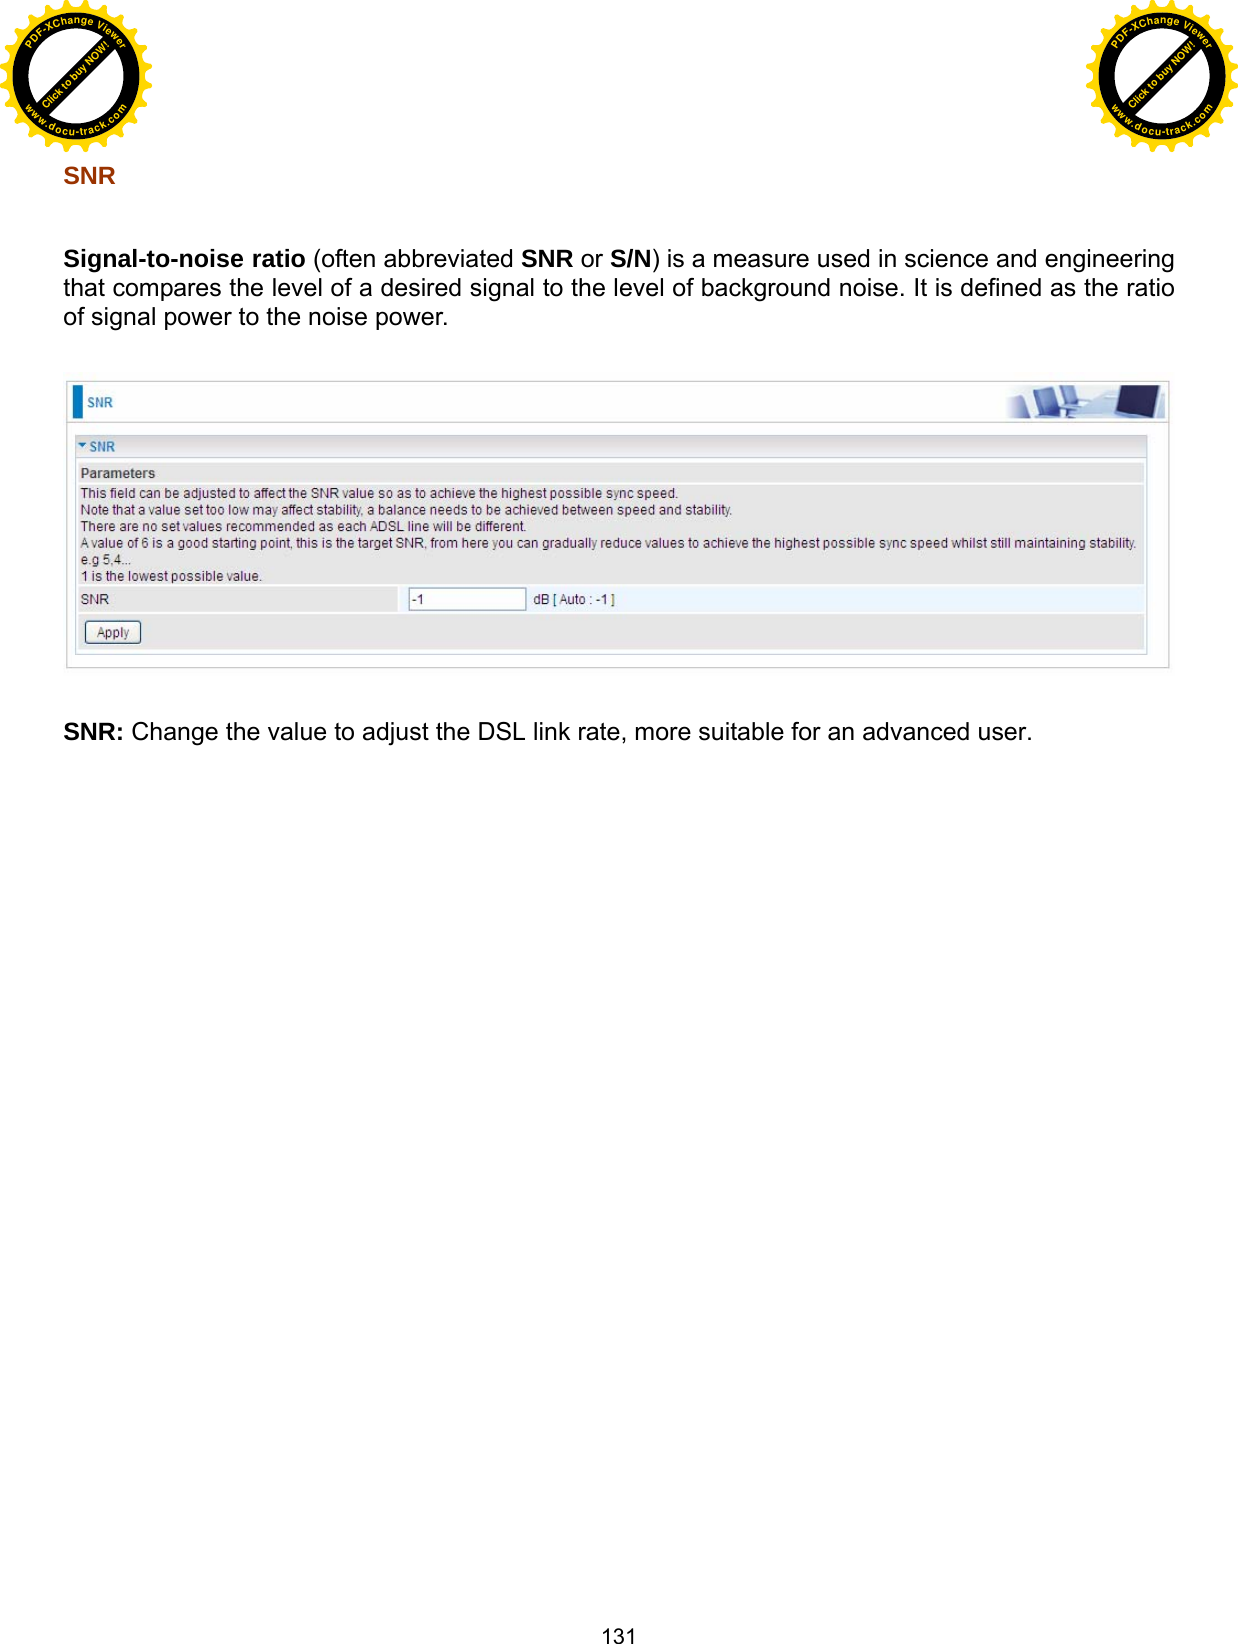
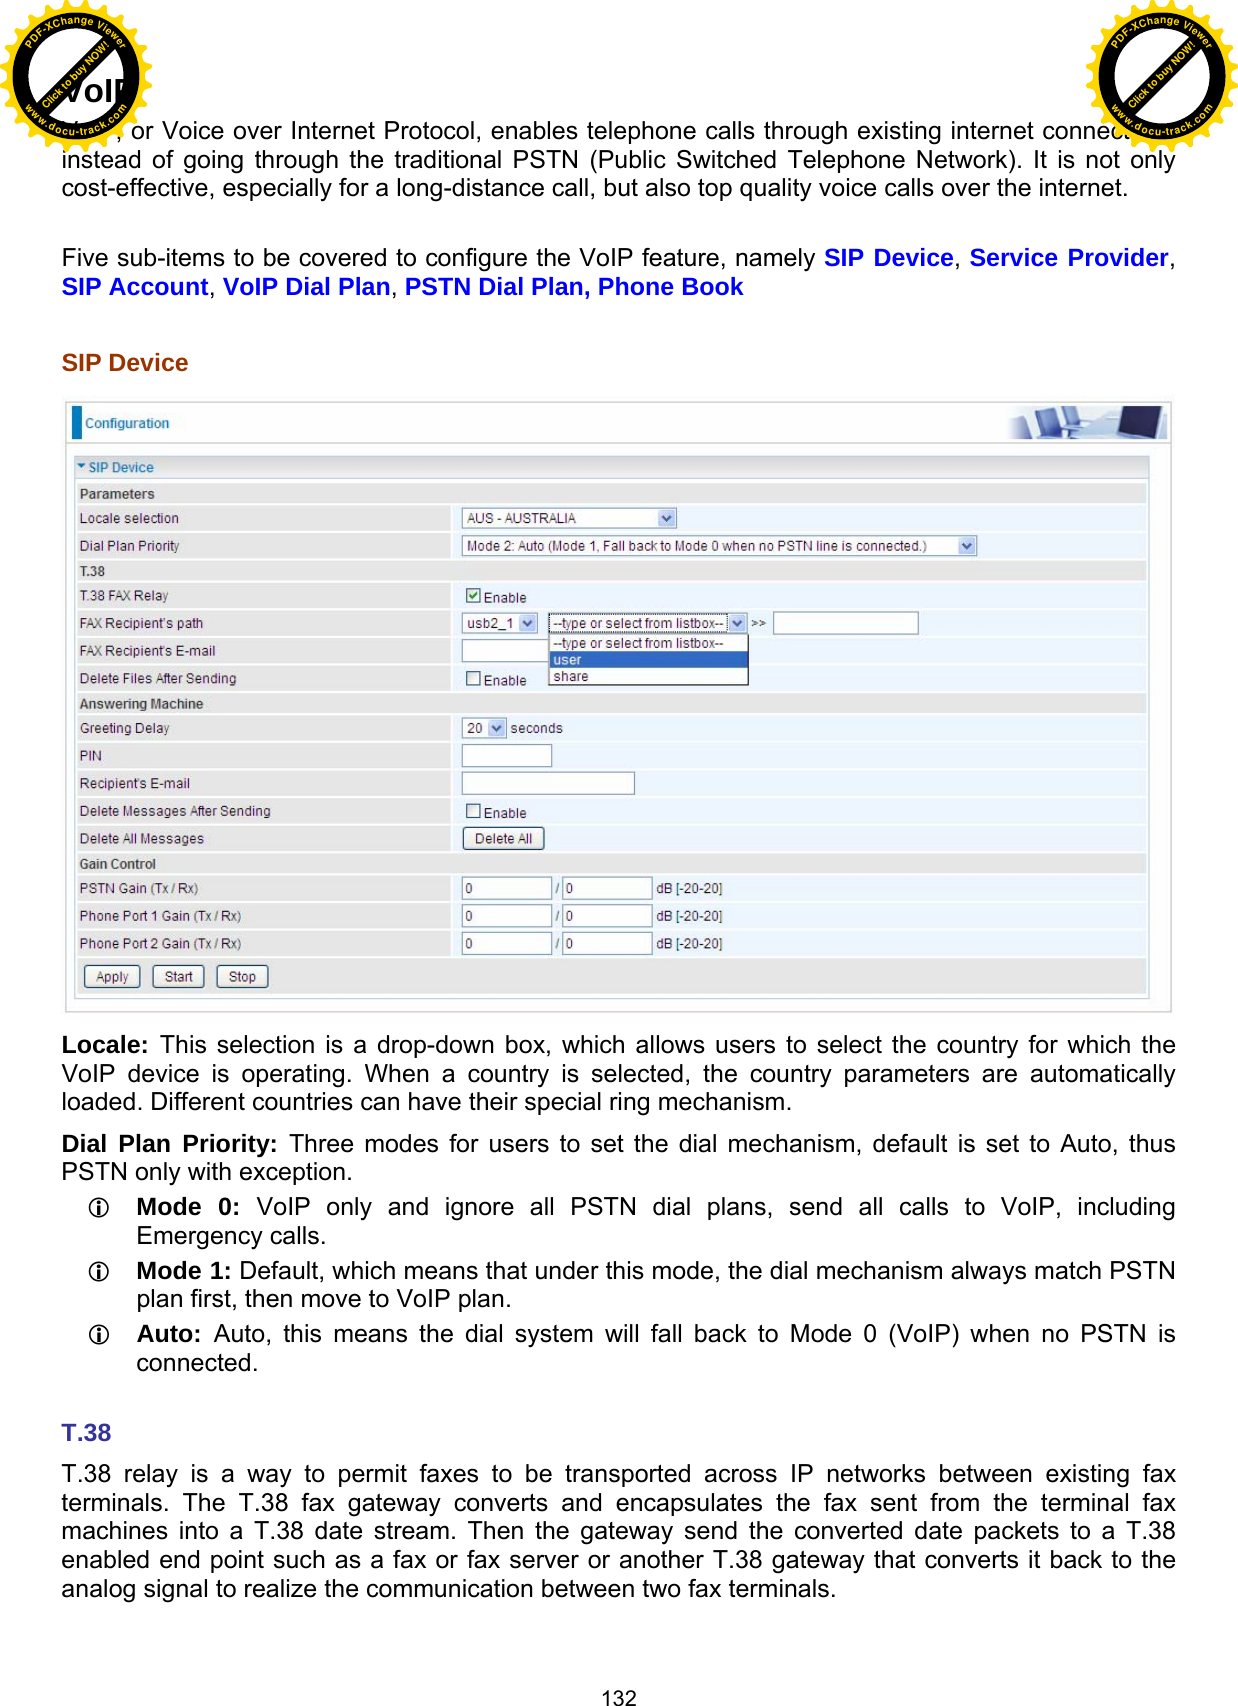
Billion Electric BIL-7800VNOX Wireless-N ADSL2+/Fibre Broadband Router User Manual 2
Billion Electric Co., Ltd. Wireless-N ADSL2+/Fibre Broadband Router 2
UserManual.wiki
>
Billion Electric
>
BIL-7800VNOX User Manual
>
user manual-2
Contents
1.
user manual-1
2.
user manual-2
3.
user manual-3
user manual-2
Navigation menu
Upload a User Manual
Namespaces
Wiki Guide
HTML
PDF
Info
Views
User Manual
Discussion / Help
Navigation
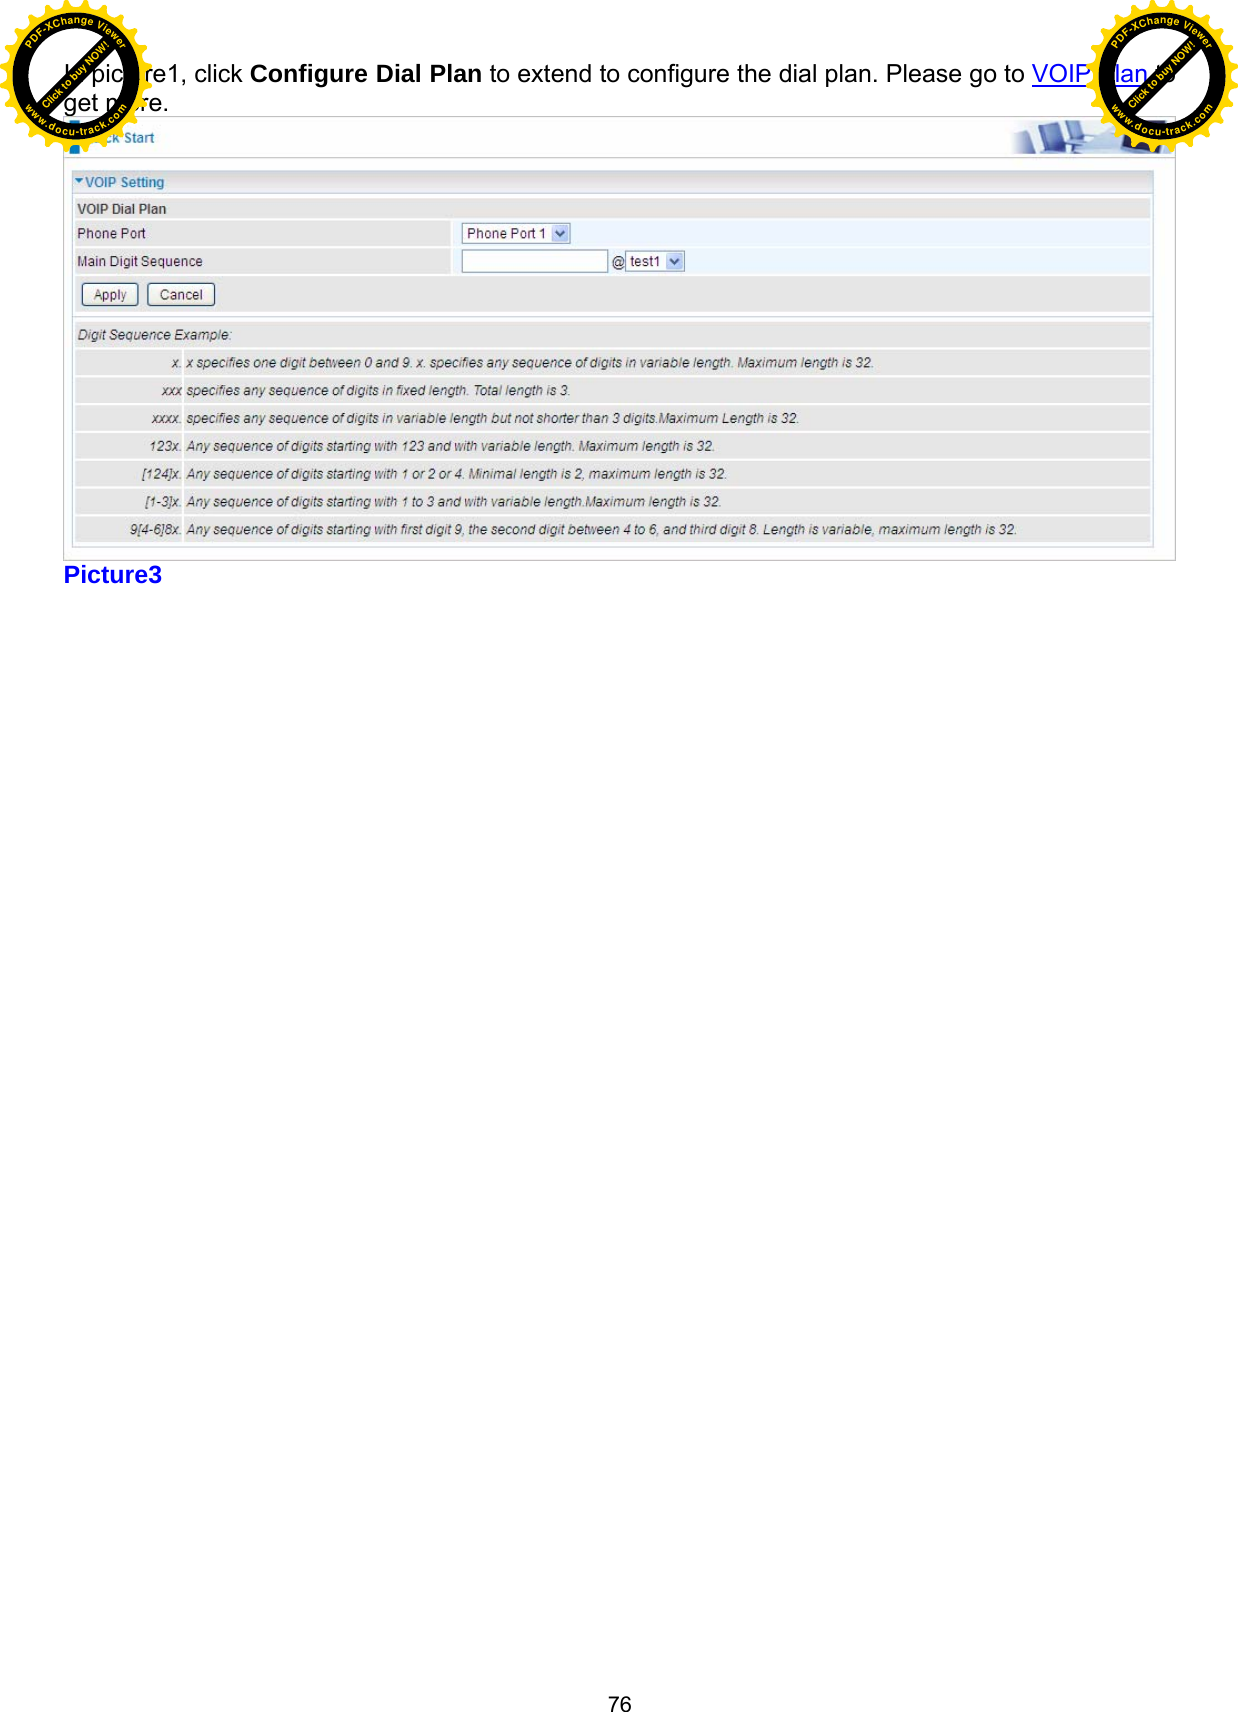

![140 Main Digit Sequence: The call(s) can be called out via SIP. leads users to regular usage for this parameter. <@ SIPgateway>: This is used for the Intelligent Call Routing feature where you need to set up your SIP account on the VoIP User-defined Profiles link on the VoIP Wizard page. Digit sequence Example Description x. x specifies one digit between 0 and 9. x. specifies any sequence of digits in variable length. Maximum length is 32. xxx Specifies any sequence of digits in fixed length. Total length is 3. xxxx. Specifies any sequence of digits in variable length but not shorter than 4 digits. Maximum Length is 32. 123x. Any sequence of digits starting with 123 and with variable length. Maximum length is 32. [124]x. Any sequence of digits starting with 1 or 2 or 4. Minimal length is 2, maximum length is 32. [1-3]x. Any sequence of digits starting with 1 to 3 and with variable length. Maximum length is 32. 9[4-6]8x. Any sequence of digits starting with first digit 9, the second digit between 4 to 6, and third digit 8. Length is variable, maximum length is 32. Click to buy NOW!PDF-XChange Viewerwww.docu-track.comClick to buy NOW!PDF-XChange Viewerwww.docu-track.com](https://usermanual.wiki/Billion-Electric/BIL-7800VNOX.user-manual-2/User-Guide-1950646-Page-69.png)