BlackBerry RAM10MN BlackBerry Wireless Handheld User Manual user guide
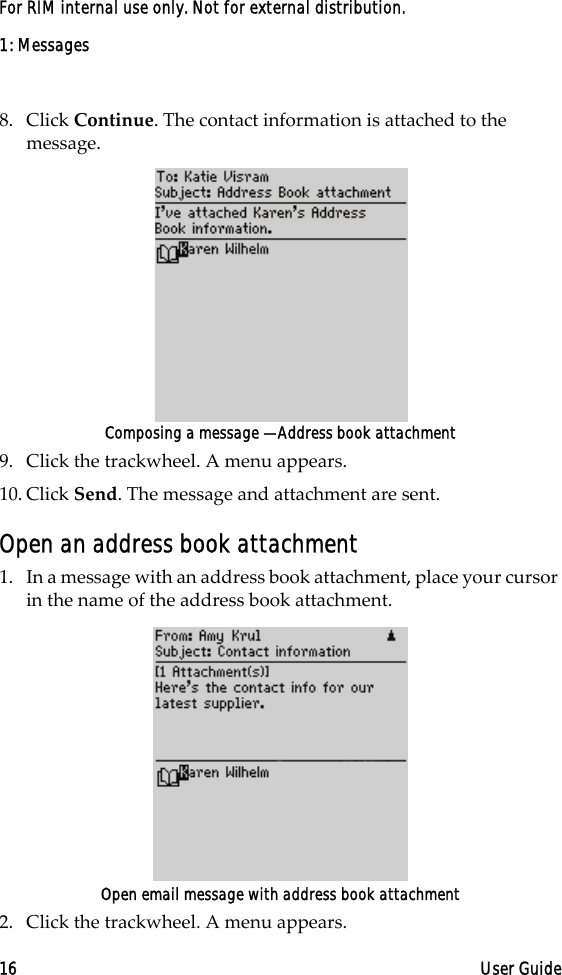
BlackBerry Limited BlackBerry Wireless Handheld user guide
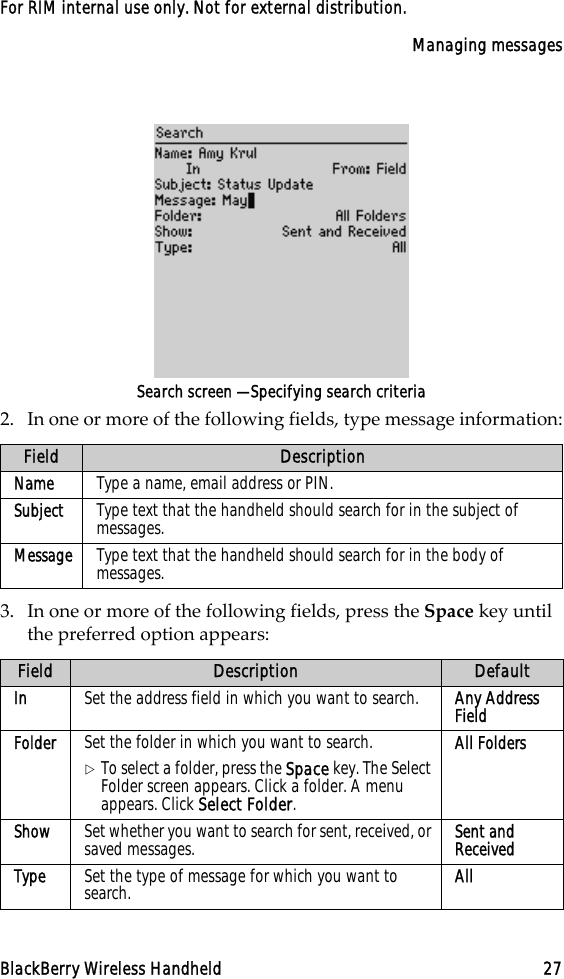
UserManual.wiki
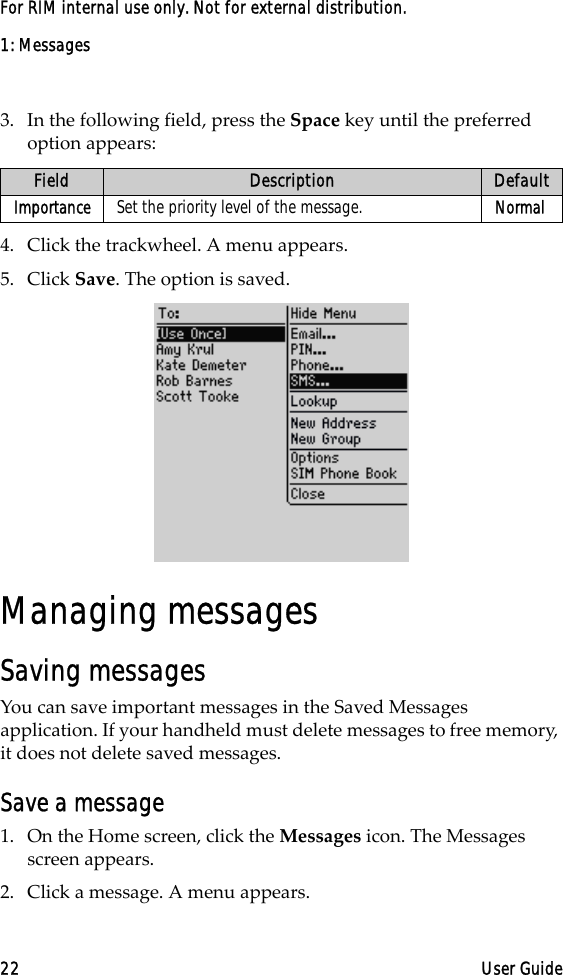
>
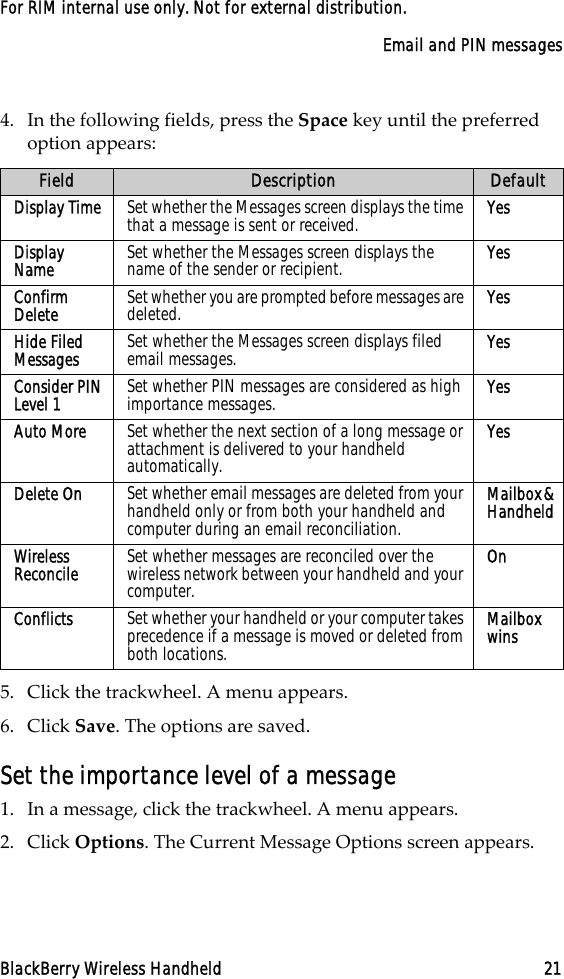
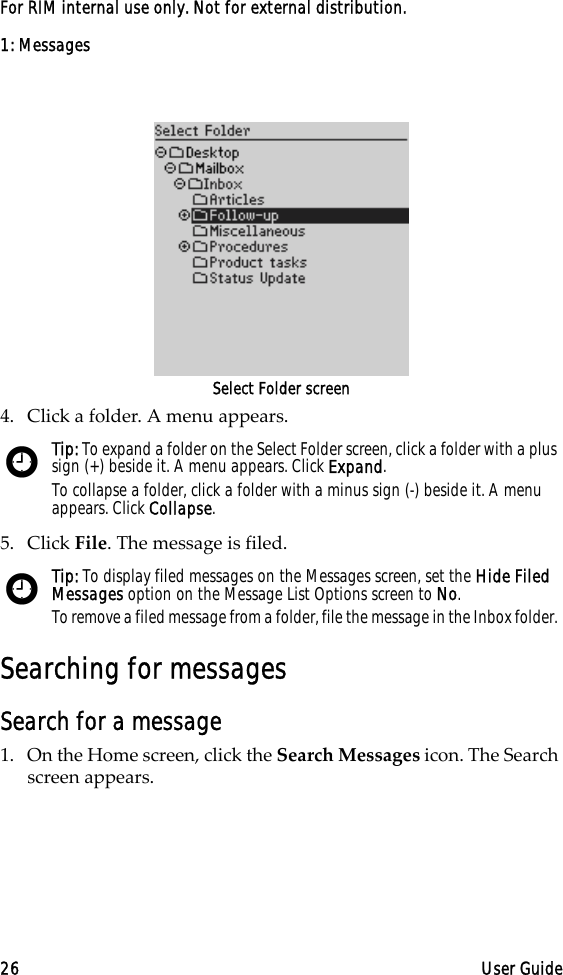
BlackBerry
>
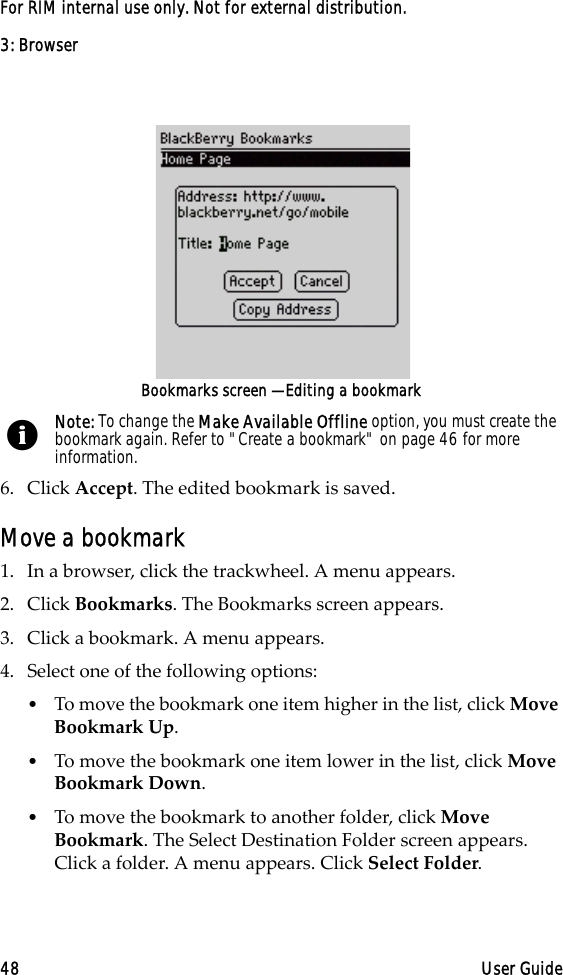
RAM10MN User Manual
>
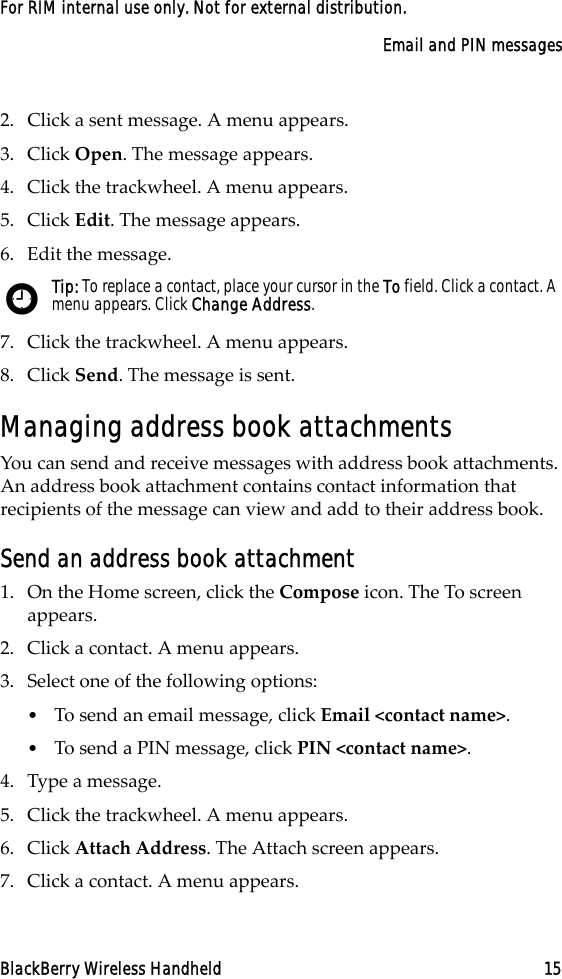
user guide
Contents
1.
user guide
2.
user guide safety info
user guide
Navigation menu
Upload a User Manual
Namespaces
Wiki Guide
HTML
PDF
Info
Views
User Manual
Discussion / Help
Navigation
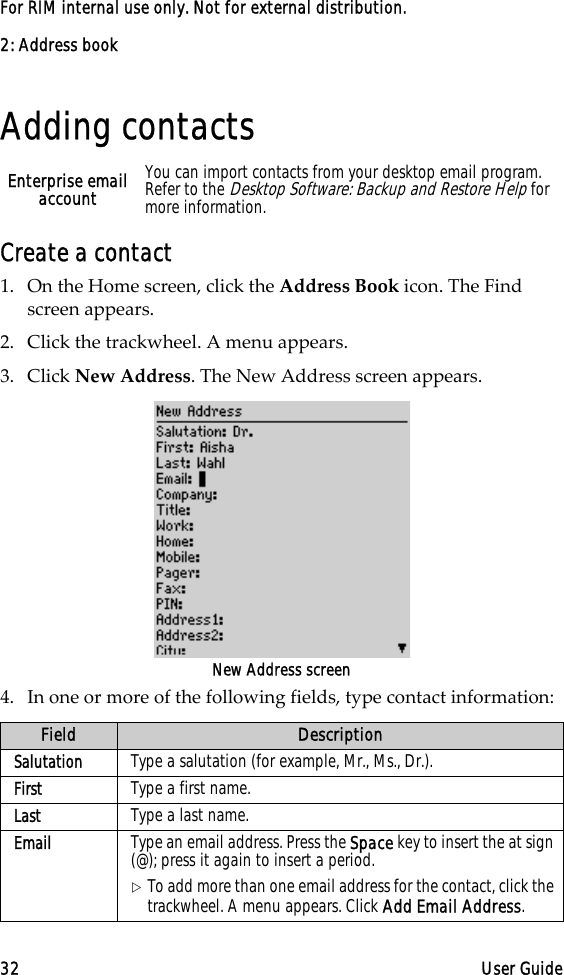
![Email and PIN messagesBlackBerry Wireless Handheld 11For RIM internal use only. Not for external distribution.Sending email and PIN messagesSend a message1. On the Home screen, click the Compose icon. The To screen appears.2. Click [Use Once]. A menu appears.3. Select one of the following options:•To send an email message, click Email. The One Time Email screen appears.•To send a PIN message, click PIN. The One Time PIN screen appears.To screen menu — Email item4. Type an email address or PIN number. 5. Click the trackwheel. A menu appears.Prerequisite: To send messages, the following requirements must be met:•The wireless coverage indicator must show a level of wireless coverage.•GPRS must appear with the wireless coverage indicator on the Home screen.](https://usermanual.wiki/BlackBerry/RAM10MN.user-guide/User-Guide-350781-Page-11.png)