Blue Bamboo P25 Bluetooth Printer User Manual
Blue Bamboo (HK) Limited Bluetooth Printer Users Manual
Users Manual

P25 Installation Guide
http://www.bluebamboo.com
1
P25 Bluetooth Printer
Quick Installation Guide

P25 Installation Guide
http://www.bluebamboo.com
2
FCC compliance statement
“This device complies with part 15 of the FCC Rules. Operation is subject to the following two
conditions: (1) This device may not cause harmful interference, and (2) this device must accept
any interference received, including interference that may cause undesired operation.”
Industry Canada Standard
"This Class (B) digital apparatus complies with Canadian ICES-003."
Cet appareil numérique de la classe (B) est conforme à la norme NMB-003 du Canada.
It is a registered trademark of BLUEBAMBOO
All other trademark is the properties of their respective companies.
Certification:
The production has approved by FCC ID: UWJP25
Li-ion Battery has approved by UN.DOT and CE certification.
Power charge has approved by CCC, TUV GS, cULus, CE and FCC certification
Changes or modifications not expressly approved by the party responsible for compliance could void
the user's authority to operate the equipmen
statement:
P25 Installation Guide
http://www.bluebamboo.com
3
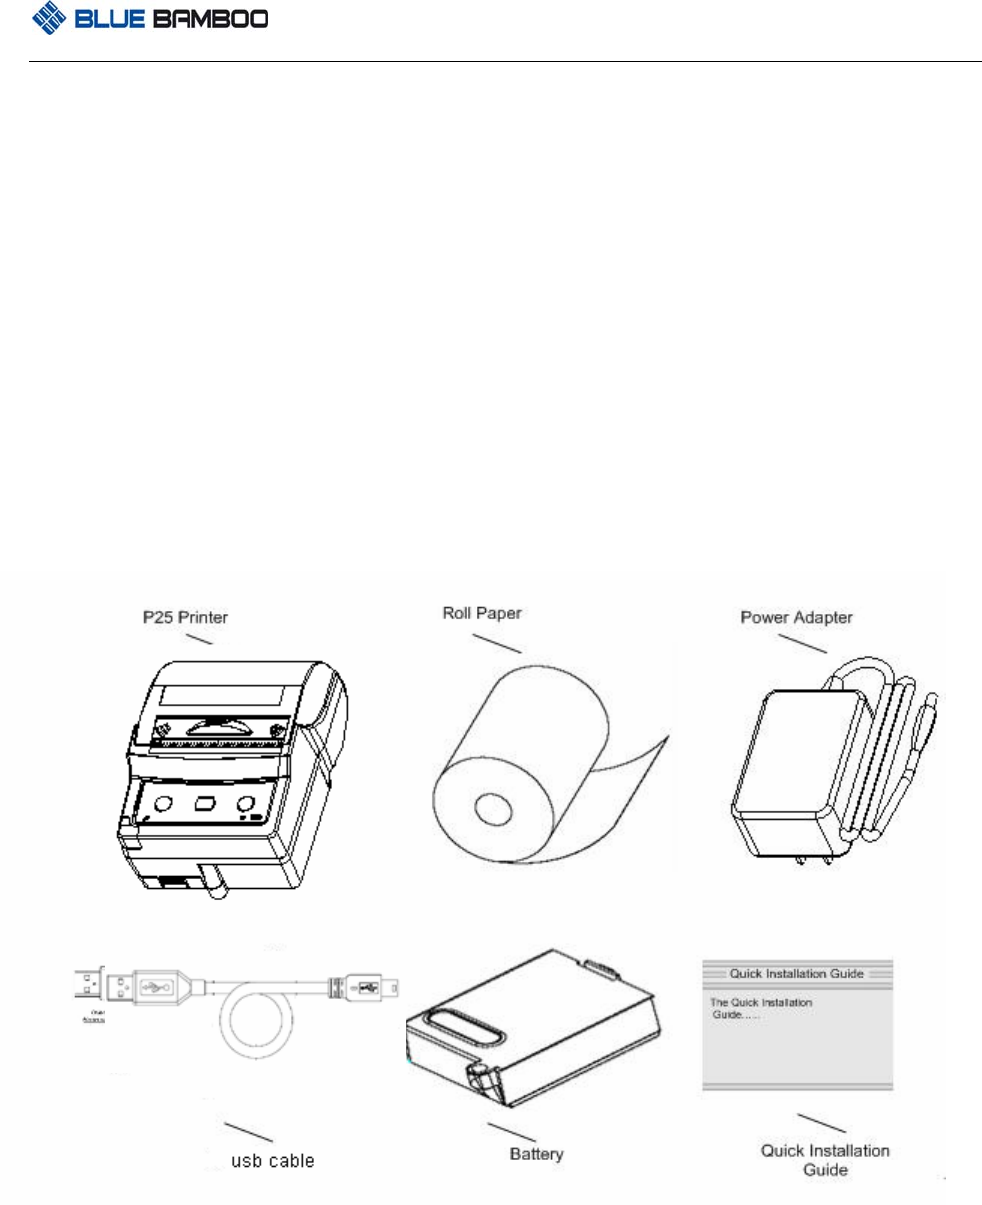
1 Unpacking P25 Printer
When opening the original shipping carton, carefully inspect the contents. It should include the
following items listed below. If any items are damaged or missing, please contact your dealer.
Figure 1: Unpacking P25 Printer
P25 Installation Guide
http://www.bluebamboo.com
4
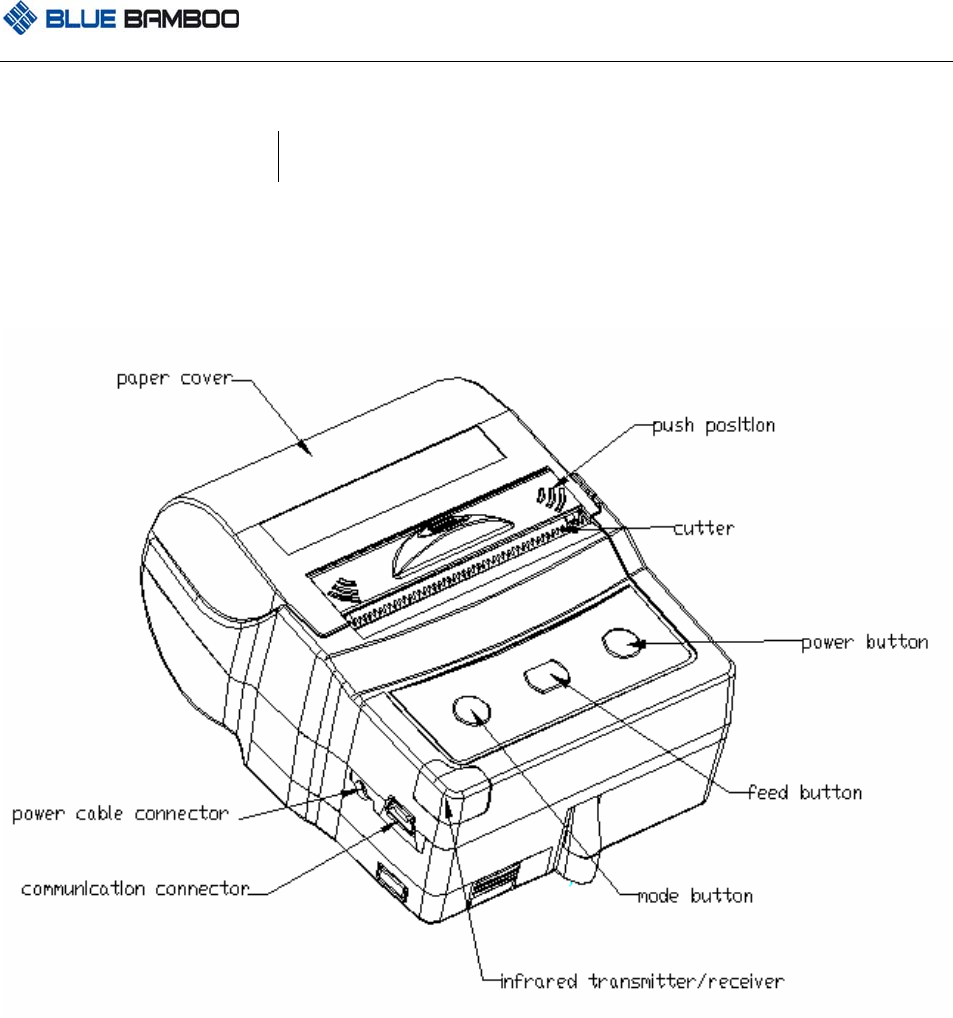
2 Installation
2.1 Hardware features
Figure 2: Hardware features
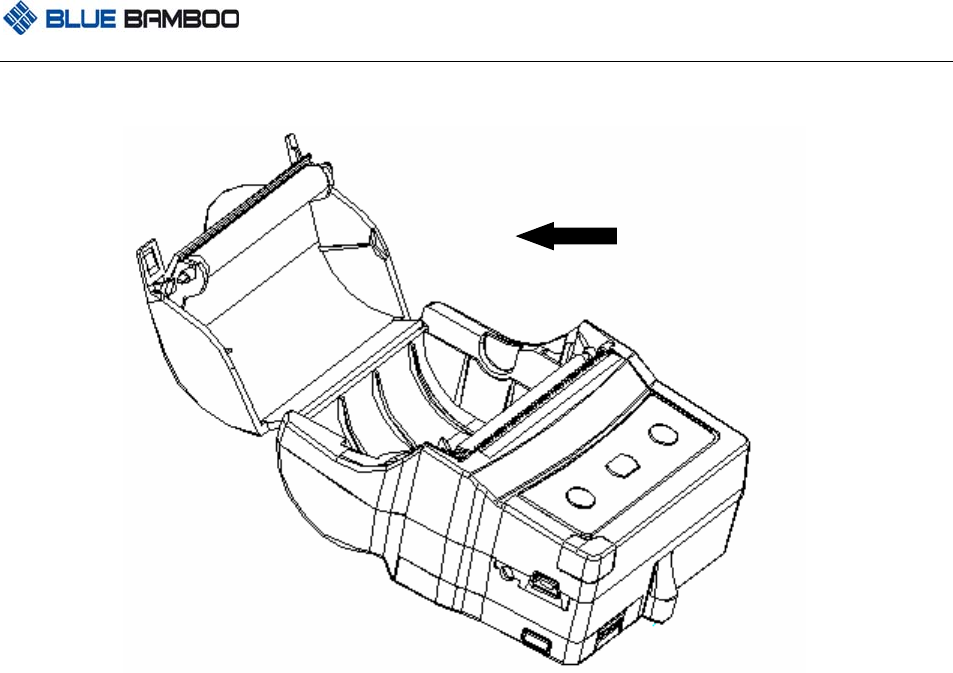
2.2 Inserting the paper roll
To install the paper roll in the printer, follow these steps:
1. Open the paper cover by applying your finger pressure to both sides of the printer cover,
squeeze to release the lock.
2. Rotate the paper cover up and back. Note that the cover is fixed. It is not necessary to remove it
from the printer.
P25 Installation Guide
http://www.bluebamboo.com
5
Figure 3: Open the paper cover
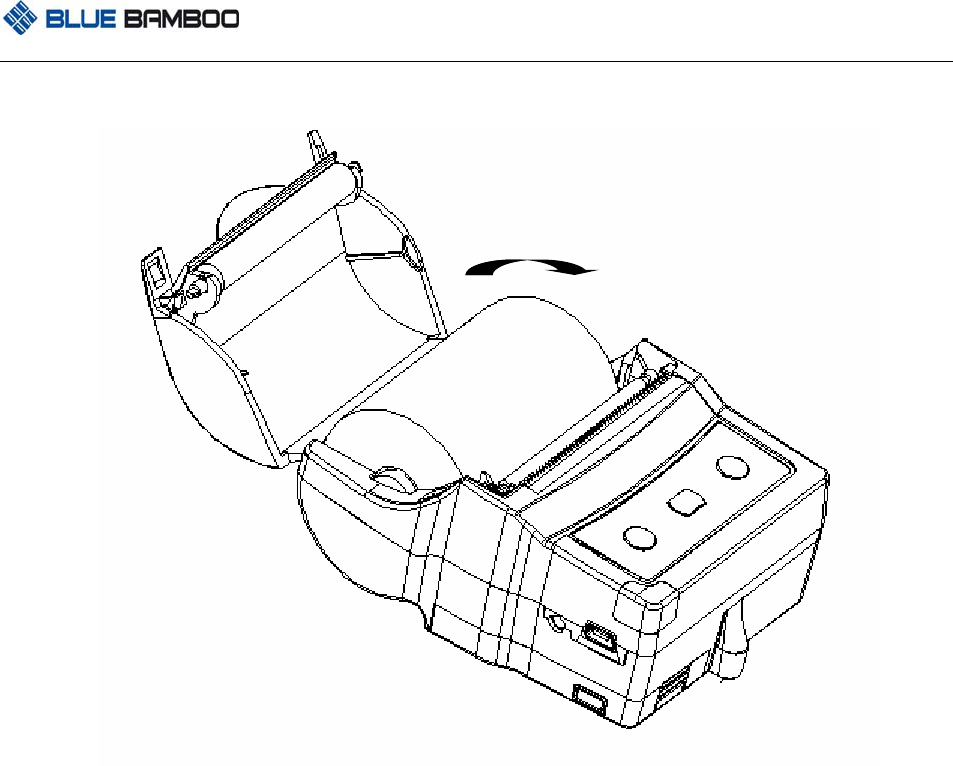
3. Remove the paper roll and insert to a new roll, paper feeds from the bottom and allowing the
free paper to extend outside the printer door.
4. Insert the paper roll in the printer as the picture shows:
P25 Installation Guide
http://www.bluebamboo.com
6
Figure 4: Install paper roll
5. Press the cover down until it snaps in place. Allow a small amount of paper to extend outside
the cover.

P25 Installation Guide
http://www.bluebamboo.com
7
Figure 5: Pull out a small amount of paper
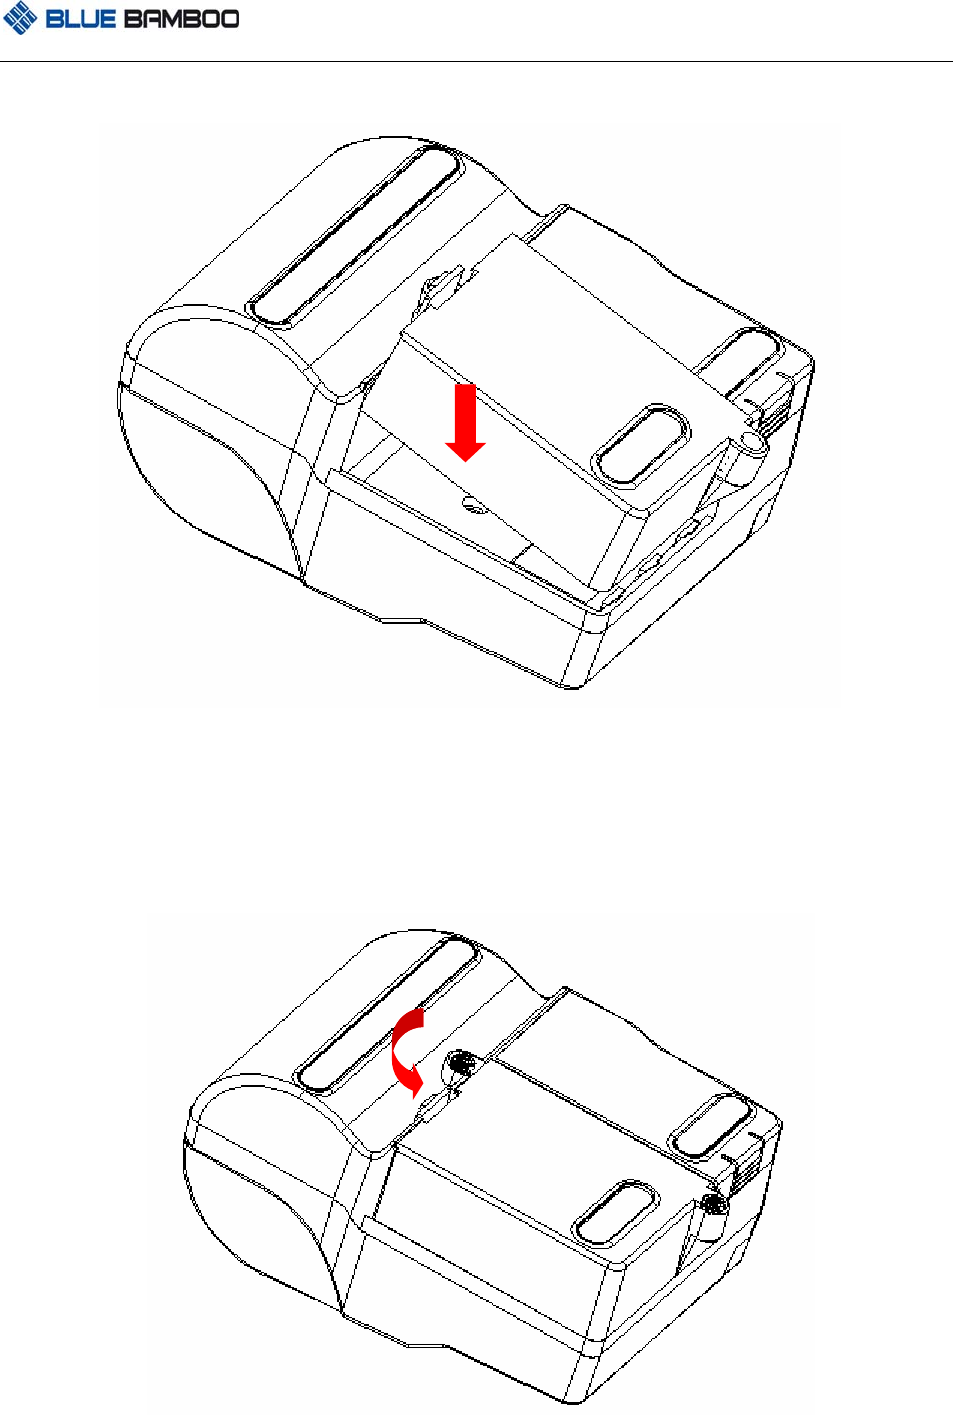
2.3 Battery supply
2.3.1 Installing/ Removing the battery pack
Installing:
The battery pack is located at the bottom of the printer. To install it please follow these steps:
1.Remove the isolation film on battery if the battery is a new one.
2.Place the battery pack as shown:
P25 Installation Guide
http://www.bluebamboo.com
8
Figure 6: Arrow to show the direction
3.Insert the battery pack, and press until it clicks into place.
Removal:
1. Release the battery pack by pressing the lock tab.
P25 Installation Guide
http://www.bluebamboo.com
9
Figure 7: Remove battery
2. Remove the battery pack.
2.3.2 Battery and charge
1.Insert the DC plug of power adaptor into the power jack of printer;
2.Insert the AC plug of power adaptor into AC power supply;
3.Start battery charge, and red LED light continuously;
4.Finish charging, the red LED turn off.
Figure 8: Battery recharge
Warning:
Notice:
1. If the red LED turns on for a short time and then turn off quickly when starting the battery
charge procedure, there are two probable reason: first is you have completed battery charging,
no need to charge again, second is this battery doesn’t work, please change it.
2. The red LED should turn on during charging and turn off after charging, please care for its
status is right or not.
P25 Installation Guide
http://www.bluebamboo.com
10
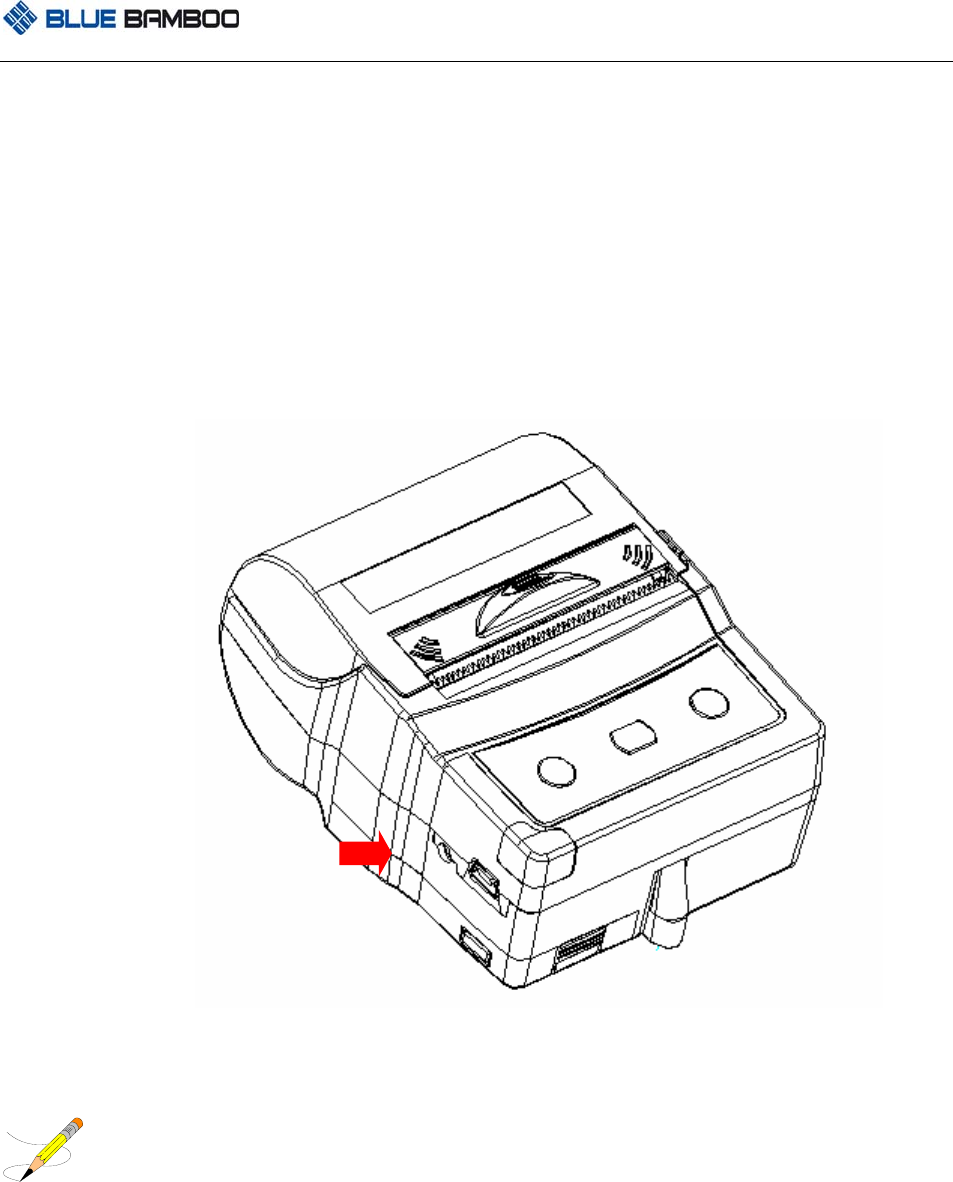
3 Using the printer
3.1 Control panel
Buttons
z The POWER button switches the power on/off. In order to power off the power, you should
press the POWER button for more than 1s.
z The FEED button advances the paper roll. Paper is advanced continuously until the button is
released.
z The Mode button prints the self-test sample paper when pressed together with feed button.
z The Feed button enter into boot loader mode when pressed together with power button
LED
There is a tricolor LED indicator only:blue, green, red
Constantly lit Bluetooth module is available Blue
Flashing data transaction via Bluetooth
Constantly lit Power on, normal status Green
Flashing data transaction via USB
Constantly lit Charging
Flashing intermittently with Blue LED An error has occurred
Red
Off Charging finished
Error description Remedy Check
Steps flashing type
There is no more paper Add paper 1
The paper cover is open Close the paper cover 2 B,R,B,R….
An transmission error oc-
curred
Check the transmission
status
3 B,R,R,B,R,R….
An overheat error occurred Wait until the print head
cools down
4 B,R,R,R,B,R,R,R….
Battery voltage is too low Charge the battery 5 B,R,R,R,R,B,R,R,R,R….

P25 Installation Guide
http://www.bluebamboo.com
11
Version History
Version Author Date Description
1.0 Initial Version
1.1 Simon 2006-12-19 Modified 3.1, the part of LED