Bosch Security Systems DCNMDX DICENTIS Discussion devices User Manual Hardware Installation Manual
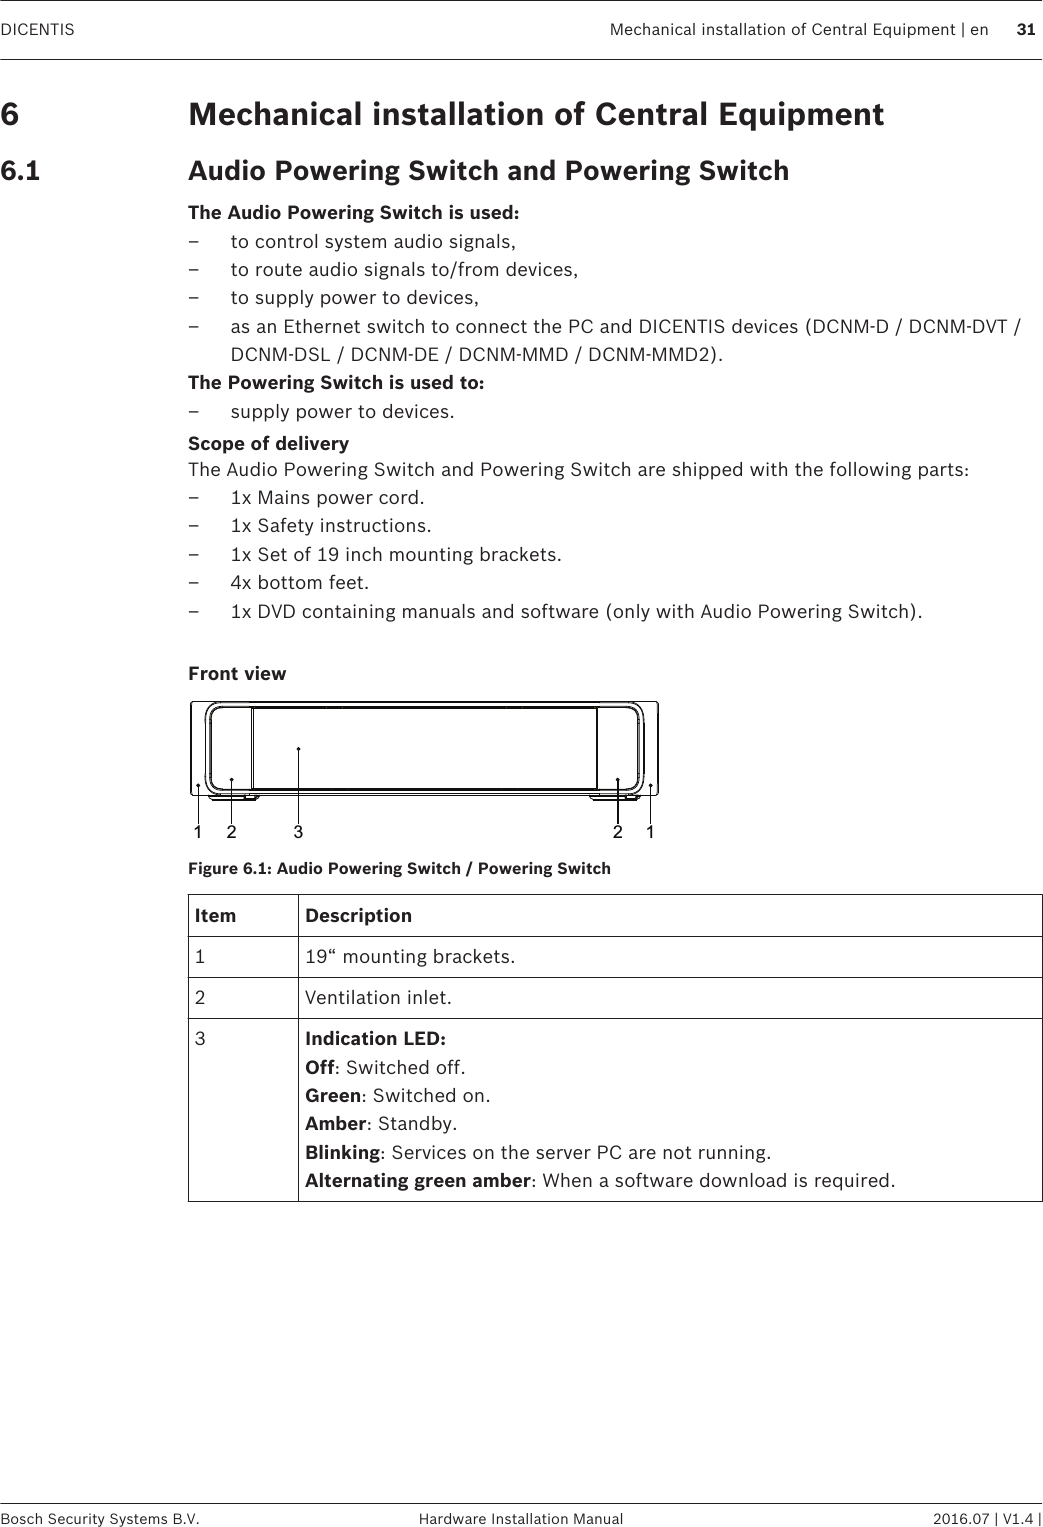
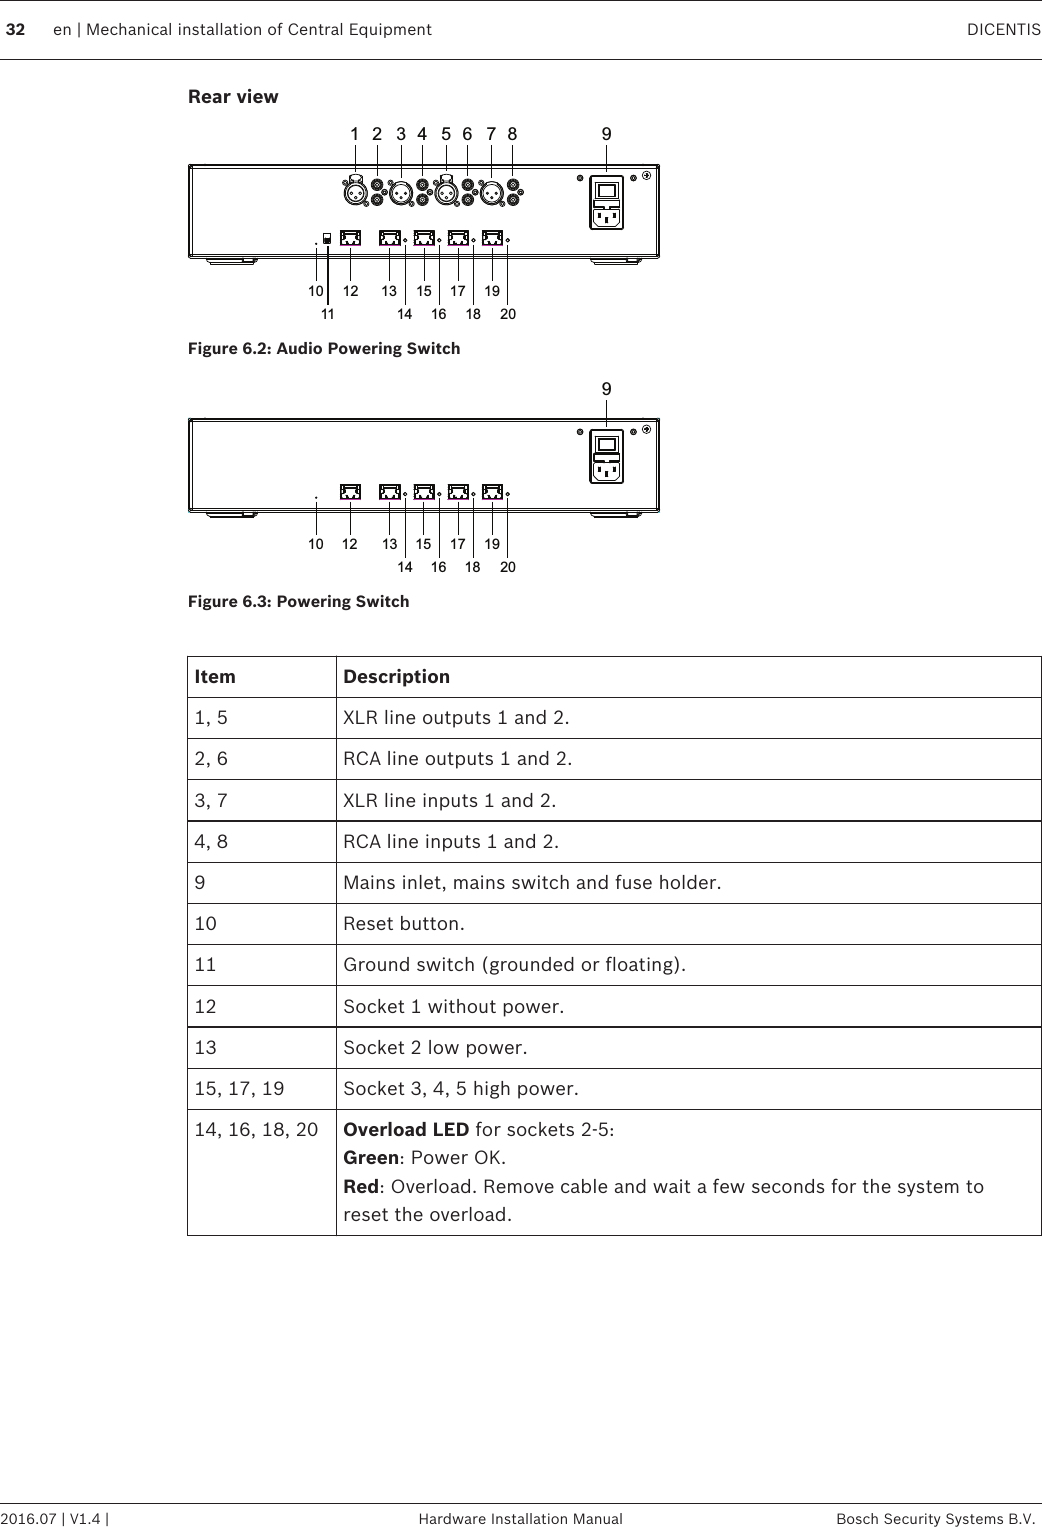
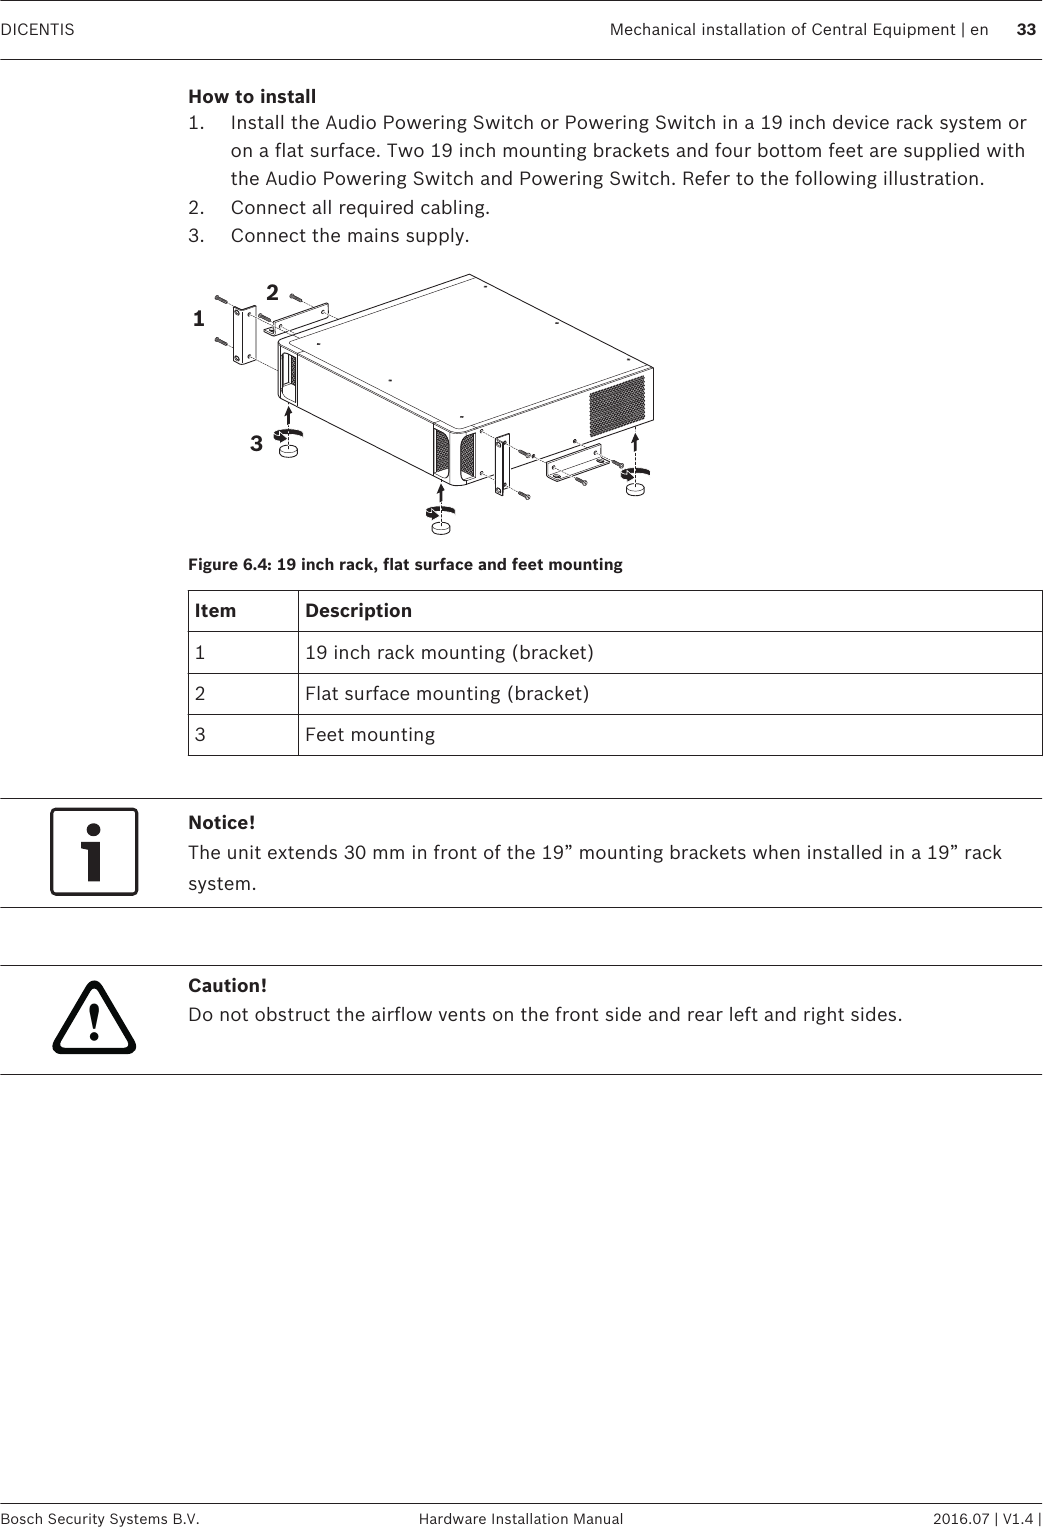
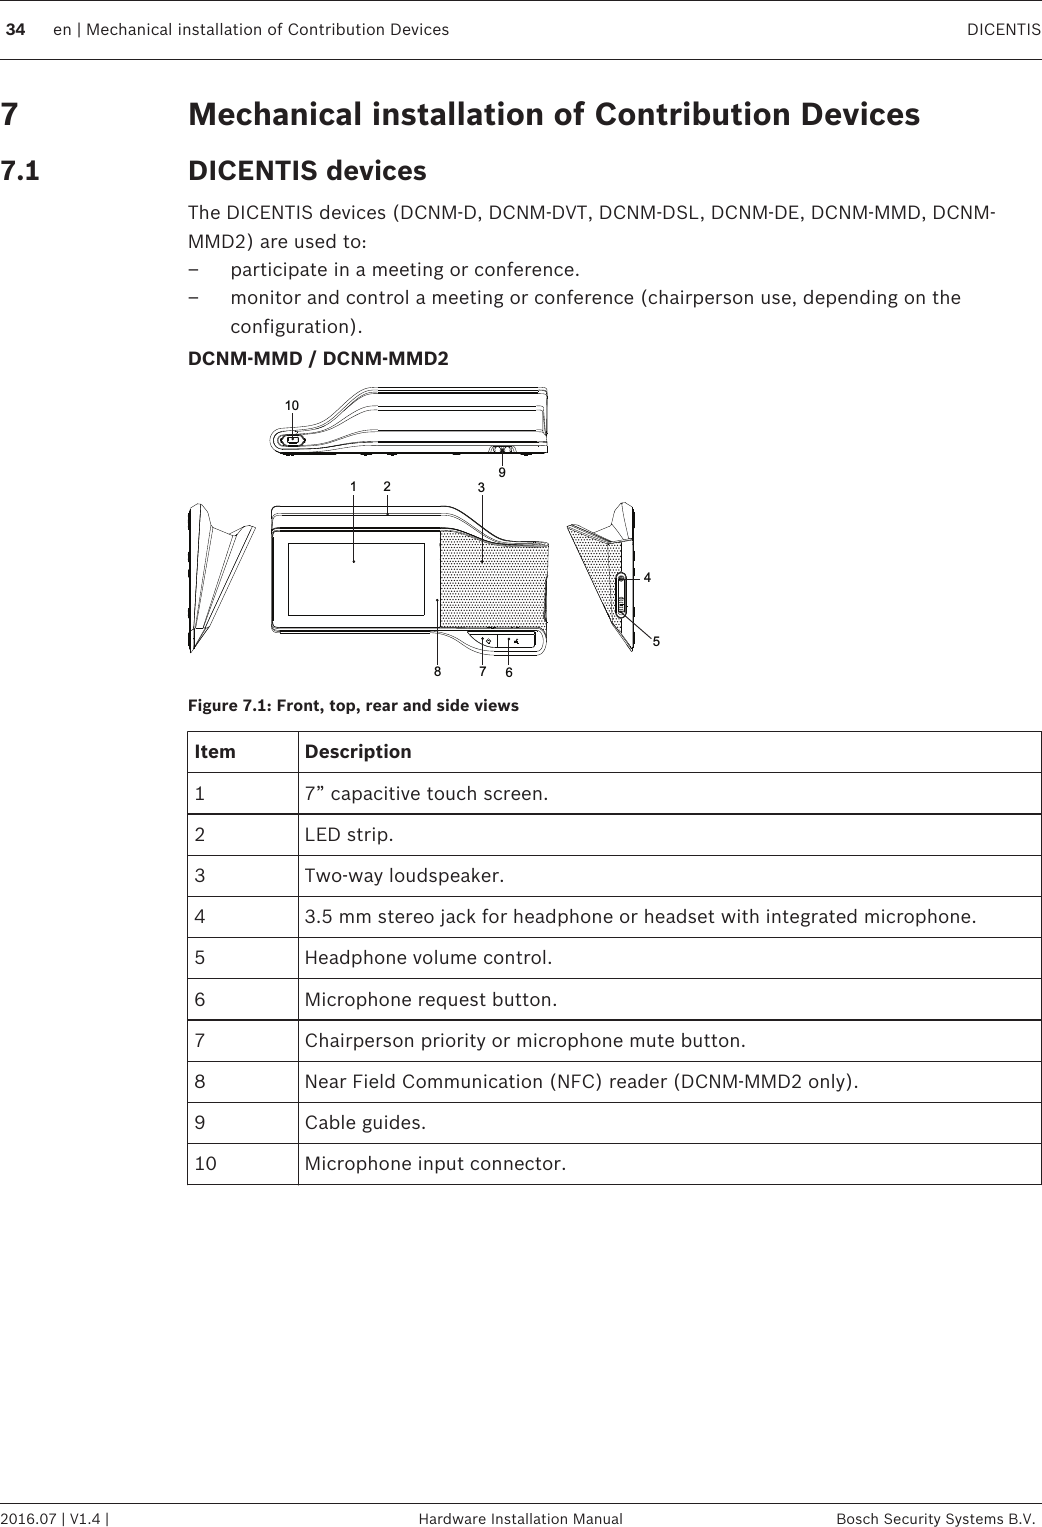
Bosch Security Systems BV DICENTIS Discussion devices Hardware Installation Manual
Contents
- 1. Users Manual_Part 1
- 2. Users Manual_Part 2
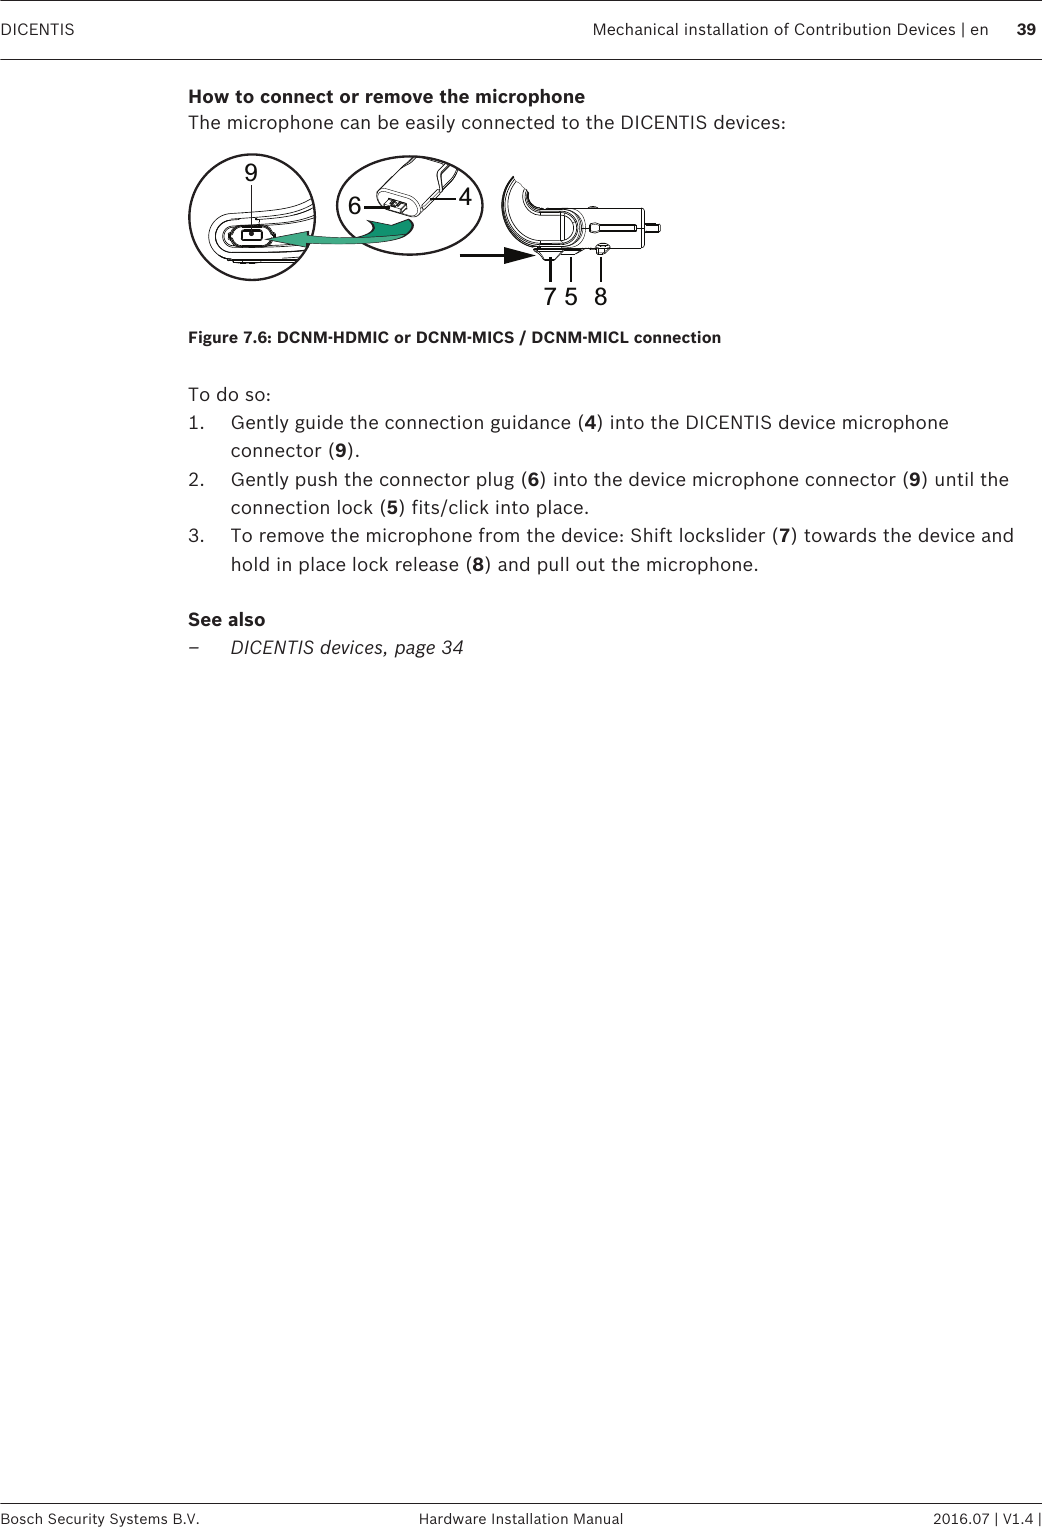
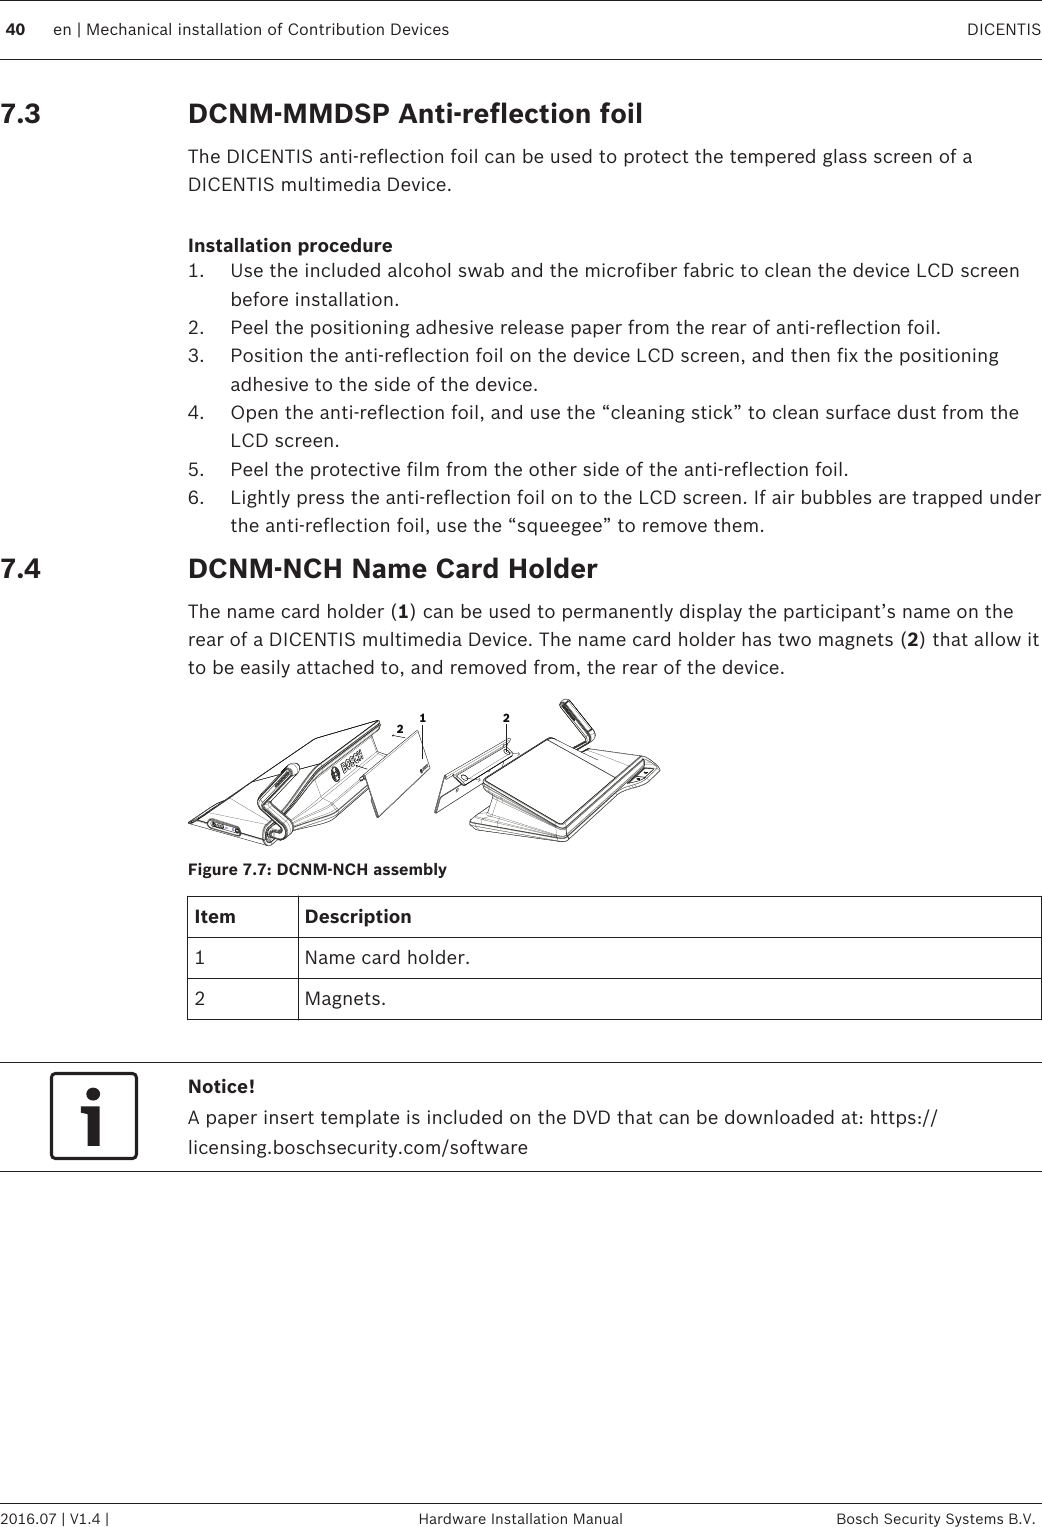
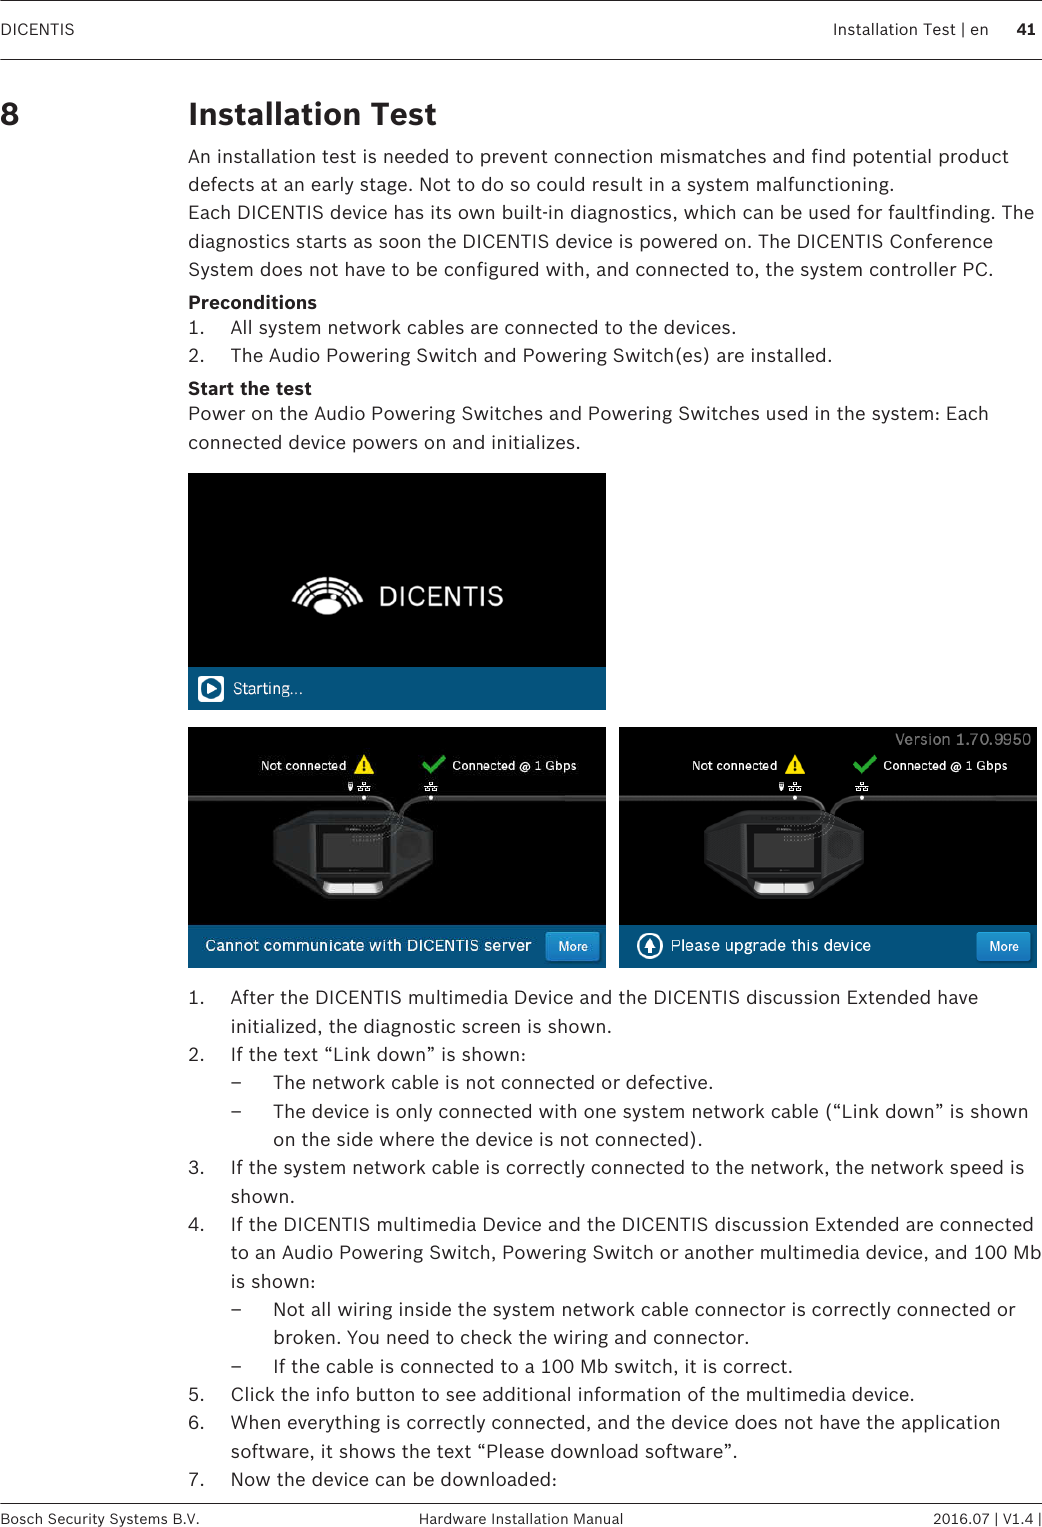
Users Manual_Part 2