Broadcom BRCM1028 802.11g Wireless LAN PCI-E Mini Card User Manual book
Broadcom Corporation 802.11g Wireless LAN PCI-E Mini Card book
UserManual.wiki
>
Broadcom
>
BRCM1028 User Manual
>
Spears User Manual
Contents
1.
User Manual
2.
Hawke User Manual
3.
Parker User Manual
4.
Sebiria User Manual
5.
Spears User Manual
6.
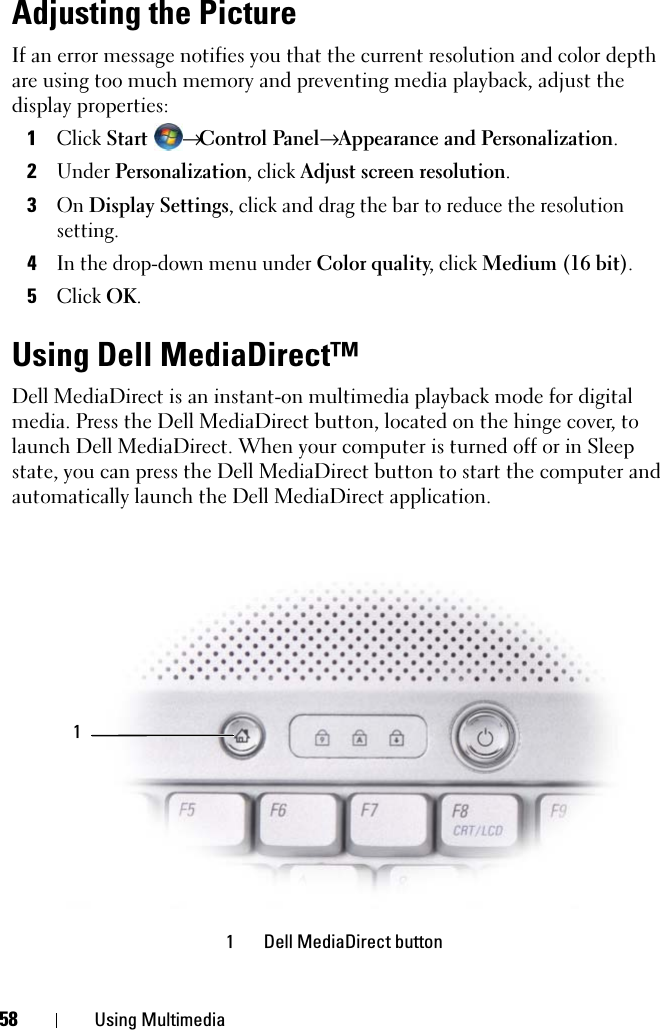
User Manual 1
7.
User Manual 2
8.
User Manual 3
9.
User Guide
10.
Manual
11.
Manual Statement
Spears User Manual
Navigation menu
Upload a User Manual
Namespaces
Wiki Guide
HTML
PDF
Info
Views
User Manual
Discussion / Help
Navigation

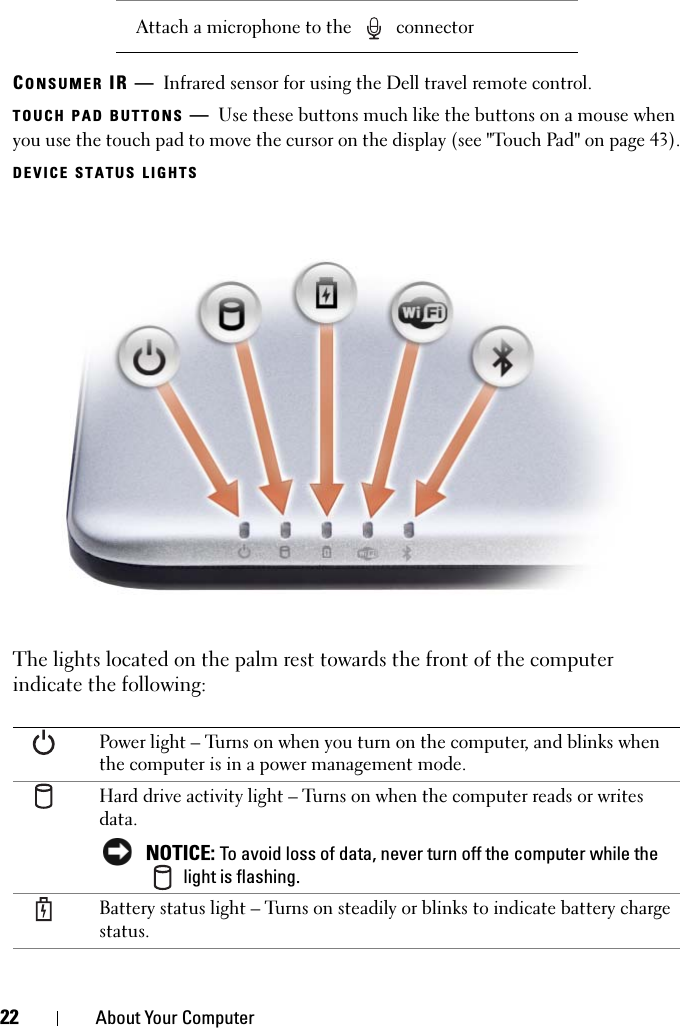
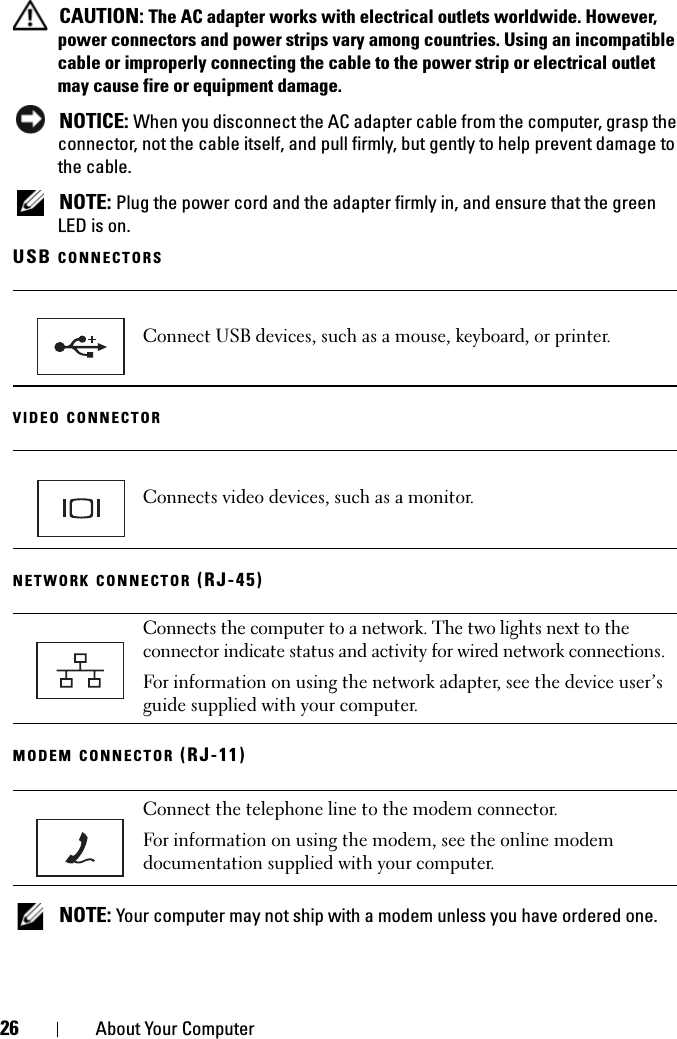
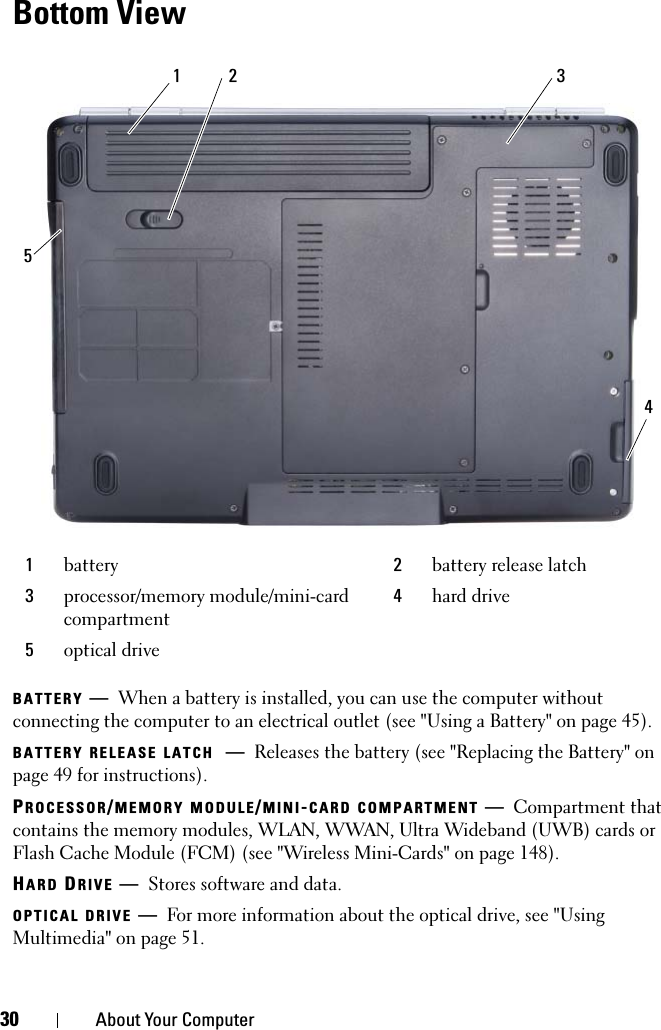
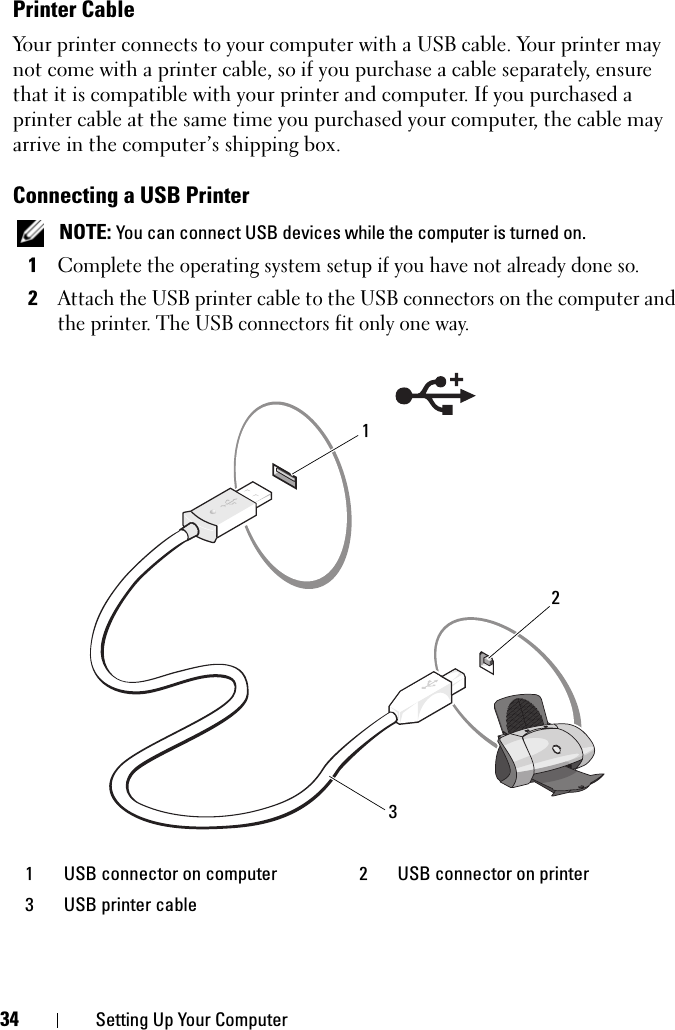
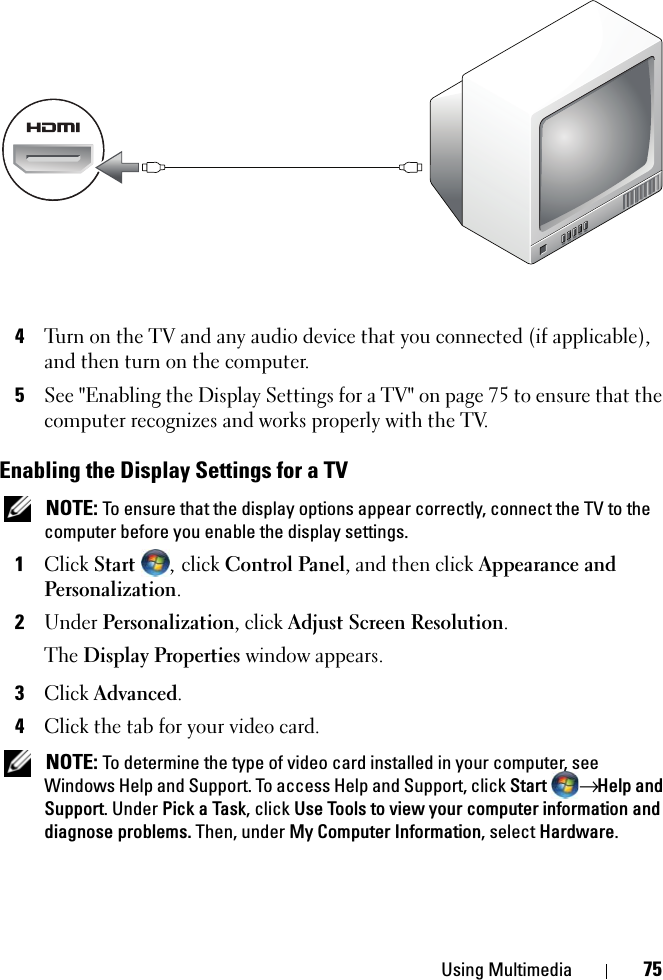
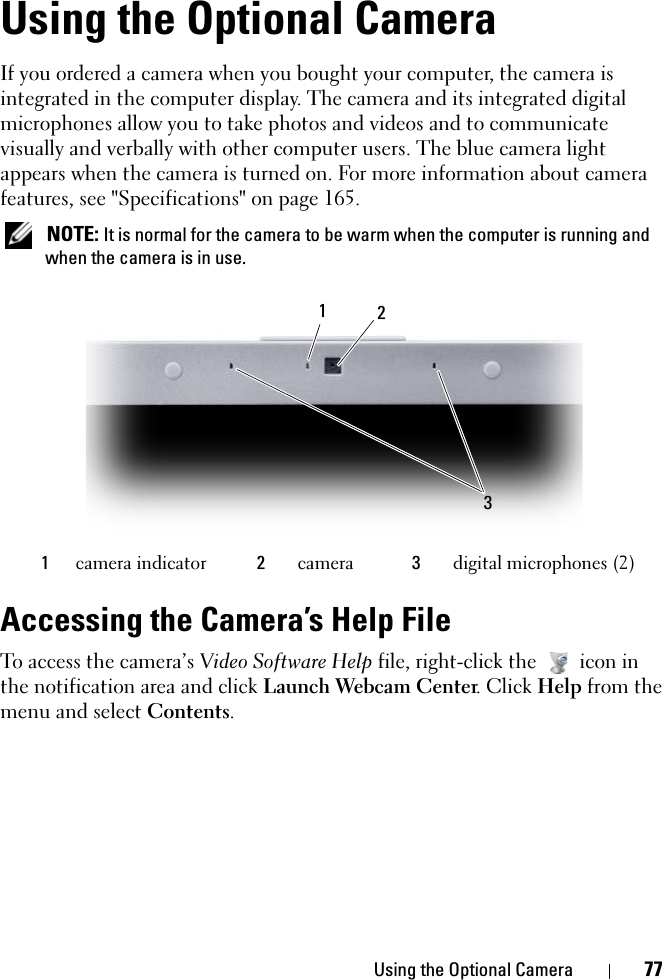
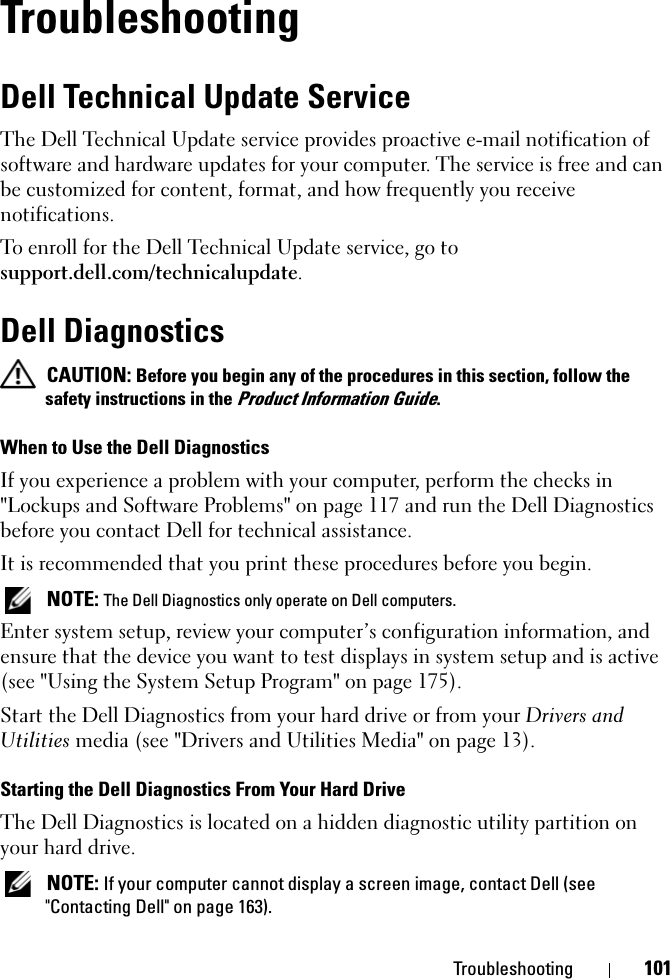
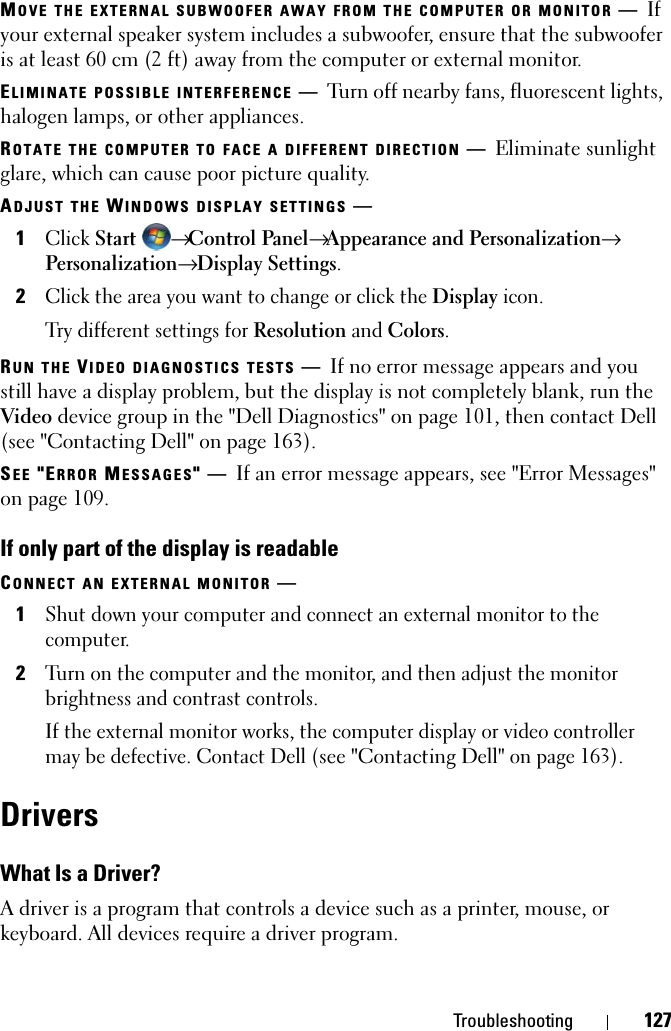
![8ContentsKeyboard Problems . . . . . . . . . . . . . . . . . . . 115External Keyboard problems . . . . . . . . . . . . 115Unexpected characters . . . . . . . . . . . . . . 116Lockups and Software Problems . . . . . . . . . . . . 117The computer does not start . . . . . . . . . . . . 117The computer stops responding . . . . . . . . . . 117A program stops responding or crashes repeatedly 117A program is designed for an earlier Microsoft® Windows® operating system . . . . . . . . . . . . . . . . . . 117A solid blue screen appears . . . . . . . . . . . . 118Dell MediaDirect problems . . . . . . . . . . . . . 118Other software problems . . . . . . . . . . . . . . 118Memory Problems . . . . . . . . . . . . . . . . . . . . 119Network Problems . . . . . . . . . . . . . . . . . . . . 120Mobile Broadband (Wireless Wide Area Network [WWAN]) 120Power Problems . . . . . . . . . . . . . . . . . . . . . 121Printer Problems . . . . . . . . . . . . . . . . . . . . . 122Scanner Problems . . . . . . . . . . . . . . . . . . . . 123Sound and Speaker Problems . . . . . . . . . . . . . . 124No sound from integrated speakers . . . . . . . . 124No sound from external speakers . . . . . . . . . 124No sound from headphones . . . . . . . . . . . . 125Touch Pad or Mouse Problems . . . . . . . . . . . . . 125Video and Display Problems . . . . . . . . . . . . . . 126If the display is blank . . . . . . . . . . . . . . . . 126If the display is difficult to read . . . . . . . . . . 126If only part of the display is readable . . . . . . . 127](https://usermanual.wiki/Broadcom/BRCM1028.Spears-User-Manual/User-Guide-846482-Page-8.png)


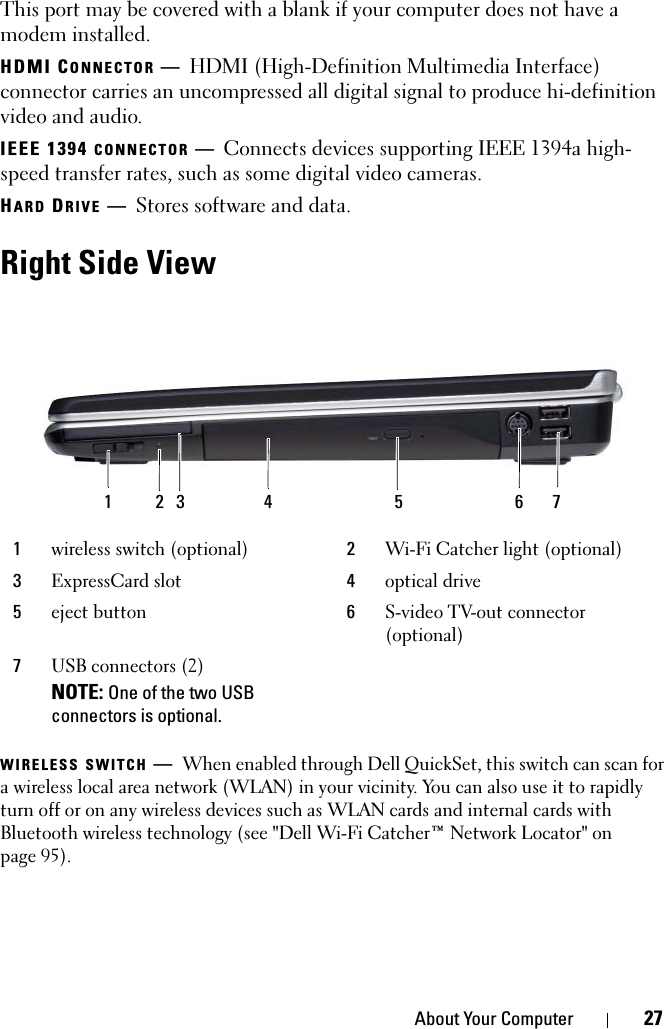
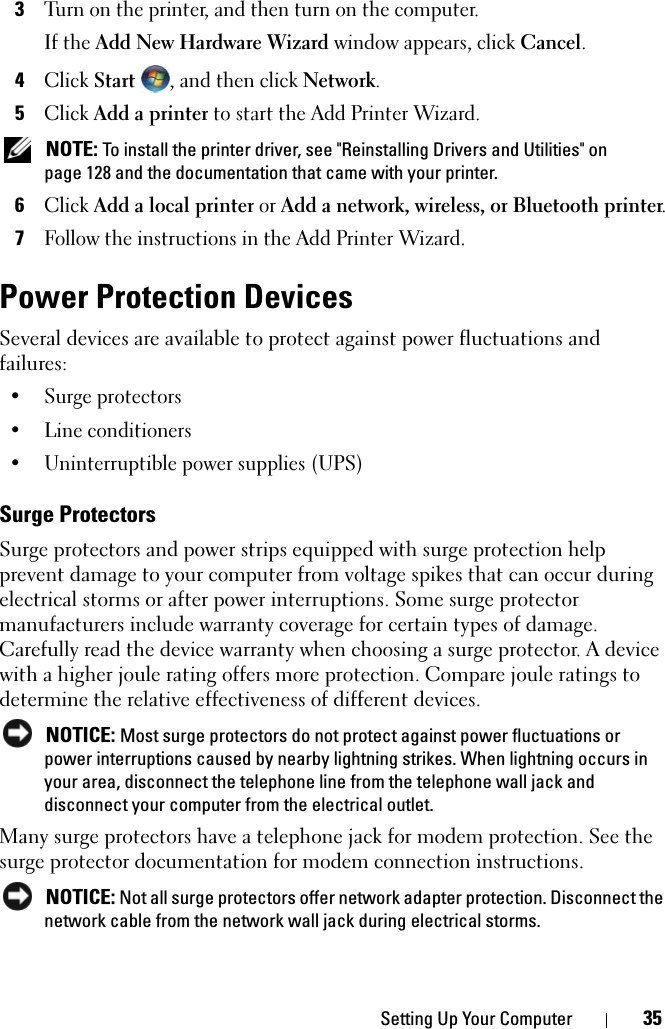


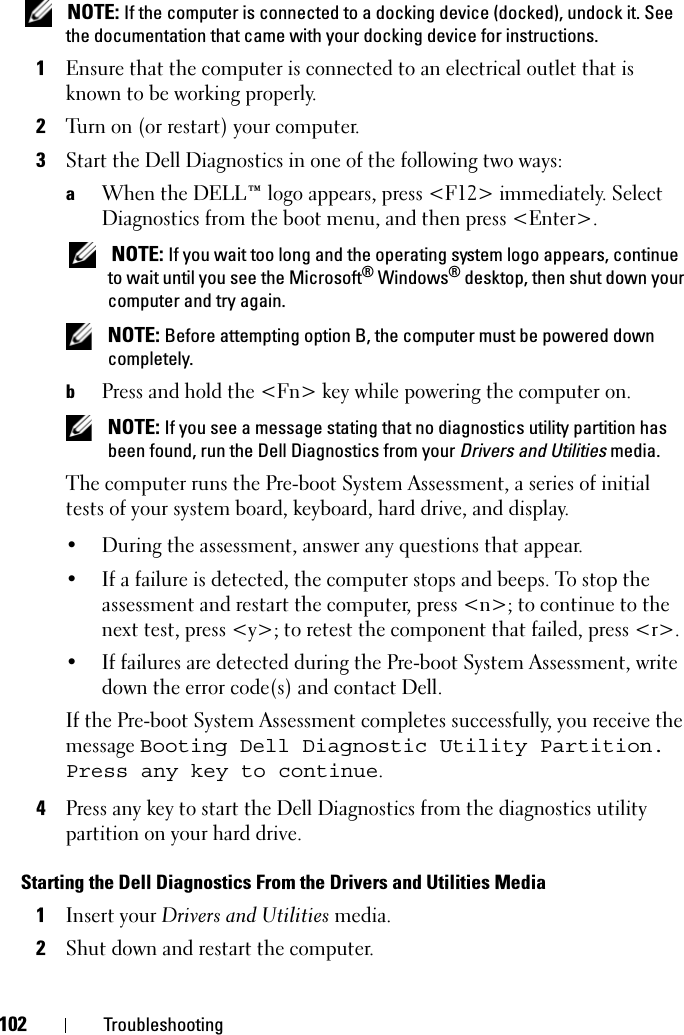
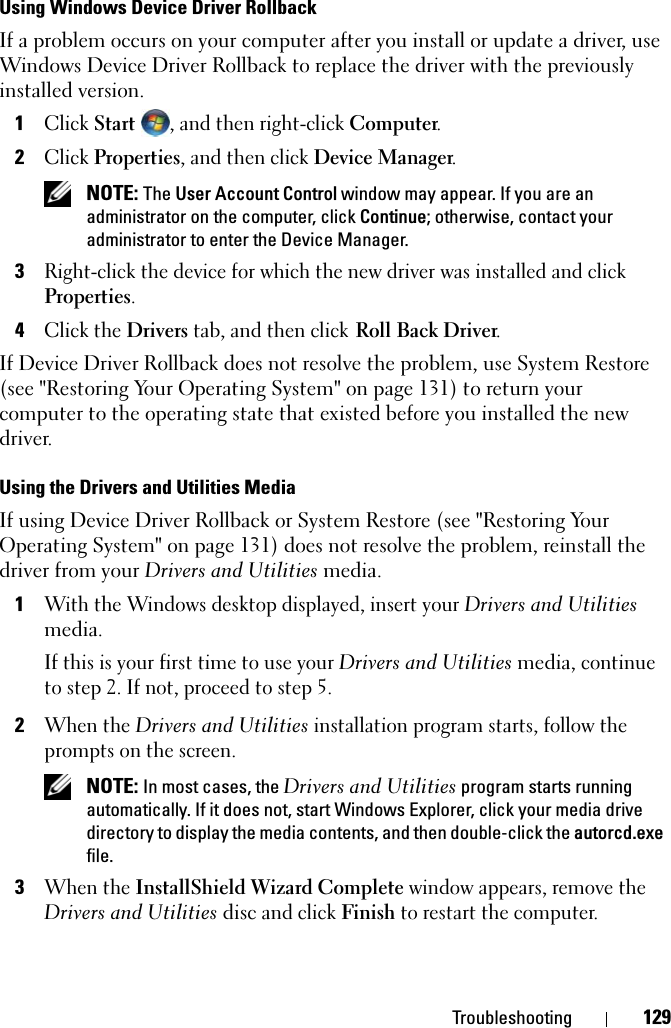
![114 TroubleshootingTIME-OF-DAY CLOCK STOPPED —The reserve battery that supports the system configuration settings may require recharging. Connect your computer to an electrical outlet to charge the battery. If the problem persists, contact Dell (see "Contacting Dell" on page 163).TIME-OF-DAY NOT SET-PLEASE RUN THE SYS TEM SETUP PROGRAM —The time or date stored in the system setup program does not match the system clock. Correct the settings for the Date and Time options (see "Using the System Setup Program" on page 175).TIMER CHIP COUNTER 2 FAILED —A chip on the system board may be malfunctioning. Run the System Set tests in the Dell Diagnostics (see "Dell Diagnostics" on page 101).UNEXPECTED INTERRUPT IN PROTECTED MODE —The keyboard controller may be malfunctioning, or a memory module may be loose. Run the System Memory tests and the Keyboard Controller test in the Dell Diagnostics (see "Dell Diagnostics" on page 101).X:\ IS NOT ACCESSIBLE. THE DEVICE IS NOT READY —Insert a disk into the drive and try again.WARNING: BATTERY IS CRITICALLY LOW —The battery is running out of charge. Replace the battery, or connect the computer to an electrical outlet; otherwise, activate hibernate mode or shut down the computer.ExpressCard Problems CAUTION: Before you begin any of the procedures in this section, follow the safety instructions in the Product Information Guide.CHECK THE EXPRESSCARD —Ensure that the ExpressCard is properly inserted into the connector.CHECK THAT THE CARD IS RECOGNIZED BY WINDOWS —Double-click the Safely Remove Hardware icon in the Windows taskbar. Some cards do not support this feature. If the card supports this Windows feature, the card will be listed.IF YOU HAVE PROBLEMS WITH A DELL-PROVIDED EXPRESSCARD —Contact Dell (see "Contacting Dell" on page 163). Also, for Mobile Broadband (WWAN) ExpressCards, see "Mobile Broadband (Wireless Wide Area Network [WWAN])" on page 120.IF YOU HAVE PROBLEMS WITH AN EXPRESSCARD NOT PROVIDED BY DELL —Contact the ExpressCard manufacturer.](https://usermanual.wiki/Broadcom/BRCM1028.Spears-User-Manual/User-Guide-846482-Page-114.png)
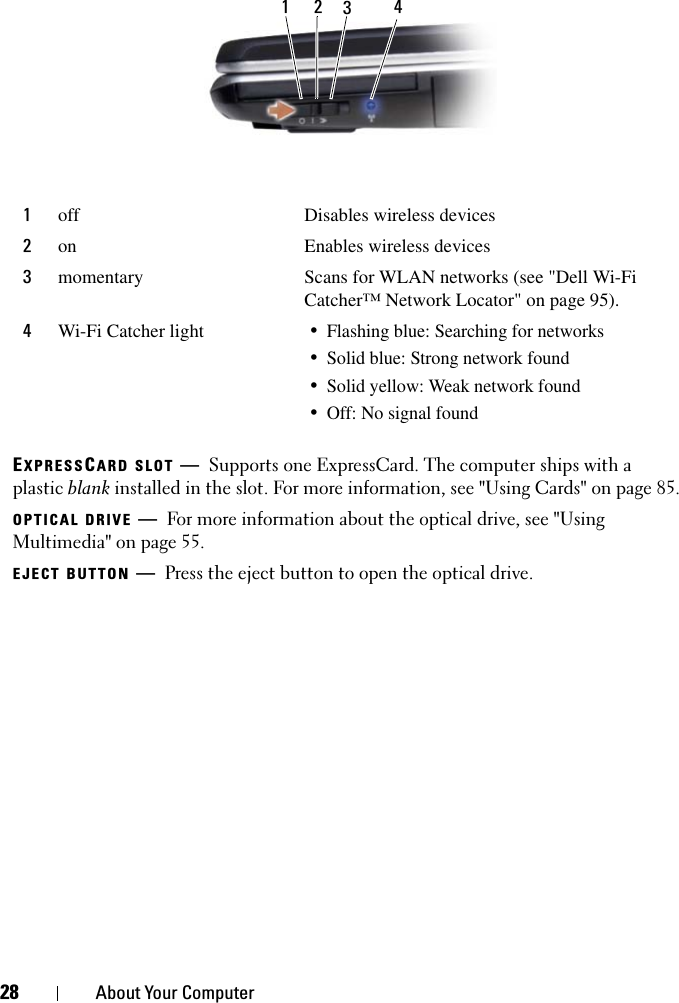
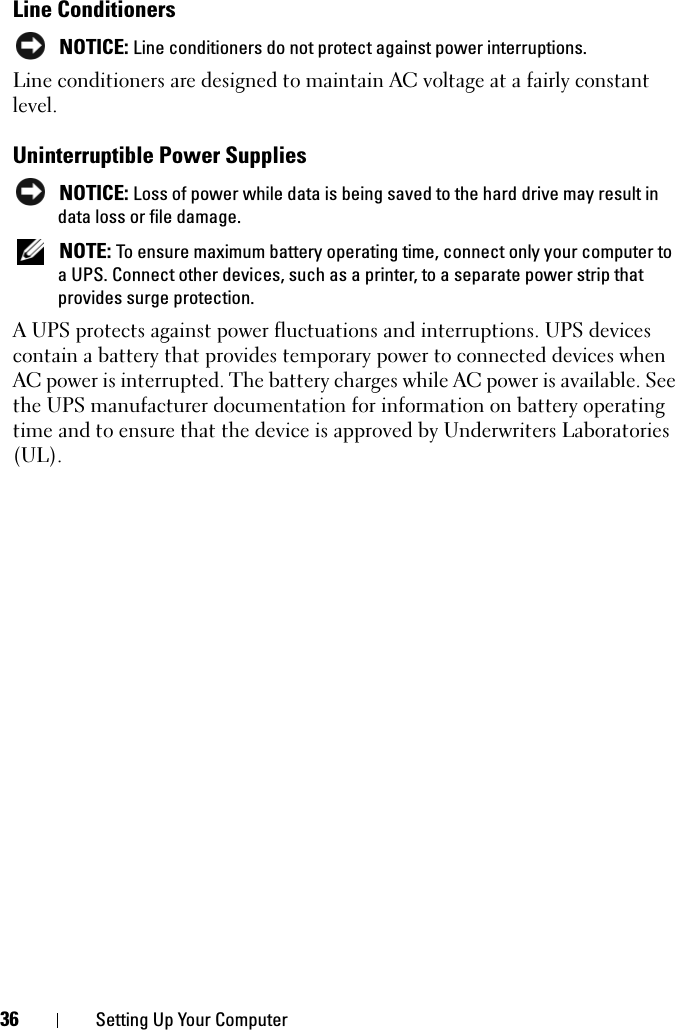
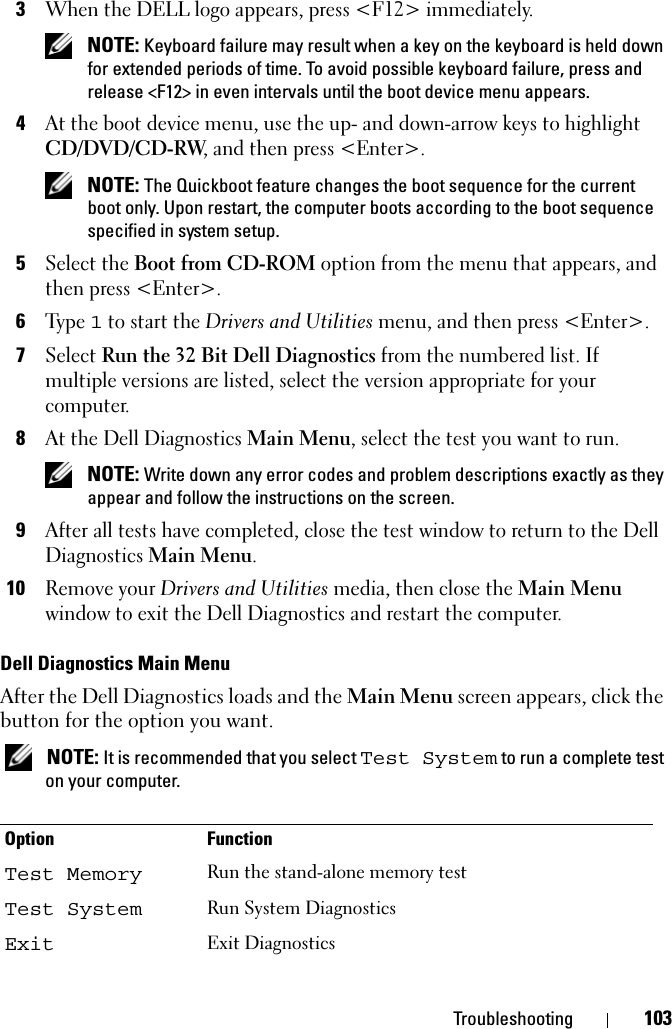
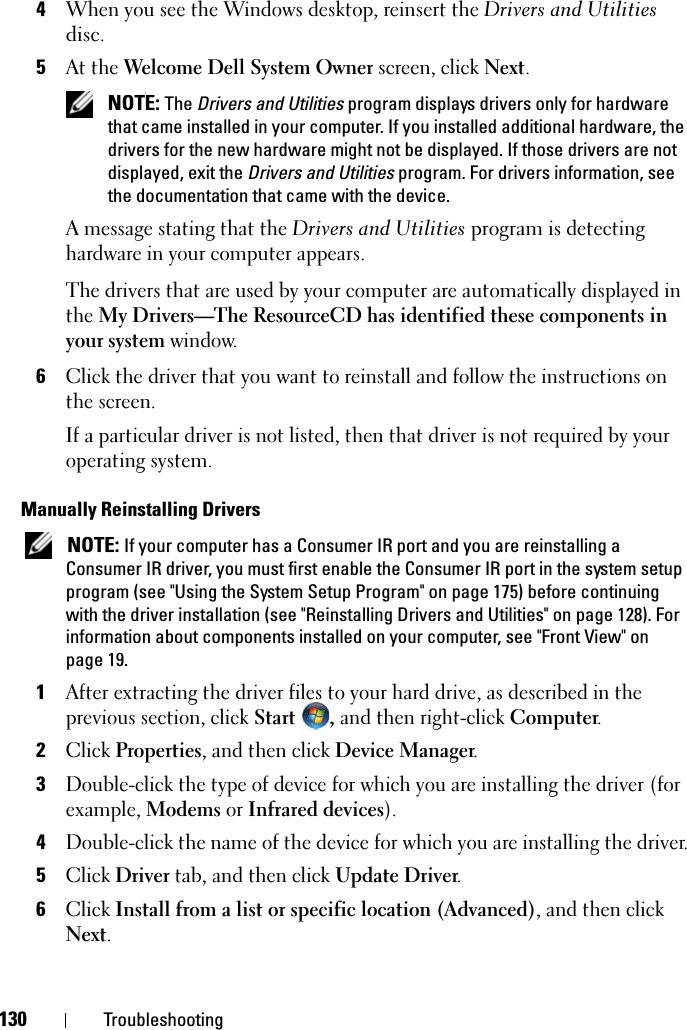
![120 TroubleshootingIF YOU EXPERIENCE OTHER MEMORY PROBLEMS —• Reseat the memory modules to ensure that your computer is successfully communicating with the memory (see "Memory" on page 144).• Ensure that you are following the memory installation guidelines (see "Memory" on page 144).• Run the Dell Diagnostics (see "Dell Diagnostics" on page 101). Network ProblemsFill out the "Diagnostics Checklist" on page 162 as you complete these checks. CAUTION: Before you begin any of the procedures in this section, follow the safety instructions in the Product Information Guide.CHECK THE NETWORK CABLE CONNECTOR —Ensure that the network cable is firmly inserted into both the network connector on the back of the computer and the network jack.CHECK THE NETWORK LIGHTS ON THE NETWORK CONNECTOR —No light indicates that no network communication exists. Replace the network cable.RESTART THE COMPUTER AND LOG ON TO THE NETWORK AGAINCHECK YOUR NETWORK SETTINGS —Contact your network administrator or the person who set up your network to verify that your network settings are correct and that the network is functioning.Mobile Broadband (Wireless Wide Area Network [WWAN]) NOTE: The Dell Mobile Broadband Card Utility user’s guide and the Mobile Broadband ExpressCard user’s guide are available through Windows Help and Support (click Start → Help and Support). You can also download the Dell Mobile Broadband Card Utility user’s guide from support.dell.com. NOTE: The icon appears in the notification area if the computer has a Dell WWAN device installed. Double-click the icon to launch the utility.ACTIVATE THE MOBILE BROADBAND EXPRESSCARD —You must activate the Mobile Broadband ExpressCard before you can connect to the network. Position the mouse over the icon in the notification area to verify the status of the connection. If the card is not activated, follow the card activation instructions located within the Dell Mobile Broadband Card](https://usermanual.wiki/Broadcom/BRCM1028.Spears-User-Manual/User-Guide-846482-Page-120.png)
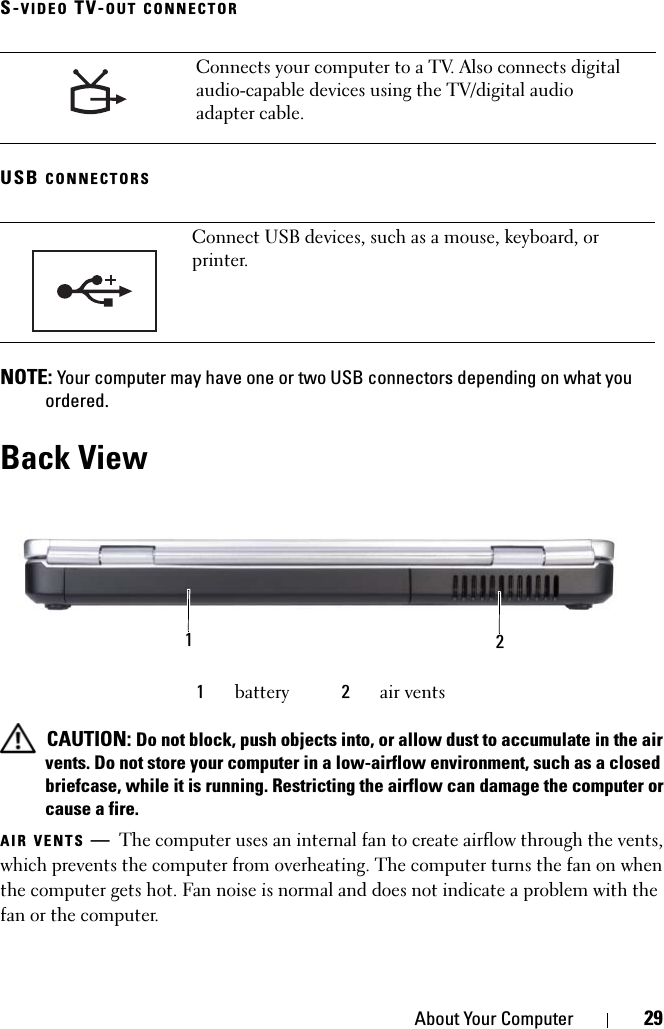
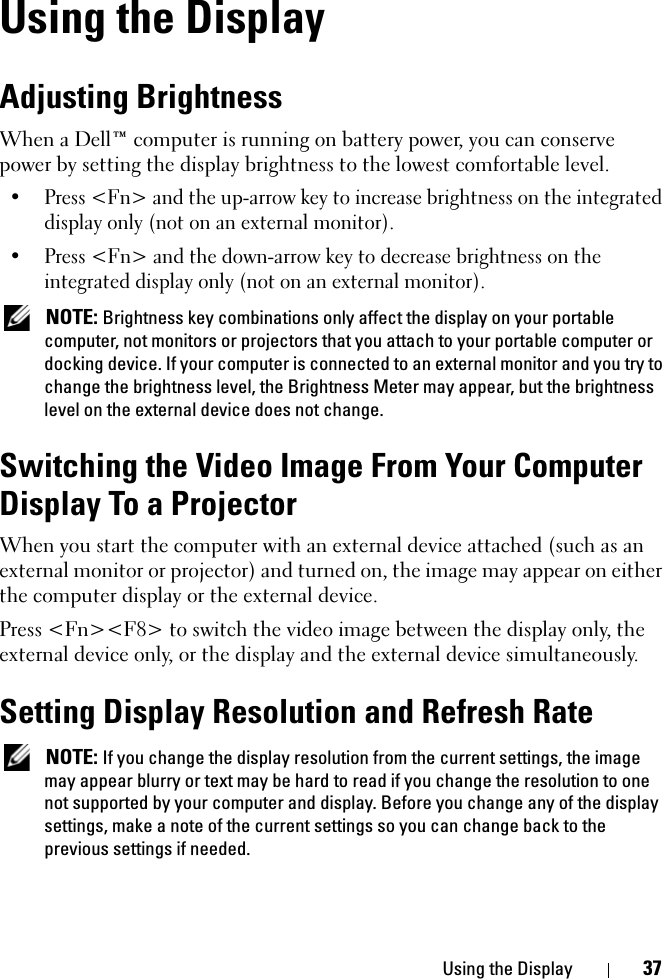
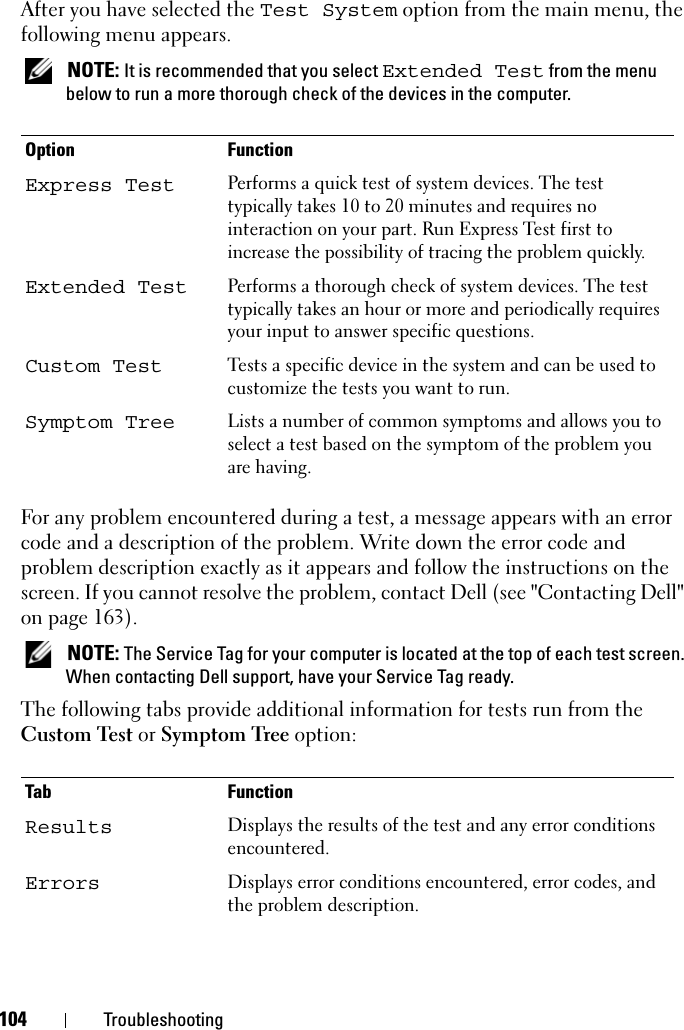
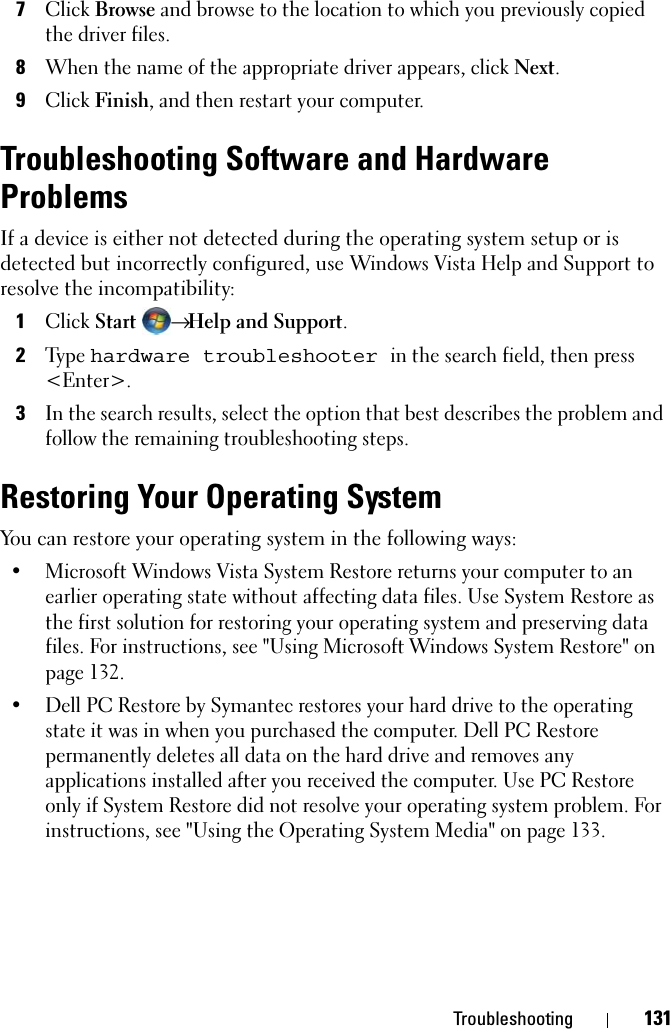
![128 TroubleshootingA driver acts like a translator between the device and any other programs that use the device. Each device has its own set of specialized commands that only its driver recognizes.Dell ships your computer to you with required drivers already installed—no further installation or configuration is needed. NOTICE: Your Drivers and Utilities media may contain drivers for operating systems that are not on your computer. Ensure that you are installing software appropriate for your operating system.Many drivers, such as the keyboard driver, come with your Microsoft® Windows® operating system. You may need to install drivers if you:• Upgrade your operating system.• Reinstall your operating system.• Connect or install a new device.Identifying DriversIf you experience a problem with any device, identify whether the driver is the source of your problem and, if necessary, update the driver.1Click Start , and then right-click Computer.2Click Properties, and then click Device Manager. NOTE: The User Account Control window may appear. If you are an administrator on the computer, click Continue; otherwise, contact your administrator to continue.Scroll down the list of devices and check for an exclamation point (a circle with a [!]) next to the device name. If an exclamation point is next to the device name, you may need to reinstall the driver or install a new driver (see "Reinstalling Drivers and Utilities" on page 128).Reinstalling Drivers and Utilities NOTICE: The Dell Support website at support.dell.com and your Drivers and Utilities media provide approved drivers for Dell computers. If you install drivers obtained from other sources, your computer might not work correctly.](https://usermanual.wiki/Broadcom/BRCM1028.Spears-User-Manual/User-Guide-846482-Page-128.png)


![184 Glossarycomputer battery powers the computer.BD — See Blu-ray Disc. BIOS — basic input/output system — A program (or utility) that serves as an interface between the computer hardware and the operating system. Unless you understand what effect these settings have on the computer, do not change them. Also referred to as system setup.bit — The smallest unit of data interpreted by your computer.Bluetooth® wireless technology — A wireless technology standard for short-range (9 m [29 feet]) networking devices that allows for enabled devices to automatically recognize each other.Blu-ray Disc — Blu-ray Disc (BD) is an optical disc format jointly developed by the Blu-ray Disc Association (BDA). A BD records and plays high-definition video (HD), and stores large amounts of data: five times the storage capacity of a DVD and can hold up to 25GB on a single-layer disc and 50GB on a dual-layer disc.BD-R — Blu-ray Disc recordable refers to two optical disc formats that can be recorded with an optical disc recorder. BD-R discs can be written to once.BD-RE — Blu-ray Disc RE can be erased and re-recorded multiple times.boot sequence — Specifies the order of the devices from which the computer attempts to boot.bootable CD — A CD that you can use to start your computer. In case your hard drive is damaged or your computer has a virus, ensure that you always have a bootable CD or floppy disk available. Your Drivers and Utilities media is a bootable CD.bootable disk — A disk that you can use to start your computer. In case your hard drive is damaged or your computer has a virus, ensure that you always have a bootable CD or floppy disk available.bps — bits per second — The standard unit for measuring data transmission speed.BTU — British thermal unit — A measurement of heat output.bus — A communication pathway between the components in your computer.bus speed — The speed, given in MHz, that indicates how fast a bus can transfer information.byte — The basic data unit used by your computer. A byte is usually equal to 8 bits.CC — Celsius — A temperature measurement scale where 0° is the freezing point and 100° is the boiling point of water.](https://usermanual.wiki/Broadcom/BRCM1028.Spears-User-Manual/User-Guide-846482-Page-184.png)