Broadcom BRCM1030 802.11g WLAN PCI-E Mini Card User Manual Q44C
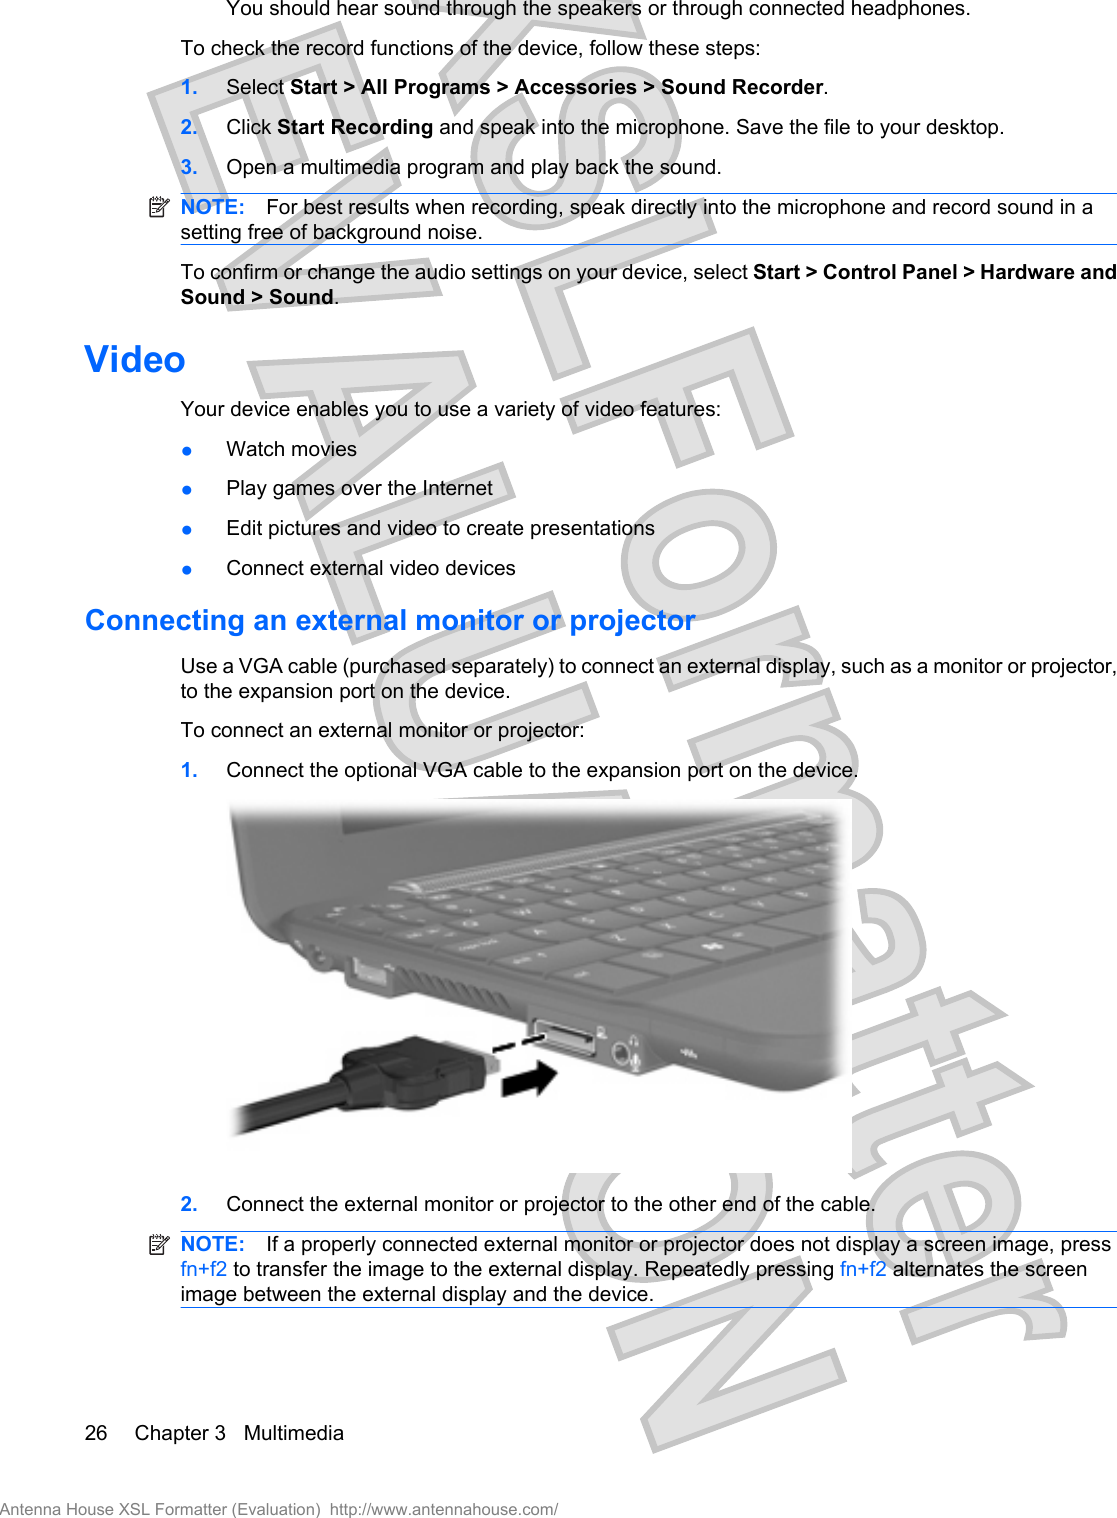
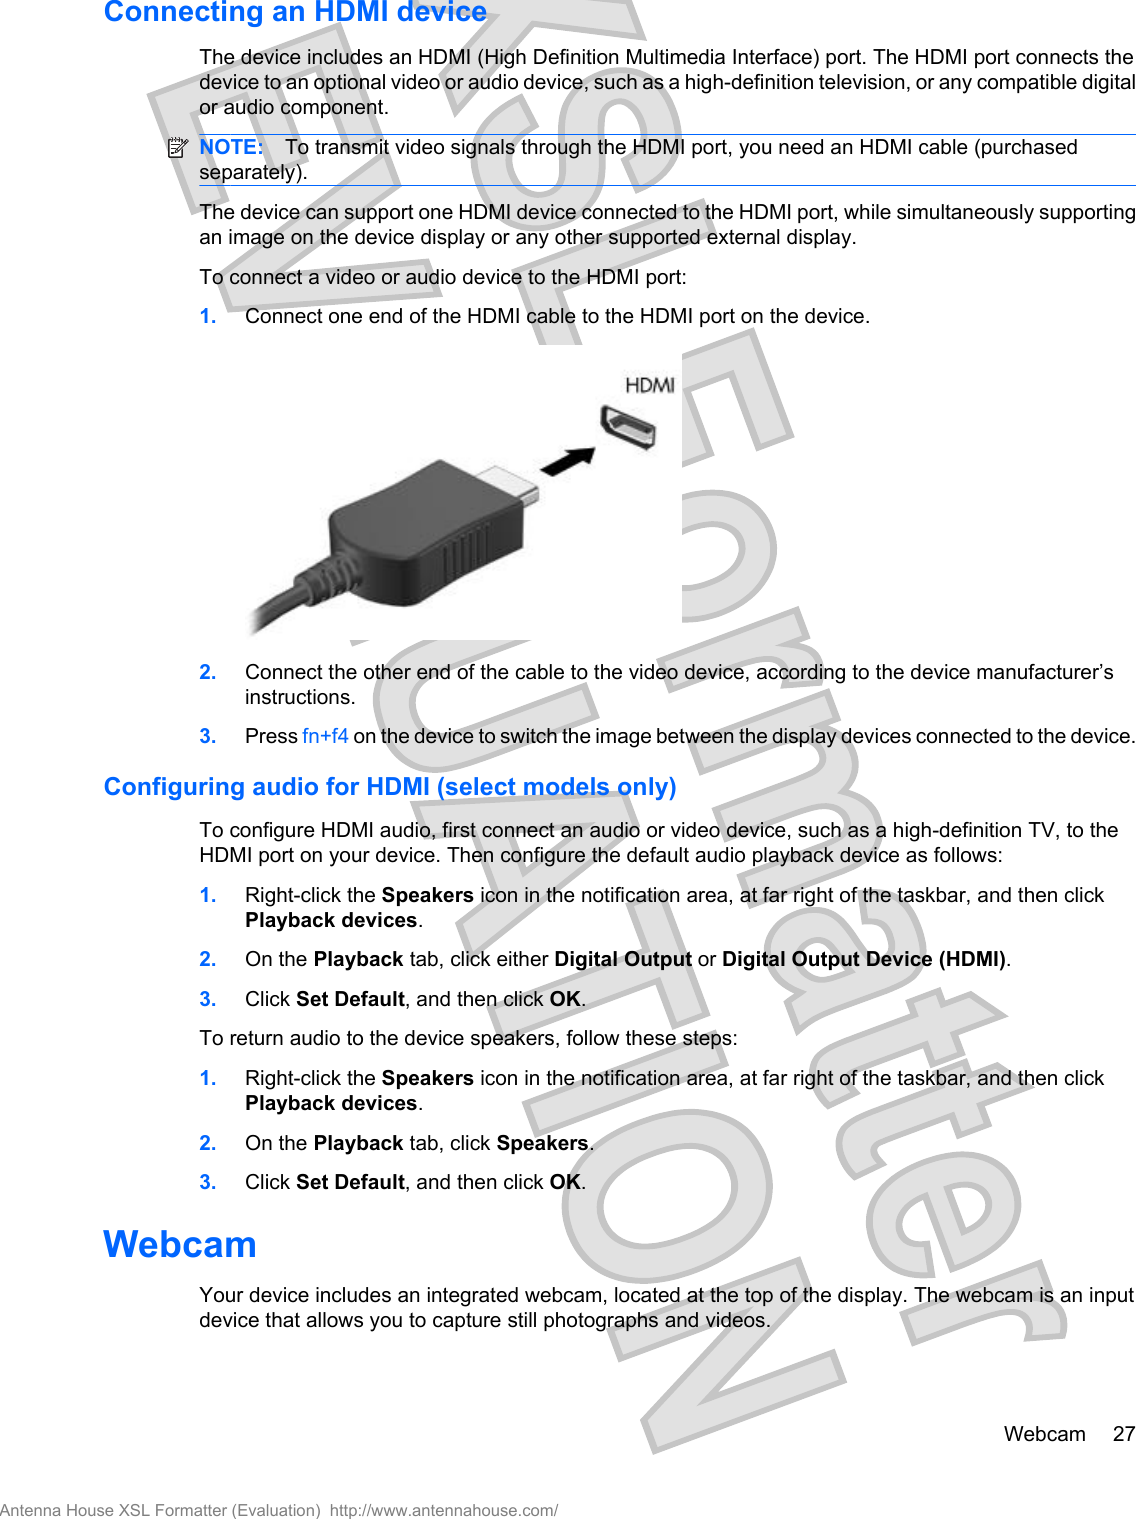
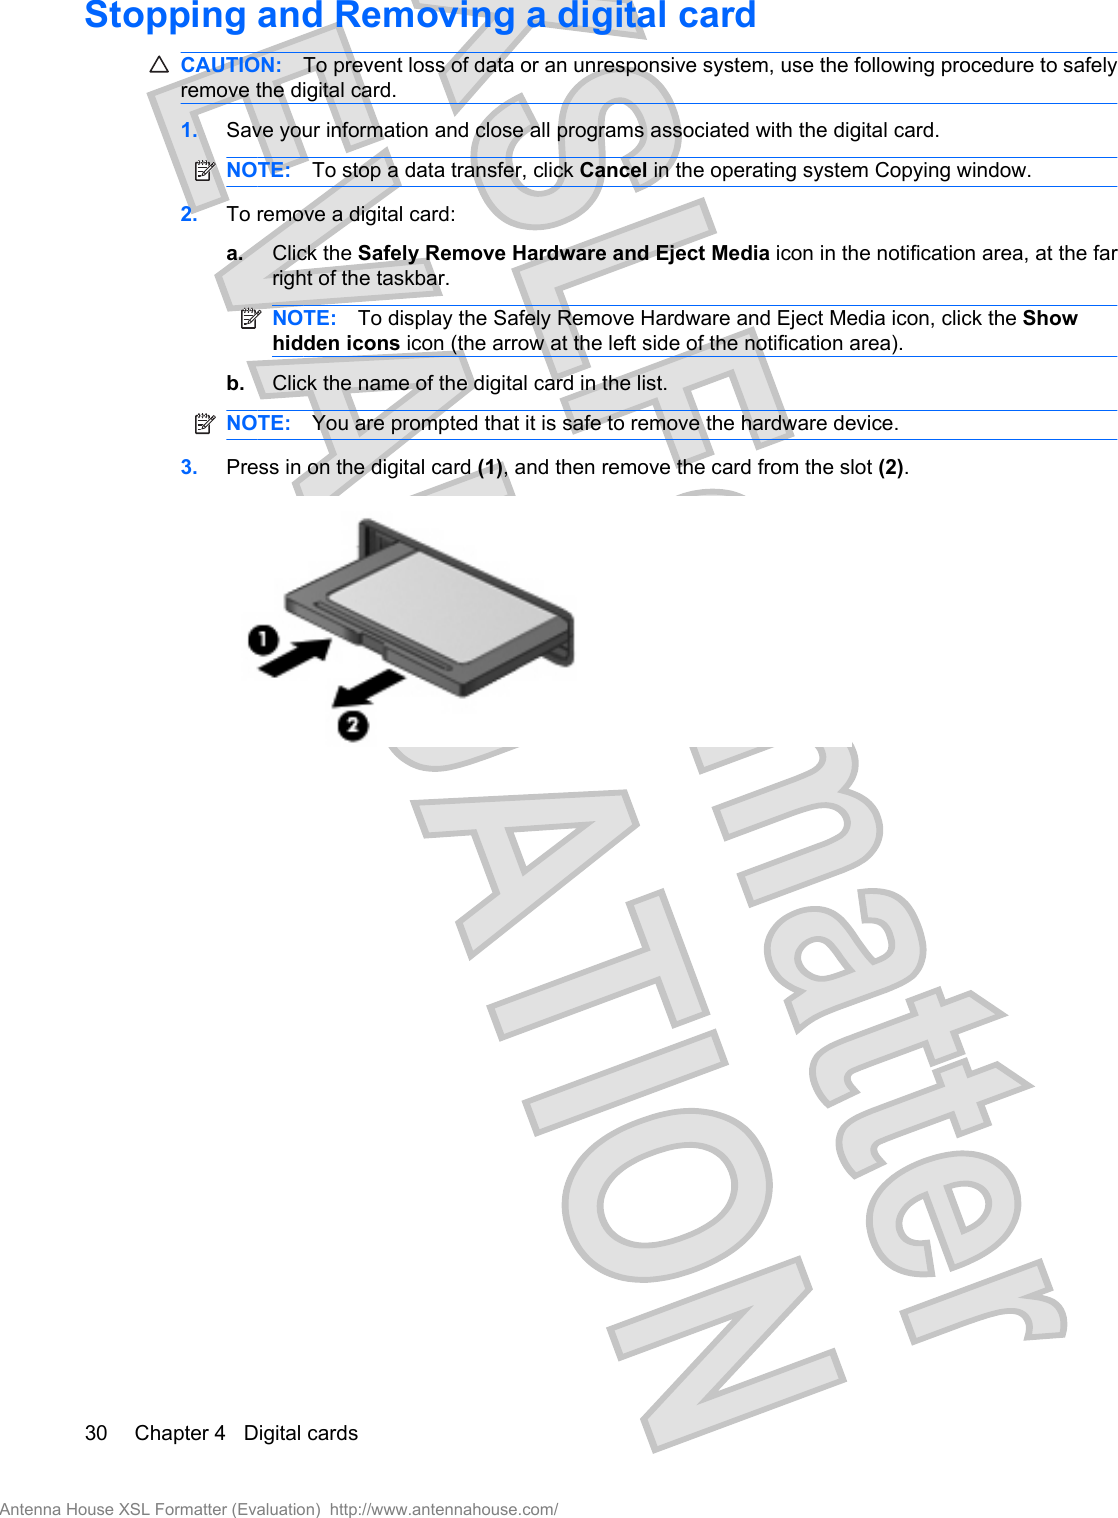
Broadcom Corporation 802.11g WLAN PCI-E Mini Card Q44C
Broadcom >
Contents
- 1. Users Manual
- 2. User Manual
- 3. Manual Statement
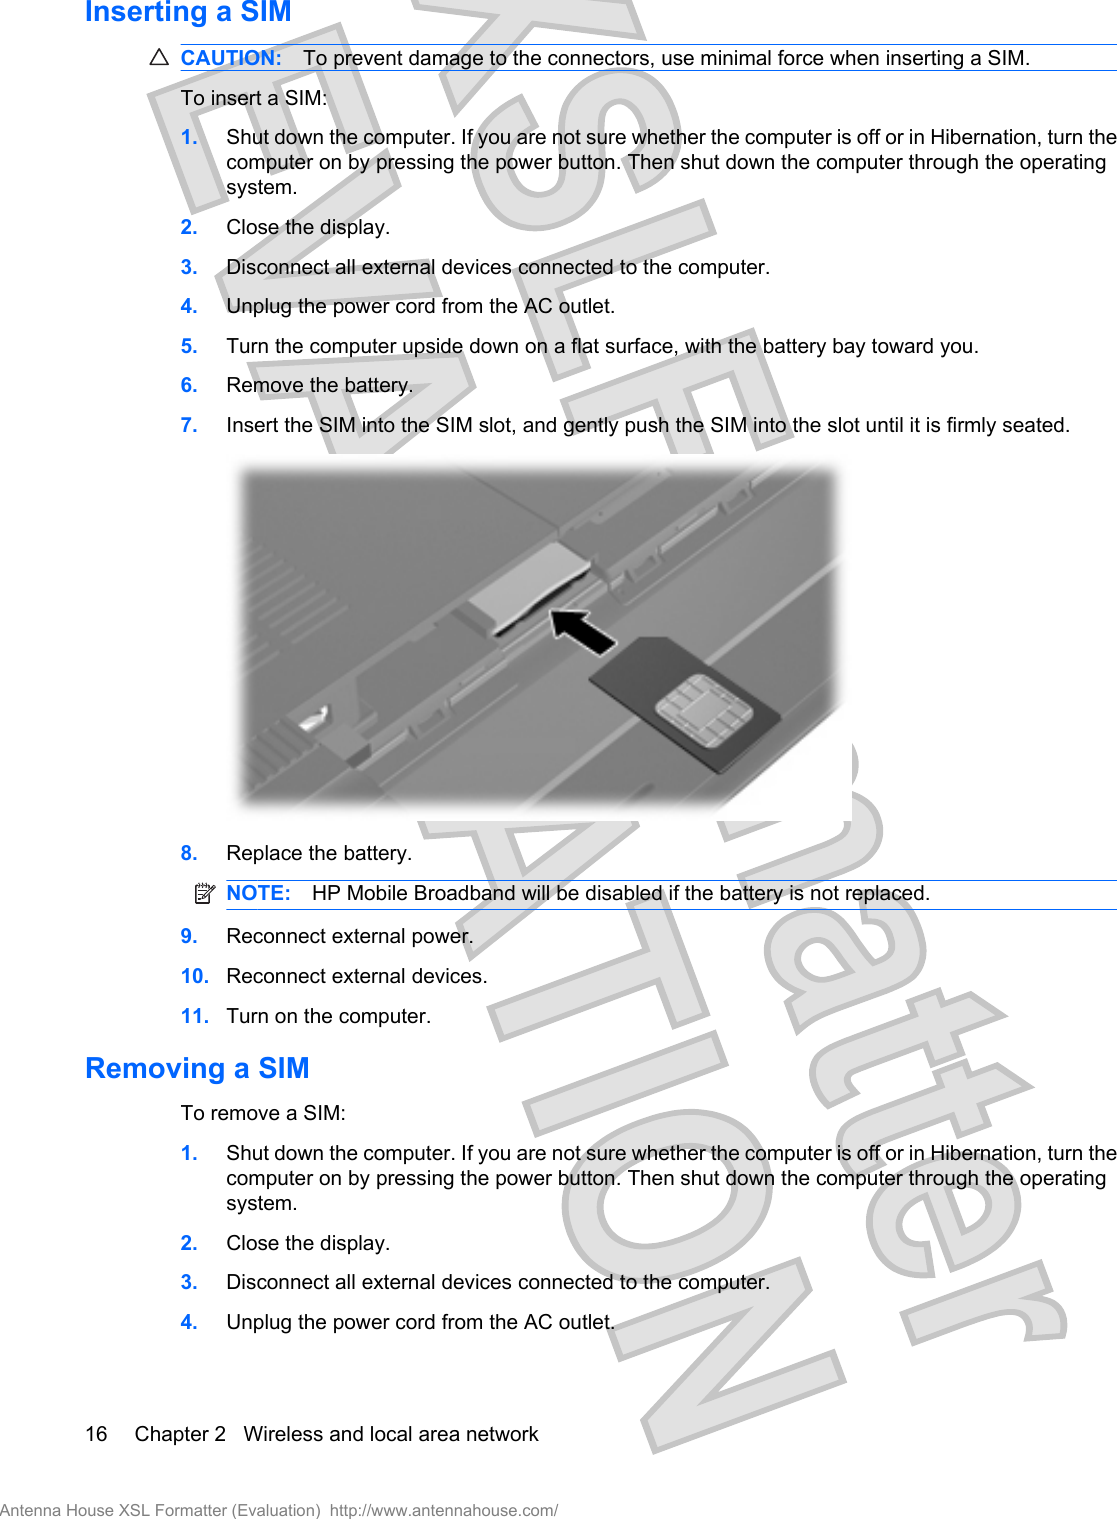
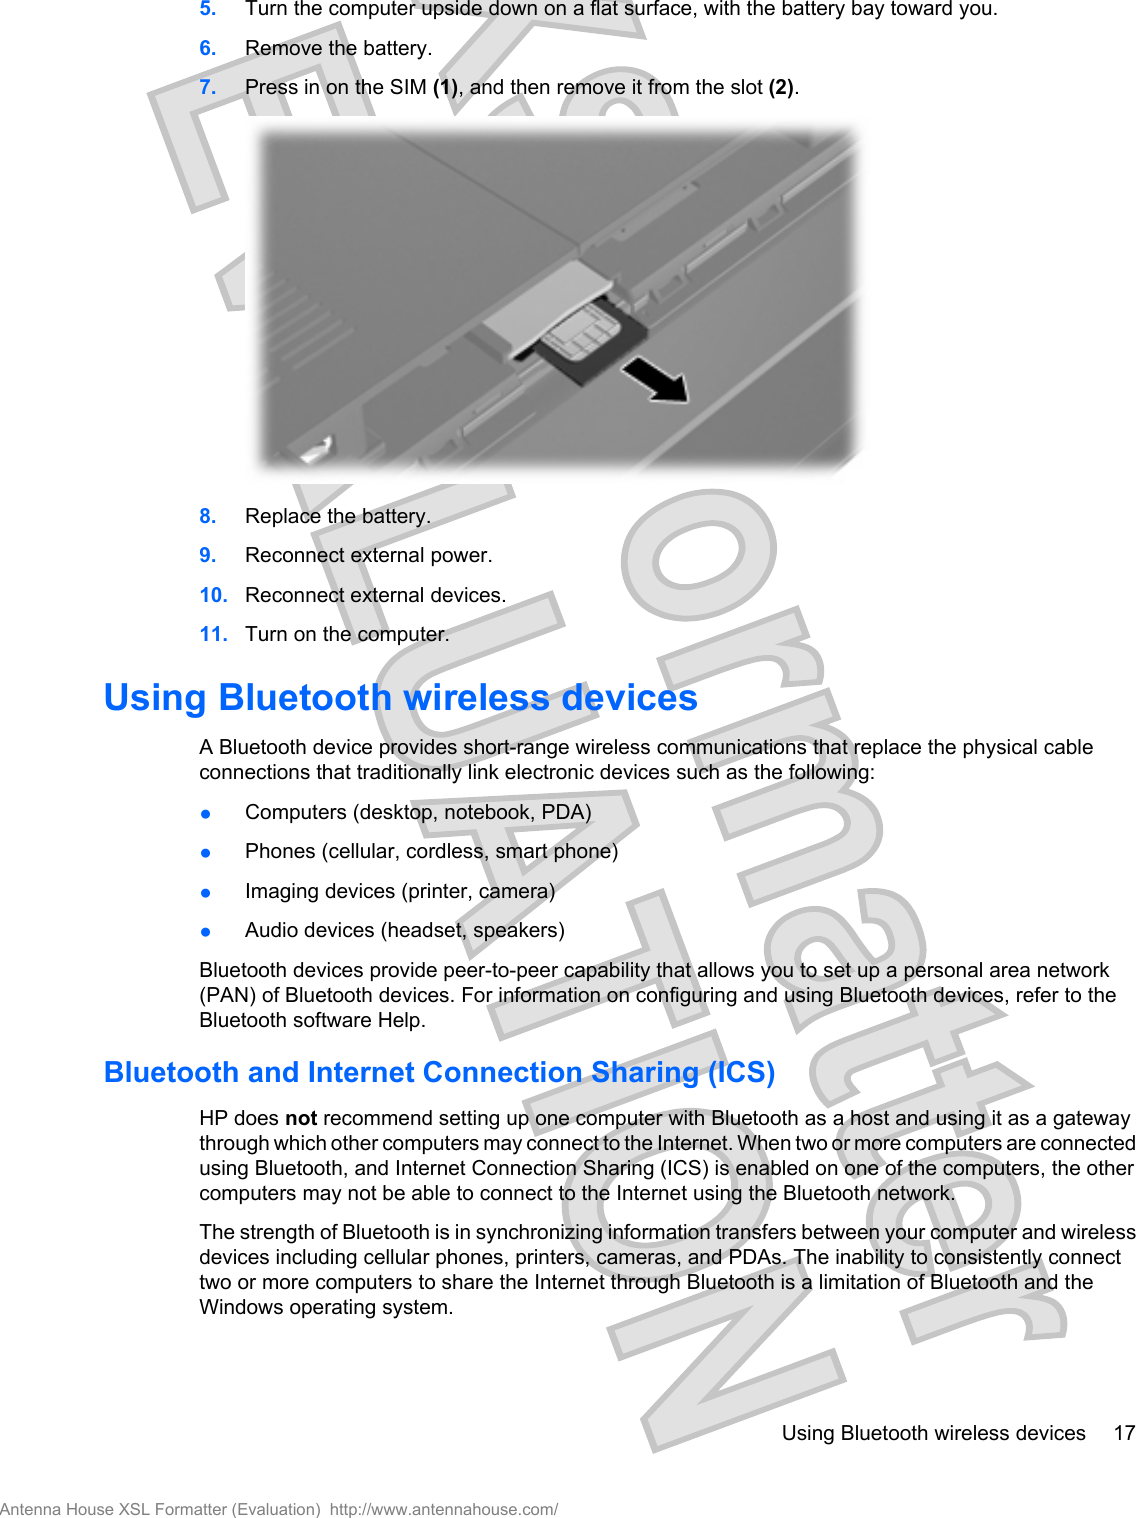
- 4. User manual 1 of 2
- 5. User manual 2 of 2
- 6. System User manual
- 7. Manual statement
- 8. User Manual Statement
- 9. Regulatory User Guide
- 10. Bear Manual
- 11. BixbyUG Manual
- 12. Welchs Manual
- 13. User Manual I71C
- 14. User Manual legal part
- 15. User Manual Q44C
- 16. OEM ODM Instruction
- 17. Manual 1
- 18. Manual 2
- 19. Manual 3
- 20. OEM installation guide
- 21. Host user manual
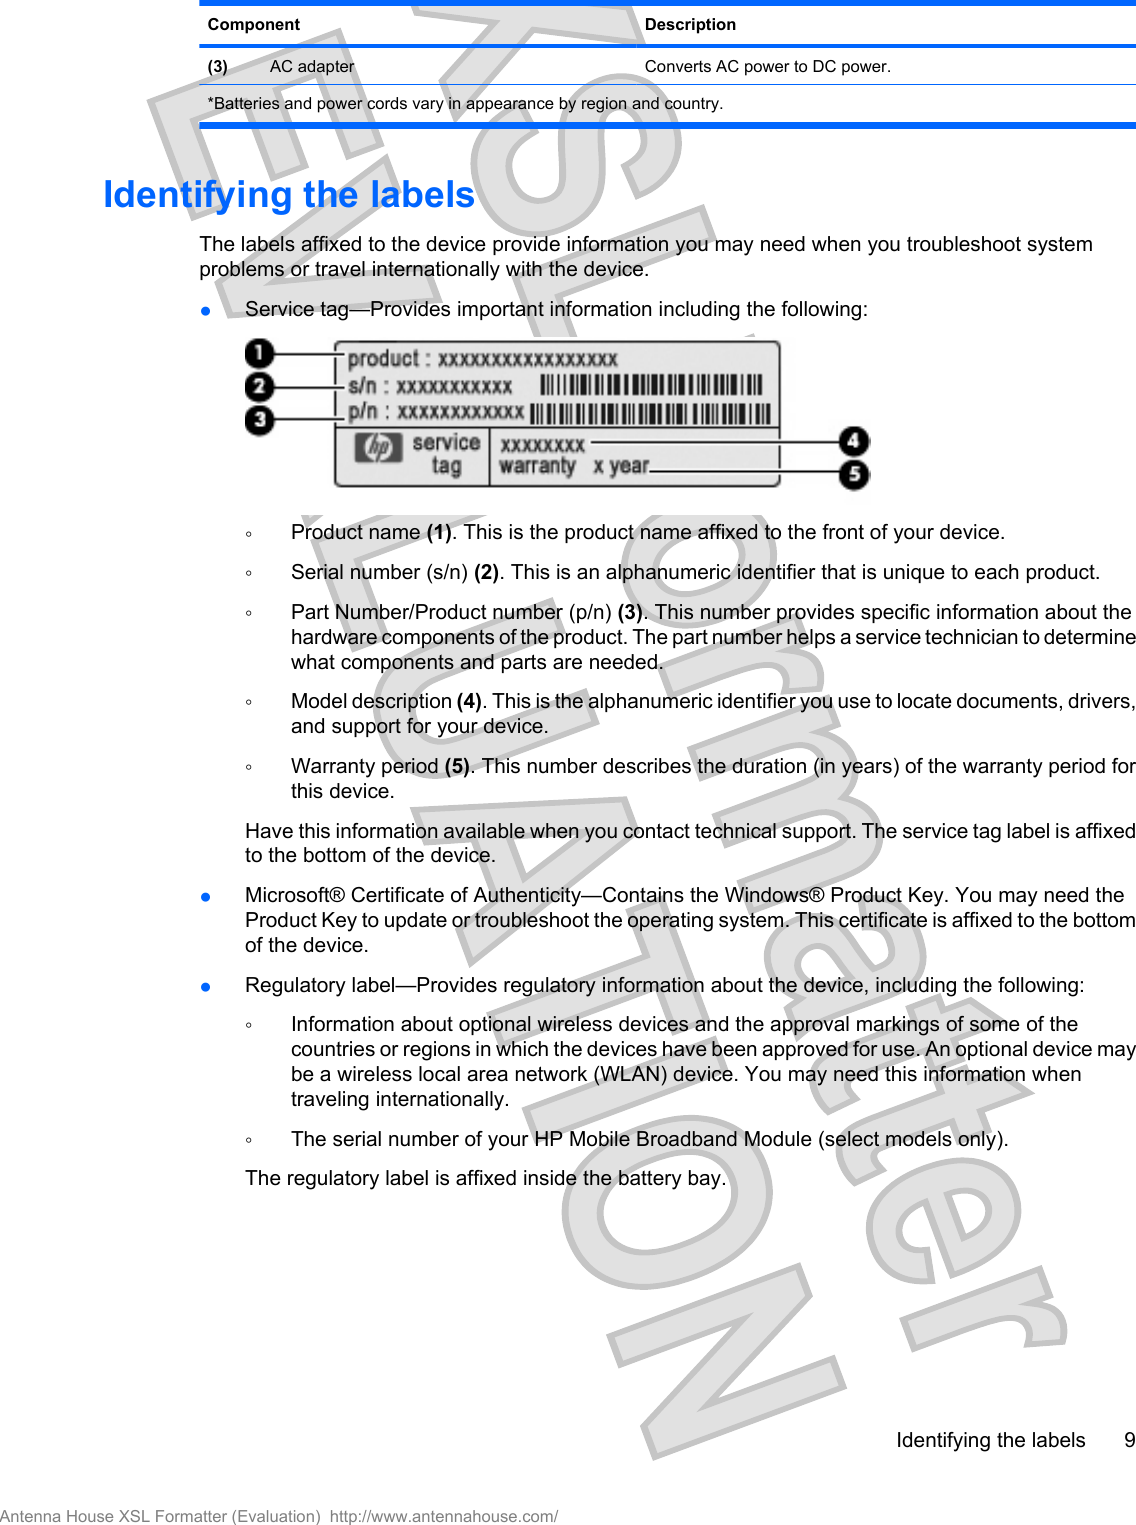
User Manual Q44C