Broadcom BRCM1030 802.11g WLAN PCI-E Mini Card User Manual Bear Manual
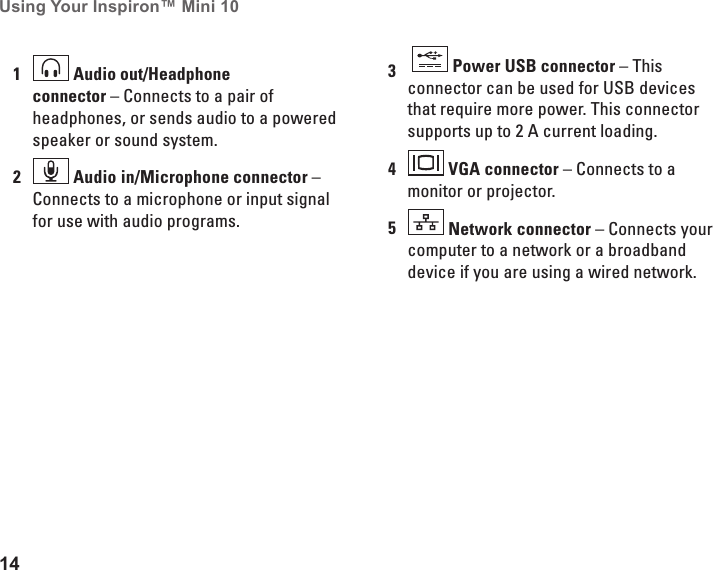
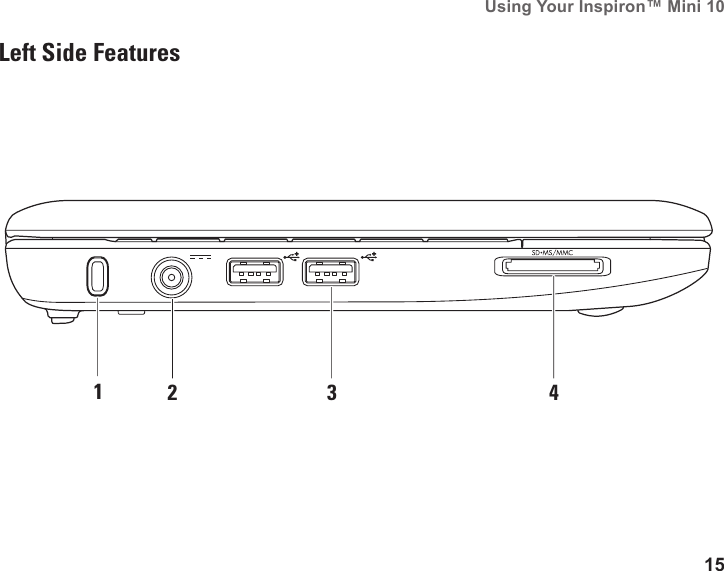
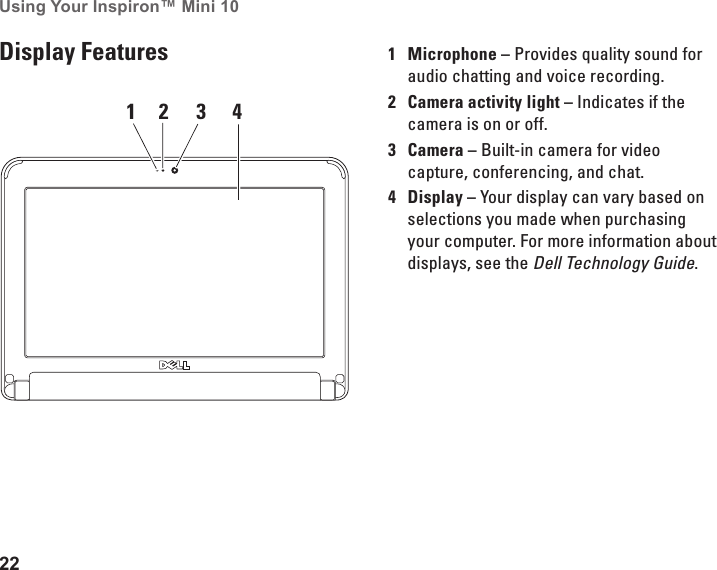
Broadcom Corporation 802.11g WLAN PCI-E Mini Card Bear Manual
Broadcom >
Contents
- 1. Users Manual
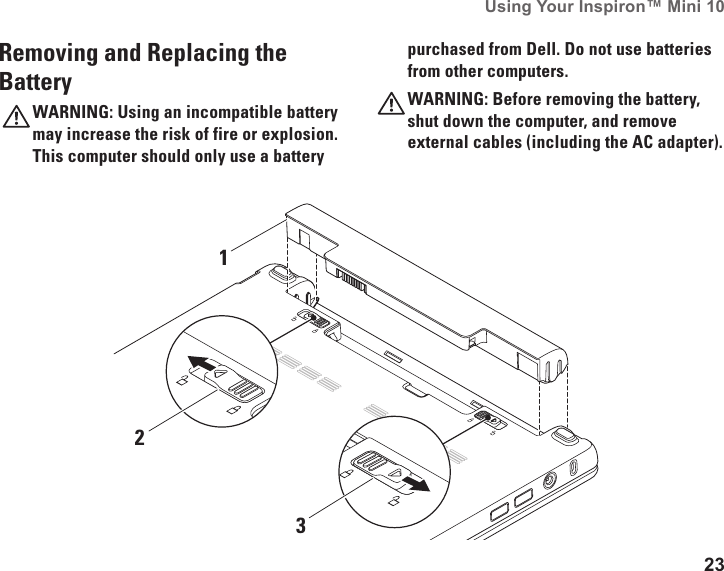
- 2. User Manual
- 3. Manual Statement
- 4. User manual 1 of 2
- 5. User manual 2 of 2
- 6. System User manual
- 7. Manual statement
- 8. User Manual Statement
- 9. Regulatory User Guide
- 10. Bear Manual
- 11. BixbyUG Manual
- 12. Welchs Manual
- 13. User Manual I71C
- 14. User Manual legal part
- 15. User Manual Q44C
- 16. OEM ODM Instruction
- 17. Manual 1
- 18. Manual 2
- 19. Manual 3
- 20. OEM installation guide
- 21. Host user manual
Bear Manual


![32Using Support Tools System MessagesIf your computer has an issue or error, it may display a System Message that will help you identify the cause and action needed to resolve the issue. NOTE: If the message you received is not listed in the following examples, see the documentation for either the operating system or the program that was running when the message appeared. Alternatively see the Dell Technology Guide on your hard disk or the Dell Support website at support.dell.com.Alert! Previous attempts at booting this system have failed at checkpoint [nnnn]. For help in resolving this problem, please note this checkpoint and contact Dell Technical Support — The computer failed to complete the boot routine three consecutive times for the same error (see “Contacting Dell” on page 47 for assistance).CMOS checksum error — Possible motherboard failure or RTC battery low. Replace the battery. (See the Dell Technology Guide on your hard disk or the Dell Support website at support.dell.com or see “Contacting Dell” on page 47 for assistance).Hard-disk drive (HDD) failure — Possible hard disk drive failure during POST (see “Contacting Dell” on page 47 for assistance).Hard-disk drive (HDD) read failure — Possible hard disk drive failure during HDD boot test (see “Contacting Dell” on page 47 for assistance).Keyboard failure — Keyboard failure or loose cable.No boot device available — No bootable partition on hard disk drive, the hard disk drive connector is loose, or no bootable device exists.If the hard drive is your boot device, ensure •that the connector is connected and that the drive is installed properly and partitioned as a boot device.](https://usermanual.wiki/Broadcom/BRCM1030.Bear-Manual/User-Guide-1091027-Page-34.png)