Brother 8CAA19 Spread Spectrum Transmitter User Manual MFC 440CN UG US
Brother Industries, Ltd. Spread Spectrum Transmitter MFC 440CN UG US
Brother >
Contents
- 1. User Manual 1
- 2. User Manual 2
- 3. User Manual 3
- 4. User Manual 4
- 5. User Manual 5
User Manual 3
Section II
Fax II
Sending a fax 38
Receiving a Fax 46
Telephone Services and External devices 52
Dialing and storing numbers 63
Message Center (MFC-665CW and
MFC-845CW only) 71
Advanced fax operations (Black & White only) 76
Printing Reports 87
Polling 89
MFC-440CN_UG_US.book Page 37 Thursday, August 10, 2006 6:59 PM
Color:Blac
k
Please see "User manual 4[Short-Term Confidentiality].pdf" for FCC manual statements.
38
5
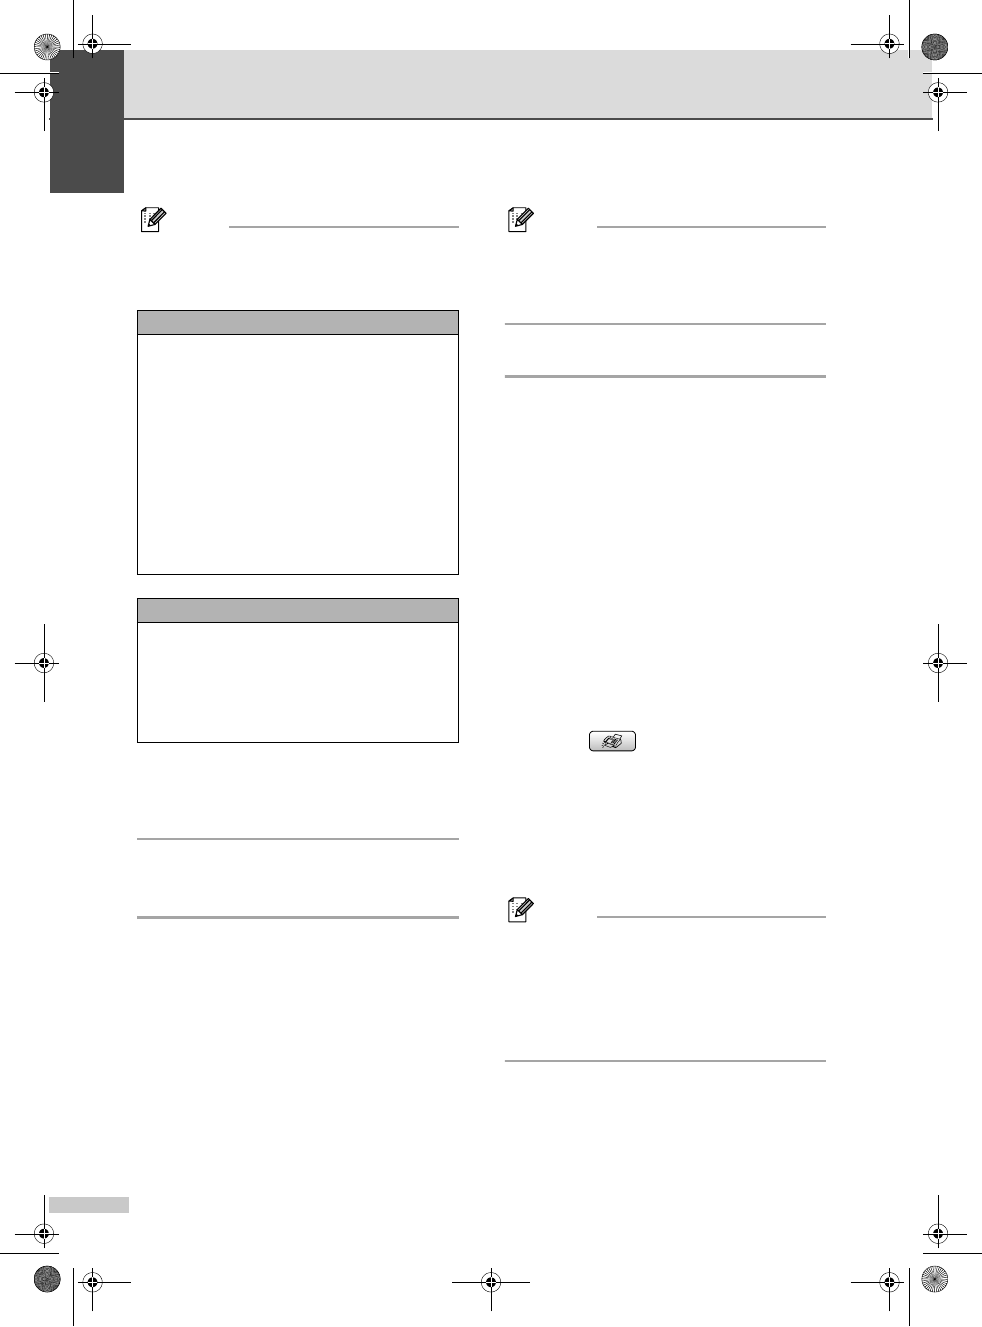
Entering Fax mode 5
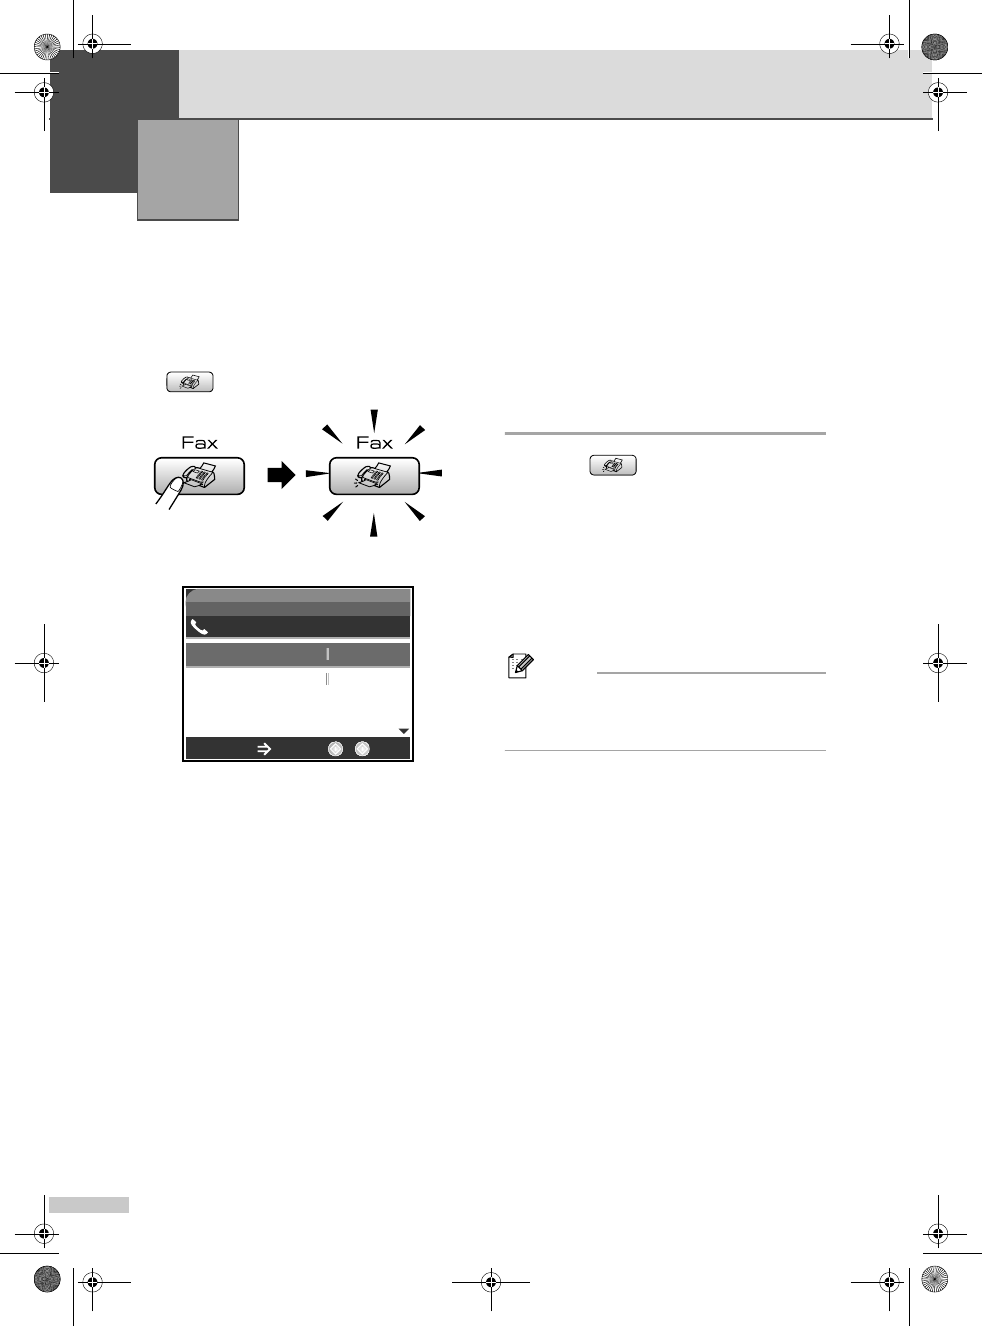
When the machine is idle, the time appears
on the LCD. When you want to send a fax, or
change fax send or receive settings, press
the (Fax) key to illuminate it in green.
The LCD shows:
Press a or b to scroll through the Fax key
options. Some functions are only available
when sending black & white faxes.
Fax Resolution (See page 41.)
Contrast (See page 41.)
Speed-Dial (See page 63.)
Outgoing Call (See page 64.)
Caller ID hist. (See page 65.)
Broadcasting (See page 40.)
Delayed Fax (See page 43.)
Batch TX (See page 43.)
Real Time TX (See page 42.)
Polled TX (See page 90.)
Polling RX (See page 89.)
Overseas Mode (See page 43.)
Scan Size (See page 39.)
Set New Default (See page 44.)
Factory Reset (See page 44.)
When the option you want is highlighted,
press OK.
Faxing from the ADF 5
aPress (Fax).
bPut the document face down in the ADF.
cEnter the fax number using the dial pad,
Speed-Dial or Search.
dPress Black Start or Color Start.
The machine starts scanning the
document.
Note
• To cancel, press Stop/Exit.
• If the memory is full, the fax will be sent in
real time.
Sending a fax 5
09012345689
FAX
Fax Start
Press
Fax Resolution Standard
Contrast Auto
Speed-Dial
Outgoing Call
MFC-440CN_UG_US.book Page 38 Thursday, August 10, 2006 6:59 PM
Color:Blac
k
Sending a fax
39
5
Faxing from the scanner
glass 5
You can use the scanner glass to fax pages
of a book one at a time. The documents can
be up to letter or A4 size.
You cannot send multiple pages for color
faxes.
Note
Since you can only scan one page at a
time, it is easier to use the ADF if you are
sending a multiple page document.
aPress (Fax).
bLoad your document face down on the
scanner glass.
cEnter the fax number using the dial pad,
Speed-Dial or Search.
dPress Black Start or Color Start.
If you press Black Start, the
machine starts scanning the first
page. Go to step e.
If you press Color Start, the
machine starts sending the
document.
eDo one of the following:
To send a single page, press 2 to
choose No (or press Black Start
again).
The machine starts sending the
document.
To send more than one page, press
1 to choose Yes and go to step f.
fPut the next page on the scanner glass.
Press OK.
The machine starts scanning the page.
(Repeat steps e and f for each
additional page.)
Note
If the memory is full and you are faxing a
single page, it will be sent in real time.
Faxing A4 size documents
from the scanner glass 5
When documents are A4 size, you need to
set Scan Size to A4. If you do not, the bottom
portion of the faxes will be missing.
aPress (Fax).
bPress a or b to choose Scan Size.
Press OK.
cPress a or b to choose A4.
Press OK.
Note
You can save the setting you use most
often by setting it as default. (See
page 44.)
Color fax transmission 5
Your machine can send a color fax to
machines that support this feature.
Color faxes cannot be stored in the memory.
When you send a color fax, the machine will
send it in real time (even if Real Time TX is
set to Off).
Canceling a fax in progress 5
If you want to cancel a fax while the machine
is scanning, dialing or sending, press
Stop/Exit.
MFC-440CN_UG_US.book Page 39 Thursday, August 10, 2006 6:59 PM
Color:Blac
k

Chapter 5
40
Broadcasting
(Black & White only) 5
Broadcasting is when the same fax message
is automatically sent to more than one fax
number. You can include Groups, Speed-Dial
numbers and up to 50 manually dialed
numbers in the same broadcast.
After the broadcast is finished, a Broadcast
Report will be printed.
aPress (Fax).
bLoad your document.
cPress a or b to choose
Broadcasting.
Press OK.
dPress a or b to choose Add Number.
Press OK.
eEnter a number using Speed-Dial, a
Group, or the dial pad.
Press OK.
fAfter you have entered all the fax
numbers by repeating steps d and e,
press a or b to choose Complete.
Press OK.
gPress Black Start.
Note
• If you did not use up any of the numbers
for Groups or access codes or credit card
numbers, you can ‘broadcast’ faxes to as
many as 210 (MFC-440CN and
MFC-665CW) or 250 (MFC-845CW)
different numbers.
• The available memory will vary depending
on the types of jobs in the memory and the
number of locations used for
broadcasting. If you broadcast to the
maximum numbers available, you will not
be able to use dual access and delayed
fax.
• Enter the long dialing sequence numbers
as you would normally, but remember that
each Speed-Dial number counts as one
number, so the number of locations you
can store becomes limited. (See Dialing
Access codes and credit card
numbers on page 69.)
• If the memory is full, press Stop/Exit to
stop the job. If more than one page has
been scanned, press Black Start to send
the portion that is in the memory.
Canceling a Broadcast in
progress 5
aPress Menu.
bPress a or b to choose Fax.
Press OK.
cPress a or b to choose
Remaining Jobs.
Press OK.
The LCD will show the fax number being
dialed and the Broadcast job number.
dPress OK.
The LCD will ask you the following
message:
Cancel Job?
YesiPress 1
NoiPress 2
ePress 1 to clear the number being
dialed.
The LCD will then show the Broadcast
job number.
fPress OK.
The LCD will ask you the following
message:
Cancel Job?
YesiPress 1
NoiPress 2
gPress 1 to cancel the Broadcast.
hPress Stop/Exit.
MFC-440CN_UG_US.book Page 40 Thursday, August 10, 2006 6:59 PM
Color:Blac
k
Sending a fax
41
5
Additional sending
operations 5
Sending faxes using multiple
settings 5
When you send a fax you can choose any
combination of these settings: resolution,
contrast, overseas mode, delayed fax timer,
polling transmission and real time
transmission.
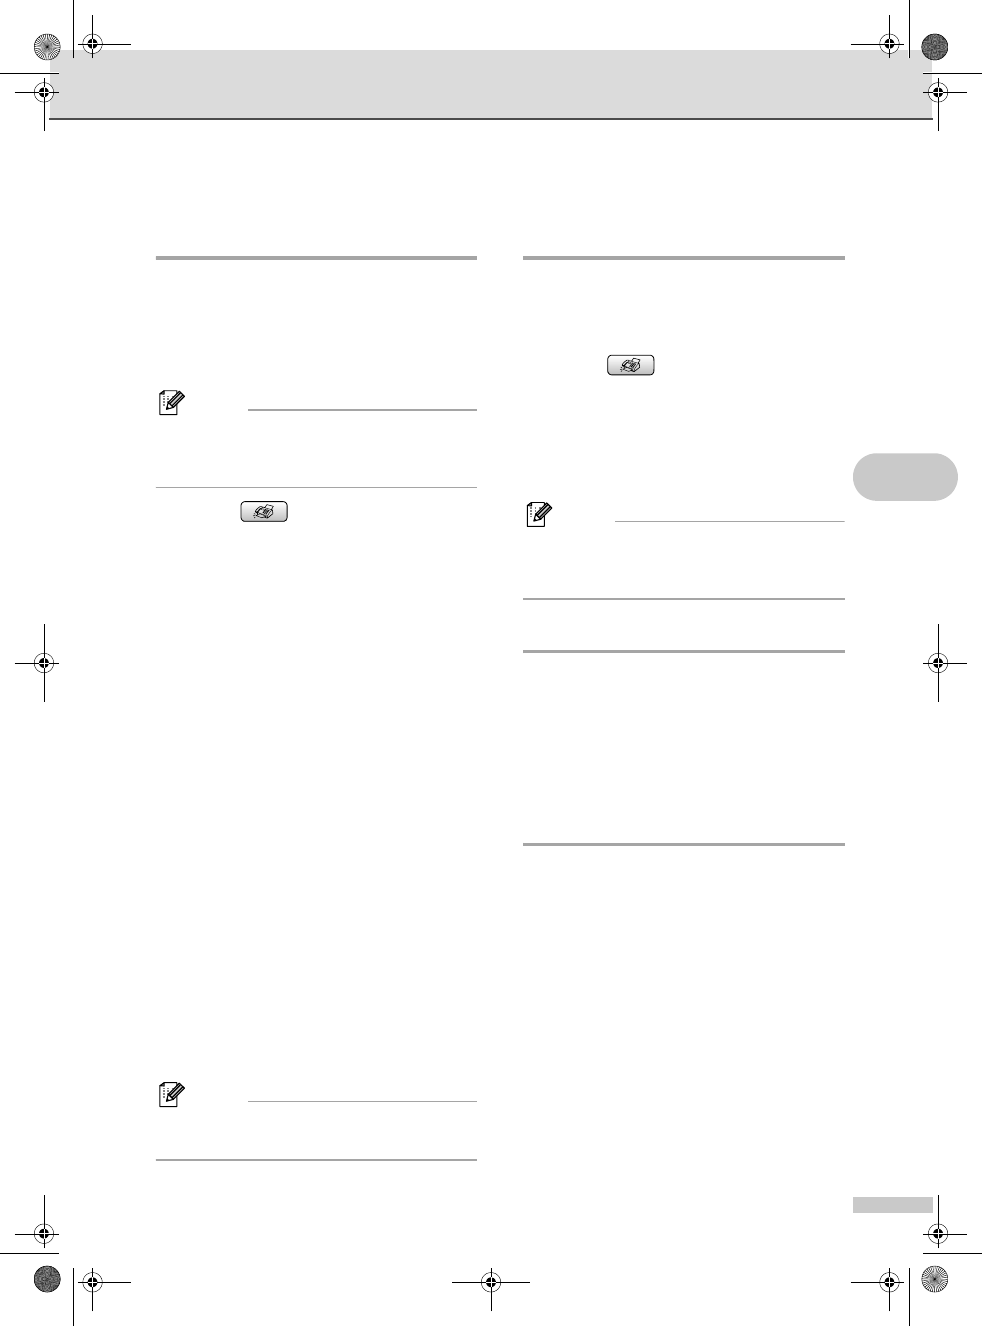
aPress (Fax).
The LCD shows:
bPress a or b to choose any settings
you want to change.
Press OK.
cAfter each setting is accepted, you can
continue to change more settings.
Note
• Most settings are temporary and the
machine returns to its default settings after
you send a fax.
• You can save some of the settings you
use most often by setting them as default.
These settings will stay until you change
them again. (See Setting your changes as
a new default on page 44.)
Contrast 5
If your document is very light or very dark, you
may want to change the contrast.
Use Light when sending a light document.
Use Dark when sending a dark document.
aPress (Fax).
bPress a or b to choose Contrast.
Press OK.
cPress a or b to choose Auto,Light
or Dark.
Press OK.
Note
Even if you choose Light or Dark, the
machine will send the fax using the Auto
setting in any of the following conditions:
• When you send a color fax.
• When you choose Photo as the Fax
Resolution.
Changing fax resolution 5
The quality of a fax can be improved by
changing the fax resolution.
aPress (Fax).
bPress a or b to choose
Fax Resolution.
Press OK.
cPress a or b to choose the resolution
you want.
Press OK.
09012345689
FAX
Fax Start
Press
Fax Resolution Standard
Contrast Auto
Speed-Dial
Outgoing Call
MFC-440CN_UG_US.book Page 41 Thursday, August 10, 2006 6:59 PM
Color:Blac
k
Chapter 5
42
Note
You can choose four different resolution
settings for black & white faxes and two for
color.
If you choose S.Fine or Photo and then
use the Color Start key to send a fax, the
machine will send the fax using the Fine
setting.
Dual access
(Black & White only) 5
You can dial a number and start scanning the
fax into memory—even when the machine is
sending from memory, receiving faxes or
printing PC data. The LCD shows the new job
number and available memory.
The number of pages you can scan into the
memory will vary depending on the data that
is printed on them.
Note
If the Out of Memory message appears
while scanning documents, press
Stop/Exit to cancel or Black Start to send
the scanned pages.
Real time transmission 5
When you are sending a fax, the machine will
scan the documents into the memory before
sending. Then, as soon as the phone line is
free, the machine will start dialing and
sending.
If the memory is full, the machine will send the
document in real time (even if Real Time
TX is set to Off).
Sometimes, you may want to send an
important document immediately, without
waiting for memory transmission. You can
turn on Real Time TX.
To send a document at once without waiting
for memory transmission, set
Real Time TX to On.
aPress (Fax).
bPress a or b to choose
Real Time TX.
Press OK.
cPress a or b to choose On.
Press OK.
Note
• In real time transmission, the automatic
redial feature does not work when using
the scanner glass.
• If you are sending a color fax, the machine
will send it in real time (even if Real Time
TX is set to Off).
Black & White
Standard Suitable for most typed
documents.
Fine Good for small print and
transmits a little slower than
Standard resolution.
S.Fine Good for small print or artwork
and transmits slower than Fine
resolution.
Photo Use when the document has
varying shades of gray or is a
photograph. This has the
slowest transmission.
Color
Standard Suitable for most typed
documents.
Fine Use when the document is a
photograph. The transmission
time is slower than Standard
resolution.
MFC-440CN_UG_US.book Page 42 Thursday, August 10, 2006 6:59 PM
Color:Blac
k
Sending a fax
43
5
Overseas Mode 5
If you are having difficulty sending a fax
overseas due to possible interference on the
phone line, we recommend that you turn on
the Overseas mode. After you send a fax
using this feature, the feature will turn itself
off.
aPress (Fax).
bLoad your document.
cPress a or b to choose
Overseas Mode.
Press OK.
dPress a or b to choose On (or Off).
Press OK.
Delayed Faxing
(Black & White only) 5
During the day you can store up to 50 faxes
in the memory to be sent within 24-hours.
These faxes will be sent at the time of day you
enter in step e.
aPress (Fax).
bLoad your document.
cPress a or b to choose Delayed Fax.
Press OK.
dPress a or b to choose On.
Press OK.
eEnter the time you want the fax to be
sent (in 24-hour format).
(For example, enter 19:45 for 7:45 PM.)
Press OK.
Note
The number of pages you can scan into
the memory depends on the amount of
data that is printed on each page.
Delayed Batch Transmission
(Black & White only) 5
Before sending the delayed faxes, your
machine will help you economize by sorting
all the faxes in the memory by destination and
scheduled time. All delayed faxes that are
scheduled to be sent at the same time to the
same fax number will be sent as one fax to
save transmission time.
aPress (Fax).
bPress a or b to choose Batch TX.
Press OK.
cPress a or b to choose On.
Press OK.
dPress Stop/Exit.
Checking and canceling
waiting jobs 5
You can check which jobs are still waiting in
the memory to be sent and cancel a job. (If
there are no jobs, the LCD shows
No Jobs Waiting.)
aPress Menu.
bPress a or b to choose Fax.
Press OK.
cPress a or b to choose
Remaining Jobs.
Press OK.
Any waiting jobs appear on the LCD.
dPress a or b to scroll through the jobs
and choose the job you want to cancel.
Press OK.
eDo one of the following:
To cancel, press 1 to choose Yes.
If you want to cancel another job go
to step d.
To exit without canceling, press 2 to
choose No.
MFC-440CN_UG_US.book Page 43 Thursday, August 10, 2006 6:59 PM
Color:Blac
k
Chapter 5
44
fWhen you have finished, press
Stop/Exit.
Setting your changes as a
new default 5
You can save the fax settings for
Fax Resolution,Contrast,
Real Time TX and Scan Size you use
most often by setting them the default setting.
These settings will stay until you change
them again.
aPress (Fax).
bPress a or b to choose your new
setting.
Press OK.
Repeat this step for each setting you
want to change.
cAfter changing the last setting, press a
or b to choose Set New Default.
Press OK.
dPress 1 to choose Yes.
ePress Stop/Exit.
Restoring all the settings to
factory settings 5
You can restore all the settings you have
changed to the factory settings. These
settings will stay until you change them again.
aPress (Fax).
bPress a or b to choose
Factory Reset.
Press OK.
cPress 1 to choose Yes.
dPress Stop/Exit.
Sending a fax manually 5
Manual transmission lets you hear the
dialing, ringing and fax-receiving tones while
sending a fax.
aPress (Fax).
bLoad your document.
cTo listen for a dial tone do one of the
following:
(MFC-440CN) Press Hook or pick up
the handset of an external phone.
(MFC-665CW) Press
Speaker Phone or pick up the
handset.
(MFC-845CW) Press
Speaker Phone on the machine.
dDial using the machine’s dial pad.
eWhen you hear the fax tone, press
Black Start or Color Start.
If you are using the scanner glass press
1 to send a fax.
fIf you picked up the machine’s handset,
or an external handset replace it.
Sending a fax at the end of a
conversation 5
At the end of a conversation you can send a
fax to the other party before you both hang
up.
aAsk the other party to wait for fax tones
(beeps) and then to press the Start or
Send key before hanging up.
bLoad your document.
cPress Black Start or Color Start.
If you are using the scanner glass,
press 1 to send a fax.
dReplace the handset.
MFC-440CN_UG_US.book Page 44 Thursday, August 10, 2006 6:59 PM
Color:Blac
k
Sending a fax
45
5
Out of Memory message 5
If you get an Out of Memory message
while scanning the first page of a fax, press
Stop/Exit to cancel the fax.
If you get an Out of Memory message
while scanning a subsequent page, you will
have the option to press Black Start to send
the pages scanned so far, or to press
Stop/Exit to cancel the operation.
Note
If you get an Out of Memory message
while faxing and you do not want to delete
your stored faxes to clear the memory,
you can send the fax in real time. (See
Real time transmission on page 42.)
MFC-440CN_UG_US.book Page 45 Thursday, August 10, 2006 6:59 PM
Color:Blac
k
46
6
Receive modes 6
You must choose the receive mode depending on the external devices and telephone subscriber
services you have on your line. The diagrams below will help you choose the correct mode. For
more detailed information about the receive modes, see page 48.
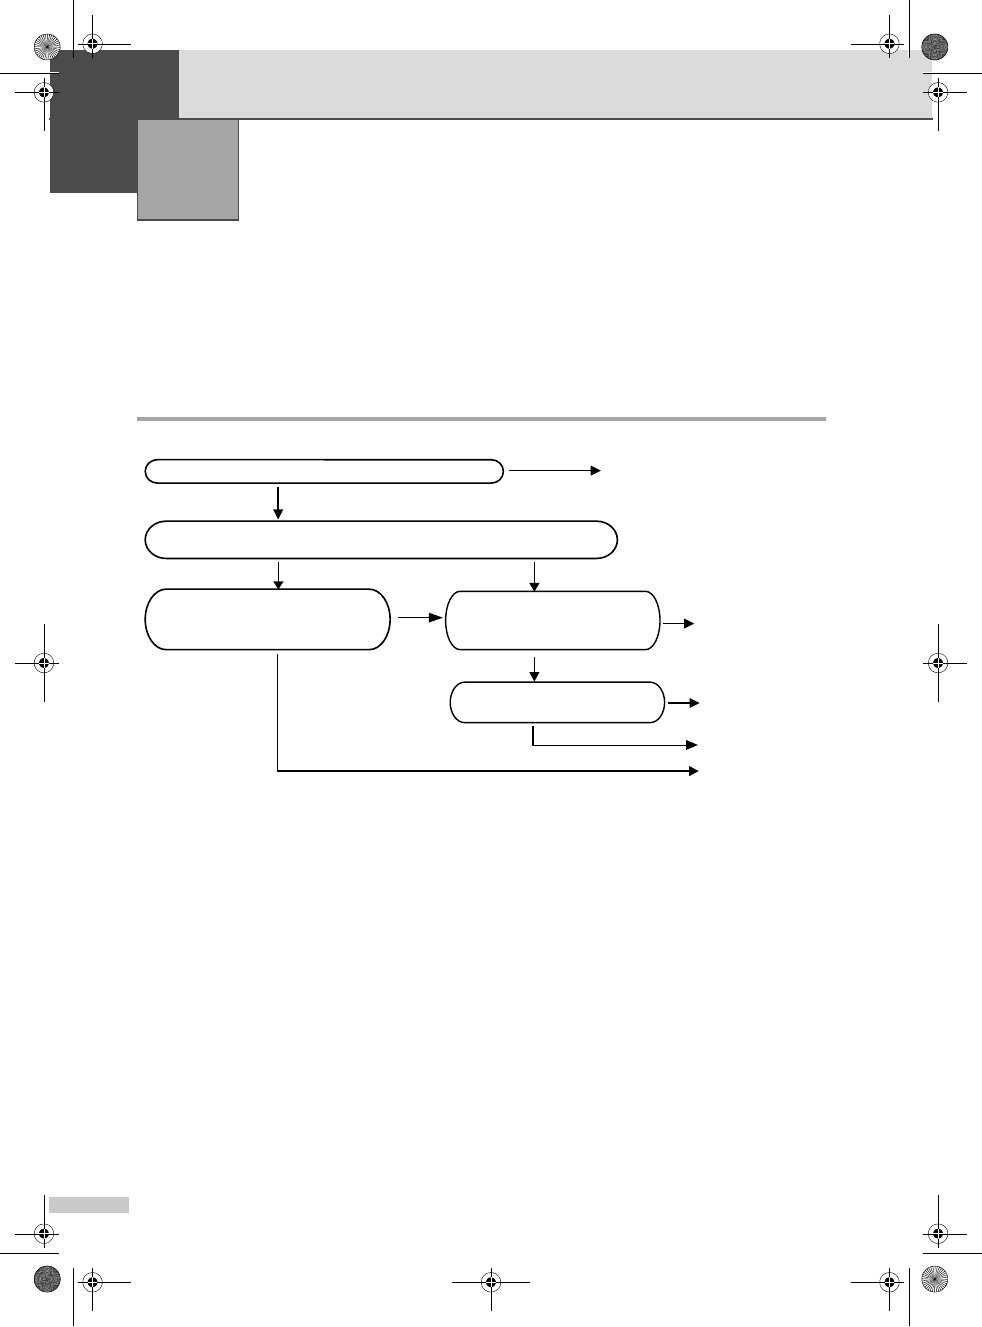
Choosing the Receive Mode 6
MFC-440CN 6
Receiving a Fax 6
Do you use a Distinctive Ring subscriber service?
Yes
Yes
See Distinctive Ring.
Fax Only
No
Yes
No
No
No
Yes
Manual
Yes
External TAD
No
Fax/Tel
Are you connecting an external telephone or external TAD (telephone
answering device) to the machine?
Do you want the machine to
answer fax and telephone
calls automatically?
Are you using the voice message
function of your external TAD
(telephone answering device)?
Do you want to use the
machine for fax only?
MFC-440CN_UG_US.book Page 46 Thursday, August 10, 2006 6:59 PM
Color:Blac
k
Receiving a Fax
47
6
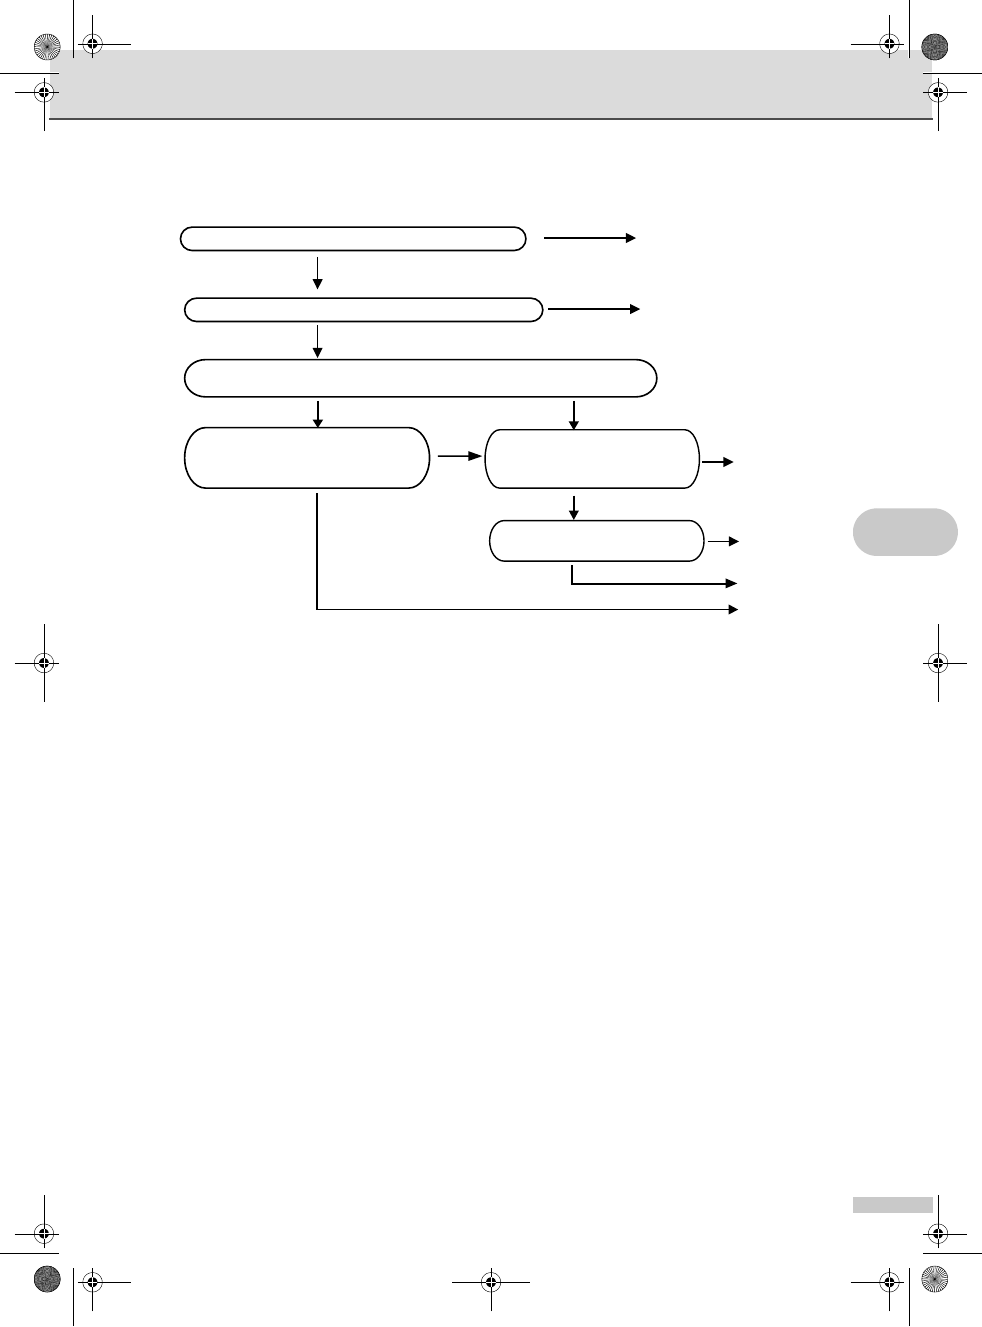
MFC-665CW and MFC-845CW 6
To set a receive mode follow the instructions
below.
aPress Menu.
bPress a or b to choose
Initial Setup.
Press OK.
cPress a or b to choose
Receive Mode.
Press OK.
dPress a or b to choose Fax Only,
Fax/Tel,External TAD
(MFC-440CN only) or Manual.
Press OK.
ePress Stop/Exit.
The LCD will display the current receive
mode.
Do you use a Distinctive Ring subscriber service?
Yes
Yes
See Distinctive Ring.
Fax Only
No
Yes
No
No
No
Yes
Manual
Yes
No
Fax/Tel
Are you connecting an external telephone or external TAD (telephone
answering device) to the machine?
Do you want the machine to
answer fax and telephone
calls automatically?
Are you using the voice message
function of your external TAD
(telephone answering device)?
Do you want to use the
machine for fax only?
Are you using the built-in Message Center? See Message Center.
No
Yes
Manual*
*We recommend you set Easy Receive to On.
MFC-440CN_UG_US.book Page 47 Thursday, August 10, 2006 6:59 PM
Color:Blac
k
Chapter 6
48
Using receive modes 6
Some receive modes answer automatically
(Fax Only and Fax/Tel). You may want to
change the ring delay before using these
modes. See Ring Delay on page 49.
Fax only 6
Fax only mode will automatically answer
every call. If the call is a fax your machine will
receive it.
Fax/Tel 6
Fax/Tel mode helps you automatically
manage incoming calls, by recognizing
whether they are fax or voice calls and
handling them in one of the following ways:
Faxes will be automatically received.
Voice calls will start the F/T ring to tell you
to pick up the line. The F/T ring is a fast
double ring made by your machine.
Also see F/T Ring Time (Fax/Tel mode only)
on page 49 and Ring Delay on page 49.
Manual 6
Manual mode turns off all automatic
answering functions unless you are using the
Distinctive Ring feature or you are using an
external TAD with the MFC-665CW or the
MFC-845CW.
To receive a fax in manual mode press
Black Start or Color Start when you hear
fax tones (short repeating beeps). You can
also use the Easy Receive feature to receive
faxes by lifting a handset on the same line as
the machine.
Also see Easy Receive on page 50.
Message Center (MC)
(MFC-665CW and
MFC-845CW only) 6
Message Center (MC) helps you automatically
manage incoming calls, by recognizing
whether they are fax or voice calls and
handling them in one of the following ways:
Faxes will be automatically received.
Voice callers can record a message.
To set up the Message Center mode see
page 71.
External TAD (MFC-440CN
only) 6
External TAD mode lets an external
answering device manage your incoming
calls. Incoming calls will be handled in one of
the following ways:
Faxes will be automatically received.
Voice callers can record a message on the
external TAD.
For more information see Connecting an
external TAD (telephone answering device)
on page 57.
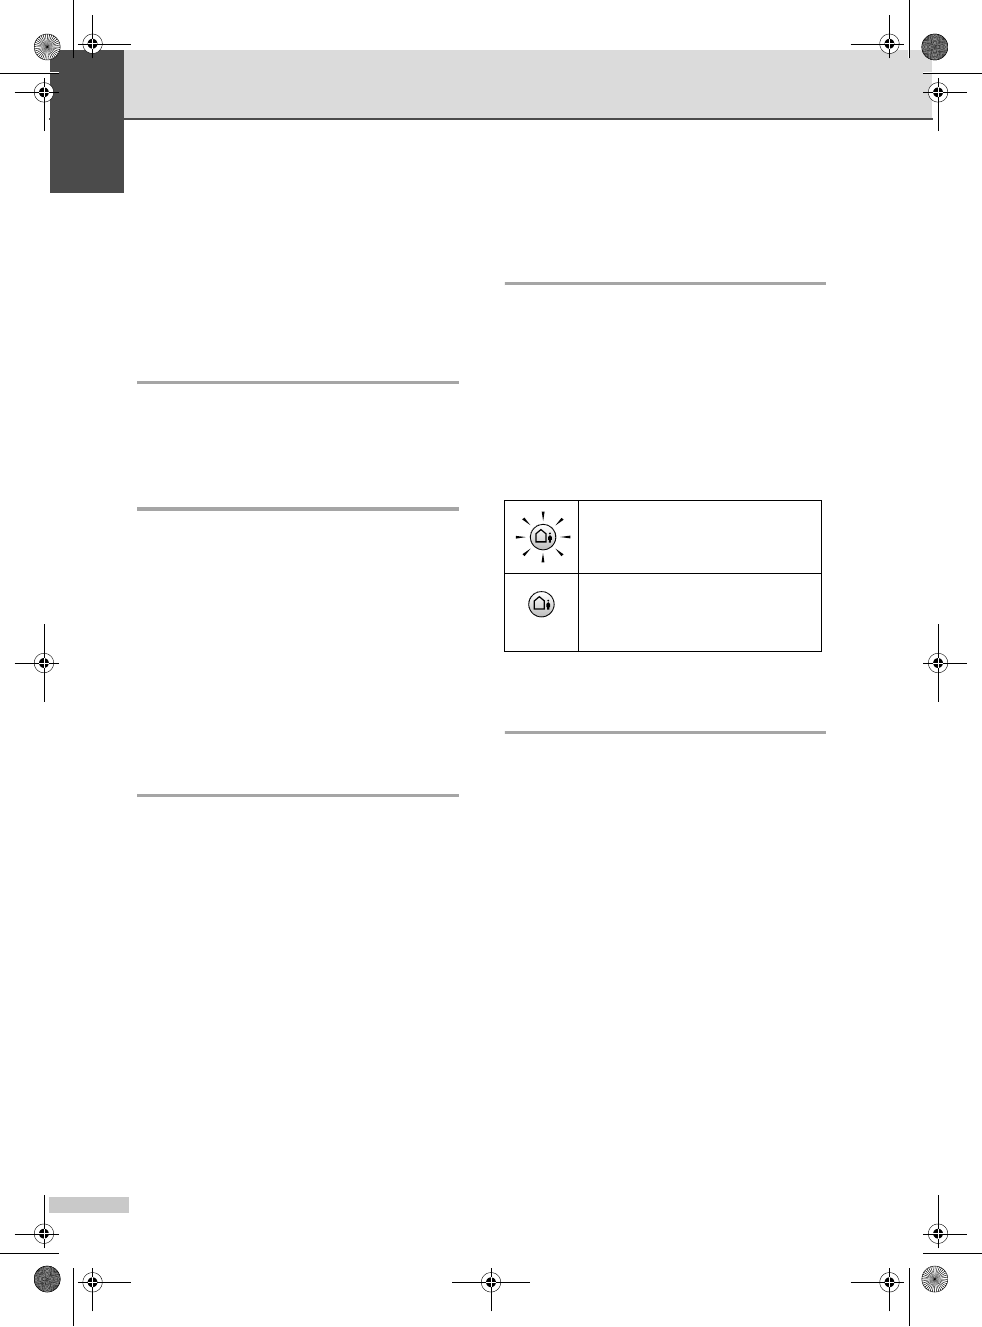
If Message Center Mode is On, it
will override your receive mode
setting. The screen shows MC.
If Message Center Mode is Off, the
receive mode returns to your
original setting. (See Message
Center mode on page 71.)
MFC-440CN_UG_US.book Page 48 Thursday, August 10, 2006 6:59 PM
Color:Blac
k
Receiving a Fax
49
6
Receive mode settings 6
Ring Delay 6
The Ring Delay sets the number of times the
machine rings before it answers in Fax Only
or Fax/Tel mode. If you have external or
extension phones on the same line as the
machine or subscribe to the telephone
company’s Distinctive Ring service, keep the
ring delay setting of 4.
(See Using external and extension
telephones on page 61 and Easy Receive
on page 50.)
If toll saver is on, then the ring delay setting
has no effect. See Setting toll saver
on page 74. (MFC-665CW and MFC-845CW
only)
aPress Menu.
bPress a or b to choose Fax.
Press OK.
cPress a or b to choose
Setup Receive.
Press OK.
dPress a or b to choose Ring Delay.
Press OK.
e(MFC-665CW and MFC-845CW)
Press a or b to choose Ring Delay
again.
Press OK.
fPress a or b to choose how many
times the line rings before the machine
answers (0-4).
Press OK.
If you choose 0, the line will not ring at
all.
gPress Stop/Exit.
F/T Ring Time
(Fax/Tel mode only) 6
If you set the Receive Mode to Fax/Tel, you
need to decide how long the machine will
signal you with its special pseudo/double-ring
when you have a voice call. If it's a fax call,
the machine receives the fax.
This pseudo/double-ring happens after the
initial ringing from the phone company. Only
the machine rings and no other phones on the
same line will ring with the special
pseudo/double-ring. However, you can still
answer the call on any telephone.
aPress Menu.
bPress a or b to choose Fax.
Press OK.
cPress a or b to choose
Setup Receive.
Press OK.
dPress a or b to choose
F/T Ring Time.
Press OK.
ePress a or b to choose how long the
machine will ring to alert you that you
have a voice call (20, 30, 40 or 70
seconds).
Press OK.
fPress Stop/Exit.
Note
Even if the caller hangs up during the
pseudo/double-ringing, the machine will
continue to ring for the set time.
MFC-440CN_UG_US.book Page 49 Thursday, August 10, 2006 6:59 PM
Color:Blac
k
Chapter 6
50
Easy Receive 6
If Easy Receive is On:6
The machine receives a fax call
automatically, even if you answer the call.
When you see Receiving on the LCD or
when you hear “chirps” through the handset
you are using, just replace the handset or
press Speaker Phone. Your machine will do
the rest.
If Easy Receive is Semi: (MFC-665CW
and MFC-845CW only) 6
The machine will only receive a fax call
automatically if you answered it using the
machine’s handset or cordless handset or
Speaker Phone. If you answered at an
extension phone press l 5 1. (See Using
external and extension telephones
on page 61.)
If Easy Receive is Off:6
If you are at the machine and answer a call
first by lifting a handset, then press
Black Start or Color Start, and then press 2
to receive.
If you answered at an extension phone press
l 5 1. (See Using external and extension
telephones on page 61.)
Note
• If this feature is set to On, but your
machine does not connect a fax call when
you lift an extension or external phone
handset, press the fax receive code l51.
• If you send faxes from a computer on the
same phone line and the machine
intercepts them, set Easy Receive to Off.
• (MFC-845CW) If you typically carry the
cordless handset away from the machine,
we recommend that you turn on Easy
Receive. If Easy Receive is turned off and
you answer a fax call you will have to go to
the machine and press Black Start or
Color Start.
aPress Menu.
bPress a or b to choose Fax.
Press OK.
cPress a or b to choose
Setup Receive.
Press OK.
dPress a or b to choose
Easy Receive.
Press OK.
ePress a or b to choose On,Semi (or
Off).
Press OK.
fPress Stop/Exit.
MFC-440CN_UG_US.book Page 50 Thursday, August 10, 2006 6:59 PM
Color:Blac
k
Receiving a Fax
51
6
Additional receiving
operations 6
Printing a reduced incoming
fax 6
If you choose On, the machine automatically
reduces each page of an incoming fax to fit on
one page of A4, Letter, Legal size paper. The
machine calculates the reduction ratio by
using the page size of the fax and your Paper
Size setting (See Paper Size on page 27).
aPress Menu.
bPress a or b to choose Fax.
Press OK.
cPress a or b to choose
Setup Receive.
Press OK.
dPress a or b to choose
Auto Reduction.
Press OK.
ePress a or b to choose On (or Off).
Press OK.
fPress Stop/Exit.
Receiving a fax at the end of a
conversation 6
At the end of a conversation you can ask the
other party to fax you information before you
both hang up.
aAsk the other party to place the
document in their machine and to press
the Start or Send key.
bWhen you hear the other machine's
CNG tones (slowly repeating beeps),
press Black Start or Color Start.
cPress 2 to receive a fax.
dReplace the handset.
Printing a fax from the
memory 6
If you have chosen paging or fax storage, you
can still print a fax from the memory when you
are at your machine. (See Turning off
Advanced Fax Operations on page 81.)
aPress Menu.
bPress a or b to choose Fax.
Press OK.
cPress a or b to choose
Advanced Fax Operation.
Press OK.
dPress a or b to choose Print Fax.
Press OK.
ePress Black Start.
MFC-440CN_UG_US.book Page 51 Thursday, August 10, 2006 6:59 PM
Color:Blac
k
52
7
Voice operations 7
Voice calls can be made either with the
handset, the cordless handset (MFC-845CW
only), the speaker phone, an extension or
external telephone, by dialing manually, or by
using Quick-Dial numbers.
Note
If you have the MFC-845CW, please see the
Digital Cordless Handset User’s Guide.
Making a telephone call
(MFC-665CW and
MFC-845CW only) 7
aDo one of the following:
(MFC-665CW) Pick up the handset
or press Speaker Phone.
(MFC-845CW) Pick up the cordless
handset and press (Talk) or
press Speaker Phone on the
machine.
bWhen you hear the dial tone, enter a
number using the dial pad, Speed-Dial
or Search.
c(Speaker phone) speak clearly toward
the microphone .
dTo hang up, do one of the following:
(MFC-665CW) Replace the handset
or press Speaker Phone.
(MFC-845CW) Press (Off)
on the cordless handset or press
Speaker Phone on the machine.
Answering calls with the
Speaker Phone
(MFC-665CW and
MFC-845CW only) 7
When the machine rings, instead of lifting the
handset, press Speaker Phone on the
machine. Speak clearly toward the
microphone . To end the call, press
Speaker Phone.
Note
If you have a bad connection, your caller
might hear your voice echoed during the
call. If you experience this problem, pick
up the handset, or hang up and try the call
again.
Hold (MFC-665CW and
MFC-845CW only) 7
For MFC-665CW 7
aPress Hold to put a call on Hold.
You can replace the handset without
disconnecting the call.
bPick up the machine's handset or press
Speaker Phone to release the call from
Hold.
Note
You can pick up an extension phone and
continue speaking without releasing the
call from Hold on the machine.
Telephone Services and External
devices 7
MFC-440CN_UG_US.book Page 52 Thursday, August 10, 2006 6:59 PM
Color:Blac
k

Telephone Services and External devices
53
7
For MFC-845CW 7
aIf you answered by pressing
Speaker Phone on the machine, press
Hold/Intercom on the machine to put a
call on Hold.
bTo release the call from Hold, press
Hold/Intercom on the machine.
Note
You can pick up an extension phone and
continue speaking without releasing the
call from Hold on the machine.
Tone or Pulse (Canada only) 7
If you have a Pulse dialing service, but need
to send Tone signals (for example, for
telephone banking), follow the instructions
below:
aDo one of the following:
(MFC-440CN) Pick up the handset of
an external phone or press Hook.
(MFC-665CW) Pick up the handset
and press Speaker Phone.
(MFC-845CW) Pick up the cordless
handset and press (Talk) or
press Speaker Phone on the
machine.
bPress # on the machine’s control panel.
Any digits dialed after this will send tone
signals.
When you hang up, the machine will return to
the Pulse dialing service.
Fax/Tel mode when the power
key is on 7
When the machine is in Fax/Tel mode, it will
use the F/T Ring Time (pseudo/double-
ringing) to alert you to pick up a voice call.
If you are at an extension phone, you'll need
to lift the handset during the F/T Ring Time
and then press #51 between the
pseudo/double rings. If no one is on the line,
or if someone wants to send you a fax, send
the call back to the machine by pressing
l51.
(MFC-440CN) Lift the external telephone’s
handset, and then press Hook to answer.
(MFC-665CW) If you are at the machine, you
can lift the handset or press Speaker Phone
to answer.
(MFC-845CW) Press Speaker Phone on the
machine or use the cordless handset.
Fax/Tel mode when the power
key is off 7
You can change the default setting of the
On/Off key to Fax Receive:On so that you
can receive faxes when the power key is off.
(See On/Off setting on page 24.) Fax/Tel
mode will work in the following ways.
(For MFC-440CN)
Fax/Tel mode does not work when the power
key is off. The machine will not answer
telephone or fax calls and will keep ringing. If
you are at an external or extension phone, lift
the handset and talk. If you hear fax tones,
hold the handset until Easy Receive activates
your machine. If the other party says they
want to send you a fax, activate the machine
by pressing l51.
(MFC-665CW and MFC-845CW only)
When the machine is in Fax/Tel mode and
F/T rings to tell you to pick up a voice call, you
can only answer by picking up the machine’s
handset or cordless handset and pressing
(Talk).
If you answer before the machine F/T rings,
you can also pick up the call at an external or
extension phone.
MFC-440CN_UG_US.book Page 53 Thursday, August 10, 2006 6:59 PM
Color:Blac
k

Chapter 7
54
Telephone services 7
Your machine supports the Caller ID and
Distinctive Ring subscriber telephone
services that some telephone companies
offer.
Features like Voice Mail, Call Waiting, Call
Waiting/Caller ID, RingMaster, answering
services, alarm systems or other custom
features on one phone line may affect the
way your machine works. If you have Voice
Mail on your phone line, please read the
following carefully.
Distinctive Ring 7
Brother uses the term ‘Distinctive Ring’ but
different telephone companies have other
names for this service such as SmartRing,
RingMaster, Teen-Ring, Indent-a-Call or
Indent-a-Ring.
What does your telephone company's
‘Distinctive Ring’ do? 7
Your telephone company's Distinctive Ring
service allows you to have more than one
number on the same phone line. If you need
more than one phone number, it is
cheaper than paying for an extra line. Each
phone number has its own distinctive ring
pattern, so you will know which phone
number is ringing. This is one way you can
have a separate phone number for your
machine.
Note
Please call your telephone company for
availability and rates.
What does Brother's ‘Distinctive Ring’
do? 7
The Brother machine has a Distinctive Ring
feature that allows you to use your machine to
take full advantage of the telephone
company's Distinctive Ring service. The new
phone number on your line can just receive
faxes.
Note
You must pay for your telephone
company's Distinctive Ring service before
you program the machine to work with it.
Do you have Voice Mail? 7
If you have Voice Mail on the phone line that
you will install your new machine on, there is
a strong possibility that Voice Mail and the
machine will conflict with each other while
receiving incoming calls.However, the
Distinctive Ring feature allows you to use
more than one number on your line, so
both Voice Mail and the machine can work
together without any problems. If each one
has a separate phone number, neither will
interfere with the other's operations.
If you decide to get the Distinctive Ring
service from the telephone company, you will
need to follow the directions on next page to
‘register’ the new Distinctive Ring pattern
they give you. This is so your machine can
recognize its incoming calls.
Note
You can change or cancel the Distinctive
Ring pattern at any time. You can switch it
off temporarily, and turn it back on later.
When you get a new fax number, make
sure you reset this feature.
MFC-440CN_UG_US.book Page 54 Thursday, August 10, 2006 6:59 PM
Color:Blac
k
Telephone Services and External devices
55
7
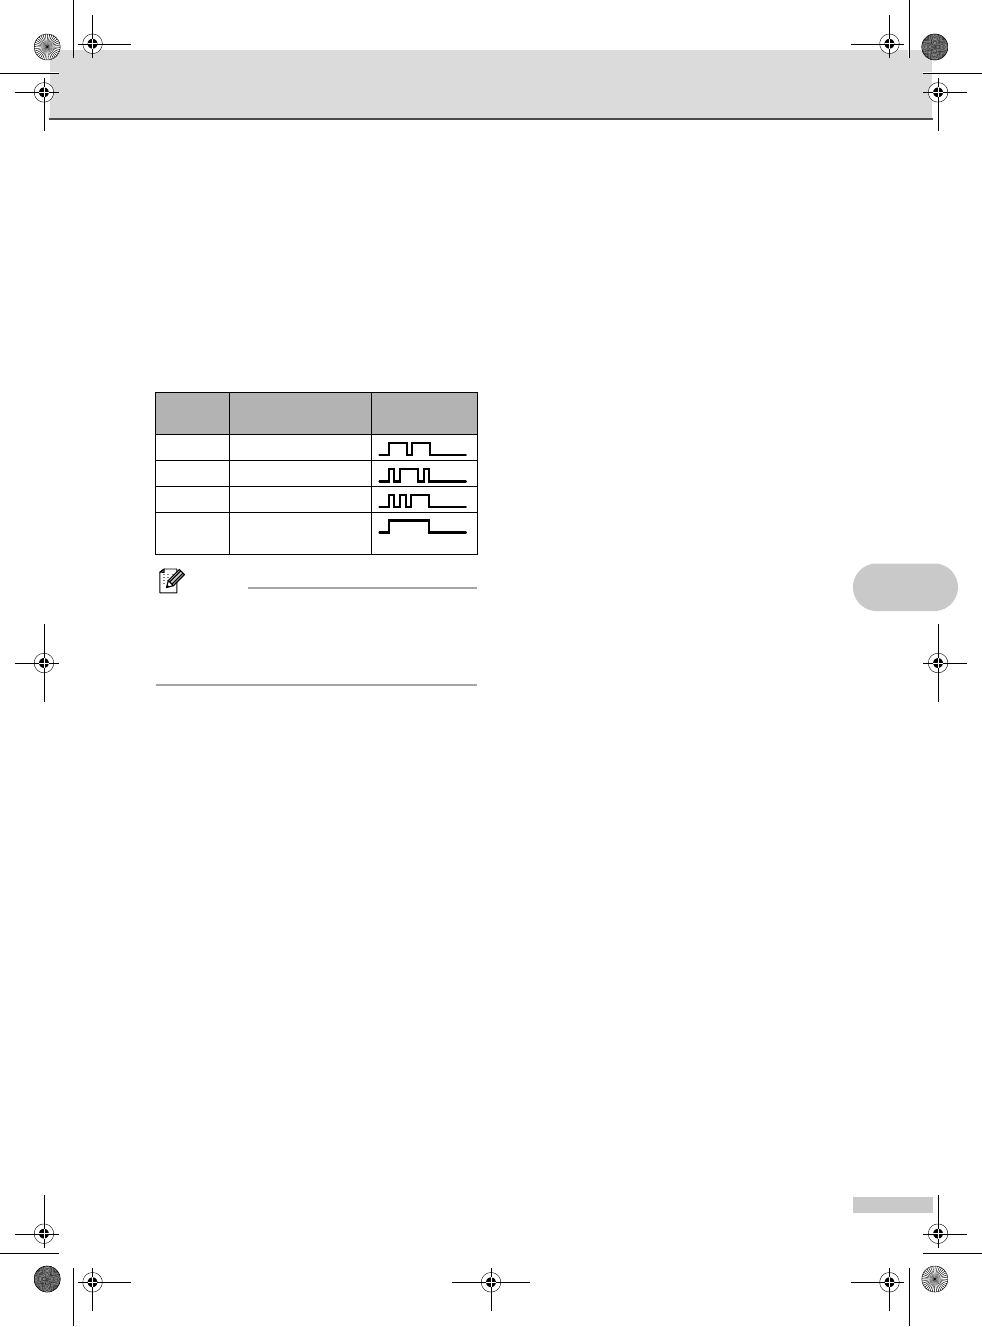
Before you choose the ring pattern to
register 7
You can only register one Distinctive Ring
pattern with the machine. Some ring patterns
cannot be registered. The ring patterns below
are supported by your Brother machine.
Register the one your telephone company
gives you.
Note
If the ring pattern you received is not on
this chart, please call your telephone
company and ask for one that is
shown.
The machine will only answer calls to its
registered number.
The first two rings are silent on the
machine. This is because the fax must
‘listen’ to the ring pattern (to compare it to
the pattern that was ‘registered’). (Other
telephones on the same line will ring.)
If you program the machine properly, it will
recognize the registered ring pattern of the
‘fax number’ within 2 ring patterns and
then answer with a fax tone. When the
‘voice number’ is called, the machine will
not answer.
Registering the Distinctive Ring
pattern 7
After you have set the Distinctive Ring feature
to on, the receive mode is set to Manual
automatically. You cannot change the receive
mode to another mode while the Distinctive
Ring is set to on.
aPress Menu.
bPress a or b to choose Fax.
Press OK.
cPress a or b to choose
Miscellaneous.
Press OK.
dPress a or b to choose Distinctive.
Press OK.
ePress a or b to choose Set.
Press OK.
fPress a or b to choose the stored ring
pattern you want to use.
Press OK.
(You hear each pattern as you scroll
through the four patterns. Make sure
you choose the pattern that the
telephone company gave you.)
gPress Stop/Exit.
Distinctive Ring is now set to on.
Turning off Distinctive Ring 7
aPress Menu.
bPress a or b to choose Fax.
Press OK.
cPress a or b to choose
Miscellaneous.
Press OK.
dPress a or b to choose Distinctive.
Press OK.
ePress a or b to choose Off.
Press OK.
Ring
Pattern
Rings
1 long-long
2 short-long-short
3 short-short-long
4 very long (normal
pattern)
MFC-440CN_UG_US.book Page 55 Thursday, August 10, 2006 6:59 PM
Color:Blac
k
Chapter 7
56
fPress Stop/Exit.
Note
If you turn off Distinctive Ring, the
machine will stay in Manual receive
mode. You will need to set the Receive
Mode again. (See Choosing the Receive
Mode on page 46.)
Caller ID 7
The Caller ID feature lets you use the Caller
ID subscriber service offered by many local
telephone companies. Call your telephone
company for details. This service shows the
telephone number, or name if it is available,
of your caller as the line rings.
You can use a number in the Caller ID History
to make a phone call (MFC-665CW and
MFC-845CW only), send a fax, add it to
Speed-Dial, or delete it from the history. (See
Caller ID history on page 65.)
After a few rings, the LCD shows the
telephone number of your caller (and name, if
available). Once you answer a call, the Caller
ID information disappears from the LCD, but
the call information stays stored in the Caller
ID memory.
You can see the first 15 characters of the
number (or name).
The Out of Area message means the
call originated outside your Caller ID
service area.
The Private Call message means the
caller has intentionally blocked
transmission of information.
You can print a list of the Caller ID information
received by your machine. (See Printing
Caller ID List on page 57.)
Note
Caller ID service varies with different
carriers. Call your local telephone
company to find out about the kind of
service available in your area.
Viewing Caller ID List 7
Your machine stores information for the last
thirty calls in the Caller ID list. You can view
or print this list. When the thirty-first call
comes in to the machine, it replaces
information about the first call.
aPress Menu.
bPress a or b to choose Fax.
Press OK.
cPress a or b to choose
Miscellaneous.
Press OK.
dPress a or b to choose Caller ID.
Press OK.
ePress a or b to choose Display#.
Press OK.
The Caller ID list will appear on the
display. If no ID is stored, the beeper will
sound and No Caller ID will appear
on the display.
fPress a or b to scroll through the Caller
ID memory to view the Caller ID
information.
The LCD shows the caller's number or
name and the date and time of the call.
gTo finish viewing, press Stop/Exit.
Note
You can also view the Caller ID list by
pressing (Fax). (See Caller ID
history on page 65.)
MFC-440CN_UG_US.book Page 56 Thursday, August 10, 2006 6:59 PM
Color:Blac
k
Telephone Services and External devices
57
7
Printing Caller ID List 7
aPress Menu.
bPress a or b to choose Fax.
Press OK.
cPress a or b to choose
Miscellaneous.
Press OK.
dPress a or b to choose Caller ID.
Press OK.
ePress a or b to choose
Print Report.
Press OK.
If no ID is stored, the beeper will sound
and No Caller ID will appear on the
LCD.
fPress Black Start or Color Start.
gAfter printing has finished, press
Stop/Exit.
Connecting an external
TAD (telephone
answering device) 7
You may choose to connect an external
answering device. However, when you have
an external TAD on the same telephone line
as the machine, the TAD answers all calls
and the machine ‘listens’ for fax calling (CNG)
tones. If it hears them, the machine takes
over the call and receives the fax. If it does
not hear CNG tones, the machine lets the
TAD continue playing your outgoing message
so your caller can leave you a voice
message.
The TAD must answer within four rings (the
recommended setting is two rings). The
machine cannot hear CNG tones until the
TAD has answered the call, and with four
rings there are only 8 to 10 seconds of CNG
tones left for the fax ‘handshake’. Make sure
you carefully follow the instructions in this
guide for recording your outgoing message.
We do not recommend using the toll saver
feature on your external answering machine if
it exceeds five rings.
Note
• If you do not receive all your faxes, reduce
the Ring Delay setting on your external
TAD.
• If You Subscribe to your Telephone
company's Distinctive Ring Service:
You may connect an external TAD to a
separate wall jack only if you subscribe to
your telephone company's Distinctive
Ring service, have registered the
distinctive ring pattern on your machine,
and use that number as a fax number. The
recommended setting is at least four rings
on the external TAD when you have the
telephone company's Distinctive Ring
Service. You cannot use the Toll Saver
setting.
MFC-440CN_UG_US.book Page 57 Thursday, August 10, 2006 6:59 PM
Color:Blac
k
Chapter 7
58
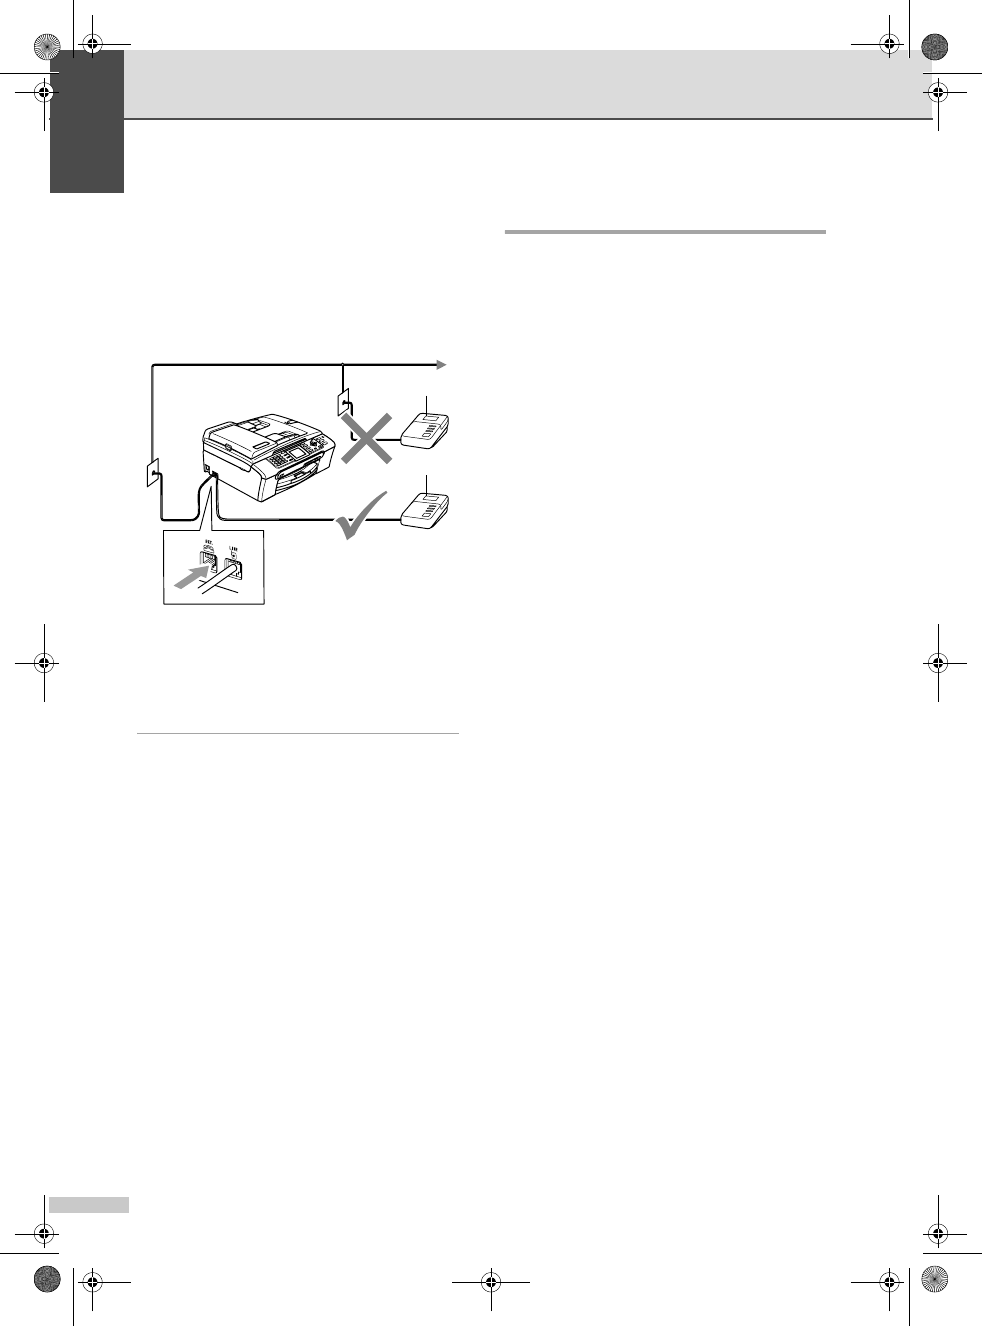
• If You Do Not Subscribe to Distinctive
Ring Service:
You must plug your TAD into the EXT.
jack of your machine. If your TAD is
plugged into a wall jack, both your
machine and the TAD will try to control the
phone line. (See the illustration below.)
1TAD
When the TAD answers a call, the LCD
shows Telephone (MFC-440CN) or
Ext. Tel in Use (MFC-665CW and
MFC-845CW).
Connections 7
The external TAD must be plugged into the
jack labeled EXT. Your machine cannot work
properly if you plug the TAD into a wall jack
(unless you are using Distinctive Ring).
aPlug the telephone line cord from the
telephone wall jack into the jack labeled
LINE.
bPlug the telephone line cord from the
external TAD into the jack labeled EXT.
(Make sure this cord is connected to the
TAD at the TAD's telephone line jack,
and not its handset jack.)
cSet your external TAD to four rings or
less. (The machine's Ring Delay setting
does not apply.)
dRecord the outgoing message on your
external TAD.
eSet the TAD to answer calls.
fDo one of the following:
(For MFC-440CN)
Set the Receive Mode to External
TAD.
(For MFC-665CW and MFC-845CW)
Set the Receive Mode to Manual
with Easy Receive turned on.
(See Choosing the Receive Mode on
page 46.)
1
1
MFC-440CN_UG_US.book Page 58 Thursday, August 10, 2006 6:59 PM
Color:Blac
k
Telephone Services and External devices
59
7
Recording outgoing message
(OGM) on an external TAD 7
Timing is important in recording this
message. The message sets up the ways to
handle both manual and automatic fax
reception.
aRecord 5 seconds of silence at the
beginning of your message. (This allows
your machine time to listen for the fax
CNG tones of automatic transmissions
before they stop.)
bLimit your speaking to 20 seconds.
cEnd your 20-second message by giving
your Fax Receive Code for people
sending manual faxes. For example:
‘After the beep, leave a message or
send a fax by pressing l51 and Start.’
Note
We recommend beginning your OGM with
an initial 5-second silence because the
machine cannot hear fax tones over a
resonant or loud voice. You may try
omitting this pause, but if your machine
has trouble receiving, then you must re-
record the OGM to include it.
Special line considerations 7
Roll over phone lines 7
A roll over phone system is a group of two or
more separate telephone lines that pass
incoming calls to each other if they are busy.
The calls are usually passed down or ‘rolled
over’ to the next available phone line in a
preset order.
Your machine can work in a roll over system
as long as it is the last number in the
sequence, so the call cannot roll away. Do not
put the machine on any of the other numbers;
when the other lines are busy and a second
fax call is received, the fax call will be sent to
a line that does not have a fax machine. Your
machine will work best on a dedicated
line.
Two-line phone system 7
A two-line phone system is nothing more than
two separate phone numbers on the same
wall outlet. The two phone numbers can be
on separate jacks (RJ11) or mixed into one
jack (RJ14). Your machine must be plugged
into an RJ11 jack. RJ11 and RJ14 jacks may
be equal in size and appearance and both
may contain four wires (black, red, green,
yellow). To test the type of jack, plug in a two-
line phone and see if it can access both lines.
If it can, you must separate the line for your
machine. (See page 50.)
MFC-440CN_UG_US.book Page 59 Thursday, August 10, 2006 6:59 PM
Color:Blac
k
Chapter 7
60
Converting telephone wall outlets 7
There are three ways to convert to an RJ11
jack. The first two ways may require help from
the telephone company. You can change the
wall outlets from one RJ14 jack to two RJ11
jacks. Or you can have an RJ11 wall outlet
installed and slave or jump one of the phone
numbers to it.
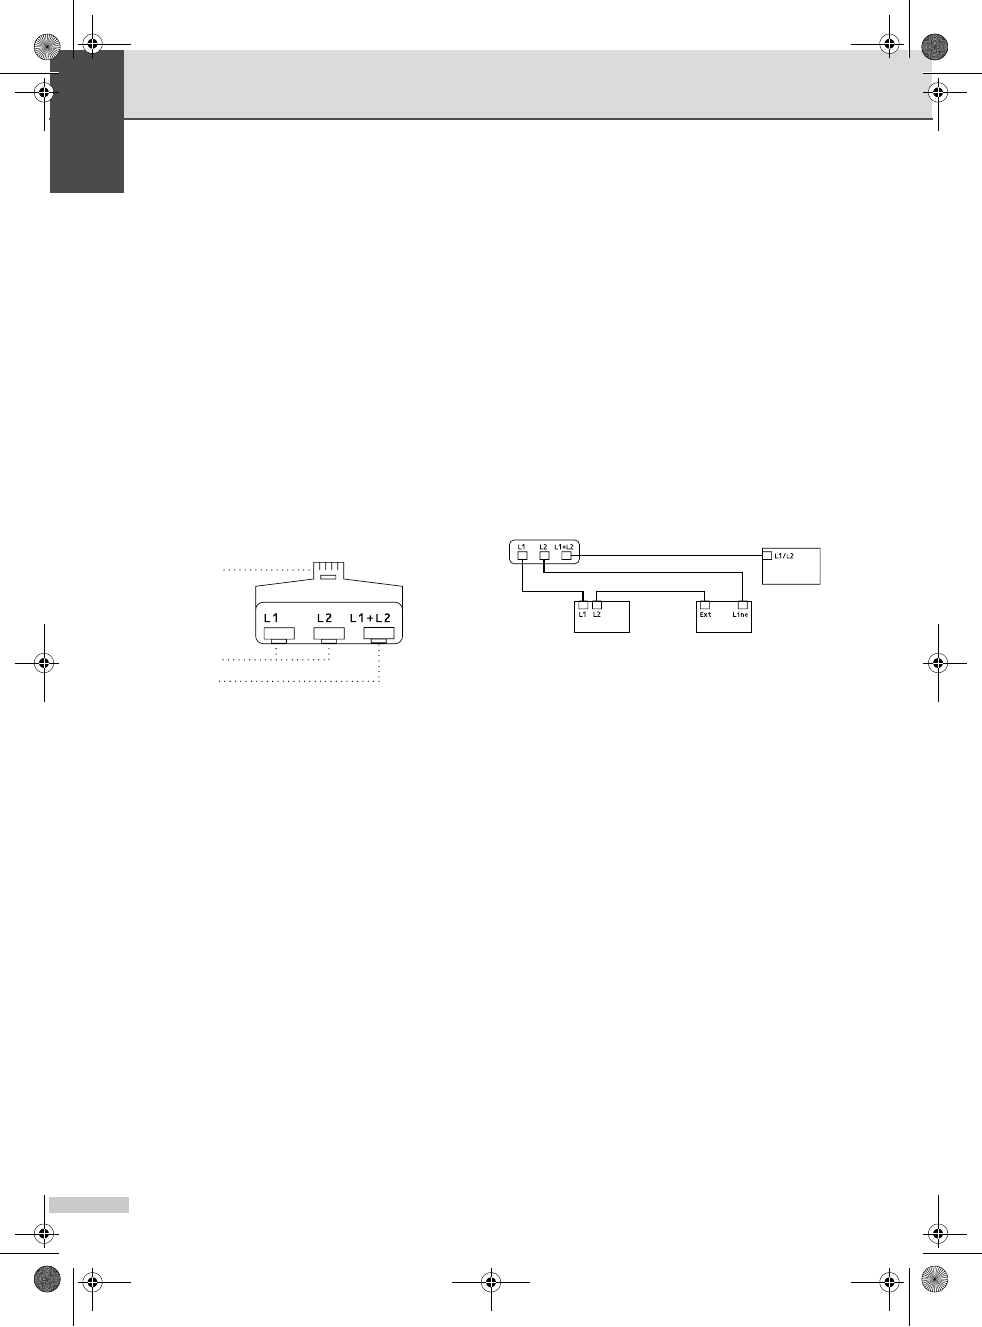
The third way is the easiest: Buy a triplex
adapter. You can plug a triplex adapter into
an RJ14 outlet. It separates the wires into two
separate RJ11 jacks (Line 1, Line 2) and a
third RJ14 jack (Lines 1 and 2). If your
machine is on Line 1, plug the machine into
L1 of the triplex adapter. If your machine is on
Line 2, plug it into L2 of the triple adapter.
Triplex Adapter 7
Installing machine, external two-line
TAD and two-line telephone 7
When you are installing an external two-line
telephone answering device (TAD) and a
two-line telephone, your machine must be
isolated on one line at both the wall jack and
at the TAD. The most common connection is
to put the machine on Line 2, which is
explained in the following steps. The back of
the two-line TAD must have two telephone
jacks: one labeled L1 or L1/L2, and the other
labeled L2. You will need at least three
telephone line cords, the one that came with
your machine and two for your external two-
line TAD. You will need a fourth line cord if
you add a two-line telephone.
aPut the two-line TAD and the two-line
telephone next to your machine.
bPlug one end of the telephone line cord
for your machine into the L2 jack of the
triplex adapter. Plug the other end into
the LINE jack on the back of the
machine.
cPlug one end of the first telephone line
cord for your TAD into the L1 jack of the
triplex adapter. Plug the other end into
the L1 or L1/L2 jack of the two-line TAD.
dPlug one end of the second telephone
line cord for your TAD into the L2 jack of
the two-line TAD. Plug the other end into
the EXT. jack on the left side of the
machine.
1 Triplex Adapter
2 Two Line Phone
3 External Two Line TAD
4 Machine
You can keep two-line telephones on other
wall outlets as always. There are two ways to
add a two-line telephone to the machine's
wall outlet. You can plug the telephone line
cord from the two-line telephone into the
L1+L2 jack of the triplex adapter. Or you can
plug the two-line telephone into the TEL jack
of the two-line TAD.
RJ14
RJ11
RJ14
12
34
MFC-440CN_UG_US.book Page 60 Thursday, August 10, 2006 6:59 PM
Color:Blac
k
Telephone Services and External devices
61
7
Multi-line connections (PBX) 7
We suggest you ask the company who
installed your PBX to connect your machine.
If you have a multi line system we suggest
you ask the installer to connect the unit to the
last line on the system. This prevents the
machine being activated each time the
system receives telephone calls. If all
incoming calls will be answered by a
switchboard operator we recommend that
you set the Receive Mode to Manual.
We cannot guarantee that your machine will
operate properly under all circumstances
when connected to a PBX. Any difficulties
with sending or receiving faxes should be
reported first to the company who handles
your PBX.
External and extension
phones 7
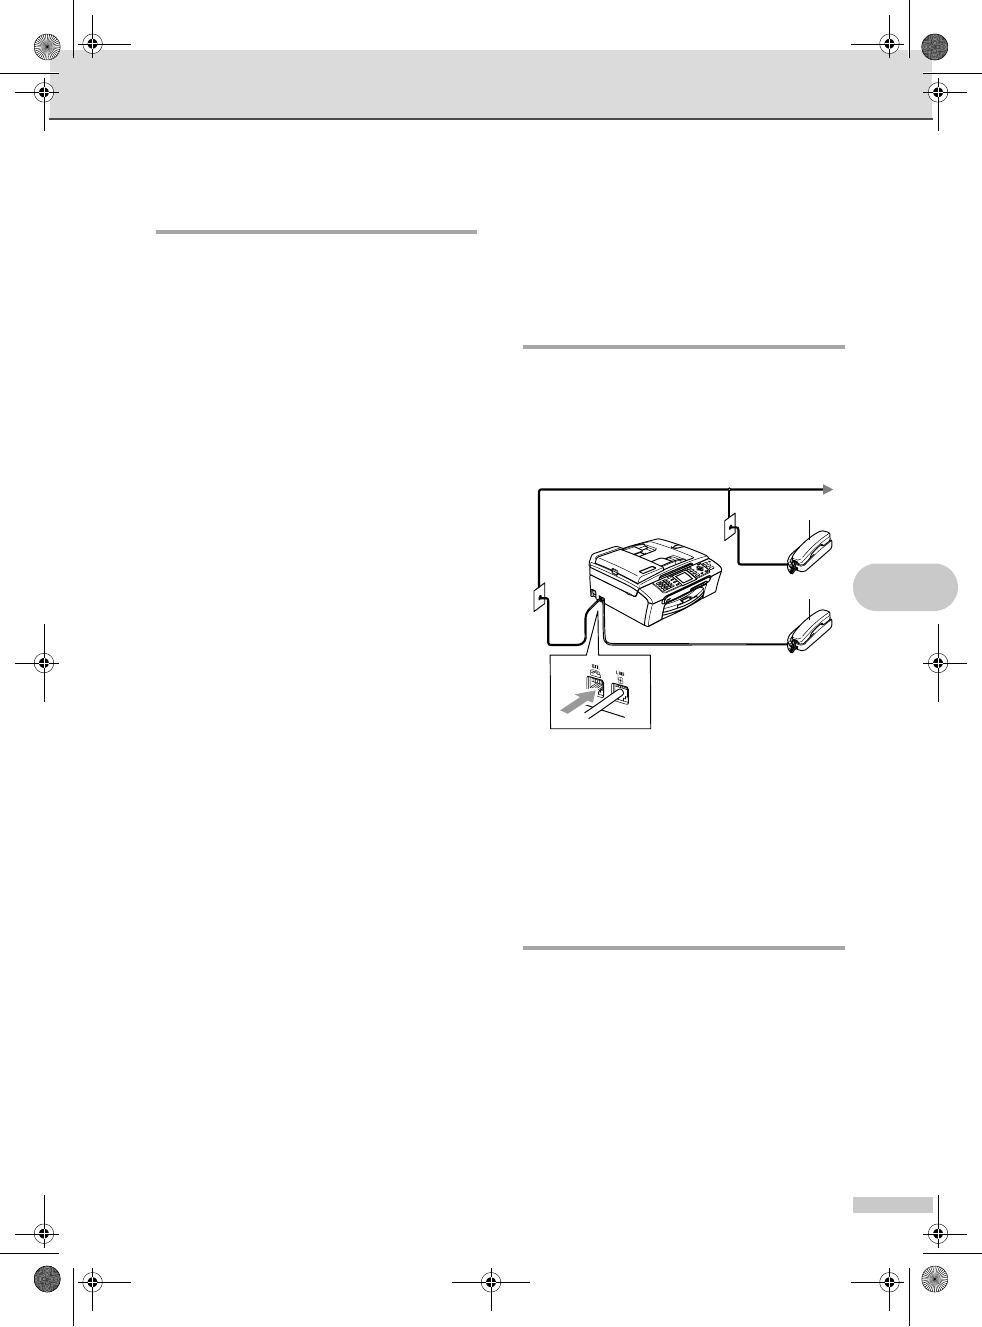
Connecting an external or
extension telephone 7
You can connect a separate telephone (or
telephone answering device) directly to your
machine as shown in the diagram below.
Connect the telephone line cord to the jack
labeled EXT.
1 Extension telephone
2 External telephone
When you are using an external or extension
phone, the LCD shows Telephone
(MFC-440CN) or Ext. Tel in Use
(MFC-665CW and MFC-845CW).
Using external and extension
telephones 7
If you answer a fax call on an extension or an
external telephone connected to the EXT.
jack of the machine, you can make your
machine take the call by using the Fax
Receive Code. When you press the Fax
Receive Code l51, the machine starts to
receive the fax.
1
2
MFC-440CN_UG_US.book Page 61 Thursday, August 10, 2006 6:59 PM
Color:Blac
k

Chapter 7
62
If the machine answers a voice call and
pseudo/double-rings for you to take over, use
the Telephone Answer Code #51 to take the
call at an extension phone. (See F/T Ring
Time (Fax/Tel mode only) on page 49.)
If you answer a call and no one is on
the line: 7
You should assume that you're receiving a
manual fax.
Press l51 and wait for the chirp or until the
LCD shows Receiving, and then hang up.
Note
You can also use the Easy Receive
feature to make your machine
automatically take the call. (See Easy
Receive on page 50.)
Using a Non-Brother cordless
external telephone
(MFC-440CN and MFC-665CW
only) 7
If your non-Brother cordless telephone is
connected to the EXT. jack of the machine
and you typically carry the cordless handset
elsewhere, it is easier to answer calls during
the Ring Delay.
If you let the machine answer first, you will
have to go to the machine so you can press
Hook or Speaker Phone to send the call to
the cordless handset.
Using remote codes 7
Fax receive code 7
If you answer a fax call on an extension or
external telephone, you can tell your machine
to receive it by dialing the fax receive code
l51. Wait for the chirping sounds then
replace the handset. See Easy Receive on
page 50. Your caller will have to press Start
to send the fax.
Telephone answer code 7
If you receive a voice call and the machine is
in F/T mode, it will start to sound the F/T
(double) ring after the initial ring delay. If you
pick up the call on an extension phone you
can turn the F/T ring off by pressing #51
(make sure you press this between the rings).
Changing the remote codes 7
The preset Fax Receive Code is l51. The
preset Telephone Answer Code is #51. If
you want to, you can replace them with your
own codes.
aPress Menu.
bPress a or b to choose Fax.
Press OK.
cPress a or b to choose
Setup Receive.
Press OK.
dPress a or b to choose
Remote Codes.
Press OK.
ePress a or b to choose On (or Off).
Press OK.
fEnter the new Fax Receive Code.
Press OK.
gEnter the new Telephone Answer Code.
Press OK.
hPress Stop/Exit.
Note
• If you are always disconnected when
accessing your external TAD remotely, try
changing the Fax Receive Code and
Telephone Answer Code to another three-
digit code (such as ### and 999).
• Remote Codes might not work with some
telephone systems.
MFC-440CN_UG_US.book Page 62 Thursday, August 10, 2006 6:59 PM
Color:Blac
k
63
8
8
How to Dial 8
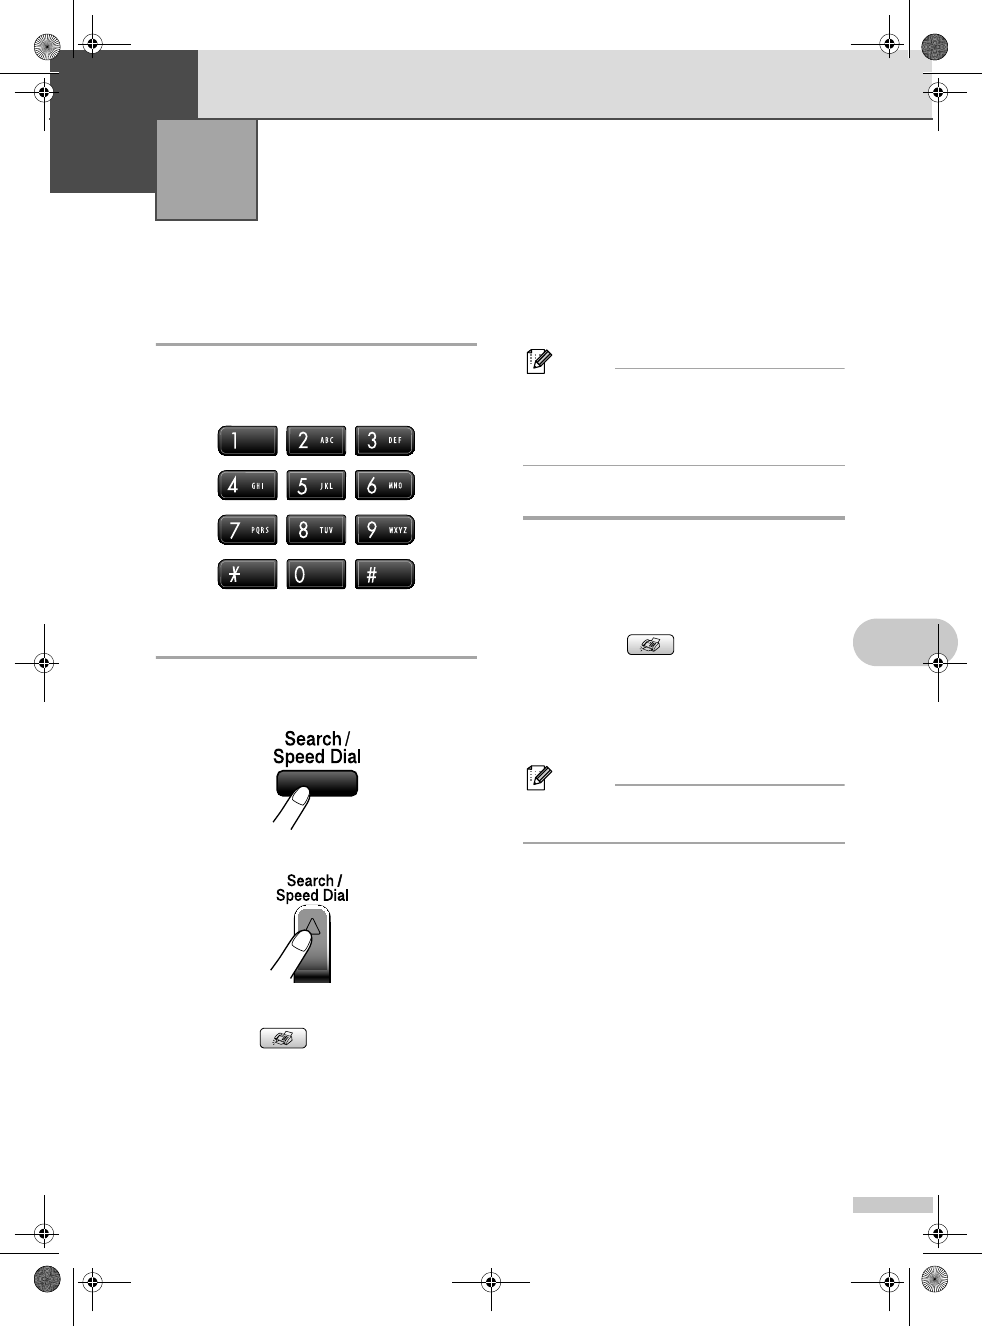
Manual dialing 8
Press all of the digits of the fax or telephone
number.
Speed-Dialing 8
aPress Search/Speed Dial.
MFC-440CN 8
MFC-665CW and MFC-845CW 8
You can also choose Speed-Dial by
pressing (Fax).
bPress the two-digit Speed-Dial number.
(See Storing Speed-Dial
numbers on page 65.)
cIf you have two numbers in the location,
press a or b to choose the number you
want to call.
Press OK.
Note
If the LCD shows Not Registered
when you enter a Speed-Dial number, a
number has not been stored at this
location.
Search 8
You can search for names you have stored in
the Speed-Dial memory.
aPress Search/Speed Dial.
You can also choose Speed-Dial by
pressing (Fax).
bPress a or b to choose
Alphabetical Order or
Numerical Order.
Press OK.
Note
• Press l to make the LCD font size larger.
• Press # to make the LCD font size smaller.
cIf you chose Alphabetical Order in
step b, use the dial pad to enter the first
letter of the name, and then press a or
b to choose the name and number you
want to call.
Press OK.
Dialing and storing numbers 8
MFC-440CN_UG_US.book Page 63 Thursday, August 10, 2006 6:59 PM
Color:Blac
k
Chapter 8
64
Fax Redial 8
If you are sending a fax manually and the line
is busy, press Redial/Pause, and then press
Black Start or Color Start to try again. If you
want to make a second call to a number you
recently dialed, you can press Redial/Pause
and choose one of the last 30 numbers from
the Outgoing Call List.
Redial/Pause only works if you dialed from
the control panel. If you are sending a fax
automatically and the line is busy, the
machine will automatically redial once after
five minutes.
aPress Redial/Pause.
bPress a or b to choose the number you
want to redial.
Press OK.
cPress a or b to choose Send a Fax.
Press OK.
dPress Black Start or Color Start.
Note
In Real Time Transmission the automatic
redial feature does not work when using
the scanner glass.
Outgoing Call 8
The last 30 numbers you telephoned
(MFC-665CW and MFC-845CW only) or sent
a fax to will be stored in the outgoing call
history. You can choose one of these
numbers to telephone (MFC-665CW and
MFC-845CW only), fax to, add to Speed-Dial,
or delete from the history.
aPress Redial/Pause.
You can also choose Outgoing Call
by pressing (Fax).
bPress a or b to choose the number you
want to call.
Press OK.
cDo one of the following:
(MFC-665CW and MFC-845CW
only)
To make a phone call, press a or b
to choose Make a Phone Call.
Press OK.
To send a fax, press a or b to
choose Send a Fax.
Press OK.
If you want to store the number,
press a or b to choose
Add to Speed-Dial.
Press OK.
(See Storing Speed-Dial numbers
from Outgoing Calls on page 66.)
Press a or b to choose Delete.
Press OK.
Then, confirm the Delete by
pressing 1.
MFC-440CN_UG_US.book Page 64 Thursday, August 10, 2006 6:59 PM
Color:Blac
k
Dialing and storing numbers
65
8
Caller ID history 8
This feature requires the Caller ID subscriber
service offered by many local telephone
companies. (See Caller ID on page 56.)
The last 30 numbers of phone calls
(MFC-665CW and MFC-845CW only) or
faxes you received will be stored in the Caller
ID history. You can choose one of these
numbers to telephone (MFC-665CW and
MFC-845CW only), fax to, add to Speed-Dial,
or delete from the history.
aPress (Fax).
bPress a or b to choose
Caller ID hist..
Press OK.
cPress a or b to choose the number you
want to call.
Press OK.
dDo one of the following:
(MFC-665CW and MFC-845CW
only)
To make a phone call, press a or b
to choose Make a Phone Call.
Press OK.
To send a fax, press a or b to
choose Send a Fax.
Press OK.
If you want to store the number,
press a or b to choose
Add to Speed-Dial.
Press OK.
(See Storing Speed-Dial numbers
from Outgoing Calls on page 66.)
Press a or b to choose Delete.
Press OK.
Then, confirm the Delete by
pressing 1.
Note
You can print the Caller ID list. (See
Printing Caller ID List on page 57.)
Storing numbers 8
You can set up your machine to do the
following types of easy dialing: Speed-Dial
and Groups for broadcasting faxes. When
you dial a Quick-Dial number, the LCD shows
the name, if you stored it, or the number.
Note
If you lose electrical power, the Quick-Dial
numbers that are in the memory will not be
lost.
Storing a pause 8
Press Redial/Pause to put a 3.5-second
pause between numbers. If you are dialing
overseas, you can press Redial/Pause as
many times as needed to increase the length
of the pause.
Storing Speed-Dial numbers 8
You can store up to 80 (MFC-440CN and
MFC-665CW) or 100 (MFC-845CW) 2-digit
Speed-Dial locations with a name, and each
name can have two numbers. When you dial
you will only have to press a few keys (For
example: Search/Speed Dial, the two-digit
number, and Black Start or Color Start).
aPress Menu.
bPress a or b to choose Fax.
Press OK.
cPress a or b to choose
Set Quick-Dial.
Press OK.
dPress a or b to choose Speed-Dial.
Press OK.
ePress a or b to choose the 2-digit
Speed-Dial location you want to store
the number in.
Press OK.
MFC-440CN_UG_US.book Page 65 Thursday, August 10, 2006 6:59 PM
Color:Blac
k
Chapter 8
66
fDo one of the following:
Enter the name (up to 16 characters)
using the dial pad.
Press OK.
(To help you enter letters, see
Entering Text on page 174.)
To store the number without a name,
press OK.
gEnter the fax or telephone number (up to
20 digits).
Press OK.
hDo one of the following:
Enter the second fax or telephone
number (up to 20 digits).
Press OK.
If you do not want to store a second
number, press OK.
iDo one of the following:
To store another Speed-Dial
number, go to step e.
To finish the setting, press
Stop/Exit.
Storing Speed-Dial numbers from
Outgoing Calls 8
You can also store Speed-Dial numbers from
the Outgoing Call history.
aPress Redial/Pause.
You can also choose Outgoing Call
by pressing (Fax).
bPress a or b to choose the name or
number you want to store.
Press OK.
cPress a or b to choose
Add to Speed-Dial.
Press OK.
dPress a or b to choose the 2-digit
Speed-Dial location you want to store
the number in.
Press OK.
eDo one of the following:
Enter the name (up to 16 characters)
using the dial pad.
Press OK.
(To help you enter letters, see
Entering Text on page 174.)
To store the number without a name,
press OK.
fPress OK to confirm the fax or
telephone number.
gDo one of the following:
Enter the second fax or telephone
number (up to 20 digits).
Press OK.
If you do not want to store a second
number, press OK.
hPress Stop/Exit.
Storing Speed-Dial numbers from the
Caller ID history 8
If you have the Caller ID subscriber service
from your telephone company you can also
store Speed-Dial numbers from incoming
calls in the Caller ID History. (See Caller
ID on page 56.)
aPress (Fax).
bPress a or b to choose
Caller ID hist..
Press OK.
cPress a or b to choose the number you
want to store.
Press OK.
dPress a or b to choose
Add to Speed-Dial.
Press OK.
ePress a or b to choose the 2-digit
Speed-Dial location you want to store
the number in.
Press OK.
MFC-440CN_UG_US.book Page 66 Thursday, August 10, 2006 6:59 PM
Color:Blac
k
Dialing and storing numbers
67
8
fDo one of the following:
Enter the name (up to 16 characters)
using the dial pad.
Press OK.
(To help you enter letters, see
Entering Text on page 174.)
To store the number without a name,
press OK.
gPress OK to confirm the fax or
telephone number.
hDo one of the following:
Enter the second fax or telephone
number (up to 20 digits).
Press OK.
If you do not want to store a second
number, press OK.
iPress Stop/Exit.
Changing Speed-Dial names
or numbers 8
You can change or delete a Speed-Dial
number that has already been stored.
aPress Menu.
bPress a or b to choose Fax.
Press OK.
cPress a or b to choose
Set Quick-Dial.
Press OK.
dPress a or b to choose Speed-Dial.
Press OK.
ePress a or b to choose the 2-digit
Speed-Dial location you want to change.
Press OK.
fDo one of the following:
Press a or b to choose Change.
Press OK.
Press a or b to choose Delete.
Press OK.
Then, confirm the Delete by
pressing 1 and Stop/Exit.
Note
How to change the stored name or
number:
If you want to change a character, press d
or c to position the cursor under the
character you want to change, and then
press Clear/Back. Re-enter the
character.
gDo one of the following:
Enter the name (up to 16 characters)
using the dial pad.
Press OK.
(See Entering Text on page 174.)
If you do not want to change the
name, press OK.
hDo one of the following:
Enter the new fax or telephone
number (up to 20 digits).
Press OK.
If you do not want to change the
number, press OK.
iDo one of the following:
Enter the second new fax or
telephone number (up to 20 digits).
Press OK.
If you do not want to change the
number, press OK.
jPress Stop/Exit.
MFC-440CN_UG_US.book Page 67 Thursday, August 10, 2006 6:59 PM
Color:Blac
k
Chapter 8
68
Setting up groups for
broadcasting 8
Groups, which can be stored on a Speed-Dial
location, allow you to send the same fax
message to many fax numbers by pressing
only Search/Speed Dial, the two-digit
location and Black Start. First, you'll need to
store each fax number in a Speed-Dial
location. Then you can include them as
numbers in the Group. Each Group uses up a
Speed-Dial location. You can have up to six
Groups, or you can assign up to 158 numbers
(MFC-440CN and MFC-665CW) or 198
numbers (MFC-845CW) in large Group if you
have 2 numbers in each location.
(See Storing Speed-Dial
numbers on page 65 and Broadcasting
(Black & White only) on page 40.)
aPress Menu.
bPress a or b to choose Fax.
Press OK.
cPress a or b to choose
Set Quick-Dial.
Press OK.
dPress a or b to choose
Setup Groups.
Press OK.
ePress a or b to choose GROUP 1,
GROUP 2,GROUP 3,GROUP 4,
GROUP 5 or GROUP 6 for the Group
name where you will store the fax
numbers.
Press OK.
fPress a or b to choose the 2-digit
location where you want to add to the
Group.
Press OK.
gPress a or b to choose Add Number.
Press OK.
hPress a or b to choose the number you
want to add.
Press OK.
(See Search on page 63.)
iAfter you have finished adding numbers
by repeating steps g and h, press a or
b to choose Complete.
Press OK.
jPress Stop/Exit.
Note
You can print a list of all the Speed-Dial
numbers. Group numbers will be marked
in the GROUP column. (See
Reports on page 88.)
Changing Group name 8
aPress Menu.
bPress a or b to choose Fax.
Press OK.
cPress a or b to choose
Set Quick-Dial.
Press OK.
dPress a or b to choose
Setup Groups.
Press OK.
ePress a or b to choose the Group
name you want to change.
Press OK.
fPress a or b to choose
Change Group name.
Press OK.
Note
How to change the stored name or
number:
If you want to change a character, press d
or c to position the cursor under the
character you want to change, and then
press Clear/Back. Re-enter the
character.
MFC-440CN_UG_US.book Page 68 Thursday, August 10, 2006 6:59 PM
Color:Blac
k
Dialing and storing numbers
69
8
gEnter the new name (up to 16
characters) using the dial pad.
Press OK.
(See Entering Text on page 174. For
example, type NEW CLIENTS).
hPress a or b to choose Complete.
Press OK.
iPress Stop/Exit.
Deleting a Group 8
aPress Menu.
bPress a or b to choose Fax.
Press OK.
cPress a or b to choose
Set Quick-Dial.
Press OK.
dPress a or b to choose
Setup Groups.
Press OK.
ePress a or b to choose the Group you
want to delete.
Press OK.
fPress a or b to choose Delete.
Press OK.
Then, confirm the Delete by pressing 1.
gPress a or b to choose Complete.
Press OK.
hPress Stop/Exit.
Deleting a number from a Group 8
aPress Menu.
bPress a or b to choose Fax.
Press OK.
cPress a or b to choose
Set Quick-Dial.
Press OK.
dPress a or b to choose
Setup Groups.
Press OK.
ePress a or b to choose the Group you
want to change.
Press OK.
fPress a or b to choose the number you
want to delete.
Press OK.
Then, confirm the Delete by pressing 1.
gPress a or b to choose Complete.
Press OK.
hPress Stop/Exit.
Dialing Access codes and
credit card numbers 8
Sometimes you may want to choose from
several long distance carriers when you
make a call. Rates may vary depending on
the time and destination. To take advantage
of low rates, you can store the access codes
or long-distance carriers and credit card
numbers as Speed-Dial numbers. You can
store these long dialing sequences by
dividing them and setting them up as
separate Speed-Dial numbers in any
combination. You can even include manual
dialing using the dial pad. (See Storing
Speed-Dial numbers on page 65.)
For example, you have stored ‘555’ on
Speed-Dial: 03 and ‘7000’ on Speed-Dial: 02.
aPress Search/Speed Dial.
bEnter 03.
Note
If you stored 2 numbers in one Speed-Dial
location, you will be asked which number
you want to send to.
cPress a or b to choose Speed-Dial.
Press OK.
MFC-440CN_UG_US.book Page 69 Thursday, August 10, 2006 6:59 PM
Color:Blac
k
Chapter 8
70
dEnter 02.
ePress Black Start or Color Start.
You will dial ‘555-7000’.
To temporarily change a number, you can
substitute part of the number with manual
dialing using the dial pad. For example, to
change the number to 555-7001 you could
press Search/Speed Dial,03 and then press
7001 using the dial pad.
Note
If you must wait for another dial tone or
signal at any point in the dialing sequence,
create a pause in the number by pressing
Redial/Pause. Each key press adds a
3.5-second delay.
MFC-440CN_UG_US.book Page 70 Thursday, August 10, 2006 6:59 PM
Color:Blac
k
71
9
9
Message Center mode 9
The Message Center feature will store up to
99 incoming messages. Messages are stored
in the order in which they are received.
Voice messages can be up to 3 minutes in
length, and can also be picked up remotely
(see Using your Remote Access
Code on page 83). The number of messages
you can store will depend on how much
memory is being used by other features (for
example, delayed and stored faxes).
Setting up the Message
Center 9
Recording the Message Center outgoing
message (Msg Ctr OGM) is the first step you
need to follow before you can use the
Message Center.
To enter Message Center mode, follow the
steps below:
aRecord your Message Center OGM.
bPress to activate the Message
Center.
Outgoing message (OGM) 9
Recording your OGM 9
You can record the following two different
types of OGM:
Msg Ctr OGM
This message will be played when a call is
received. The caller will be able to leave a
voice or fax message.
F/T OGM
This message is played when a call is
received and your machine is set to
Fax/Tel mode. The caller will not be able
to leave a message. See Fax/Tel OGM
(Announcement) on page 72.
aPress Menu.
bPress a or b to choose Fax.
Press OK.
cPress a or b to choose
Setup Msg Ctr.
Press OK.
dPress a or b to choose OGM.
Press OK.
The LCD prompts you to choose an
OGM.
ePress a or b to choose either
Msg Ctr OGM or F/T OGM, then press
OK.
Note
If callers tell you they cannot leave a
message on your machine, make sure you
have chosen Msg Ctr OGM (not F/T
OGM).
fPress a or b to choose Record OGM.
Press OK.
gRecord your message, using one of the
options below:
(MFC-665CW only)
Pickup the handset, record your
message, and replace the handset
when finished.
(MFC-845CW only)
Speak clearly toward the
microphone to record your
message. Press Stop/Exit when
finished.
Message Center (MFC-665CW
and MFC-845CW only) 9
MFC-440CN_UG_US.book Page 71 Thursday, August 10, 2006 6:59 PM
Color:Blac
k
Chapter 9
72
The Message Center will play your
OGM back to you.
hPress Stop/Exit.
Listening to your OGM 9
aPress Menu.
bPress a or b to choose Fax.
Press OK.
cPress a or b to choose
Setup Msg Ctr.
Press OK.
dPress a or b to choose OGM.
Press OK.
ePress a or b to choose Msg Ctr OGM
or F/T OGM.
Press OK.
fPress a or b to choose Playing OGM.
Press OK.
Adjust the volume by pressing Volume
d or c.
gPress Stop/Exit.
Erasing your OGM 9
aPress Menu.
bPress a or b to choose Fax.
Press OK.
cPress a or b to choose
Setup Msg Ctr.
Press OK.
dPress a or b to choose OGM.
Press OK.
ePress a or b to choose either
Msg Ctr OGM or F/T OGM.
Press OK.
fPress a or b to choose Erase OGM.
Press OK.
gDo one of the following:
Press 1 to erase the OGM.
Press 2 to exit without erasing.
hPress Stop/Exit.
Fax/Tel OGM
(Announcement) 9
If your machine is set to Fax/Tel receive
mode this message will be played by your
Brother machine to a caller. Unlike the Msg
Ctr OGM, the caller will not be able to leave a
message.
To record your Fax/Tel OGM follow the
instructions on Outgoing message
(OGM) on page 71 and choose F/T OGM (not
Msg Ctr OGM).
If you need to review the steps for setting up
the Fax/Tel receive mode, see Receive
modes on page 46.
Activating Message Center
mode 9
When the light glows, Message Center
mode is active. Press to enter MC mode.
MFC-440CN_UG_US.book Page 72 Thursday, August 10, 2006 6:59 PM
Color:Blac
k
Message Center (MFC-665CW and MFC-845CW only)
73
9
Managing your
messages 9
Message indicator 9
The light flashes if you have any new
messages waiting for you.
The LCD displays the total number of voice
and fax messages stored in the Message
Center memory.
Fax messages are only stored when Fax
Storage or Fax Preview is turned on. See
Advanced fax operations (Black & White
only) on page 76.
Playing voice messages 9
All messages are played in the order they
were recorded. The LCD shows the number
of the current message, the total number of
messages, and the time and date the
message was recorded.
Follow the steps below to listen to your voice
messages:
aPress Play/Record or Play.
The following commands are available
when playing messages:
bPress Stop/Exit.
Erasing incoming messages 9
To erase voice messages individually9
aPress Play/Record or Play.
The machine will sound a two second
beep and begins message playback.
Each message is preceded by one long
beep, and followed by two short beeps.
bTo erase a specific message, press
Erase immediately after the two short
beeps, or while the message is playing.
cDo one of the following:
Press 1 to erase the message.
Press 2 to cancel.
dPress Stop/Exit.
l (RWD) Repeats a message.
# (FWD) Skips to the next message.
or Adjusts the volume.
MFC-440CN_UG_US.book Page 73 Thursday, August 10, 2006 6:59 PM
Color:Blac
k

Chapter 9
74
To erase all of your messages 9
aPress Erase.
The LCD displays the following:
Erase All Voice?
YesiPress 1
NoiPress 2
bDo one of the following:
Press 1 to erase all of your voice
messages.
Press 2 to cancel.
cPress Stop/Exit.
Additional Message
Center operations 9
Setting maximum time for
incoming messages 9
Your machine’s default setting will save
incoming messages up to 30 seconds long.
To change this setting follow the steps below:
aPress Menu.
bPress a or b to choose Fax.
Press OK.
cPress a or b to choose
Setup Msg Ctr.
Press OK.
dPress a or b to choose ICM Max.
Time.
Press OK.
ePress a or b to choose the maximum
time setting for incoming messages (30,
60,120 or 180 seconds).
Press OK.
fPress Stop/Exit.
Setting toll saver 9
When the toll saver feature is on, the machine
will answer after two rings if you do have
voice or fax messages, and after four rings if
you do not have any messages.
This way, when you call your machine for
remote retrieval, if it rings three times, you
have no messages and can hang up to avoid
a toll charge.
The toll saver feature is only available when
Message Center mode is on. When toll saver
is On, it overrides your ring delay setting.
If you are using Distinctive Ring, do not use
the Toll Saver feature.
MFC-440CN_UG_US.book Page 74 Thursday, August 10, 2006 6:59 PM
Color:Blac
k
Message Center (MFC-665CW and MFC-845CW only)
75
9
aPress Menu.
bPress a or b to choose Fax.
Press OK.
cPress a or b to choose
Setup Receive.
Press OK.
dPress a or b to choose Ring Delay.
Press OK.
ePress a or b to choose Toll Saver.
Press OK.
fPress a or b to choose On (or Off).
Press OK.
gPress Stop/Exit.
ICM Recording Monitor 9
This feature lets you turn the speaker volume
for voice messages On or Off. When you turn
the monitor Off, you will not hear messages
as they come in.
aPress Menu.
bPress a or b to choose Fax.
Press OK.
cPress a or b to choose
Setup Msg Ctr.
Press OK.
dPress a or b to choose ICM
Rec.Monitr.
Press OK.
eUse a or b to choose Off or On.
Press OK.
fPress Stop/Exit.
Recording a conversation
(MFC-665CW only) 9
If you are using the handset, you can record
a telephone conversation by pressing
Play/Record during the conversation. Your
recording can be as long as the incoming
message maximum time (up to 3 minutes).
The other party will hear an intermittent
beeping while recording. To stop recording,
press Stop/Exit.
MFC-440CN_UG_US.book Page 75 Thursday, August 10, 2006 6:59 PM
Color:Blac
k

76
10
You can only use one advanced fax
operation at a time:
Fax Forwarding
Paging
Fax Storage
Fax Preview (MFC-665CW and
MFC-845CW only)
PC Fax Receive
Off
You can change your selection at any time. If
received faxes are still in the machine’s
memory when you change the advanced fax
operations, an LCD question will appear.
(See Changing Advanced Fax
Operations on page 82.)
Fax Forwarding 10
When you choose Fax Forward, your
machine stores the received fax in the
memory. The machine will then dial the fax
number you have programmed and forward
the fax message.
aPress Menu.
bPress a or b to choose Fax.
Press OK.
cPress a or b to choose
Advanced Fax Operation.
Press OK.
dPress a or b to choose
Fwd/Page/Store.
Press OK.
ePress a or b to choose Fax Forward.
Press OK.
fEnter the forwarding number (up to 20
digits).
Press OK.
gPress a or b to choose
Backup Print:On or
Backup Print:Off.
Press OK.
Note
• If you choose Backup Print:On, the
machine will also print the fax at your
machine so you will have a copy. This is
the safety feature in case there is a power
failure before the fax is forwarded or a
problem at the receiving machine.
• (MFC-665CW and MFC-845CW only)
The machine can store faxes
approximately 24 hours if there is a power
failure.
• When Fax Forwarding is turned on your
machine will only receive black & white
faxes into memory. Color faxes will not be
received, unless the sending machine
converts them to black & white before
sending.
hPress Stop/Exit.
Advanced fax operations
(Black & White only) 10
MFC-440CN_UG_US.book Page 76 Thursday, August 10, 2006 6:59 PM
Color:Blac
k
Advanced fax operations (Black & White only)
77
10
Paging 10
When you choose Paging, your machine
dials the pager number you have
programmed, and then dials your PIN
(Personal identification Number). This
activates your pager so you will know that you
have a fax message in the memory.
If you have set Paging, a backup copy of the
received fax will automatically be printed at
the machine.
aPress Menu.
bPress a or b to choose Fax.
Press OK.
cPress a or b to choose
Advanced Fax Operation.
Press OK.
dPress a or b to choose
Fwd/Page/Store.
Press OK.
ePress a or b to choose Paging.
Press OK.
fEnter your pager phone number
followed by # # (up to 20 digits).
Press OK.
Do not include the area code if it is the
same as that of your machine.
For example, press:
180055 5 1 2 3 4 # #.
gDo one of the following:
If your pager needs a PIN, enter the
PIN, press #, press Redial/Pause,
and then enter your fax number
followed by ##.
Press OK.
For example, press:
1 2 3 4 5 # Redial/Pause 1 8 0 0 5 5
5 6 7 8 9 # #
If you do not need a PIN, press:
Redial/Pause, and then enter your
fax number followed by ##. Press
OK.
For example, press:
Redial/Pause 1 8 0 0 5 5 5 6 7 8 9 # #
hPress Stop/Exit.
Note
• You cannot change a paging number or
PIN remotely.
• If Paging is turned on your machine
cannot receive a color fax unless the
sending machine converts it to black &
white.
• (MFC-665CW and MFC-845CW only)
If you want to be paged for voice
messages, make sure you pressed MC
on/off key to turn the Message Center on.
MFC-440CN_UG_US.book Page 77 Thursday, August 10, 2006 6:59 PM
Color:Blac
k

Chapter 10
78
Fax Storage 10
If you choose Fax Storage, your machine
stores the received fax in the memory. You
will be able to retrieve fax messages from
another location using the remote retrieval
commands.
If you have set Fax Storage, a backup copy
will automatically be printed at the machine.
aPress Menu.
bPress a or b to choose Fax.
Press OK.
cPress a or b to choose
Advanced Fax Operation.
Press OK.
dPress a or b to choose
Fwd/Page/Store.
Press OK.
ePress a or b to choose Fax Storage.
Press OK.
fPress Stop/Exit.
Note
If Fax Storage is turned on your machine
cannot receive a color fax unless the
sending machine converts it to black &
white.
Fax Preview
(MFC-665CW and
MFC-845CW only) 10
If you choose Fax Preview you can view
received faxes on the LCD by pressing the
Fax Preview key. When the machine is in
Ready mode, a popup message will appear
on the LCD to alert you of new faxes. You can
continue all operations.
Setting Fax Preview 10
aPress Menu.
bPress a or b to choose Fax.
Press OK.
cPress a or b to choose
Advanced Fax Operation.
Press OK.
dPress a or b to choose
Fwd/Page/Store.
Press OK.
ePress a or b to choose Fax Preview.
Press OK.
fPress Stop/Exit.
Note
When Fax Preview is turned on your
machine can only print the color faxes it
receives. It cannot store them in memory.
MFC-440CN_UG_US.book Page 78 Thursday, August 10, 2006 6:59 PM
Color:Blac
k
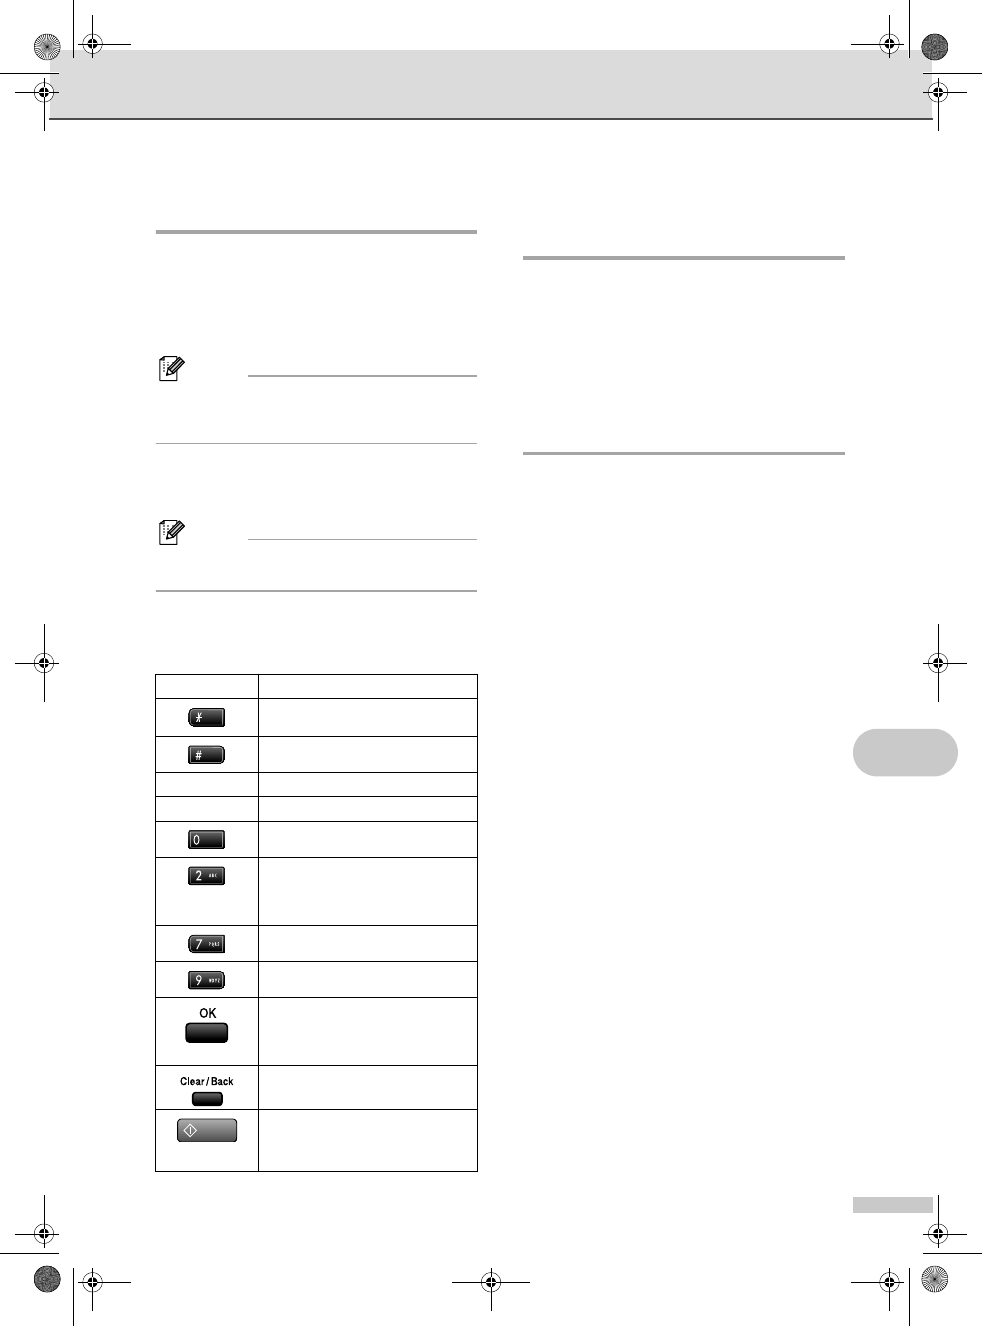
Advanced fax operations (Black & White only)
79
10
How to preview a fax 10
When you receive a fax, you will see the pop-
up message on the LCD. (For example: New
Fax(es):02)
aPress Fax Preview.
You can see the new fax list.
Note
You can also see your old fax list by
pressing l. Press # to go back to your
new fax list.
bPress a or b to choose the fax you
want to see.
Press OK.
Note
If your fax is large there may be a delay
before it is displayed on the LCD.
cPress Stop/Exit.
When a fax is open the control panel keys will
perform the operations shown below.
How to delete all faxes in the
list 10
aPress Fax Preview.
bPress a or b to choose Delete All.
Press OK.
Then, confirm the Delete by pressing 1.
How to print all faxes in the
list 10
aPress Fax Preview.
bPress a or b to choose Print All.
Press OK.
Key Description
Enlarge the fax.
Reduce the fax.
a or bScroll vertically.
d or cScroll horizontally.
Rotate the fax clockwise.
Delete the fax.
Then, confirm the Delete by
pressing 1.
Go back to the previous page.
Go to the next page.
Go to the next step.
(Print, Back and Exit are
available.)
Go back to the fax list.
Black Start
Print the fax.
MFC-440CN_UG_US.book Page 79 Thursday, August 10, 2006 6:59 PM
Color:Blac
k
Chapter 10
80
PC Fax Receive 10
If you turn on the PC-Fax Receive feature
your machine will store received faxes in
memory and send them to your PC
automatically. You can then use your PC to
view and store these faxes.
Even if you have turned off your PC (at night
or on the weekend, for example), your
machine will receive and store your faxes in
its memory. The number of received faxes
that are stored in the memory will appear at
the bottom left side of the LCD.
When you start your PC and the PC-FAX
Receiving software runs, your machine
transfers your faxes to your PC automatically.
To transfer the received faxes to your PC you
must have the PC-FAX Receiving software
running on your PC. (For details, see PC-FAX
receiving in the Software User’s Guide on the
CD-ROM.)
If you choose Backup Print:On the
machine will also print the fax.
aPress Menu.
bPress a or b to choose Fax.
Press OK.
cPress a or b to choose
Advanced Fax Operation.
Press OK.
dPress a or b to choose
Fwd/Page/Store.
Press OK.
ePress a or b to choose
PC Fax Receive.
Press OK.
fPress a or b to choose <USB> or the
PC you want to receive.
Press OK.
gPress a or b to choose
Backup Print:On or
Backup Print:Off.
Press OK.
hPress Stop/Exit.
Note
• PC Fax Receive is not supported in the
Mac OS®.
• Before you can set up PC Fax Receive
you must install the MFL-Pro Suite
software on you PC. Make sure your PC is
connected and turned on. (For details see
PC-FAX Receiving in the Software User’s
Guide on the CD-ROM.)
• (MFC-665CW and MFC-845CW only)
In the event of a power failure, the
machine will store your faxes in the
memory for approximately 24 hours.
However, if you choose
Backup Print:On the machine will print
the fax, so you will have a copy if there is
a power failure before it is sent to the PC.
• If you get an error message and the
machine cannot print the faxes in memory,
you can use this setting to transfer your
faxes to your PC. (For details, see Error
messages on page 136.)
• When PC Fax Receive is turned on only
black & white faxes can be received into
the memory and sent to the PC. Color
faxes will be received in real time and
printed in color.
MFC-440CN_UG_US.book Page 80 Thursday, August 10, 2006 6:59 PM
Color:Blac
k
Advanced fax operations (Black & White only)
81
10
Changing the destination PC 10
aPress Menu.
bPress a or b to choose Fax.
Press OK.
cPress a or b to choose
Advanced Fax Operation.
Press OK.
dPress a or b to choose
Fwd/Page/Store.
Press OK.
ePress a or b to choose
PC Fax Receive.
Press OK.
fPress a or b to choose Change.
Press OK.
gPress a or b to choose <USB> or the
PC you want to receive.
Press OK.
hPress a or b to choose
Backup Print:On or
Backup Print:Off.
Press OK.
iPress Stop/Exit.
Turning off Advanced
Fax Operations 10
aPress Menu.
bPress a or b to choose Fax.
Press OK.
cPress a or b to choose
Advanced Fax Operation.
Press OK.
dPress a or b to choose
Fwd/Page/Store.
Press OK.
ePress a or b to choose Off.
Press OK.
fPress Stop/Exit.
Note
The LCD will give you more options if
there are received faxes still in your
machine’s memory. (See Changing
Advanced Fax Operations on page 82.)
MFC-440CN_UG_US.book Page 81 Thursday, August 10, 2006 6:59 PM
Color:Blac
k
Chapter 10
82
Changing Advanced
Fax Operations 10
If received faxes are left in your machine's
memory when you change the Advanced Fax
Operations, the LCD will ask you one of the
following questions:
Erase All Fax?
YesiPress 1
NoiPress 2
Print All Fax?
YesiPress 1
NoiPress 2
• If you press 1, faxes in the memory will
be erased or printed before the setting
changes. If a backup copy has already
been printed it will not be printed again.
• If you press 2, faxes in the memory will
not be erased or printed and the setting
will be unchanged.
If received faxes are left in the machine's
memory when you change to
PC Fax Receive from another option
[Fax Forward,Paging,Fax Storage or
Fax Preview (MFC-665CW and
MFC-845CW only)], press a or b to choose
the PC.
The LCD will ask you the following message:
Send Fax to PC?
YesiPress 1
NoiPress 2
• If you press 1, faxes in the memory will
be sent to your PC before the setting
changes. You will be asked if you want
to turn on Backup Print. (For detail, see
PC Fax Receive on page 80.)
• If you press 2, faxes in the memory will
not be erased or transferred to your PC
and the setting will be unchanged.
Remote Retrieval 10
You can call your machine from any touch
tone telephone or fax machine, then use the
remote access code and remote commands
to retrieve fax messages.
Setting a Remote Access
Code 10
The remote access code lets you access the
remote retrieval features when you are away
from your machine. Before you can use the
remote access and retrieval features, you
have to set up your own code. The factory
default code is inactive code (---l).
aPress Menu.
bPress a or b to choose Fax.
Press OK.
cPress a or b to choose
Advanced Fax Operation.
Press OK.
dPress a or b to choose
Remote Access.
Press OK.
eEnter a three-digit code using numbers
0-9,l, or #.
Press OK. (The preset ‘l’ cannot be
changed.)
Note
Do not use the same code as your fax
receive code (l 5 1) or telephone answer
code (# 5 1). (See Using external and
extension telephones on page 61.)
fPress Stop/Exit.
MFC-440CN_UG_US.book Page 82 Thursday, August 10, 2006 6:59 PM
Color:Blac
k
Advanced fax operations (Black & White only)
83
10
Note
You can change your code at any time by
entering a new one. If you want to make
your code inactive, press Clear/Back in
step e to restore the inactive setting
(---l) and press OK.
Using your Remote Access
Code 10
aDial your fax number from a touch tone
telephone or another fax machine.
bWhen your machine answers, enter
your remote access code (3 digits
followed by l) at once.
cThe machine signals if it has received
messages:
1 long beep — Fax messages
2 long beeps — Voice messages
(MFC-665CW and MFC-845CW
only)
3 long beeps — Fax & Voice
messages
(MFC-665CW and MFC-845CW
only)
No beeps — No messages
dWhen the machine gives two short
beeps, enter a command.
The machine will hang up if you wait
longer than 30 seconds to enter a
command.
The machine will beep three times if you
enter an invalid command.
ePress 90 to reset the machine when you
have finished.
fHang up.
Note
If your machine is set to Manual mode
and you want to use the remote retrieval
features, wait about 2 minutes after it
starts ringing, and then enter the remote
access code within 30 seconds.
MFC-440CN_UG_US.book Page 83 Thursday, August 10, 2006 6:59 PM
Color:Blac
k

Chapter 10
84
Remote Fax commands 10
Follow the commands below to access features when you are away from the machine. When you
call the machine and enter your remote access code (3 digits followed by l), the system will give
two short beeps and you must enter a remote command.
Remote commands Operation details
91 Playing Voice messages
(MFC-665CW and MFC-845CW only)
After one long beep, the machine plays the ICM.
1 Repeat or Skip Backward Press 1 while listening to an ICM to repeat it. If you press 1
before a message, you will hear the previous message.
2 Skip Forward While playing the ICM, you can skip to the next message.
9 STOP Playing Stop Playing the ICM.
93 Erase all ICM
(MFC-665CW and MFC-845CW only)
If you hear one long beep, the erase is accepted. If you hear
three short beeps, you cannot erase because all voice
messages have not been played, or there are no voice
message to erase.
*This code erases all recorded messages, not one at a time.
94 Play and Record OGM in Memory
(MFC-665CW and MFC-845CW only)
1 Play 1 Msg Ctr OGM The machine plays the selected OGM. You can stop playing
OGMs by pressing 9.
2 F/T OGM
2 Record 1 Msg Ctr OGM After one long beep, you can record the selected OGM. You
will hear the message played once. You can stop recording
the message by pressing 9.
2 F/T OGM
95 Change the Fax Forwarding,
Paging or Fax Storage settings
1 OFF You can choose Off after you have retrieved or erased all
your messages.
2 Fax Forwarding One long beep means the change is accepted. If you hear
three short beeps, you cannot change because something
has not been set up (for example, a Fax Forwarding or
Paging number has not been registered). You can register
your Fax Forwarding number by entering 4. (See Changing
your Fax Forwarding number on page 86.) Once you have
registered the number, Fax Forwarding will work.
3 Paging
4 Fax Forwarding number
6 Fax Storage
96 Retrieve a fax
2 Retrieve all faxes Enter the number of a remote fax machine to receive stored
fax messages. (See Retrieving fax messages on page 86.)
3 Erase faxes from the memory If you hear one long beep, fax messages have been erased
from the memory.
97 Check the receiving status
(MFC-440CN only)
1 Fax You can check whether your machine has received any
faxes. If yes, you will hear one long beep. If no, you will hear
three short beeps.
MFC-440CN_UG_US.book Page 84 Thursday, August 10, 2006 6:59 PM
Color:Blac
k
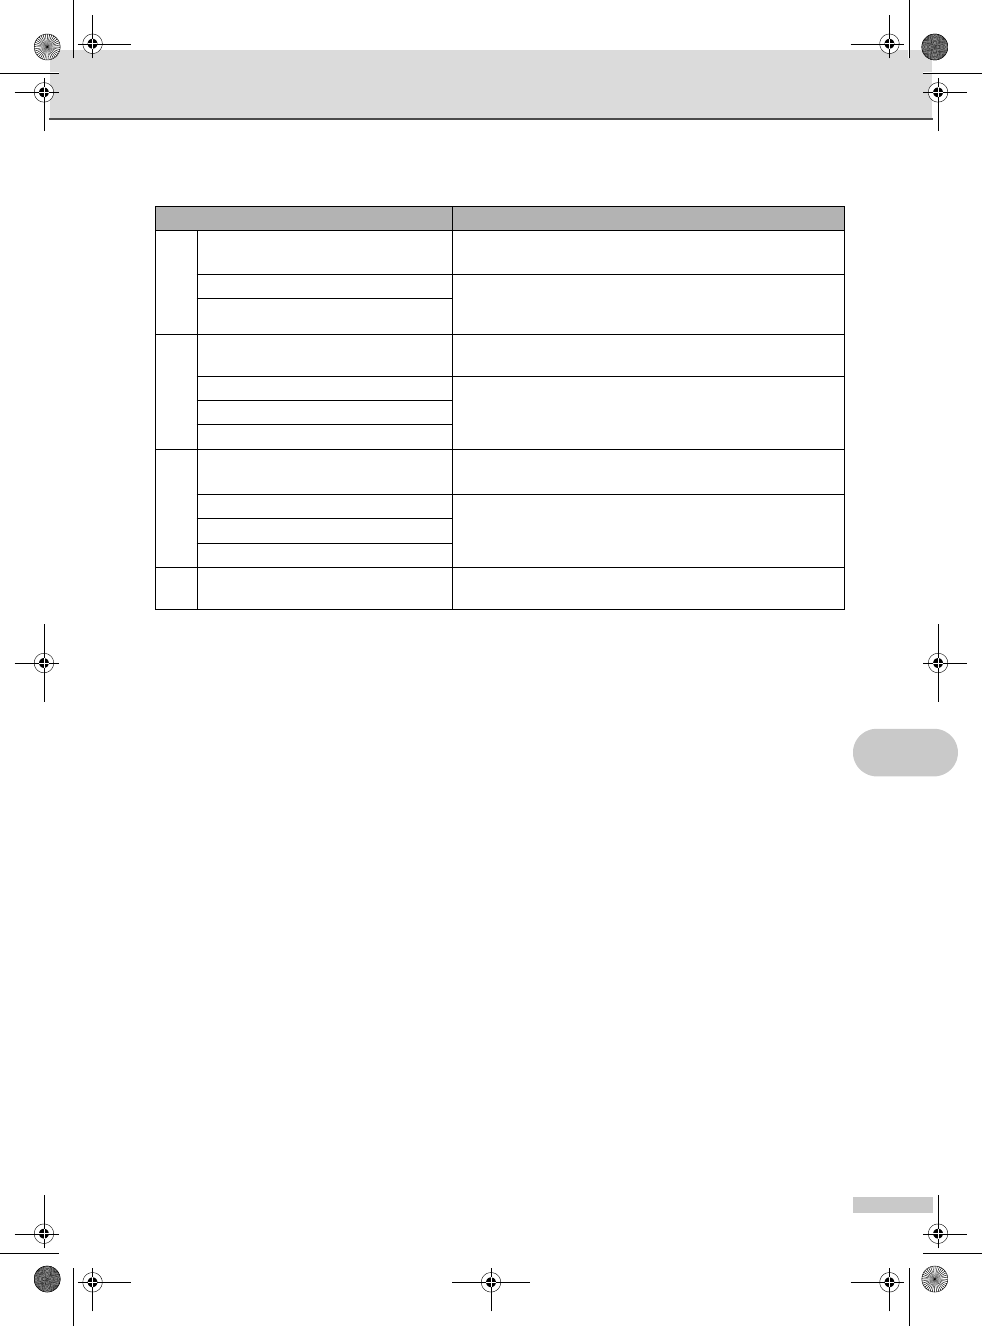
Advanced fax operations (Black & White only)
85
10
97 Check the receiving status
(MFC-665CW and MFC-845CW only)
1 Fax You can check whether your machine has received any
faxes or voice messages. If yes, you will hear one long
beep. If no, you will hear three short beeps.
2 Voice
98 Change the Receive Mode
(MFC-440CN only)
1 External TAD If you hear one long beep, your change has been accepted.
2 Fax/Tel
3 Fax Only
98 Change the Receive Mode
(MFC-665CW and MFC-845CW only)
1 Msg Ctr If you hear one long beep, your change has been accepted.
2 Fax/Tel
3 Fax Only
90 Exit Pressing 90 allows you to exit remote retrieval. Wait for the
long beep, then replace the handset.
Remote commands Operation details
MFC-440CN_UG_US.book Page 85 Thursday, August 10, 2006 6:59 PM
Color:Blac
k
Chapter 10
86
Retrieving fax messages 10
You can call your machine from any touch
tone phone and have your fax messages sent
to a machine.
aDial your fax number.
bWhen your machine answers, enter
your remote access code (3 digits
followed by l) at once. If you hear one
long beep, you have messages.
cWhen you hear two short beeps, press
962.
dWait for the long beep, enter the number
(up to 20 digits) of the remote fax
machine you want your fax messages
sent to using the dial pad, then enter ##.
Note
You cannot use l and # as dial numbers.
However, press # if you want to create a
pause.
ePress 90 to reset the machine when
you’ve finished.
fHang up after you hear your machine
beep. Your machine will call the other
fax machine, which will then print your
fax messages.
Changing your Fax
Forwarding number 10
You can change the default setting of your fax
forwarding number from another touch tone
telephone or fax machine.
aDial your fax number.
bWhen your machine answers, enter
your remote access code (3 digits
followed by l) at once. If you hear one
long beep, you have messages.
cWhen you hear two short beeps, press
954.
dWait for the long beep, enter the new
number (up to 20 digits) of the remote
fax machine you want your fax
messages forwarded to using the dial
pad, then enter ##.
Note
You cannot use l and # as dial numbers.
However, press # if you want to create a
pause.
ePress 90 to reset the machine when you
have finished.
fHang up after you hear your machine
beep.
MFC-440CN_UG_US.book Page 86 Thursday, August 10, 2006 6:59 PM
Color:Blac
k