Bryton orporation CA1505 GPS enabled cycling computer User Manual 3
Bryton Incorporation GPS enabled cycling computer Users Manual 3
Contents
- 1. Users Manual-1
- 2. Users Manual-2
- 3. Users Manual-3
- 4. Users Manual-4
Users Manual-3
ENGLISH
Getting Started 5
Accessories
The Rider 320 comes with the following accessories:
USB cable
• Bike mount•
Optional items:
Heart rate belt• Speed sensor
•
Cadence sensor•
Speed/Cadence Dual sensor•
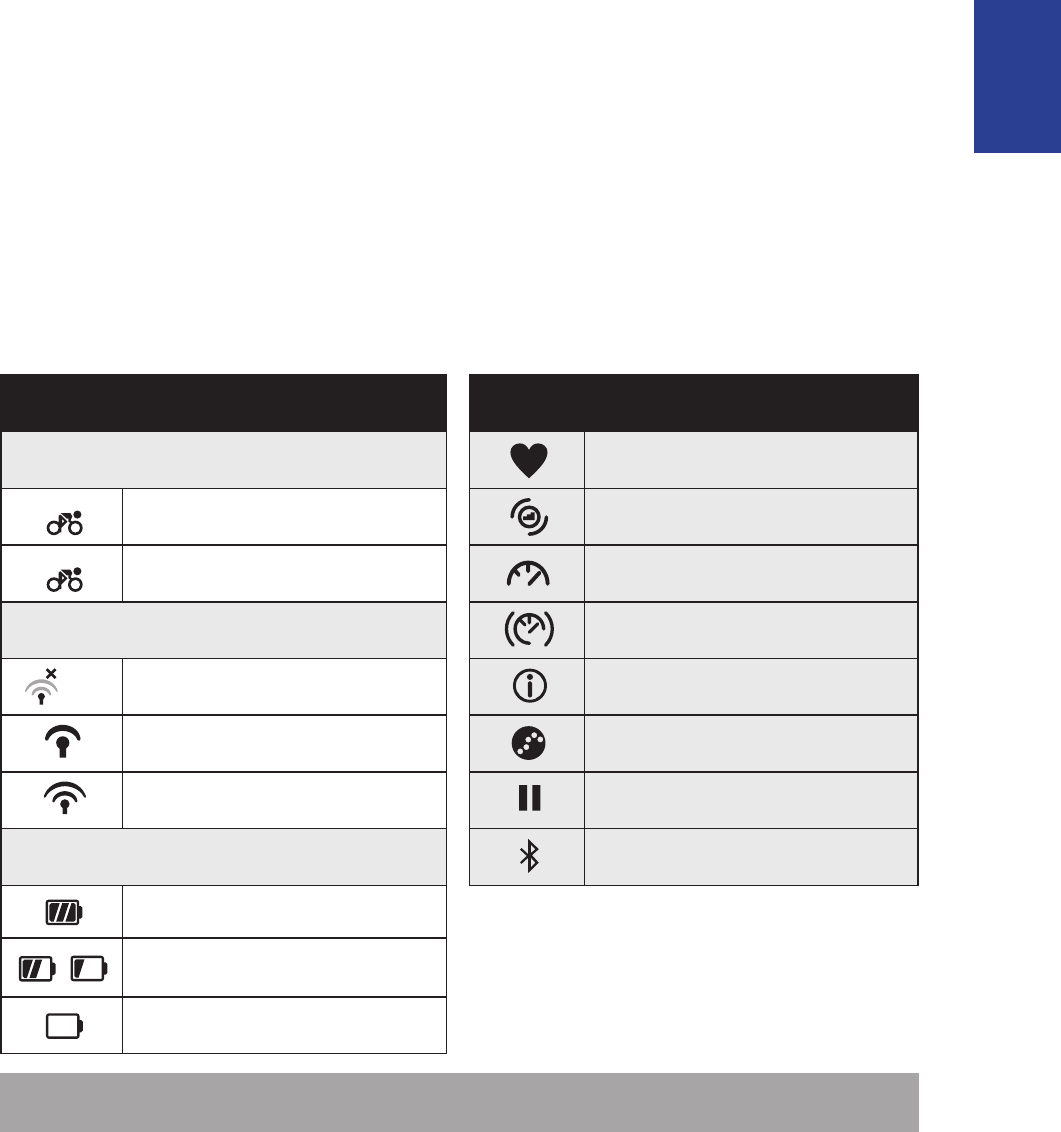
Status Icons
Icon Description Icon Description
Bike Type Heart Rate Sensor Active
1Bike 1 Cadence Sensor Active
2Bike 2 Speed Sensor Active
GPS Signal Status Dual Sensor Active
No signal (not xed Notication
Weak signal Log Record in Progress
Strong signal Recording is paused
Power Status Bluetooth function is enabled
Full battery
/Half battery
Low battery
NOTE: Only the active icons are displayed on the screen.
•Out-front Bike Mount
/- - -
reset
Getting Started6
Step 1: Charge your Rider 320
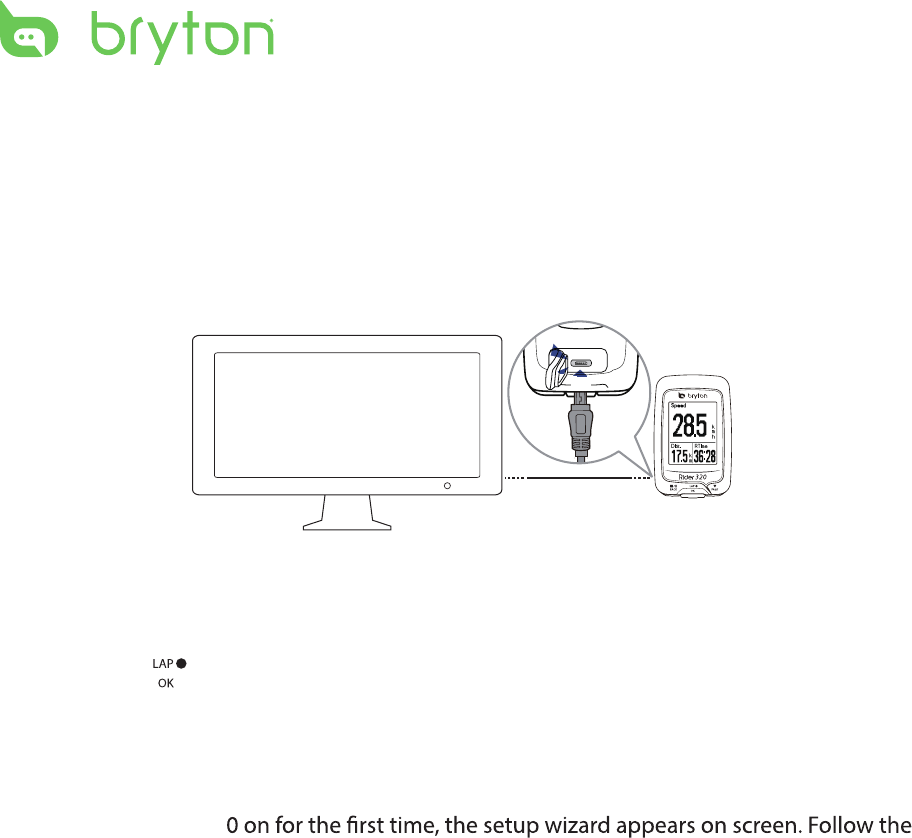
Connect Rider 320 to a PC to charge the battery for at least 4 hours.
Unplug the device when it is fully charged.
Step 2: Turn On Rider 320
Press and hold to turn on the device.
Step 3: Initial Setup
When turning Rider 32
instructions to complete setup.
1. Select the display language.
2. Read and accept the Safety Agreement.
* You may see a white screen when the battery is really low.
Keep the device plugged for several minutes, it will automatically turn-on after battery is properly charged.
ENGLISH
Getting Started 7
Step 4: Acquire Satellite Signals
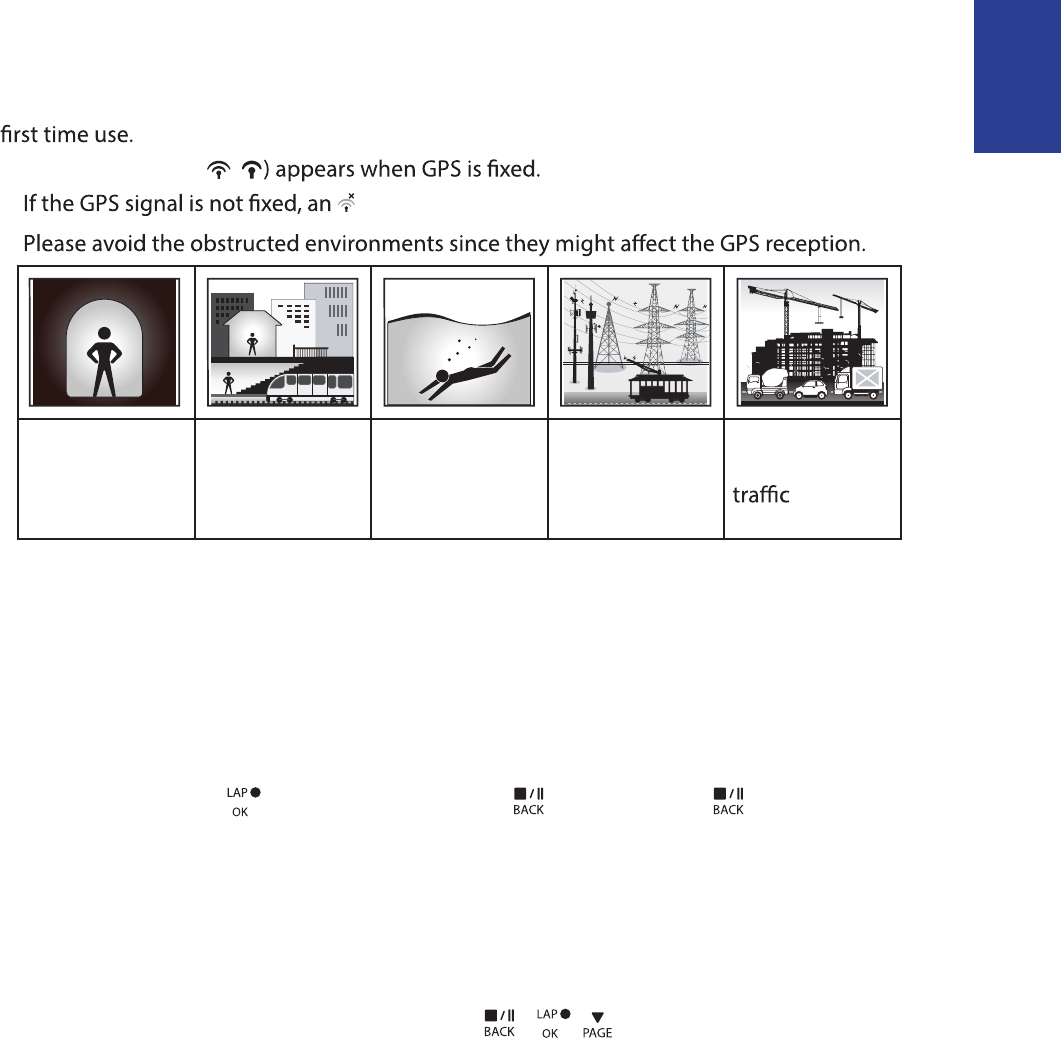
Once the Rider 320 is turned on, it will automatically search for satellite signals. It may take
30 to 60 seconds to acquire signals. Please make sure you acquire the satellite signal for the
The GPS signal icon ( /
• icon appears on the screen.
•
Tunnels Inside rooms,
building, or
underground
Under water High-voltage
wires or
television
towers
Construction
sites and heavy
Step 5: Ride Your Bike with Rider 320
Free ride:•
In meter view, measurement starts and stops automatically in sync with the movement
of the bicycle.
Start an exercise and record your data:•
In meter view, press to start recording, press to pause, press again to stop.
Start a training:•
Select Train from the menu list. Training can be based on time, distance, calories burn, or
the saved workouts.
Reset Rider 320
To reset the Rider 320, long press all three keys ( / / ) at the same time.

Getting Started
8
Share Your Records
Download Bryton Update Tool
Share Your Records
Download Bryton Update Tool
NOTE: Bryton Update Tool can notify you if a new software version or GPS data is available.
The newer GPS data can speed up the GPS acquisition. We highly recommend you to check
for updates every 1-2 weeks.
1. Go to http://www.brytonsport.com/help/start and download Bryton Update Tool.
2. Follow the on-screen instructions to install Bryton Update Tool.
Share Your Tracks to Brytonsport.com
1. Sign up/log in on Brytonsport.com
a. Go to http://www.brytonsport.com/help/start.
b. Register a new account or use your current Bryton account to log in.
NOTE: Bryton account is the email address used to register as a member of brytonsport.com.
2. Connect to PC
Turn on your Rider 320 and connect it to your computer by using USB cable.
3. Share Your Records
a. Go to http://www.brytonsport.com/help/landing. Click “Upload Files” button. Then,
click “Select from Files”.
b. Choose to save as “History”. Then, click “Select and Upload file”.
c. Select FIT files fom Bryton folder in the device.
Training9
Train & Test
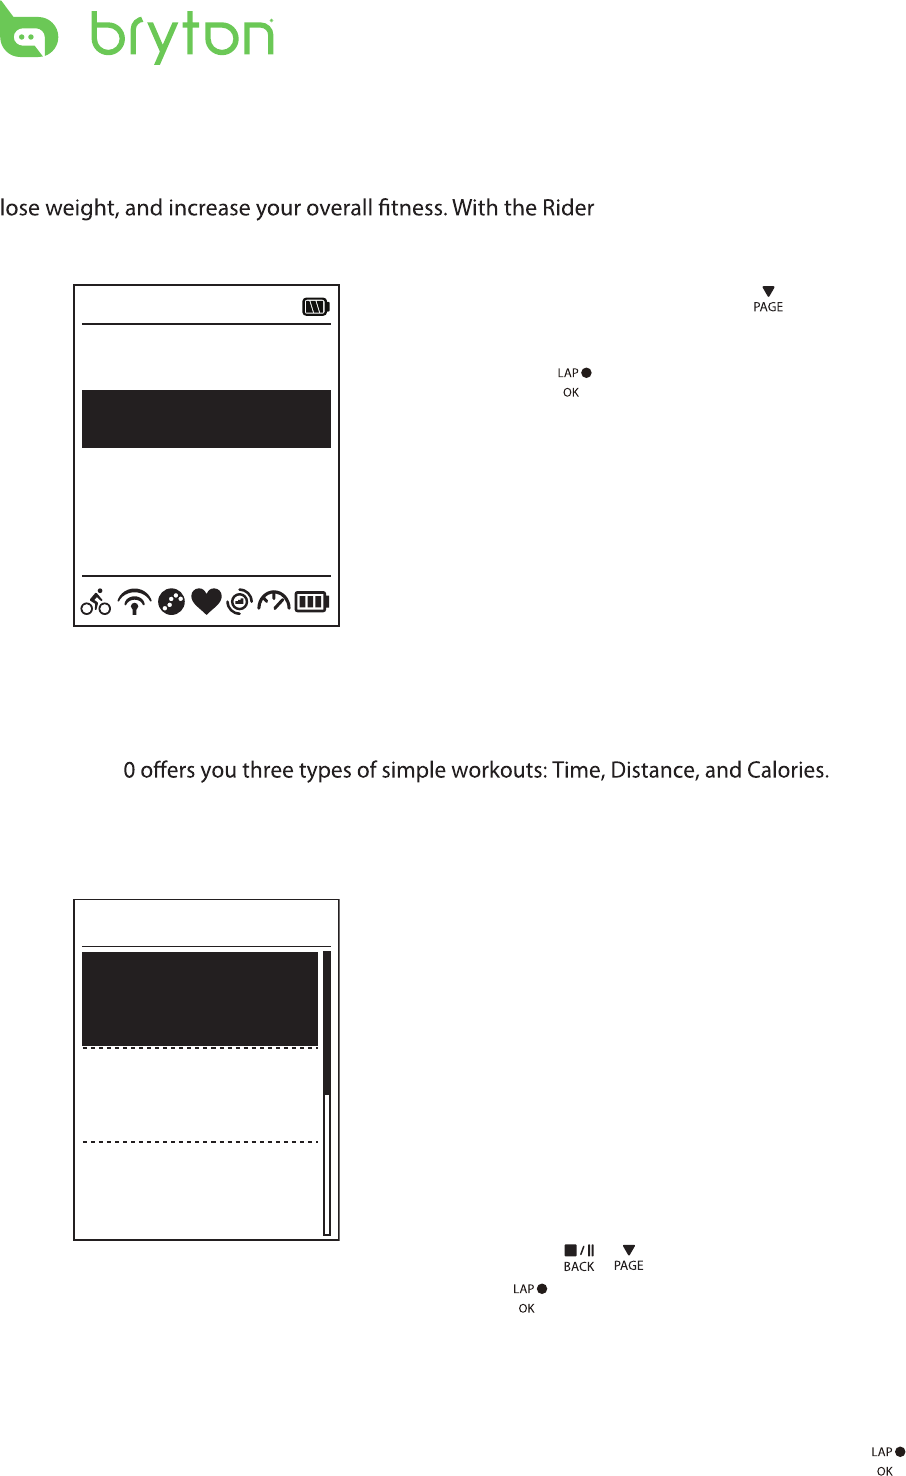
Bicycling is one of the best types of exercise for your body. It helps you to burn your calories,
320 Training feature, you can
set simple workouts and use the Rider 320 to track your training or workout progress.
1. In the main screen, press to select
Train&Test.
2. Press to enter the Training menu.
08:08 09/09
Cycling
Train & Test
View History
Settings
To Plan
You can set simple workouts by entering your time or distance goals.
The Rider 32
Simple
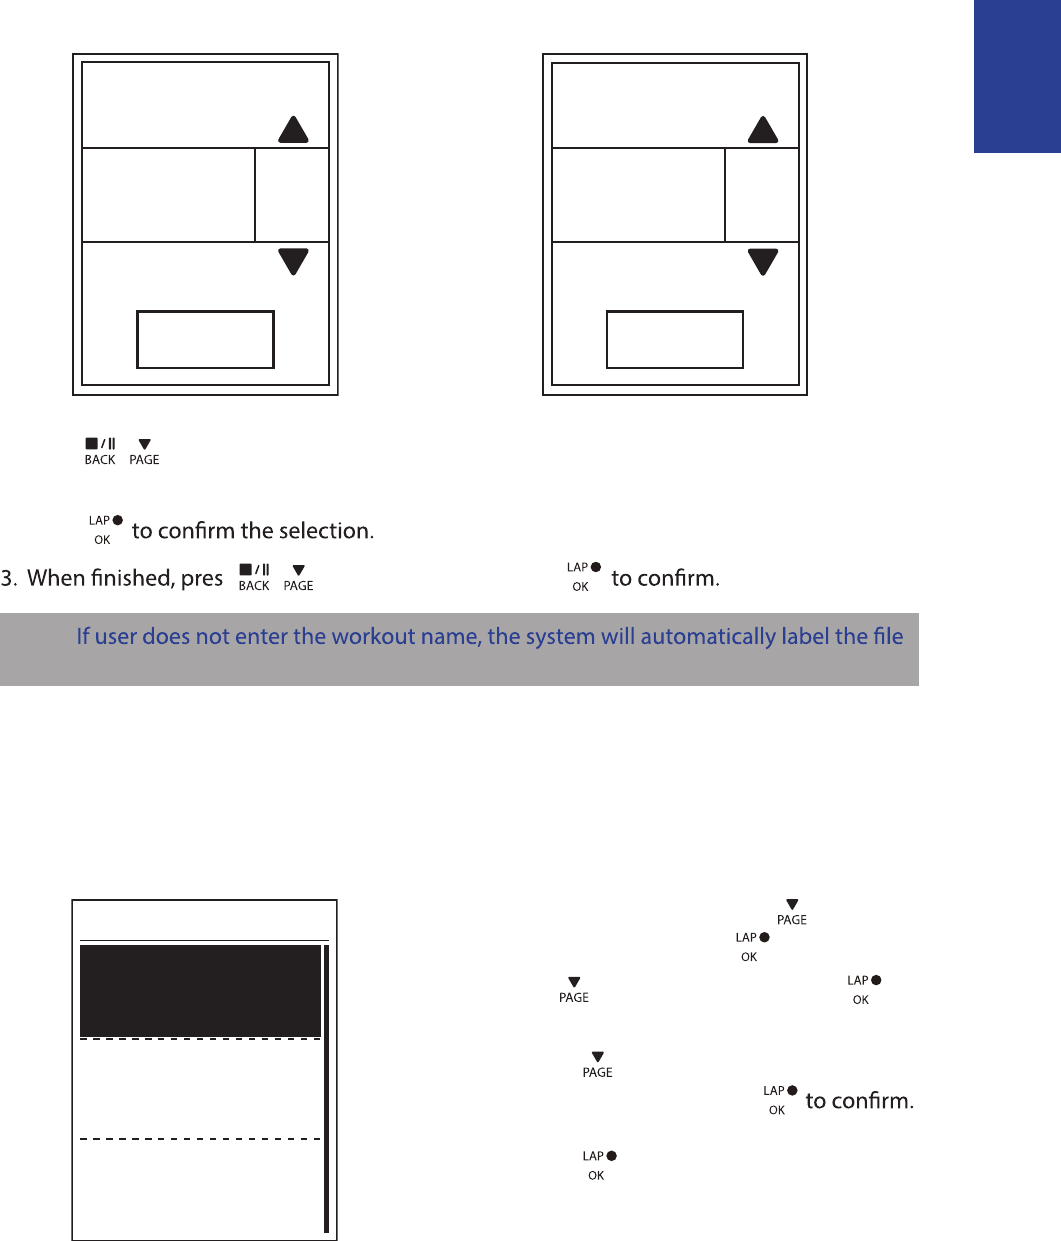
1. To set a simple workout, select
To Plan > Simple > Warm Up, Work ,
Cooldown.
2. Press / to set your time and press
3. Choose Save and enter the workout name
using the on-screen keyboard.
4. Go for a ride.
Go to Train & Test > My Workouts > View
and choose the save workout. Press
to start training and record log.
6’ 0” 159 ~171
10’ 94 ~111
10’ 94 ~111
Work
Warm Up
Cooldwn
Simple
• Warm Up :
Duration (manual, calorie,time, distance),
Target (HR, MHR, LTHR).
• Work :
Duration (calorie, time,distance), Target
(MHR%, LTHR%, HR, MHR, LTHR, OFF).
• Cooldown :
Duration (manual, calorie,time, distance),
Target (HR, MHR, LTHR).
to confirm.
ENGLISH
Training 10
Using the On-screen Keyboard
Name
Save
001 END
Name
Save
001 A
1. Press / to select the input character.
Select • DEL to erase the data.
2. Press
s / to select END and press
NOTE:
name according to the current date and time.
My Workout
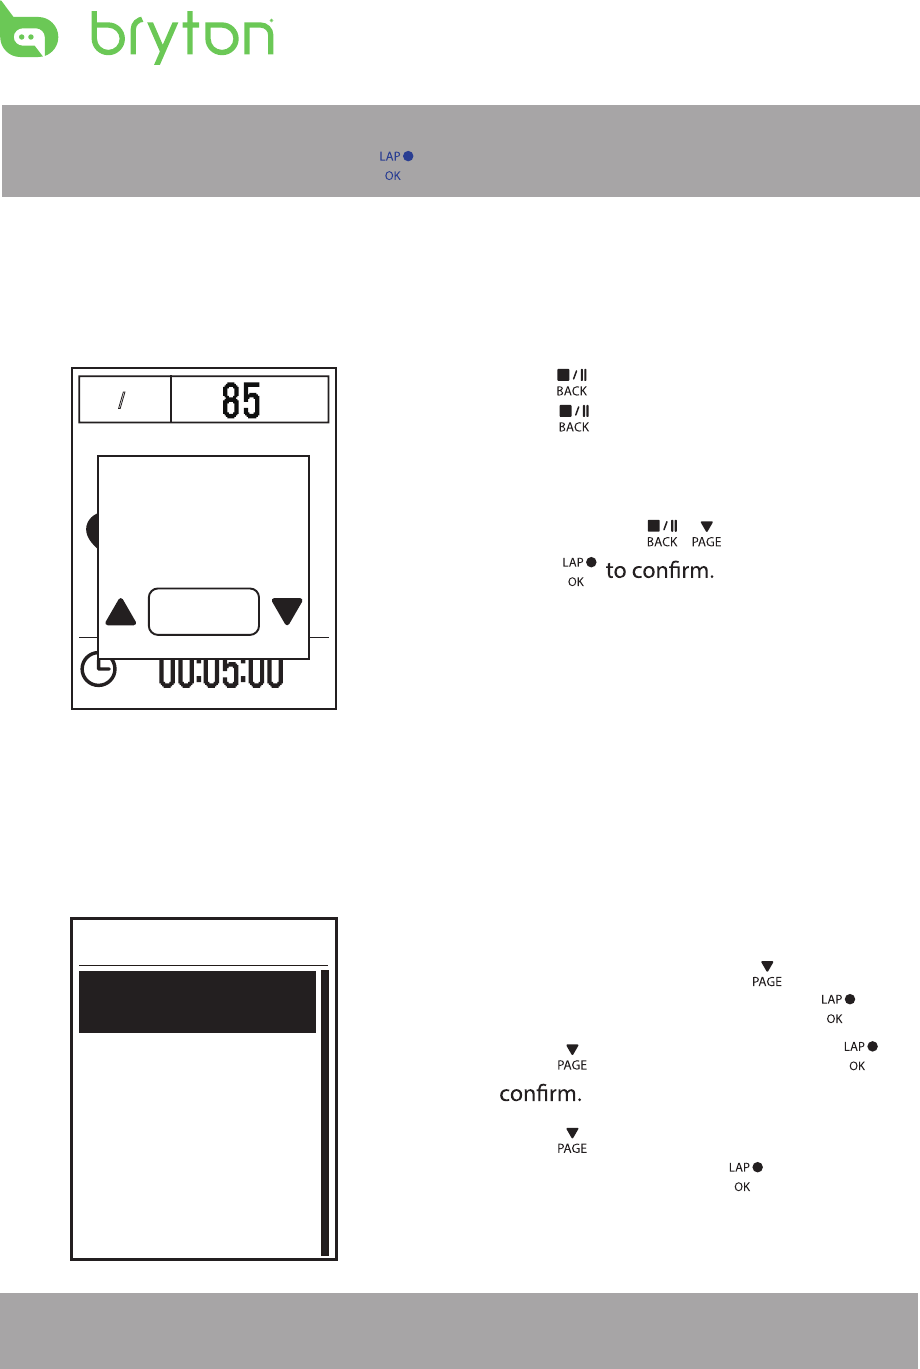
With My Workout feature, you can start your workout using the training plan that you have
saved in To Plan menu.
1. In the Training menu, press to select
My Workout and press .
2. Press to select View and press to
enter its submenu.
Press • to select your desired
training plan and press
Go for a ride.•
Press to start training and record
log.
3. To choose which workouts to delete,
select Delete.
4. To delete all workouts to delete, select
Delete All.
View
Delete
Delete All
My Workout
Training11
NOTE: If the selected workout includes several interval settings, a workout details appear
on the screen. Select Start and press to proceed with the workout.
Stop Training
You can stop the current training after you have reached your goal or when you decide to
end the current training.
/
1 1 / 1 1 r
p
m
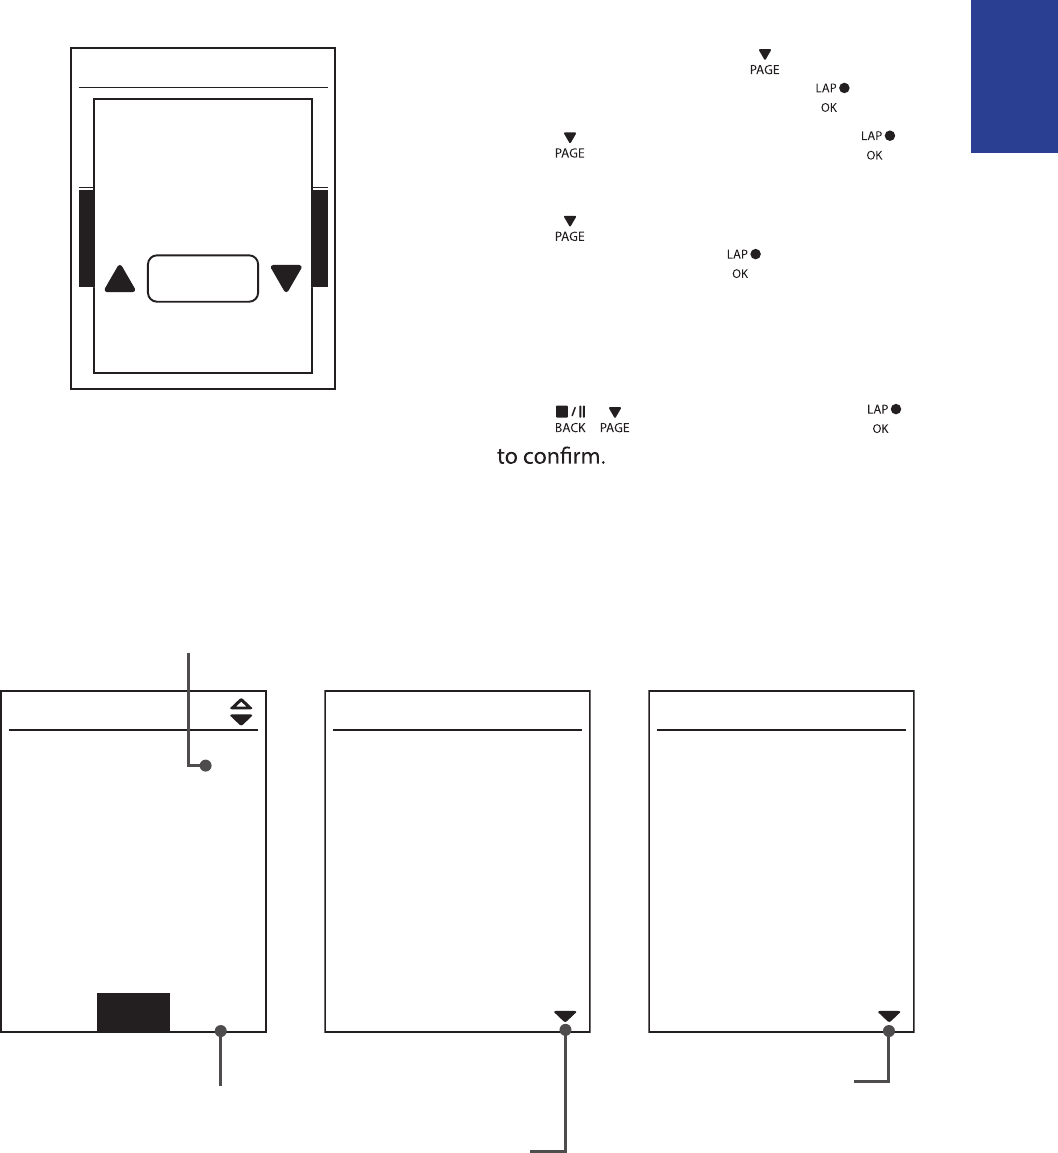
1. Press to pause the recording and
press again to stop the recording.
2. A “Do you want to stop?” message
appears on the screen. To stop the current
training, press / to select Yes and
press
View Exercise/Training Record
Use View History to view or delete your exercise/training history.
To view your history:
1. In the main screen, press to select
View History > View and press .
2. Press to select View and press to
3. Press to select a training history
from the list and press to view your
history.
NOTE: You can also upload your history to brytonsport.com to keep track of all your ride
data.
Summary
View
Delete All
Delete
History
Do you want
to stop?
Yes
ENGLISH
Training 12
To delete your history:
1. In the main screen, press to select
View History > View and press .
2. Press to select Delete and press
to enter the history list.
3. Press to select a training history
from the list and press to delete the
selected history.
4. A “Do you want to delete?” message
appears on the screen. To delete the data,
press / to select Yes and press
Delete
Do you want to delete?
Yes
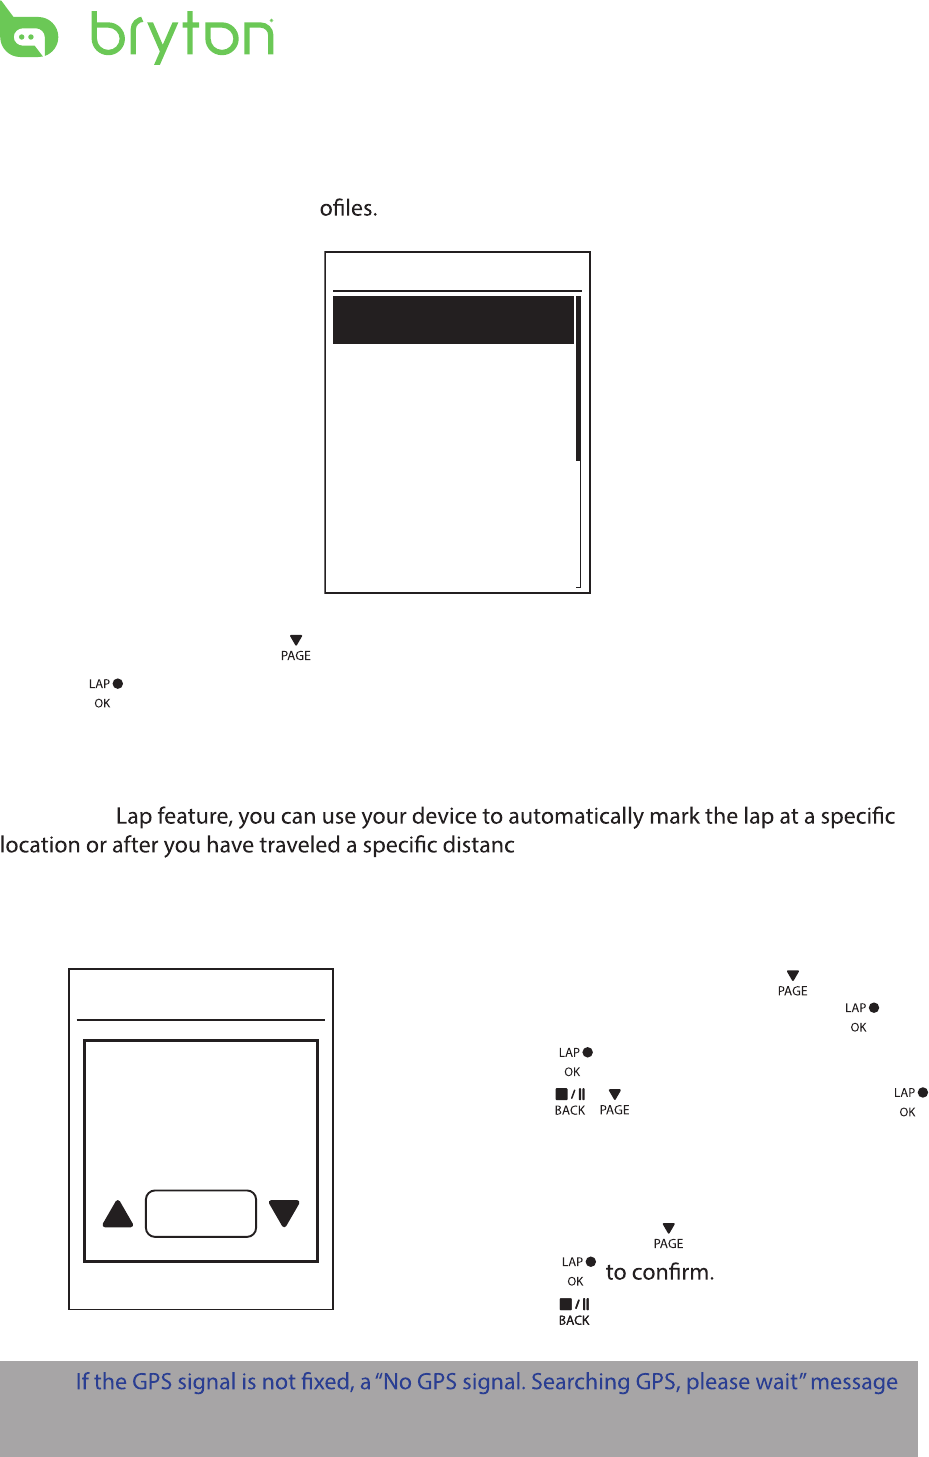
History Flow
09/19 21:44
00:03:08 trip
3.69 km
39 kcal
04 laps
1/20
More
00:02:25 ride
AVG MAX
75.6 kmh
39 bpm
19 rpm
75.6
39
19
Lap 01 00:49
0.25 km
81.4 kmh
13 kcal
0bpm
0rpm
trip = Trip Time
The arrow appears only
when there is lap in this
record.
Record#/Total records The arrow appears only
when there are more than
1 lap.
Settings13
Settings
With the Settings feature, you can customize exercises settings, altitude, general settings,
sensor settings, bike and user pr
Exercises
Altitude
General
Sensors
Settings
1. In the main screen, press to select Settings.
2. Press to enter the Settings menu.
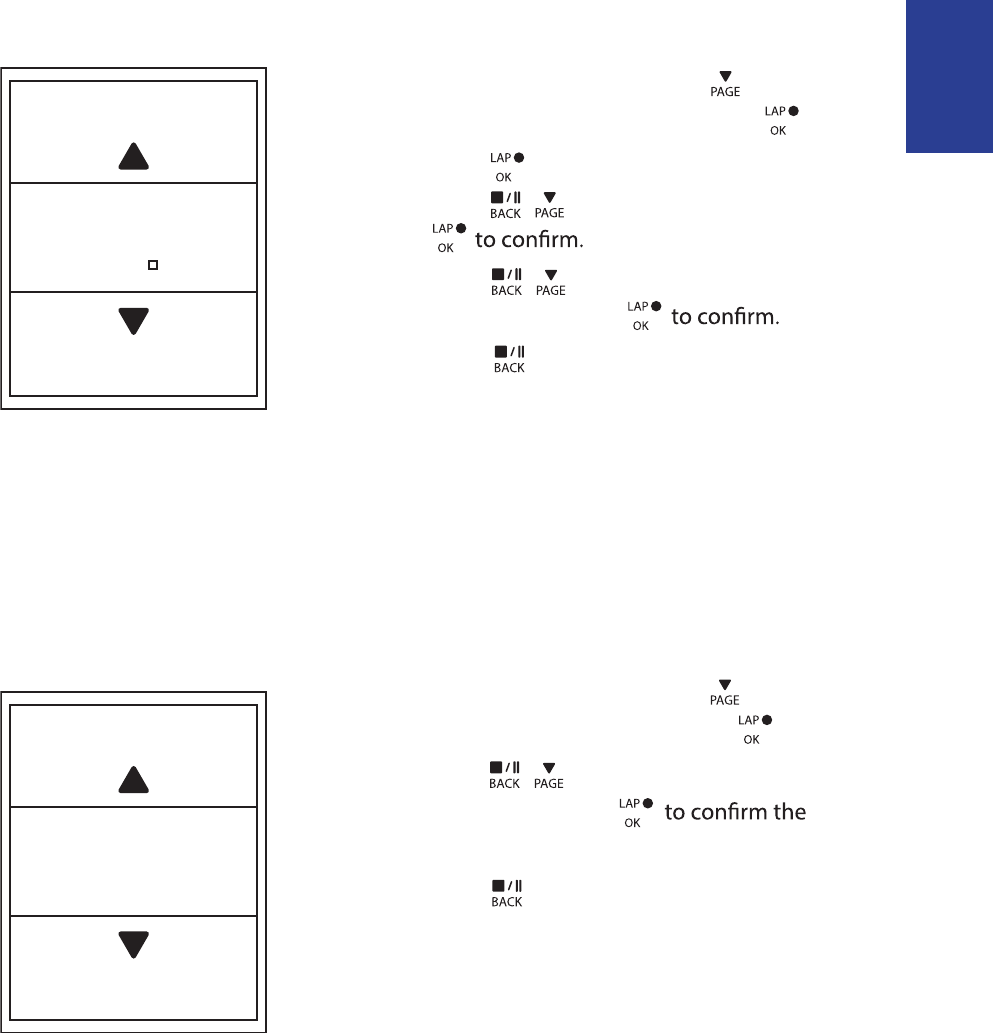
Smart Lap
With Smart
e.
Lap by Location
By Location
Use current
location as
lap location?
Yes
1. In the Settings menu, press to select
Exercises> Smart Lap and press .
2. Press to enter the editing menu.
3. A “Use current location as lap location?”
message appears on the screen. To save
the data, press to select Yes and
press
4. Press to exit this menu.
NOTE:
appears on the screen. Check if the GPS is on and make sure you step outside to acquire
the signal.
/
Press to select and press
Location
to confirm.
ENGLISH
Settings 14
Altitude
You can set the altitude setting for the current location and four other locations.
Current Altitude
1. In the Settings menu, press to select
Altitude > Altitude and press .
2. Press / to adjust the desired
altitude and press
setting.
3. Press to exit this menu.
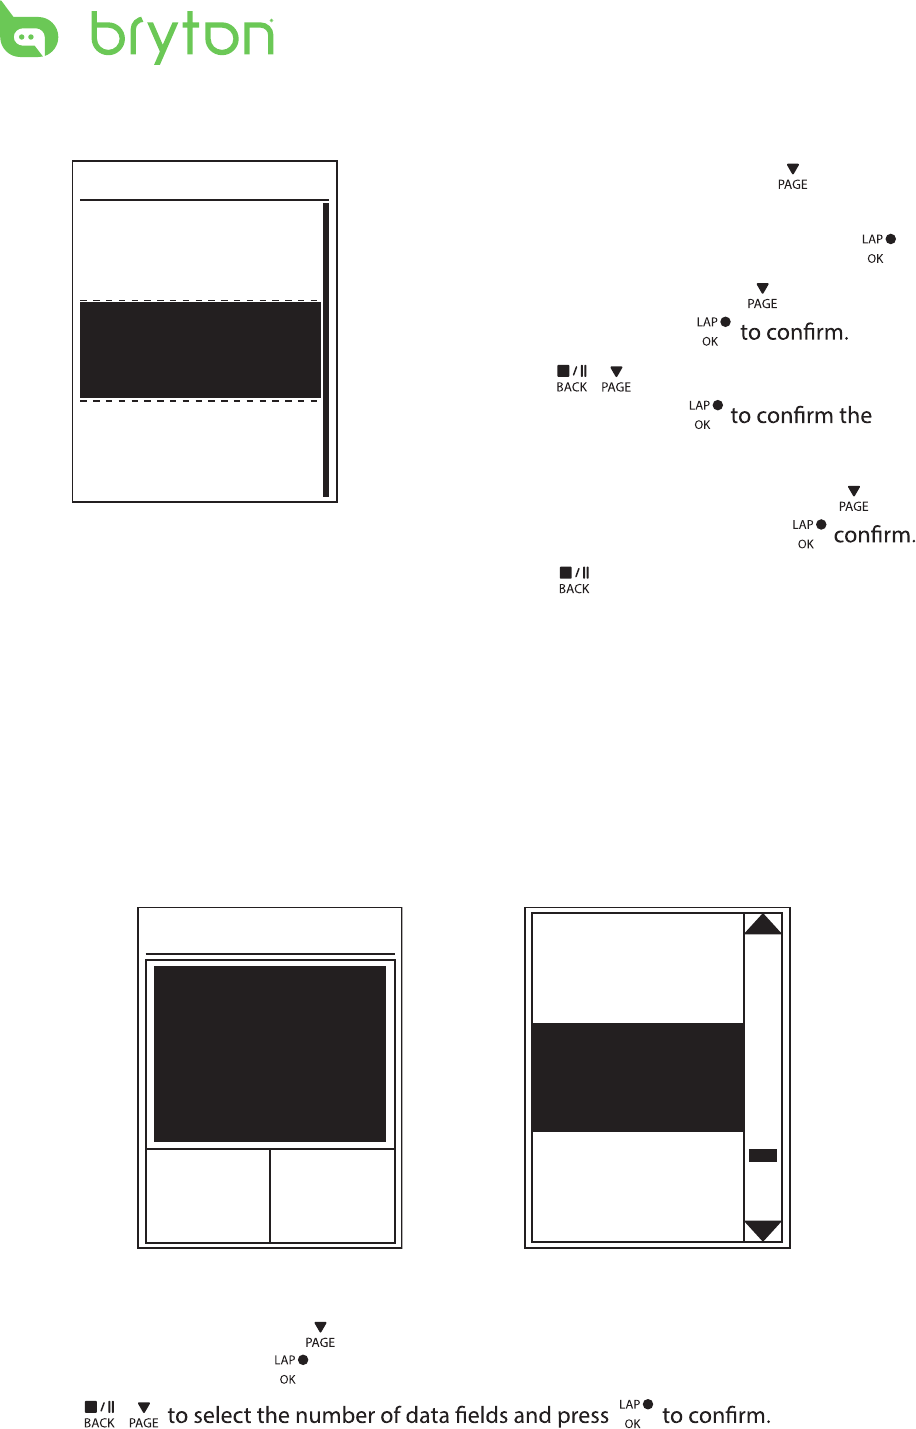
Lap by Distance
Altitude
M
31
By Distance
KM
10.0
1. In the Settings menu, press to select
Exercise > Smart Lap and press .
2. Press to enter the editing menu.
Press
3. Press / to select your desired
distance and press
4. Press to exit this menu.
/ to select and press
Distance
Ride Time
Current
Time
Trip Time
Current
Time
Current
Speed
Total
Distance
Data Page
Settings15
Other Location Altitude
1. In the Settings menu, press to select
Altitude > Location 1, Location 2,
Location 3, or Location 4 and press .
2. To set the altitude, press to select
Altitude and press
3. Press / to adjust the desired
altitude and press
setting.
4. To calibrate the set altitude, press to
select Calibrate and press to
5. Press to exit this menu.
Location 1
Altitude
10m
Calibrate
Data Page
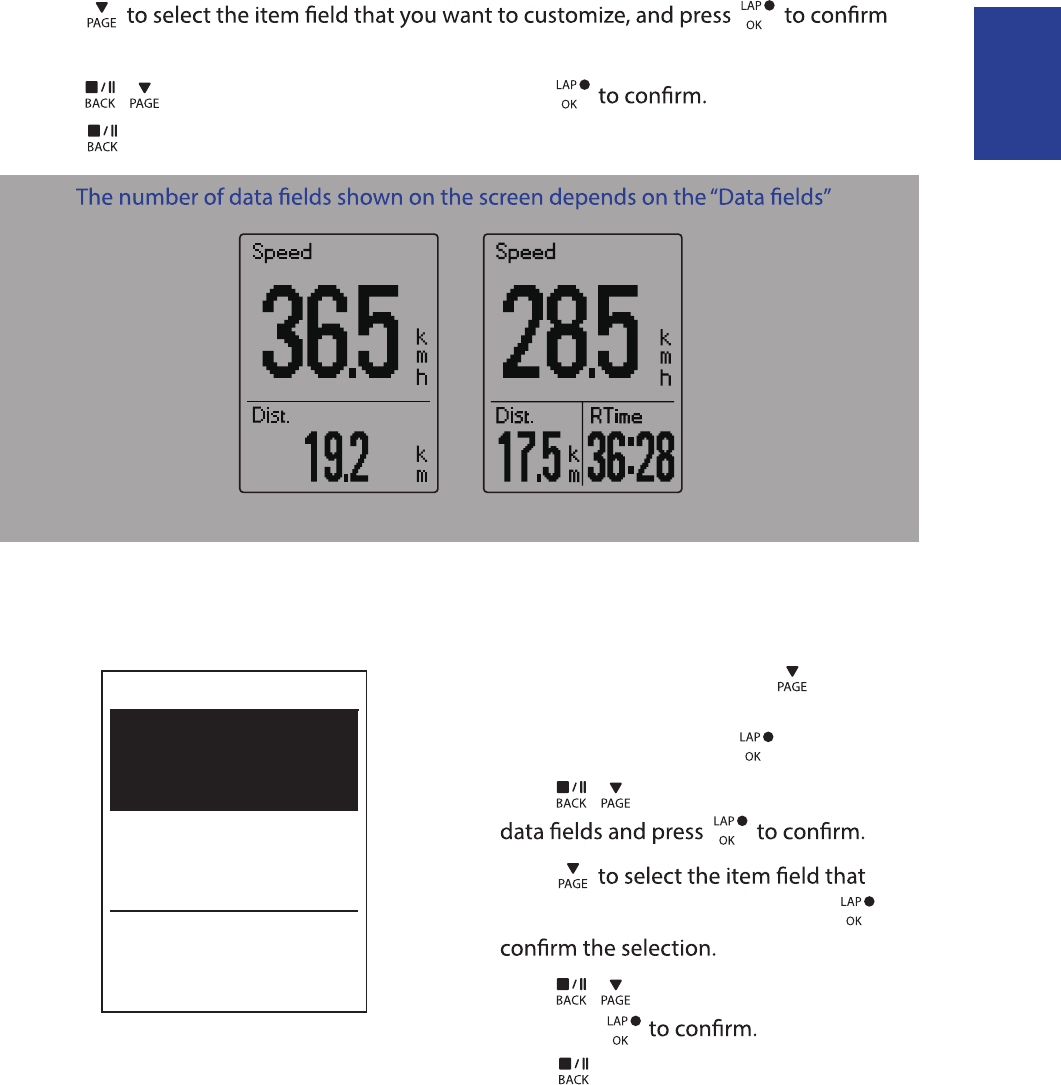
You can set the display settings for the Meter, Lap, and Auto Switch. You can also set the
Auto Switch interval setting.
Meter Display
3-grid display Item selection
1. In the Settings menu, press to select Exercises > Data Page > Data Page 1, Data Page 2
and press .
2. Press /
or
Data Page 3
ENGLISH
Settings 16
3. Press
the selection.
4. Press / to select the desired setting and press
5. Press to exit this menu.
NOTE:
selection.
2-grid display 3-grid display
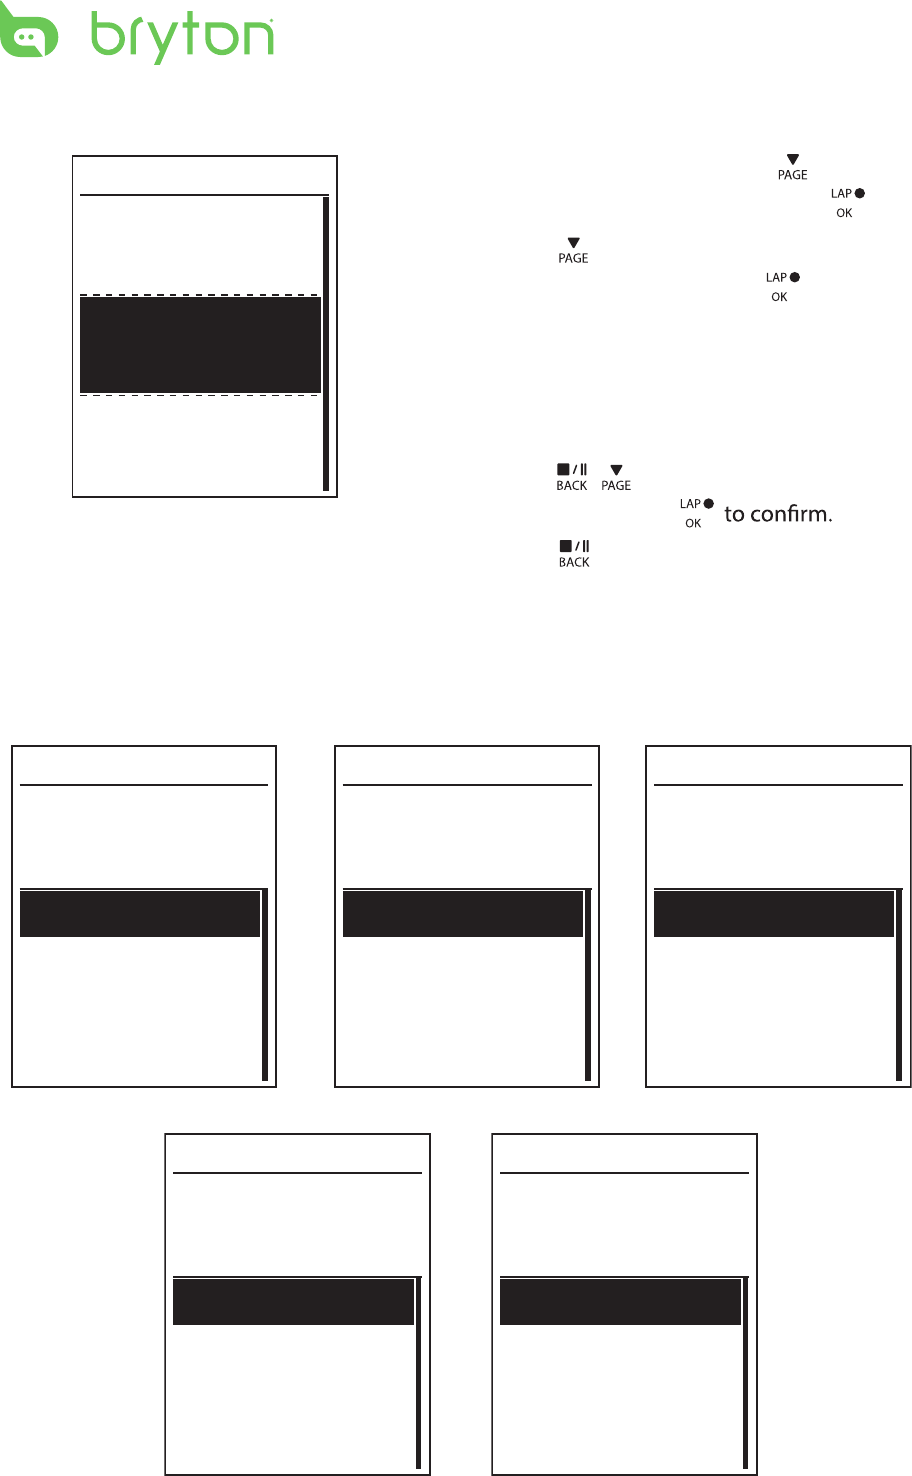
Lap Display
1. In the Settings menu, press to select
Exercises > Data Page > Data Page 1 or
Data Page 2 and press .
2. Press / to select the number of
3. Press
you want to customize, and press to
4. Press / to select the desired setting
and press
5. Press to exit this menu.
Cycle Lap
Data Page 1
On
On
Data Page 2
Settings17
Auto Scroll
1. In the Settings menu, press to select
General> Auto scroll and press .
2. Press to select the setting that you
want to change and press to enter its
submenu.
Auto scroll: enable/disable the auto •
switch.
Interval: set the interval time.•
3. Press / to adjust the desired
setting and press
4. Press to exit this menu.
Auto scroll
Auto scroll
On
5 sec
Interval
Sensors
You can customize the respective sensor settings such as enable/disable the function or
rescan the sensor for the device.
Heart Rate
Turn Off
Status: active
ID XXXXXXXXX
Rescan
Heart Rate
Speed
Turn Off
Status: active
ID XXXXXXXXX
Rescan
Cadence
Turn Off
Status: active
ID XXXXXXXXX
Rescan
Speed Cadence
Power meter
Turn Off
Status: active
ID XXXXXXXXX
Rescan
Power meter
Speed/CAD
Turn Off
Status: active
ID XXXXXXXXX
Rescan
Speed/Cadence
ENGLISH
Settings 18
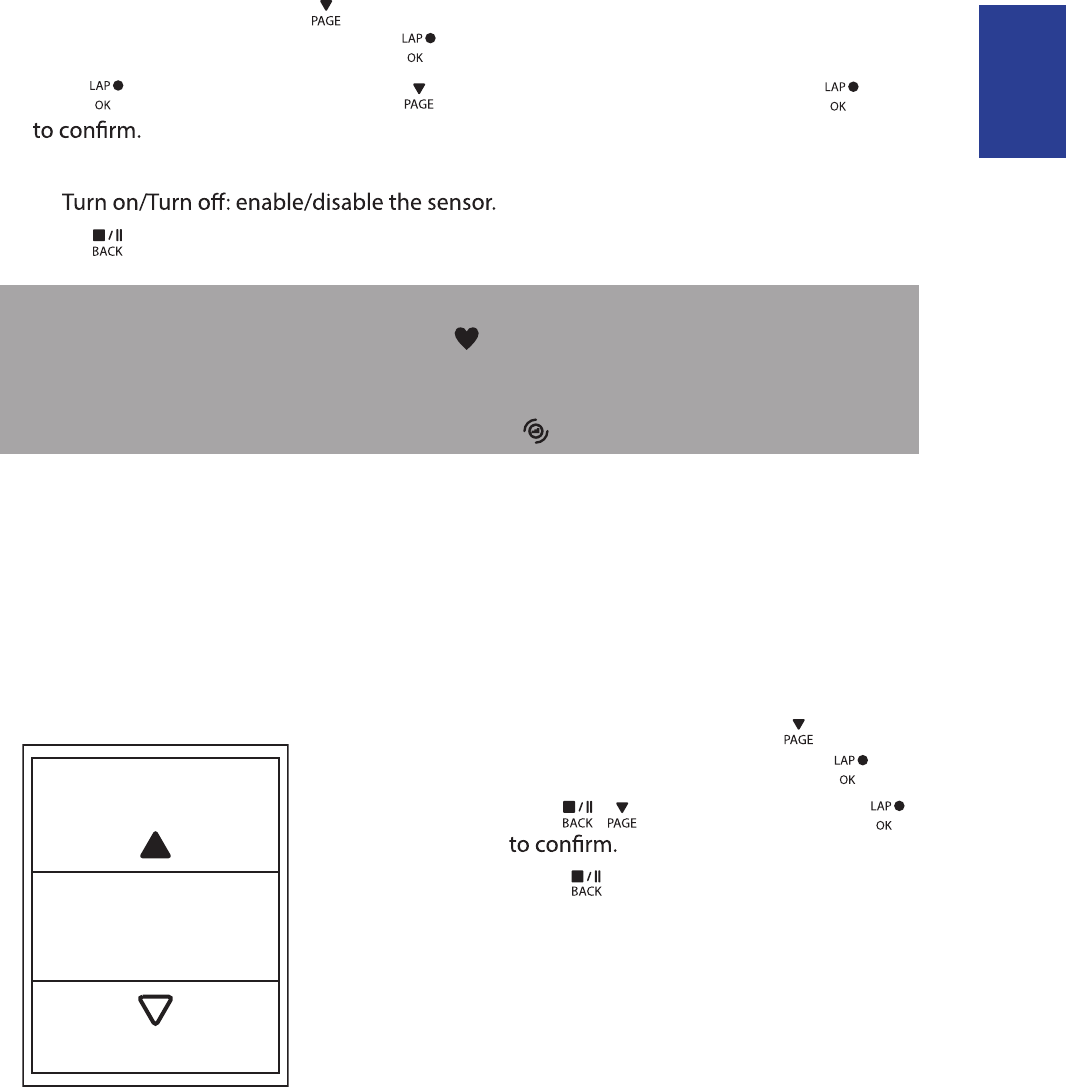
1. In the Settings menu, press to select Sensors > Heart Rate, Speed, Cadence, or
Speed/CAD Power Meter and press .
2. Press to have more options. Press to select the desired setting and press
Rescan: rescan to detect the sensor. •
•
3. Press to exit this menu.
NOTE:
When the heart rate monitor is paired, the • heart rate icon appears on the main screen.
While pairing your speed/cadence sensor/the heart rate belt and power meter, please
make sure there
is no other cadence/speed sensor
/power meter within 5 m.
When the
cadence sensor is paired, the
cadence sensor icon appears on the main screen.
Bluetooth
Enable Bluetooth
Before pairing Rider 320 with your bluetooth enabled mobile phone, make sure the
bluetooth function of your mobile phone and Rider 320 is turned on.
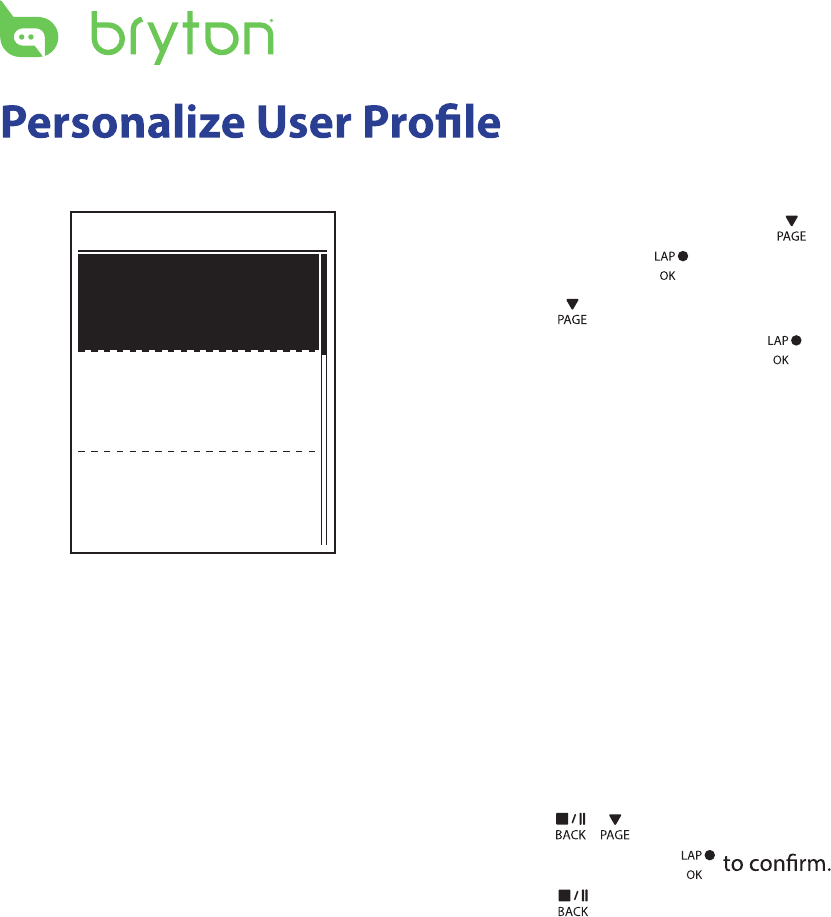
1. In the Settings menu, press to select
General > Bluetooth and press .
2. Press / to select On and press
3. Press to exit this menu.
Enable
On
,
Birthday : set your Birthday
Settings19
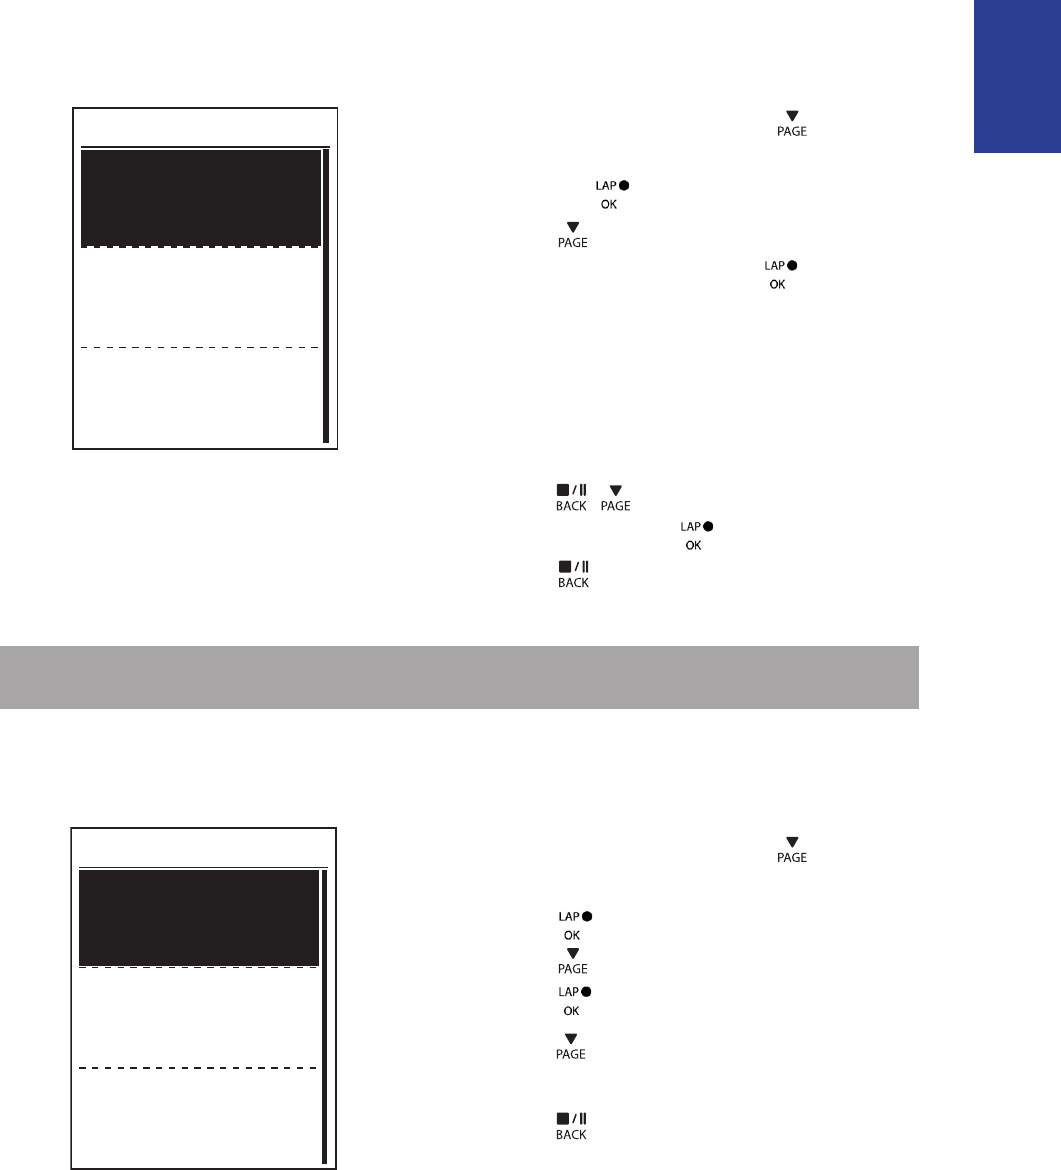
You can change your personal information.
User
Gender
Birthday
Male
1982/01/01
Height
177 cm
1. In the Settings menu, press to select
User and press .
2. Press to select the setting that you
want to change and press to enter its
submenu.
Gender: select your gender.•
•
Height: set your height. •
Weight: set your weight.•
Max HR: set your maximum heart rate. •
LTHR: set your lactate threshold heart •
rate.
FTP: set your functional threshold •
power.
MAP: set your maximum aerobic •
power.
3. Press / to adjust the desired
setting and press
4. Press to exit this menu.
ENGLISH
Settings
20
Personalize Bike Prole
You can customize and view your bicycle(s) prole.
Bike 1
Bike Type
Weight
Folding Bike
13 kg
Wheel
1700 mm
1. In the Settings menu, press to select
Profile > Bike Profile > Bike 1 or Bike 2
2. Press to select the setting that you
want to change and press to enter its
submenu.
Bike Type: select the bike type.•
Weight: set the bike weight.•
Wheel: set the bike wheel size.•
Activate: select to activate the bike.•
3. Press / to adjust the desired
setting and press to conrm.
4. Press to exit this menu.
NOTE: For details on wheel size, see “Wheel Size and Circumference” on page 30.
View Bike Prole
Bike 1
ODO
Ride Time
1033 km
89:23:28
Alt. Gain
1700 mm
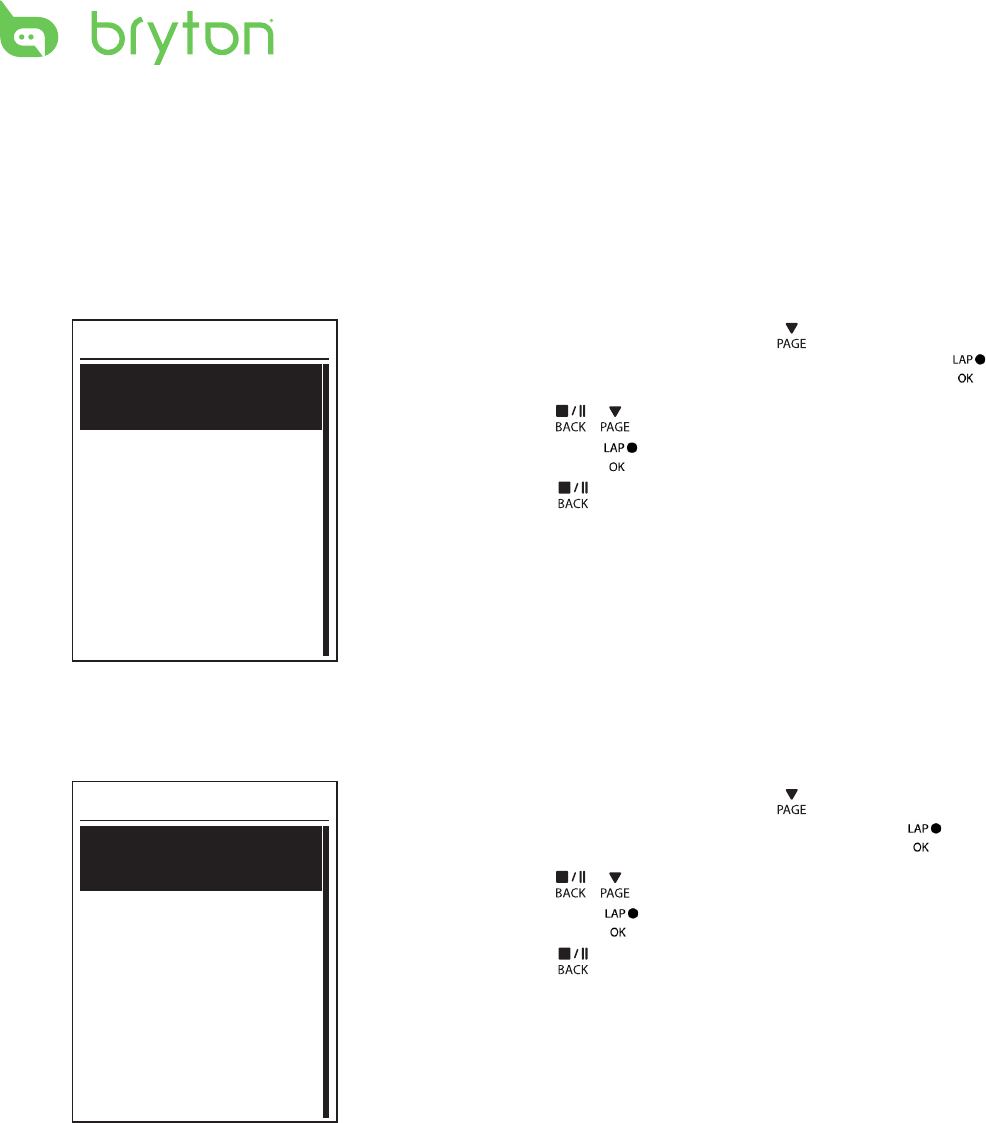
1. In the Settings menu, press to select
Profile > Bike Profile> Overview and
press .
2. Press to select the desired bike and
press to conrm.
3. Press to view more data of the
selected bike.
4. Press to exit this menu.
and press .
Settings
21
Change System Settings
You can customize the device system settings such as backlight o, key tone, sound,
time/unit , on-screen display language.
Backlight O
Back light
Auto
Never
1 min
10 min
1. In the Settings menu, press to select
General > System > Backlight O and press .
2. Press / to select the desired setting
and press to conrm.
3. Press to exit this menu.
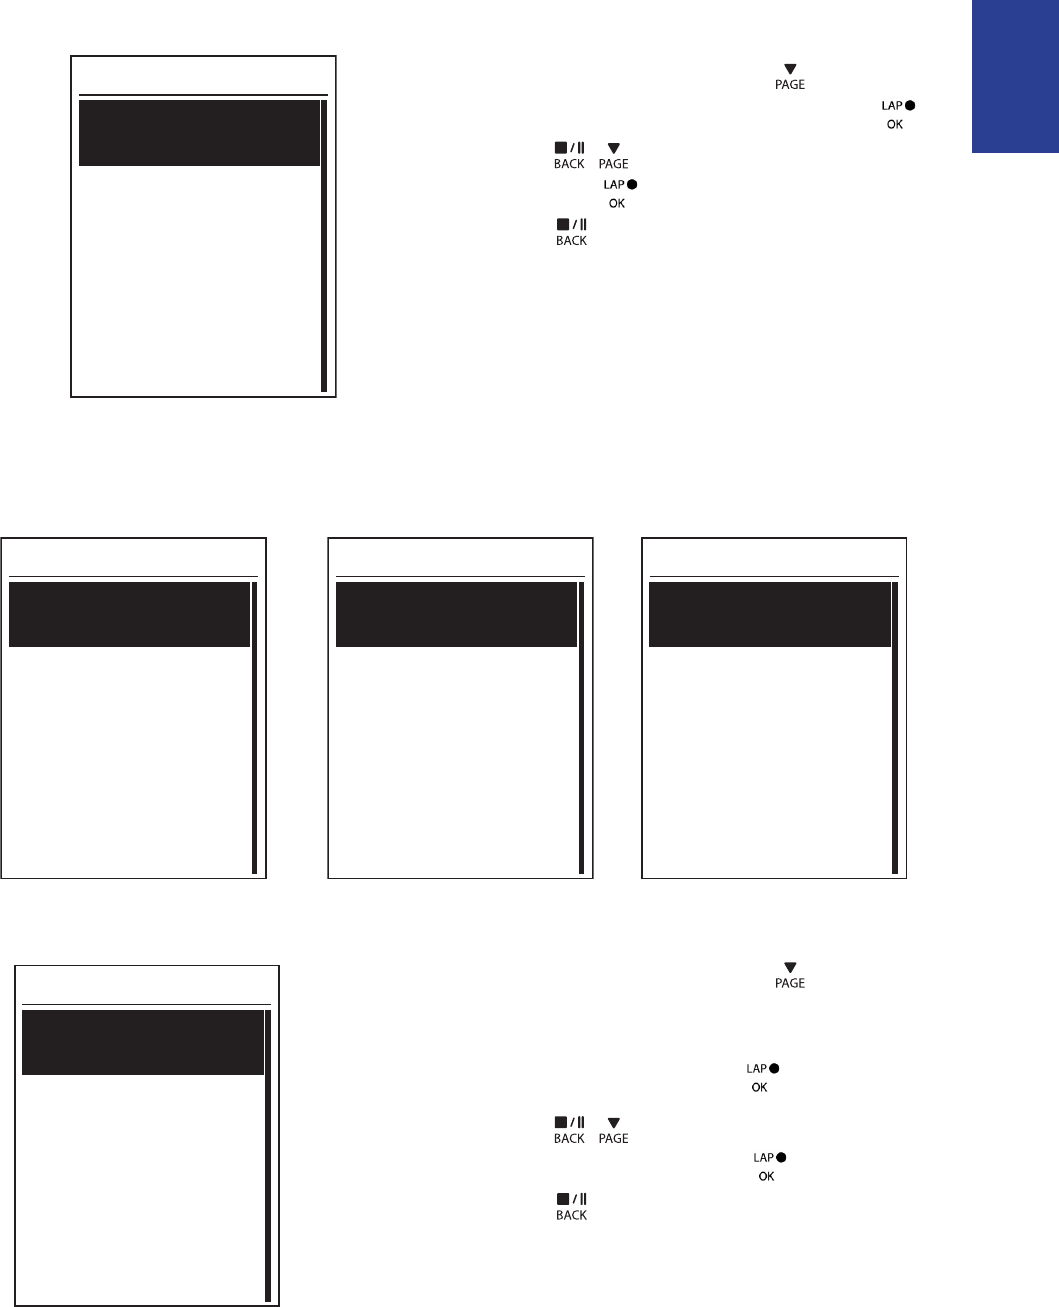
Key Tone
Key Tone
On
Off
1. In the Settings menu, press to select
General > System > Key Tone and press .
2. Press / to select the desired setting
and press to conrm.
3. Press to exit this menu.
ENGLISH
Settings
22
Sound
6RXQG
On
Off
1. In the Settings menu, press to select
General > System > Sound and press .
2. Press / to select the desired setting
and press to conrm.
3. Press to exit this menu.
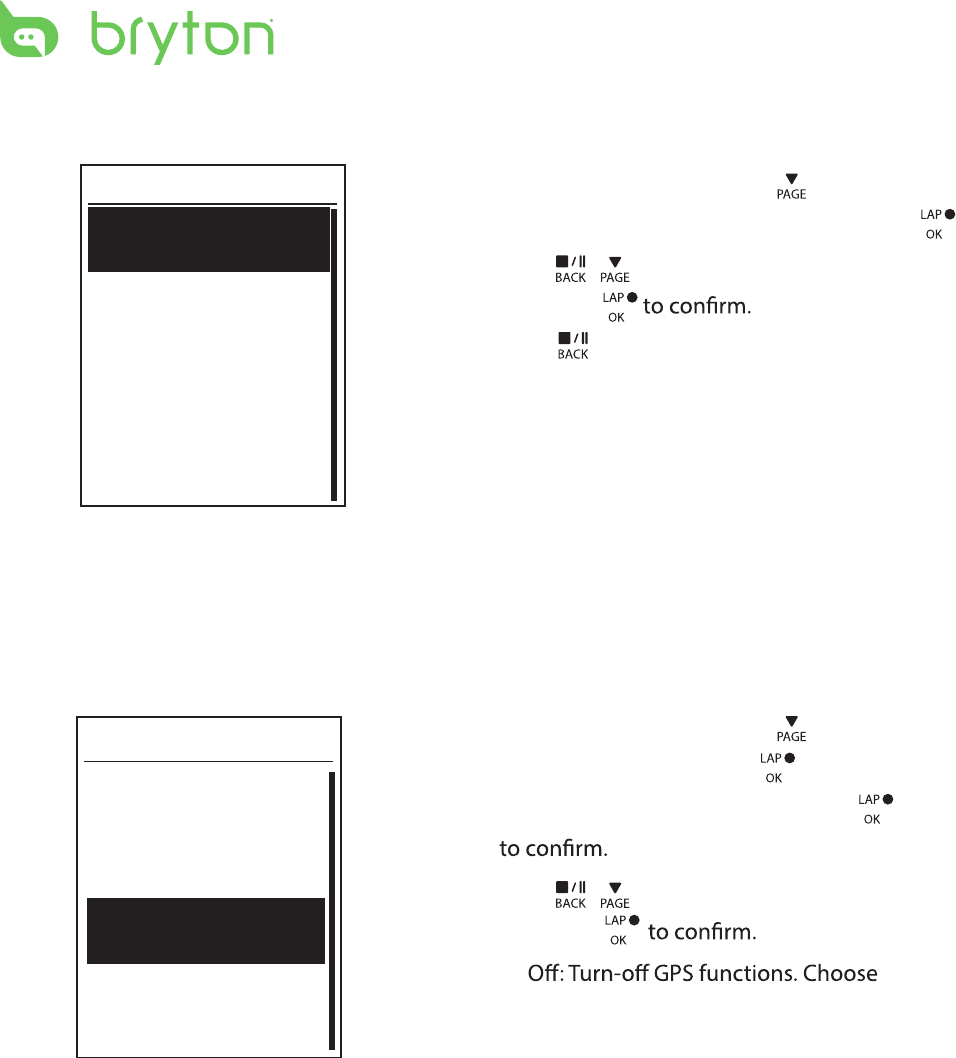
Time/Unit
Dlight Save
+0:00
+1:00
Daylight Save
Date
mmddyyyy
yyyymmdd
ddmmyyyy
Date format
Time
12hr
24hr
Time format
Unit
.0.*
0,/%
Unit
1. In the Settings menu, press to select
General > System > Time/Unit > Daylight
Save, Date format , Time format, Unit
Temperature and press .
2. Press / to select the desired
setting/format and press to conrm.
3. Press to exit this menu.
, or
Settings23
Language
Language
English
Deutsch
Français
1. In the Settings menu, press to select
General > System > Language and press .
2. Press / to select the desired setting
and press
3. Press to exit this menu.
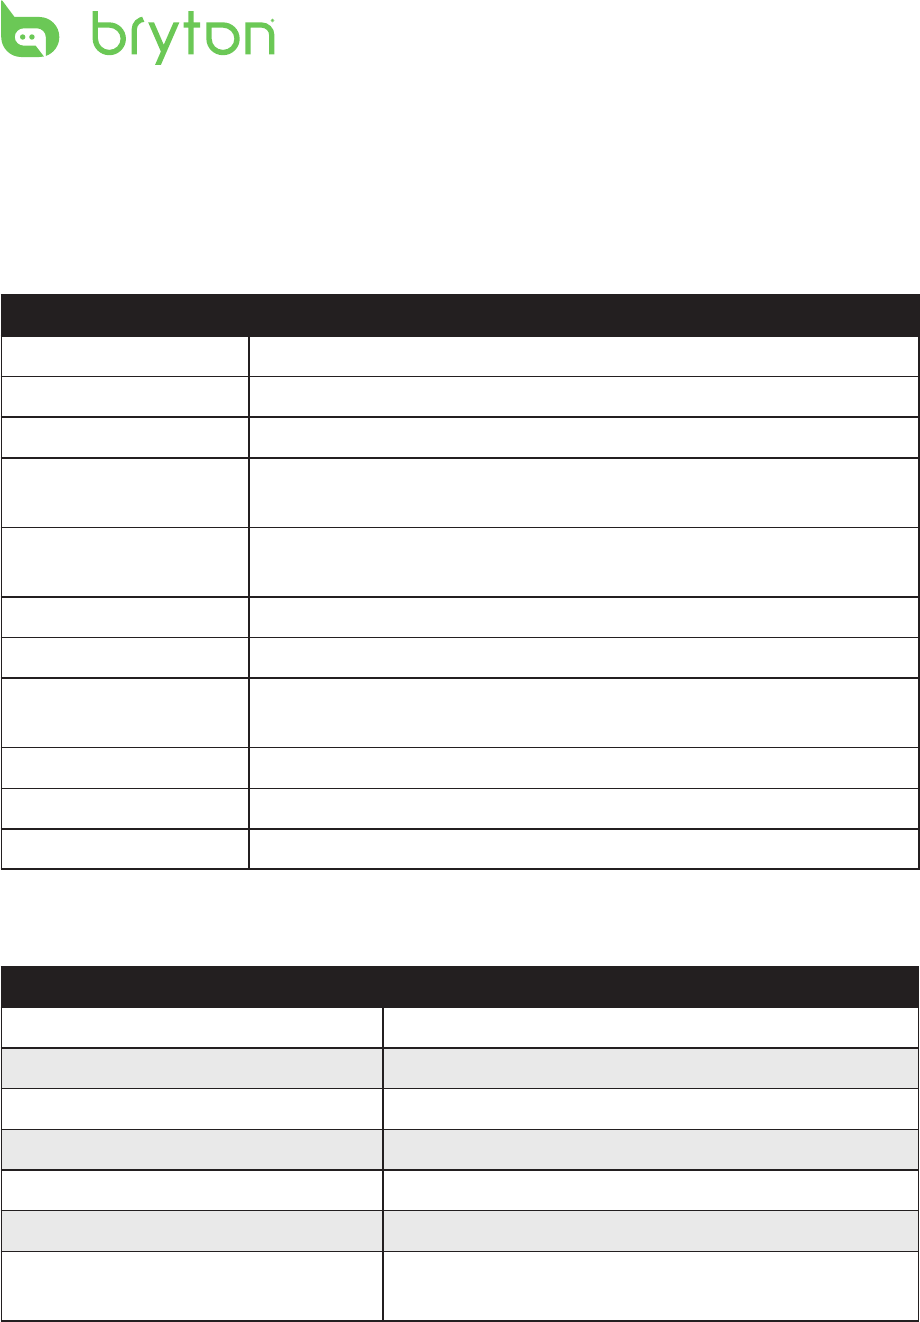
View GPS Status
You can view the GPS signal information that your device is currently receiving.
1. In the Settings menu, press to select
General > GPS and press .
2. To set the signal search mode, press
3. Press / to select the desired setting
and press
•
this to save power when GPS signal is
not available, or when GPS information
is not required (such as indoor use).
Full Power: maximum position and •
speed accuracy, consumes more
power.
PowerSaving: Achieves longer battery •
life when used in good GPS signal
condition, but less accurate.
GPS
PowerSave
Full Power
Off

ENGLISH
Settings
24
View Software Version
You can view your device current software version.
1. In the Settings menu, press to select General > About.
2. Press to conrm.
The current software version is displayed on the screen.
3. Press to exit this menu.
Appendix
25
Appendix
Specications
Rider 320
Item Description
Display 1.8" FSTN positive transective dot-matrix LCD
Physical Size 45.1 x 71.9 x 17.3 mm
Weight 54g
Operating
Temperature
-10°C ~ 50°C
Battery Charging
Temperature
0°C ~ 40°C
Battery Li polymer rechargeable battery
Battery Life 20 hours with open sky
GPS
Integrated high-sensitivity GPS receiver with embedded an
tenna
RF Transceiver
2.4GMHz receiver with embedded antenna to support ANT+
heart rate, speed sensor, cadence sensor
Water Resistant IPX7 waterproof rating
Cadence Sensor
Item Description
Physical size
33.9 x 13.5 x 39 mm
Weight 14 g
Water Resistance IPX7
Transmission range 5 m
Battery life 1 hour per day for 16 months
Operating temperature -10oC ~ 60oC
Radio frequency/protocol 2.4GHz / Dynastream ANT+ Sport wireless
communications protocol
Accuracy may be degraded by poor sensor contact, electrical interference, and receiver
distance from the transmitter.
BLE Smart Bluetooth smart wireless technology with embedded antenna
ENGLISH
Appendix
26
Heart Rate Monitor
Item Description
Physical size 67~100 x 26 x 15 mm
Weight 14 g (sensor) / 35g (strap)
Water Resistance 20 m
Transmission range 5 m
Battery life 1 hour per day for 24 months
Operating temperature 5oC ~ 40oC
Radio frequency/protocol 2.4GHz / Dynastream ANT+ Sport wireless
communications protocol
Accuracy may be degraded by poor sensor contact, electrical interference, and receiver
distance from the transmitter.
Battery Information
Heart Rate Monitor and Cadence Sensor Battery
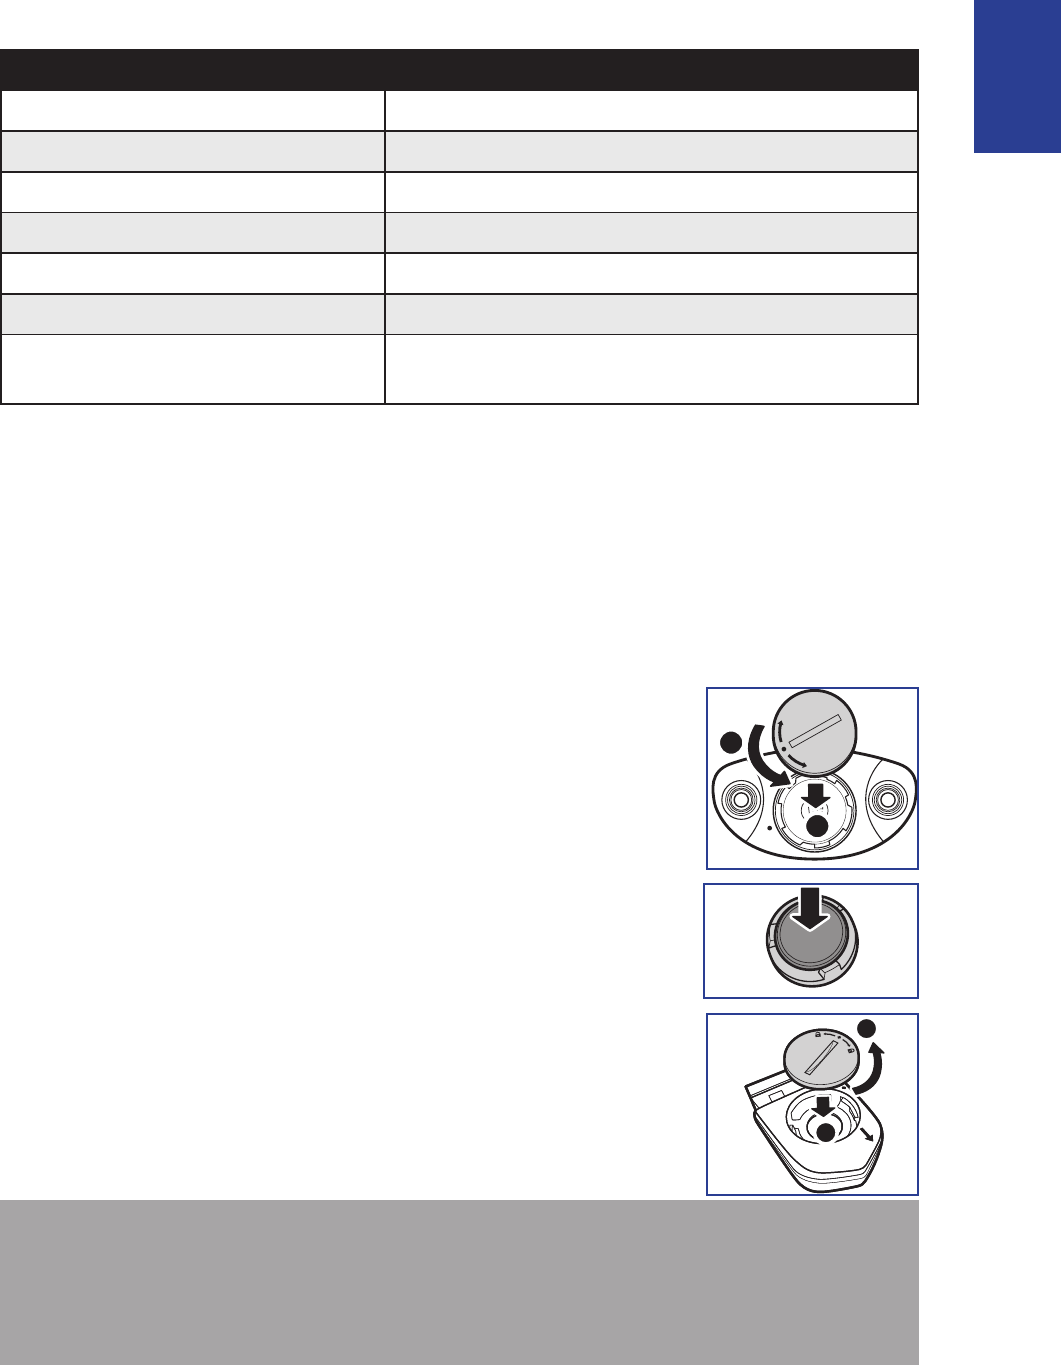
The heart rate monitor/cadence sensor contains a user-replaceable CR2032 battery.
To replace the battery:
1. Locate the circular battery cover on the back of the heart rate
monitor/cadence sensor.
2. Use a coin to twist the cover counter-clockwise so the arrow on
the cover points to OPEN.
3. Remove the cover and battery. Wait for 30 seconds.
4. Insert the new battery, with the positive connector rst into the
battery chamber.
5. Use a coin to twist the cover clockwise so the arrow on the cover
points to CLOSE.
A
B
NOTE:
When installing a new battery, if the battery is not placed with the positive connector •
rst, the positive connector will easily deform and malfunction.
Be careful not to damage or lose the O-ring gasket on the cover.•
Contact your local waste disposal department to properly dispose of used batteries.•
A
C
L
O
S
E
O
P
E
N
B
Appendix27
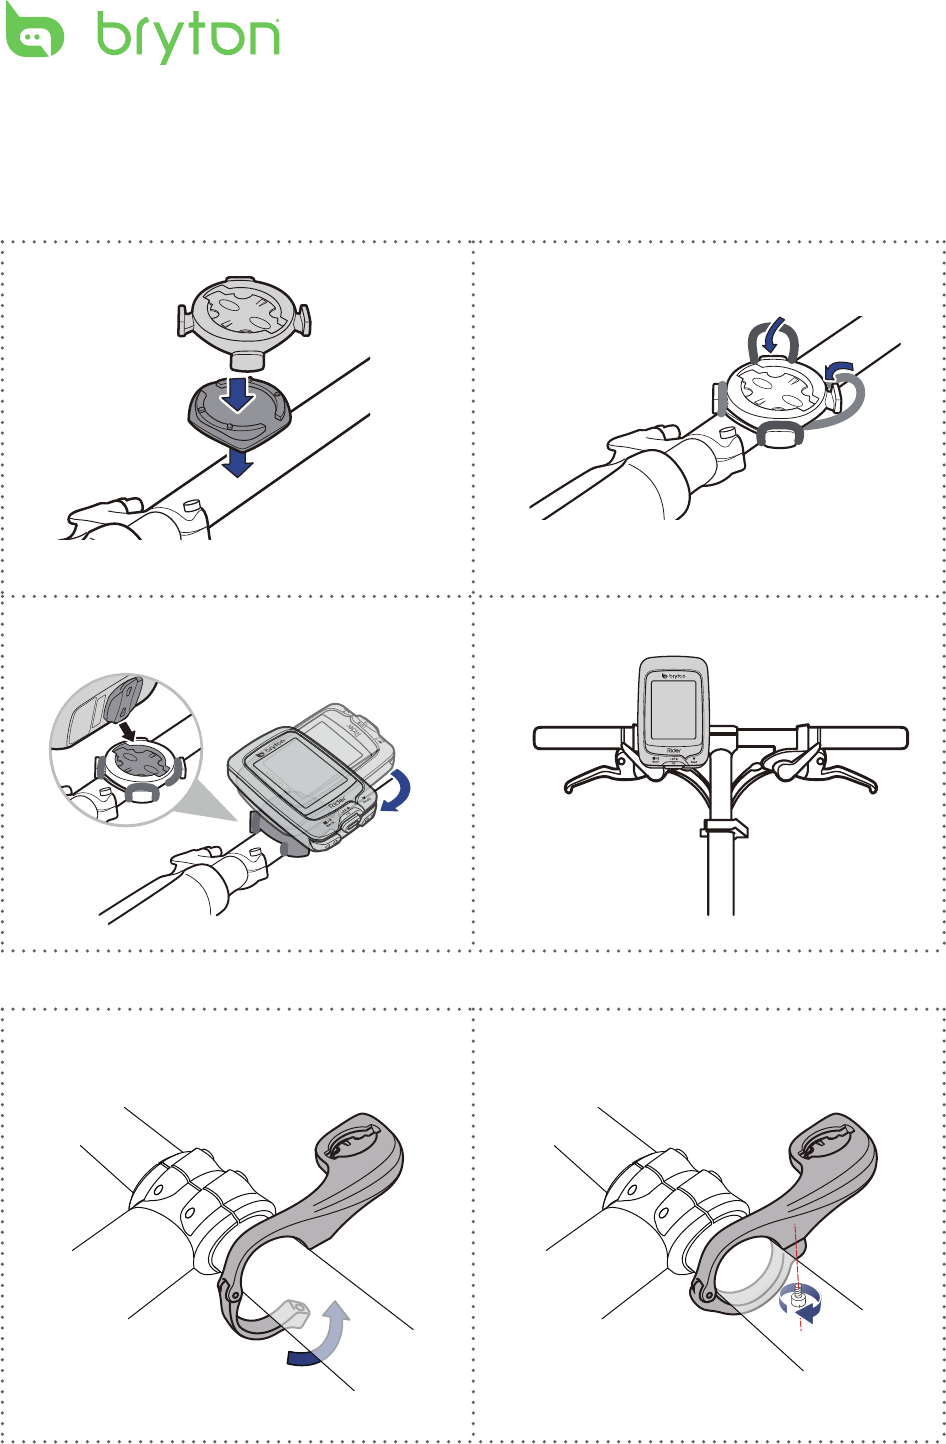
Install Rider 320
Mount Rider 320 to the Bike
3
1 2
1 2
4