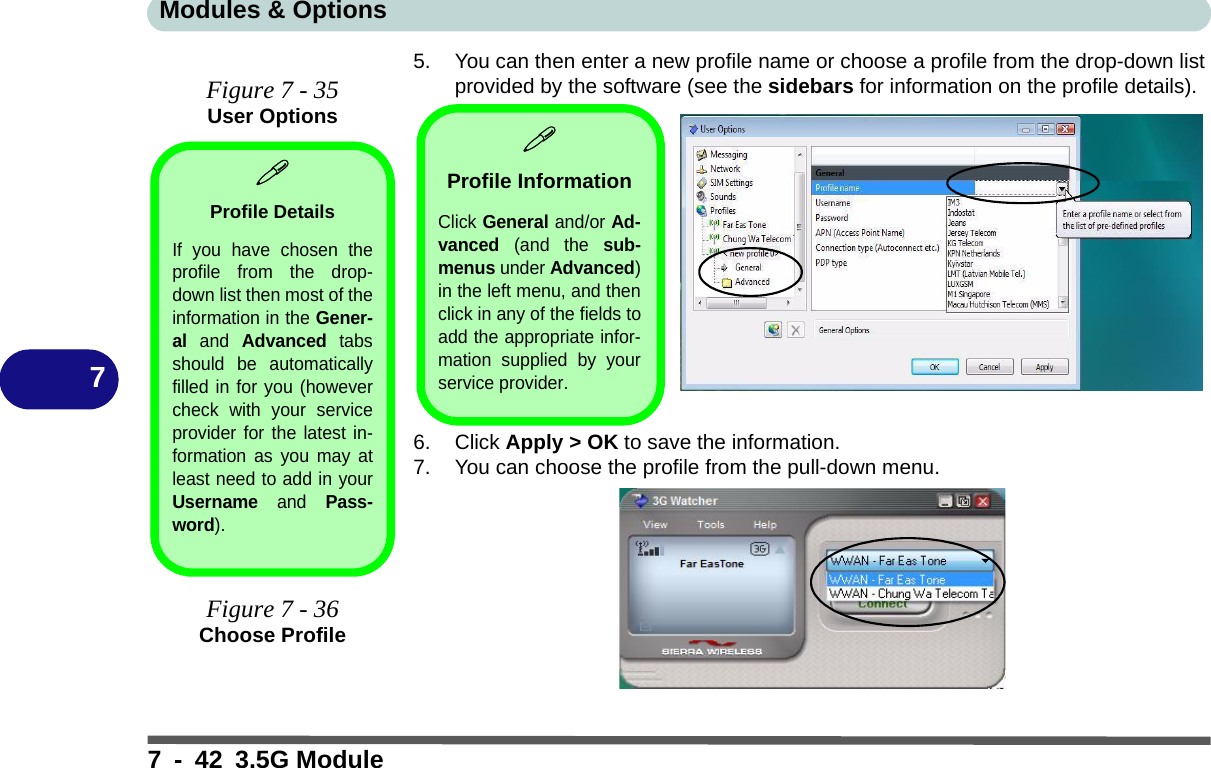
CLEVO M72R Notebook User Manual Part II
CLEVO Co. Notebook Users Manual Part II
UserManual.wiki
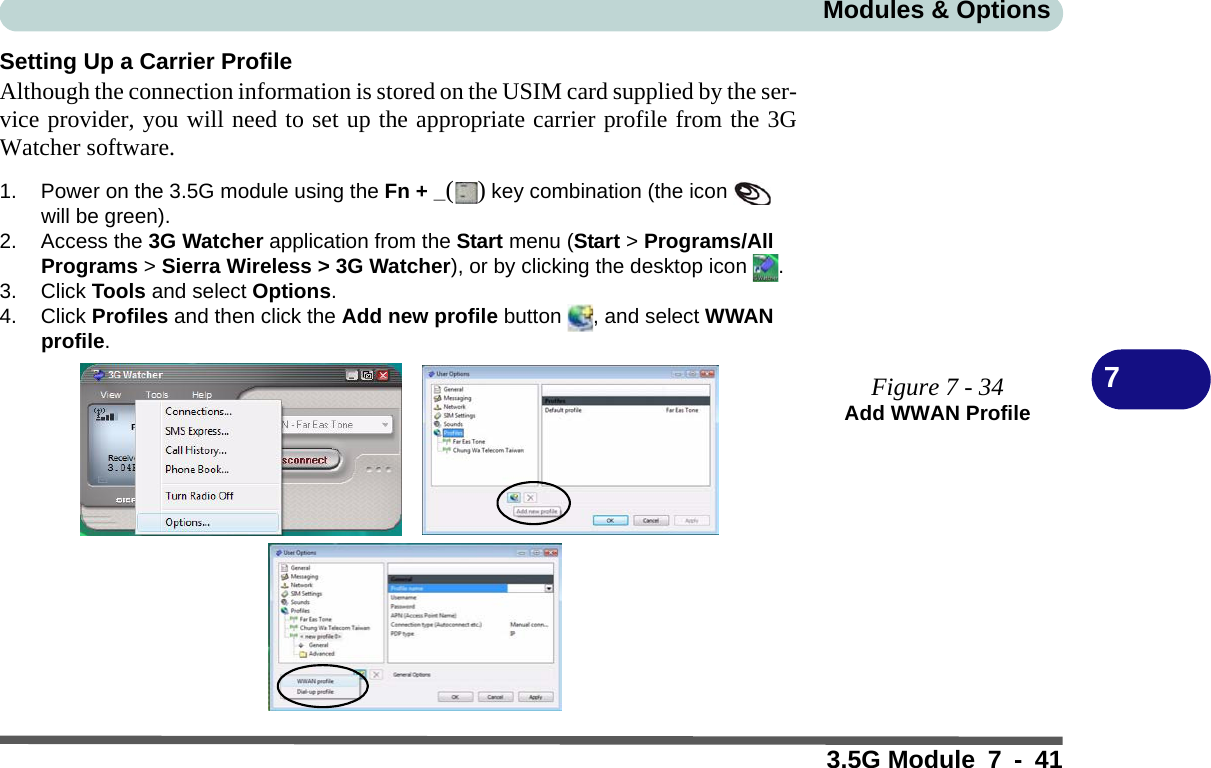
>
CLEVO
>
M72R User Manual
>
Users Manual Part II
Contents
1.
Users Manual Part I
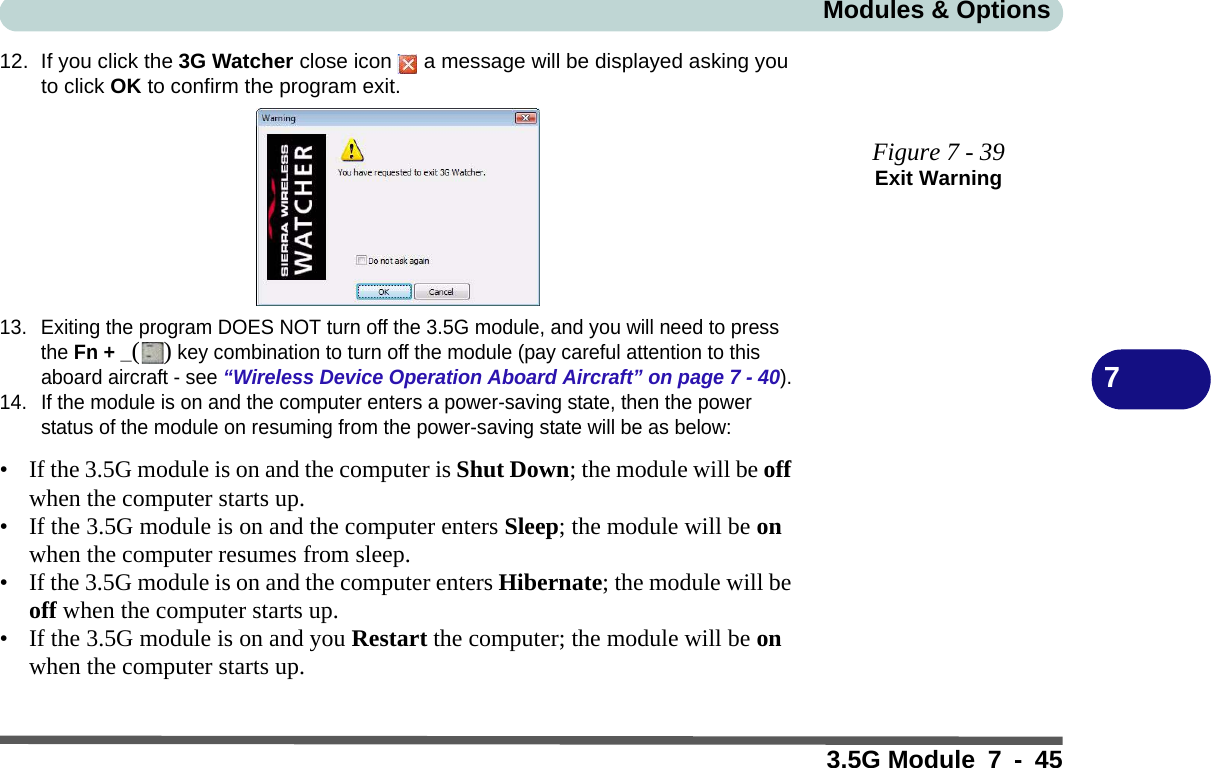
2.
Users Manual Part II
3.
Users Manual Part III
Users Manual Part II
Navigation menu
Upload a User Manual
Namespaces
Wiki Guide
HTML
PDF
Info
Views
User Manual
Discussion / Help
Navigation


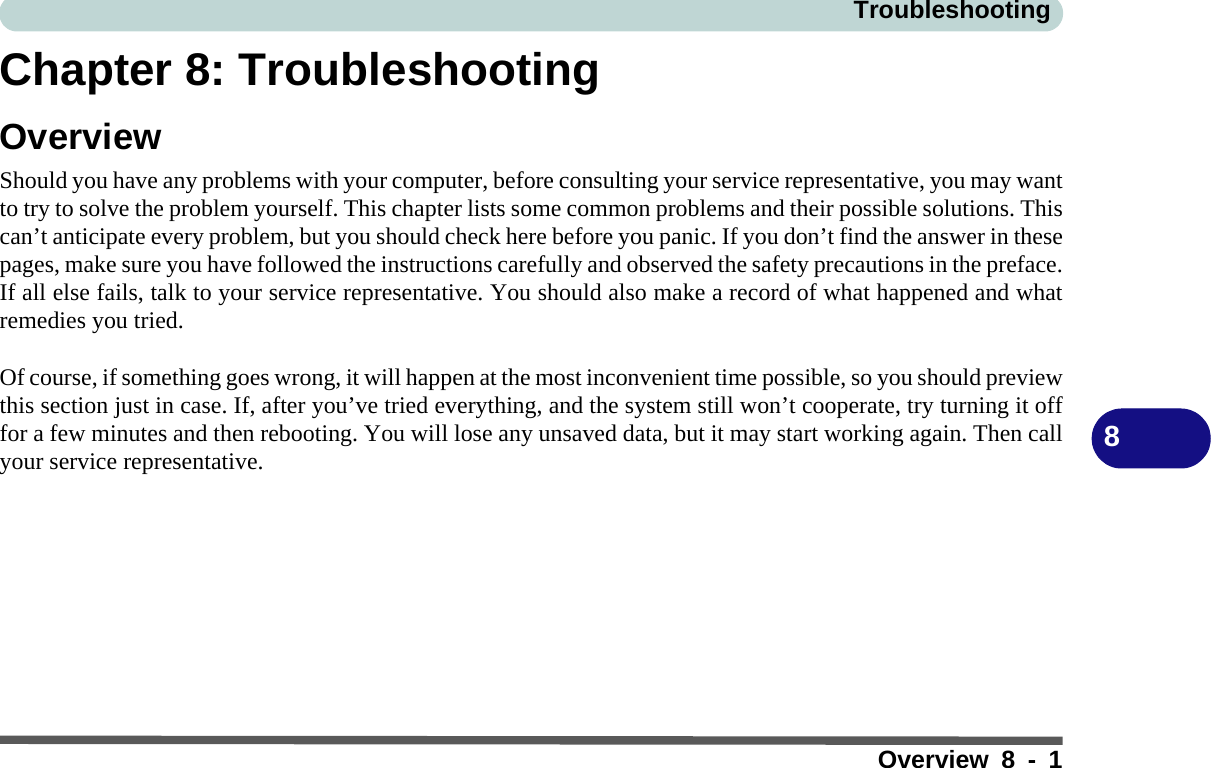
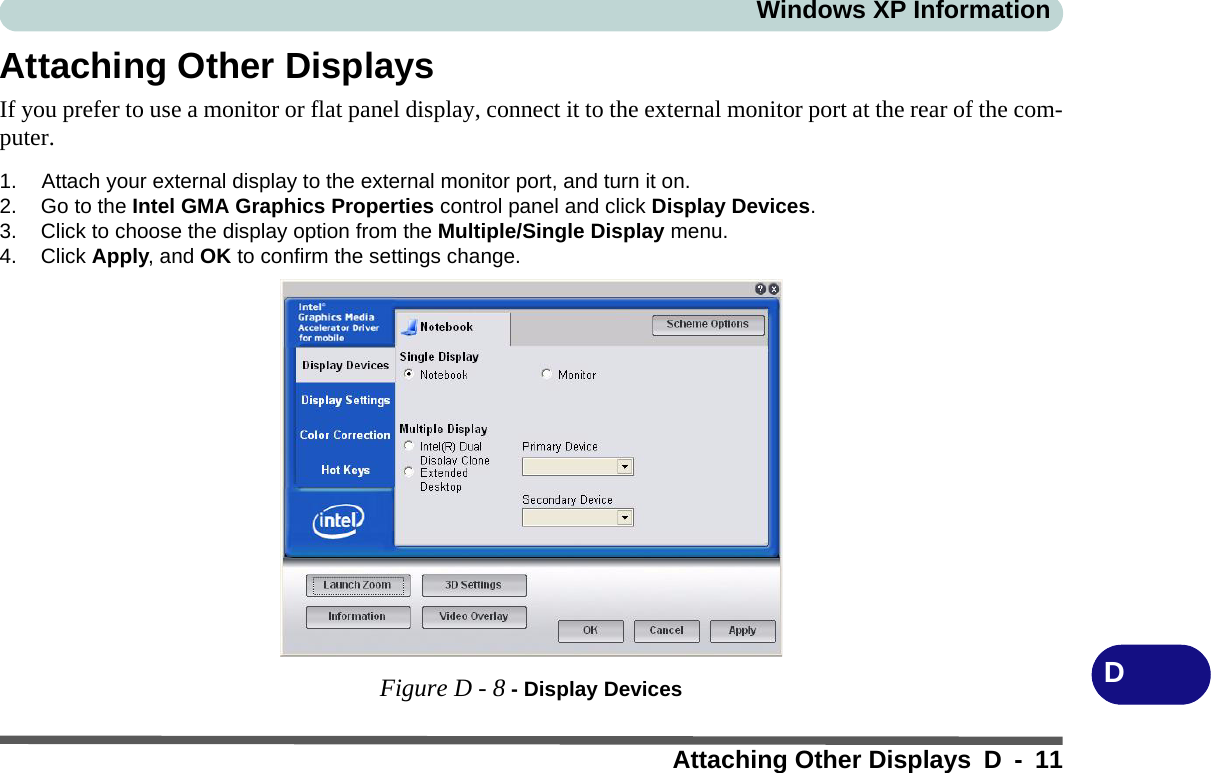
![Modules & OptionsTrusted Platform Module 7 - 257Trusted Platform ModuleBefore setting up the TPM functions you must initialize the security platform.Initializing TPM1. Restart the computer.2. Enter the PhoenixBIOS Setup Utility by pressing F2 during the POST.3. Use the arrow keys to select the Security menu.4. Select TPM Support and set the item to Enabled.5. The TPM State menu will then appear.Figure 7 - 18TPM SupportMain Advanced SSeeccuurriittyyTPM State Boot ExitF1 Help Select Item -/+ Change Values F9 Setup DefaultsEsc Exit Select Menu Enter Select Sub-Menu F10 Save and ExitItem Specific HelpEnable Trusted PlatformModule supportSecurityPhoenix TrustedCore(tm) Setup UtilitySupervisor Password Is: ClearSet Supervisor Password [Enter]Password on boot: [Disabled]Fixed disk boot sector: [Normal]TPM Support [Enabled]](https://usermanual.wiki/CLEVO/M72R.Users-Manual-Part-II/User-Guide-806511-Page-7.png)
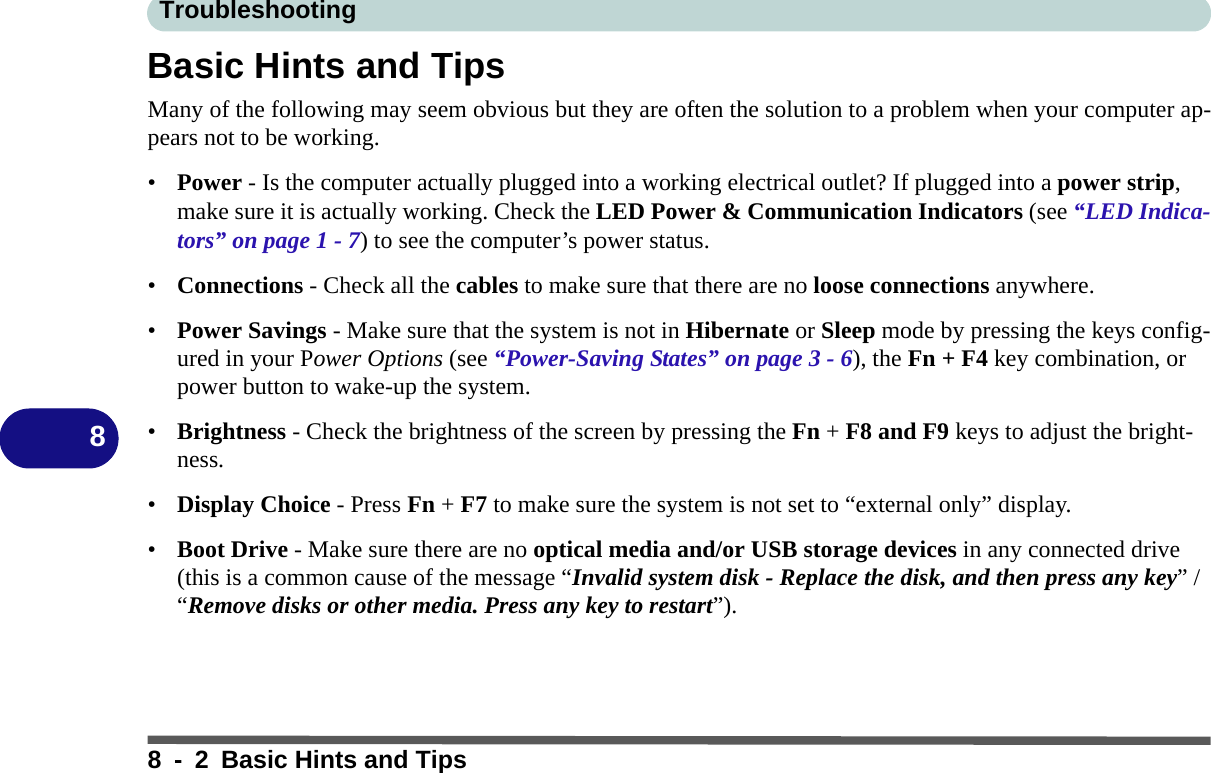
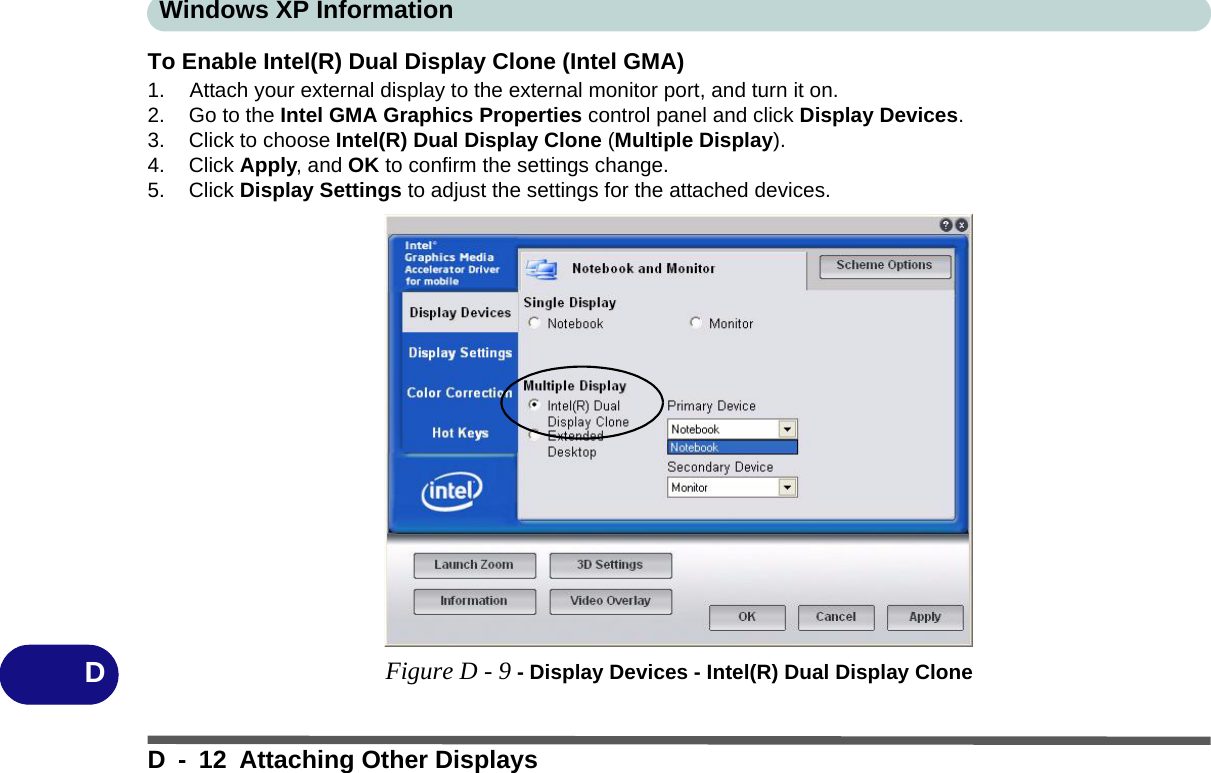
![Modules & Options7 - 26 Trusted Platform Module76. Use the arrow keys to select the TPM State menu.7. Select TPM State, and set the item to Enable & Activate.8. Press F10 to save the changed BIOS information, exit the BIOS and restart the computer.9. If you make any changes to the TPM State you will be asked to Execute/Reject the change after restart (“Physical Presence Operations” on page 5 - 13).10. You can now install the TPM driver (see overleaf).Figure 7 - 19TPM State Main Advanced Security Boot ExitF1 Help Select Item -/+ Change Values F9 Setup DefaultsEsc Exit Select Menu Enter Select Sub-Menu F10 Save and ExitItem Specific HelpChanges TPM StateTPM StateNo ChangeEnable & ActivateDeactivate & DisableClearCurrent TPM State: Enabled and DeactivatedChange TPM State [Enable & Activate ]Phoenix TrustedCore(tm) Setup Utility](https://usermanual.wiki/CLEVO/M72R.Users-Manual-Part-II/User-Guide-806511-Page-8.png)