CUB ELECPARTS VS60U029 Sensor AID DUO TPMS TOOL User Manual
CUB ELECPARTS INC Sensor AID DUO TPMS TOOL
UserManual.wiki
>
CUB ELECPARTS
>
VS60U029 User Manual
User Manual
Navigation menu
Upload a User Manual
Namespaces
Wiki Guide
HTML
PDF
Info
Views
User Manual
Discussion / Help
Navigation


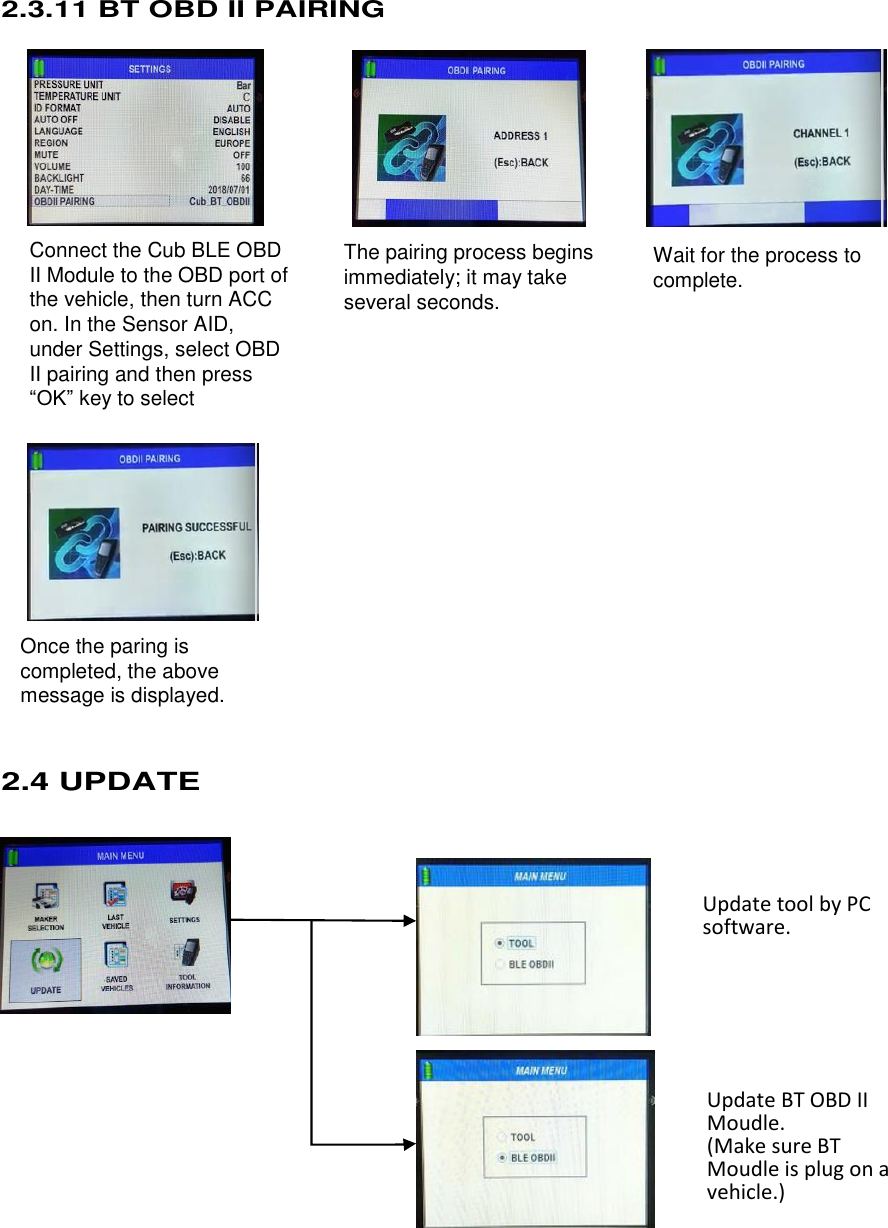
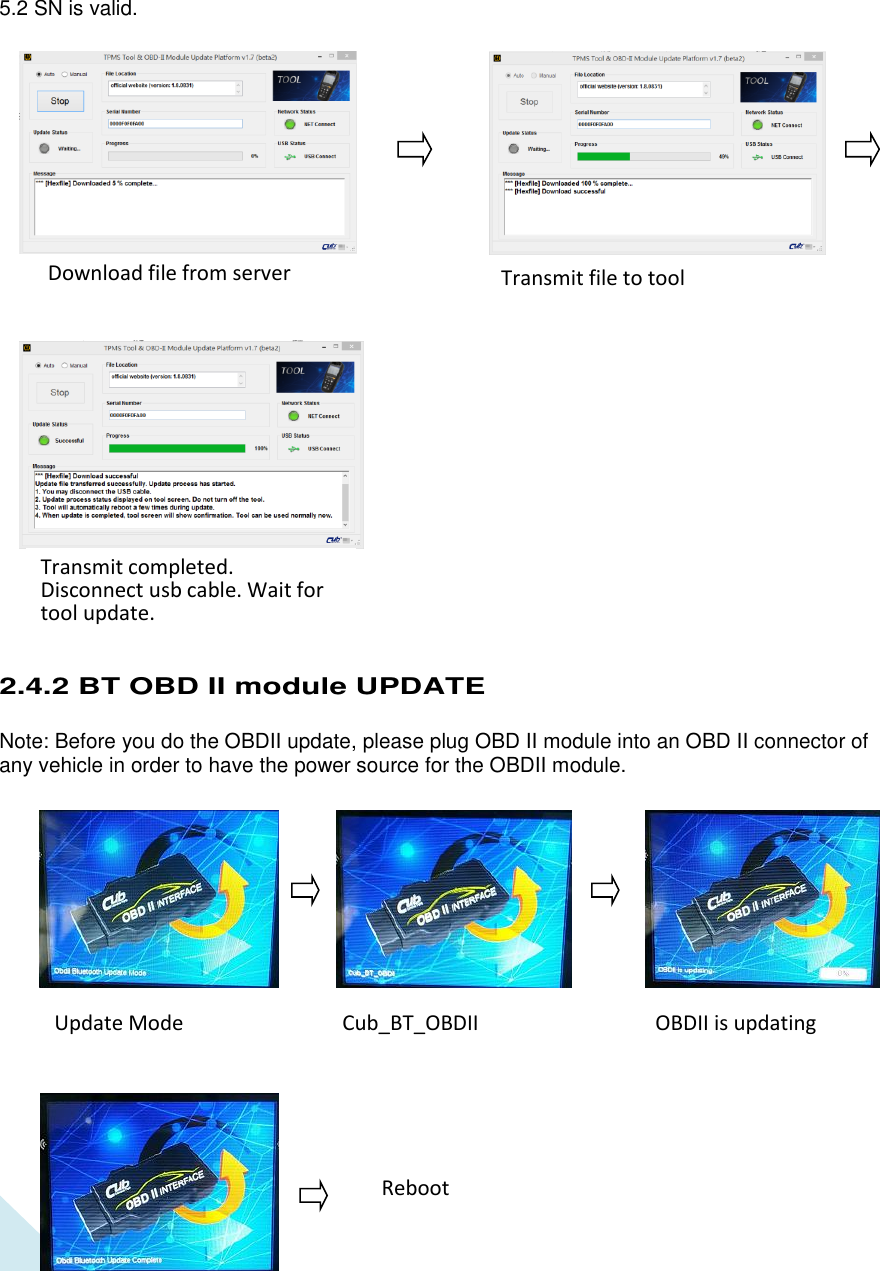
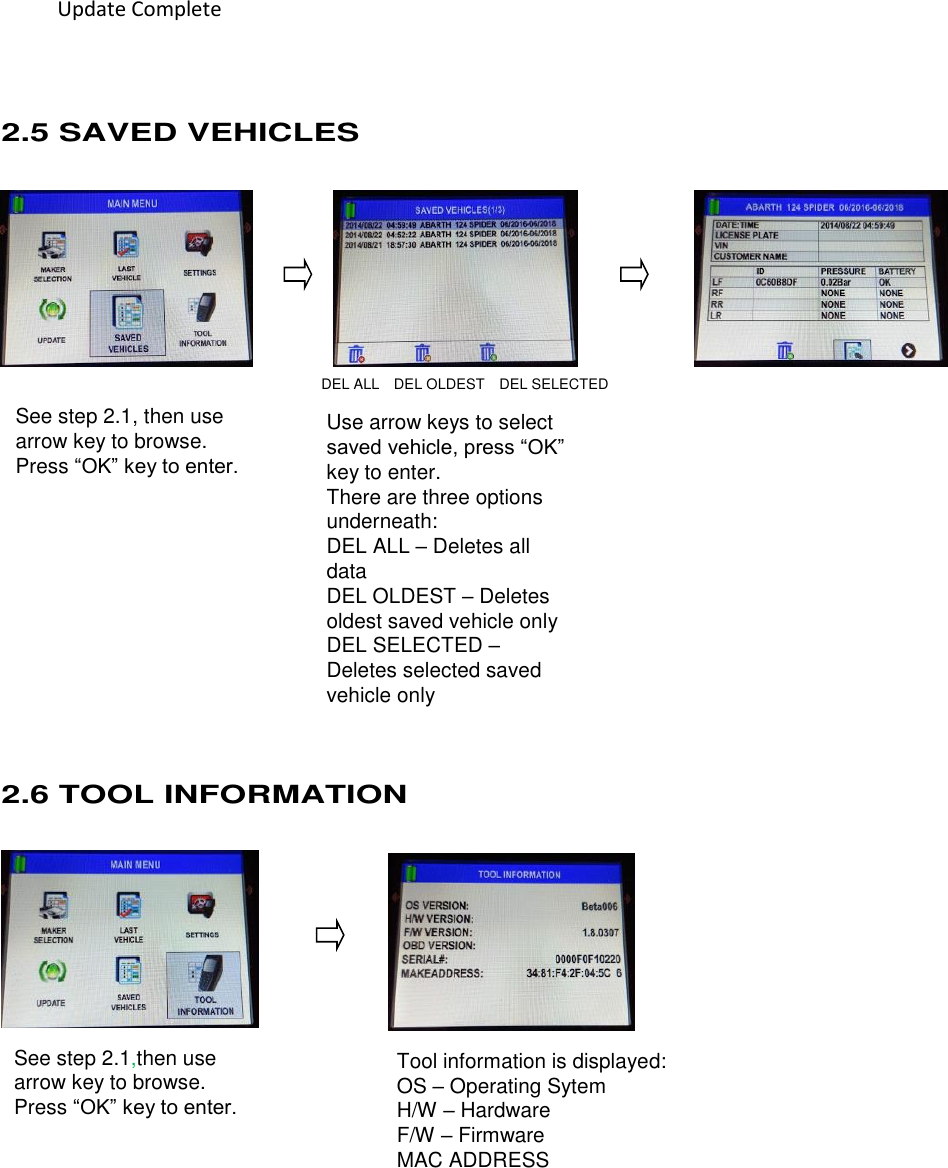
![18 2.4.1 WIRE UPDATE by PC software 1. 2.Extract the file [Cub] TPMS Tool & OBD-II Module Update Platform v1.7 (beta2)(lite).zip 3.Execute Cub Updater.exe 4. Connect Mico usb to TOOL and PC usb port. 5. Click “Download” for auto update 5.1 SN is invalid. You will see the error message “ Serial number “0000F0F10F00” cannot be found”. Please contact your distributor/dealer. Enter Appear connect](https://usermanual.wiki/CUB-ELECPARTS/VS60U029/User-Guide-4200283-Page-19.png)