Canon K30254 Wireless LAN Module User Manual end product users manaul 1
Canon Inc Wireless LAN Module end product users manaul 1
Canon >
Contents
- 1. end product users manaul 1
- 2. end product users manual 2
end product users manaul 1

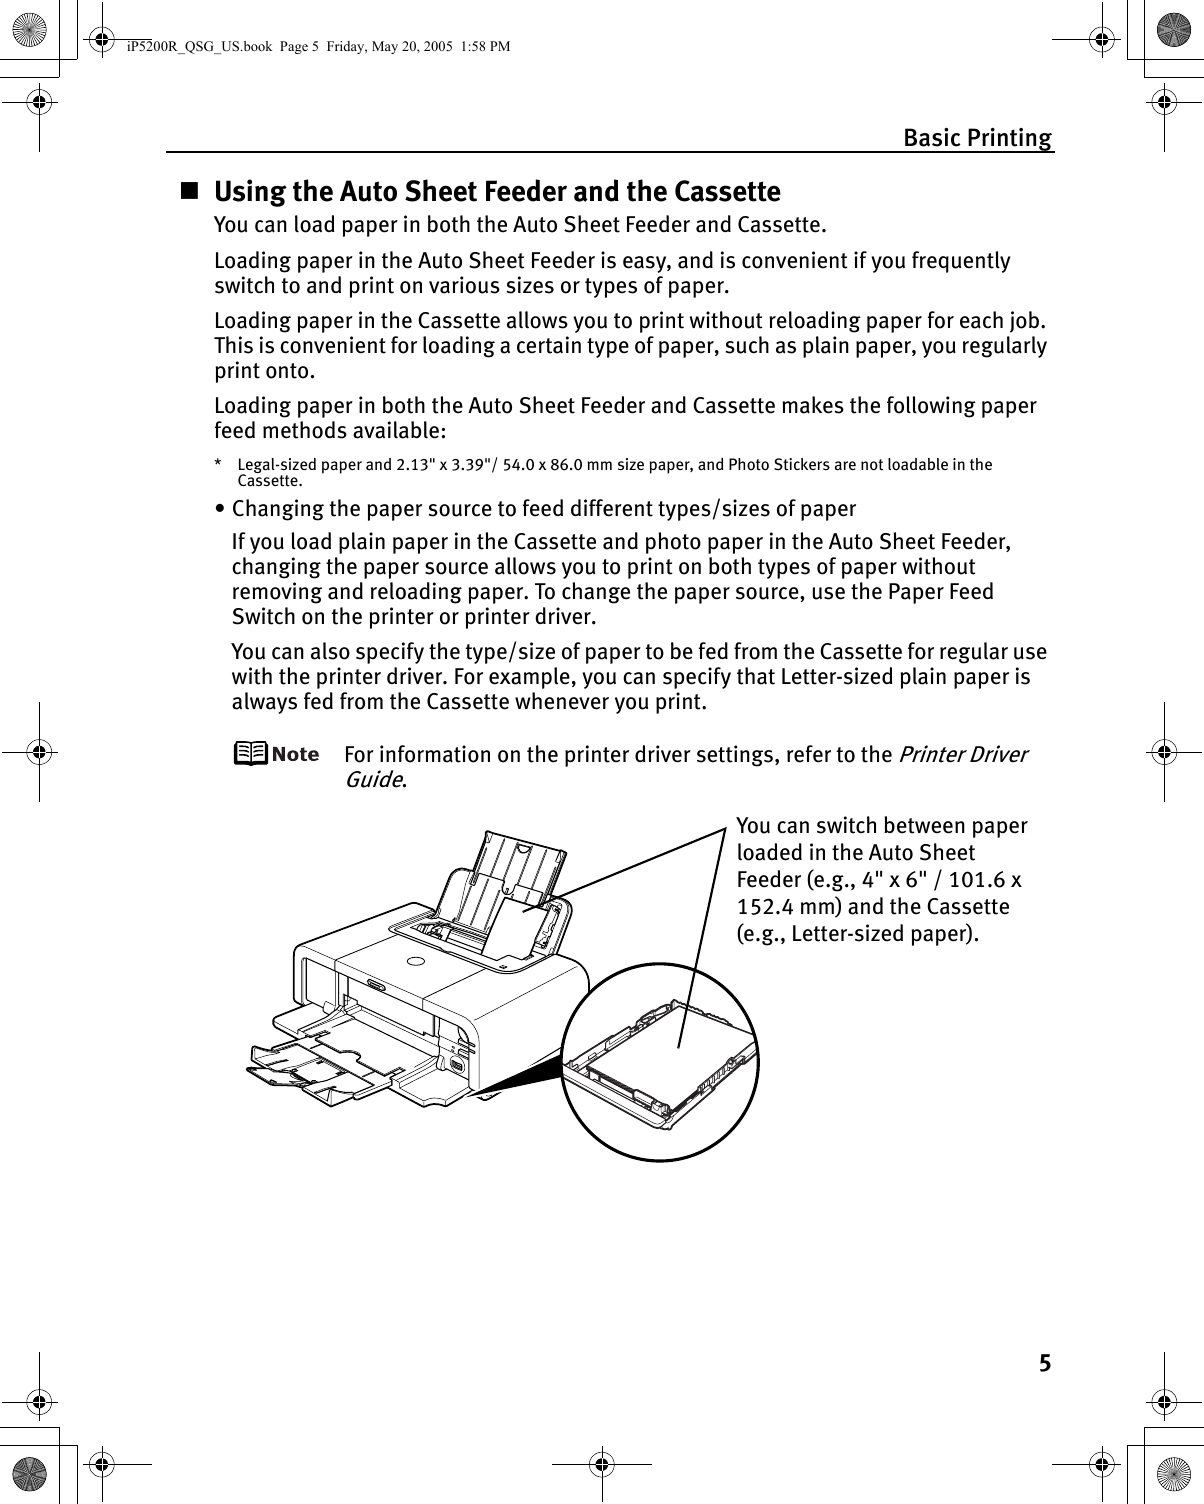
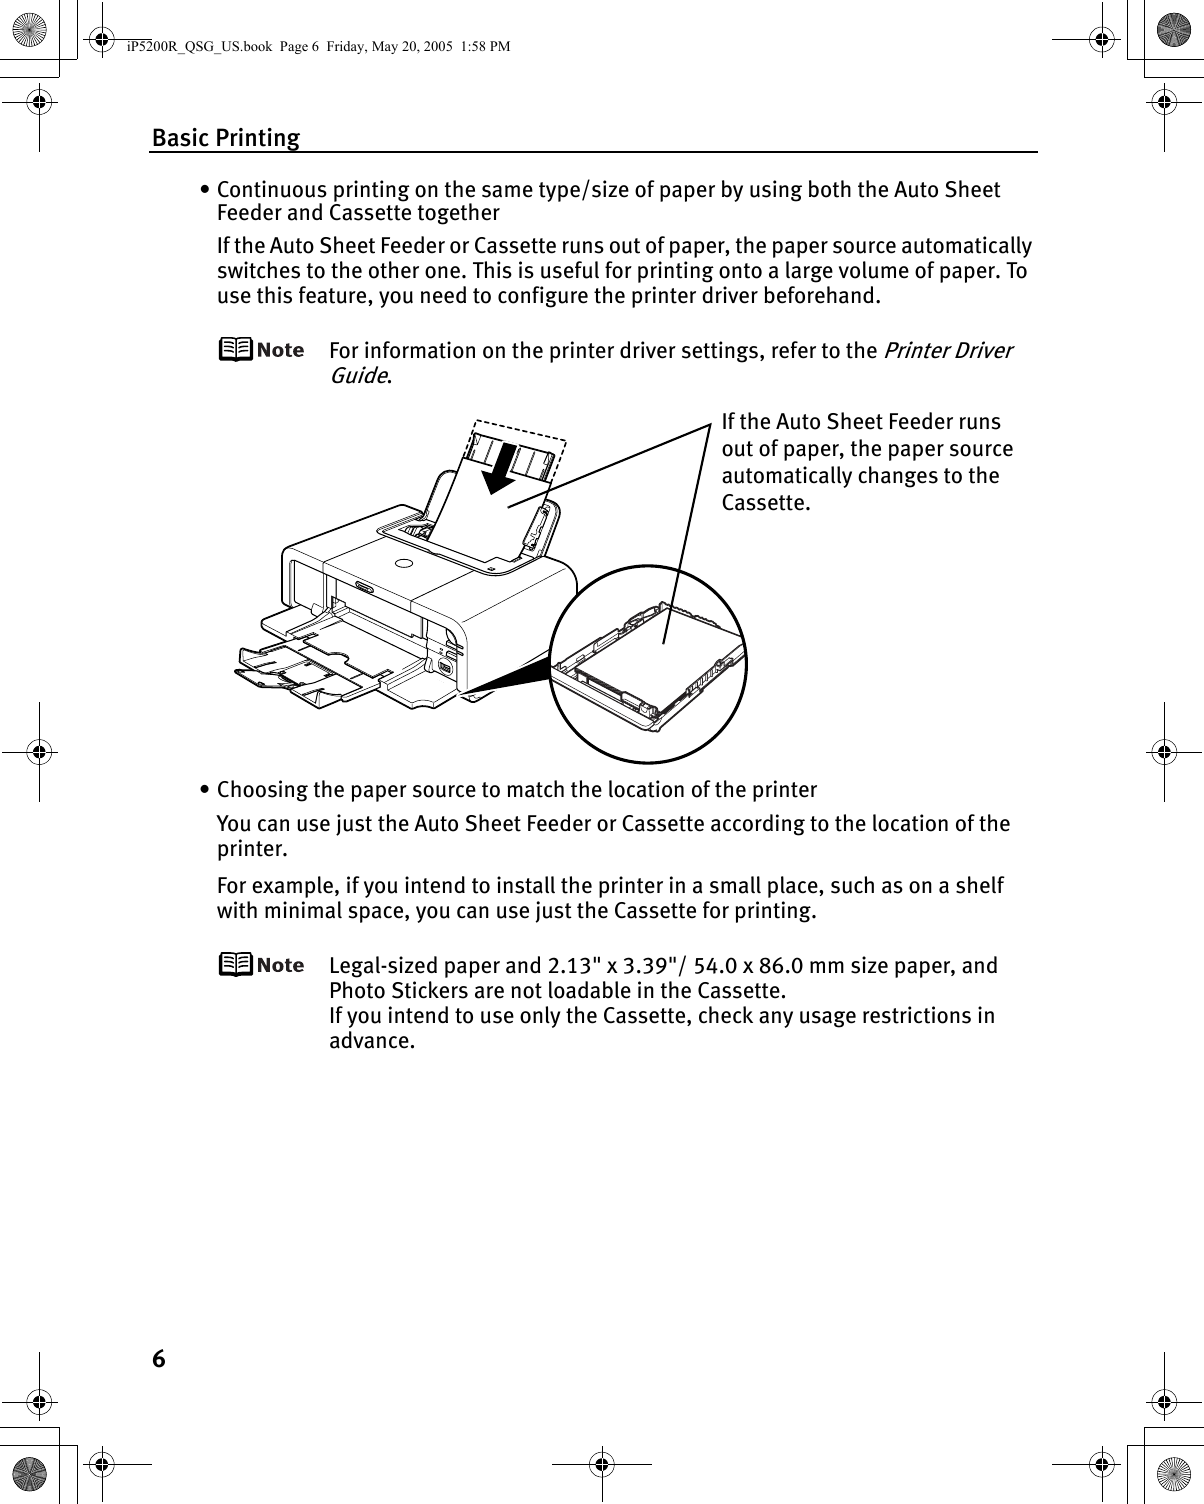
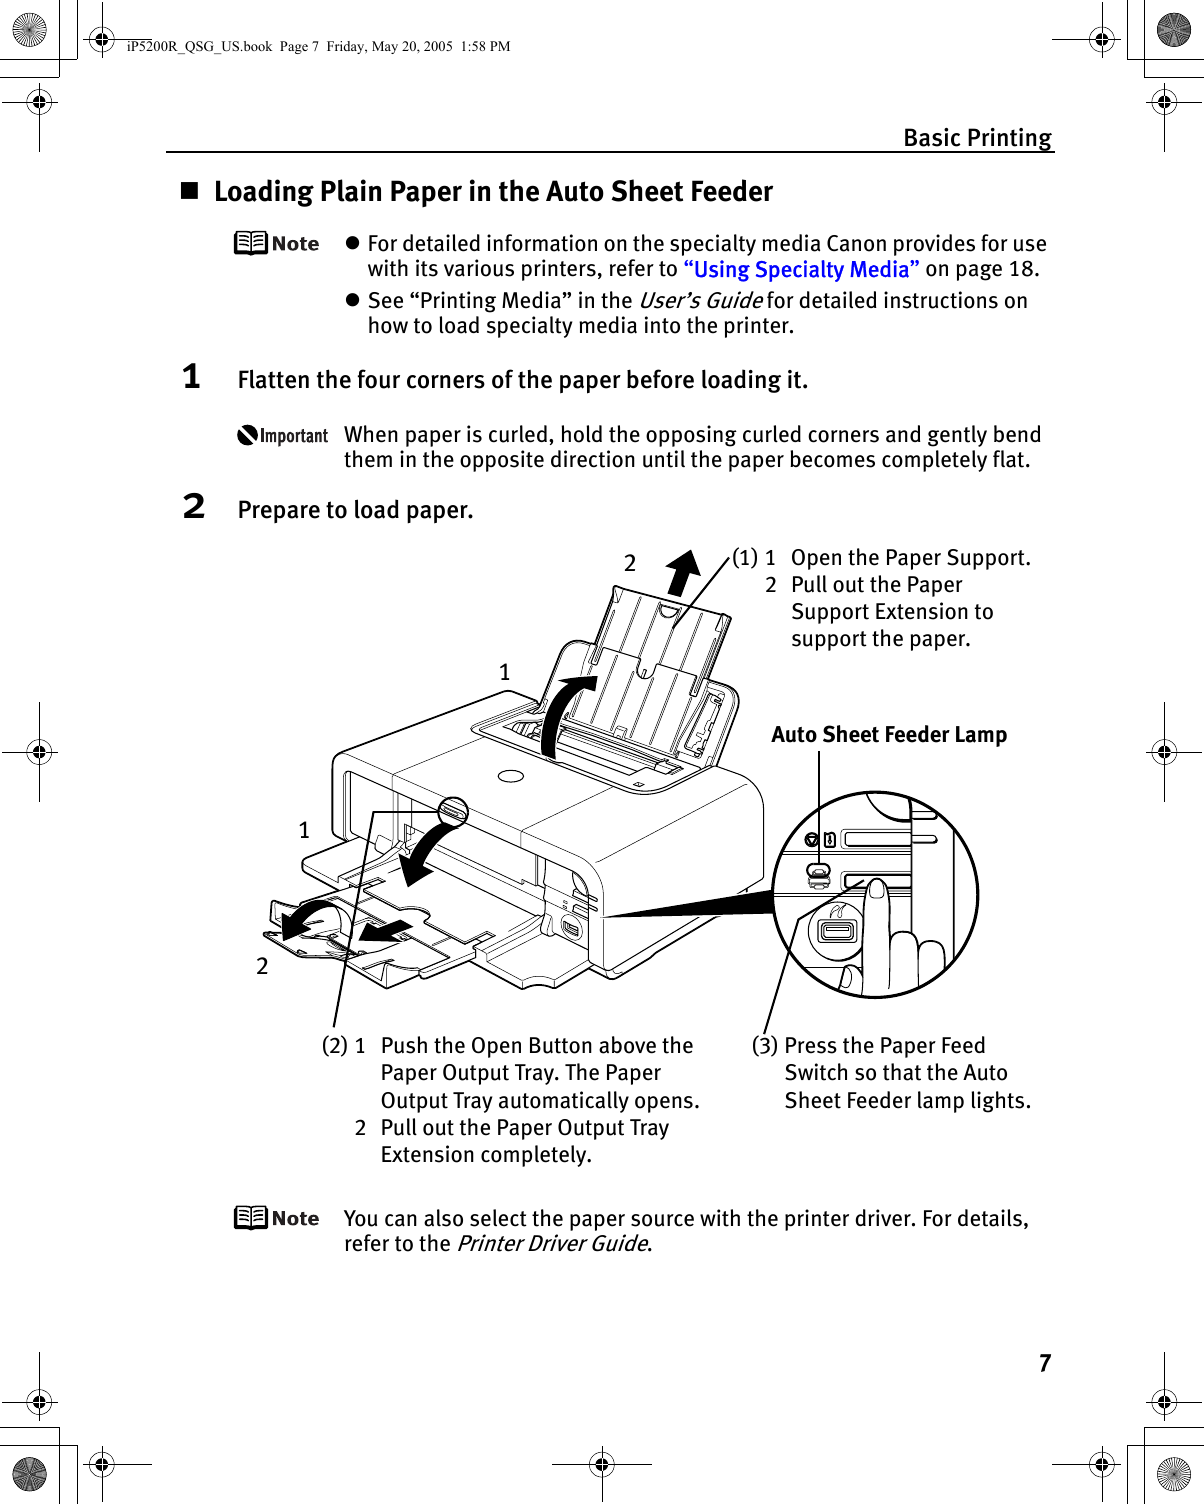
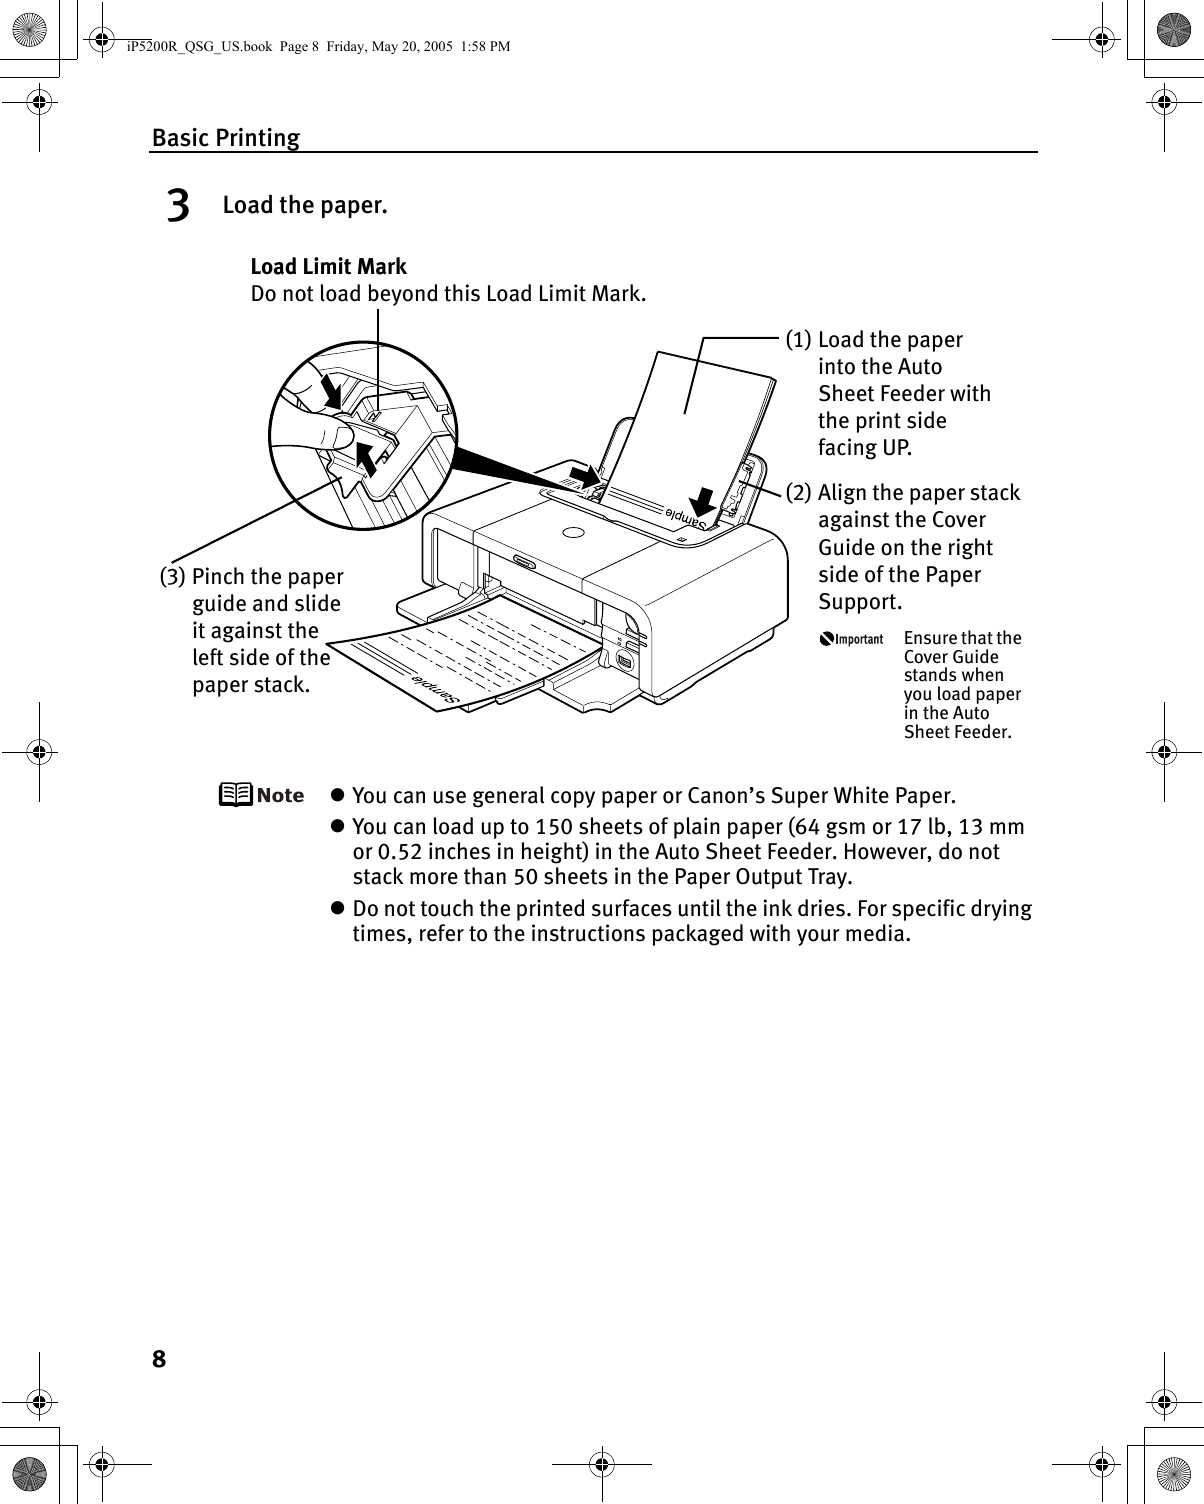
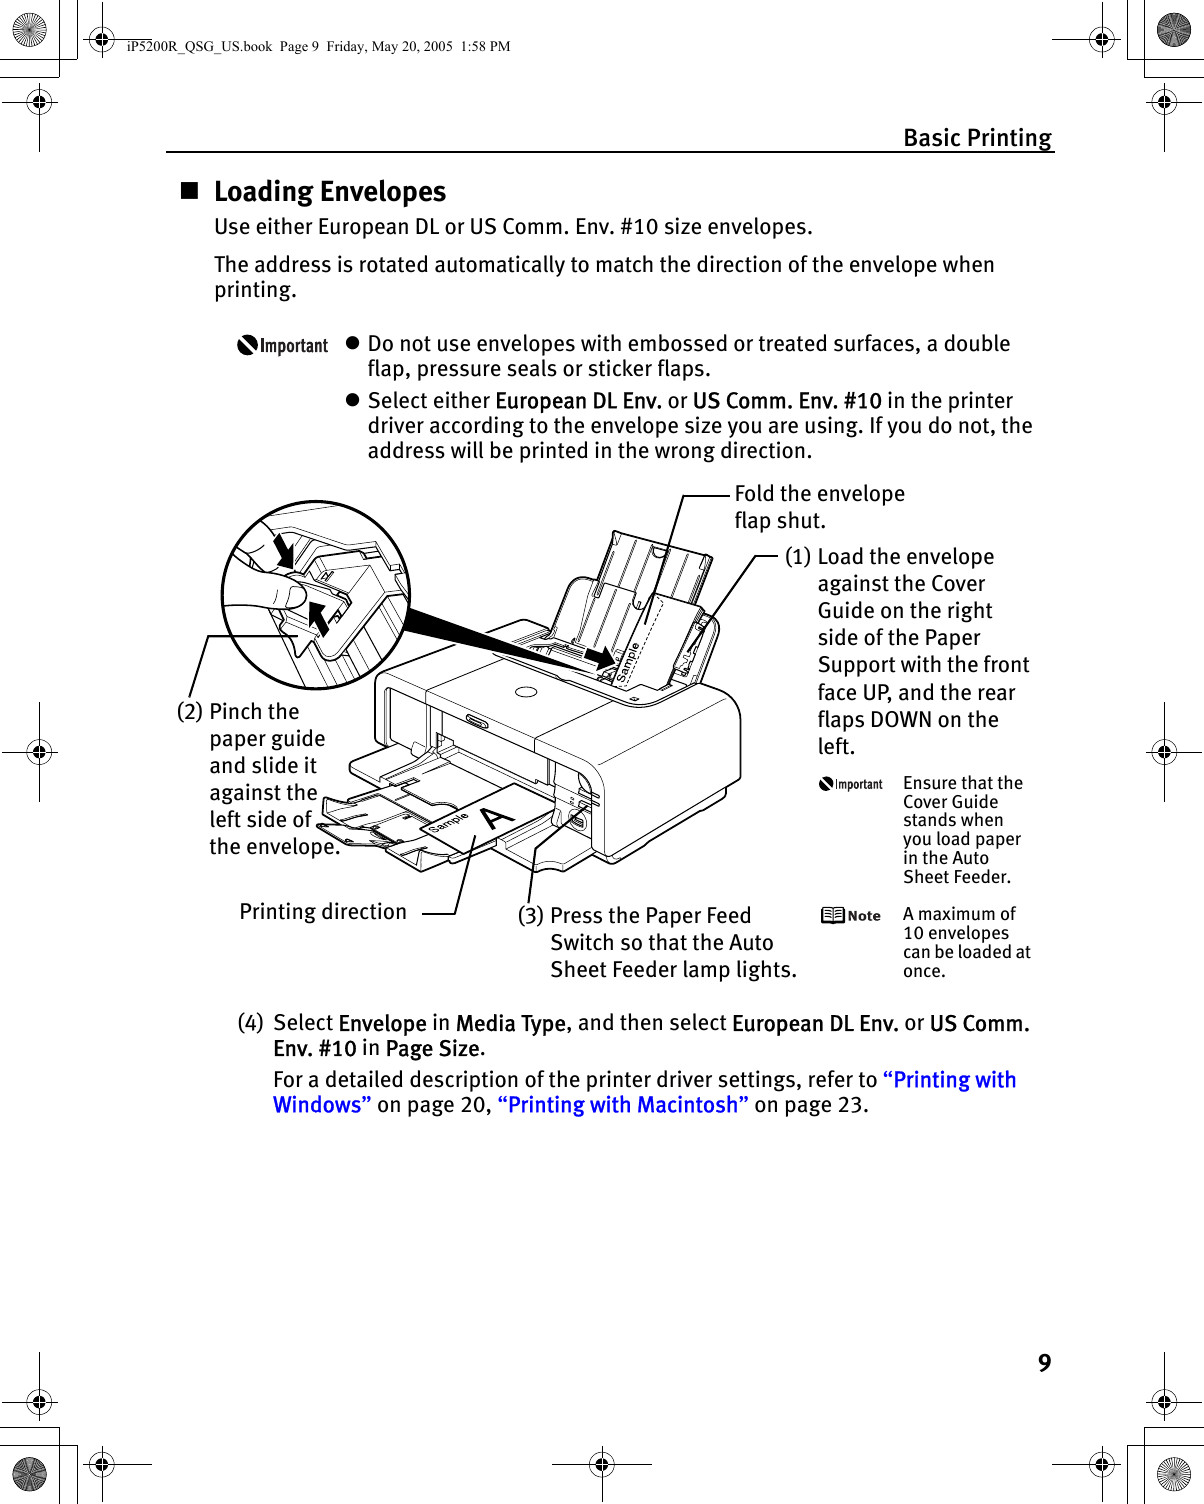
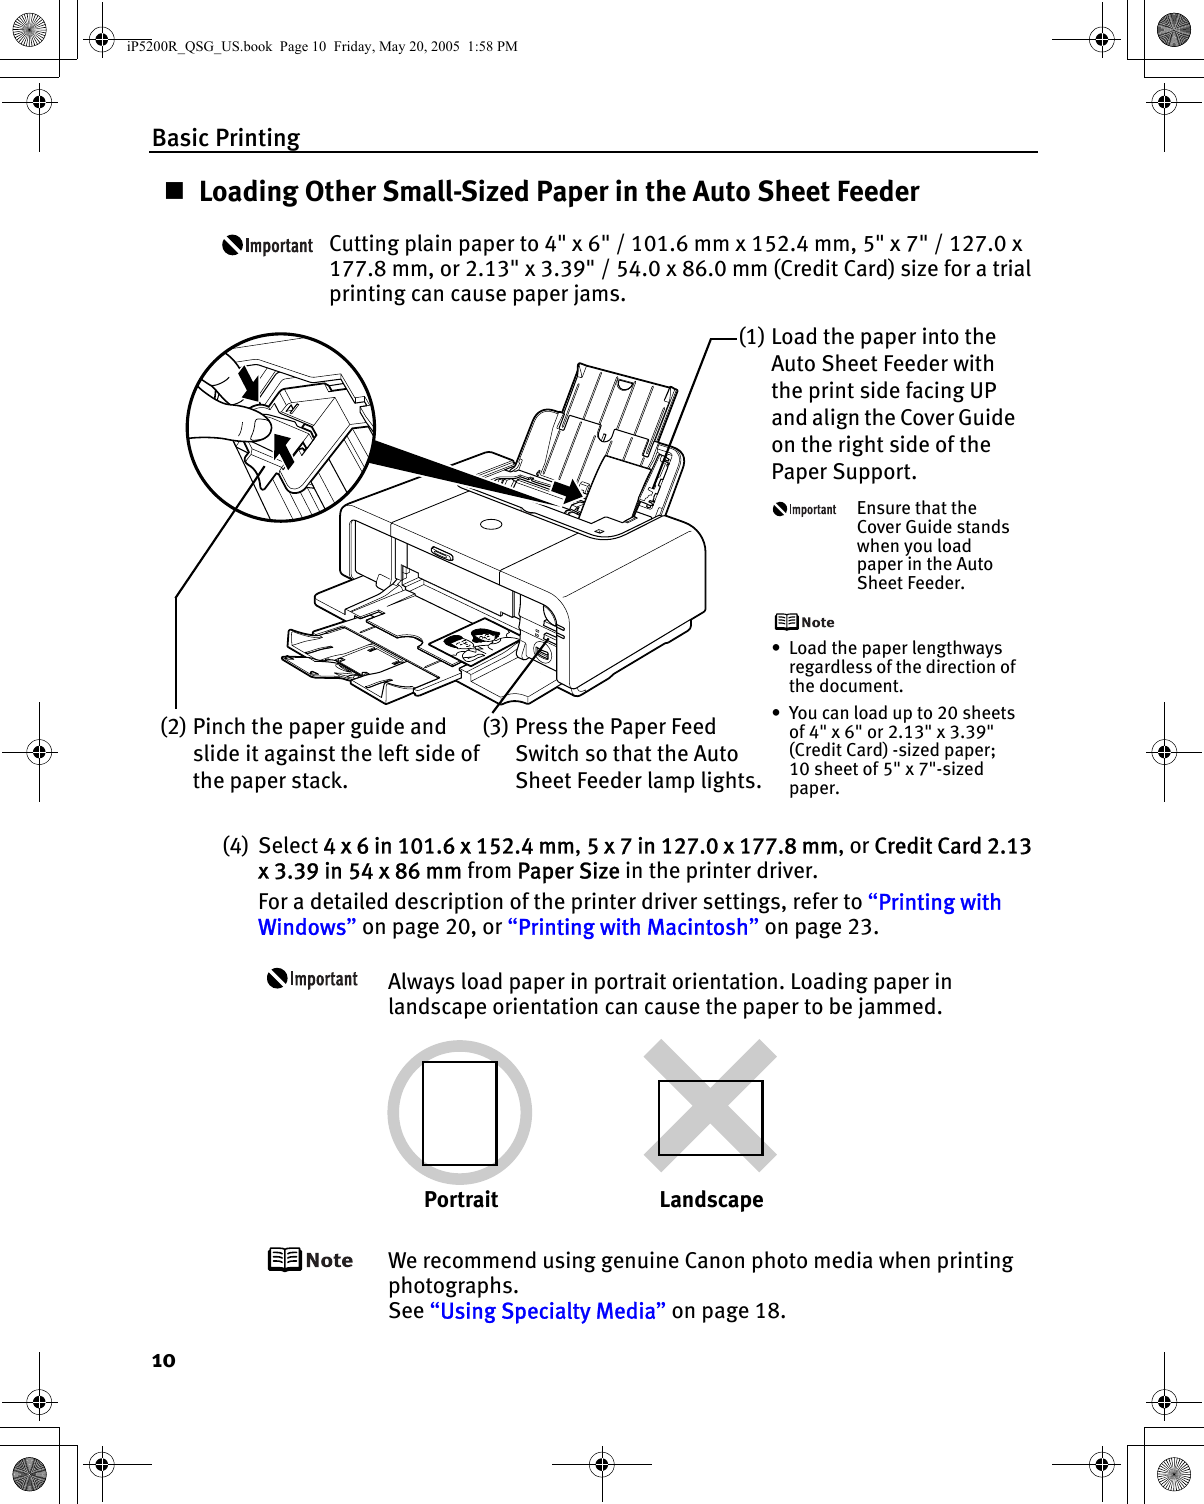
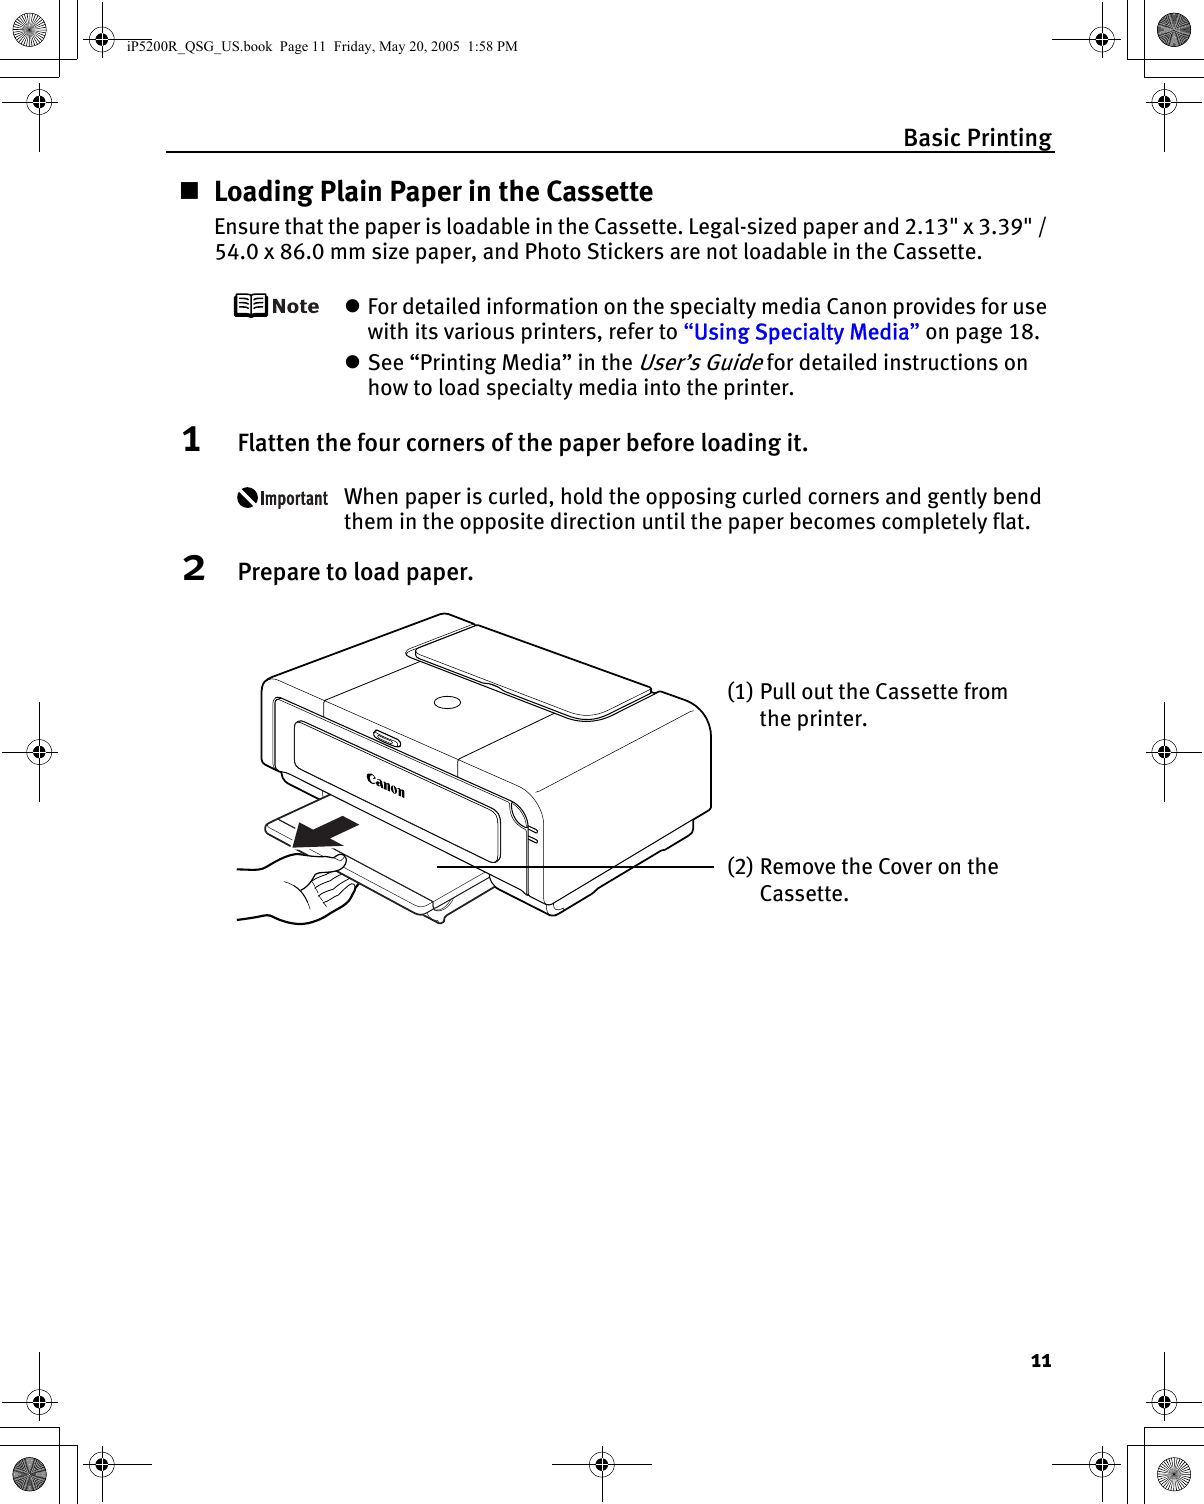
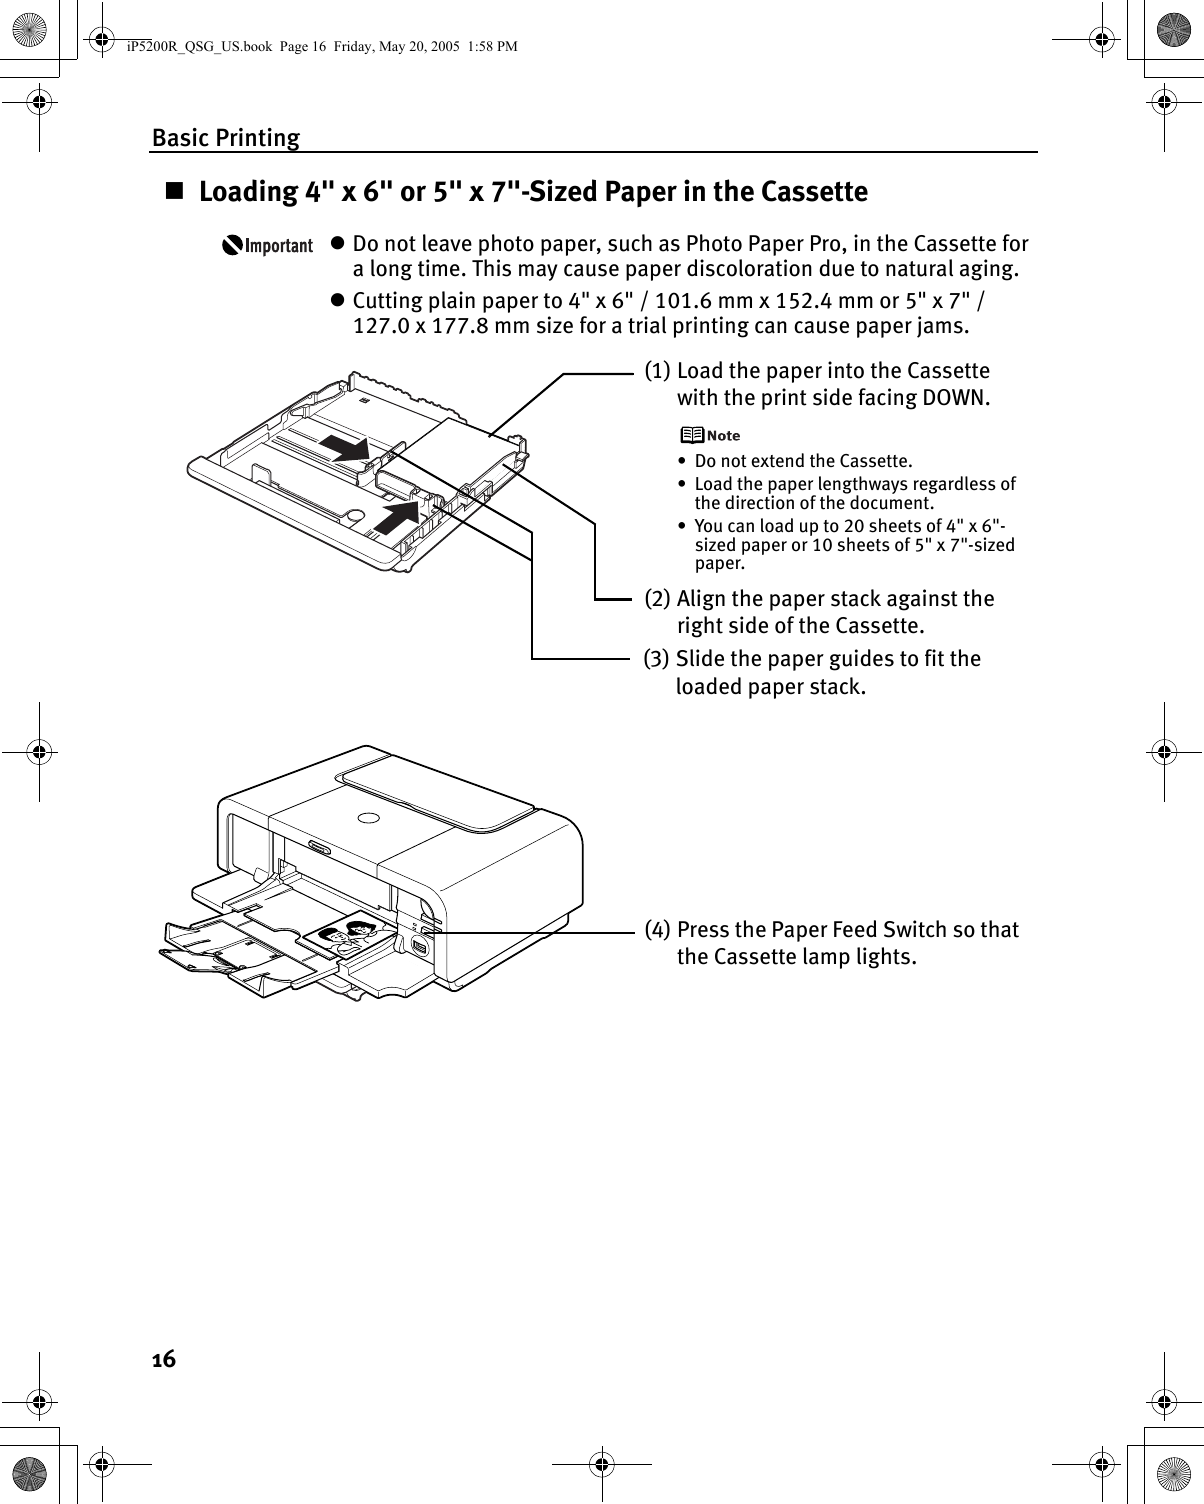

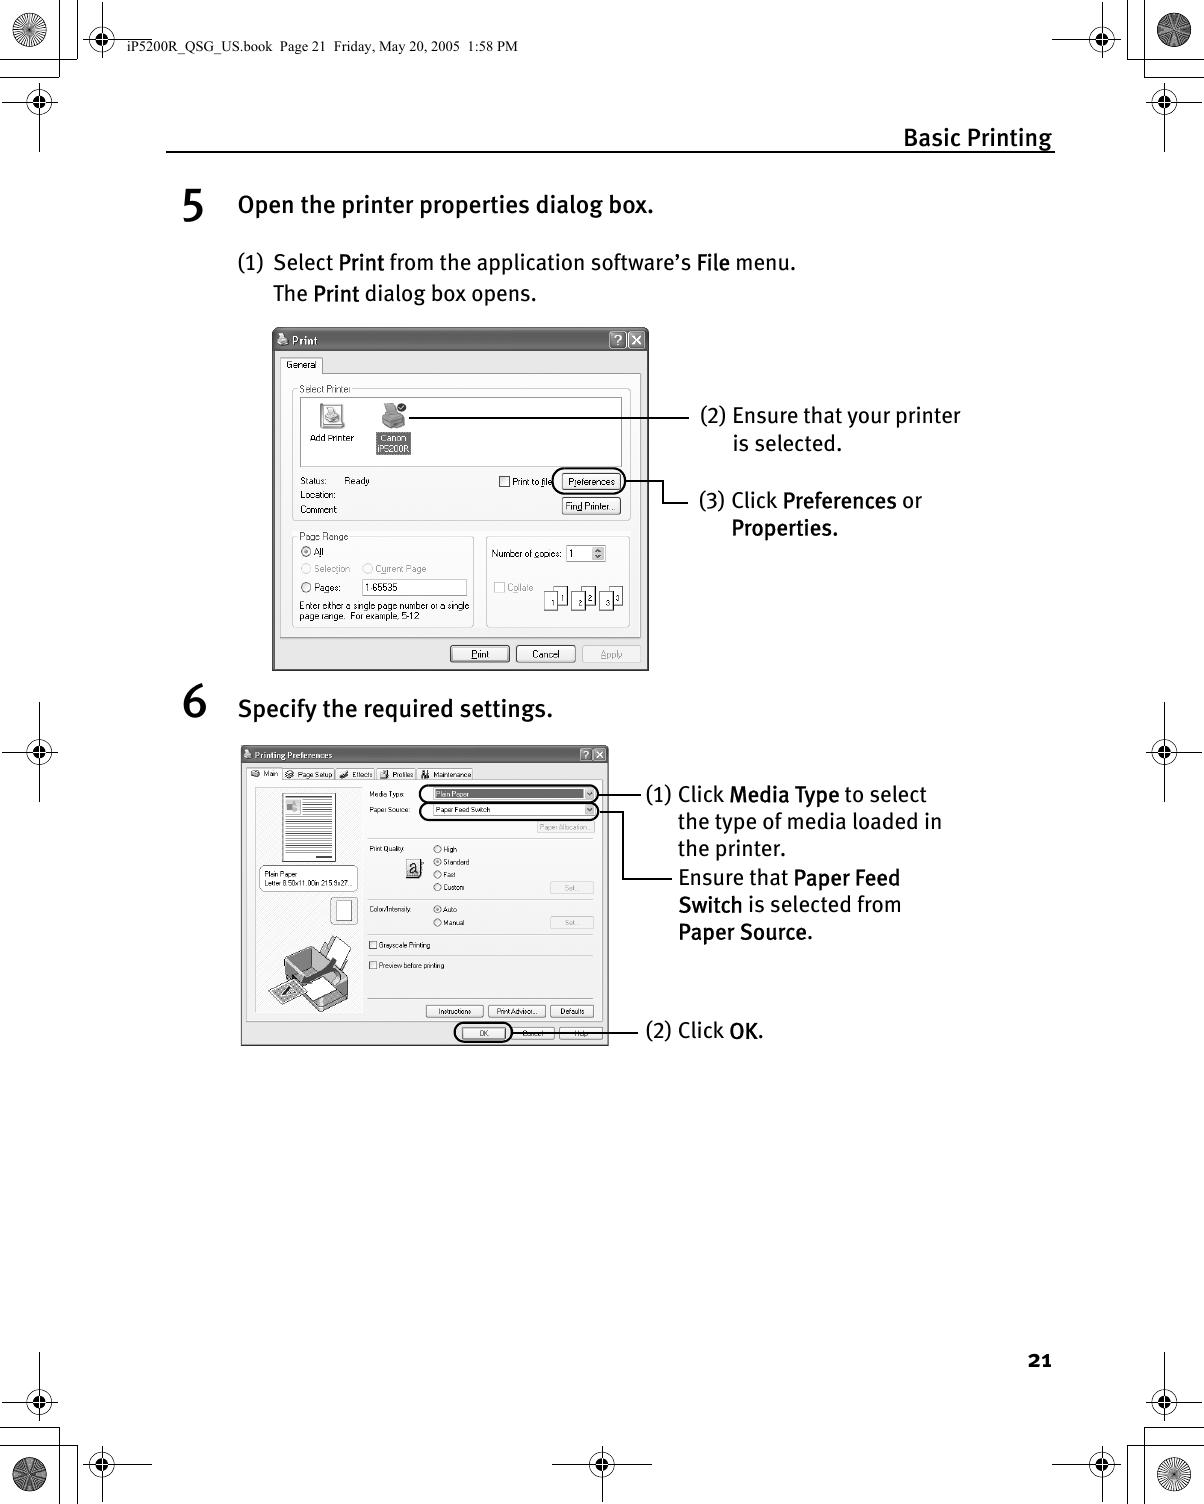
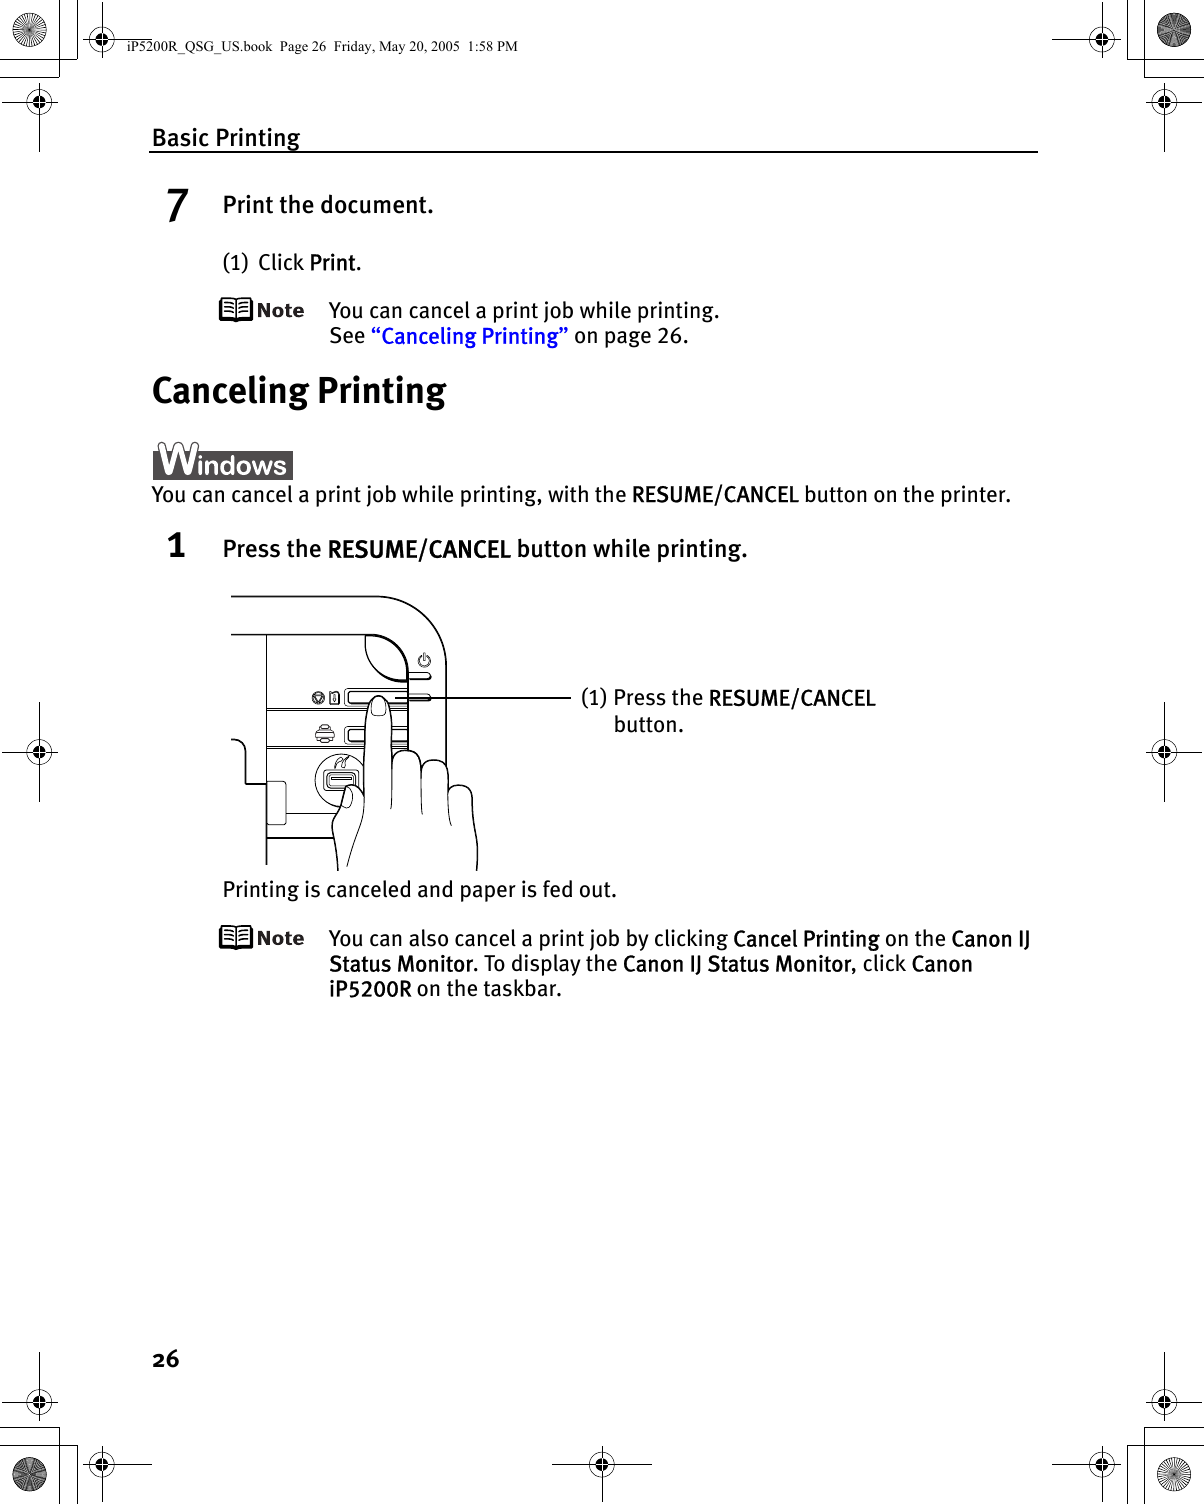
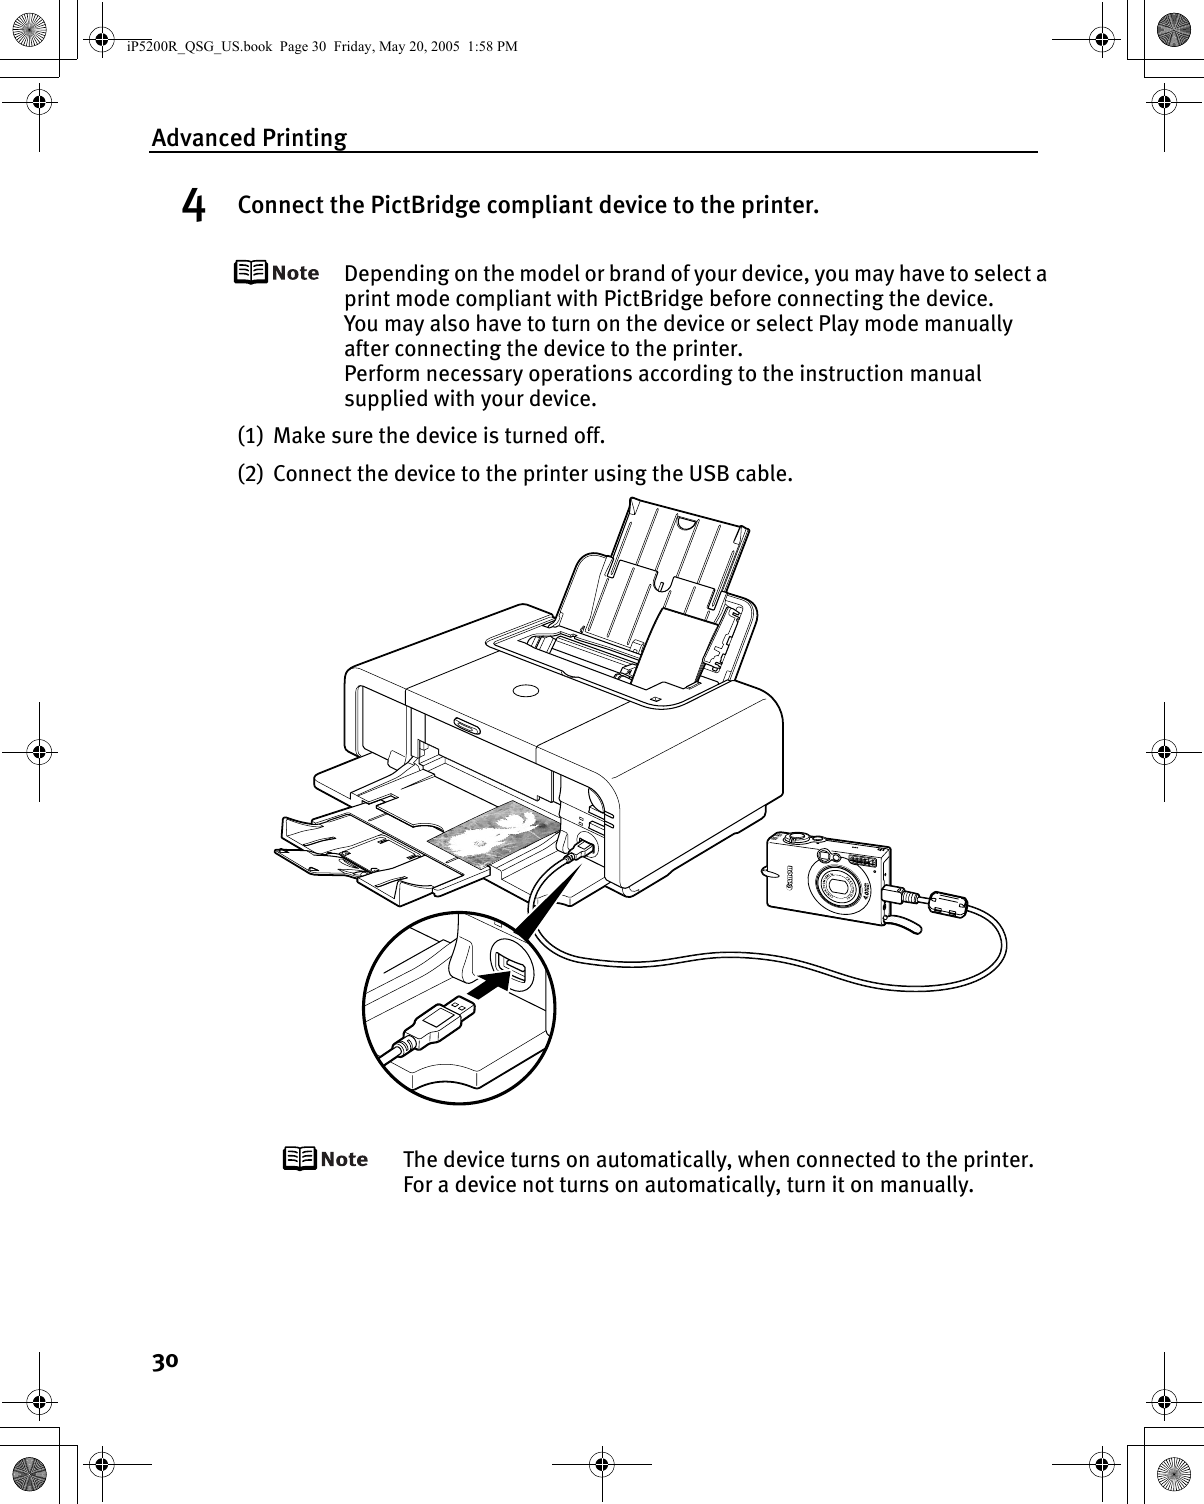

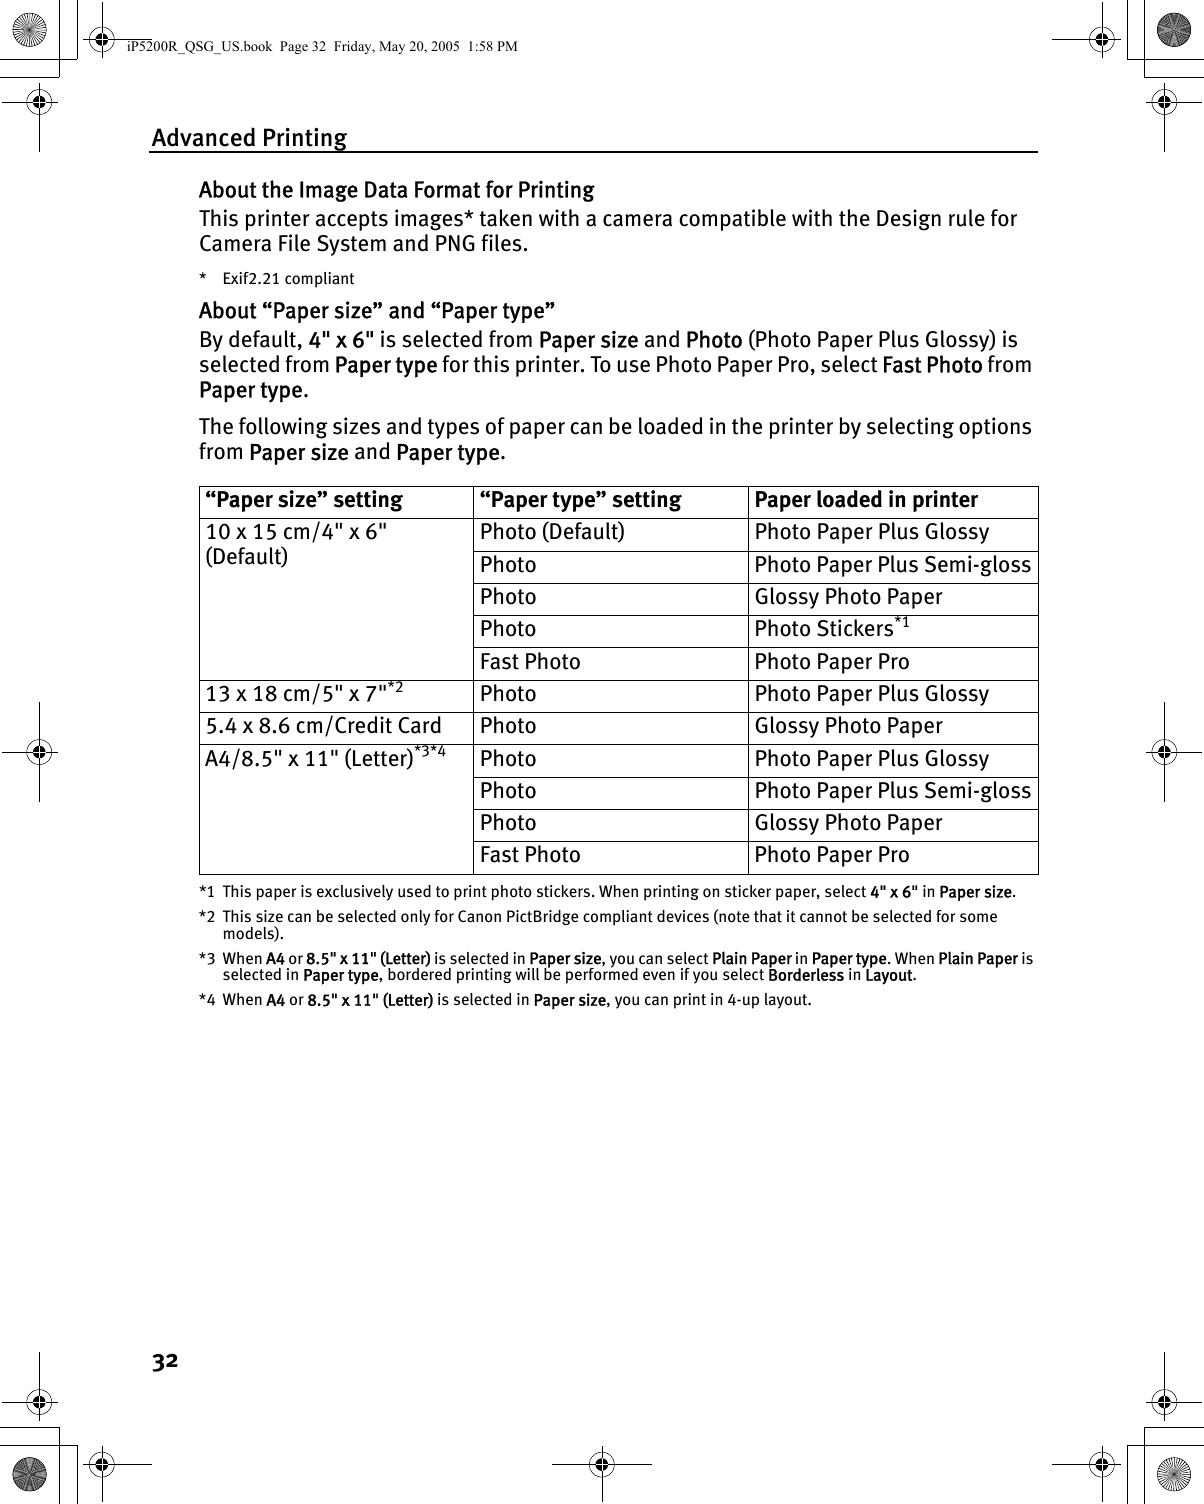
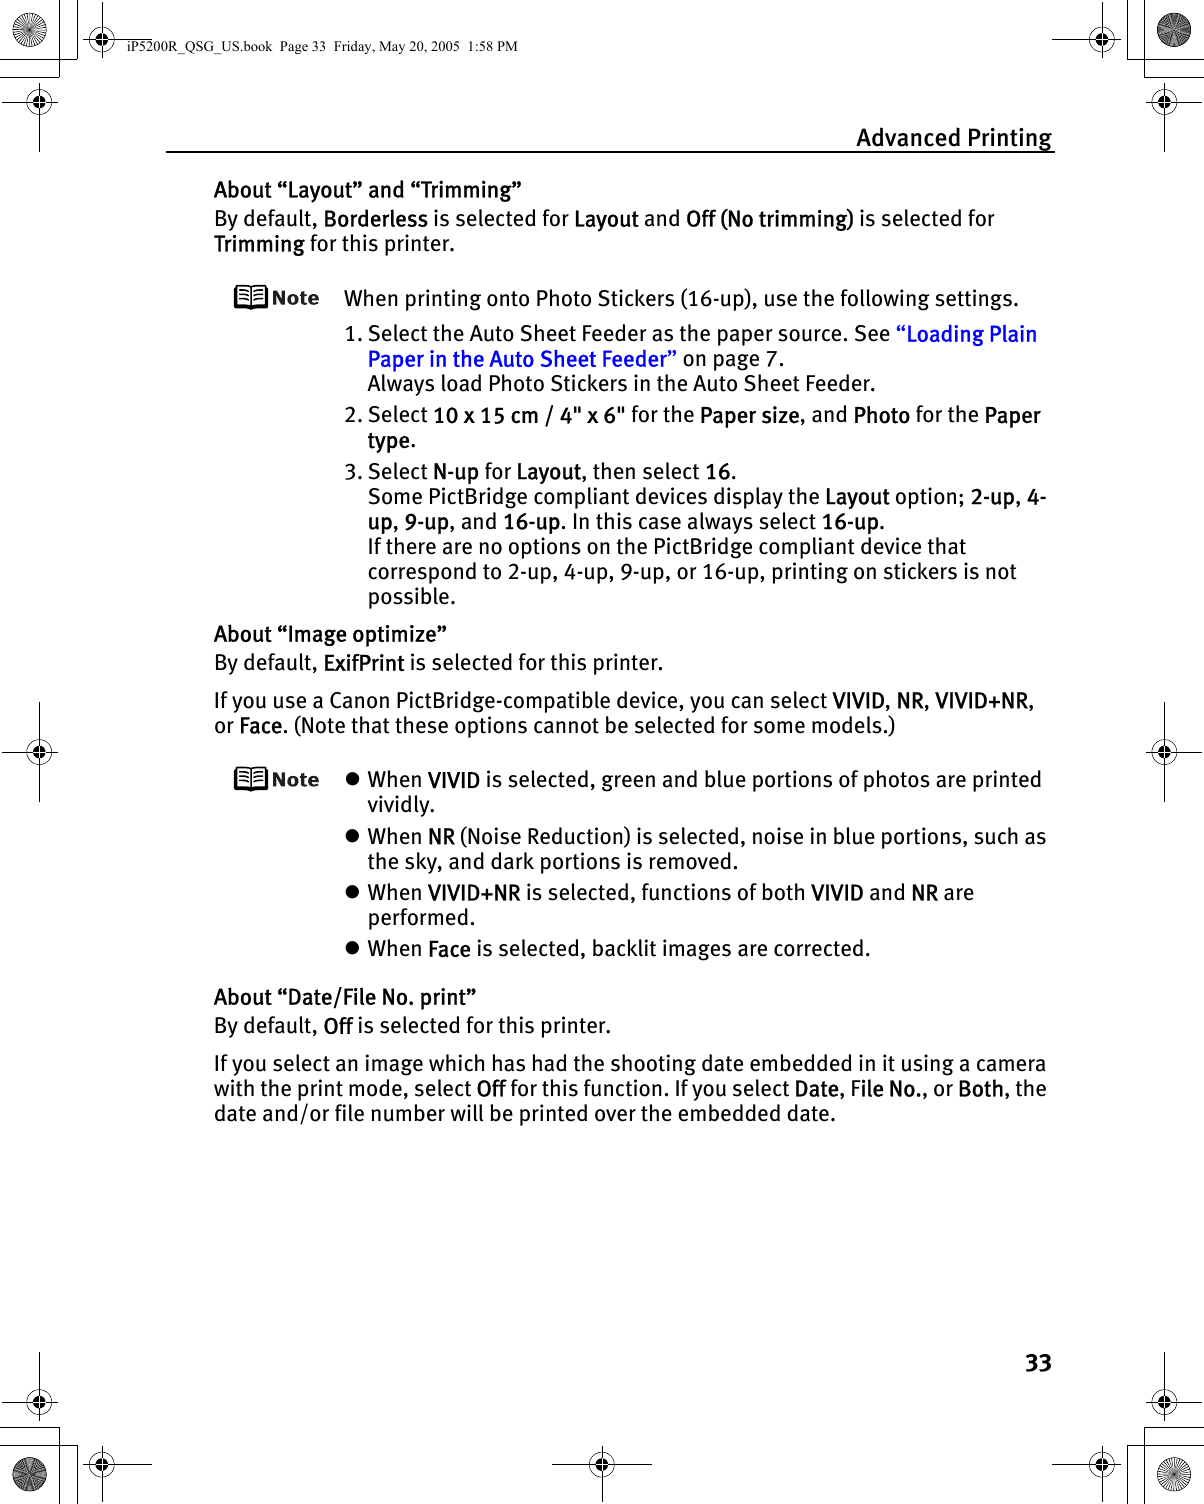
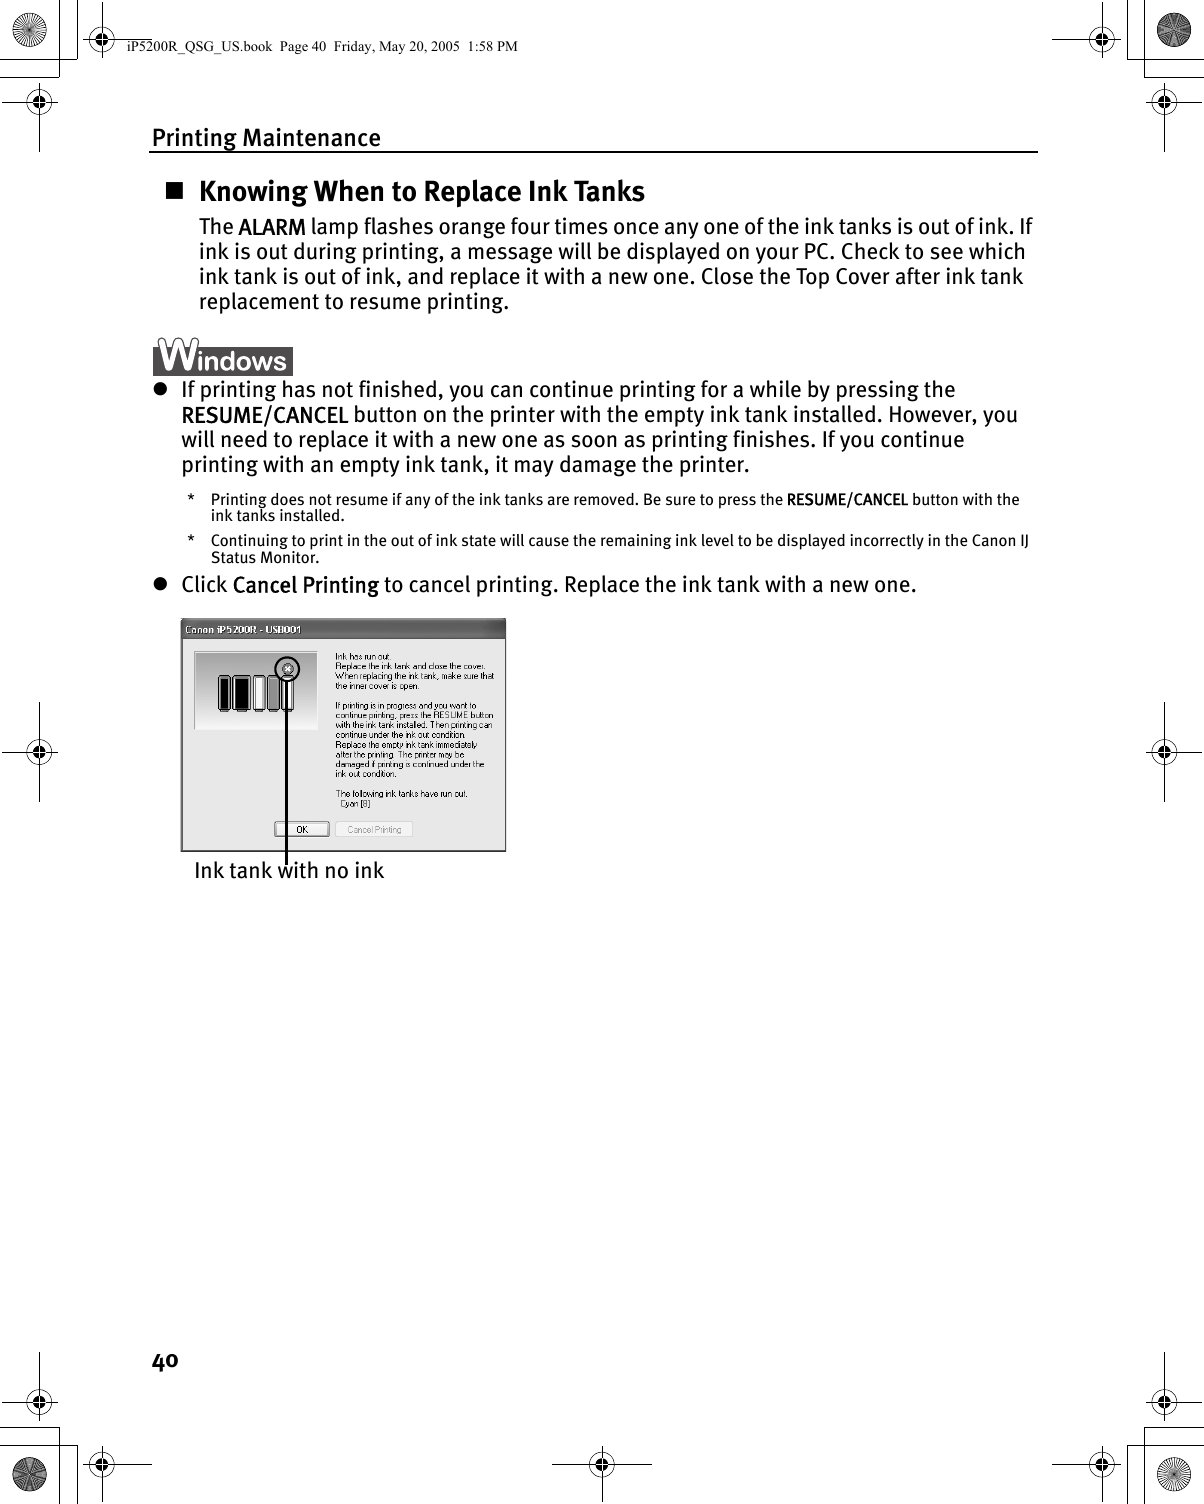
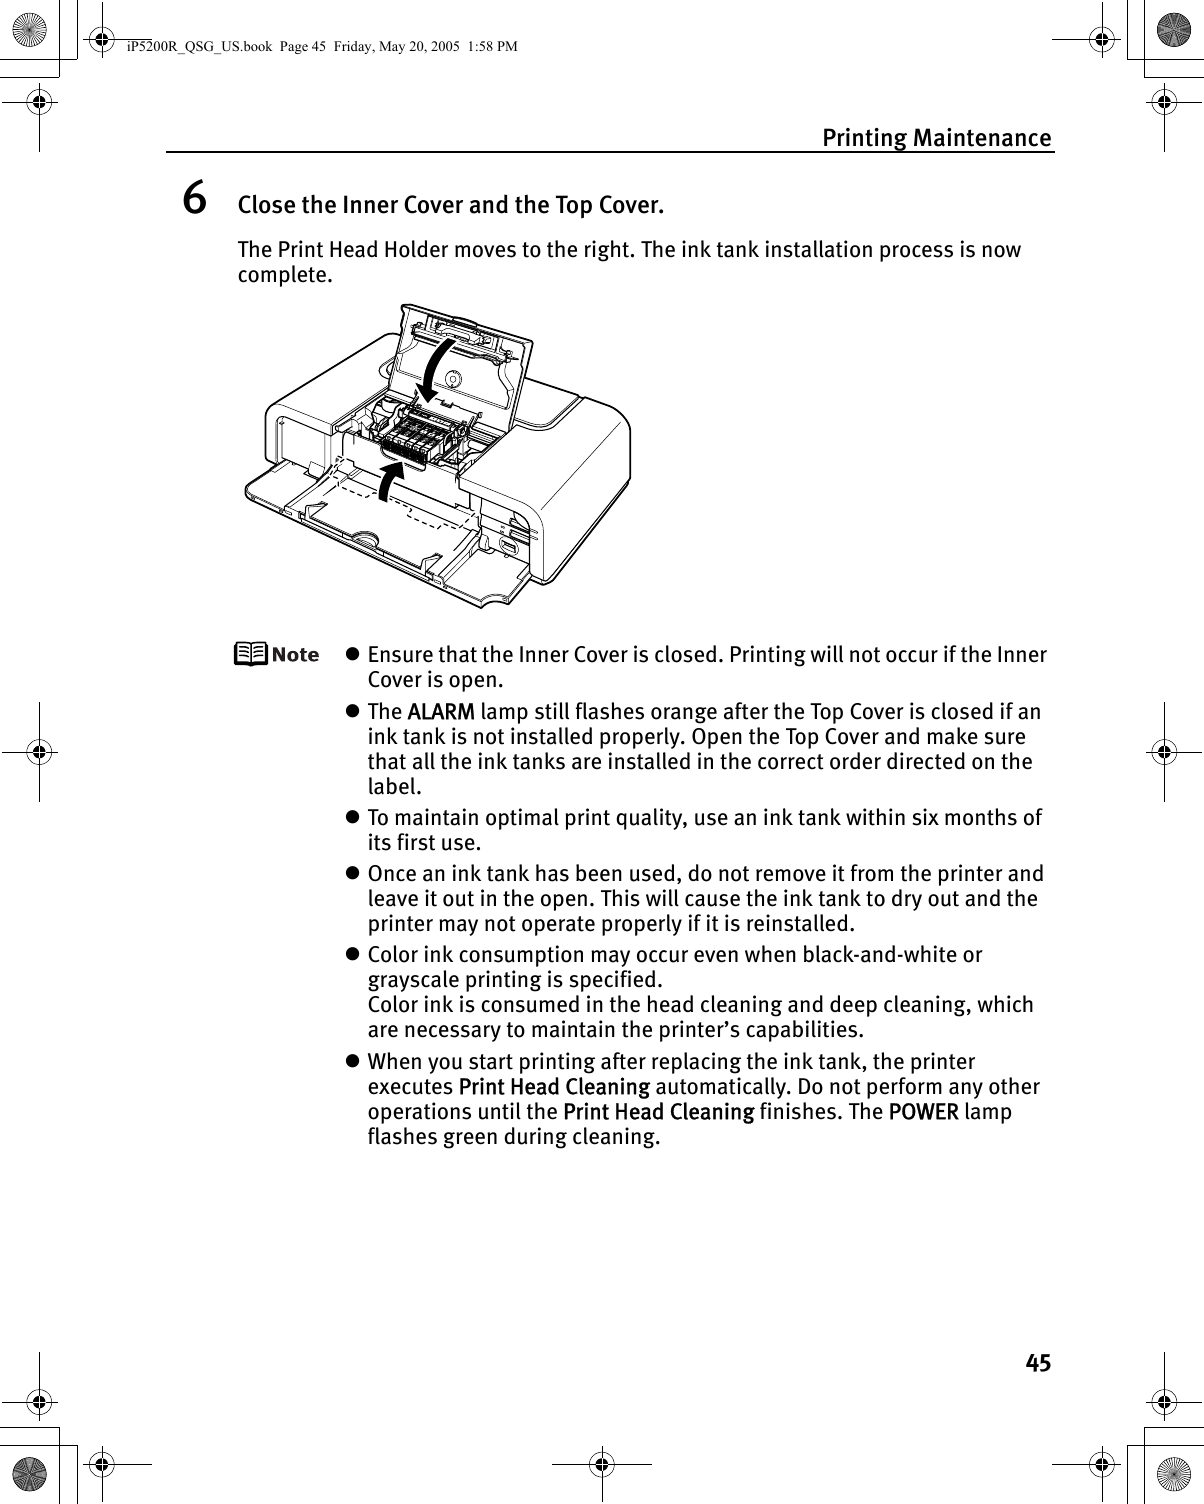
![Advanced Printing34Other SettingsIf you use a Canon PictBridge-compliant device, you can use the following print settings. (Note that these print settings cannot be used for some models.) For details, refer to your device’s instruction manual.• Shooting Info (Exif Data)You can print shooting info (Exif data) on photos in list format, or in the margins of specified photos. Select Layout, then select the item displayed with the [i] icon.• 35 mm Film Style Layout (Contact Printing Layout)You can print selected photos or index-specified photos as 35 mm film style layout (contact printing layout).Select Layout then select the item displayed with the film icon.zNever disconnect the USB cable during printing.zWhen disconnecting the USB cable between the device and printer, follow the instructions given in the instruction manual of the device.zControls of the device cannot be used for the following functions:- Print quality setting-Printer maintenancezFor the device operation method and troubleshooting, refer to your device manual. For print error messages, see “Cannot Print Properly from the Digital Camera” on page 82.Checking or Changing PictBridge Print Settings From the PrinterYou can change the printer’s default PictBridge print settings, such as paper size and type. To do this, install the Canon Setup Utility from the included CD-ROM and connect the printer to a computer. For details, refer to the User’s Guide.iP5200R_QSG_US.book Page 34 Friday, May 20, 2005 1:58 PM](https://usermanual.wiki/Canon/K30254.end-product-users-manaul-1/User-Guide-573769-Page-36.png)
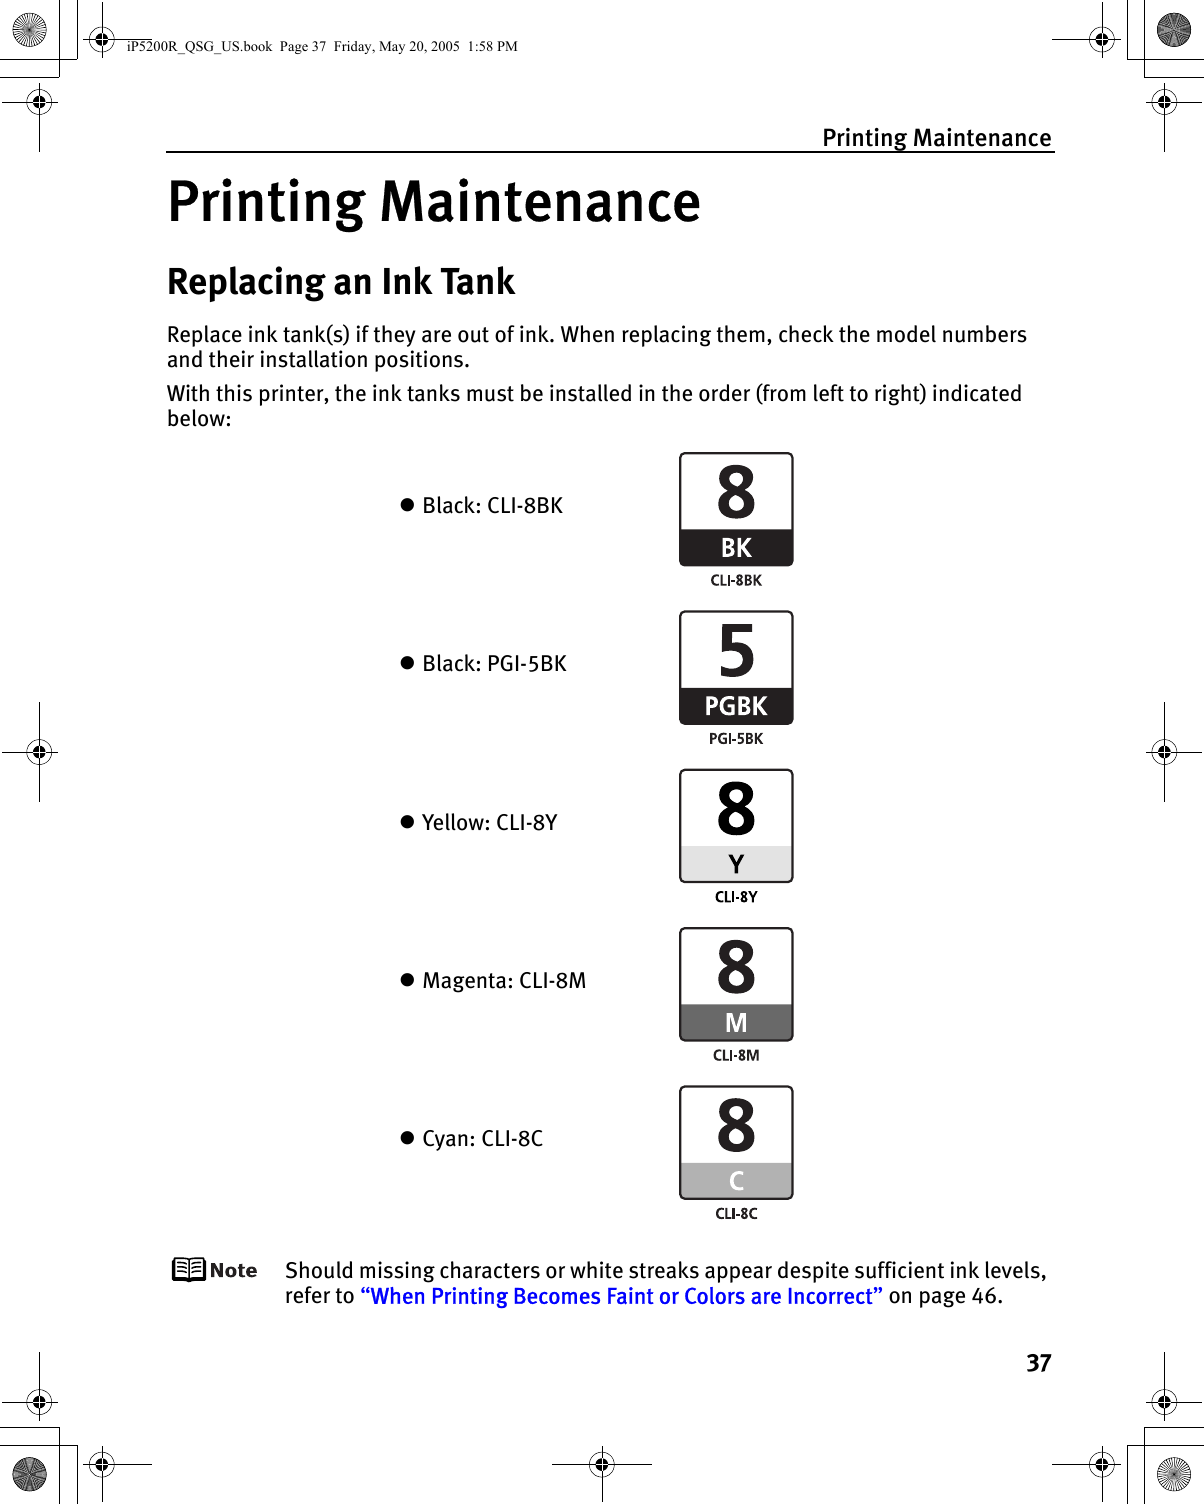
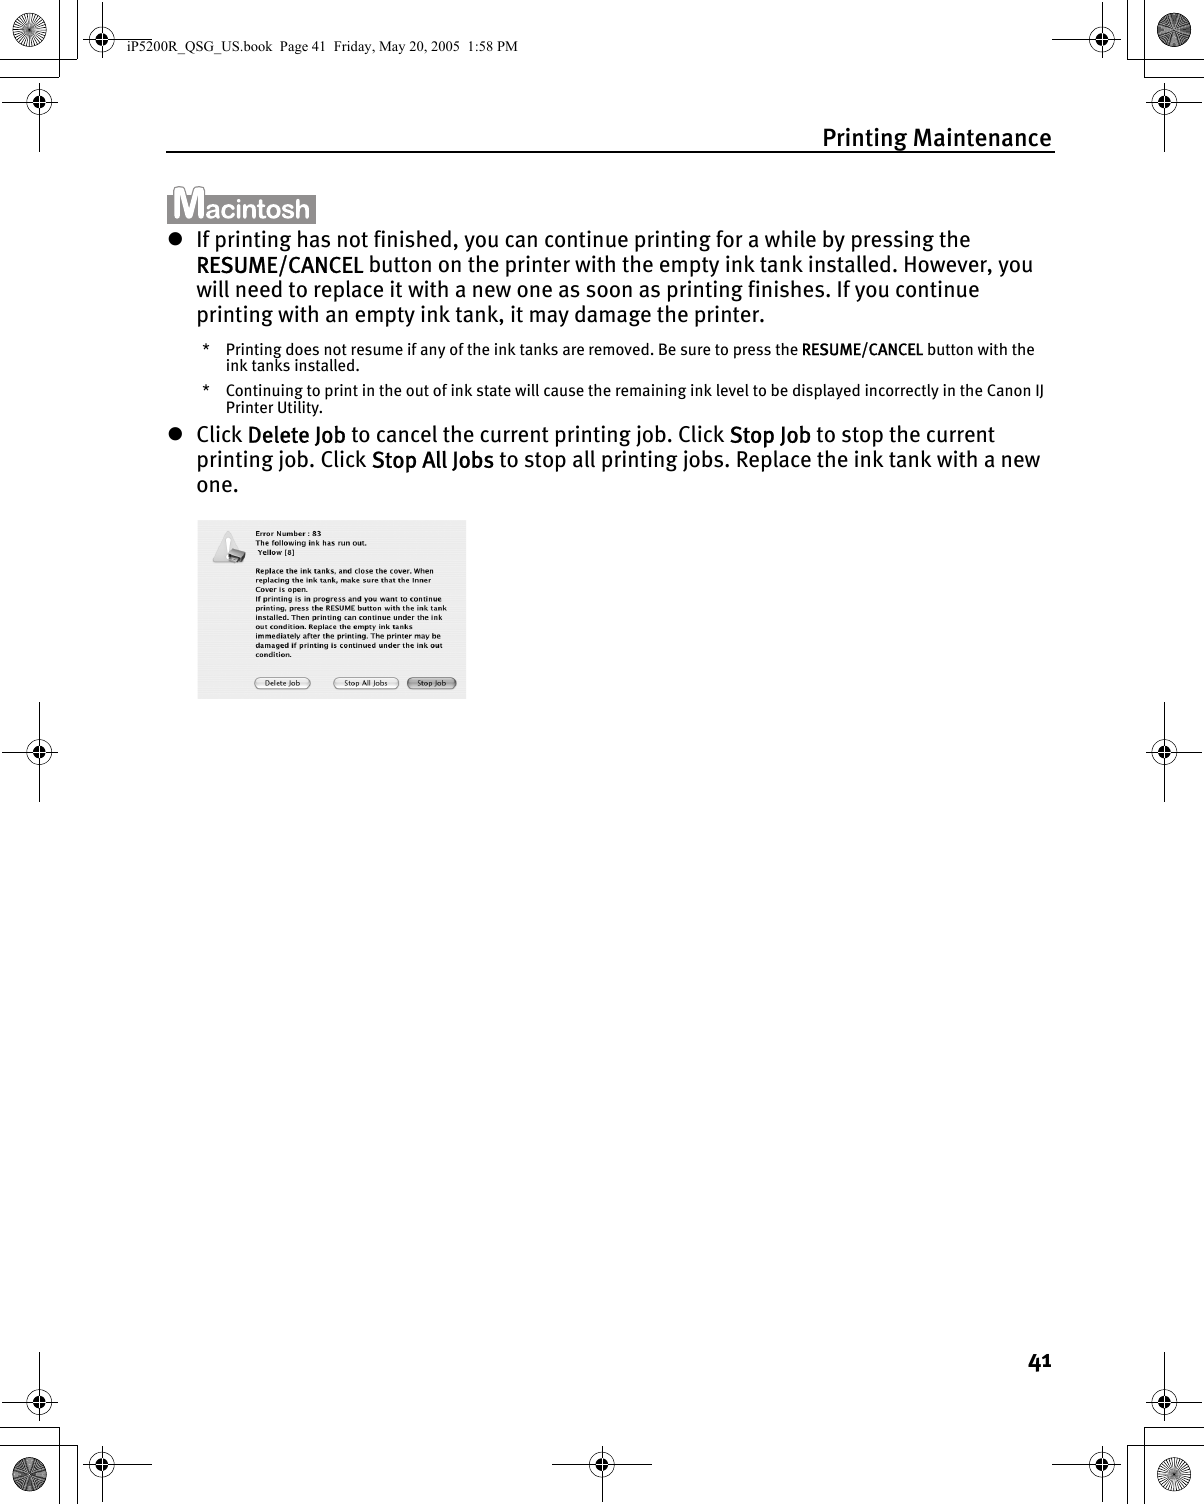
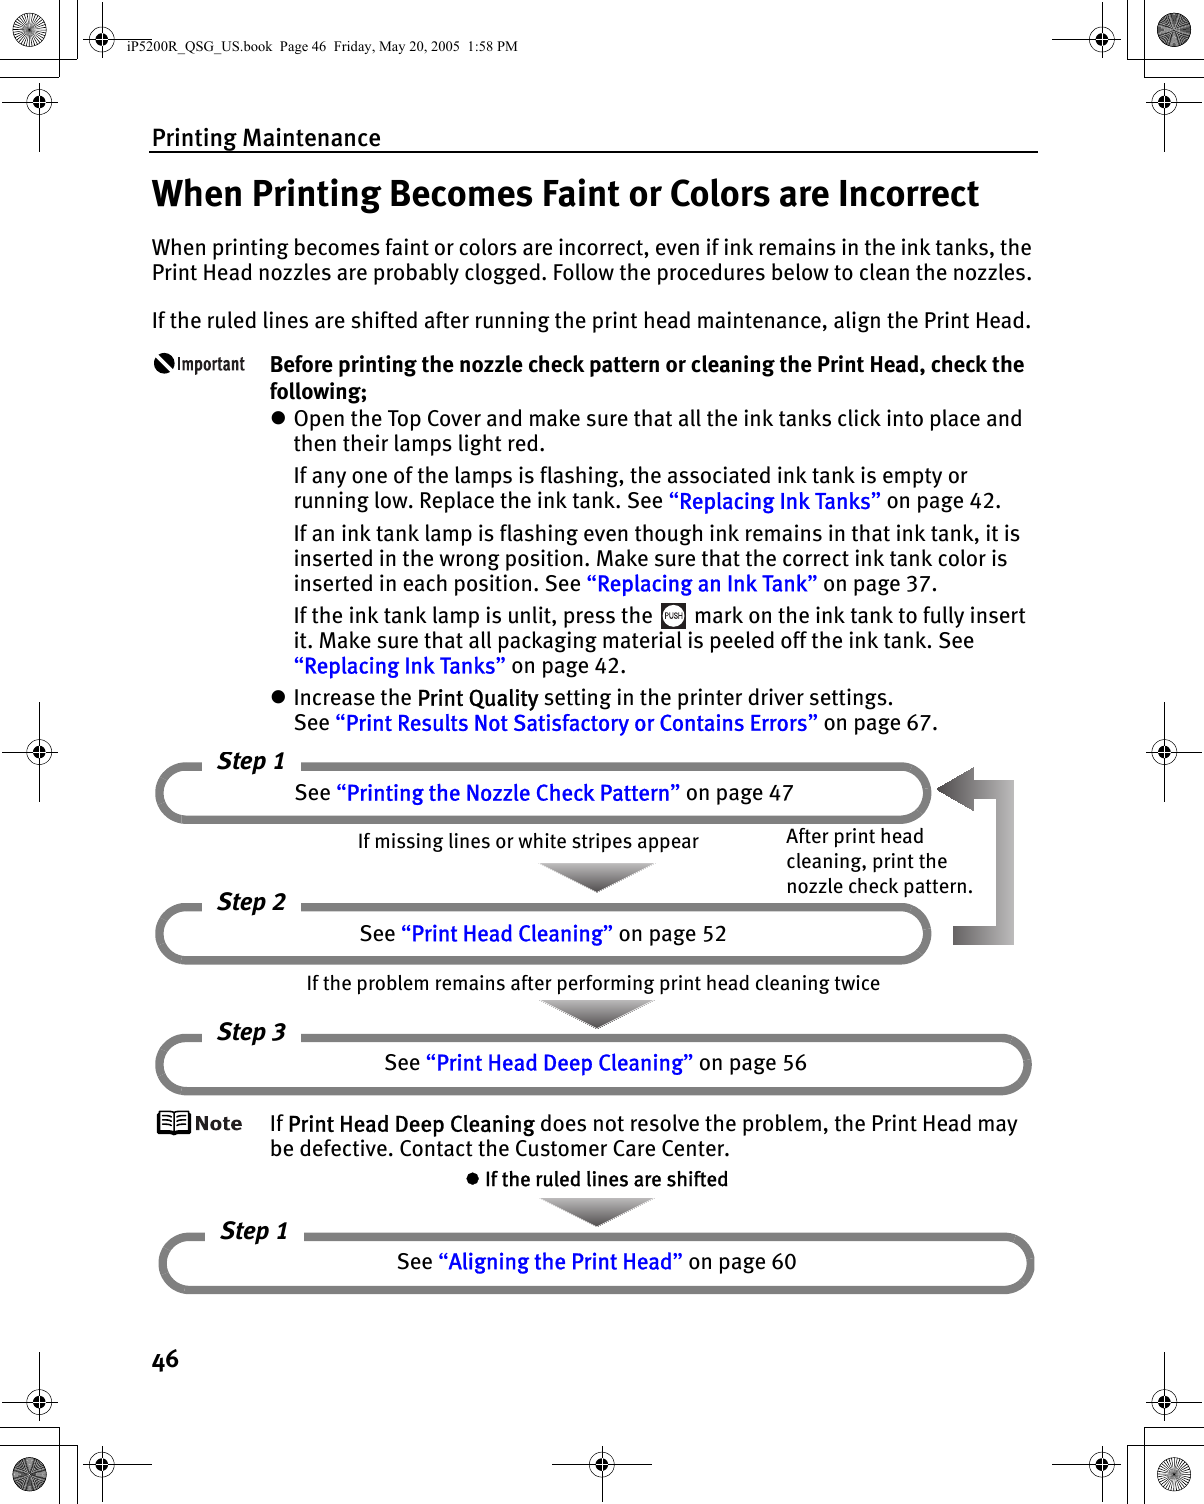
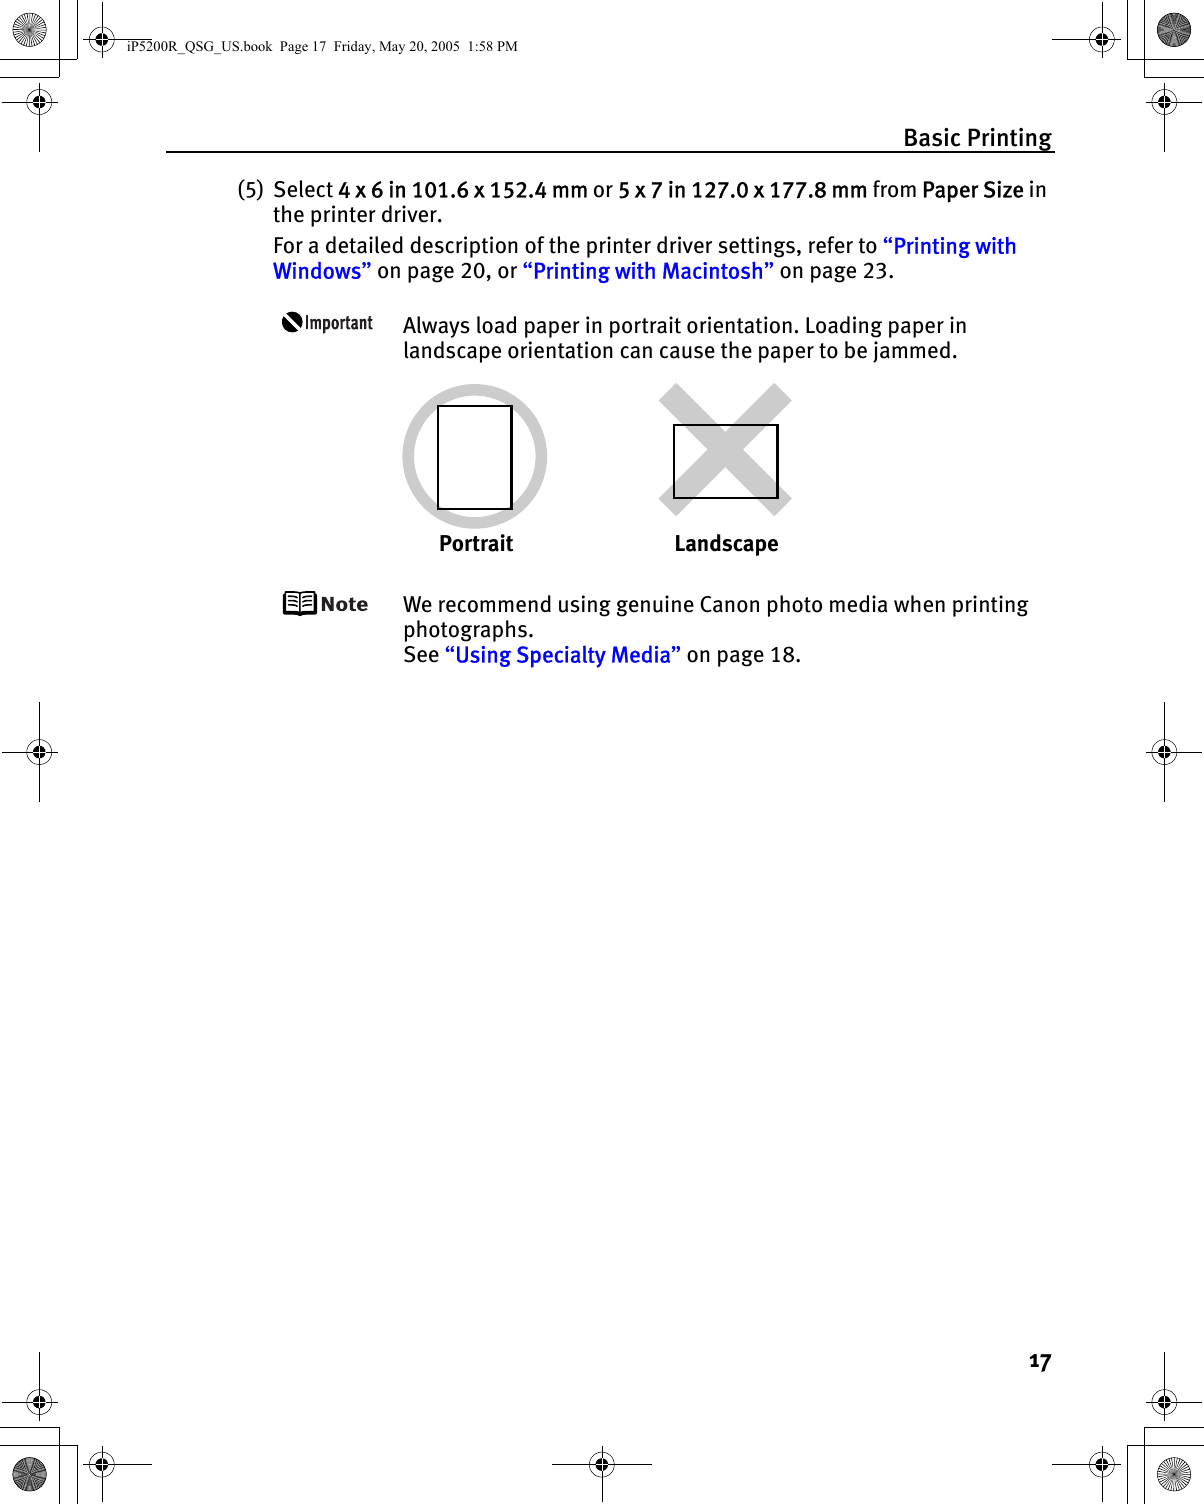
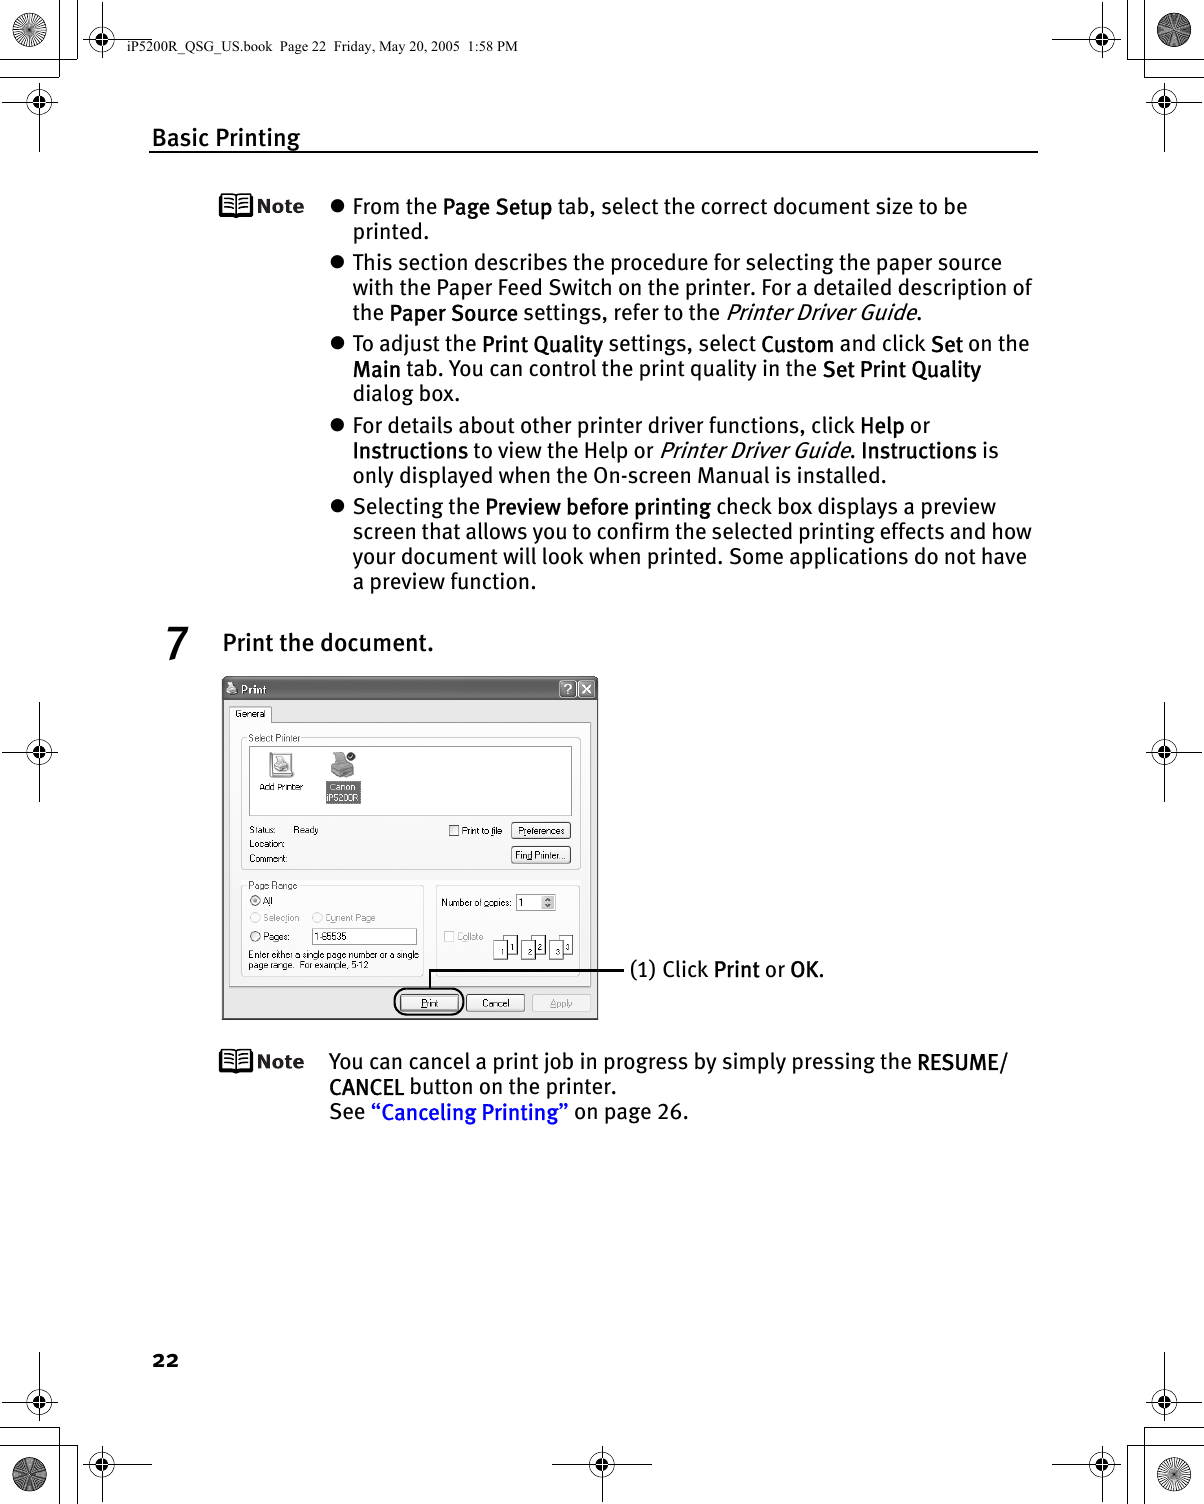
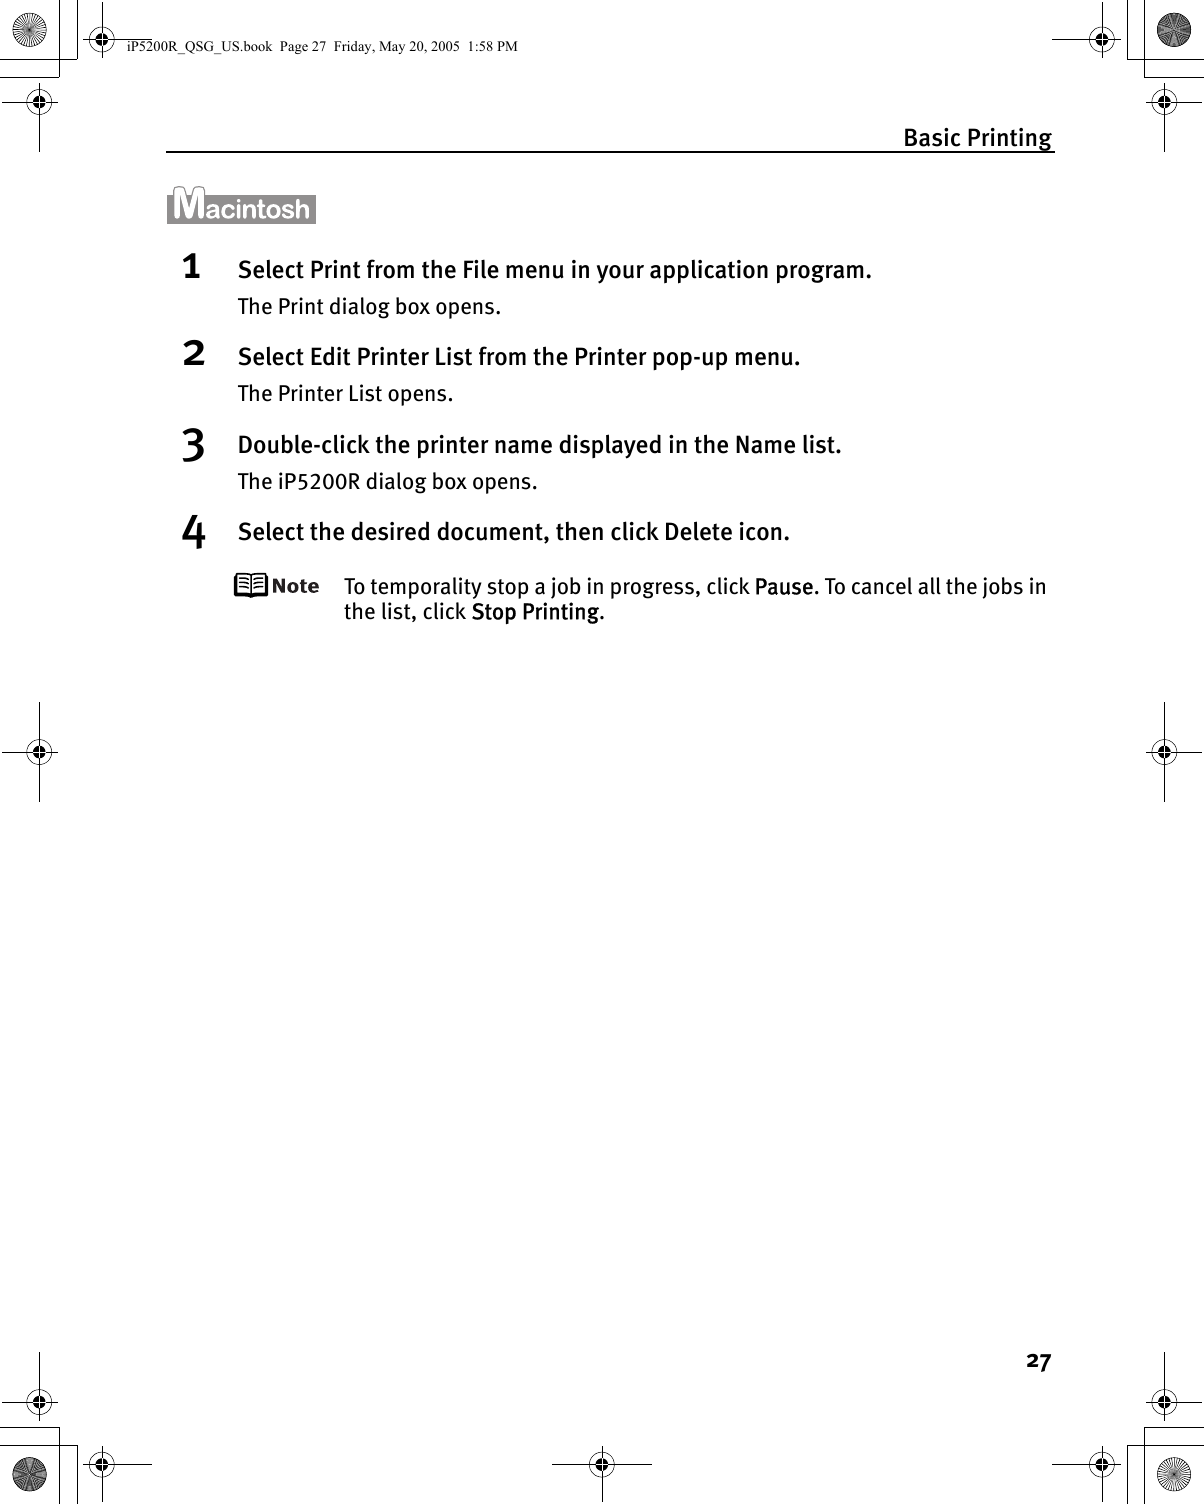
![Printing Maintenance38Getting the Ink Level InformationInk Level Indication on the PrinterYou can confirm the ink level in each ink tank through the ink tank lamps. Open the Top Cover of the printer to see how the ink tank lamps light or flash.Ink is low: The ink tank lamp flashes slowly (at about three second interval). Prepare a new ink tank.Ink is out: The ink tank lamp flashes quickly (at about one second interval), and the ALARM lamp on the printer flashes orange four times. Replace the ink tank with a new one.*When the ALARM lamp on the printer flashes orange seven or thirteen times, an error has occurred and therefore the printer is unable to print. For details, refer to “Handling Error Messages” on page 77.Ink Level Indication on the PCOpen the Canon IJ Status Monitor to check the ink level information.1. Open the printer properties dialog box.See “Accessing the Printer Driver (Windows)” on page 35.2. Click View Printer Status on the Maintenance tab.The following message will be displayed.*You can also display the Canon IJ Status Monitor by clicking the Canon IJ Status Monitor button which appears on the taskbar during printing.Ink is low: The [!] symbol appears above an ink tank that is low.Ink is out: The [x] symbol appears above an empty ink tank. Click Ink Details to show the ink tank information, then replace the ink tank with a new one. RepeatsRepeatsConfirm whether any symbols are displayed here.iP5200R_QSG_US.book Page 38 Friday, May 20, 2005 1:58 PM](https://usermanual.wiki/Canon/K30254.end-product-users-manaul-1/User-Guide-573769-Page-40.png)
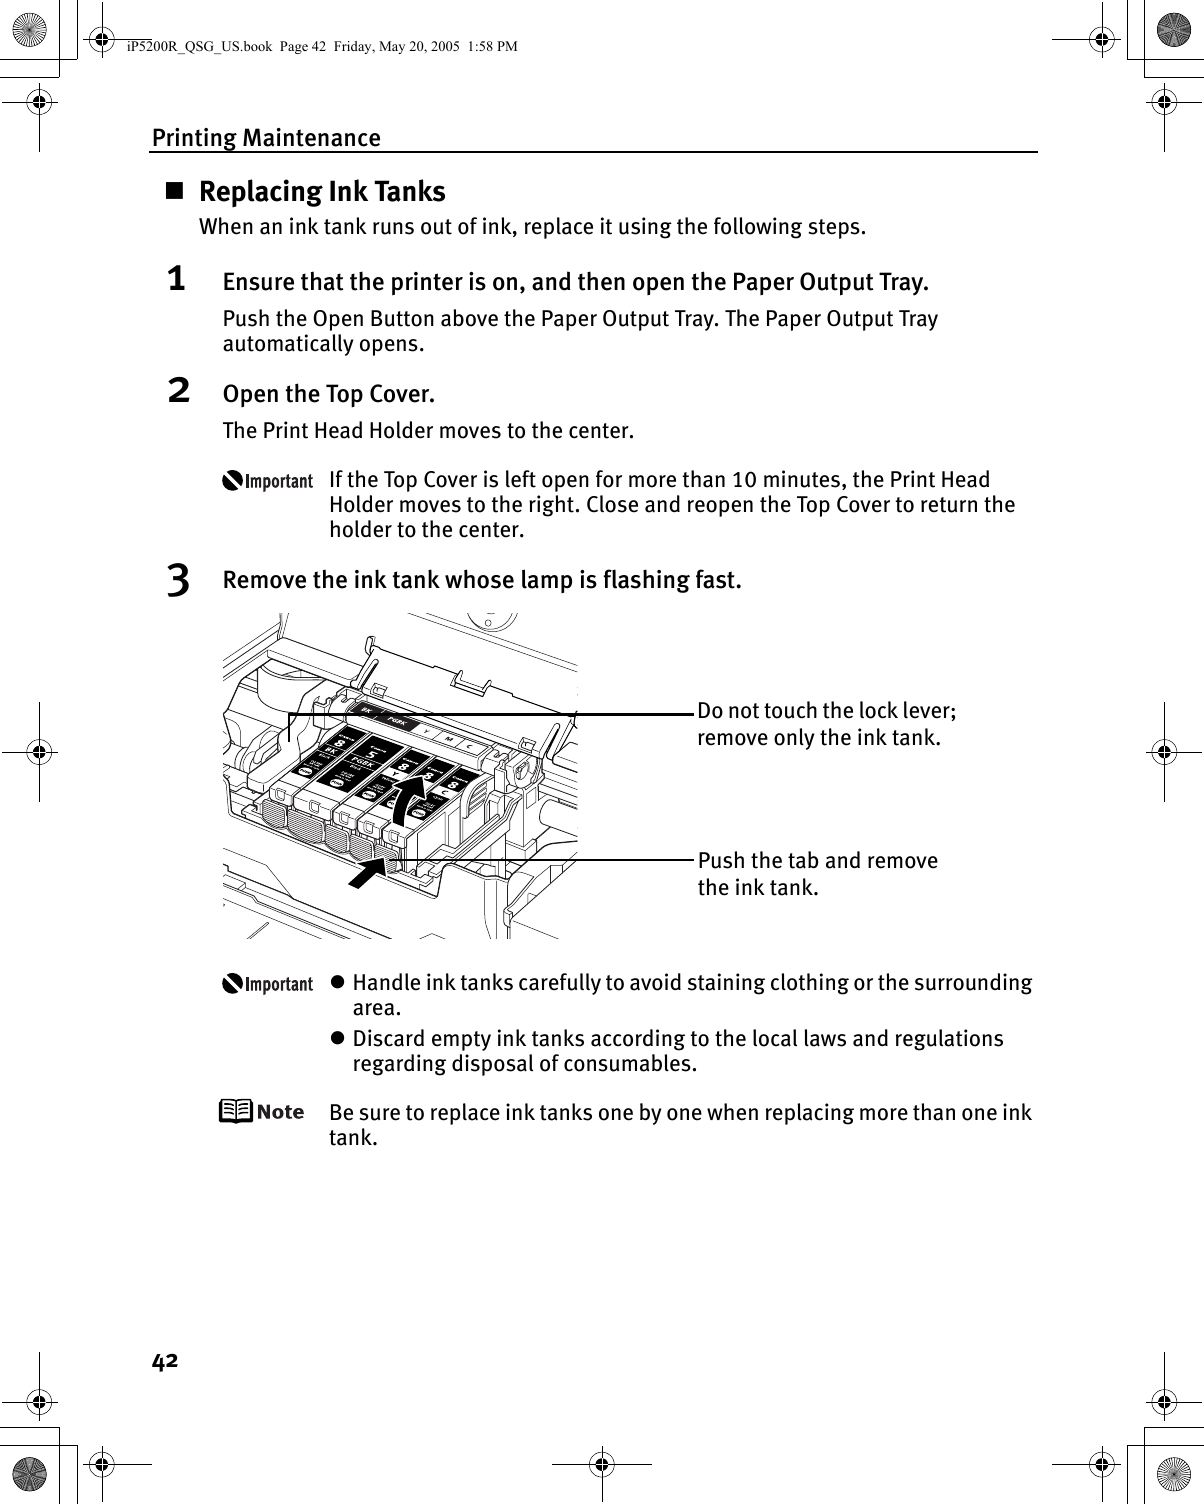
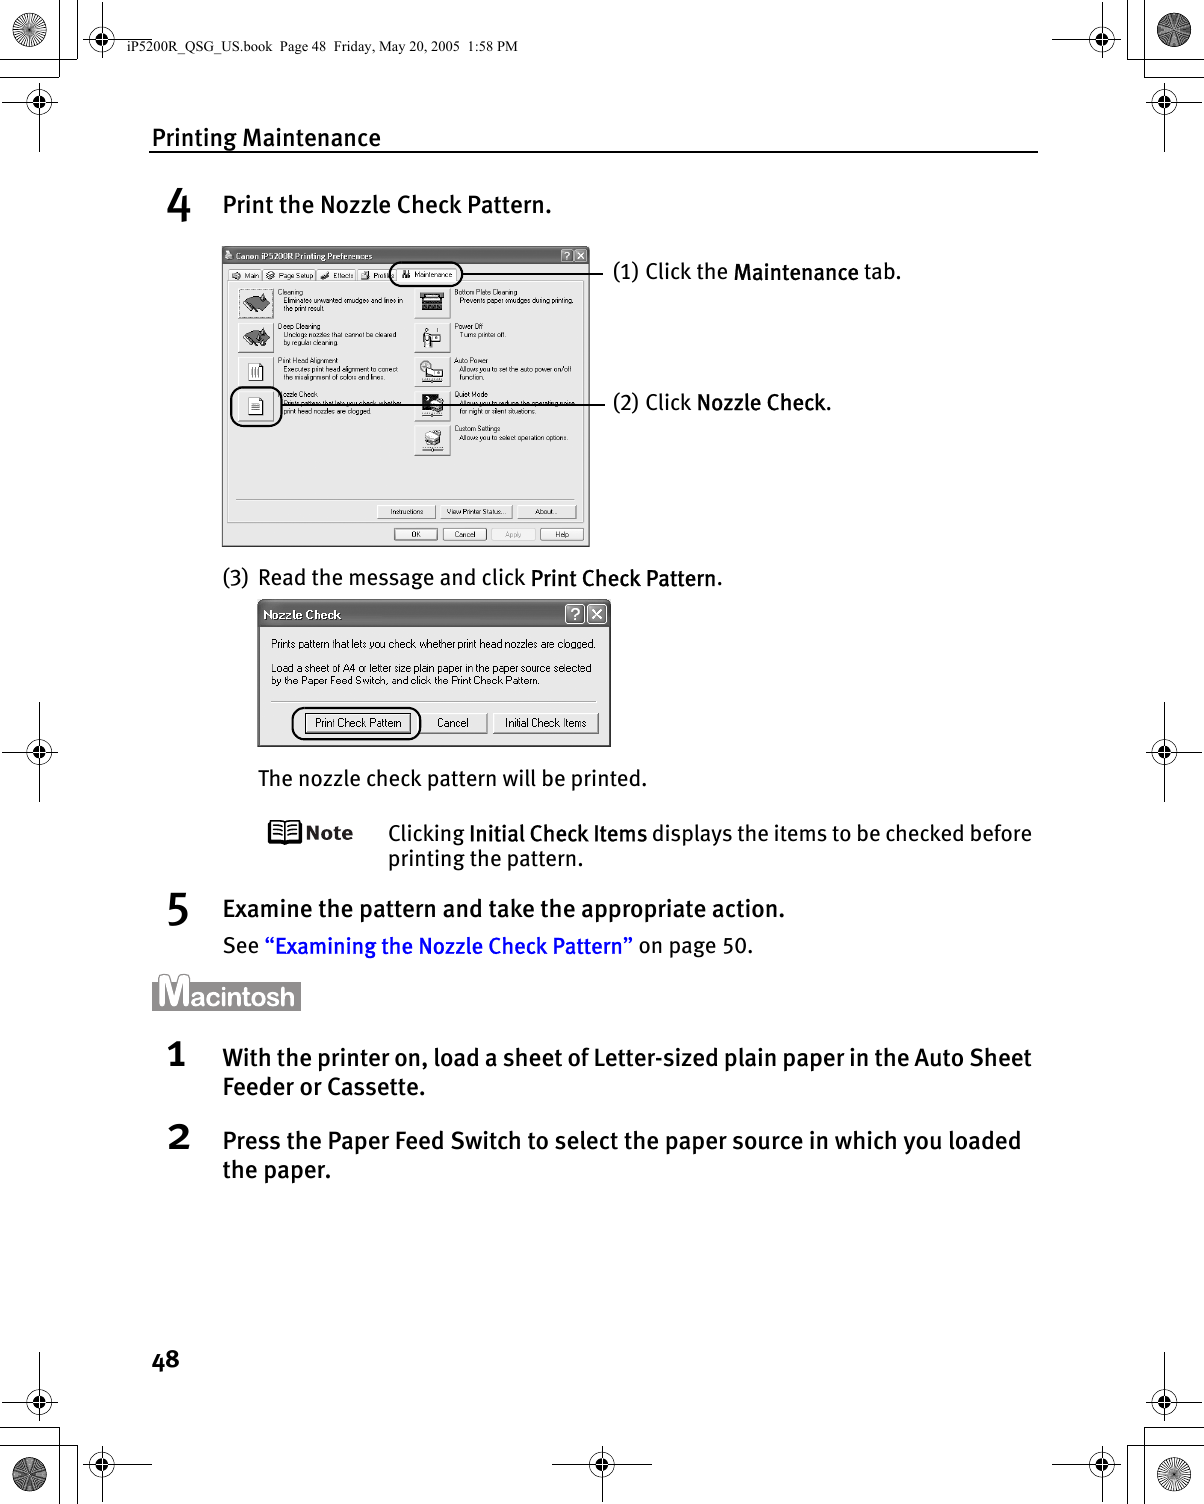
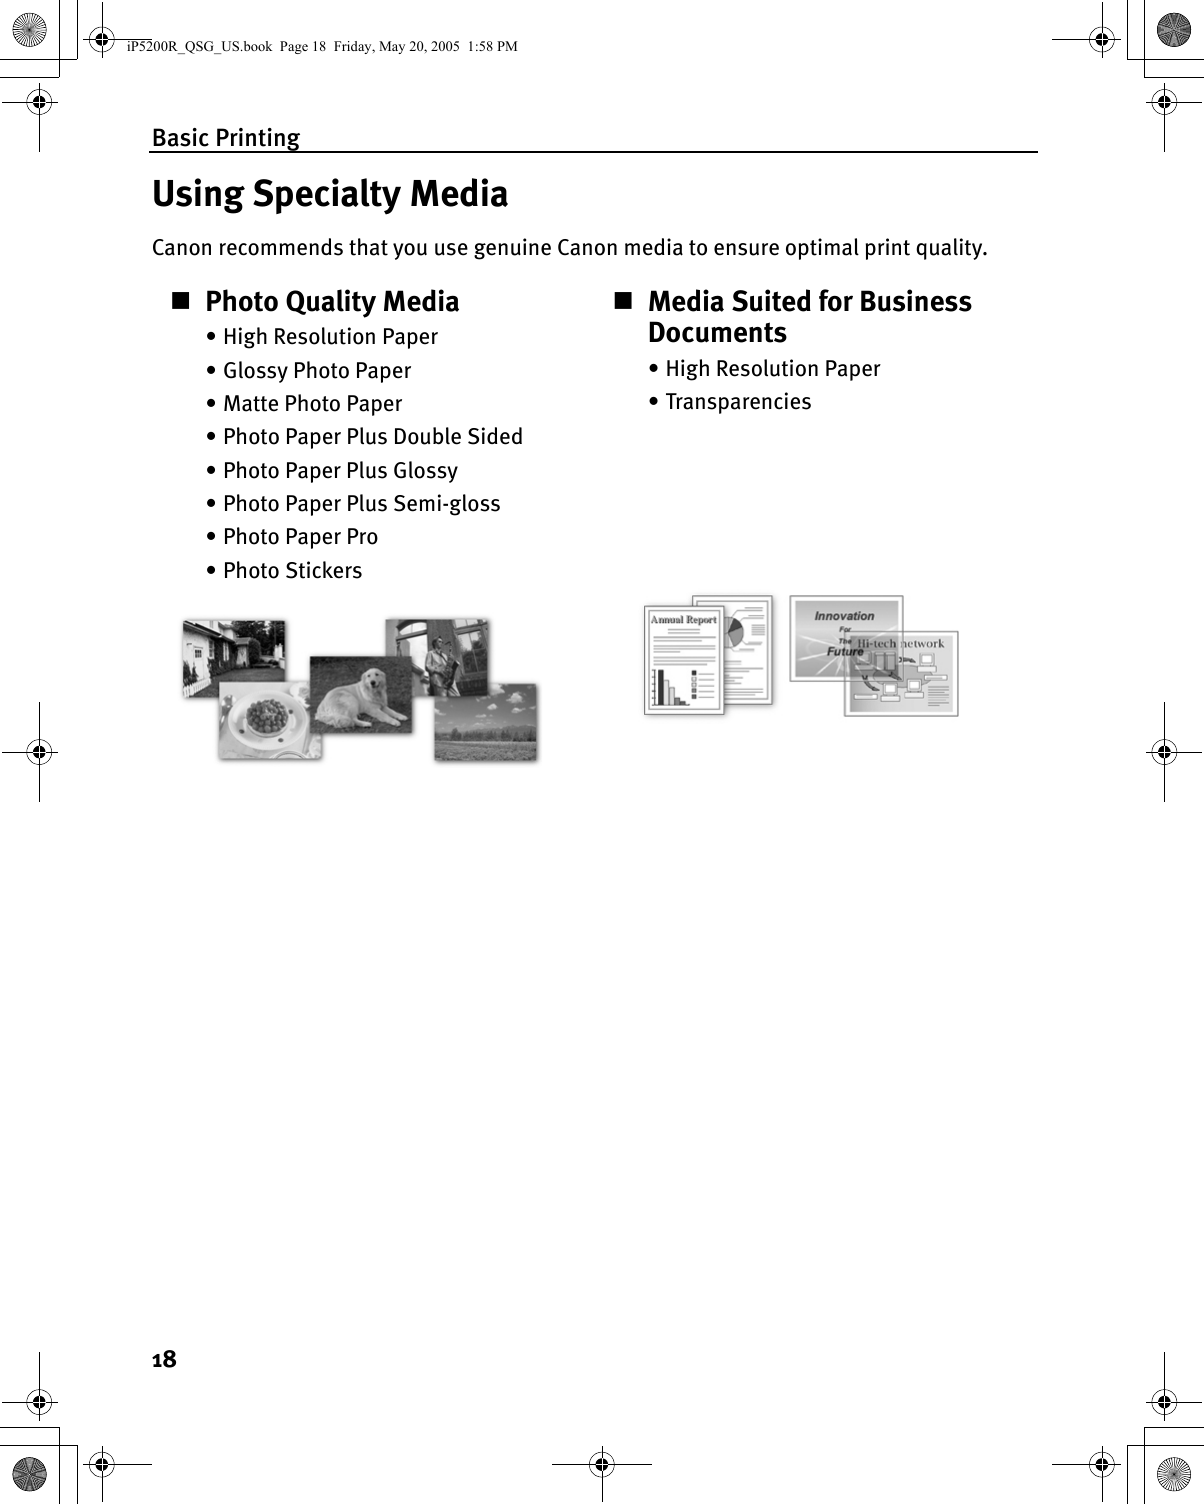
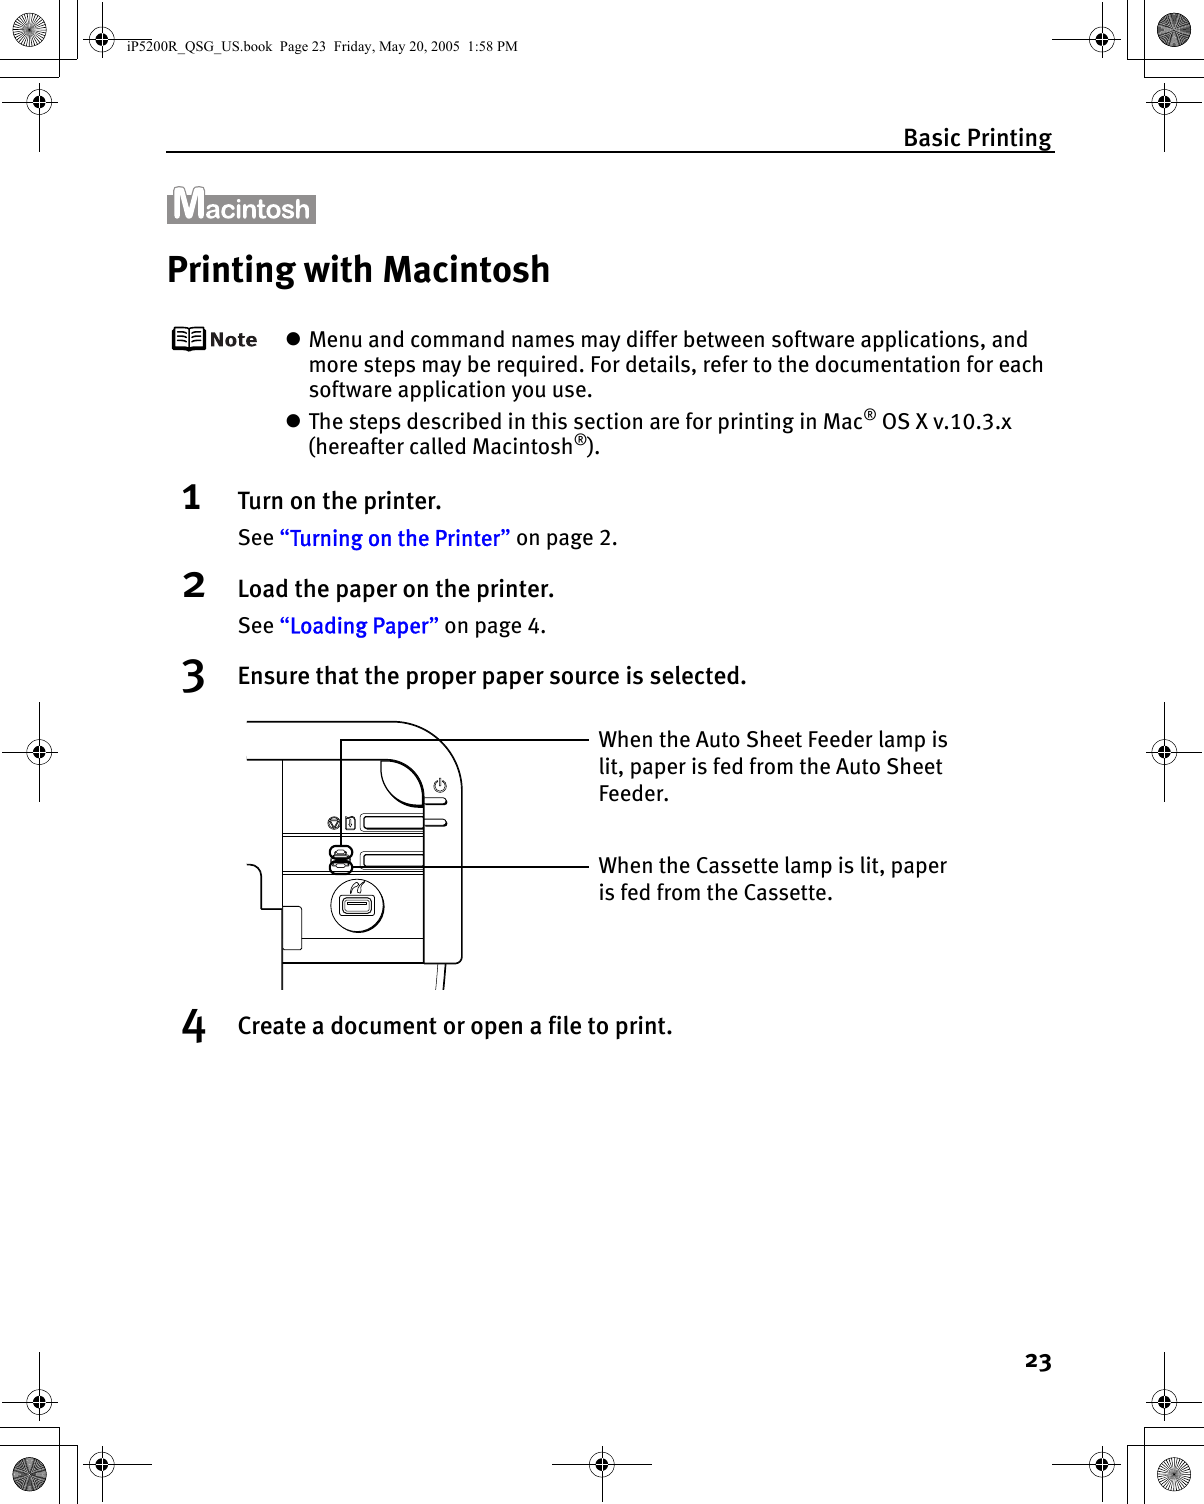
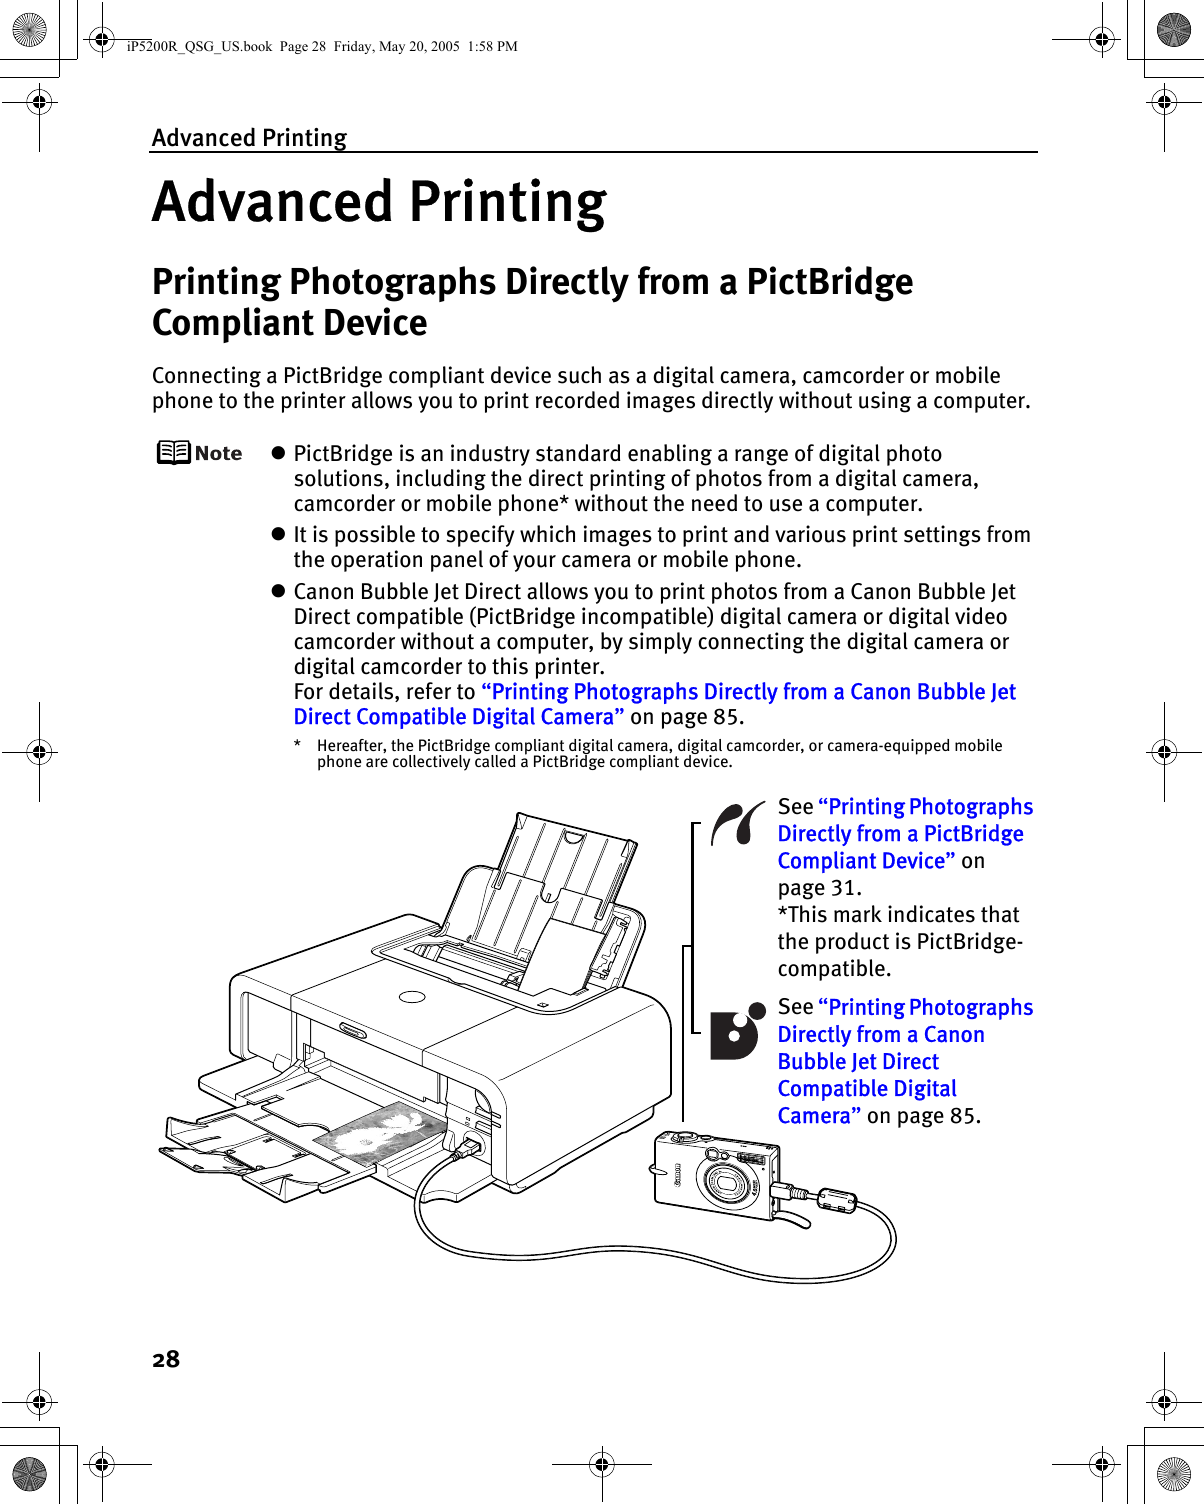
![Printing Maintenance39Open the Canon IJ Printer Utility to check the ink level information.1. Select Applications from the Go menu, and then double-click the Utilities folder.2. Double-click the Printer Setup Utility icon.When using Mac OS X v.10.2, double-click the Print Center icon.3. Select the name of your printer from the Name list and click Utility.When using Mac OS X v.10.2, select the name of your printer from the Name list and click Configure.4. Select the name of your printer from the Product list and click Maintenance.The Canon IJ Printer Utility launches.5. Select Ink Level Information from the pop-up menu.The following dialog box is displayed.Ink is low: The [!] symbol appears above an ink tank that is low.Ink is out: The [x] symbol appears above an empty ink tank. Click About ink to show the ink tank information, then replace the ink tank with a new one.Confirm whether any symbols are displayed here.iP5200R_QSG_US.book Page 39 Friday, May 20, 2005 1:58 PM](https://usermanual.wiki/Canon/K30254.end-product-users-manaul-1/User-Guide-573769-Page-41.png)