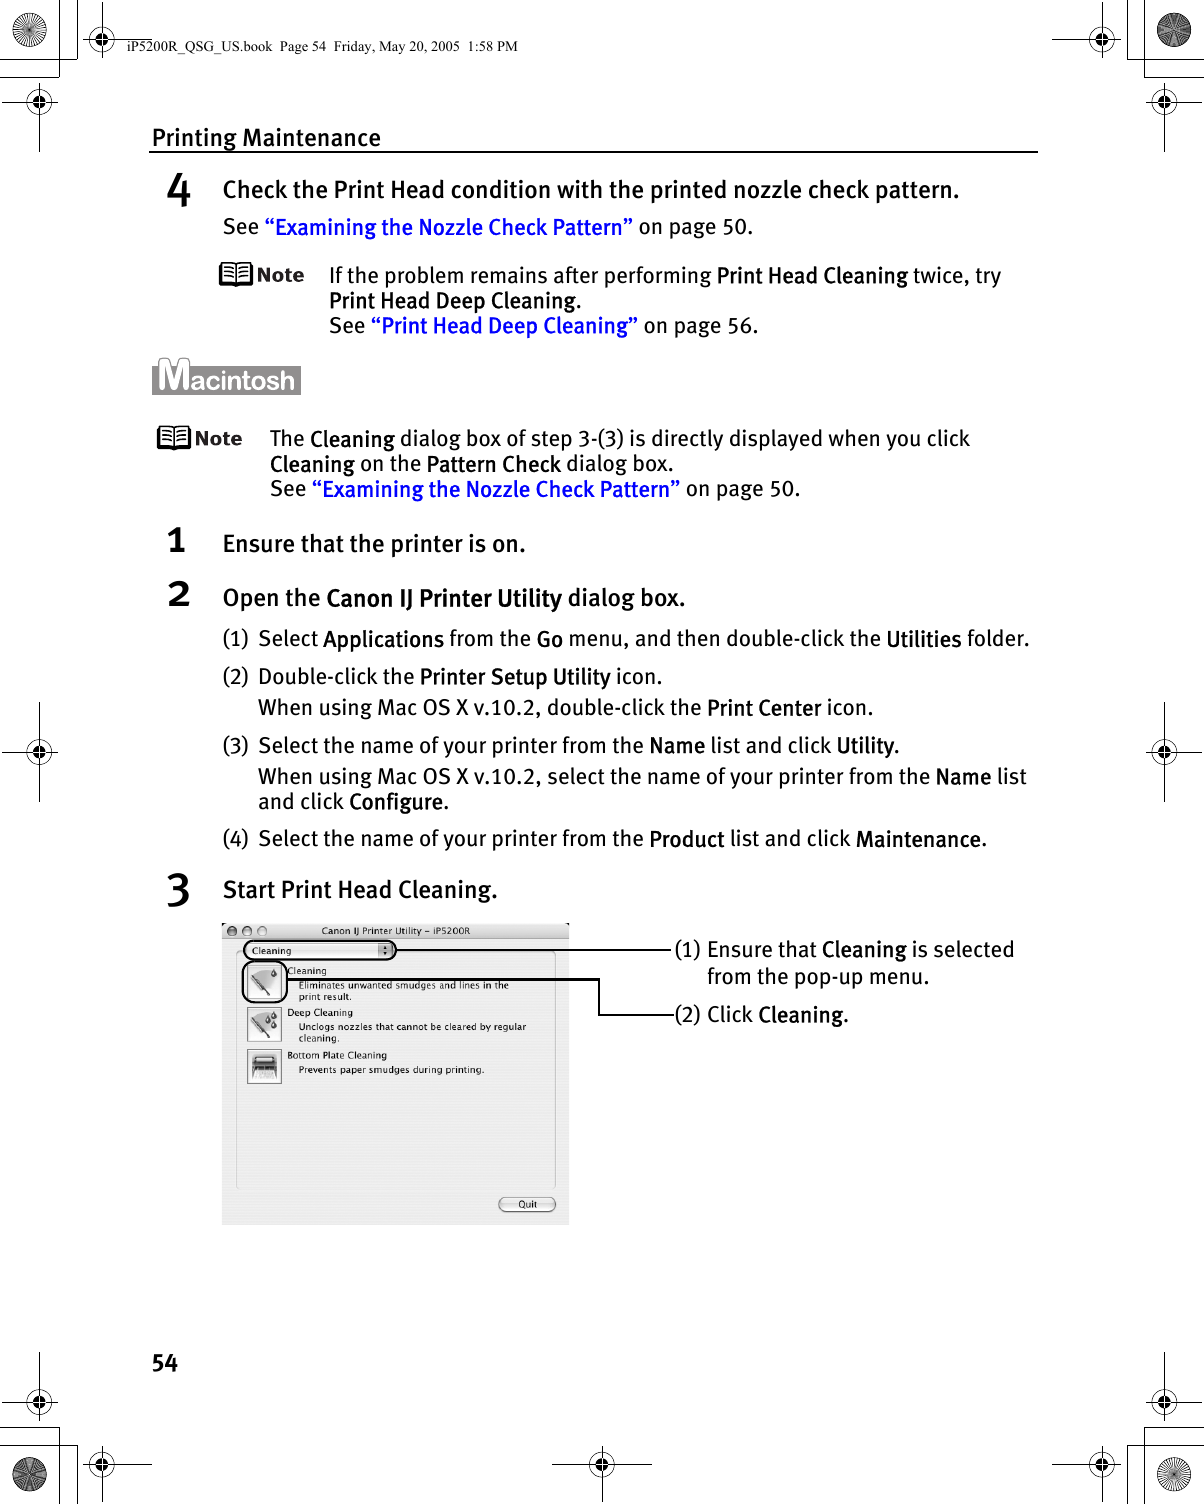
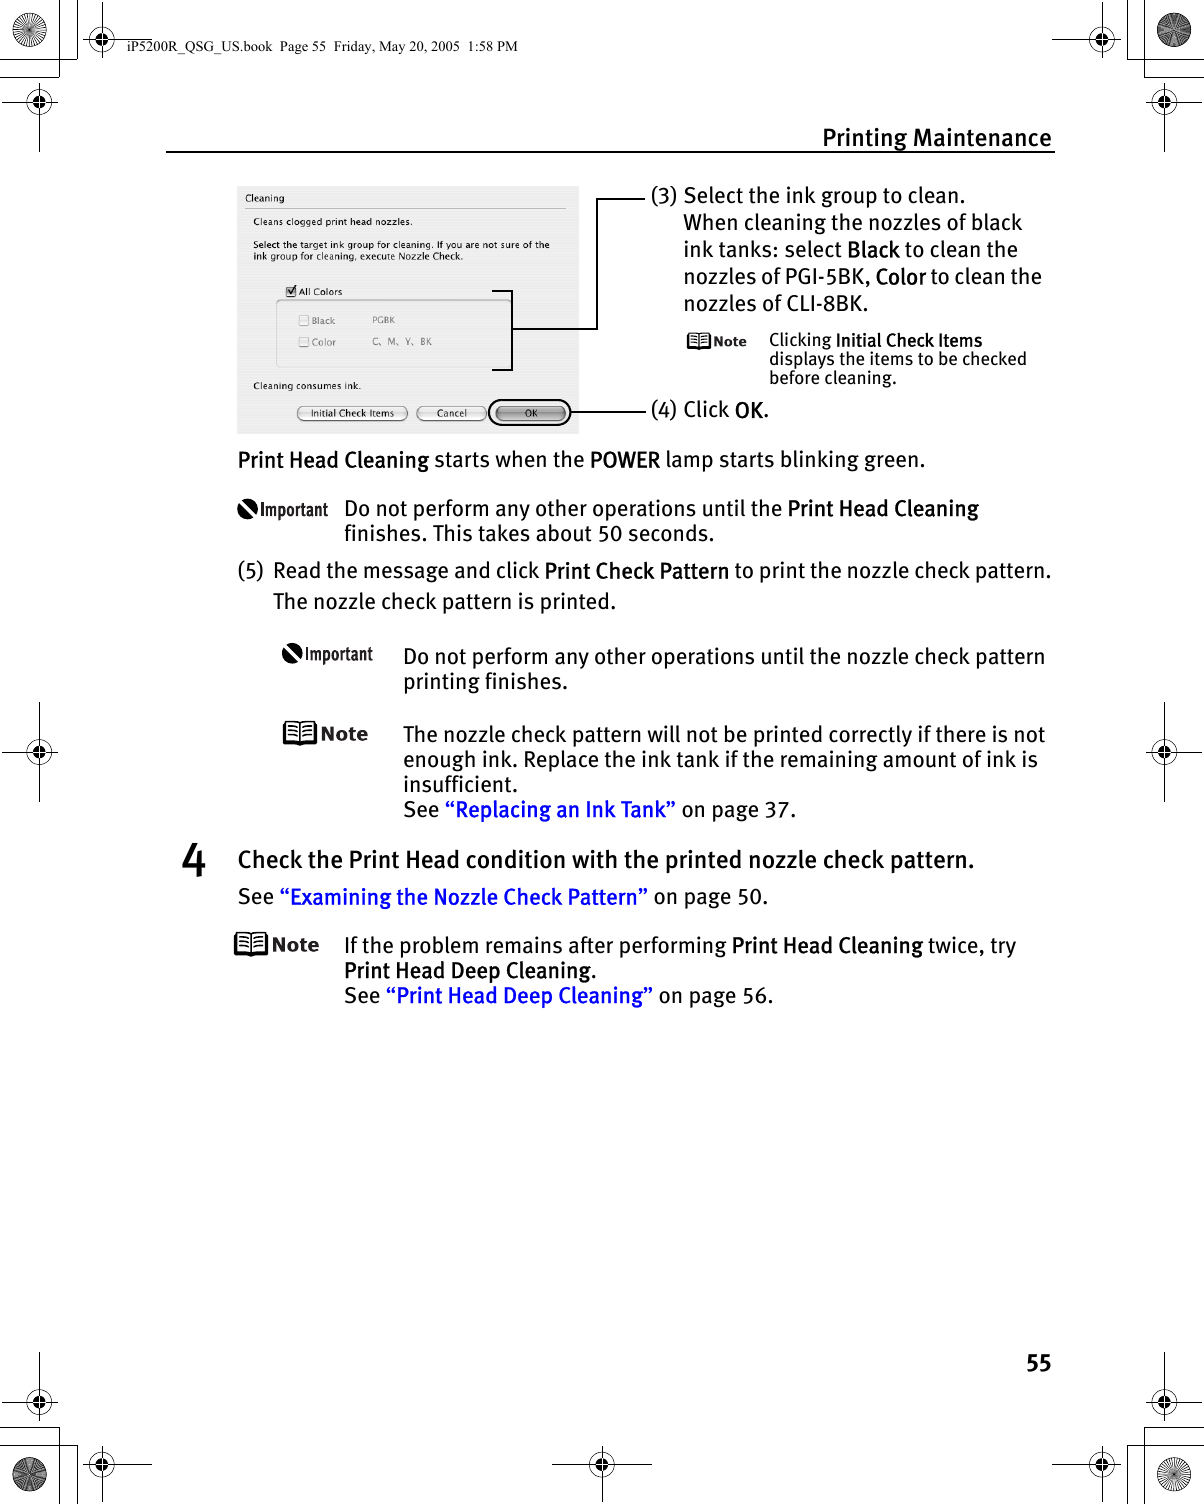
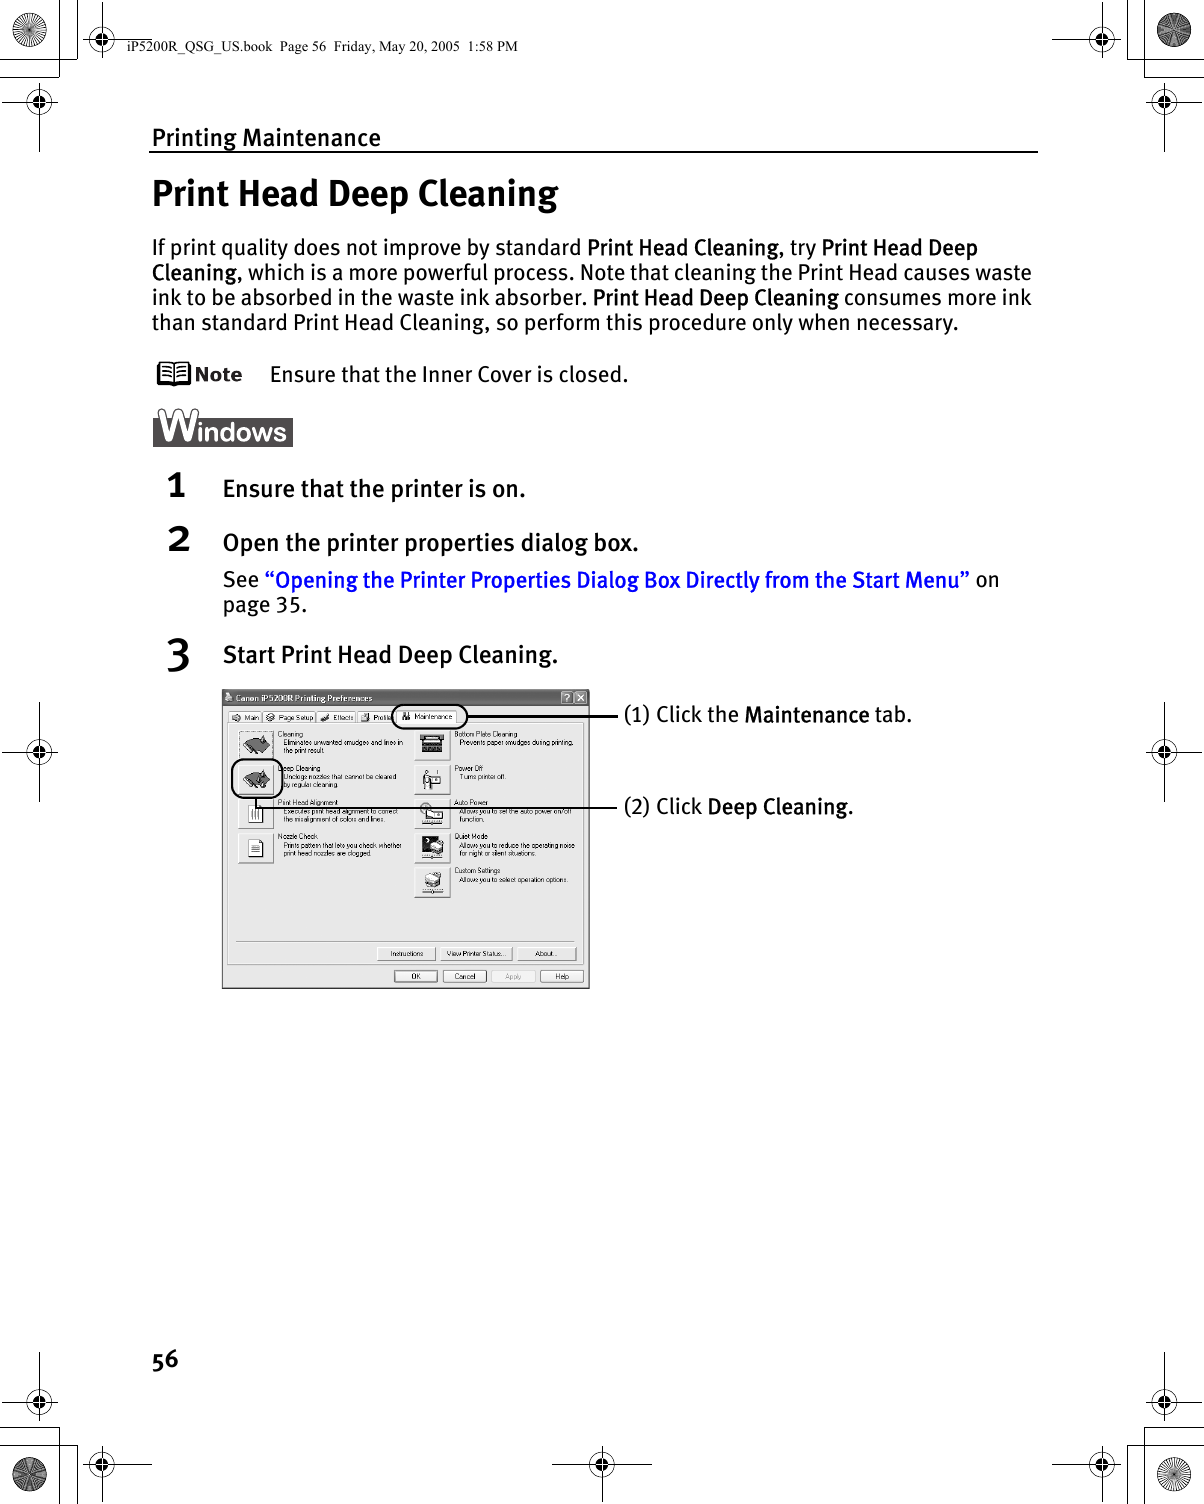
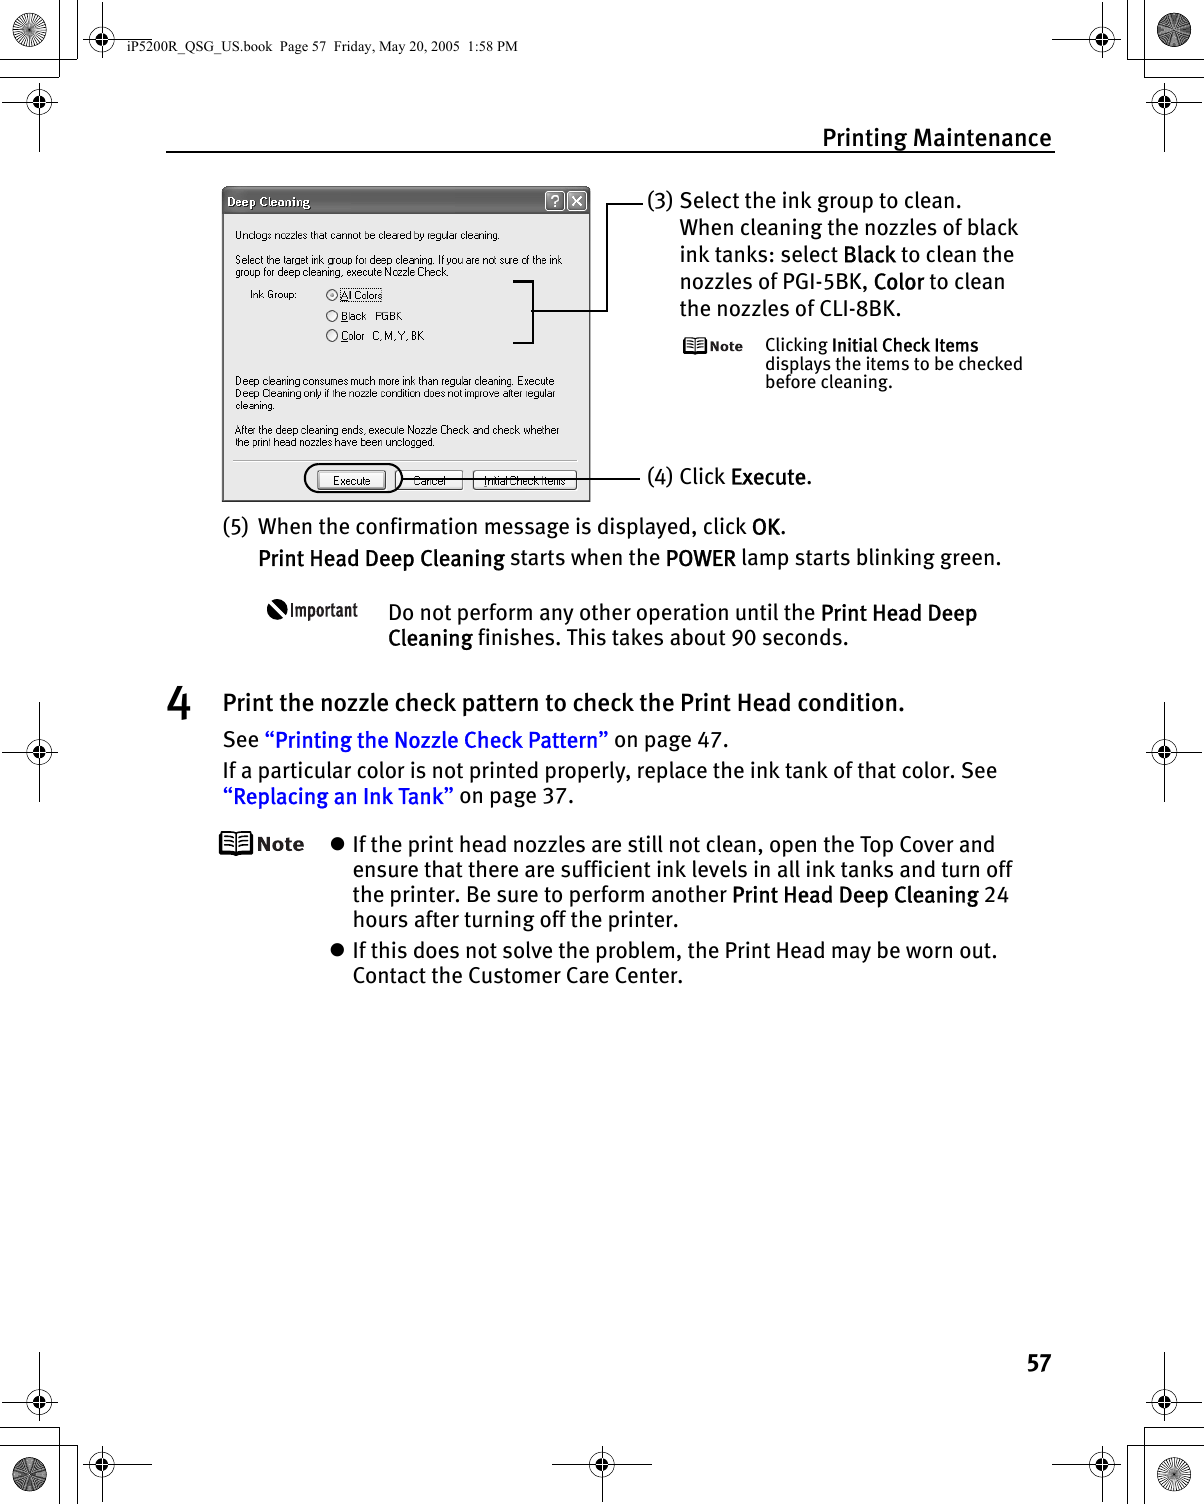
Canon K30254 Wireless LAN Module User Manual end product users manual 2
Canon Inc Wireless LAN Module end product users manual 2
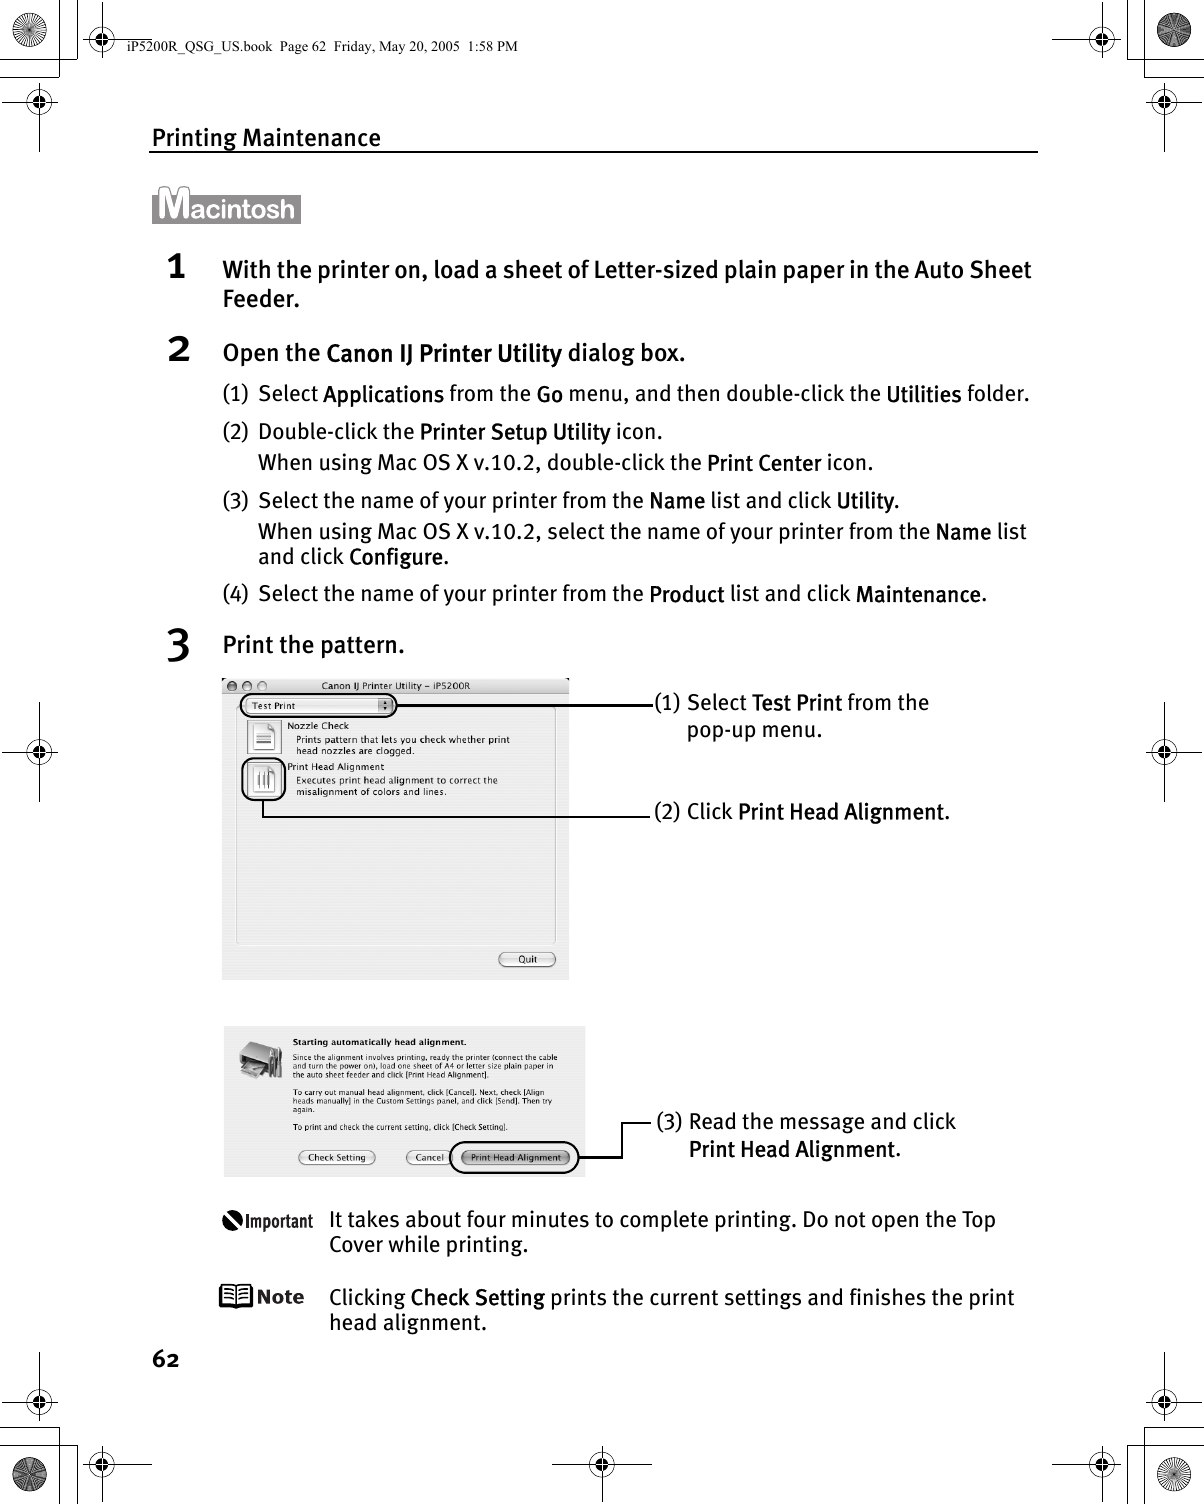
Canon >
Contents
- 1. end product users manaul 1
- 2. end product users manual 2
end product users manual 2

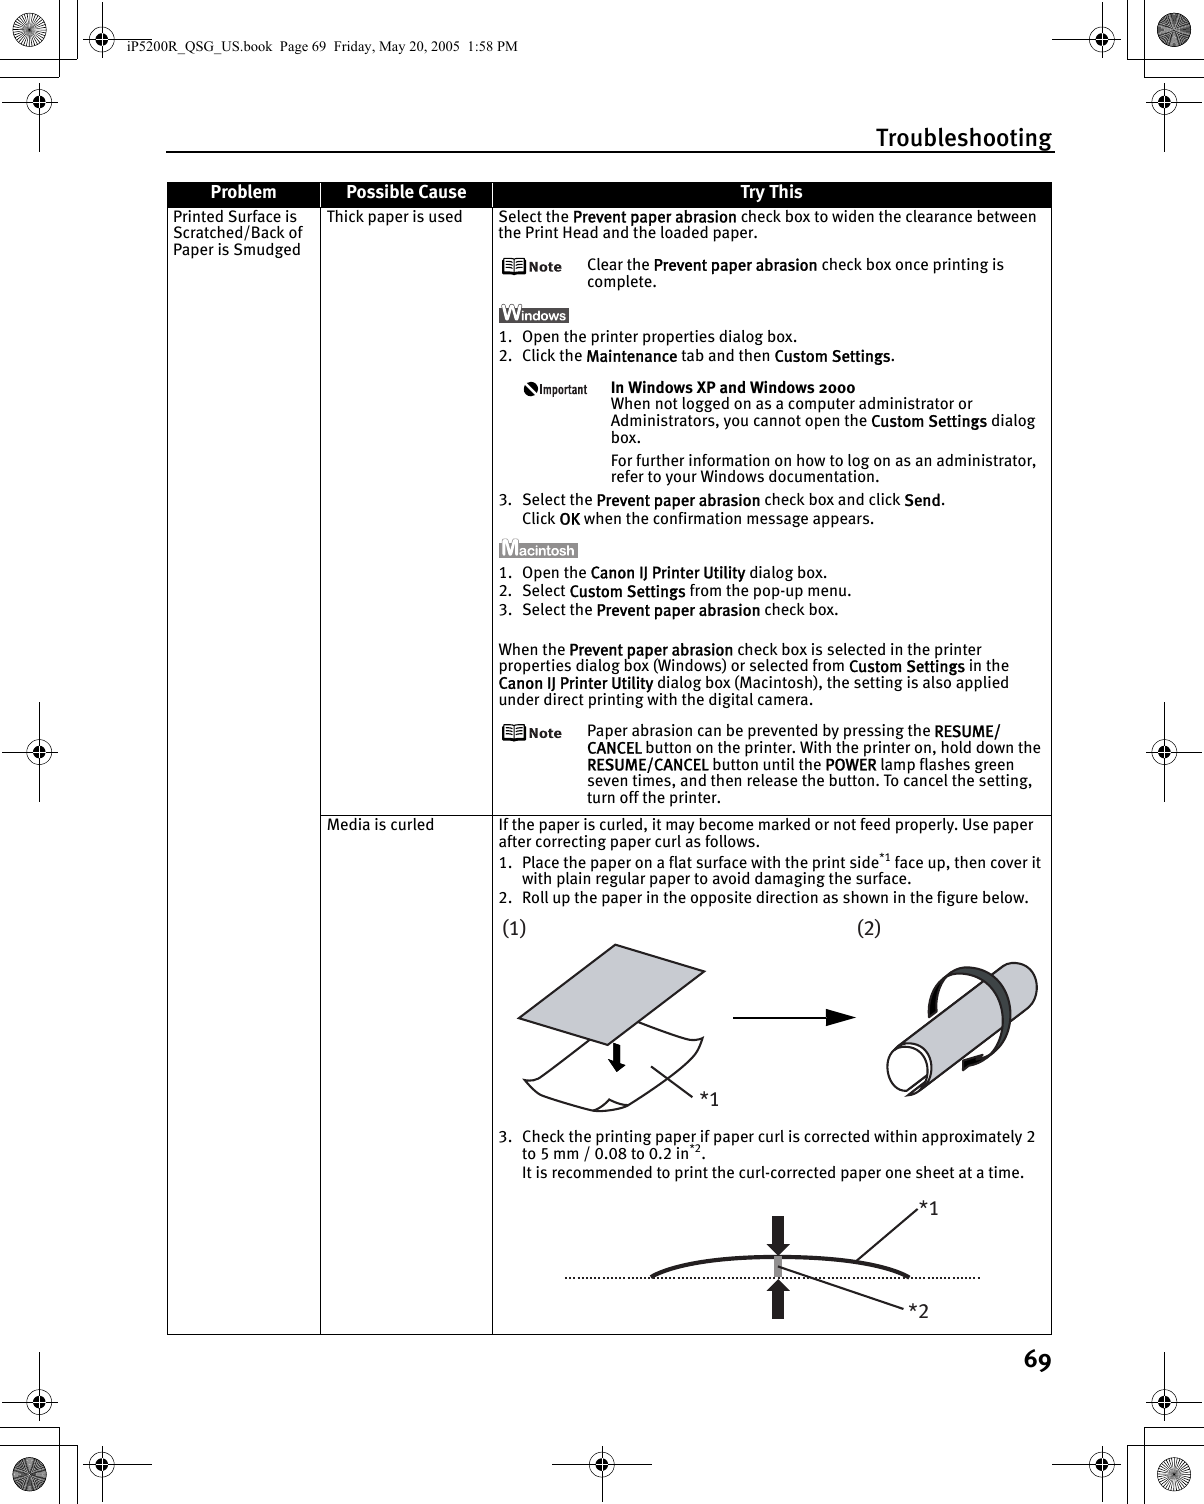


![Appendix90Camera Direct Print (PictBridge)Paper size Default (Photo Paper Plus Glossy 10 x 15 cm/4" x 6")10 x 15 cm/4" x 6" (Photo Paper Plus Glossy, Photo Paper Pro, Photo Paper Plus Semi-gloss, Glossy Photo Paper, Photo Stickers*1)13 x 18 cm/5" x 7" (Photo Paper Plus Glossy)*2A4/8.5" x 11" (Photo Paper Plus Glossy A4/Letter, Photo Paper Pro A4/Letter, Photo Paper Plus Semi-gloss A4/Letter, Glossy Photo Paper A4/Letter, Plain Paper A4/Letter)5.4 x 8.6 cm/Credit Card (Glossy Photo Paper Card Size)*1 Canon-brand sticker. Printing on this paper is available only when the Layout function on your camera has a 16-up option.See “Canon Specialty Media” on page 19.*2 If using a Canon PictBridge-compatible camera, you can select it.Paper type Default (Photo Paper Plus Glossy), Photo (Photo Paper Plus Glossy, Glossy Photo Paper), Fast Photo (Photo Paper Pro), Plain Paper (Only A4/Letter)Layout Default (Borderless), Borderless, Bordered, N-up (2, 4, 9, 16)*1, 35-up*2*1 Layout compatible with Canon-brand sticker above. See “Canon Specialty Media” on page 19.*2 Photos are printed in 35 mm Film Style layout (contact printing layout). This option can be selected for Canon PictBridge-compliant devices only. (Note that this option cannot be used for some models.) For a Canon PictBridge-compliant device, selecting the item displayed with the [i] icon prints the shooting information (Exif data) in list format, or in the margins of specified photos. (Note that these options cannot be used for some models.) Trimming Default (Off: No trimming), On (follow camera’s setting), OffImage optimize Default (ExifPrint), On, Off, “VIVID”*, “NR” (Noise Reduction)*, “VIVID+NR”*, “Face”** If using a Canon PictBridge-compatible camera, you can select it.Date/File No. print Default (Off: No printing), Date, File No., Both, OffiP5200R_QSG_US.book Page 90 Friday, May 20, 2005 1:58 PM](https://usermanual.wiki/Canon/K30254.end-product-users-manual-2/User-Guide-573770-Page-42.png)