Cheng Uei Precision Industry H3 Bluetooth Headset User Manual Part II
Cheng Uei Precision Industry Co., Ltd. Bluetooth Headset Part II
Contents
- 1. User Manual Part I
- 2. User Manual Part II
User Manual Part II
3
4
DRAFT
TURNING HEADSET
ON/OFF
MAKING CALLS
To turn your headset on, press and hold
the Call button until the indicator light
flashes. Then, release the button.
To turn your headset off, press and hold
the Call button until the indicator light
flashes rapidly and then turns off.
INDICATOR LIGHTS
IMPORTANT:
Be sure to first follow the
Quick Start Guide
on the reverse side
of this guide
to complete initial setup
of your H3.
WEARING THE
HEADSET
Open the earhook.
Loop the earhook over your ear.
Press the headset to your ear.
1
2
3
AUDIO TONES
The audio tones provide information about your
headset status.
Audio Tone Headset Status
Single high tone when Volume at minimum
pressing volume button or maximum
Five rapid high tones Low battery
repeated every 60 sec.
No audio indications; Out of range
deteriorating quality
Ring tone Incoming call
Single high tone Pairing confirmation
Single low tone Voice activation
Dual high/low tone Voice tag not
recognized
Single high tone End call
Low to high tone Phone network
not available
Two ascending tones Mute enabled
Two descending tones Mute enabled
Call
Button
Note: Your H3 supports both Handsfree and Headset
Profiles. Accessing call functions depends upon which
profile your phone supports. See your phone's user's guide
for more information.
Function Action
Make a voice dial call Tap the Call button
and speak the
name after the tone
End a call Tap the Call button
Receive a call Tap the Call button
Reject a call Press and hold the
Call button until you
hear a beep
Redial last call Press and hold the
Call button until you
hear a beep
Answer a second Press and hold the
incoming call Call button (places
first call on hold)
MAKING CALLS CONTINUED
Function Action
Toggle between two Press and hold
active calls the Call button
Join a 3-way call Press and hold
both Volume buttons
Put an active call on Press and hold the
hold or resume a call Call button until you
on hold hear a beep
Transfer a call from the Tap the Call button
phone to the headset
Disable or enable the Press and hold
indicator light both Volume
buttons for 3 to 4
seconds
Mute or unmute a call Tap both Volume
buttons
Note: Some features are phone/network dependent.
The indicator light provides information about
your headset status.
With the Charger Plugged In
Headset Indicator Headset Status
On (steady) Charging
Off Charging complete
With No Charger Plugged In
Headset Indicator Headset Status
Off Power off
On (steady) Pairing mode
10 rapid flashes Pairing successful
Slow pulse Connected
(on a call)
Quick flash Standby
(not on call)
Note: After 5 minutes of inactivity, the light stops flashing to
conserve power, but the headset remains in standby mode.
Features and
Functions Guide
H3
Bluetooth®
Handsfree Headset
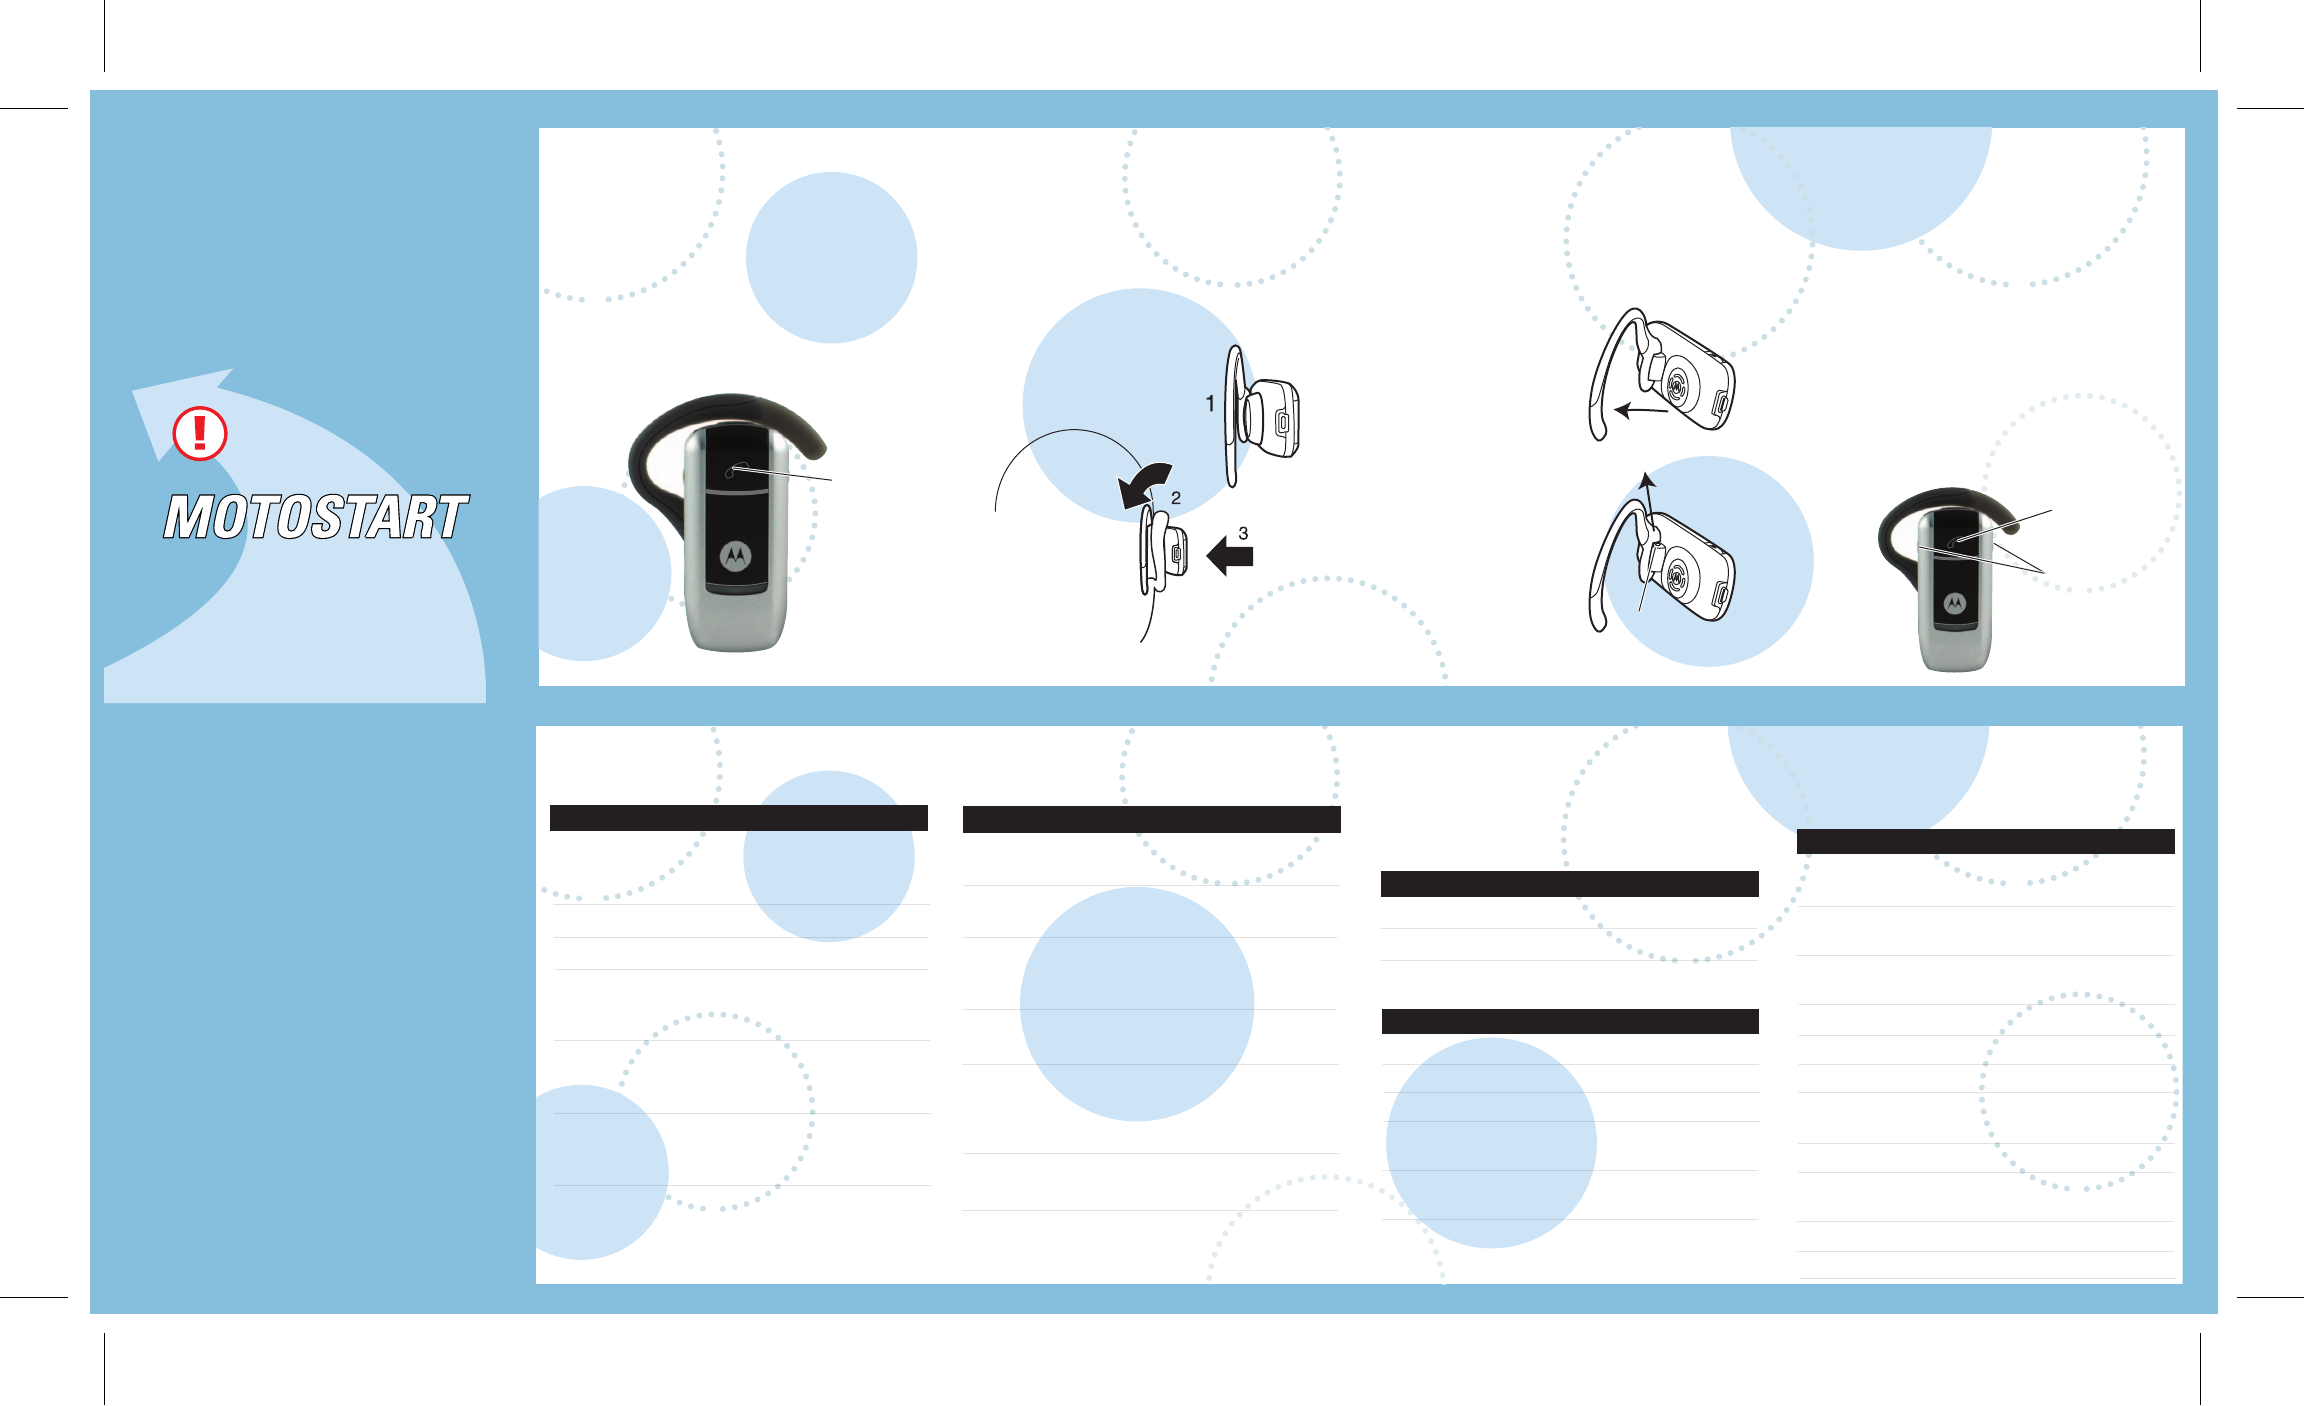
CHANGING FOR USE
ON OTHER EAR
Open the earhook 90
degrees from the
headset.
Gently lift and pull the
top of the earhook up
and off the upper
hinge pin. Then, pull it
away to remove it.
Flip the headset over.
Hook the bottom of
the earhook onto the
lower hinge pin, then
lift and pull the top of
the earhook over the
upper hinge pin.
1
2
3
4
You can wear your H3 headset on your left or
right ear. The headset comes ready for the right
ear. To change the headset for the left ear:
CHANGING VOLUME
BUTTON ORIENTATION
If you change your headset to wear on the
other ear, you can also change the
orientation of the volume buttons.
Turn the headset power off.
Press the Call button along with the
Volume button you want to assign as
"volume up" button until the indicator
light flashes twice.
The headset power turns on.
1
2
2 Pull Earhook Up
Hinge Pin
1 Open Earhook
Volume
Buttons
Call
Button
FEDERAL COMMUNICATIONS COMMISSION
This device complies with Part 15 of the FCC Rules. Operation is subject to the following two
conditions:(1) this device may not cause harmful interference, and (2) this device must accept
any interference received, including interference that may cause undesired operation.
NOTE
This equipment has been tested and found to comply with the limits for a Class B digital
device, pursuant to Part 15 of the FCC Rules. These limits are designed to provide
reasonable protection against harmful interference in a residential installation. This equipment
generates, uses and can radiated radio frequency energy and, if not installed and used in
accordance with the instructions, may cause harmful interference to radio communications.
However, there is no guarantee that interference will not occur in a particular installation If this
equipment does cause harmful interference to radio or television reception, which can be
determined by turning the equipment off and on, the user is encouraged to try to correct the
interference by one or more of the following measures:
-Reorient or relocate the receiving antenna.
-Increase the separation between the equipment and receiver.
-Connect the equipment into an outlet on a circuit different from that to which the receiver is
connected.
-Consult the dealer or an experienced radio/TV technician for help.
Changes or modifications not expressly approved by the party responsible for compliance
could void the user‘s authority to operate the equipment.