CipherLab 1660 Barcode Scanner User Manual
CipherLab Co., Ltd. Barcode Scanner
UserManual.wiki
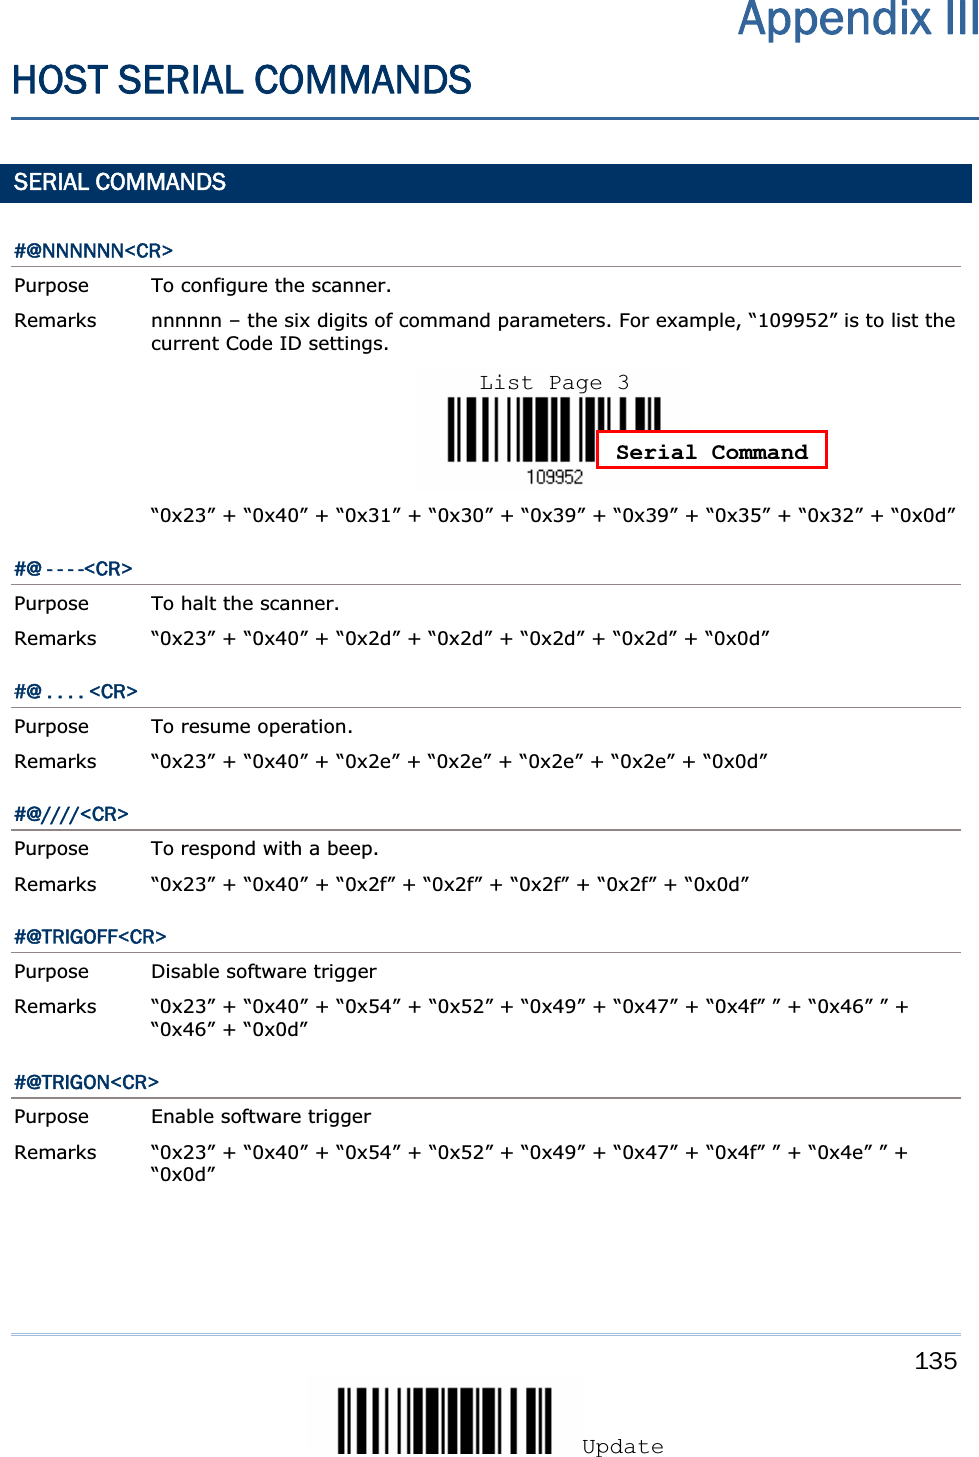
>
CipherLab
>
1660 User Manual
User manual
Navigation menu
Upload a User Manual
Namespaces
Wiki Guide
HTML
PDF
Info
Views
User Manual
Discussion / Help
Navigation

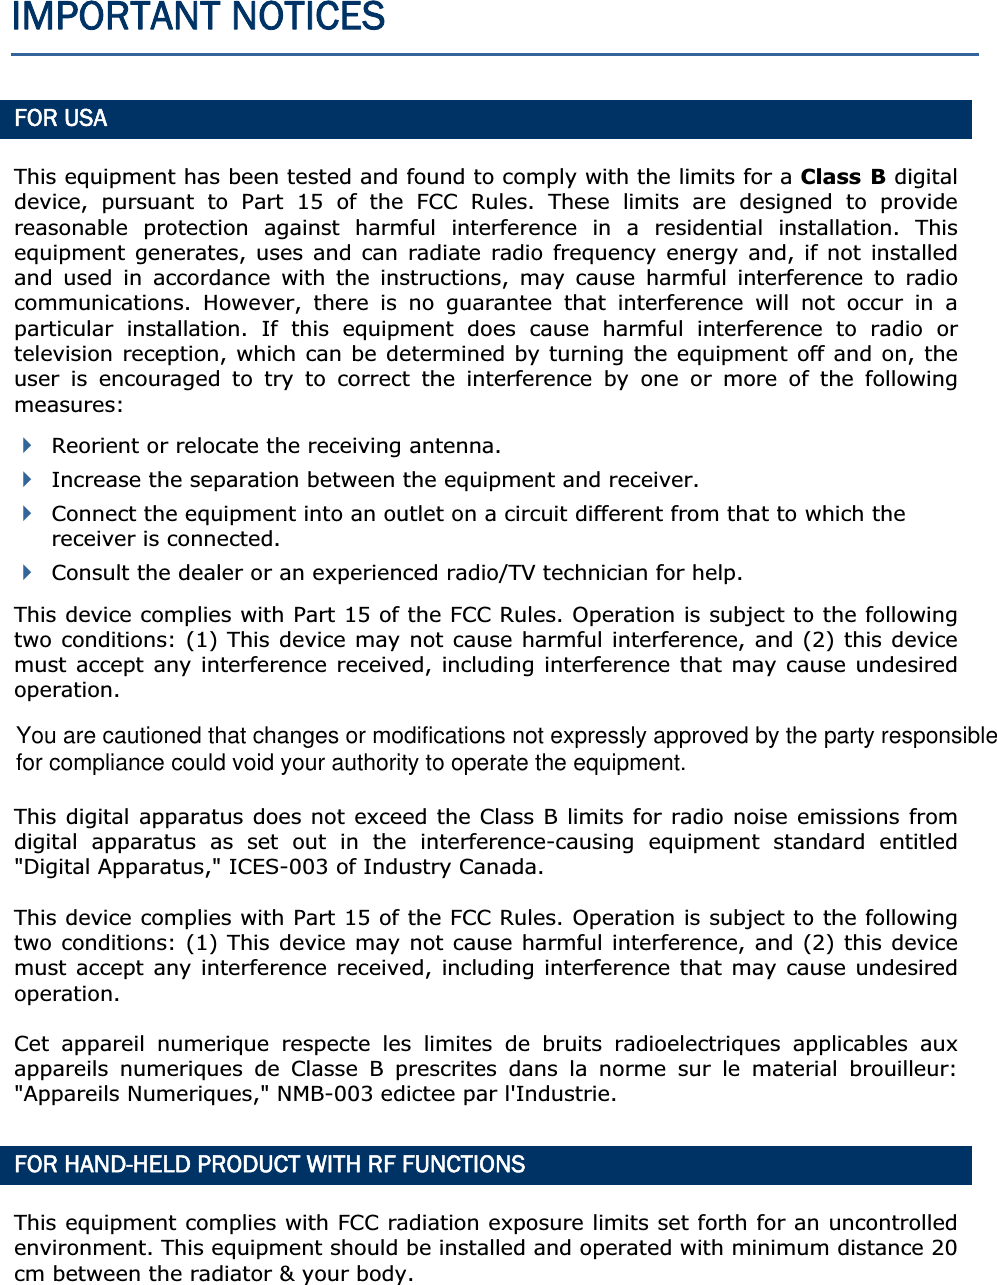
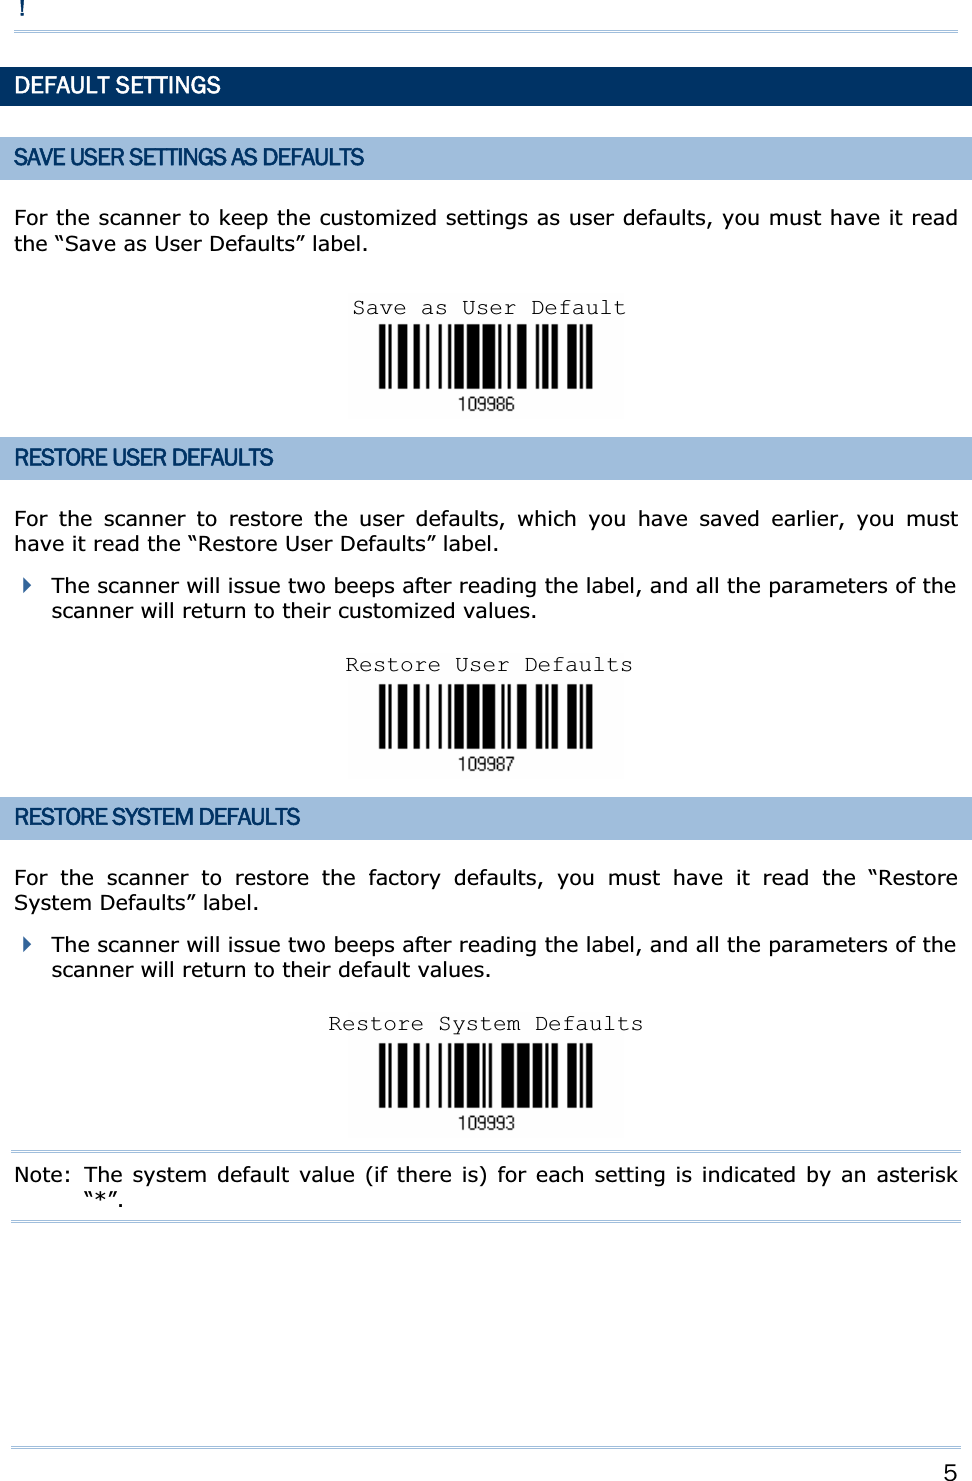

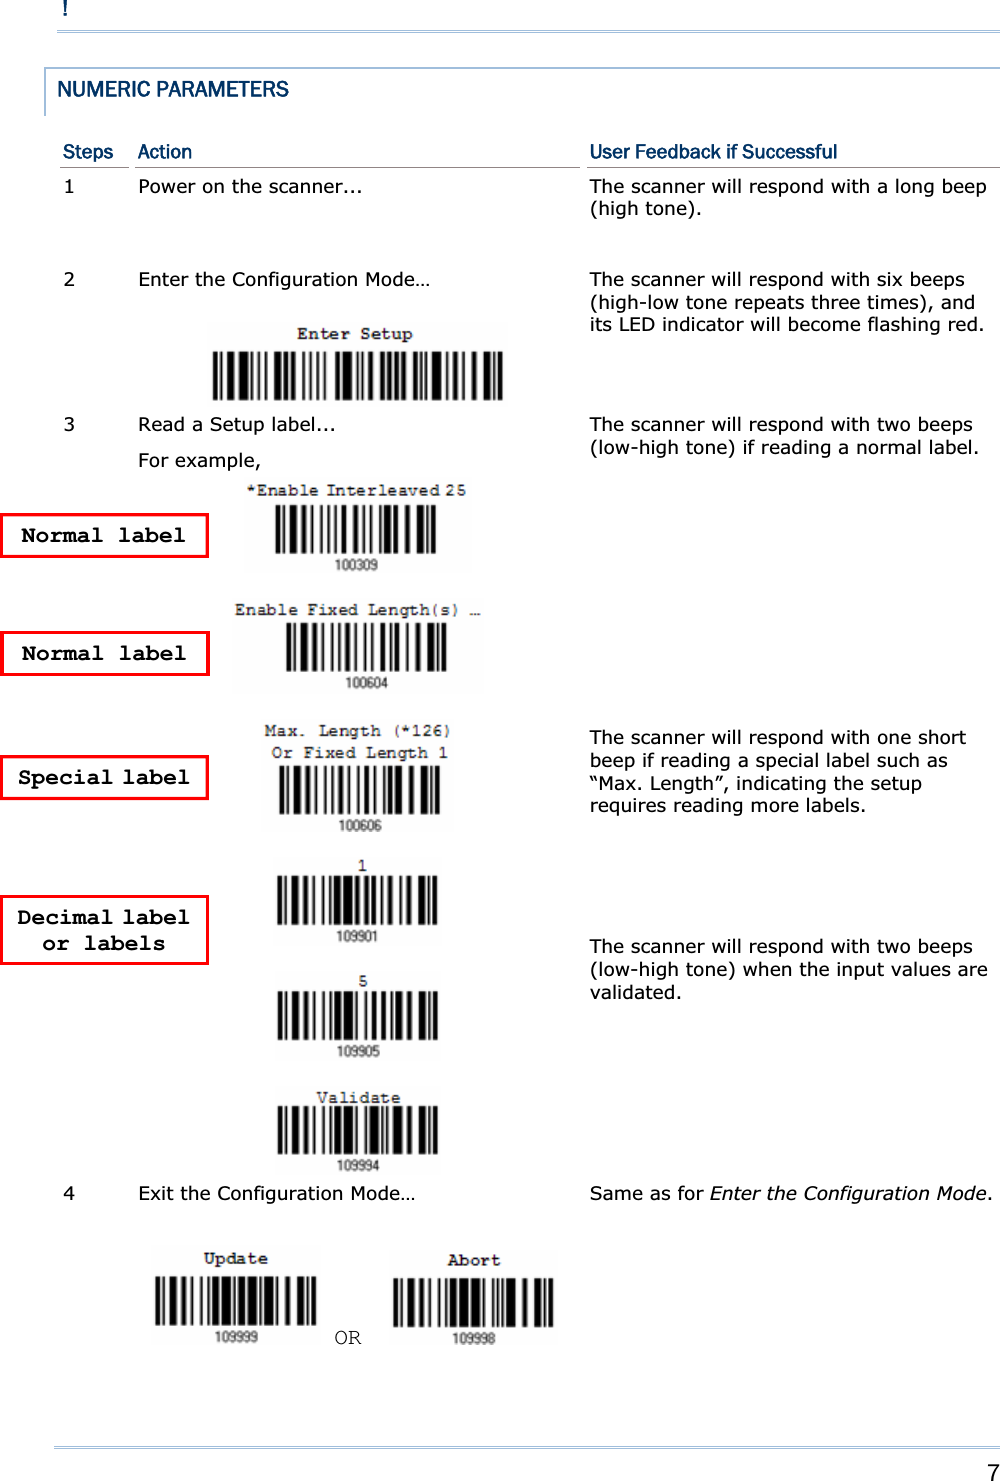
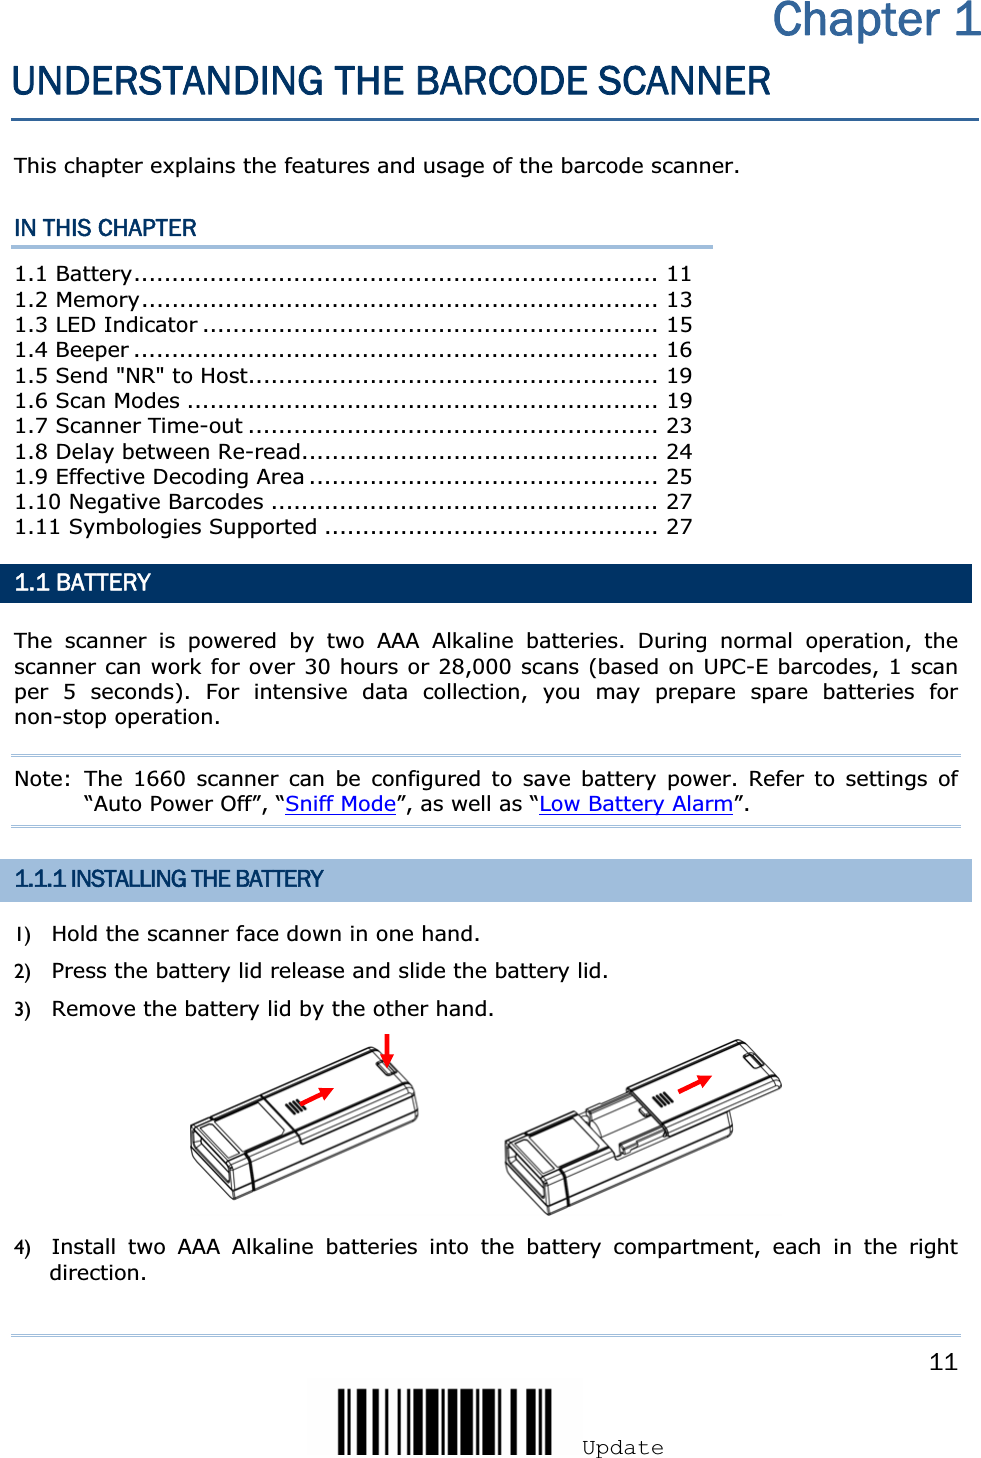
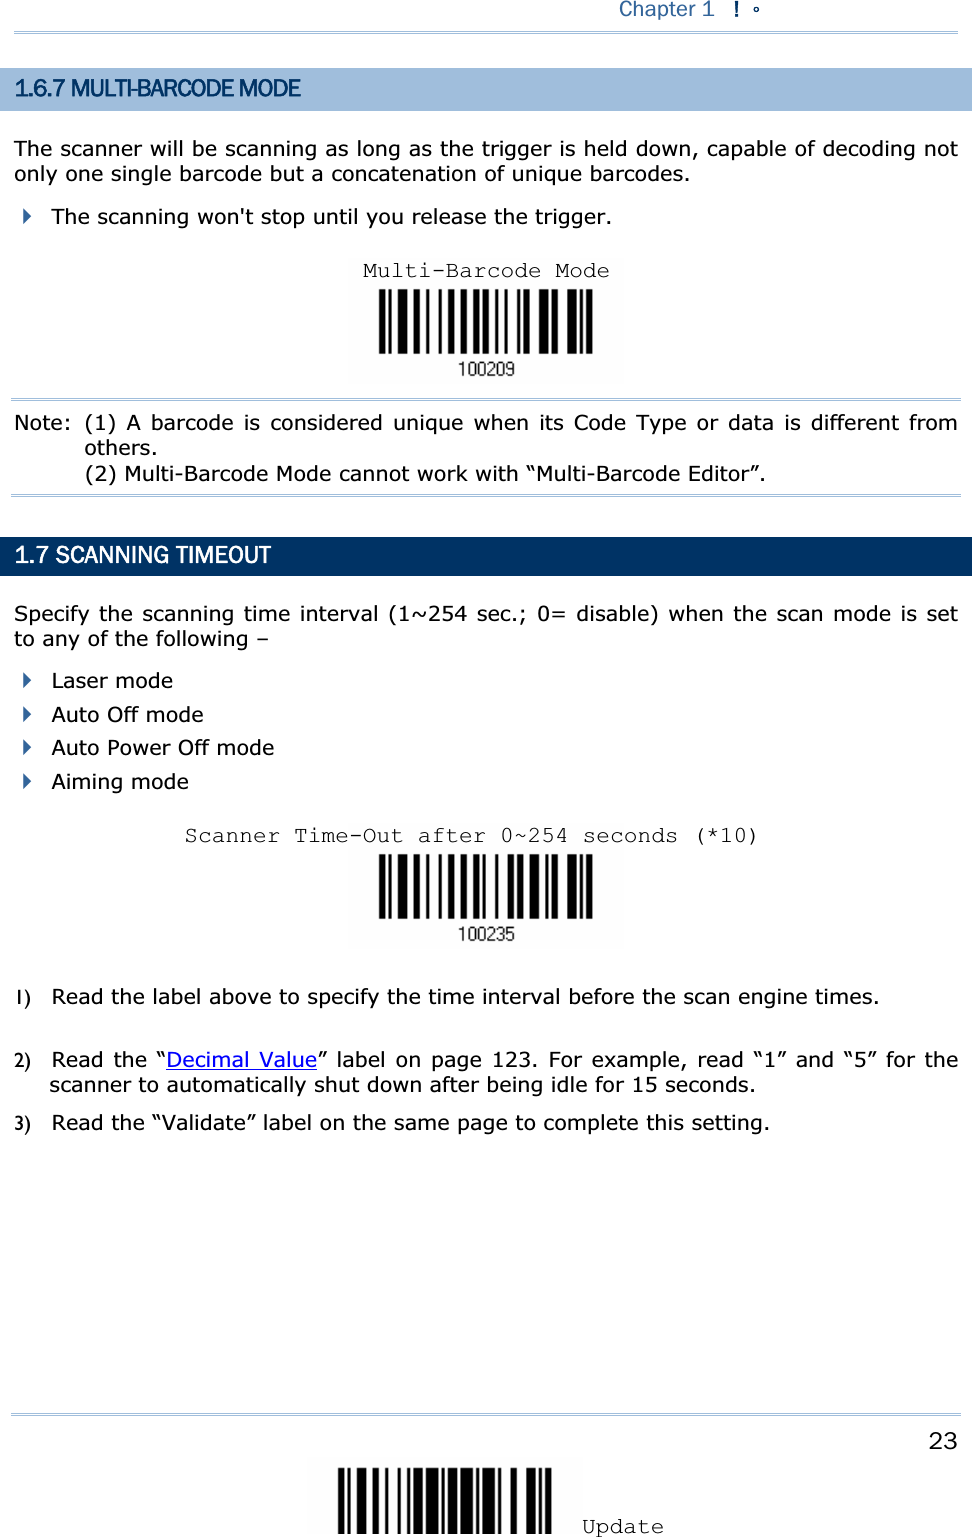
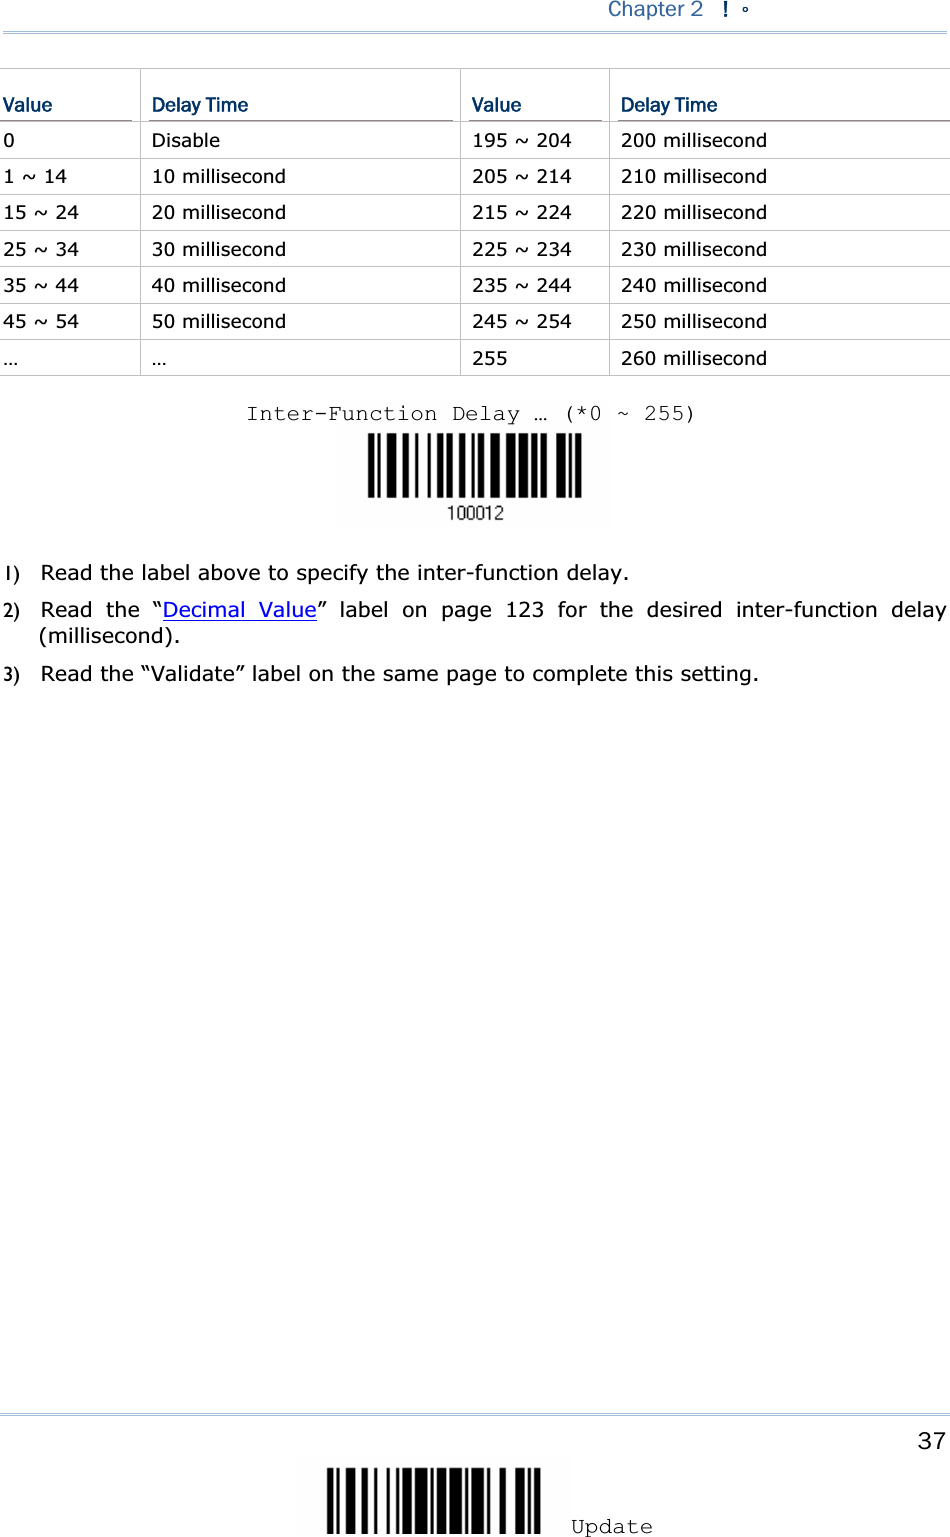
![12Enter Setup 1600 Series Barcode Scanner User Guide5) Replace the battery lid and lock it firmly. 1.1.2 HOW TO OPERATE THE SCANNER To turn on the scanner, press the [Delete] key for 3 seconds, and the scanner will respond with a long beep (high tone). To turn off the scanner, press the [Delete] key for 1.5 seconds. The scanner will respond with short beep (high tone) and the LED will become solid green, then go off, and finally become solid red. Release the key then. To delete the last collected data, press the [Delete] key. The scanner will respond with short beep (high tone) and the LED will become solid green. Before the LED goes off (within 1 second), press the [Delete] key again to confirm the deletion. 1.1.3 AUTO POWER OFF Specify the time interval (1~254 min.; 0= disable) for the scanner to wait for a computer to establish a connection via a Bluetooth dongle. By default, the 1660 scanner will stay active for 10 minutes waiting for a connection request. If it fails to connect within the time interval, the scanner will automatically turn off in order to conserve battery power (you will hear three short beeps, tone descending from high to low). Press the [Delete] key for 3 seconds to turn it on. On your computer, you will have to search Bluetooth devices again. Once a Bluetooth connection is established successfully, the scanner will stay active as long as the COM port is opened by a host application. 1) Read the label above to specify the time interval before the scanner automatically turns off. 2) Read the “Decimal Value” label on page 123. For example, read “1” and “5” for the scanner to automatically turn off after being idle for 15 minutes. 3) Read the “Validate” label on the same page to complete this setting. Auto Off after 0~254 minutes (*10)](https://usermanual.wiki/CipherLab/1660/User-Guide-925344-Page-24.png)
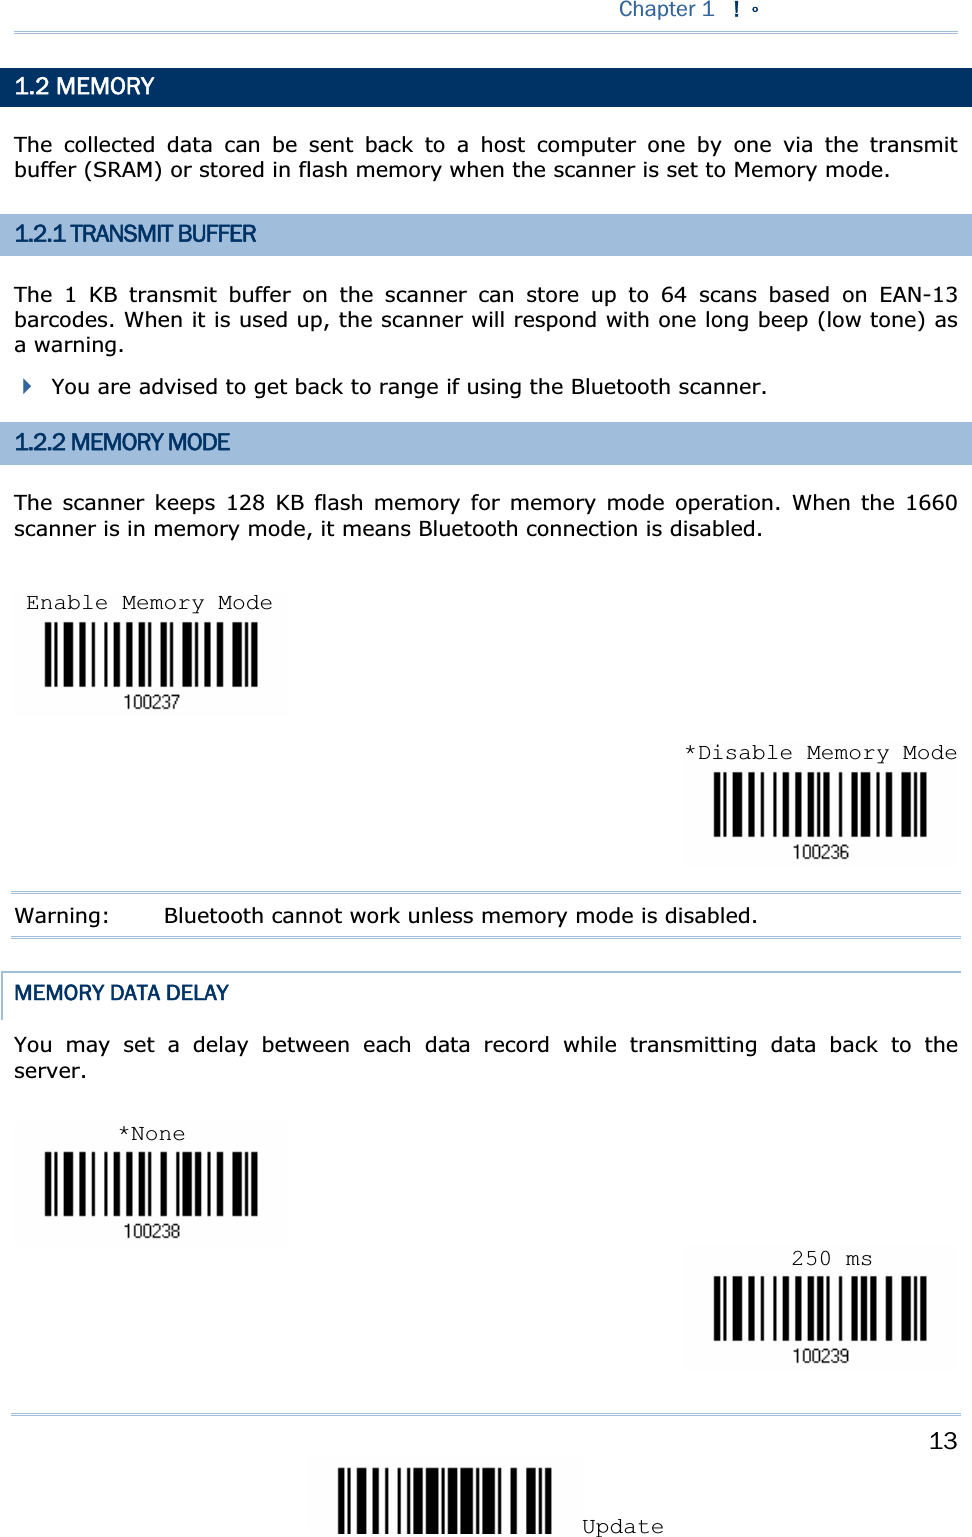
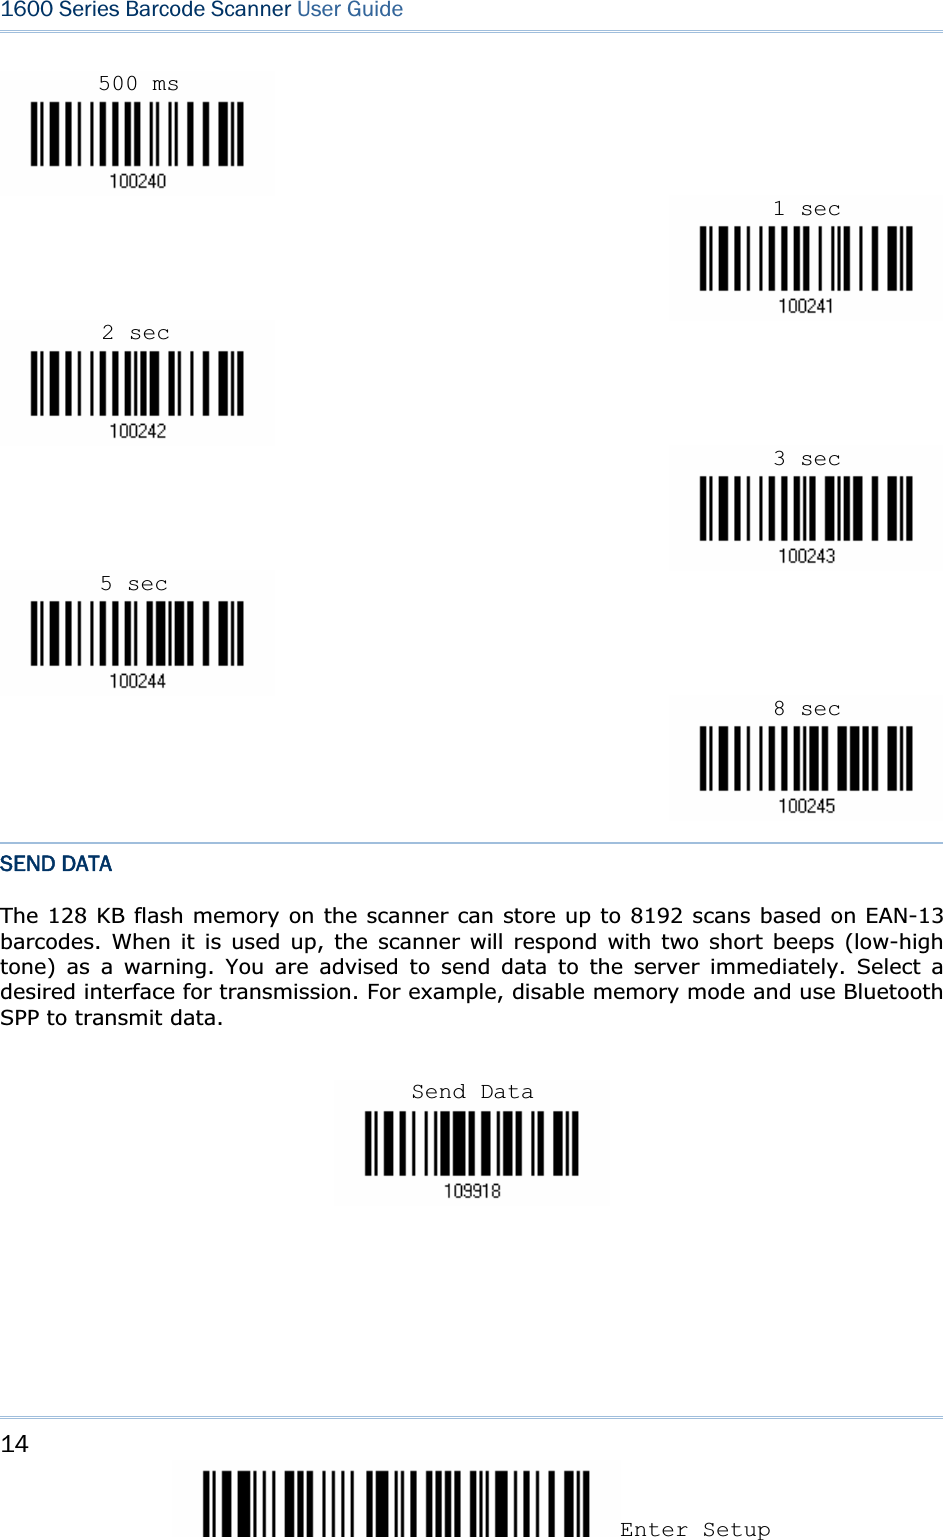
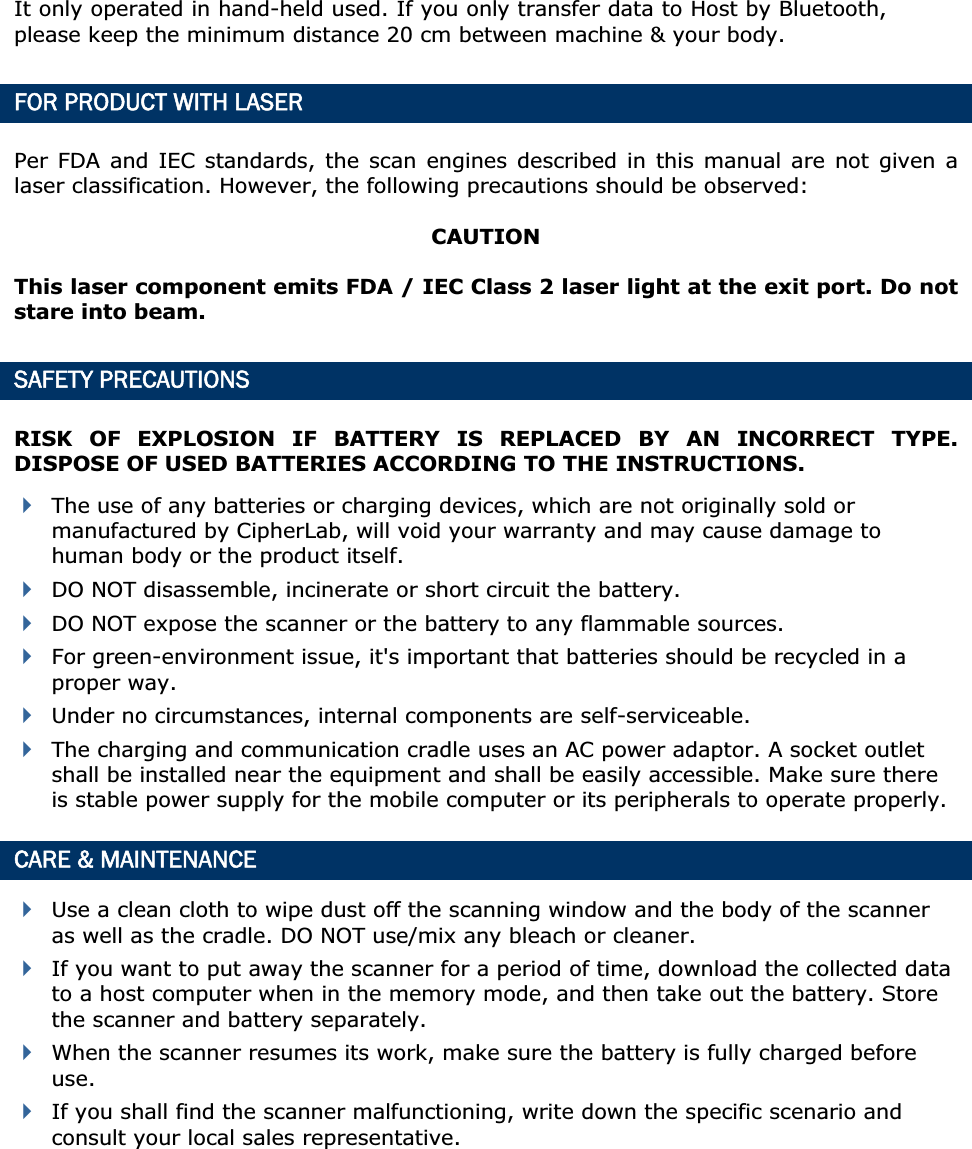
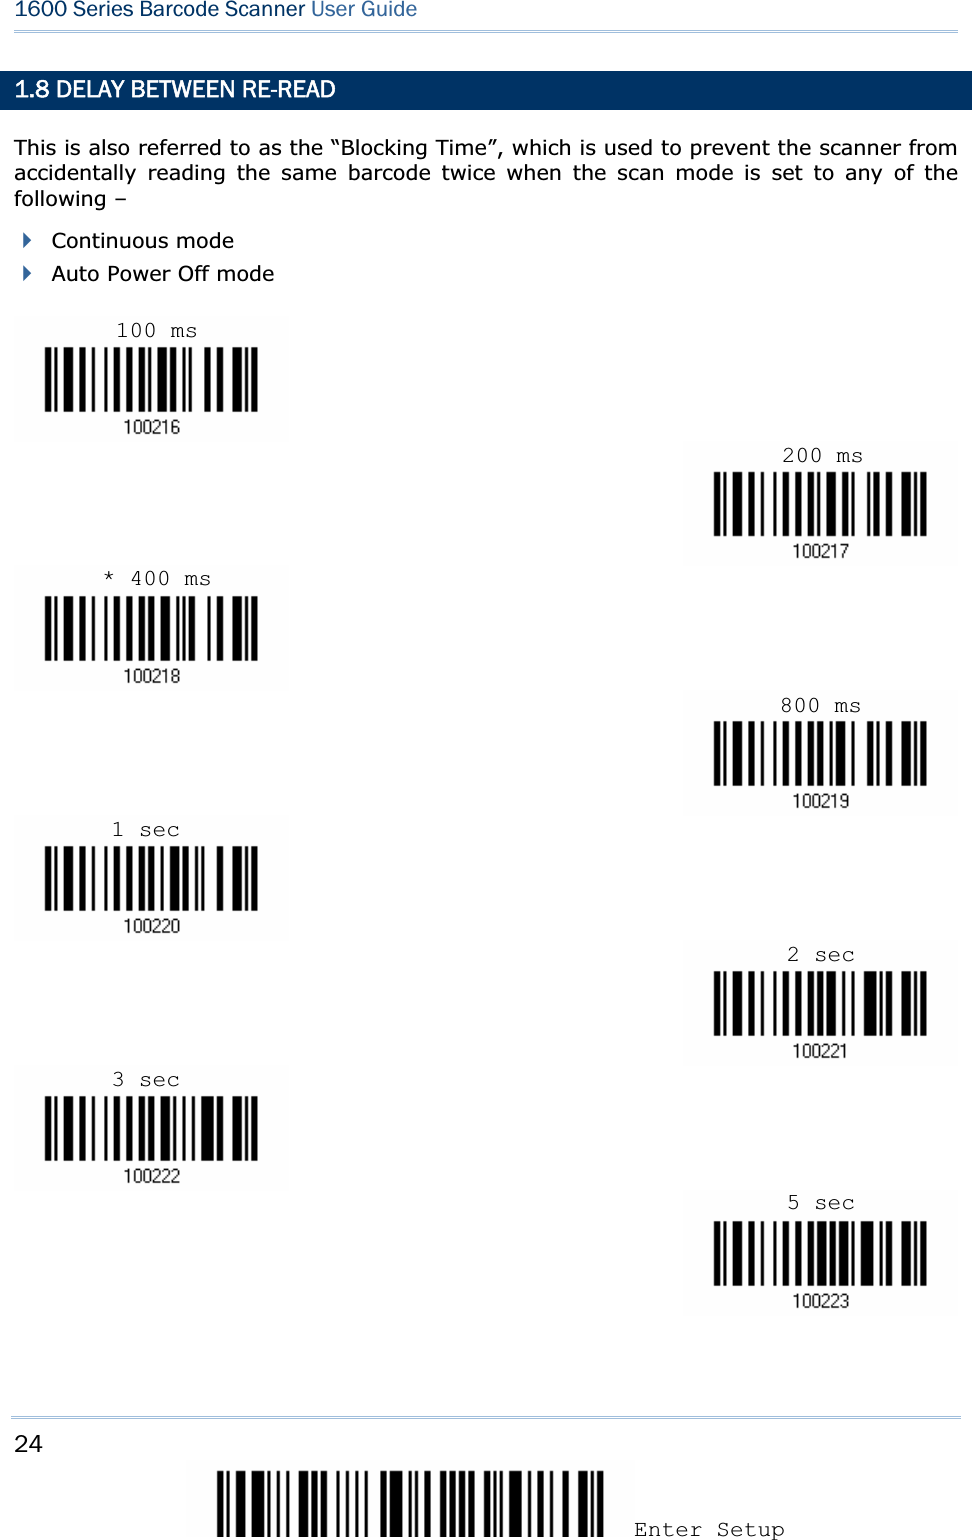
![15UpdateChapter 1 !ΖCLEAR DATA & CONFIRM Even though data has been sent back to the server, the flash memory is still occupied unless you erase the memory by having the scanner read two labels – “Clear Data” and “Confirm”. 1) Read the “Clear Data” label to clear the flash memory. 2) Read the “Confirm” label to confirm the action. 1.3 LED INDICATOR The triple-color LED on top of the scanner is used to provide user feedback. For example, the LED becomes solid red and goes off quickly (= Standby mode) upon powering on or running out of transmit buffer. You may tell the difference by the beeps – for example, you will hear a long beep of high tone when powering on the scanner, and a long beep of low tone when the transmit buffer becomes full. LED – Red/Green/Blue MeaningGreen, and goes off quickly, and becomes red, and finally goes off when the [Delete] key is released. Power off Red, and goes off quickly Power on, with one long beep (high tone) Transmit buffer full, with one long beep (low tone) Memory full, with two short beeps (low-high tone) Bluetooth connection out of range, with two beeps (high-low tone) Green, and goes off quickly Good Read, beeper pitch and duration programmable Flashing blue (On/Off ratio 1:1) No Bluetooth connection (flashing slowly) Dynamic PIN code request from host (flashing quickly) Flashing blue (On/Off ratio 1:6) Bluetooth connection established Flashing blue and red Dynamic PIN code input error Flashing red Configuration Mode Clear Data Confirm](https://usermanual.wiki/CipherLab/1660/User-Guide-925344-Page-27.png)


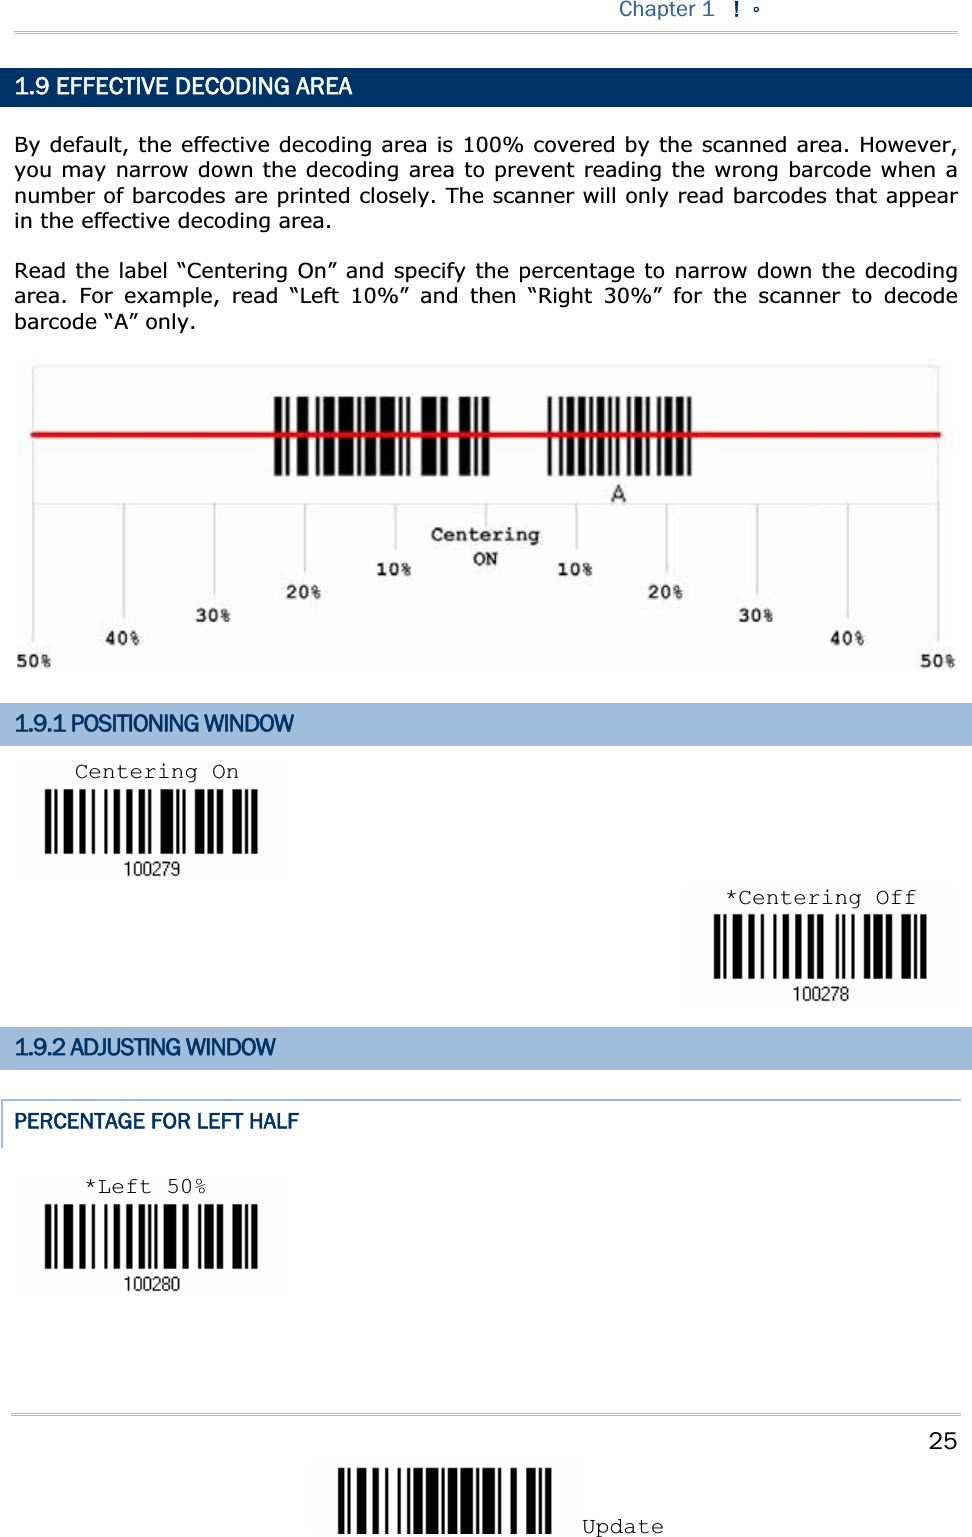

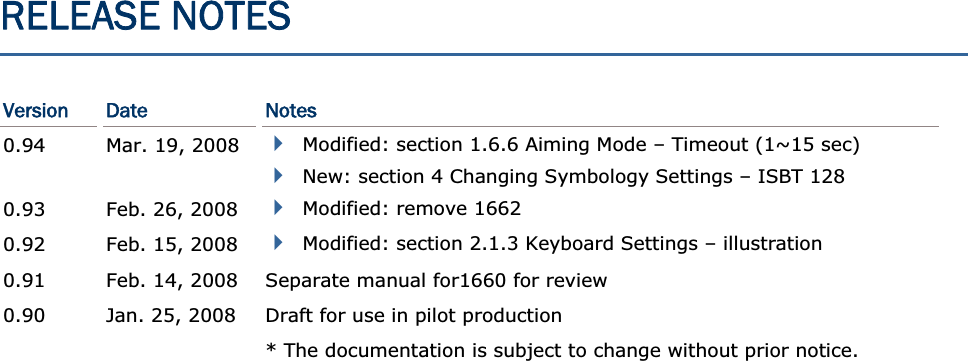
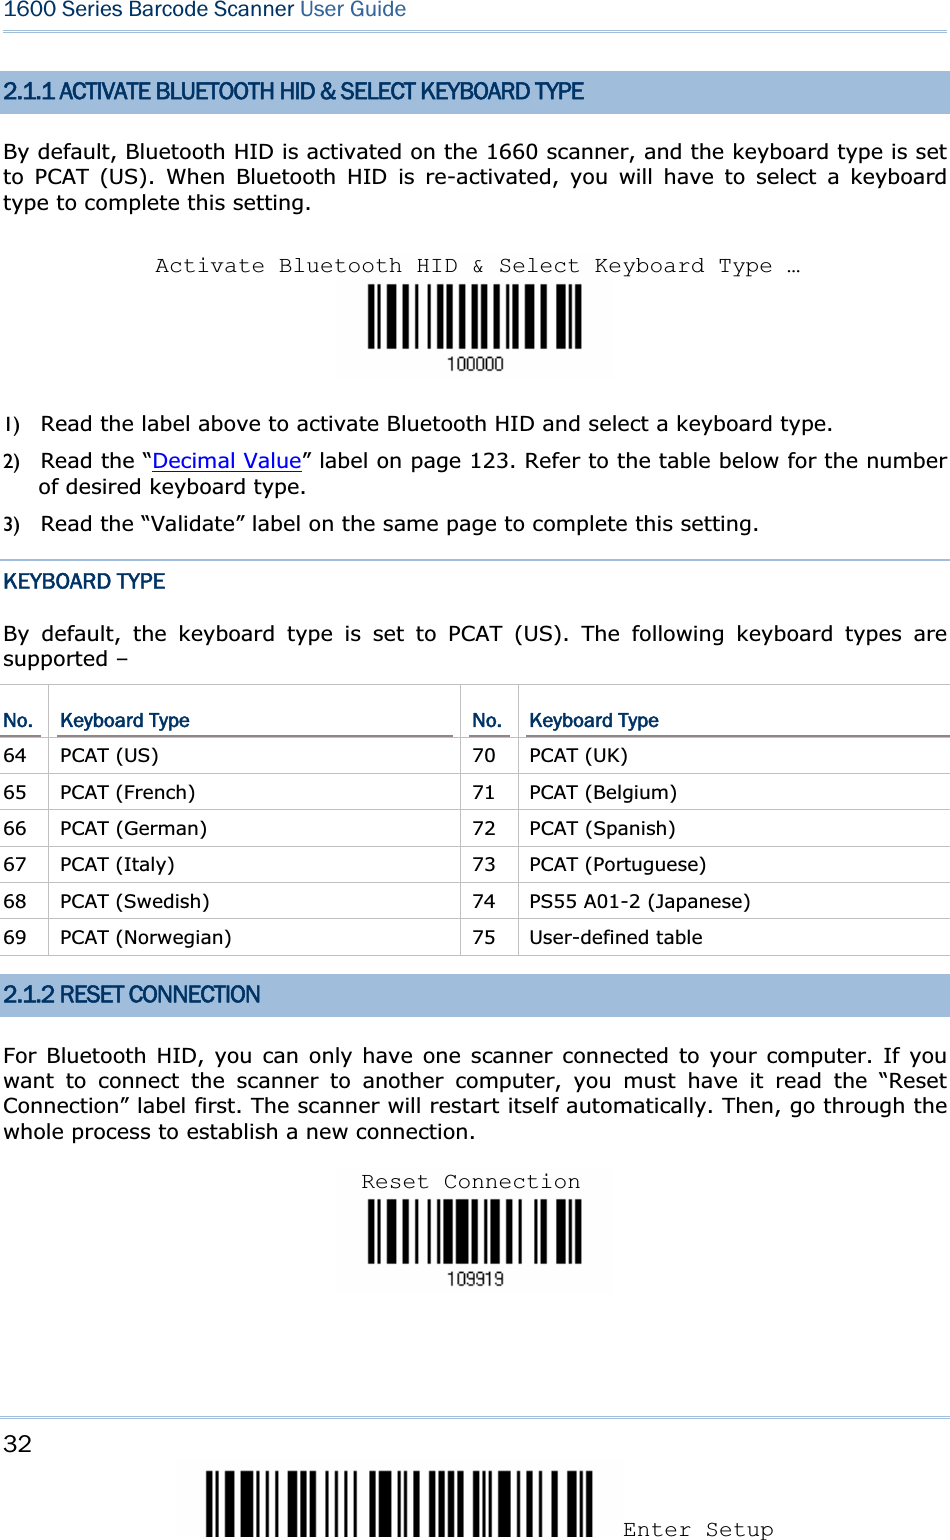
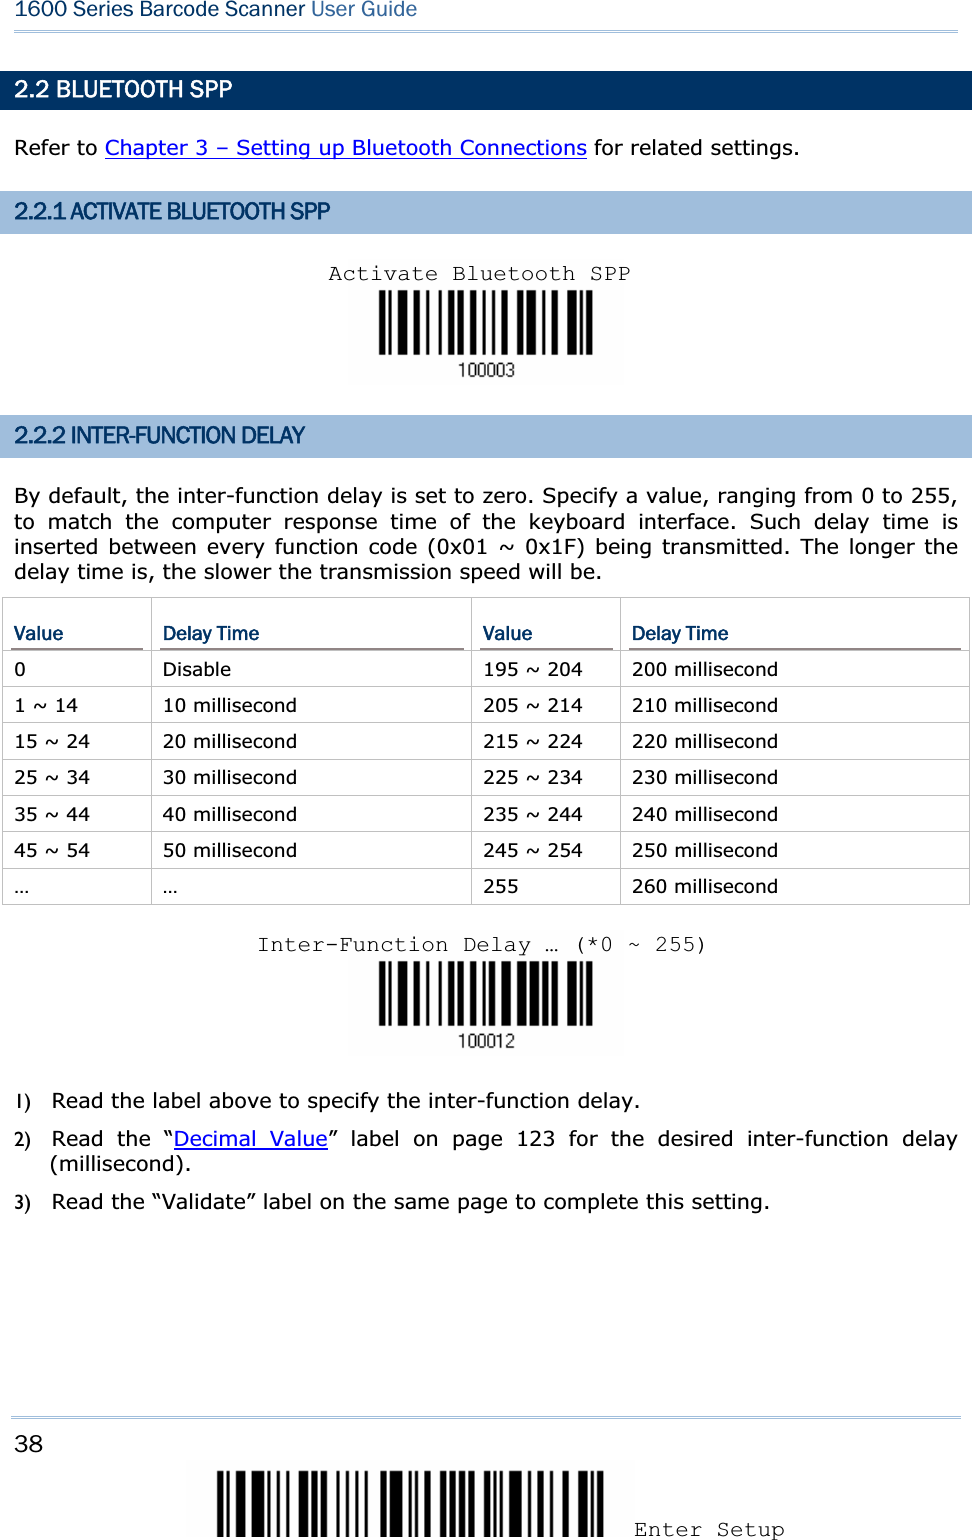
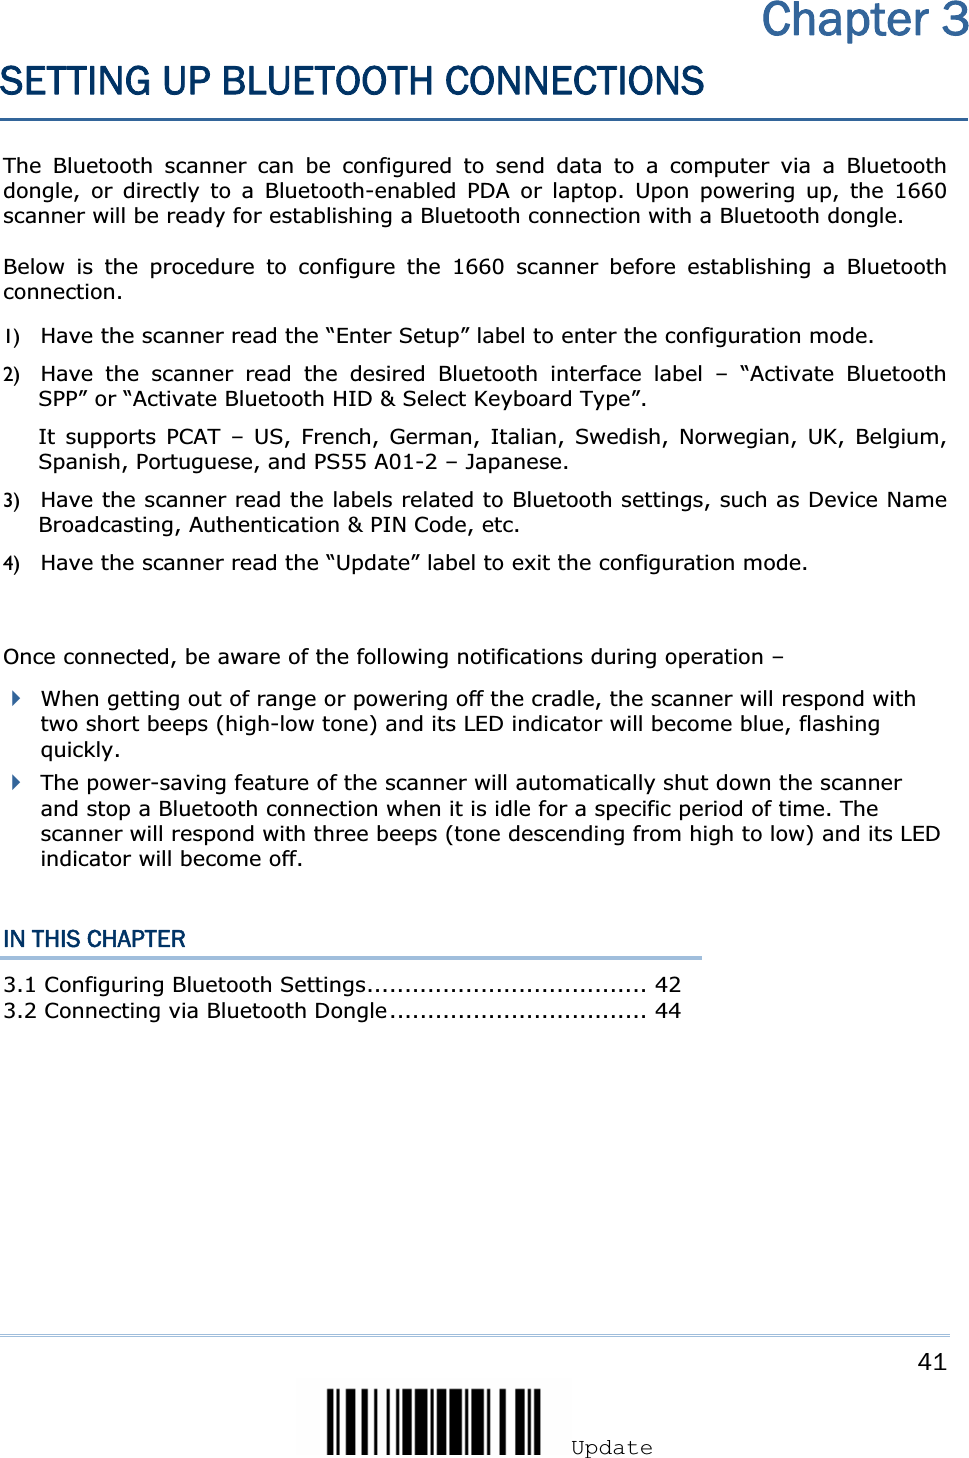
![31UpdateIn order to establish a proper connection between your computer and the scanner, we suggest that you follow these instructions – 1) Install batteries and press the [Delete] key for 3 seconds to turn on the scanner. 2) Have the scanner read the “Enter Setup” label to enter the configuration mode. 3) Have the scanner read the associated label to activate the desired interface. See the following sections for output interfaces supported. 4) Have the scanner read the labels for related settings. 5) Have the scanner read the “Update” label to exit the configuration mode. Note: By default, the output interface is set to “Bluetooth HID”. IN THIS CHAPTER 2.1 Bluetooth HID ........................................................... 31 2.2 Bluetooth SPP ........................................................... 38 2.1 BLUETOOTH HID Refer to Chapter 3 – Setting up Bluetooth Connections for related settings. Bluetooth HID Settings DefaultsKeyboard Type PCAT (US) Digits Layout Normal Capital Lock Type Normal Capital Lock State OffAlphabets Transmission Case-sensitive Digits Transmission Alphanumeric keypad Inter-Function Delay 0 (ms) Send “NR” to Host Disable Chapter 2SELECTING OUTPUT INTERFACE](https://usermanual.wiki/CipherLab/1660/User-Guide-925344-Page-43.png)
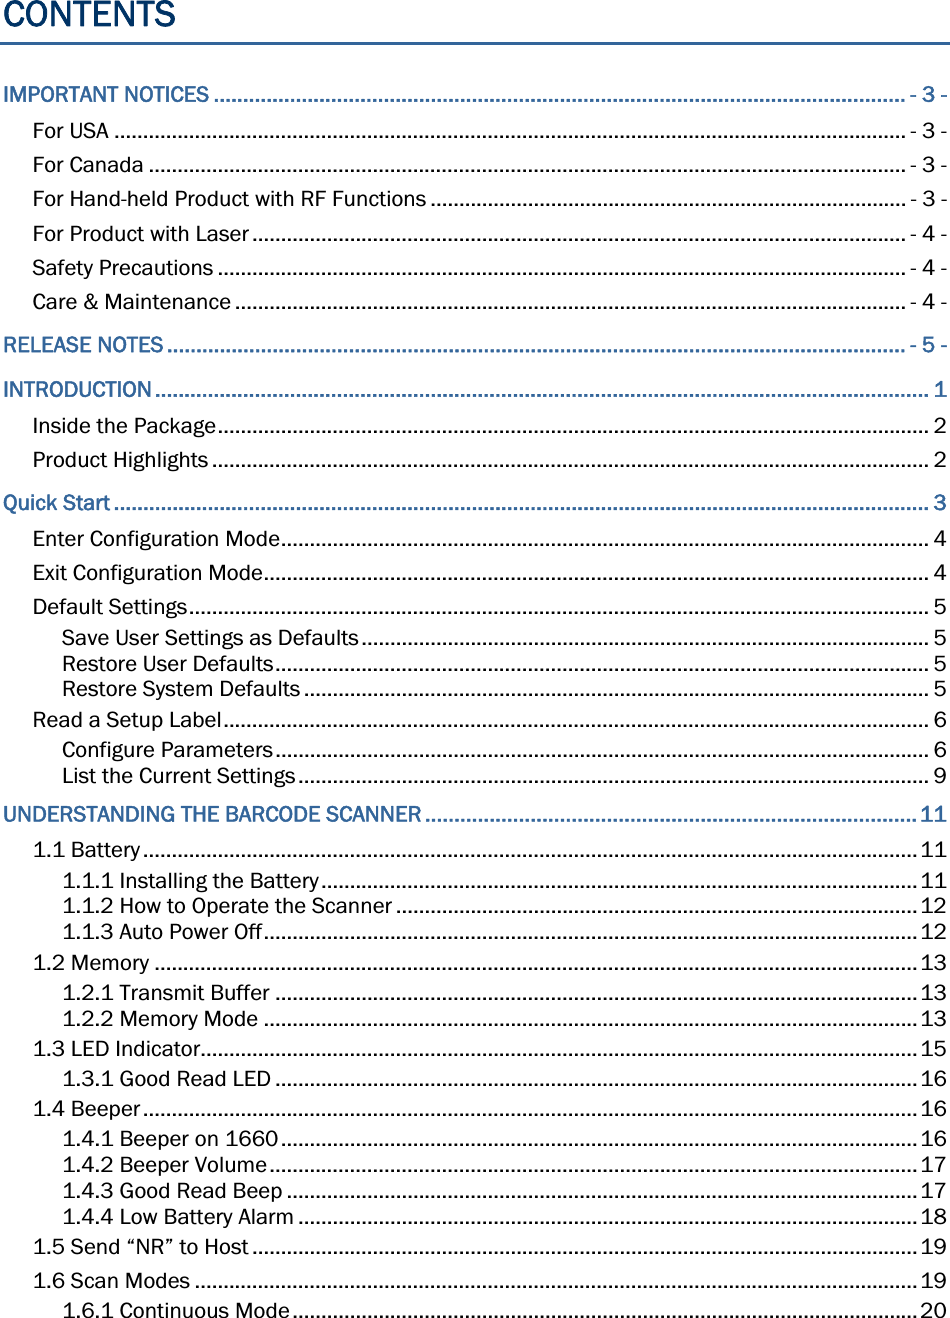
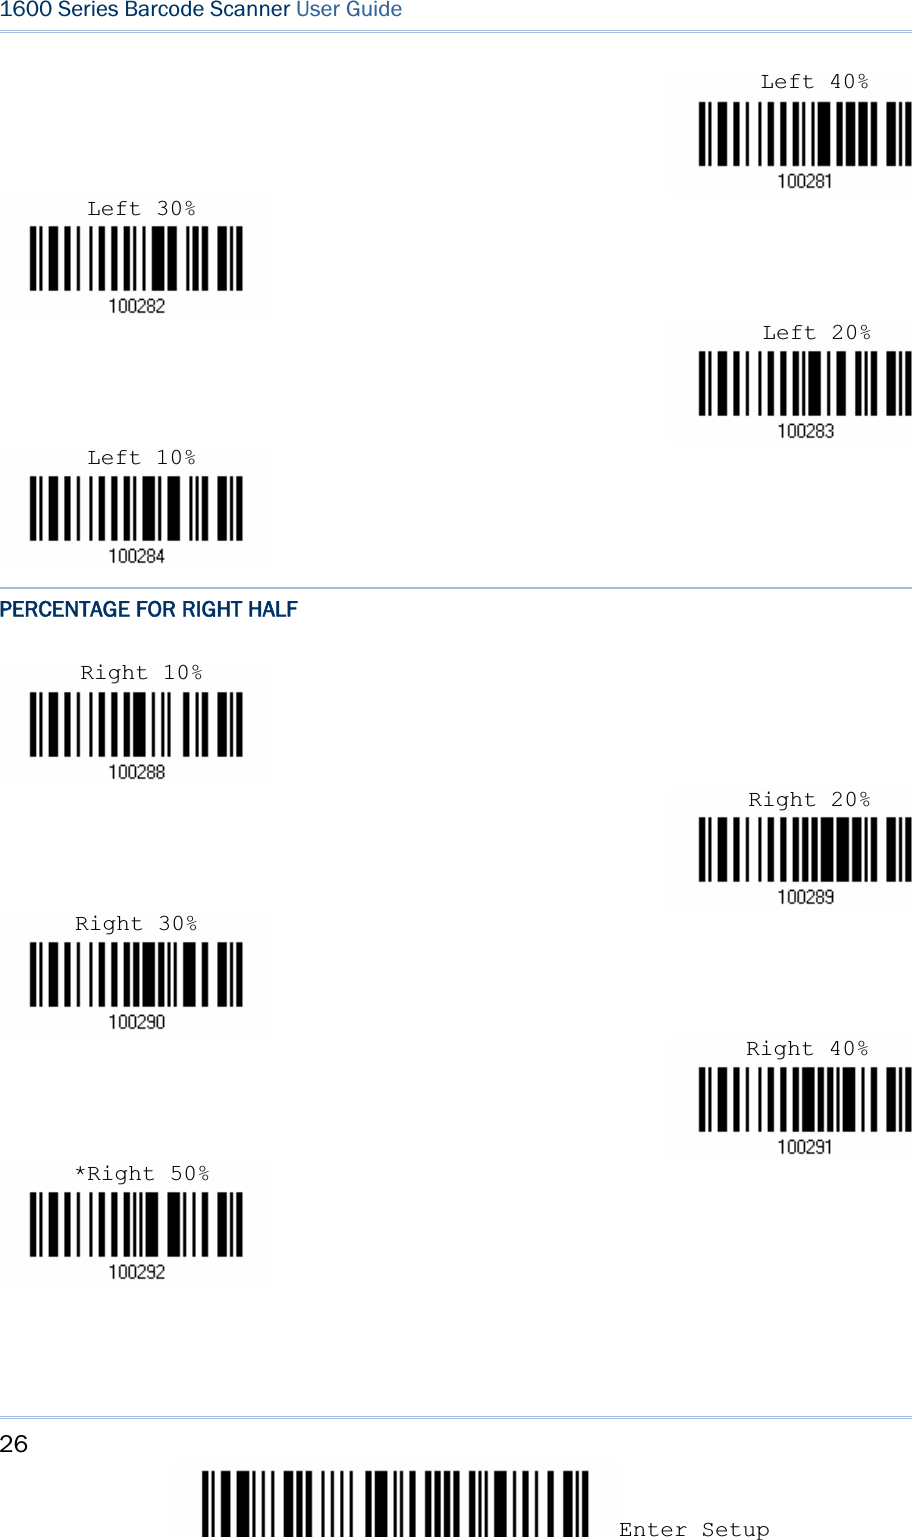
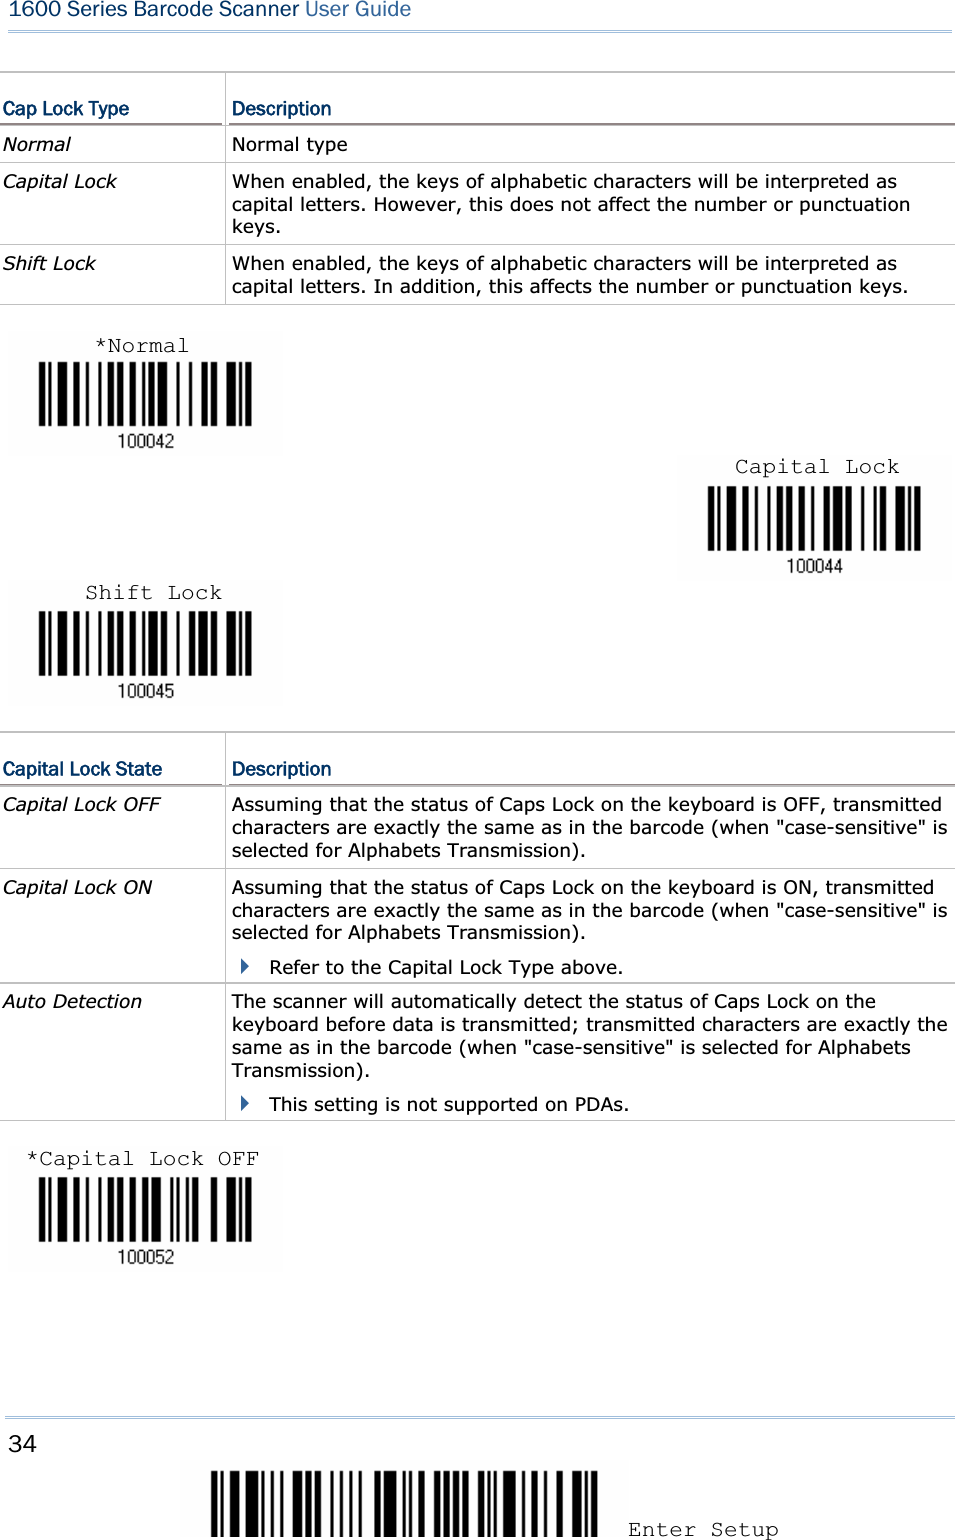
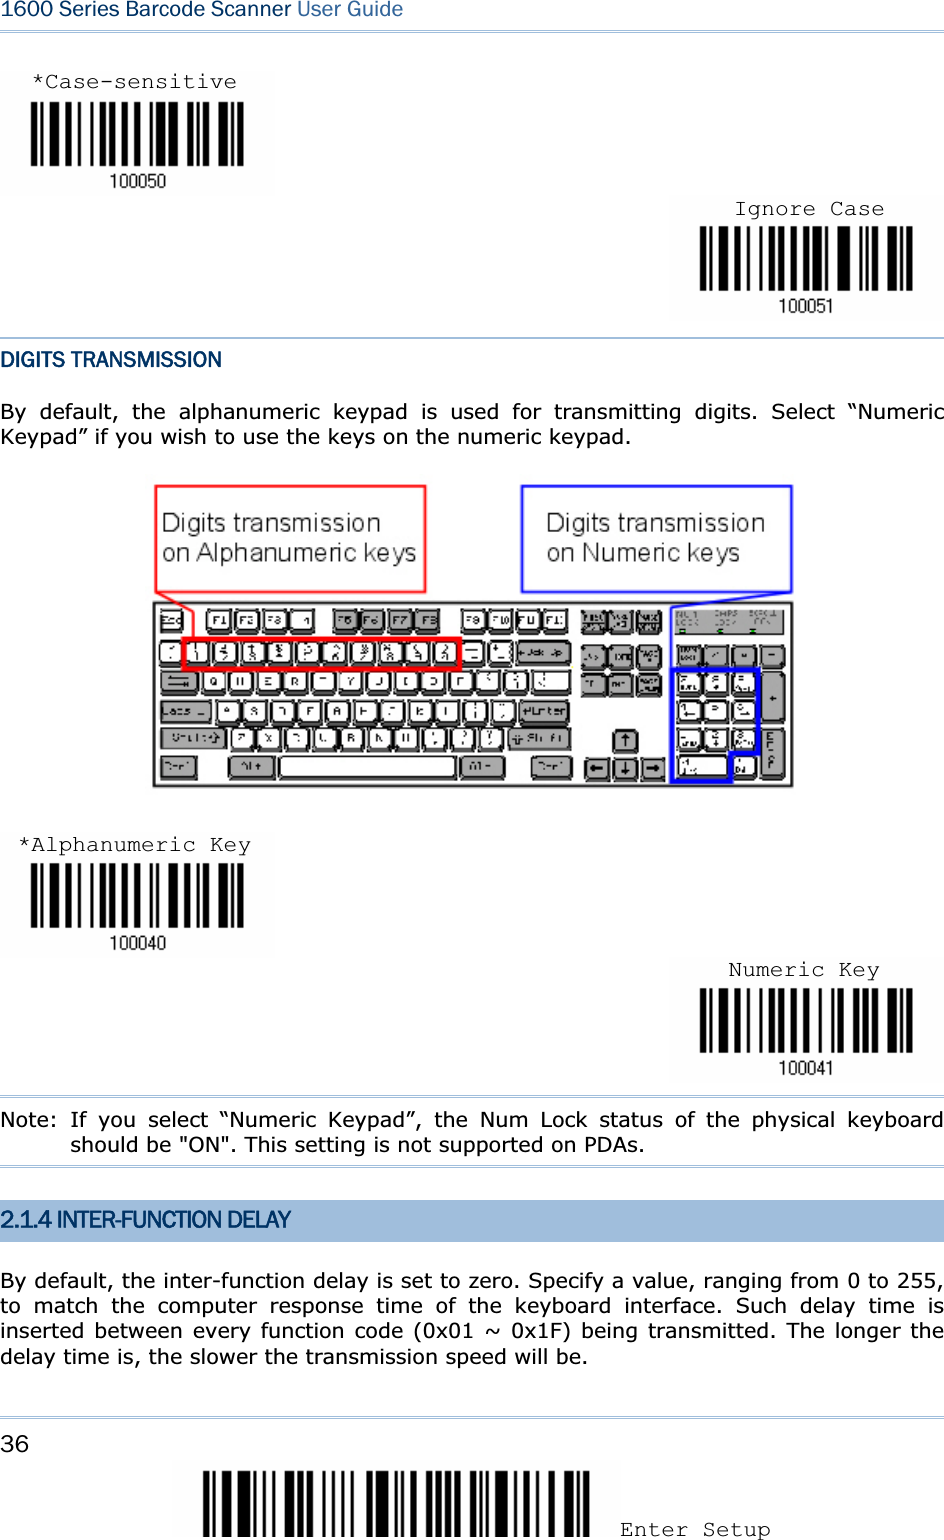
![33UpdateChapter 2 !Ζ2.1.3 KEYBOARD SETTINGS Digits Layout Capital Lock Type Capital Lock Setting Alphabets Transmission Digits Transmission Note: Bluetooth HID does not support these functions on PDAs – (1) Capital Lock Setting: Auto Detection (2) Digits Transmission: Numeric Key DIGITS LAYOUT Select a proper layout that matches the alphabets layout. The scanner will make adjustments according to this setting. Options DescriptionNormal Depends on the [Shift] key or [Shift Lock] setting Lower Row For QWERTY and QWERTZ keyboards Upper Row For AZERTY keyboards Note: This setting is to be used with the Character Substitution setting when support to certain keyboard types (languages) is unavailable but required. CAPITAL LOCK TYPE & SETTING In order to send the alphabets with correct case, the scanner needs to know the status of Caps Lock on the keyboard. Incorrect settings may result in reversed case of the alphabets being transmitted. *NormalLower Row Upper Row](https://usermanual.wiki/CipherLab/1660/User-Guide-925344-Page-45.png)
![35UpdateChapter 2 !ΖALPHABETS TRANSMISSION By default, the alphabets transmission is case-sensitive, meaning that the alphabets will be transmitted according to their original case, the status of Caps Lock on the keyboard, as well as the Capital Lock setting. Select [Ignore Case] to have alphabets transmitted according to the status of Caps Lock on the keyboard only. Auto DetectionCapital Lock ON](https://usermanual.wiki/CipherLab/1660/User-Guide-925344-Page-47.png)


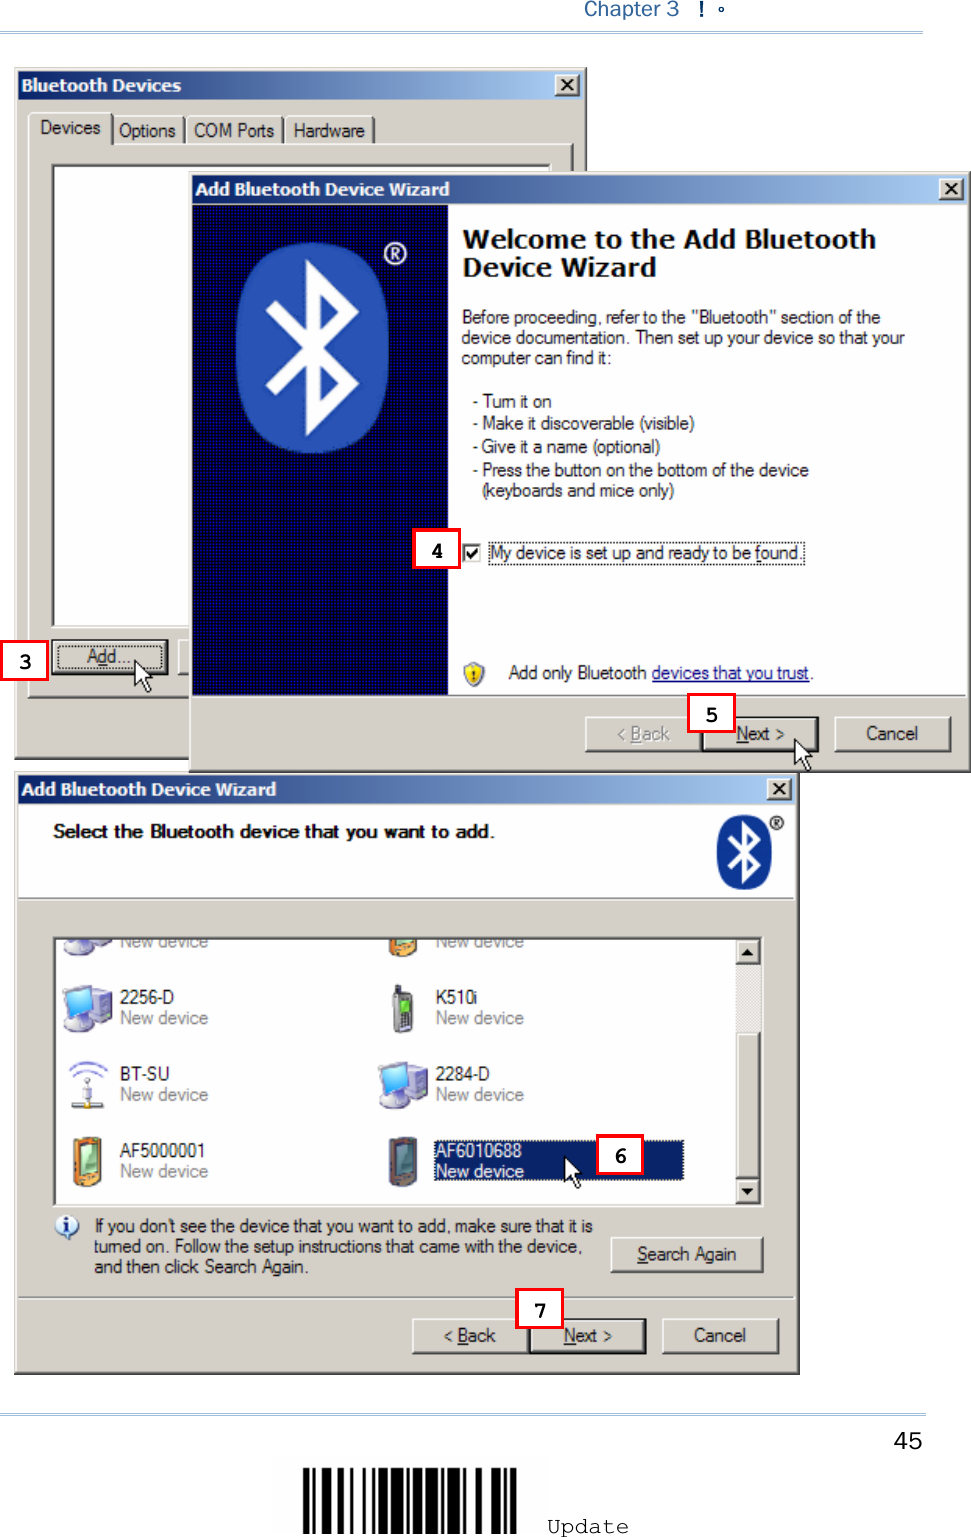
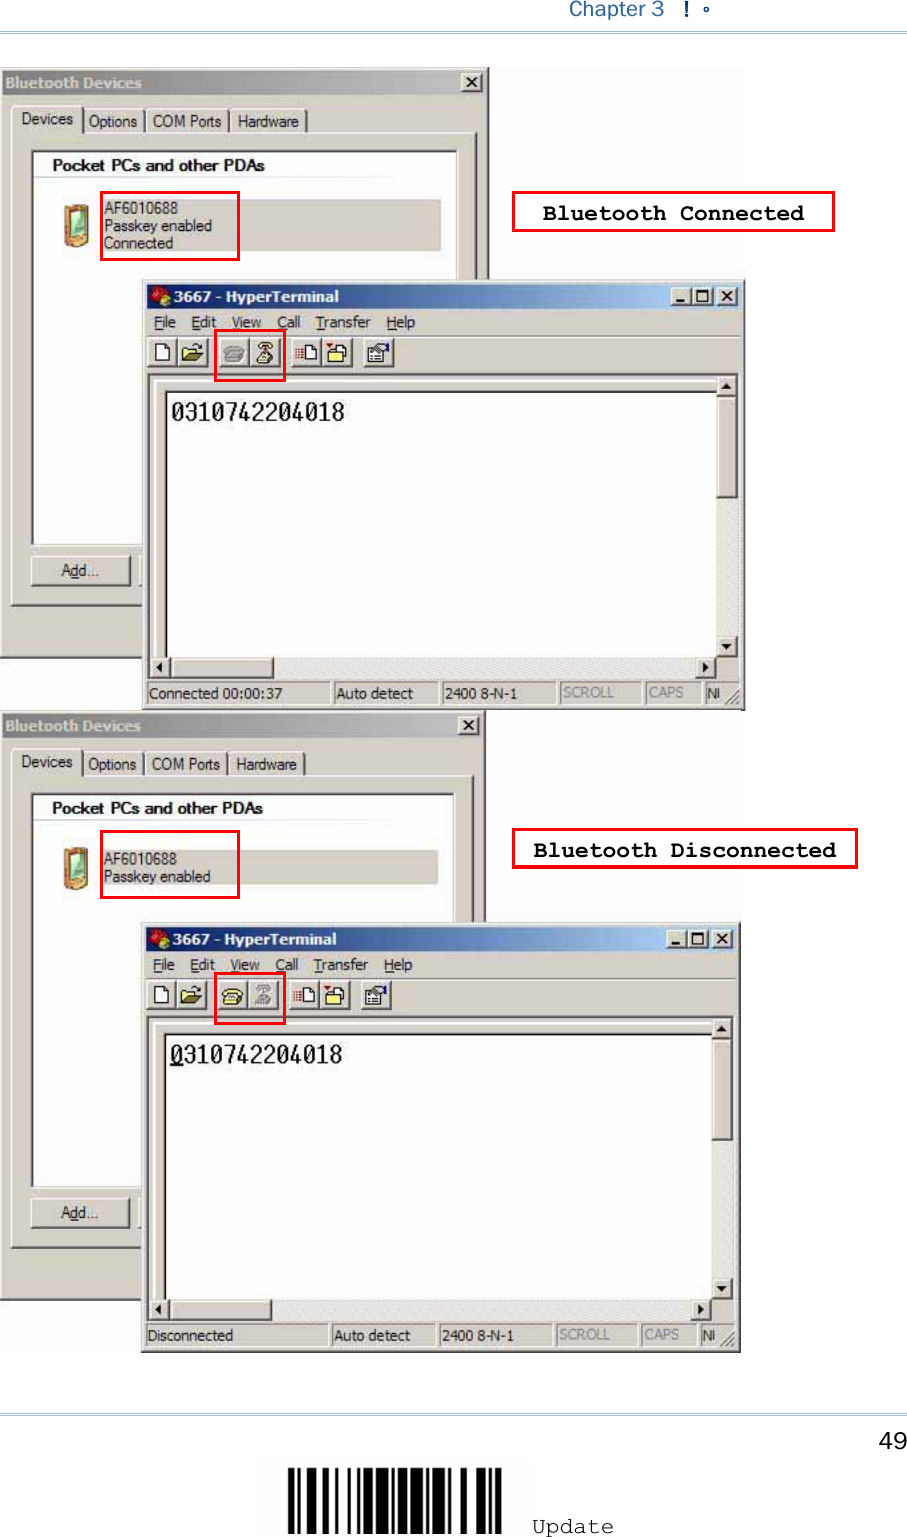
![44Enter Setup 1600 Series Barcode Scanner User Guide3.2 CONNECTING VIA BLUETOOTH DONGLE This is called "pairing with a Bluetooth device". The procedure for connecting the scanner to a computer via a Bluetooth dongle is pretty much the same except for the software you are using. Note: When connecting more than two Bluetooth scanners to a computer via the Bluetooth dongle, we suggest you to disable “Sniff Mode” for a more reliable connection. If your computer is running Microsoft Windows XP Service Pack 2 (SP2) or Windows Vista, you can use the generic software support that Windows includes, or you can use the driver that the device manufacturer provides. Now, let’s try using the generic software support that Windows XP Service Pack 2 includes.3.2.1 BLUETOOTH HID – ADD BLUETOOTH DEVICE WIZARD By default, Bluetooth HID is activated on the 1660 scanner, and the keyboard type is set to PCAT (US). When Bluetooth HID is re-activated, you will have to select a keyboard type to complete this setting. The procedure is the same as for Bluetooth SPP. Refer to steps 1~11 below. 3.2.2 BLUETOOTH SPP – ADD BLUETOOTH DEVICE WIZARD 1) Connect a Bluetooth dongle to your computer, running Windows XP SP2. 2) Double-click the Bluetooth icon fro the lower right of the taskbar. Alternatively, you may go to Control Panel > Bluetooth Devices.3) Click [Add] to search Bluetooth devices nearby. 4) Select the check box of [My device is set up and ready to be found] when the Bluetooth scanner is ready – having battery inserted or USB cable connected, Bluetooth settings such as select Bluetooth SPP or Bluetooth HID, broadcasting enabled, authentication enabled, and PIN code specified, etc. 5) Click [Next]. 6) Wait for a few seconds for the Wizard to search available Bluetooth devices nearby. The scanner will appear with its “serial number” as the device name. You may double-check the “Serial Number” label on the scanner to ensure connecting with the correct scanner. Select the target scanner. If the target scanner does not appear on the list, click [Search Again] to refresh the list. The scanner might enter Suspend Mode now, and you can press the trigger to have it active again (=discoverable). It will then stay active for one minute and wait for PC to establish a connection. 7) Click [Next]. 2](https://usermanual.wiki/CipherLab/1660/User-Guide-925344-Page-56.png)
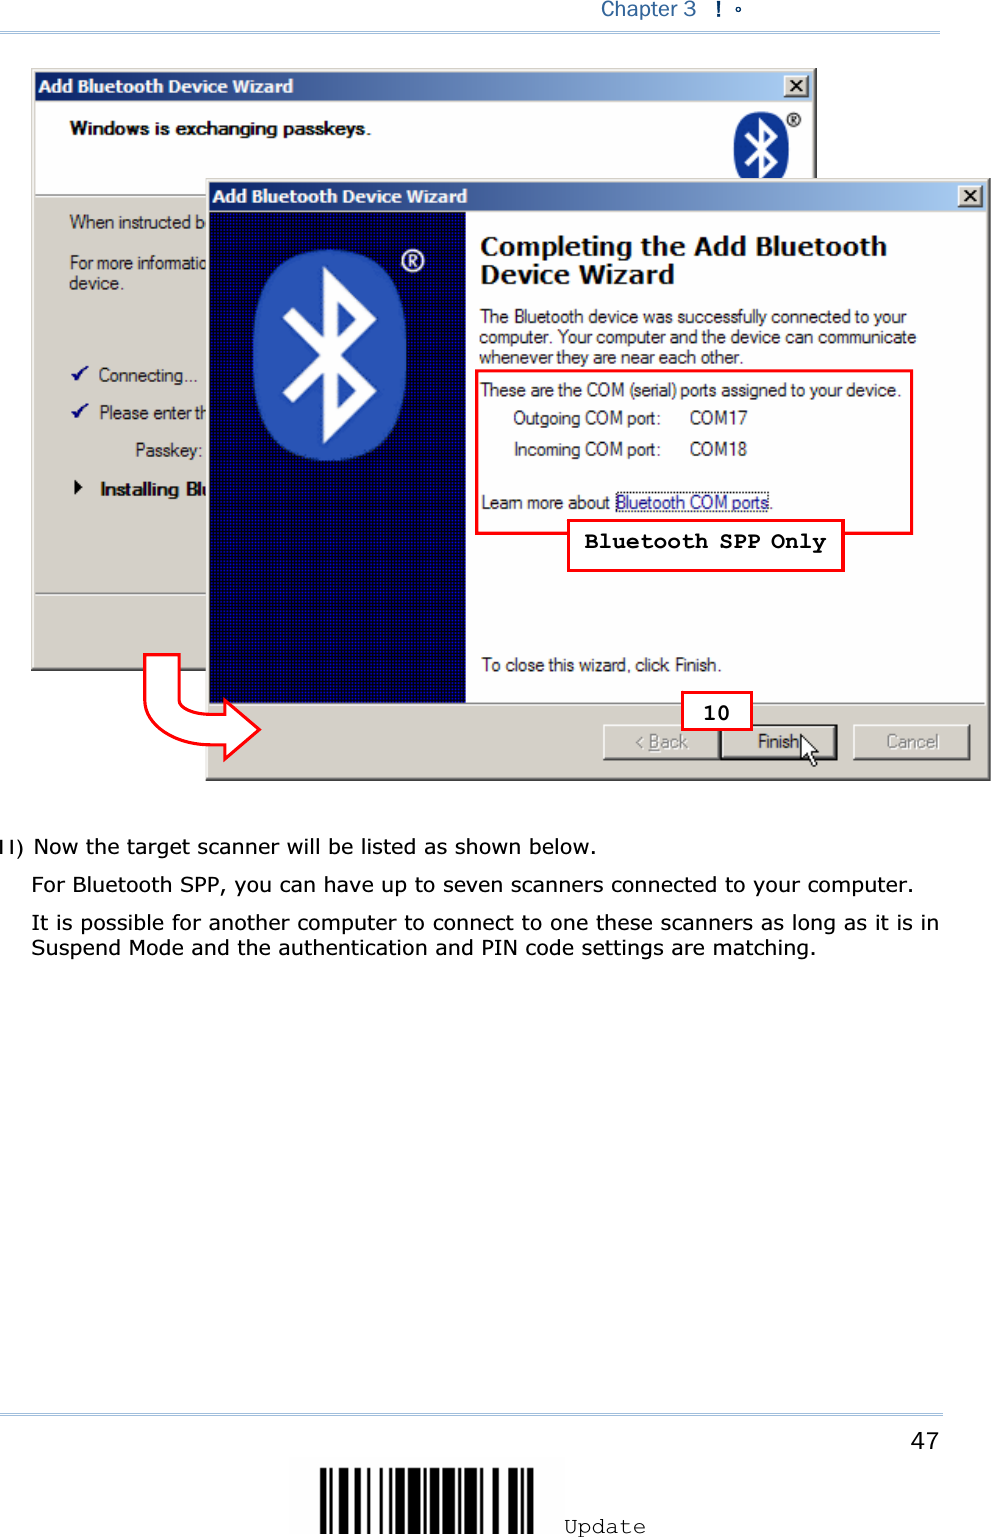
![46Enter Setup 1600 Series Barcode Scanner User Guide8) Enter the passkey for authentication, which must be exactly the same as configured for the scanner. 9) Click [Next]. Wait for a few seconds for Windows to exchange passkeys. 10) Click [Finish]. 89Ignore this](https://usermanual.wiki/CipherLab/1660/User-Guide-925344-Page-58.png)


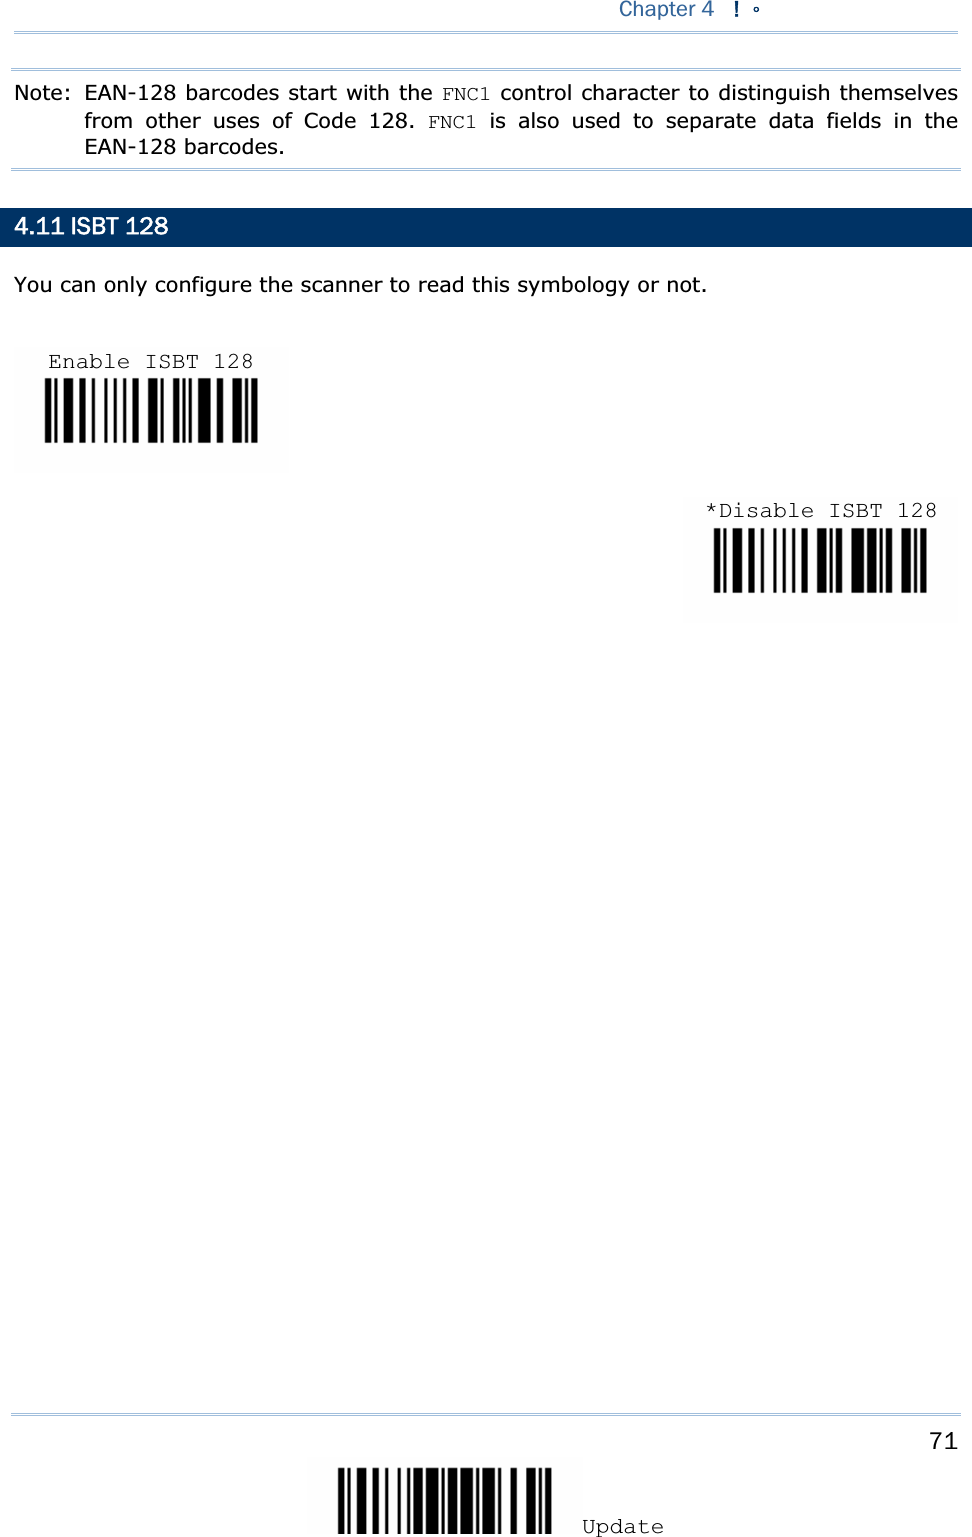
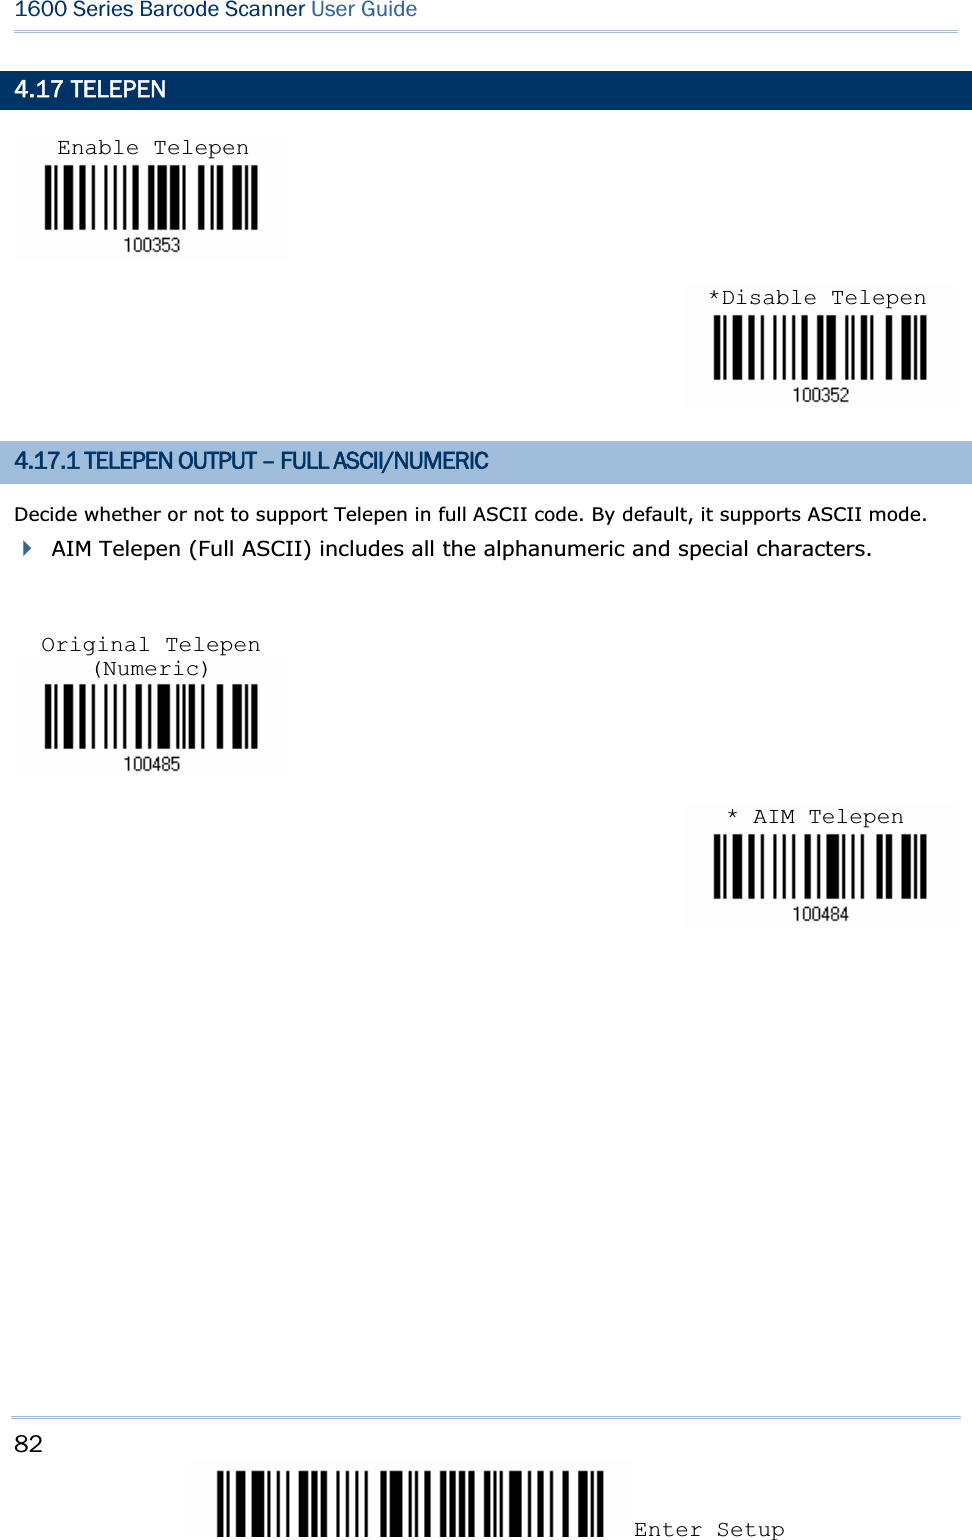
![70Enter Setup 1600 Series Barcode Scanner User Guide4.10 EAN-128 4.10.1 CODE ID TRANSMISSION Decide whether or not to include the Code ID (“]C1”) in the data being transmitted. 4.10.2 FIELD SEPARATOR (GS CHARACTER) Decide whether or not to apply a field separator (to convert the FNC1 control character to human readable character). 1) Read the label above to enable field separator. 2) Read the “Hexadecimal Value” label on page 124 for the desired character string. 3) Read the “Validate” label on the same page to complete this setting. Enable EAN-128*Disable EAN-128Transmit EAN-128 Code ID*Do Not TransmitEnable Field Separator …](https://usermanual.wiki/CipherLab/1660/User-Guide-925344-Page-82.png)

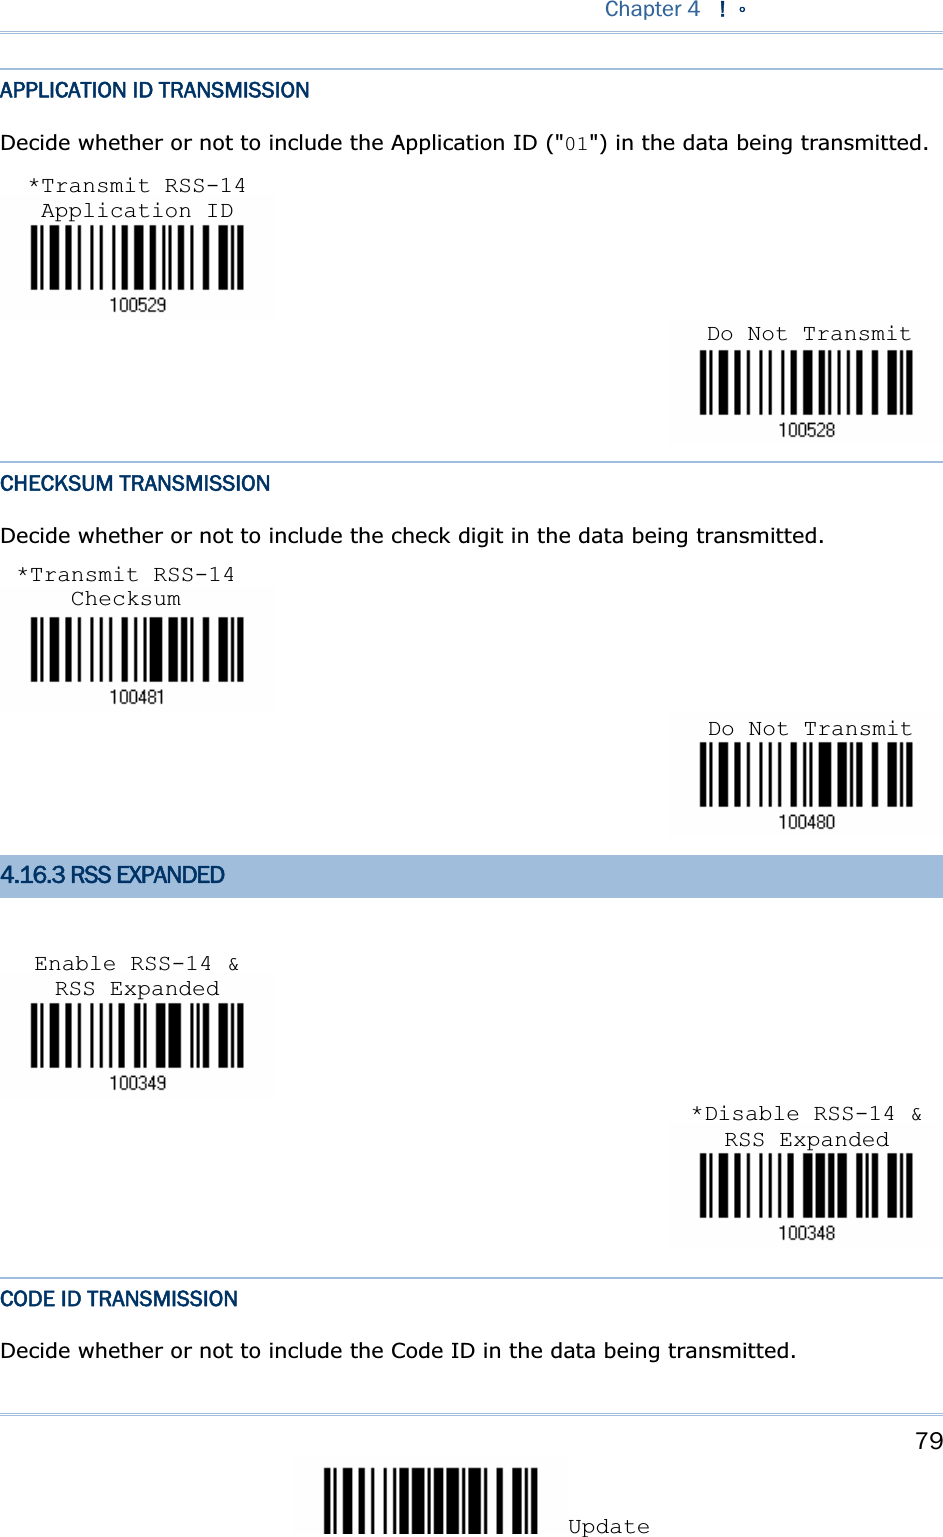
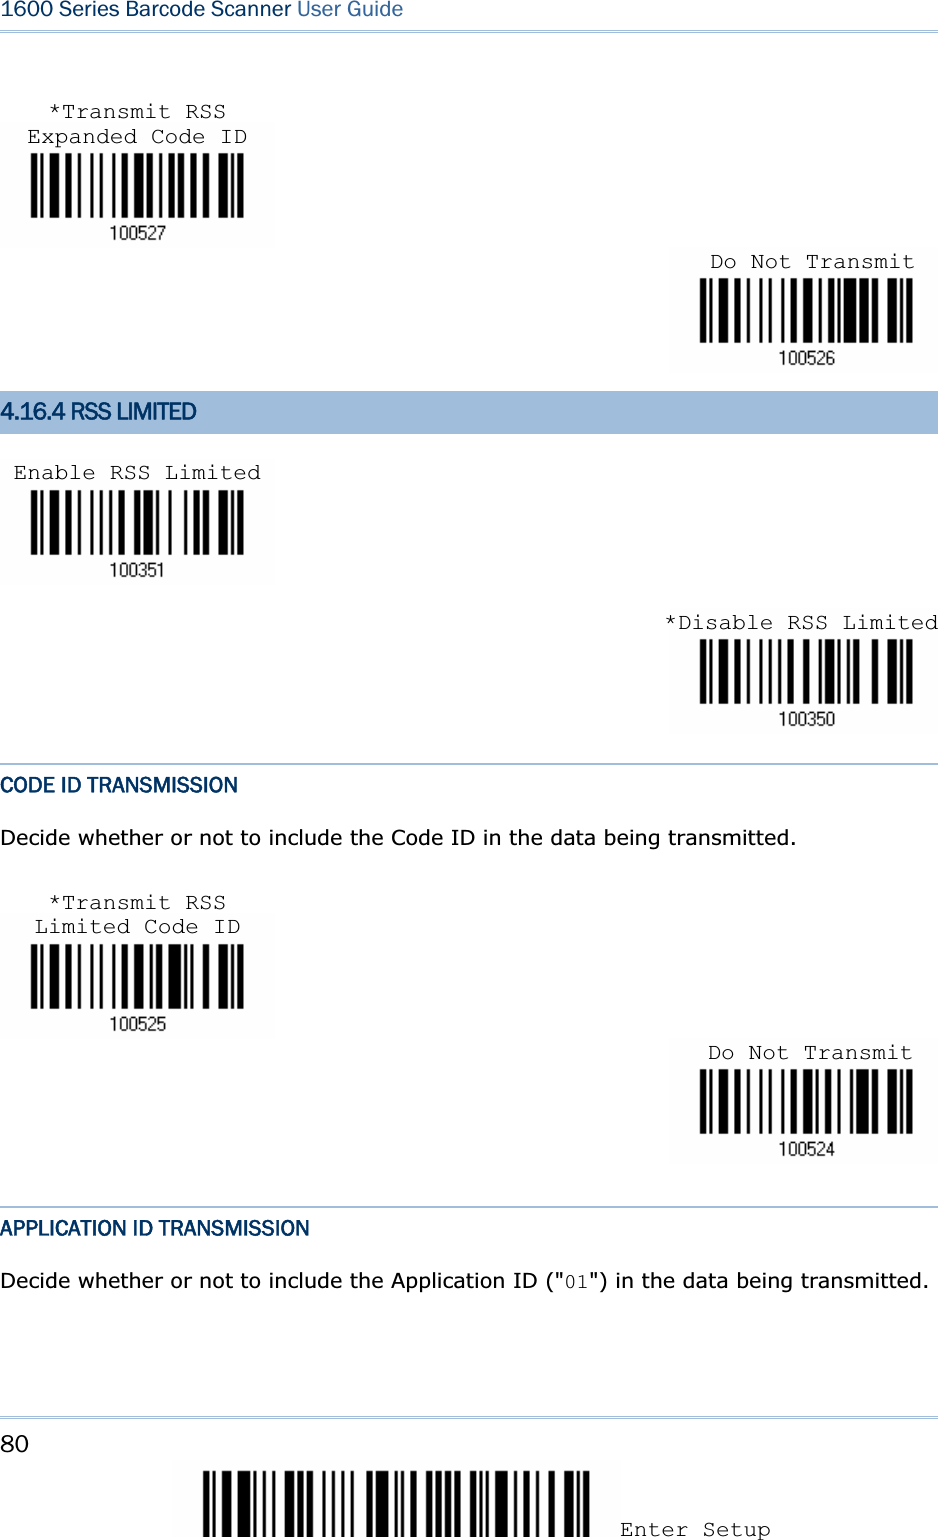
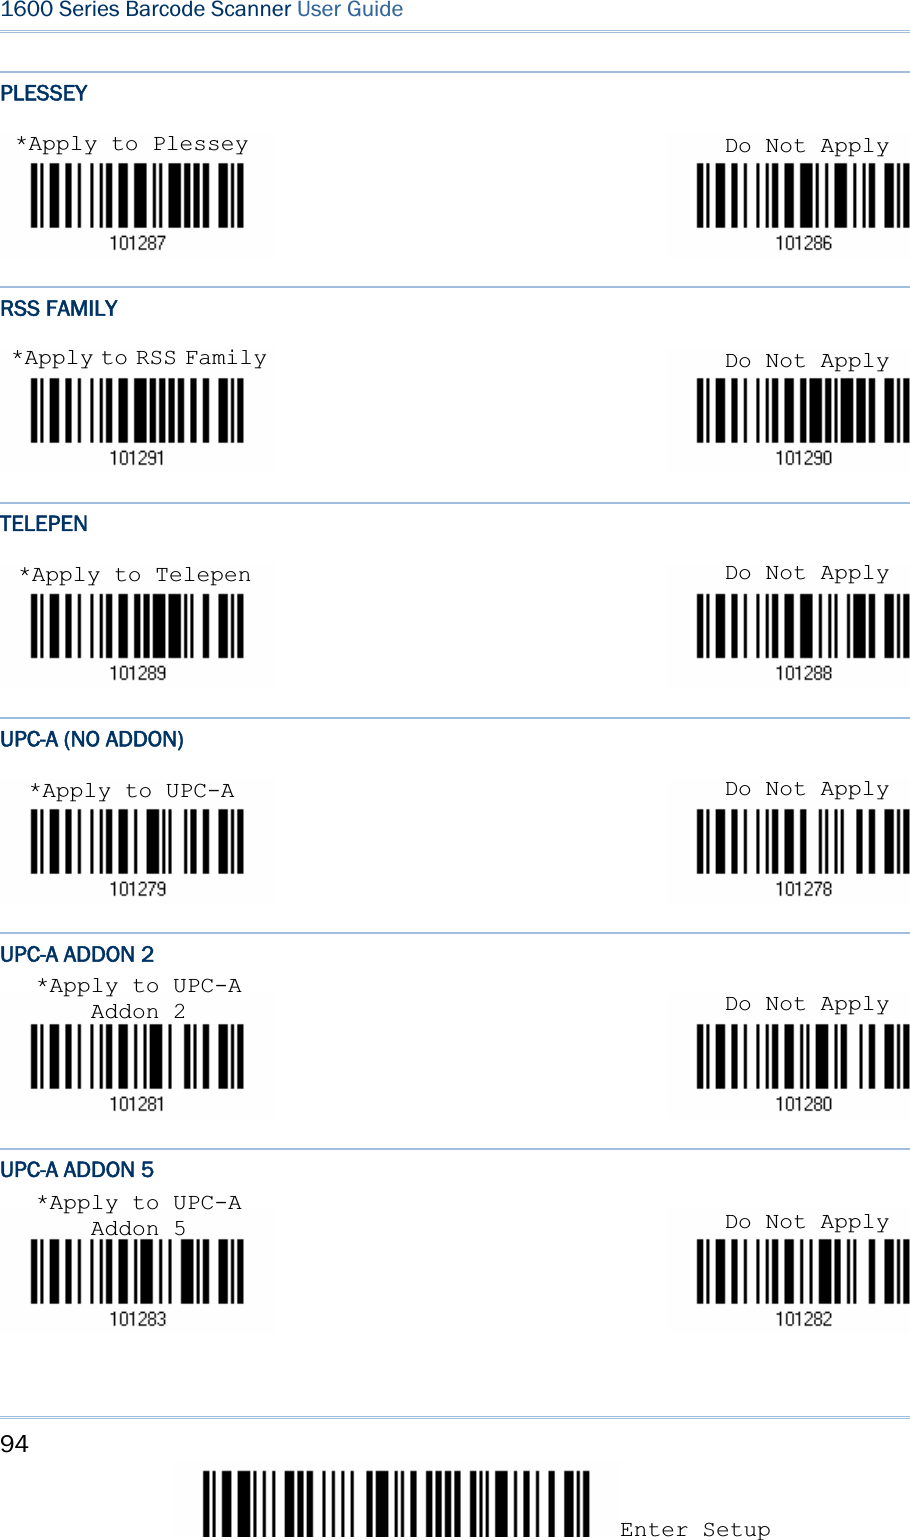
![78Enter Setup 1600 Series Barcode Scanner User Guide4.16 RSS FAMILY 4.16.1 CODE ID SELECTION Select a desired Code ID to use – RSS Code ID “]e0“ or EAN-128 Code ID “]C1”. 4.16.2 RSS-14 CODE ID TRANSMISSION Decide whether or not to include the Code ID in the data being transmitted. Enable RSS-14 & RSS Expanded*Disable RSS-14 & RSS Expanded“]C1” for RSS Code ID“]e0” for RSS Code ID (Default)*Transmit RSS-14 Code IDDo Not Transmit](https://usermanual.wiki/CipherLab/1660/User-Guide-925344-Page-90.png)

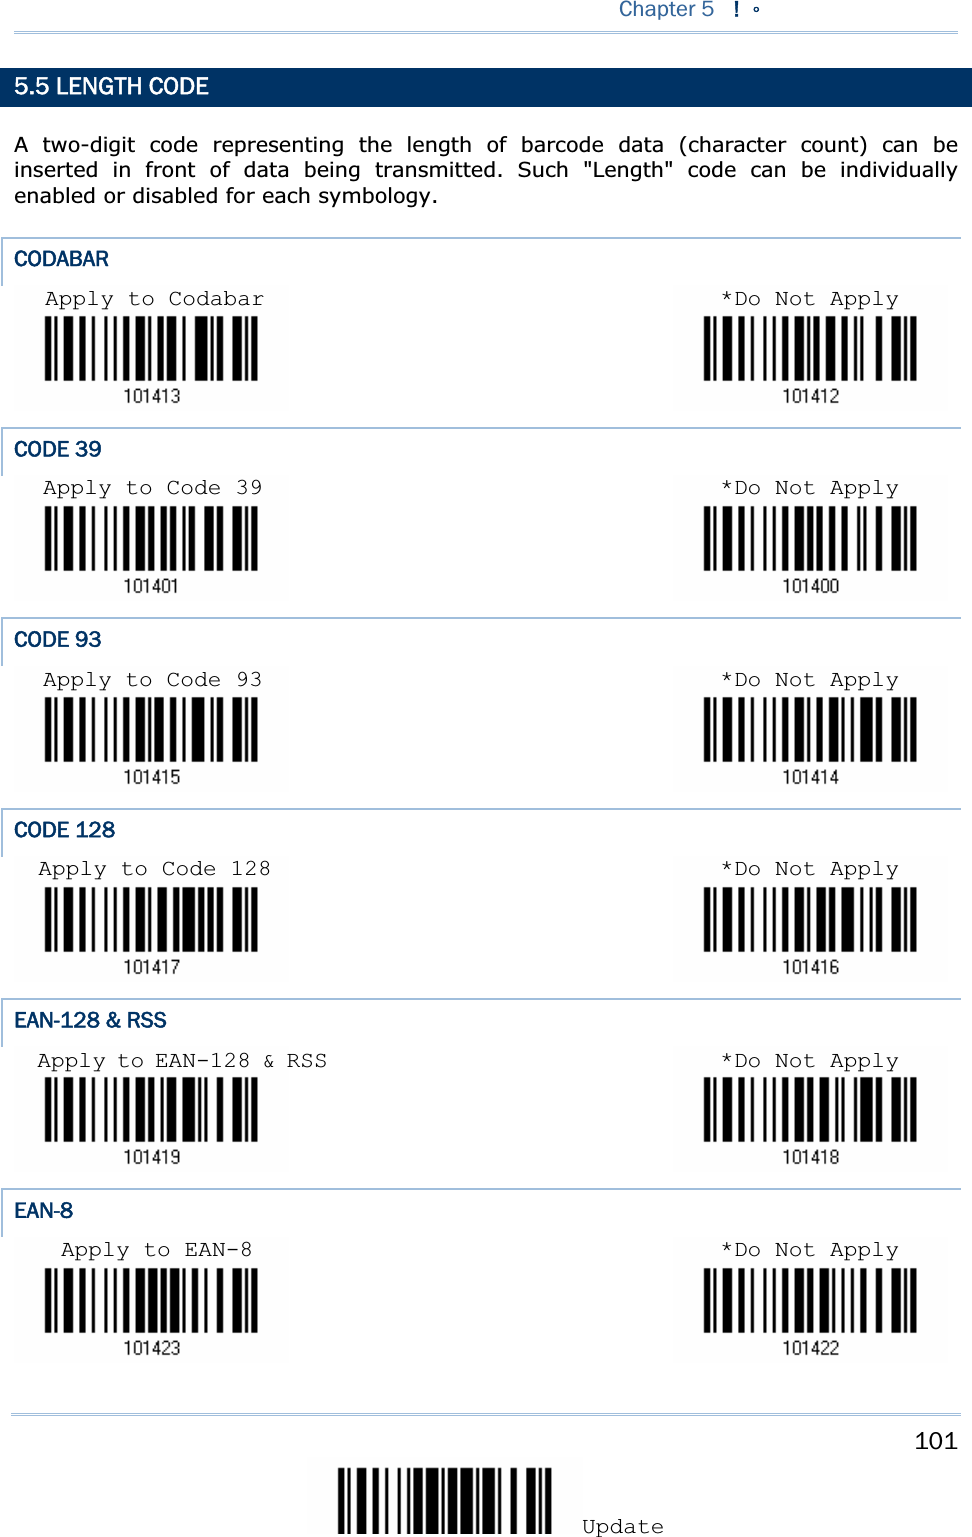
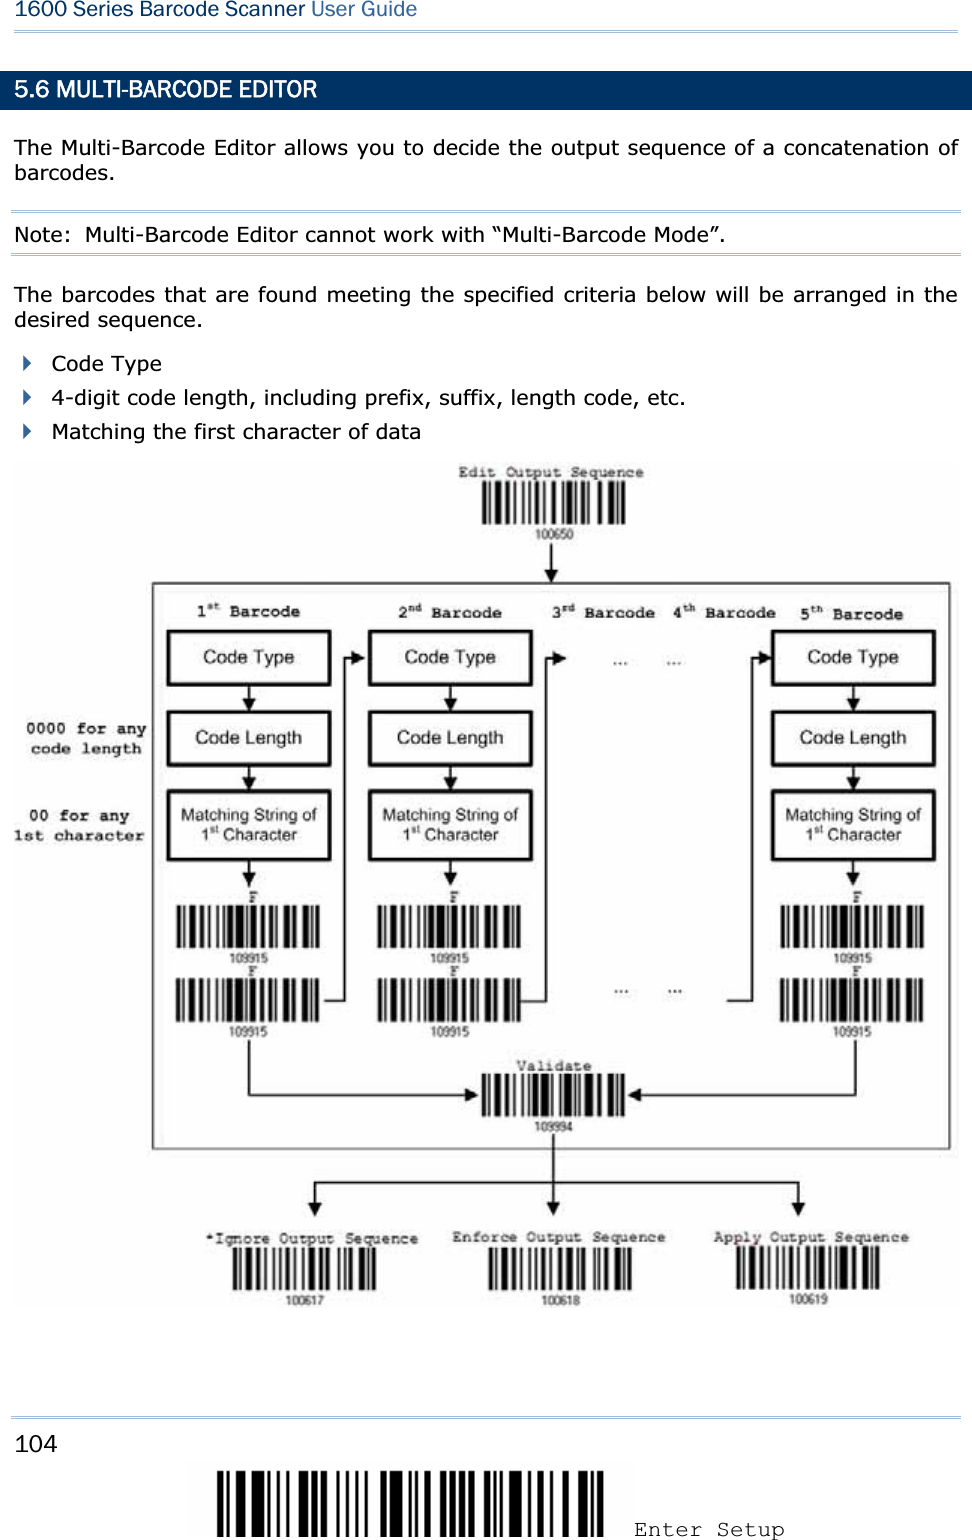
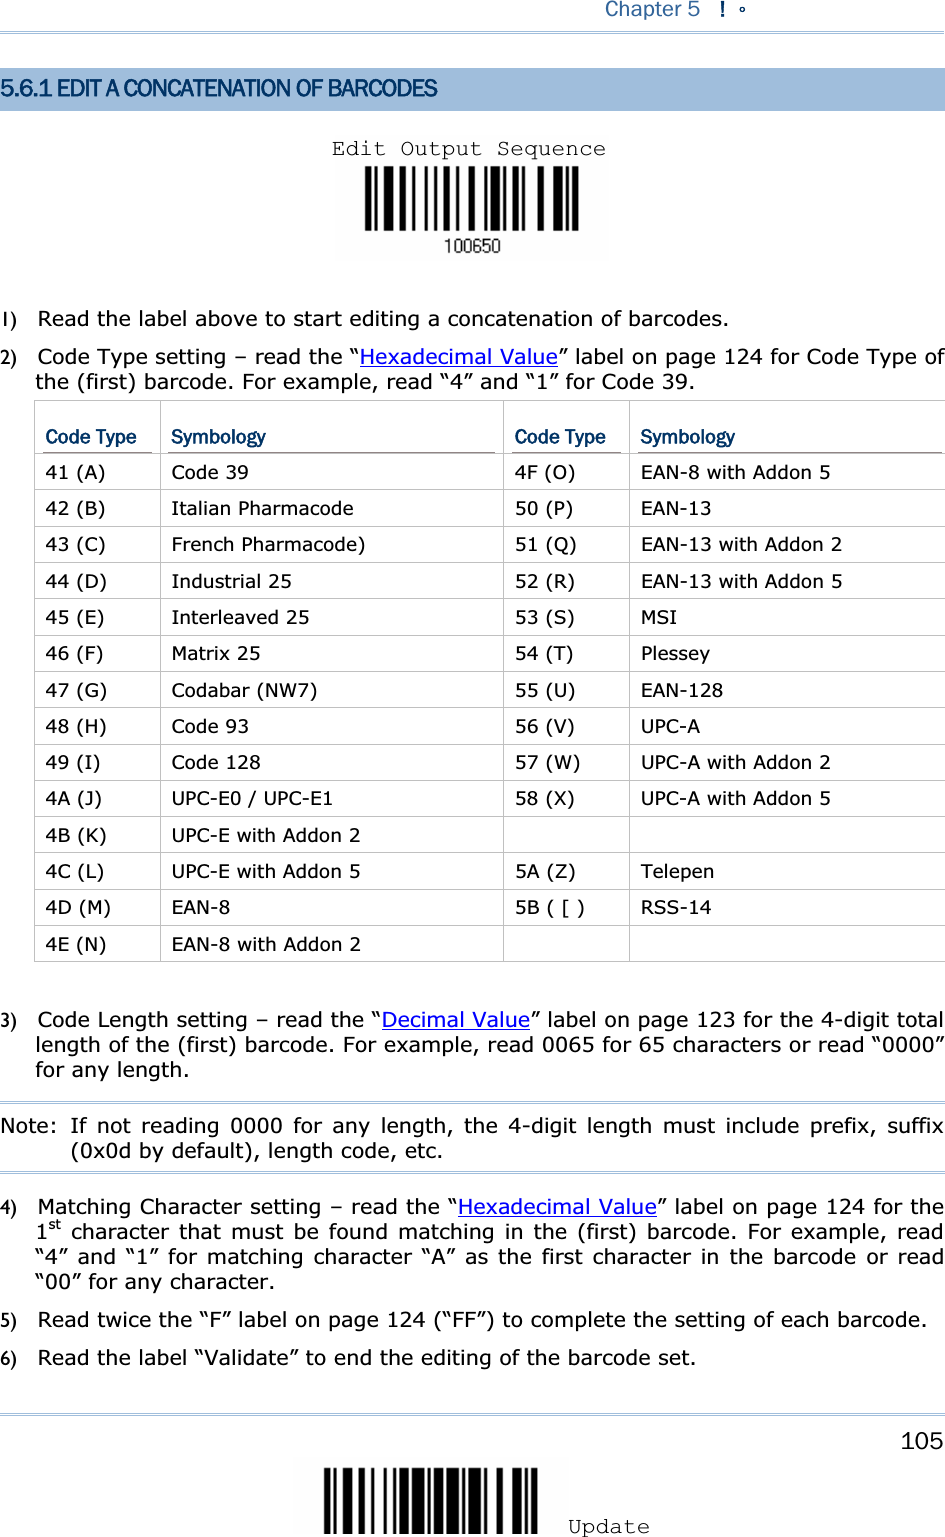
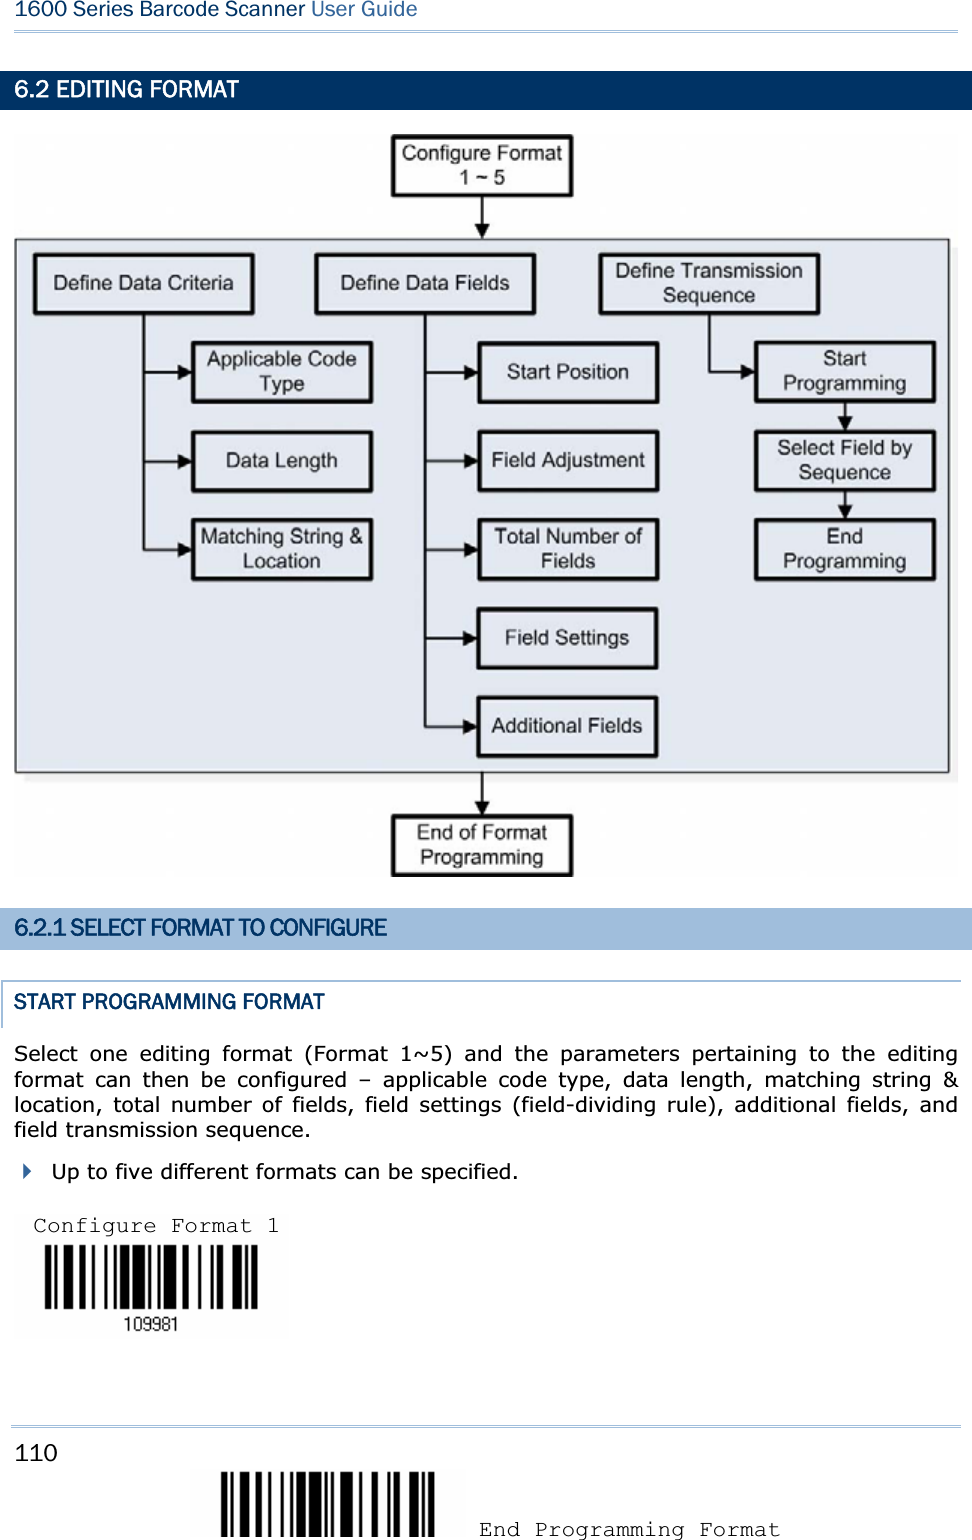
![89UpdateYou may configure in which format the collected data will be output to the host computer. Barcode read by the scanner will be processed in the following sequence – 1) Perform character substitution on the data scanned. 2) Add Code ID and Length Code to the front of the data: [Code ID][Length Code][Data] 3) Process the whole data in step 2 with user formats. Data is now divided into fields by user specified rules. 4) Add Prefix Code and Suffix Code before transmission: [Prefix Code][Processed Data][Suffix Code] IN THIS CHAPTER 5.1 Letter Case ............................................................... 89 5.2 Character Substitution................................................ 90 5.3 Prefix/Suffix Code ...................................................... 96 5.4 Code ID.................................................................... 97 5.5 Length Code ............................................................101 5.6 Multi-Barcode Editor..................................................104 5.1 LETTER CASE By default, the alphabets transmission is case-sensitive, meaning that the alphabets will be transmitted according to their original case. Ignoring the original letter case, select [Upper Case] to output data in upper case only; otherwise, select [Lower Case] to output data in lower case only. Chapter 5DEFINING OUTPUT FORMAT *NormalUpper CaseLower Case](https://usermanual.wiki/CipherLab/1660/User-Guide-925344-Page-101.png)
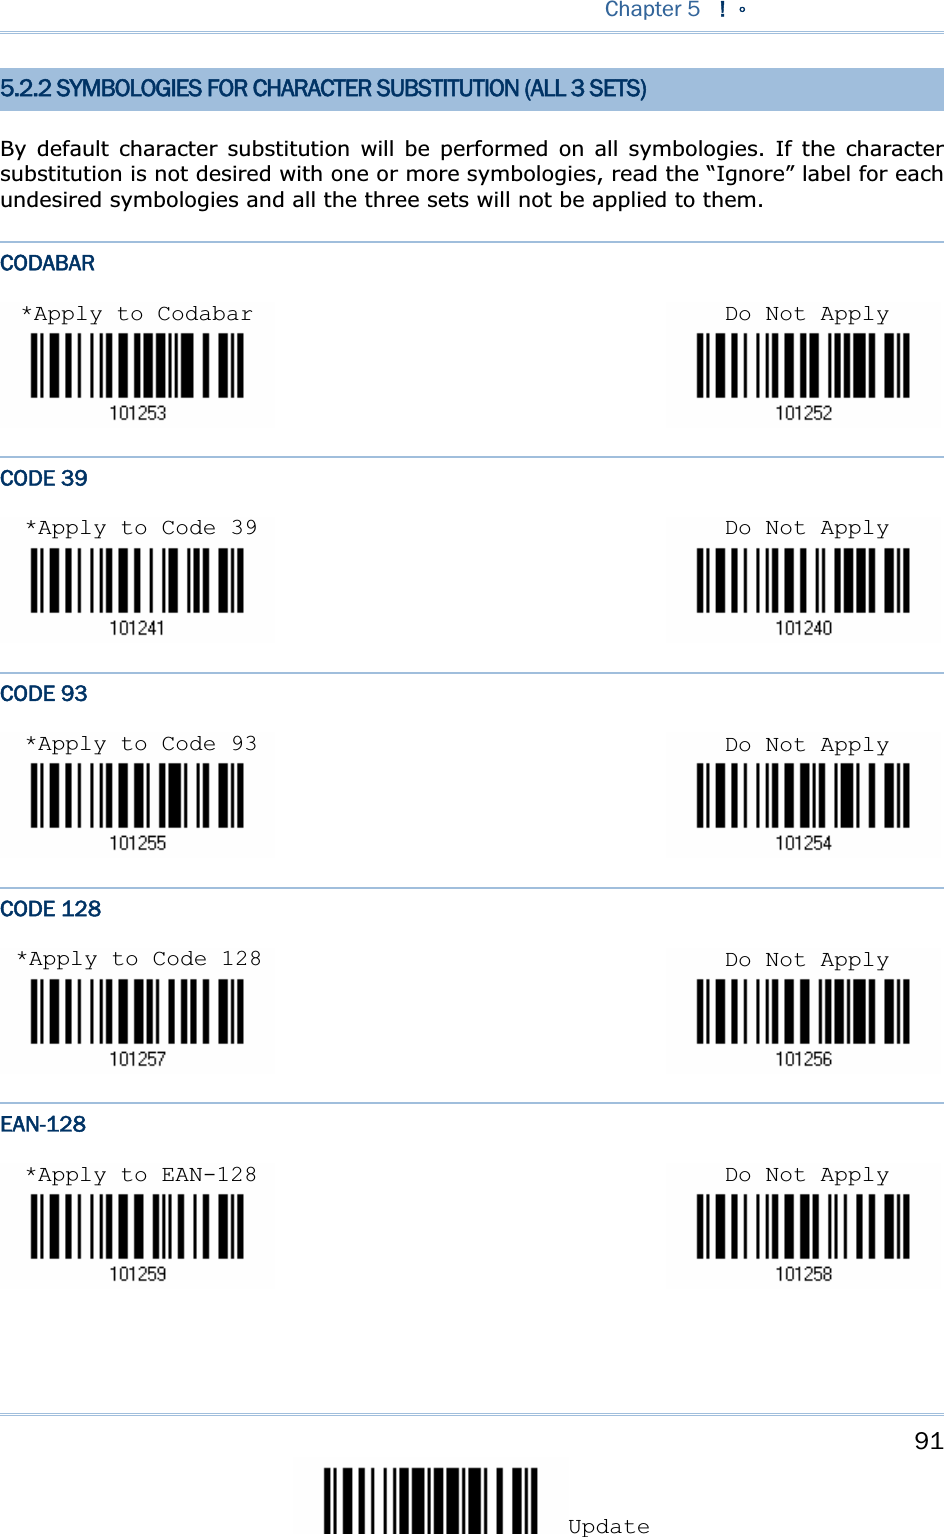
![90Enter Setup 1600 Series Barcode Scanner User Guide5.2 CHARACTER SUBSTITUTION Character substitution is performed on every occurrence of the first character specified. If only one character is specified, every occurrence of that character in the barcode will be taken away. The first character will be replaced by the second character(s). Up to three sets of character substitution can be configured. Note: The character substitution is performed only on the barcode itself and before the processing of editing formats. It is not applicable to the Prefix/Suffix Code, Code ID, Length Code, or any Additional Field. 5.2.1 SELECT A SET FOR CHARACTER SUBSTITUION 1) Read the label above to enable character substitution by set. For example, have the scanner read the “Set 1” label to configure the first set of character substitution. The scanner will respond with one short beep, high tone, to indicate more setup labels are required. 2) Read the “Hexadecimal Value” label on page 124 for the desired character string. For example, have the scanner read (1) “3”, “0”, “2” and “D” to replace the character [0] with a dash [-] for Set 1, and (2) “3”, “0”, “2”, “D”, “3” and “0”to replace the character [0] with a dash [- 0] for Set 2. 3) Read the “Validate” label on the same page to complete this setting. (The defined set or sets will be applied to all symbologies by default.) Configure Set 1Configure Set 2Configure Set 3](https://usermanual.wiki/CipherLab/1660/User-Guide-925344-Page-102.png)
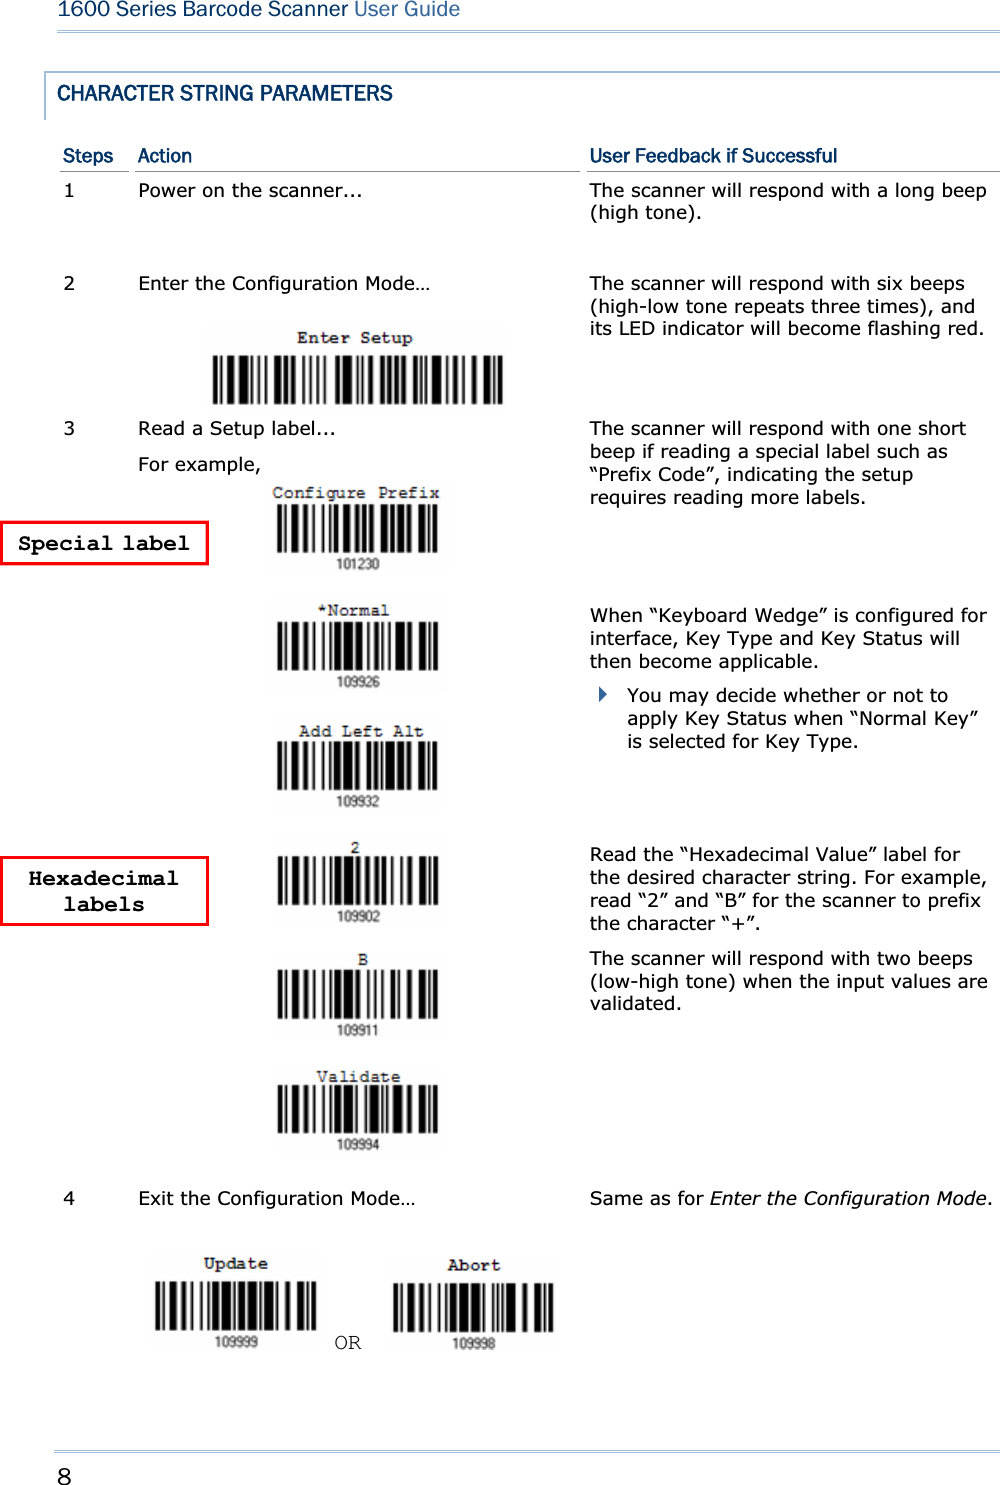
![96Enter Setup 1600 Series Barcode Scanner User Guide5.3 PREFIX/SUFFIX CODE By default, there is no prefix code, and [ENTER] or [CR] (Carriage Return) is configured to be suffix code. Up to 8 characters can be configured, for example, “Barcode_”, and you will have the string appear in front of the barcode read, like this – “Barcode_1234567890”.If “Keyboard Wedge” is configured for interface, Key Type and Key Status will then become applicable. You may decide whether or not to apply Key Status when “Normal Key” is selected for Key Type. Key Type Key Status Scan Code Up to 4 scan code values are allowed – each requires two hexadecimal values.N/ANormal Key Up to 8 character strings are allowed – each requires two hexadecimal values.Default setting Add Shift Add Left Ctrl Add Left Alt Add Right Ctrl Add Right Alt Add Break For example, read labels for [Add Shift], [A], [Add Shift], and [B]. 1) Read the label above to apply prefix code or suffix code separately. (Max. 8 characters each) 2) Read the “Hexadecimal Value” label on page 124 for the desired character string. For example, read “2” and “B” for the scanner to prefix or suffix the character [+]. 3) Read the “Validate” label on the same page to complete this setting. Configure PrefixConfigure Suffix](https://usermanual.wiki/CipherLab/1660/User-Guide-925344-Page-108.png)
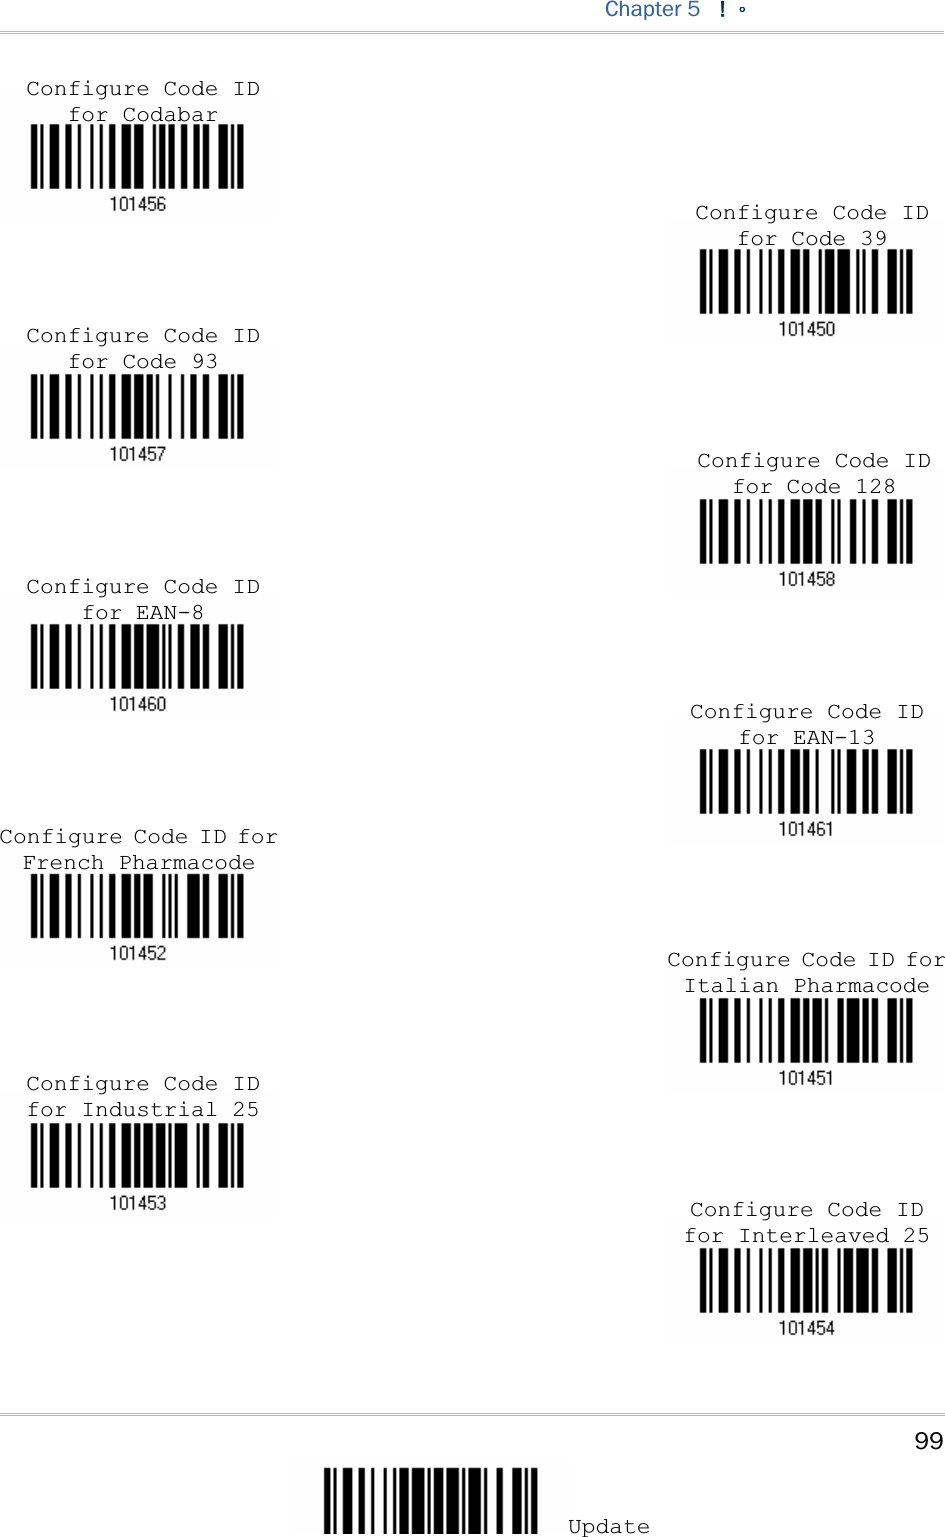
![97UpdateChapter 5 !Ζ5.4 CODE ID Up to two characters for Code ID can be configured for each symbology. To make the Code ID configuration easier, the scanner provides five pre-defined Code ID sets that you can select one and make necessary changes on it. If "Keyboard Wedge" is configured for interface, Key Type and Key Status will then become applicable. You may decide whether or not to apply Key Status when “Normal Key” is selected for Key Type. Key Type Key Status Scan Code Up to 1 scan code values are allowed – each requires two hexadecimal values.N/ANormal Key Up to 2 character strings are allowed – each requires two hexadecimal values.Default setting Add Shift Add Left Ctrl Add Left Alt Add Right Ctrl Add Right Alt Add Break For example, read labels for [Add Shift] and the character [A]. Note: "]C1" is the Code ID of EAN-128 barcodes; "]e0" is the default Code ID of RSS barcodes.5.4.1 SELECT PRE-DEFINED CODE ID Code ID options Set 1 Set 2 Set 3 Set 4 Set 5 Code 39 A C Y M A Italian Pharmacode A C Y M A French Pharmacode A C Y M A Industrial 25 C H H H S Interleaved 25 D I Z I S Matrix 25 E G G G S](https://usermanual.wiki/CipherLab/1660/User-Guide-925344-Page-109.png)
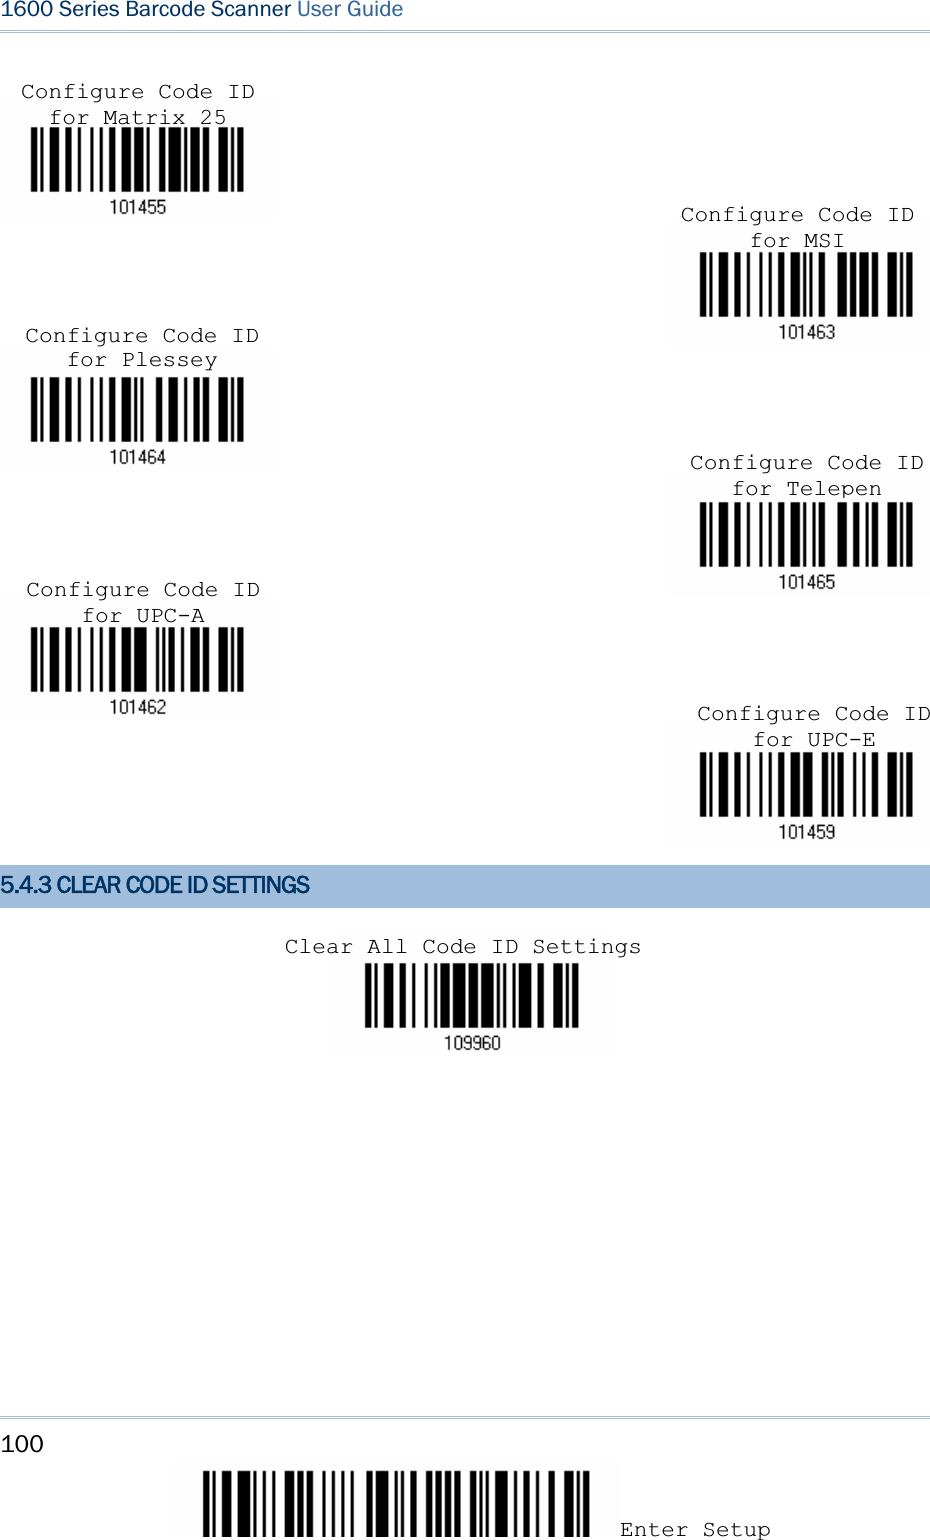
![98Enter Setup 1600 Series Barcode Scanner User GuideCodabar F N X N F Code 93 I L L L G Code 128 H K K K C UPC-E S E C E E EAN-8 P B B FF E EAN-13 M A A F E UPC-A J A A A E MSI V V D P M Plessey W W E Q P Telepen Z --- --- --- --- 5.4.2 CHANGE CODE ID 1) Read the label of a specific symbology below to change its code ID. 2) Read the “Hexadecimal Value” label on page 124 for the desired character string. For example, read “4” and “4” for applying the character [D] for Code ID. 3) Read the “Validate” label on the same page to complete this setting. Apply Code ID Set 1Apply Code ID Set 2Apply Code ID Set 3Apply Code ID Set 4Apply Code ID Set 5](https://usermanual.wiki/CipherLab/1660/User-Guide-925344-Page-110.png)

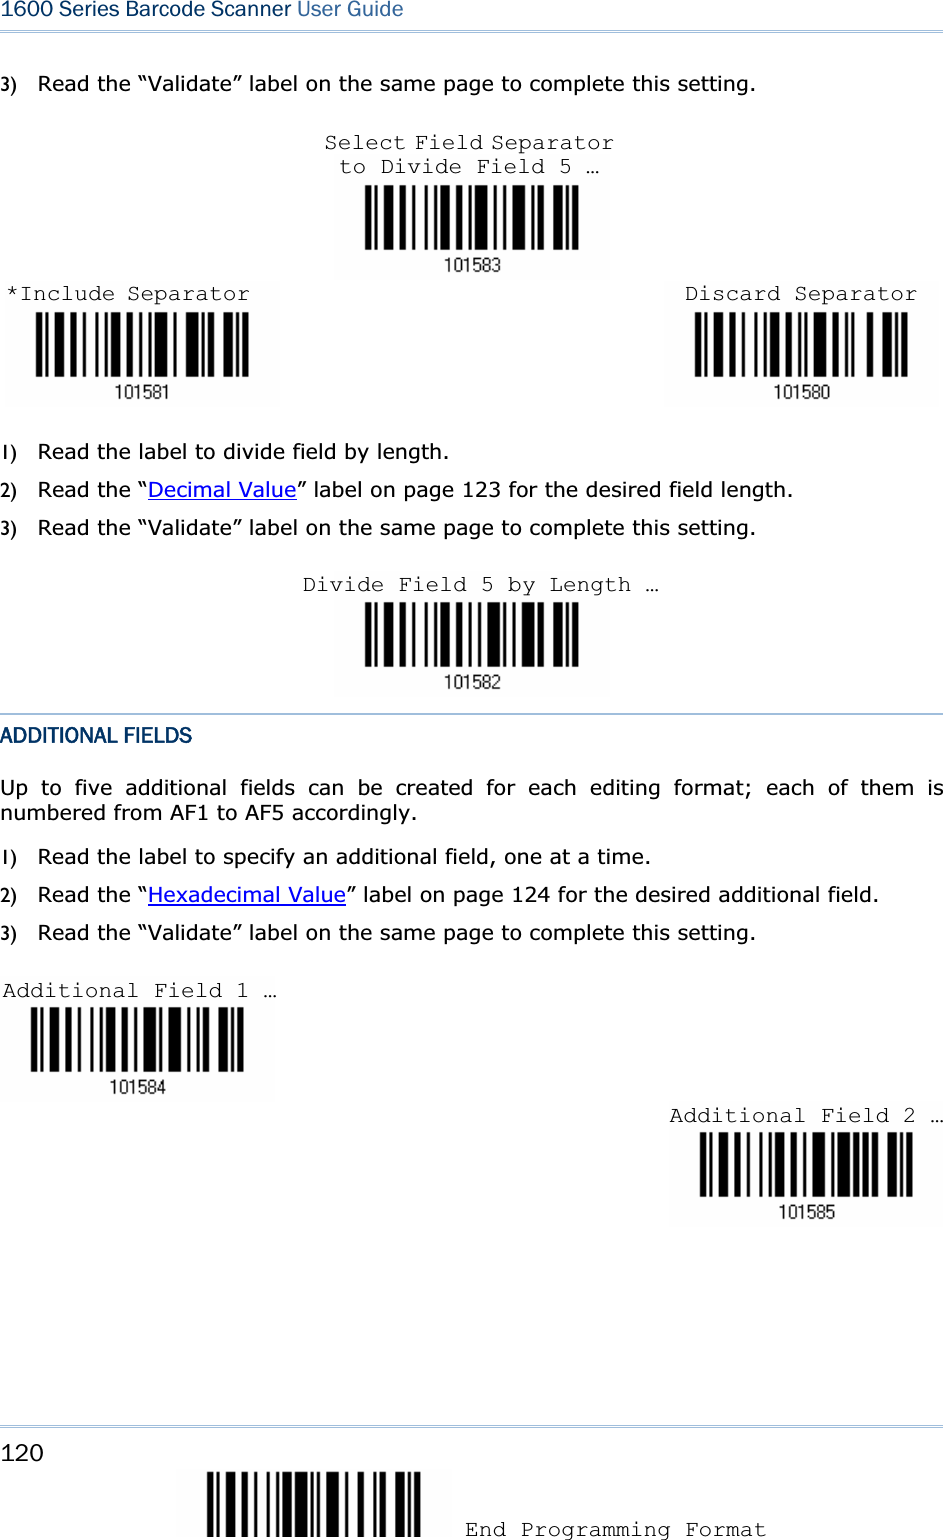
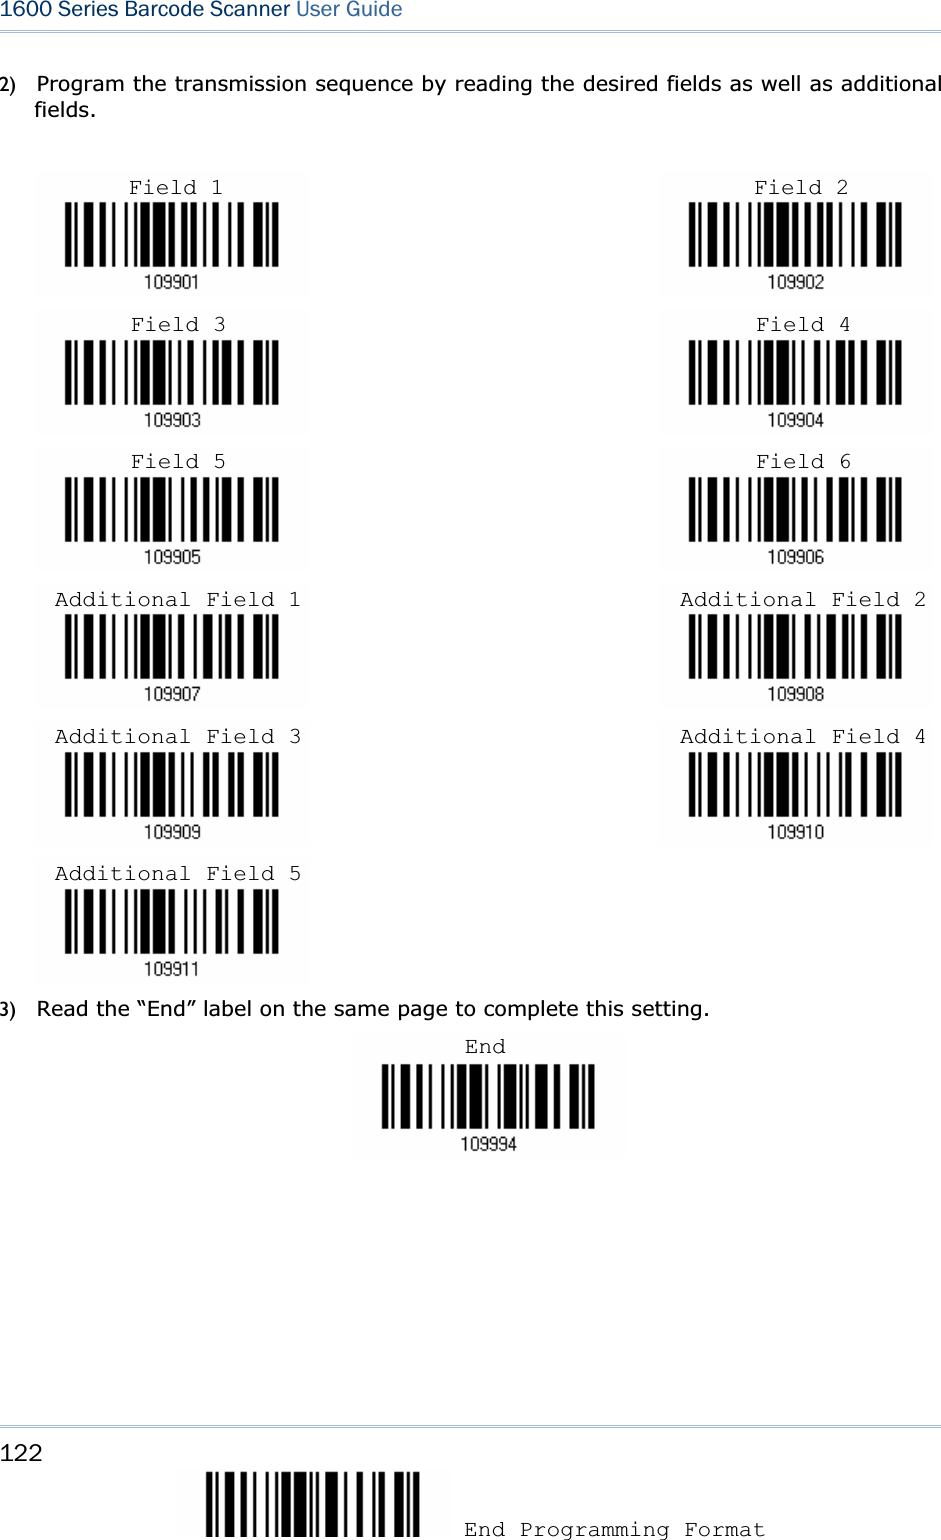
![121UpdateChapter 6 !ΖIf "Keyboard Wedge" is configured for interface, Key Type and Key Status will then become applicable. You may decide whether or not to apply Key Status when “Normal Key” is selected for Key Type. Key Type Key Status Scan Code Up to 2 scan code values are allowed – each requires two hexadecimal values.N/ANormal Key Up to 4 character strings are allowed – each requires two hexadecimal values.Default setting Add Shift Add Left Ctrl Add Left Alt Add Right Ctrl Add Right Alt Add Break For example, read labels for [Add Shift], [A], [Add Shift], and [B]. 6.2.6 FIELD TRANSMISSION SEQUENCE After configuring the data fields and additional fields, you must now program the transmission sequence of these fields that comprise the final data. This field transmission sequence can be assigned in any desired order and fields can be assigned multiple times as well. Note: Up to twelve fields can be assigned. 1) Read the “Start” label to begin with programming the field transmission sequence. Additional Field 4 …Additional Field 5 … Start (Programming) …Additional Field 3 …](https://usermanual.wiki/CipherLab/1660/User-Guide-925344-Page-133.png)
![123UpdateChapter 6 !Ζ6.3 PROGRAMMING EXAMPLES 6.3.1 EXAMPLE I Extract data from the 10th character to the 19th character... The editing format should be configured as follows: Total Number of Fields – 3. Field 1 Setting – Divide Field by Field Length, and set length to 9. Field 1 data starts from the 1st character to the 9th character. Field 2 Setting – Divide Field by Field Length, and set length to 10. Field 2 data starts from the 10th character to the 19th character. Field Transmission Sequence – F2. 6.3.2 EXAMPLE II Extract the date code, item number, and quantity information from barcodes. Data in a barcode is encoded like this: -From the 1st character to the 6th character is the date code. -From the 7th character to the "-" character is the item number. -After the "-" character is the quantity information. Data will be transmitted like this: -The item number goes first, then a TAB character, followed by the date code, then another TAB character, and finally the quantity information. The editing format should be configured as follows: Total Number of Fields – 3. Field 1 Setting – Divide Field by Field Length, and set length to 6. Field 1 data starts from the 1st character to the 6th character. Field 2 Setting – Divide Field by Field Terminating String, and set the character string to [-]. Field 2 data starts from the 7th character until the [-] character is met. Additional Field 1 created and set to one [TAB] character. Field Transmission Sequence – F2 A1 F1 A1 F3.](https://usermanual.wiki/CipherLab/1660/User-Guide-925344-Page-135.png)
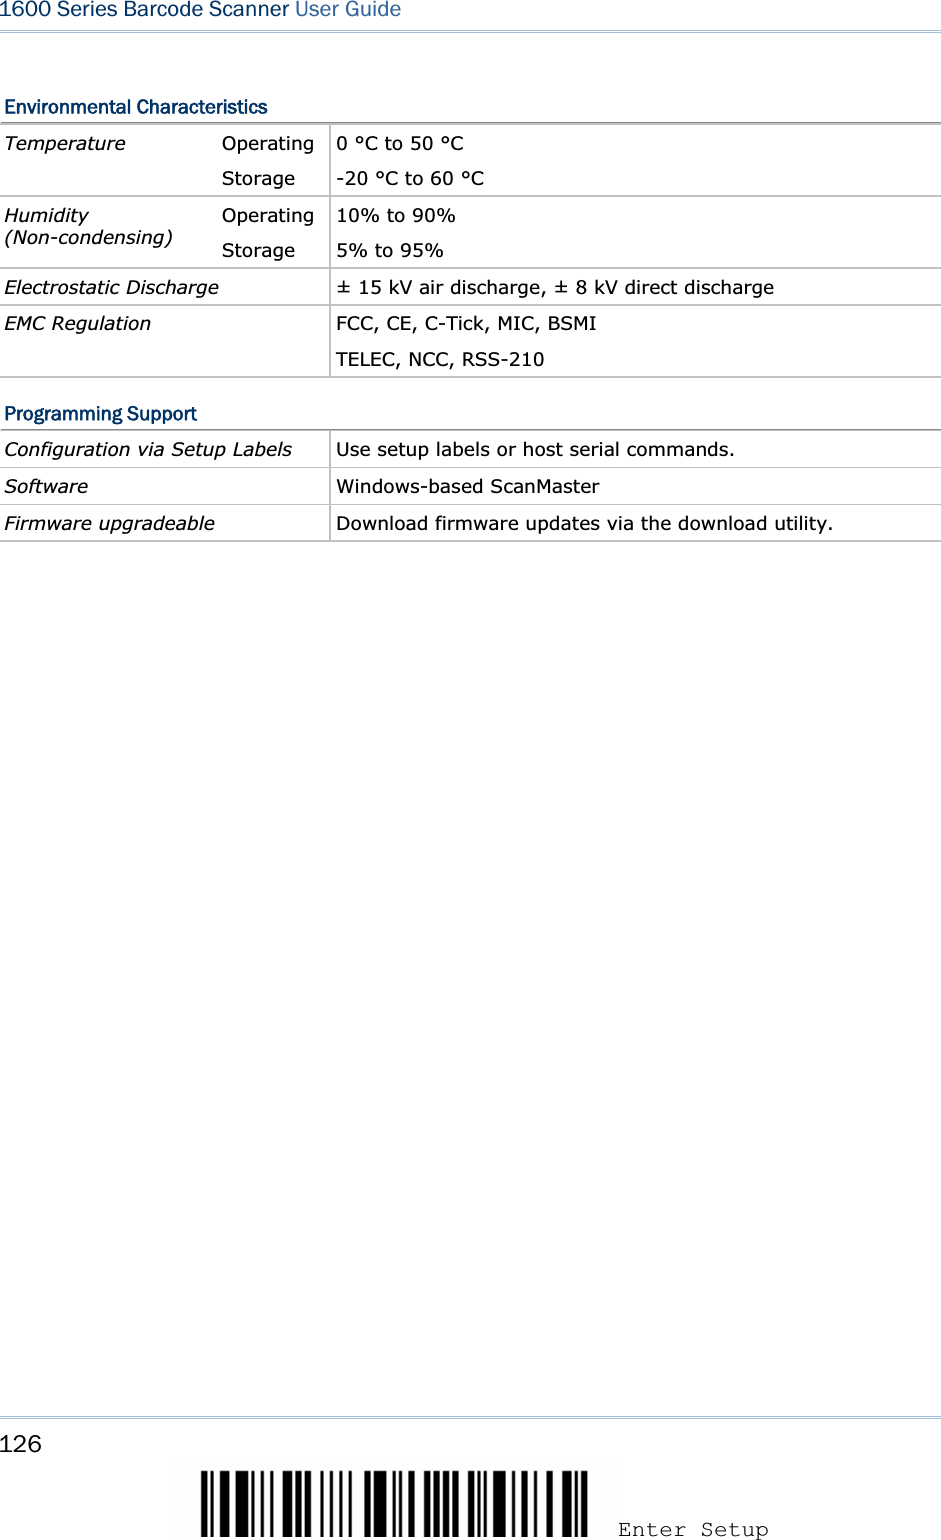
![125Update Optical Characteristics 1660Scan Engine Non-contact type Optical Sensor CCD, 2500 pixels Light Source Red LED Wavelength 625 nm RF Characteristics Bluetooth Module Bluetooth Specification Version 2.0, Class 3 Coverage (line-of-sight) Up to 3 meters Profiles Supported Serial Port Profile (SPP), Human Interface Device Profile (HID)Connected Devices 1 for Bluetooth HID and up to 7 scanners for Bluetooth SPP Physical Characteristics Color Dark grey Switch Push-button switch, plus [Delete] key Dimensions 95 mm (L) 35 mm (W) 20 mm (H) Weight Approx. 50 g Electrical Characteristics Battery 2 AAA Alkaline batteries SPECIFICATIONS](https://usermanual.wiki/CipherLab/1660/User-Guide-925344-Page-137.png)
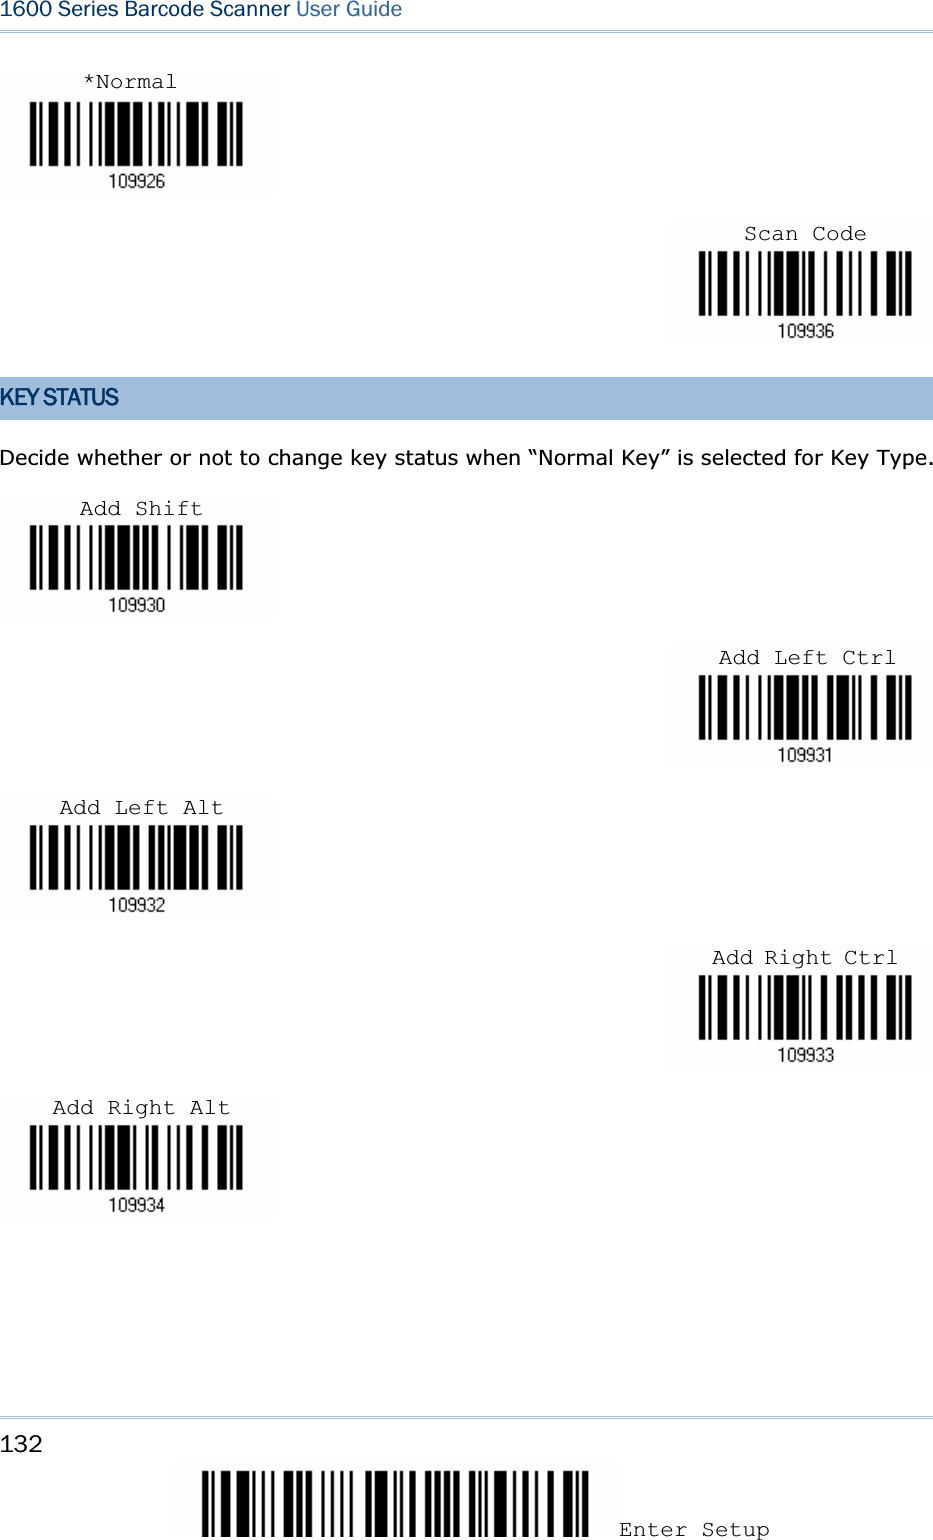
![131UpdateKEYBOARD WEDGE TABLE 0 123456780F2 SP 0 @ P ` p b1INS F3 ! 1 A Q a q c2DLT F4 " 2 B R b r d3Home F5 # 3 C S c s e4End F6 $ 4 D T d t f5Up F7 % 5 E U e u g6Down F8 & 6 F V f v h7Left F9 ' 7 G W g w i8BS F10 ( 8 H X h x j9HT F11 ) 9 I Y i y kALF F12 * : J Z j z BRight ESC + ; K [ k { CPgUp Exec , < L \ l | DCR CR* - = M ] m } EPgDn . > N ^ n ~ FF1 / ? O _ o Dly ENTER*Note: (1) b~k: Digits of numeric keypad. (2) CR*/Send/ENTER*: ENTER key on the numeric keypad. KEY TYPE If "Keyboard Wedge" is configured for interface, Key Type and Key Status will then become applicable. Appendix IIKEYBOARD WEDGE TABLE & ASCII TABLE](https://usermanual.wiki/CipherLab/1660/User-Guide-925344-Page-143.png)
![133UpdateAppendix II !ΖUSER-DEFINED SCAN CODE 1) Read the “Set Scan Code” label to define new scan code. 2) Read the “Hexadecimal Value” label on page 124 for the desired character string. 3) Read the “Validate” label on the same page to complete this setting. 4) Read the “Confirm” label to confirm the action. ASCII TABLE 0 12345670 DLE SP 0 @ P ` p 1 SOH DC1 ! 1 A Q a q 2 STX DC2 " 2 B R b r 3 ETX DC3 # 3 C S c s 4 EOT DC4 $ 4 D T d t 5 ENQ NAK % 5 E U e u 6 ACK SYN & 6 F V f v 7 BEL ETB ' 7 G W g w 8 BS CAN ( 8 H X h x 9 HT EM ) 9 I Y i y A LF SUB * : J Z j z B VT ESC + ; K [ k { C FF FS , < L \ l | D CR GS - = M ] m } E SO RS . > N ^ n ~ F SI US / ? O _ o DEL Set Scan CodeConfirm](https://usermanual.wiki/CipherLab/1660/User-Guide-925344-Page-145.png)