Cisco Linksys WPC54A Wireless Network PC Card User Manual Part 4
Cisco-Linksys, LLC Wireless Network PC Card Part 4
Part 4
36
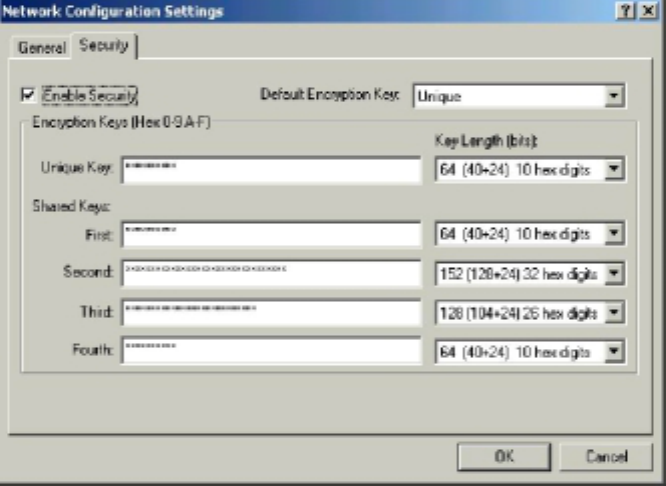
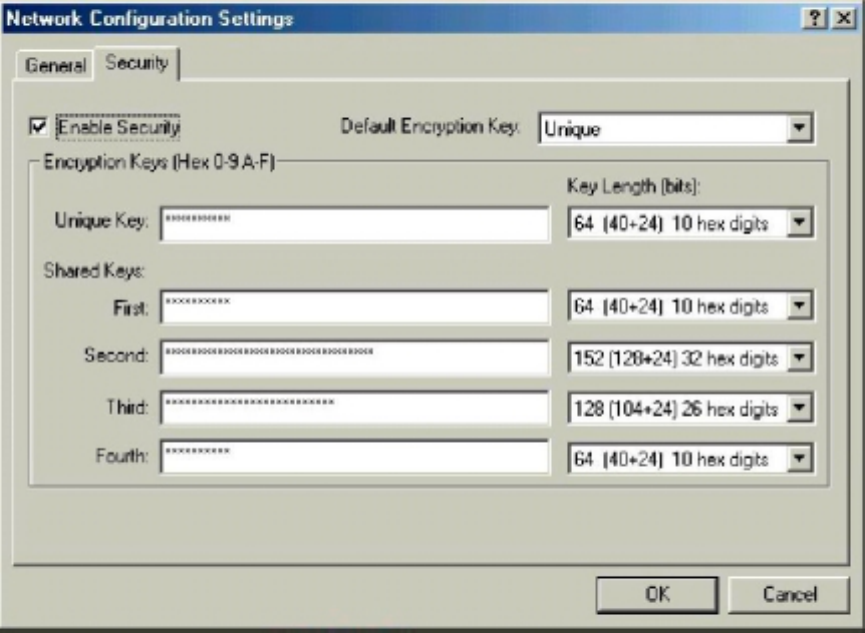
3. The next tab on this property sheet allows for the selection of security features. The fields on
this page are as follows:
Enable Security: This field completely enables or disables the IEEE 802.11 wired
equivalent privacy (WEP) security feature.
Default Encryption Key: This field defines the type of encryption key to use (either
Unique Key or Shared Keys). This field allows you to select only a key (Unique, First,
Second, Third, or Fourth) whose corresponding field has been completed.
Unique Key: This field defines the unique encryption key for security for the current
network configuration. In ad hoc mode, this encryption key type is not used. To
enable security using a Unique Key, this field must be populated.
Shared Keys: These fields define a set of Shared encryption keys. To enable
security using Shared Keys, at least one Shared Key field must be populated.
Key Length: This field defines the length for each encryption key. As the Key Length
is changed, the number of available characters in the field is changed automatically.
If after a key is entered the length is adjusted to a smaller number, the key is
automatically truncated to fit. If the length is increased again, the field is not
automatically updated to its previous value.
37
All encryption key fields are displayed only when initially entered. On subsequent entry into the
security property page, the fields are masked. The keys must be entered as hexadecimal digits.
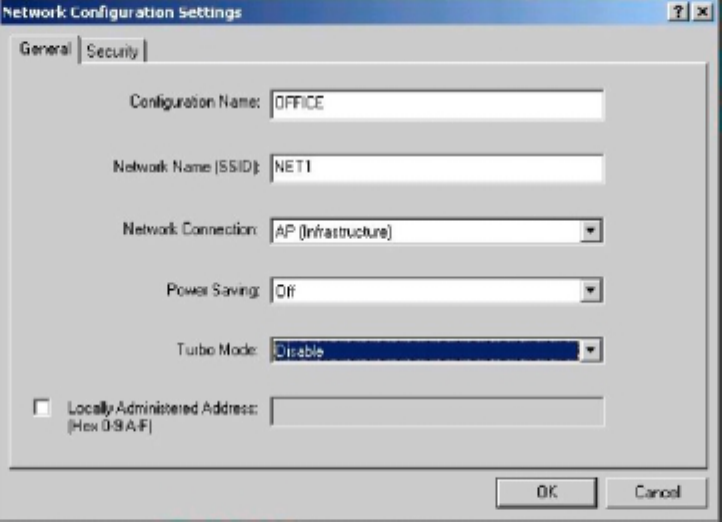
2.5.1 Infrastructure Mode
To configure an 802.11a Wireless LAN Network Adapter in infrastructure mode:
1. Ensure that the "Locally Administered Address" checkbox is unchecked
2. Choose the following settings:
Configuration Name: This field identifies the configuration. This name must be unique.
Configuration names are case insensitive.
Network Name (SSID): This is the name of the IEEE 802.11a Wireless LAN Network, for
example, "802.11a Wireless LAN Network." This field has a maximum limit of 32
characters. If this field is left blank, the STA connects to the AP with the best signal
strength.
Network Connection: AP (infrastructure).
Power Saving: This field allows the configuration of power management options. The
options are Off, Normal, and Maximum.
Turbo Mode: This field enables or disables 802.11a turbo mode.
Locally Administered Address: This field defines the locally administered MAC address
(LAA). To enter a value in the address field, the check box needs to he selected.
Usually infrastructure mode is used in an enterprise environment where APs are installed and
maintained by corporate IT staff. Much of the data in the enterprise network is confidential. It is
important to configure security to make sure only stations with appropriate keys can receive
sensitive data. The 802.11a Wireless LAN Network Adapter and NDIS driver support key lengths
of 40 bits, 104 bits, and 128 bits. Typically, the appropriate encryption and decryption keys are
supplied by the corporate IT staff.
38
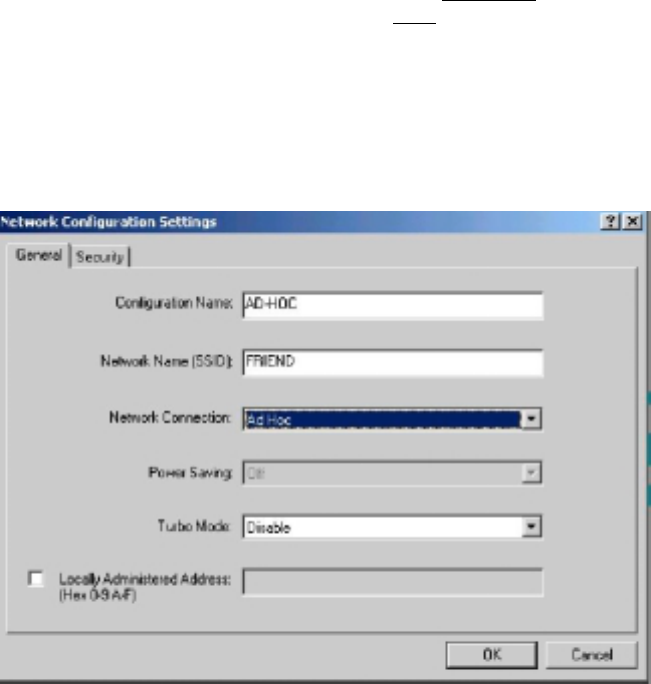
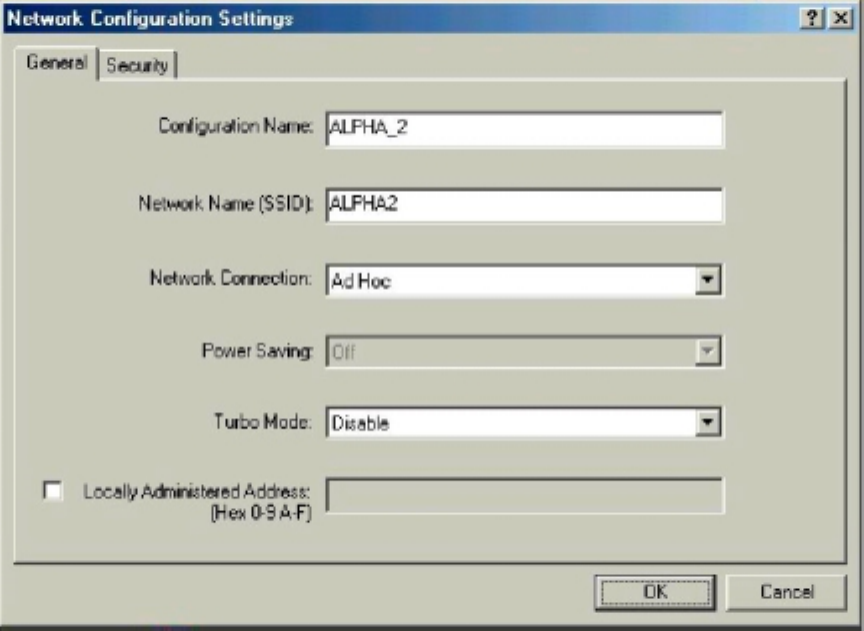
2.5.2 Ad Hoc Mode
An ad hoc network usually is a short-lived network with a small number of stations. The network is
usually created for a special purpose such as exchanging data between friends, or between
customer and client. Because the duration of the ad hoc network tends to be limited, Power
Saving and Security features are not typically a requirement. For ad hoc network activity, the
Power Saving and Security features can be disabled. Currently, shared key security is supported
in ad hoc mode. Future 802.11a software implementations will provide unique key support.
In ad hoc mode, a station scans the air for an existing BSS. If no BSS is found, the station
establishes a BSS for other stations to join. When other stations scan the air and find an
established BSS in place, they join that BSS to form an ad hoc network. If a specific set of stations
requires ad hoc network connectivity, it is recommended to have one station establish a BSS first
before configuring the remaining stations. This prevents the scenario of several stations trying to
form a BSS at the same time, which can result in multiple singular BSSs being established, rather
than a single BSS with multiple stations.
Configuration Name: This field identifies the configuration. This name must be unique.
Configuration names are case insensitive.
Network Name (SSID): A Network Name is mandatory for ad hoc mode. The SSID for
all stations in a single ad hoc network must be the same.
Network Connection: Ad Hoc.
Power Saving: Power saving mode is not currently supported in an ad hoc network.
Turbo Mode: All stations participating in the ad hoc network must have the same rate
setting.
Locally Administered Address: This field defines the locally administered MAC address
(LAA). To enter a value in the address field, the check box needs to be selected.
39
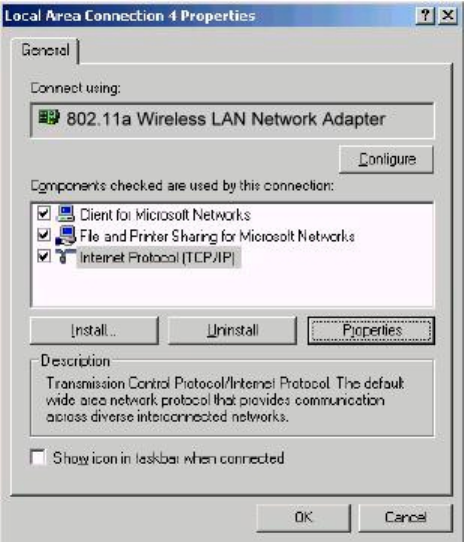
2.5.3 TCP/IP Setup
After configuring the 802.11a Wireless LAN Network Adapter through the Network Control Panel,
the TCP/IP address for the network device must be configured.
1. Open the "Control Panel" and click "Network and Dial-up Connections."
2. Find the "Local Area Connection" that is associated with the 802.11a Wireless LAN Network
Adapter. Right-click that connection, and click Properties.
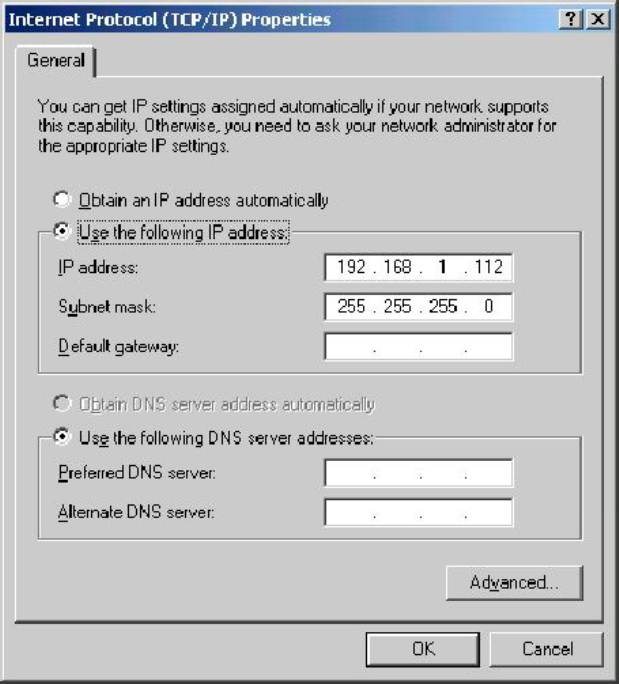
3. Select "Internet Protocol (TCP/IP)" and click Properties.
4. Click "Use the following IP address" and input an IP address and Subnet mask. Assigning an
LP address and Subnet mask allows stations to operate in infrastructure mode and to have
Internet access. "Default gateway" and "DNS server" information is also required. IP
configuration information (DHCP or assigned IP address, Gateway and DNS server IP
addresses) is usually obtained from the corporate IT staff.
5. After obtaining IP configuration information from the appropriate IT staff, Click OK in both
"Internet Protocol (TCP/IP) Properties" and "Local Area Connection Properties" to complete
the IP configuration.
40
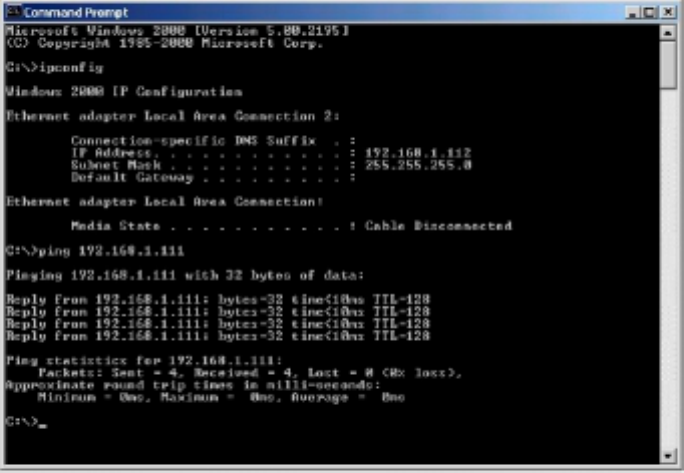
6. Click Start, Programs, Accessories, and Command Prompt to open the DOS command
prompt window. Type "ipconfig" at the C:\> prompt to determine if the TCP/IP configuration
has taken effect. To test IP connectivity in ad hoc or infrastructure mode, use the "ping
<ipaddress>" command. When a TCP/IP connection is established, the LinkMon utility (See
Section 6) can be used to monitor the 802.11a Wireless LAN Network Adapter operating
status.
41
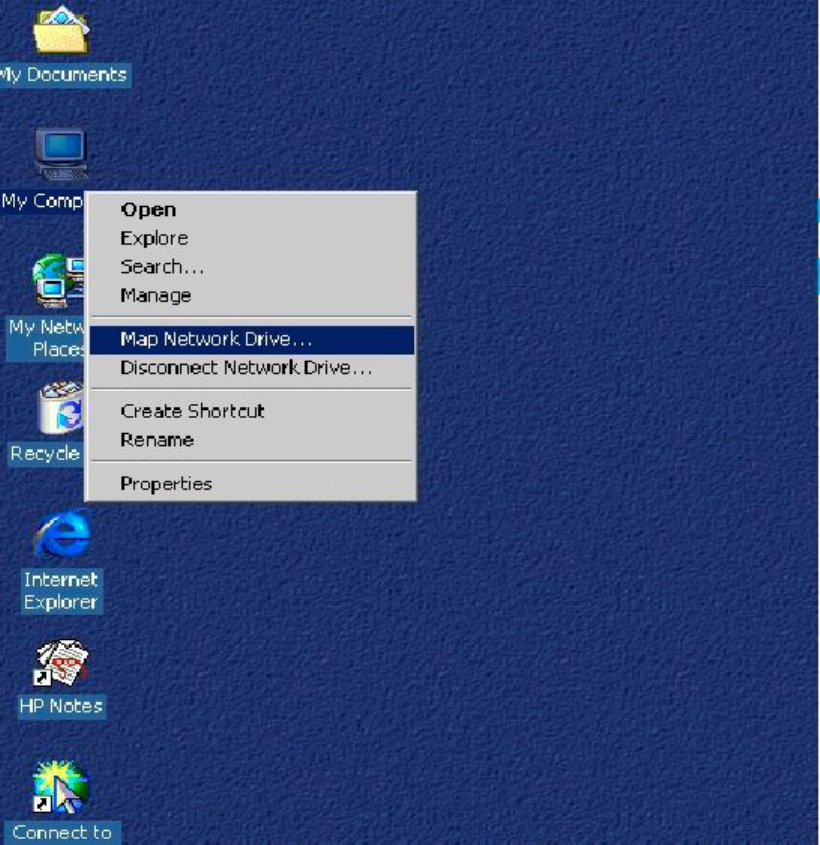
7. To map the drive on another machine to your computer, right-click "My Computer" and click
"Map Network Drive...."
42

43
8. After mapping the drive, you can perform file transfers, use video streaming applications,
and all other network data transfers that are normally performed with wired 10/100 Ethernet
connections.
44
3 Windows Millennium Edition
3.1 Driver Installation
We recommends that you remove any existing 802.11a NDIS driver on the PC system before
installing Version 1.2 release of the NDIS driver. See Section 3.2 for the instructions on how to
remove previous driver releases. When the system no longer has the 802.11a NDIS driver
installed, insert the Wireless LAN Network Adapter into a 32-bit CardBus slot, and follow these
steps to install the NDIS driver:
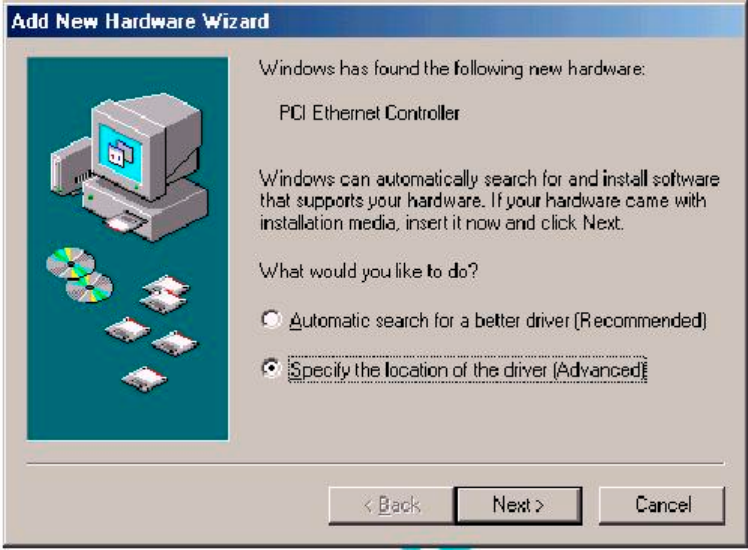
1. Wait for the following dialog box to appear. Choose "Specify the location of the driver
(Advanced)," and click Next to continue.
45
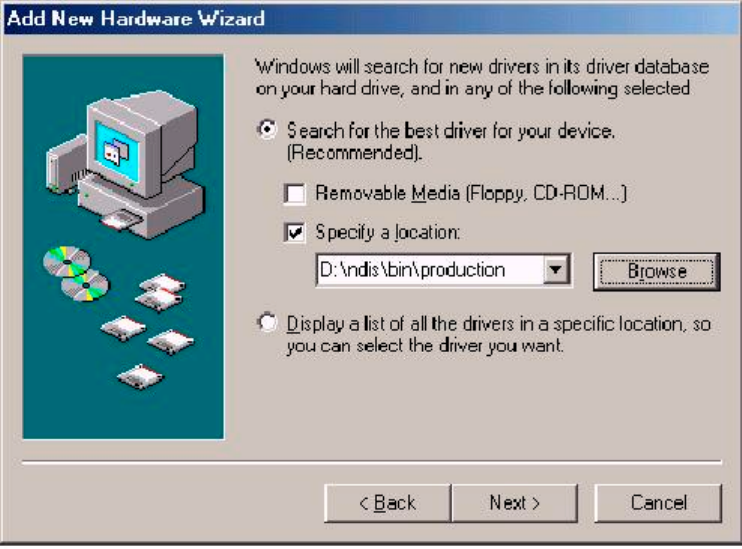
2. Choose "Search for the best driver for your device. (Recommended)" and select "Specify a
location." Click Browse to locate the NDIS driver. The default folder is "D:\ndis\bin\production)
(assuming D: is the CD-ROM drive). Click Next to continue.
46
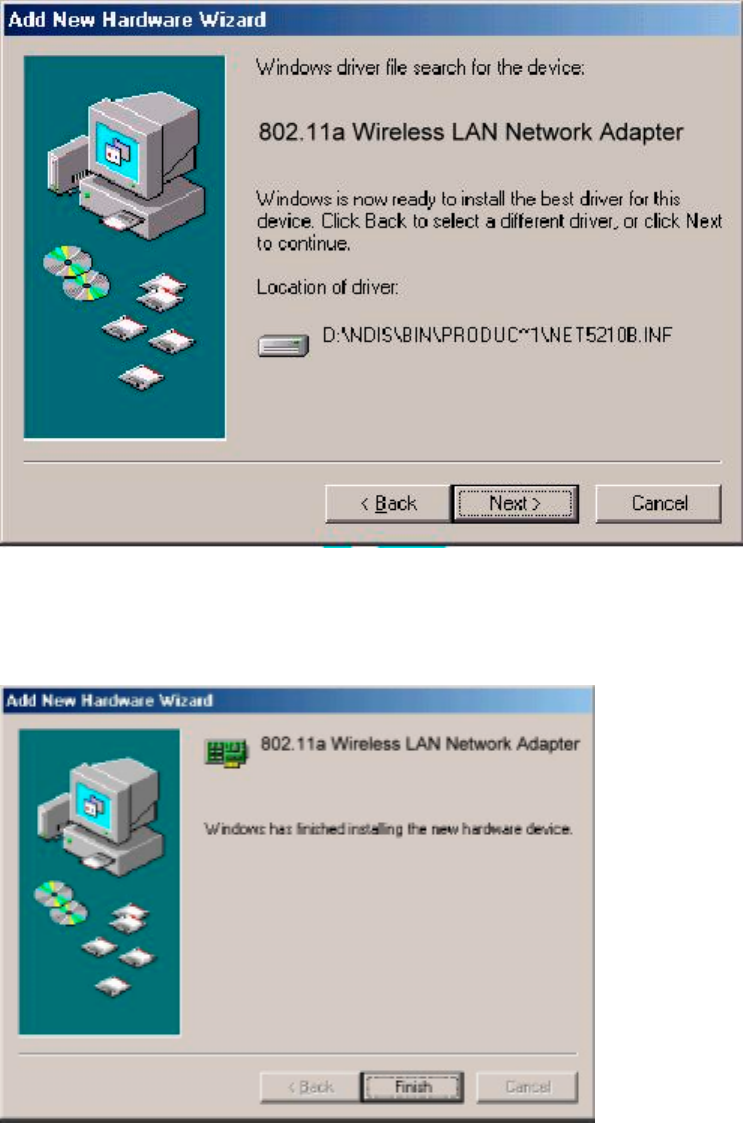
3. When the 802.11a driver installation file (NET5210B.INF) has been found, click Next to
continue.
4. Click Finish to continue, and restart the system to complete driver installation. Refer to Section
3.3 for device configuration.
47
3.2 Driver Uninstallation
This section provides uninstallation procedures for removing the 802.11a NDIS driver from the
system. Uninstallation is recommended for upgrading the NDIS driver from previous 802.11a
driver releases.
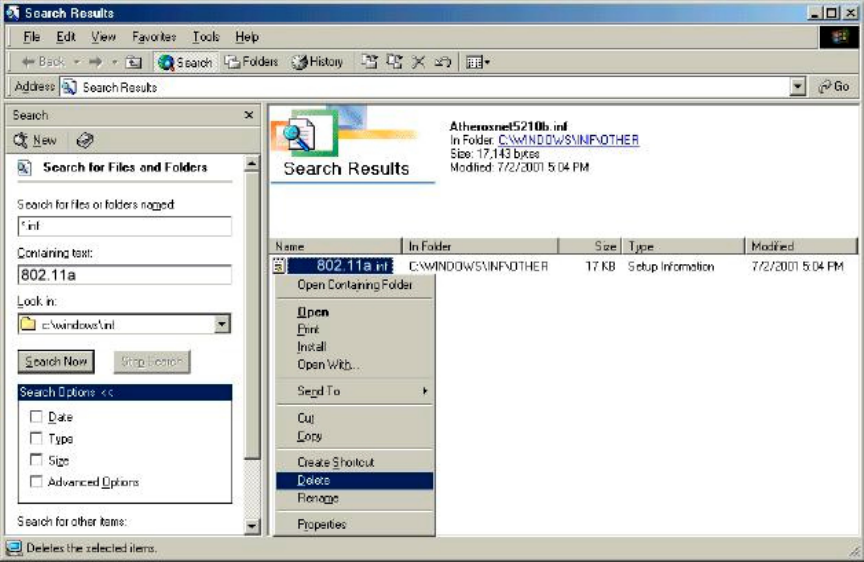
1. To remove the NDIS driver from the OS, go to "Start Menu" "Search" "Find Files or
Folders...," and search for the INF file containing the "802_11a" text string under the
\WINDOWS\INF folder. Be sure to include subfolders in the search criteria. When
"802_11a.inf" has been found, delete it by right-clicking the file and choose Delete.
48
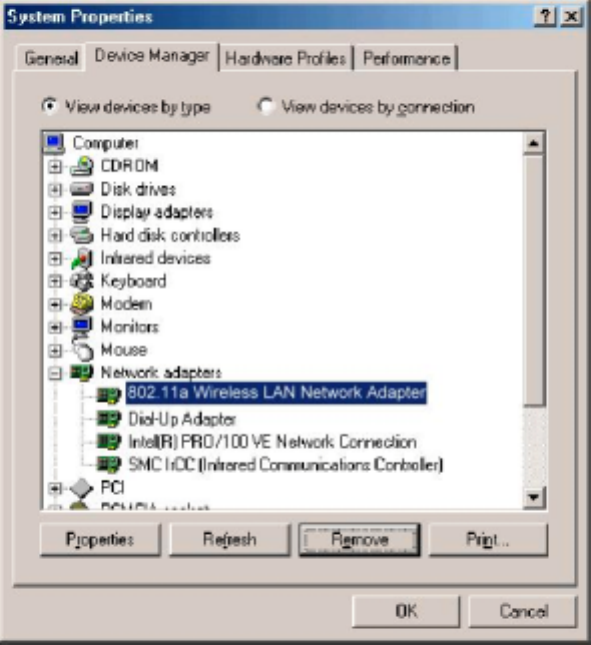
2. From Control Panel, launch the System Properties window. Select "802.11a Wireless LAN
Network Adapter" from Device Manager, and click Remove to uninstall the device.
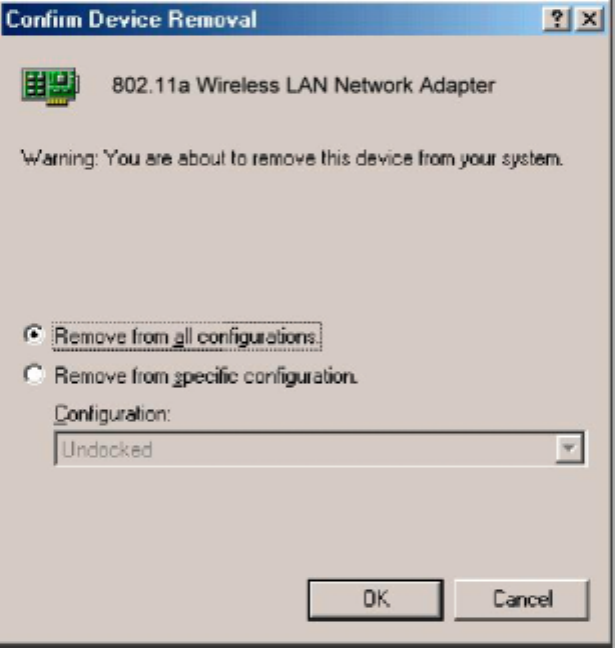
3. Click OK to confirm the removal of the device. Restart the system to complete un-installation.
49
50
3.3 Device Configuration
Configuration of the 802.11a Wireless LAN Network Adapter can be done through the 802.11a
NIC Configuration utility found in the Windows Control Panel. Similar to Windows 2000 the device
can be set to work in one of two modes: infrastructure mode or ad hoc mode. Please refer to
Section 2.4 for more details on these network connection types.
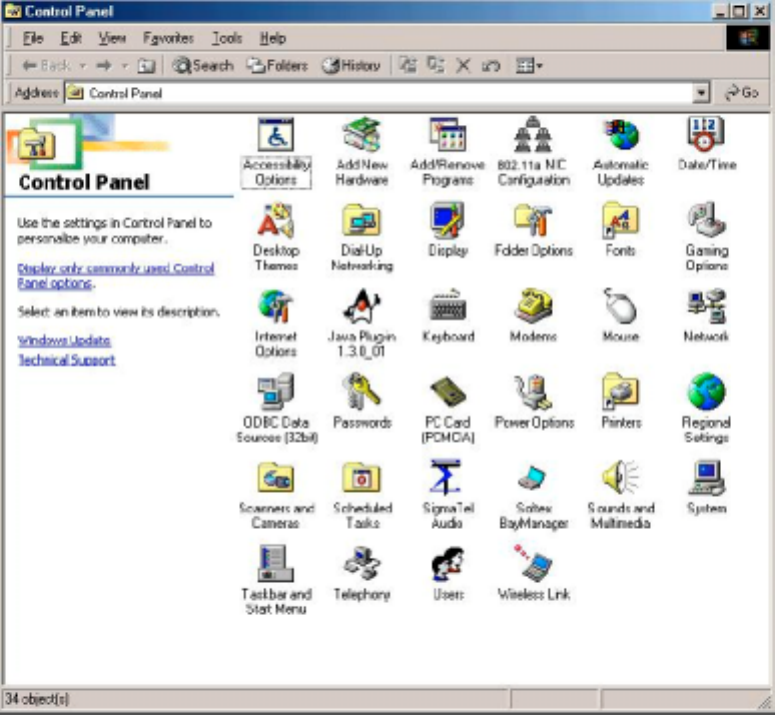
To launch the configuration utility, go to Control Panel and double-click on the 802.11a NIC
Configuration icon.
The configuration utility allows addition, modification, and deletion of the configuration profiles.
Select one of the existing configuration profiles under the configuration list to modify or click New
to add a new configuration profile. Follow Section 3.3.1 and Section 3.3.2 to set up the station to
work in infrastructure mode and ad hoc mode.
51
3.3.1Infrastructure Mode
This section defines the process of configuring an 802.11a Wireless LAN Network Adapter in
infrastructure mode. See Section 2.4 for detailed descriptions of each option in the Network
Configuration Settings.
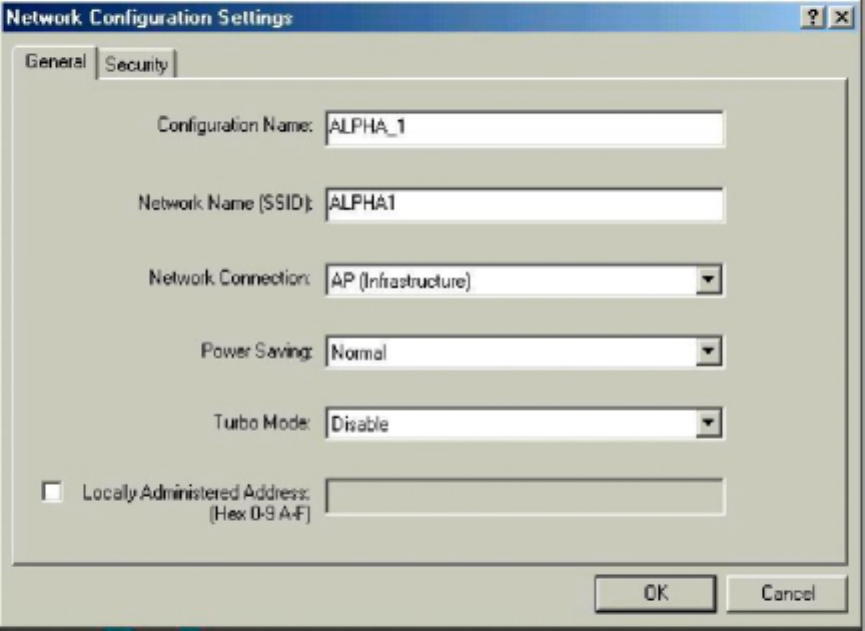
1. Under the "General" tab, make sure the "Locally Administered Address" checkbox is
unchecked. Use the following information as a guideline to choose the values of each field in
the configuration window:
Configuration Name: This field identifies the configuration. This name must be unique.
Configuration names are case insensitive.
Network Name (SSID): This is the name of the IEEE 802.11a Wireless LAN Network.
This field has a maximum limit of 32 characters. If this field is left blank, the STA
connects to the AP with the best signal strength.
Network Connection: AP (Infrastructure)
Power Saving: This field allows the configuration of power management options. The
options are Off, Normal, and Maximum.
Turbo Mode: This field enables or disables 802.11a turbo mode.
52
2. Usually, infrastructure mode is used in an enterprise environment where APs are installed and
maintained by corporate IT staff. Much of the data in the enterprise network is confidential. It is
important to configure security to make sure only stations with appropriate keys can receive
sensitive data. The 802.11a Wireless LAN Network Adapter and NDIS driver support key
lengths of 40 bits, 104 bits and 128 bits. Typically, the appropriate encryption and decryption
keys are supplied by the corporate IT staff.
53
3.3.2 Ad Hoc Mode
This section defines the process of configuring an 802.11a Wireless LAN Network Adapter in ad
hoc or IBSS mode See Section 2.4.2 for description of ad hoc operation.
1. Similar to the set-up of AP Infrastructure mode described in the previous section, ad hoc mode
is also configured by changing the options in the Network Configuration Settings of the
802.11a NIC Configuration utility. Use the following information as a guideline to choose the
values of each field in the configuration window:
Configuration Name: This field identifies the configuration. This name must be unique
Configuration names are case insensitive.
Network Name (SSID): A Network Name is mandatory far ad hoc mode. The SSID for
all stations in a single ad hoc network must be the same.
Network Connection: Ad Hoc.
Power Saving: Power saving mode is not currently supported in an ad hoc network.
Turbo Mode: All stations participating in the ad hoc network must have the same rate
setting.
Locally Administered Address: This field defines the locally administered MAC address
(LAA). To enter a value in the address field, the check box needs to be selected.
54
2. You can optionally set up other properties, bur because the duration of the ad hoc network
tends to be limited, Power Saving and Security features are not typically a requirement. For ad
hoc network activity, the Power Saving and Security features can be disabled. Currently,
shared key security is supported in ad hoc mode. Future 802.11a software implementations
will provide unique key support.
3. Click OK when the properties are set correctly. The system needs to reboot in order for the
changes to take effect.
Note that in ad hoc mode, a station scans the air for an existing BSS. If no BSS is found, the
station establishes a BSS for other stations to join When other stations scan the air and find an
established BSS in place, they join that USS to farm an ad hoc network if a specific set of stations
requires ad hoc network connectivity, it is recommended to have one station establish a BSS first
before configuring the remaining stations. This prevents the scenario of several stations trying to
farm a BSS at the same time, which can result in multiple singular BSSs being established, rather
than a single BSS with multiple stations.
55
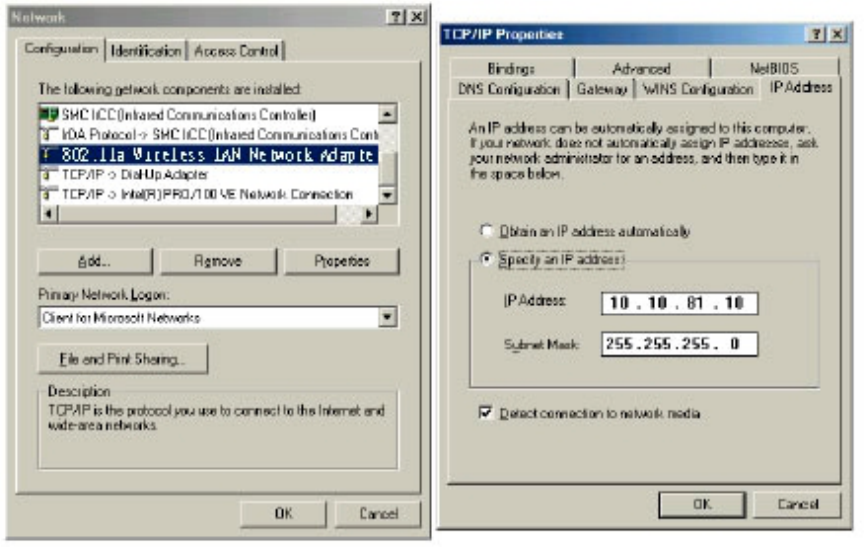
3.3.3 TCP/IP Configuration
After configuring the 802.11a Wireless LAN Network Adapter network adapter properties, the
TCP/IP address for the network device needs to be configured.
1. From Control Panel, launch the Network properties window. Select “TCP/IP → 802.11a
Wireless LAN Network Adapter" and click Properties. Depending on the type of network the
station connects to, Gateway and DNS Configuration information can also be required. IP
configuration information (DHCP or assigned IP address, Gateway and DNS server IP
addresses) is usually obtained from the corporate IT staff. For a simple demonstration, the
station is assigned a static IP address. From "TCP/IP Properties," choose "IP Address" and
select "Specify an IP address." Input an IP address and subnet mask. Assigning an IP address
and subnet mask allows the station to interact with the AP or other stations in the same IP
subnet. Click OK to complete the TCP/IP configuration, and restart the system for the changes
to take effect.