Cisco Linksys WRT55AG Dual-Band Wireless A+G Broadband Router User Manual WRT55AG ug Rev NC
Cisco-Linksys, LLC Dual-Band Wireless A+G Broadband Router WRT55AG ug Rev NC
Contents
User manual part 2
Dual-Band Wireless A+G Broadband Router
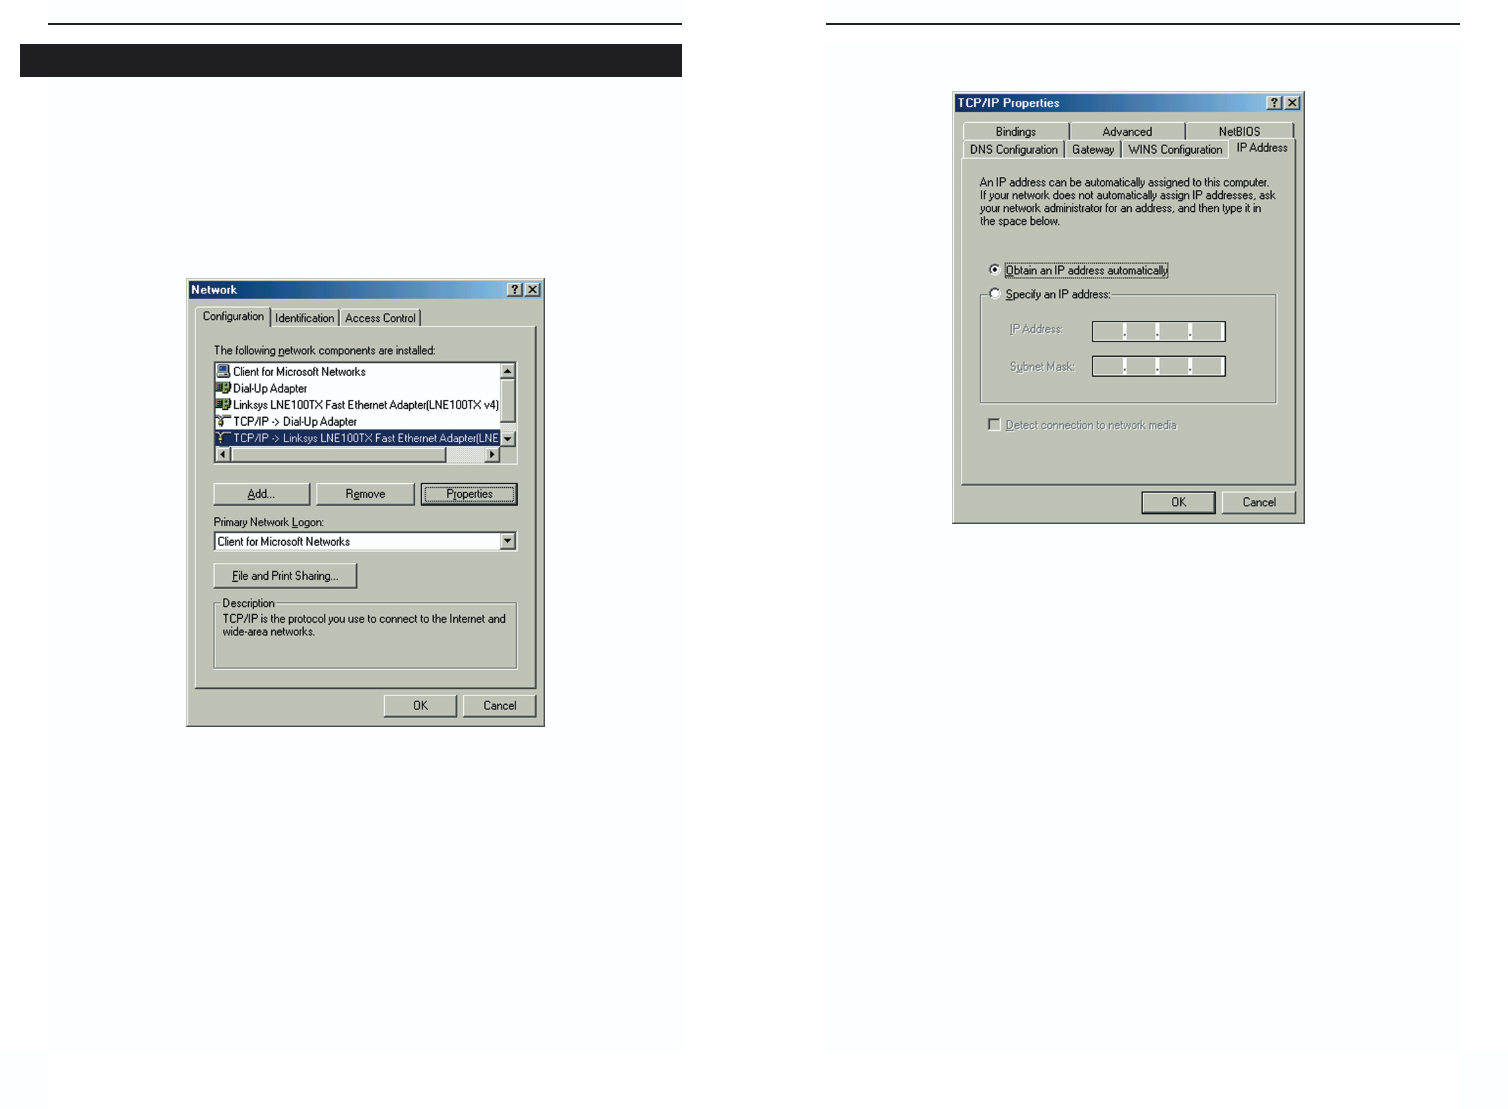
3. Click the IP Address tab. Select Obtain an IP address automatically.
4. Now click the Gateway tab, and verify that the Installed Gateway field is
blank. Click the OK button.
5. Click the OK button again. Windows may ask you for the original Windows
installation disk or additional files. Check for the files at
c:\windows\options\cabs, or insert your Windows CD-ROM into your CD-
ROM drive and check the correct file location, e.g., D:\win98, D:\win9x,
etc. (if “D” is the letter of your CD-ROM drive).
6. Windows may ask you to restart your PC. Click the Ye s button. If Windows
does not ask you to restart, restart your computer anyway.
Go to “Chapter 5: Setting Up the Dual-Band Wireless A + G Broadband
Router.”
15
Instant Wireless®Series
1. Click the Start button. Select Settings and click the Control Panel icon.
Double-click the Network icon.
2. On the Configuration tab, select the TCP/IP line for the applicable
Ethernet adapter. Do not choose a TCP/IP entry whose name mentions
DUN, PPPoE, VPN, or AOL. If the word TCP/IP appears by itself, select
that line. Click the Properties button.
14
Figure 4-2
Figure 4-1
Configuring Windows 98 and Millennium PCs
Dual-Band Wireless A+G Broadband Router
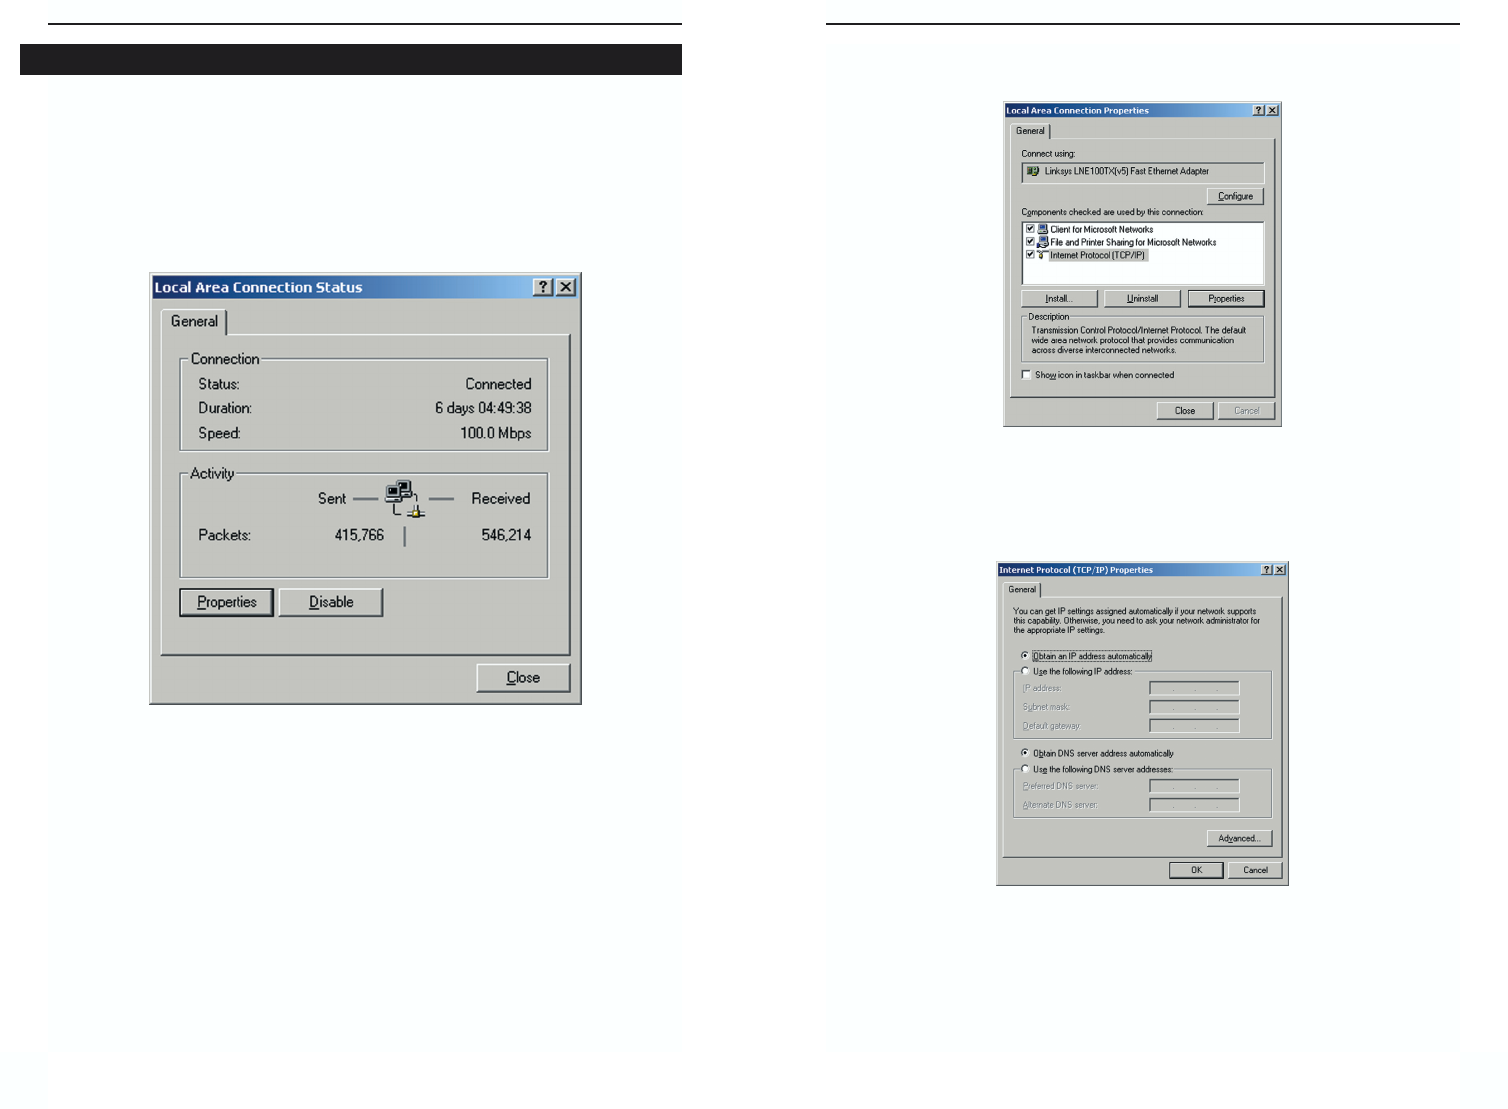
3. Make sure the box next to Internet Protocol (TCP/IP) is checked. Highlight
Internet Protocol (TCP/IP), and click the Properties button.
4. Select Obtain an IP address automatically. Once the new window
appears, click the OK button. Click the OK button again to complete the
PC configuration.
5. Restart your computer.
Go to “Chapter 5: Setting Up the Dual-Band Wireless A + G Broadband
Router.”
17
Instant Wireless®Series
1. Click the Start button. Select Settings and click the Control Panel icon.
Double-click the Network and Dial-up Connections icon.
2. Select the Local Area Connection icon for the applicable Ethernet adapter
(usually it is the first Local Area Connection listed). Double-click the
Local Area Connection. Click the Properties button.
16
Figure 4-4
Figure 4-5
Configuring Windows 2000 PCs
Figure 4-3
Dual-Band Wireless A+G Broadband Router
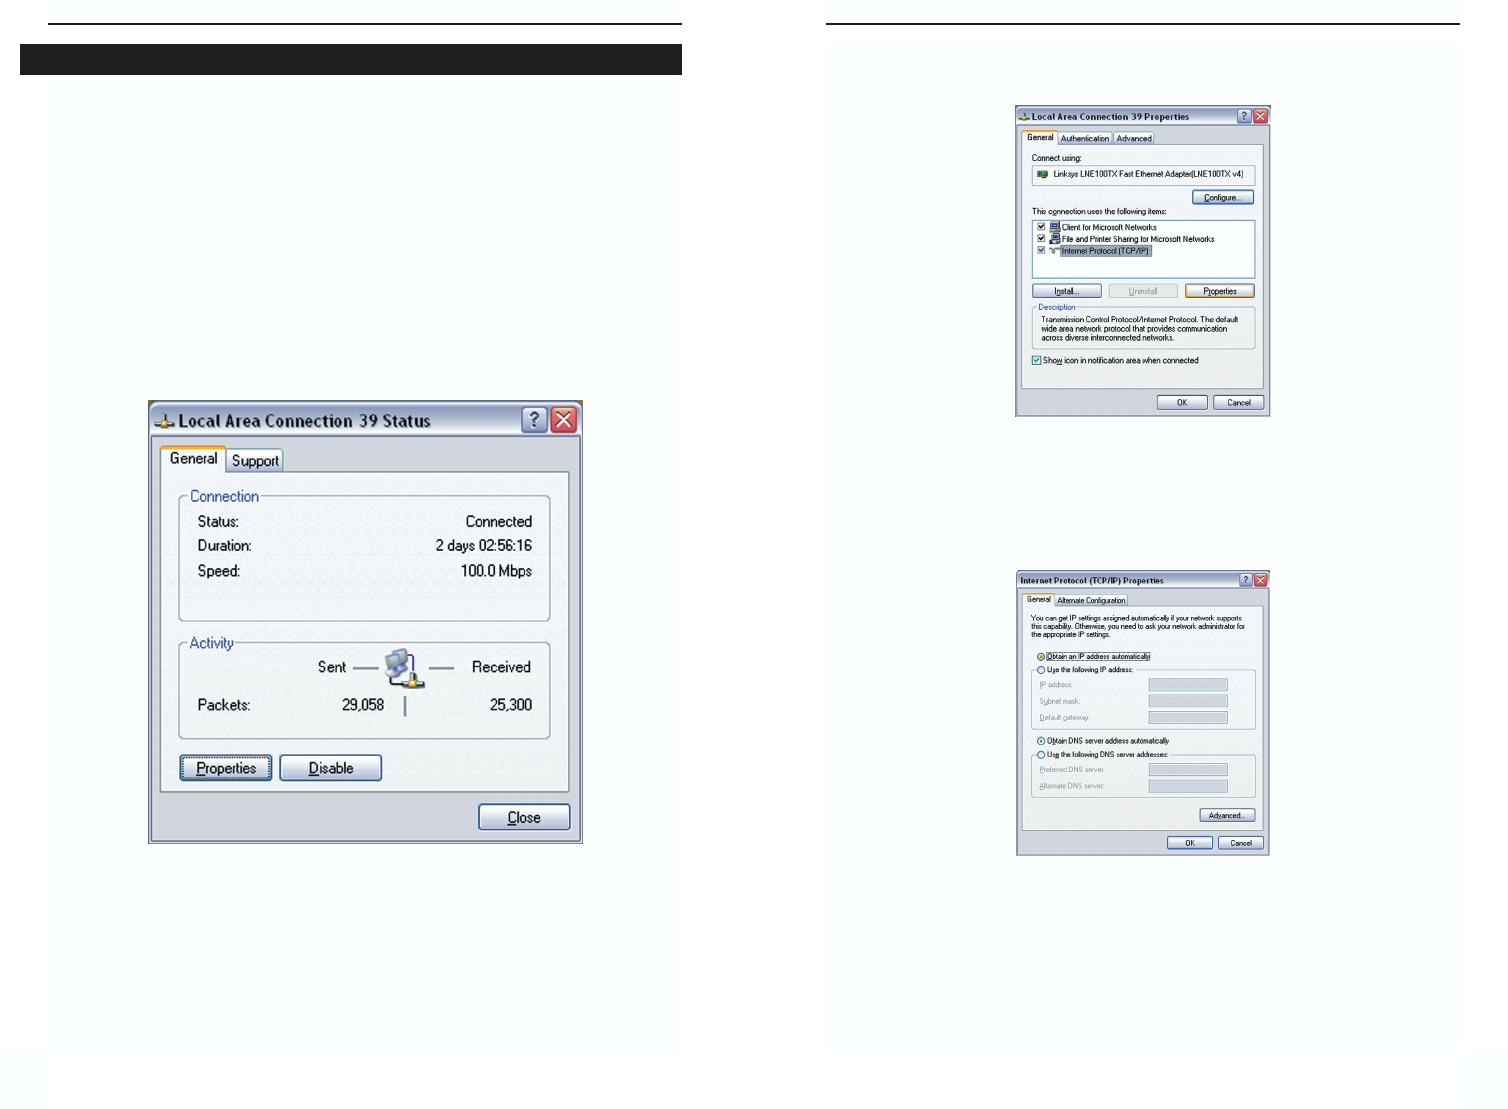
3. Make sure the box next to Internet Protocol (TCP/IP) is checked. Highlight
Internet Protocol (TCP/IP), and click the Properties button.
4. Select Obtain an IP address automatically. Once the new window
appears, click the OK button. Click the OK button again to complete the
PC configuration.
5. Restart your computer.
Go to “Chapter 5: Setting Up the Dual-Band Wireless A + G Broadband
Router.”
19
Instant Wireless®Series
The following instructions assume you are running Windows XP with the
default interface. If you are using the Classic interface (where the icons and
menus look like previous Windows versions), please follow the instructions for
Windows 2000.
1. Click the Start button and then the Control Panel icon. Click the Network
and Internet Connections icon. Then click the Network Connections
icon.
2. Select the Local Area Connection icon for the applicable Ethernet adapter
(usually it is the first Local Area Connection listed). Double-click the
Local Area Connection. Click the Properties button.
18
Figure 4-7
Figure 4-8
Configuring Windows XP PCs
Figure 4-6
Dual-Band Wireless A+G Broadband Router
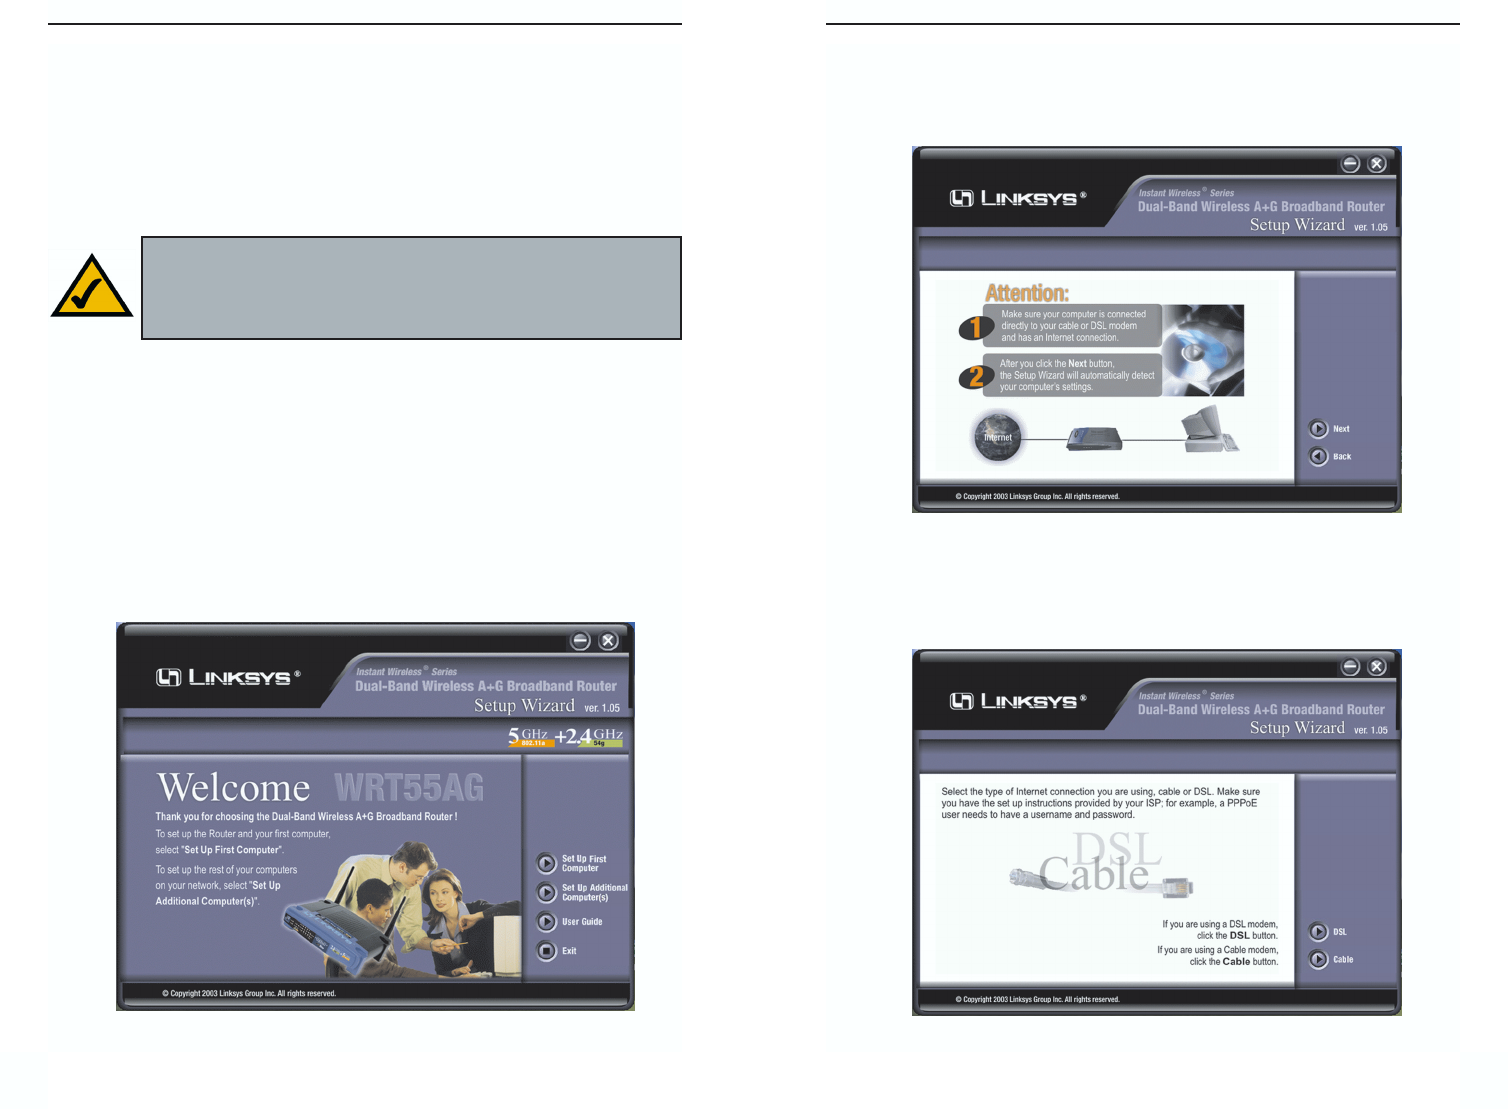
3. As shown in Figure 5-2, you will need to have your PC connected to an
active Internet connection. The Setup Wizard will use this connection to
detect what type of Internet access you have. Verify that you are set up cor-
rectly to your Internet connection and click the Next button to continue.
4. Next, you will be asked what type of Internet connection you are using, as
shown in Figure 5-3. Click the DSL or Cable button, whichever is appro-
priate for your type of connection.
21
Instant Wireless®Series
Chapter 5: Setting Up the Dual-Band
Wireless A + G Broadband Router
When you are ready to connect the Router to your network, the Router’s Setup
Wizard will take you through all the steps necessary for configuration.
1. Insert the Setup Wizard CD into your PC’s CD-ROM drive. Your PC must
have an active Internet connection.
2. The screen in Figure 5-1 should appear on your monitor. If it does not, this
means the autorun is not functioning. Start the Setup Wizard manually by
clicking the Start button, selecting Run, and typing d:\setup.exe (where
“D” is your PC’s CD-ROM drive). To set up the first computer connected
to the Router, click the Set Up First Computer button. When you are ready
to set up additional PCs, click the Set Up Additional Computer(s) button.
Clicking the User Guide button opened this User Guide. To exit this Setup
Wizard, click the Exit button.
20
Note: While the Router has been designed to work correctly right
out of the box, setting it up on a wireless computer will require you
to use the Linksys default settings. These settings can then be
changed with the Setup Wizard or Web-based Browser Utility.
Figure 5-1
Figure 5-2
Figure 5-3
Dual-Band Wireless A+G Broadband Router
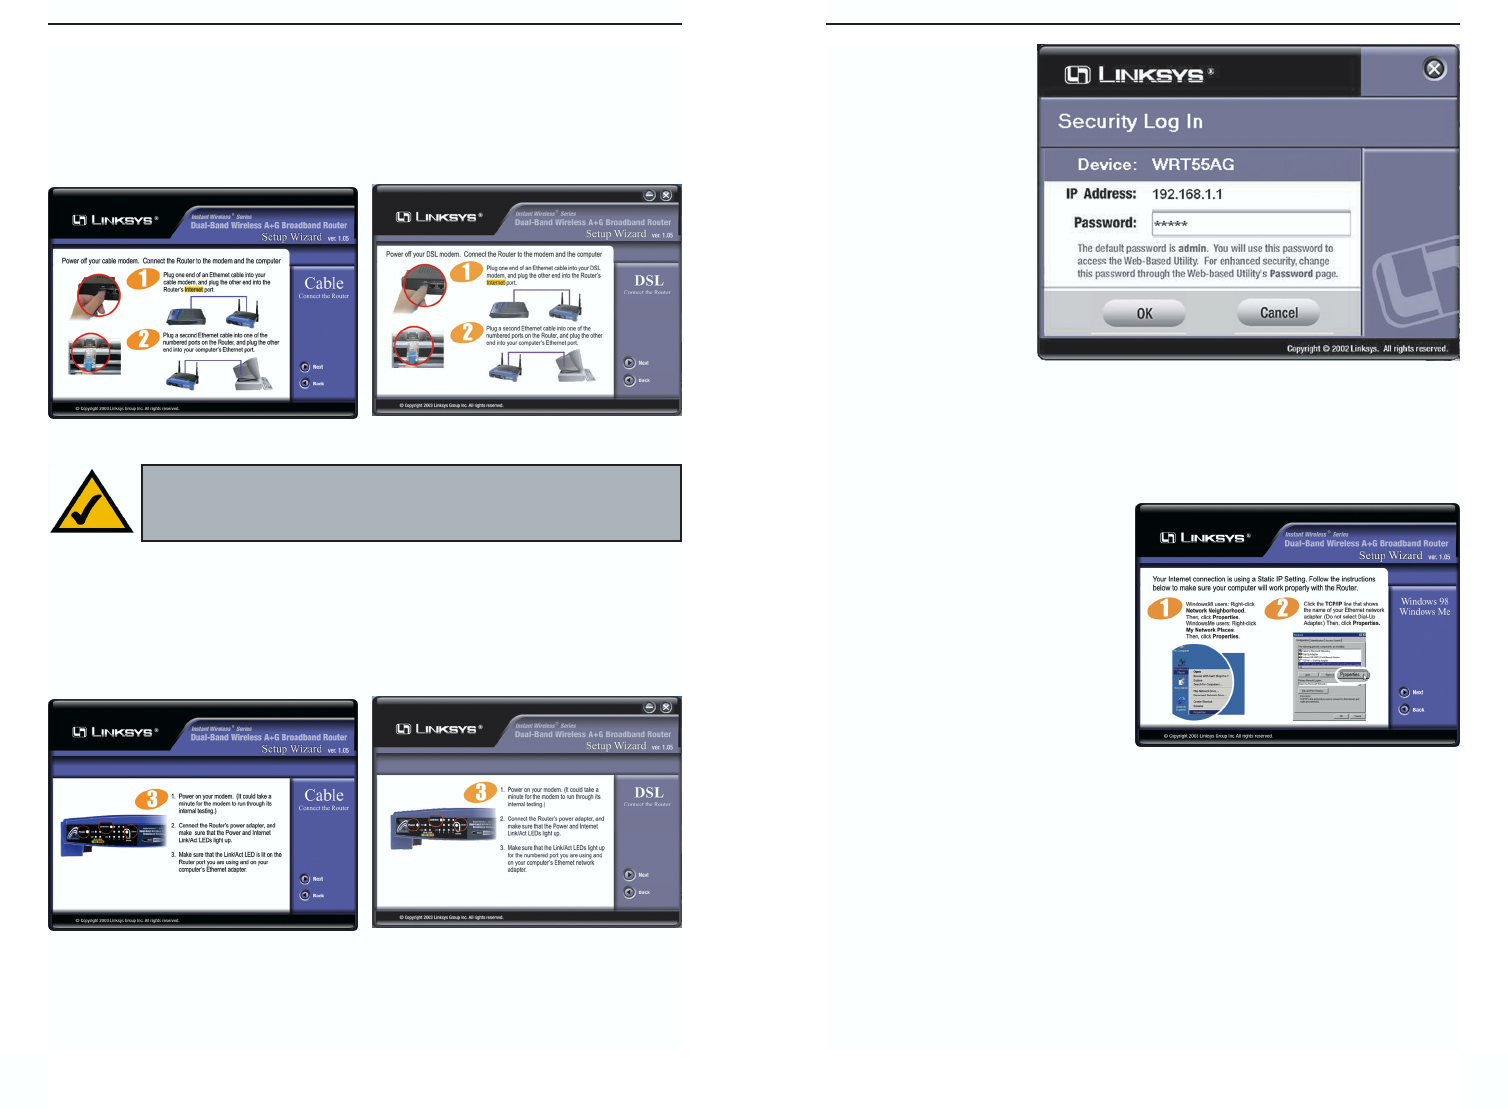
6a. While making your
Internet connection,
the Router will
require you to Log
in, as shown in
Figure 5-8. Enter the
default password:
admin. Then, click
the OK button. (This
password should be
changed from the
Web-based Utility’s
Password tab for
greater security.)
7a. When connecting to the Internet
through a Static IP Address:
The Setup Wizard will now ask
you to make changes to your PC’s
TCP/IP settings. Follow the
instructions shown, clicking the
Next button to continue.
If you are using Windows 98 or
Me, the instructions will start as
shown in Figure 5-9.
23
Instant Wireless®Series
5. Now, power off your modem and disconnect your Internet connection.
Then, connect the Router as shown on the screen displayed. If you have a
cable connection, you will see a screen similar to that shown in Figure 5-4.
If you have a DSL connection, you will see a screen similar to that shown
in Figure 5-5. When the connections are made, click the Next button to con-
tinue.
6. Power on your modem and connect the power to the modem and the Router.
As shown on the following screen, verify that the Router’s LEDs are cor-
rectly lit. If you have a cable connection, you will see a screen similar to
that shown in Figure 5-6. If you have a DSL connection, you will see a
screen similar to that shown in Figure 5-7. When the LEDs are lit appro-
priately, click the Next button to continue.
If you are using a Static IP Address to connect to the Internet, proceed to
step 7a. If you are using a DHCP connection, proceed to step 7b. If you are
using a PPPoE connection, proceed to step 7c.
22
Figure 5-4 Figure 5-5
Figure 5-6 Figure 5-7
Note: After the Router is connected, your PC may try to connect directly
to the Internet. Since the connection will now be made through the Router,
you can disregard (click Cancel) any attempt your PC makes to connect.
Figure 5-9
Figure 5-8