Cobra Electronics MRHH425 Handheld Marine Transceiver with GMRS User Manual
Cobra Electronics Corporation Handheld Marine Transceiver with GMRS
Contents
- 1. users manual 1
- 2. users manual 2
- 3. users manual 3
users manual 3
Introduction
51
Nothing Comes Close to a Cobra®
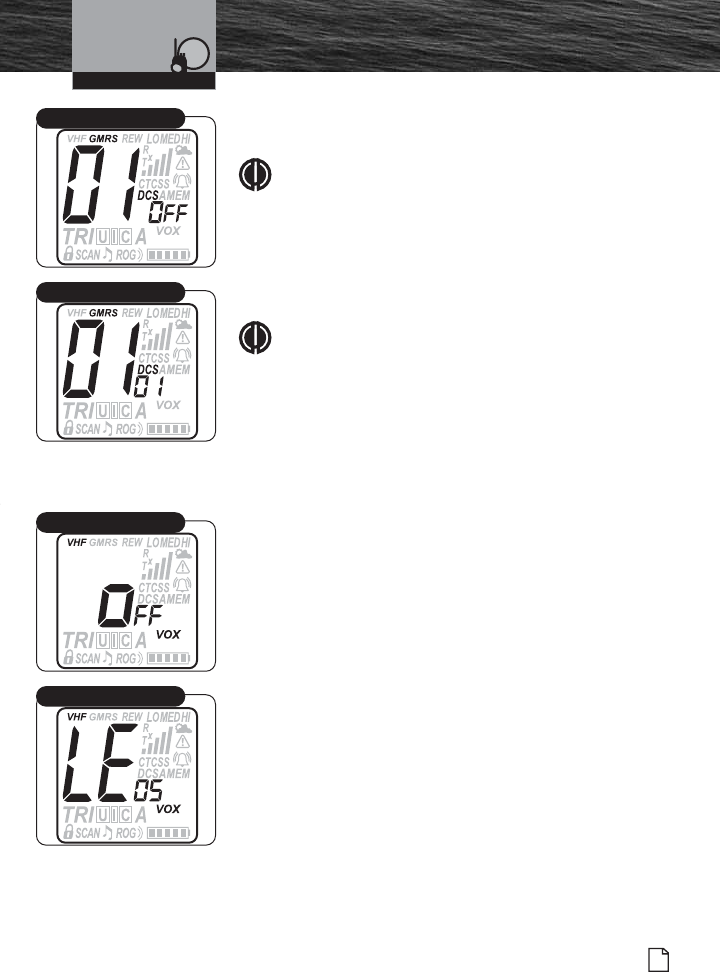
Setup Mode Programming
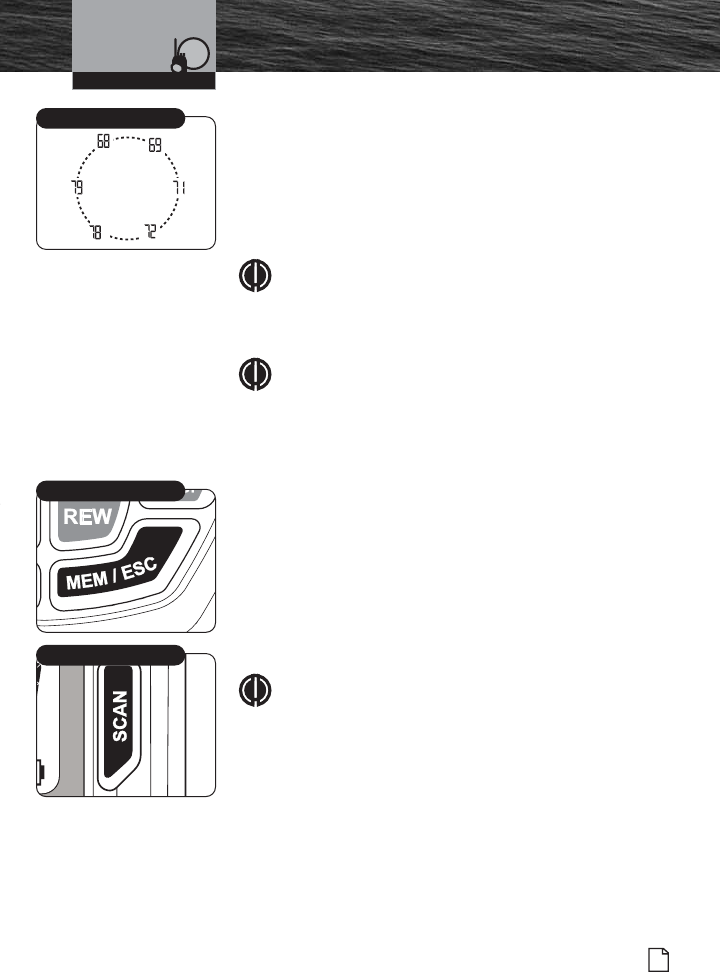
To Set DCS Code Entry:
1. Display will show DCS icon and OFF icon flashing.
NOTE
If DCS was previously set to a Code number, the
display will show the current GMRS channel and flash
the DCS icon and Code number.
2. Codes begin at 01 and go to 83, followed by OFF
and return back to 01 again. Last used GMRS
channel will be shown in the large digit display.
NOTE
If CTCSS is On, then DCS must be Off. If DCS is On,
then CTCSS must be Off.
3. Press Channel Up/Down button to change code
number, or press and hold Channel Up/Down button
to rapid advance (scroll).
4. Press Call/Enter/Setup button to save entry and
move to the next setup programming mode.
Voice Activated Transmit (VOX) Mode
The VOX Mode On or Off and VOX Sensitivity Level setup
procedures are the next two settings in GMRS Mode
Programming. Follow the same procedures on page 44, in
Marine (VHF) Setup Programming, to set these functions.
After these two settings have been made, press
Call/Enter/Setup button to save each entry and move to the
next setup programming mode.
Operating Your Radio
DCS Code Entry
CTCSS Code Number
VOX Mode On/Off
VOX Level
MRHH425VP-Body-Eng.qxp:400_Body 10/26/06 1:37 PM Page 51
52 English
Setup Mode Programming
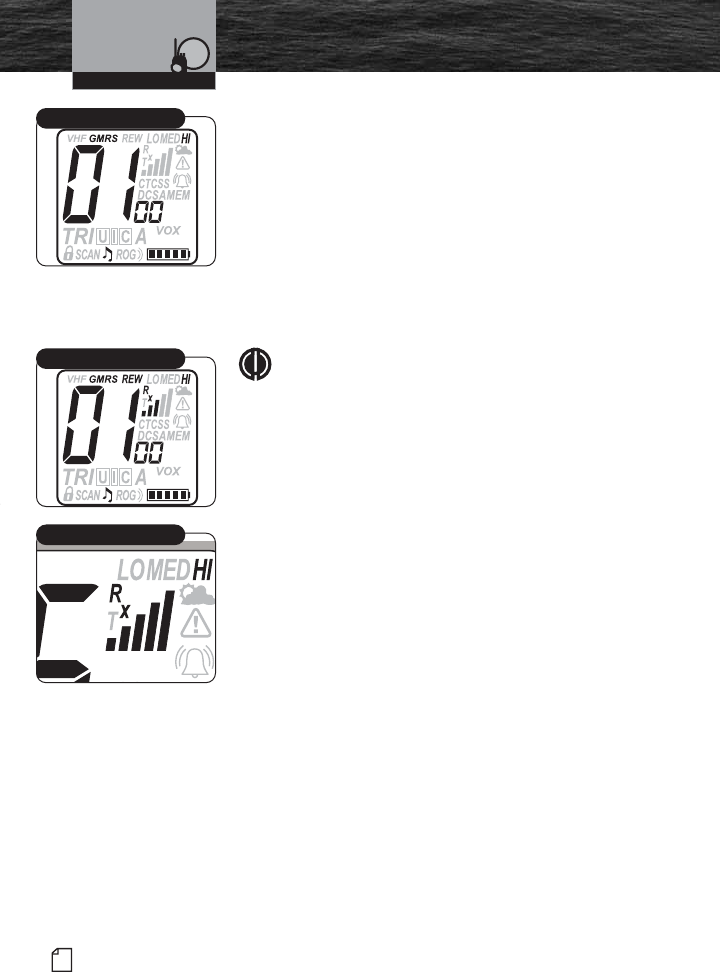
CTCSS and DCS Code Scan Mode
This mode will allow you to scan for all incoming audio
CTCSS and DCS coded signals.
To Set CTCSS Code Scan:
1. Display will show current CTCSS working channel.
CTCSS and SCAN icons and small digit CTCSS Code
number will be flashing. DCS is not active during
CTCSS operation.
2. Press Channel Up/Down button to start CTCSS
Code number scan.
3. If there is no input activity within five (5) seconds,
CTCSS Code scan will automatically continue.
4. When a valid CTCSS Code is detected, the radio will
stop scanning and open a path to the incoming
CTCSS audio transmission. This connection will
continue for as long as the signal is present. When
the audio transmission ends, the CTCSS Code Scan
will resume after five (5) seconds.
5. Press Call/Enter/Setup button to save entry and
move to the next setup programming mode.
To Set DCS Code Scan:
1. Display will show current DCS working channel.
DCS and SCAN icons and small digit DCS Code
number will be flashing. CTCSS is not active during
DCS operation.
2. Press Channel Up/Down button to start DCS Code
number scan.
3. If there is no input activity within five (5) seconds,
the CTCSS Code scan will automatically continue.
4. When a valid DCS Code is detected, the radio will
stop scanning and open a path to the incoming DCS
audio transmission. This connection will continue
for as long as the signal is present. When the audio
transmission ends, the DCS Code Scan will resume
after five (5) seconds.
5. Press Call/Enter/Setup to save entry and move to
the next setup programming mode.
Operating Your Radio
CTCSS Code Scan
DCS Code Scan
MRHH425VP-Body-Eng.qxp:400_Body 10/26/06 1:37 PM Page 52

53
Nothing Comes Close to a Cobra®
Setup Mode Programming
VibrAlert®Mode, Call Tone Mode, Roger Beep Mode and Key Tone
Mode
The VibrAlert®, Call Tone, Roger Beep and Key Tone setup procedures are the next
four (4) settings in GMRS Mode Programming. Follow the same procedures on
pages 47 through 49, in Marine (VHF) Setup Programming, to set these functions.
After these four (4) settings have been made, press Call/Enter/Setup button to save
each entry and move to the next setup programming mode.
You have now ended GMRS Setup programming mode and will enter GMRS
Standby mode.
Operating Your Radio
MRHH425VP-Body-Eng.qxp:400_Body 10/26/06 1:37 PM Page 53
54 English
Setup Mode Programming
Programming these features will allow your radio to listen to
all NOAA Hazard Alert radio channels. In this process, you
will be programming the channel settings for the “Specific
Area Message Encoding (SAME)” and “Emergency Alert
Messages” sent by NOAA. See channels and frequencies
listed on page 31.
Start from WX Alert Standby mode to begin WX Alert Setup
programming. Press and hold the Call/Enter/Setup button
for two (2) seconds to enter the programming mode.
To Set WX Alert On or Off:
1. WX Alert mode is the first mode that begins WX
Alert Setup programming.
2. Display will show WX Alert icon and ON or OFF
flashing.
3. Press Channel Up/Down button to select ON or
OFF.
4. Press Call/Enter/Setup button to save this entry and
move to the next setup programming mode.
To Set WX Auto Search (SCAN) On or Off:
1. Display will show WX Alert icon and SCAN, ON or
OFF is flashing.
2. Press Channel Up/Down button to select SCAN, ON
or OFF.
3. Press the Call/Enter/Setup button to save entry.
NOTE
When WX Auto Search (SCAN) is set to On, weather
channel scanning will start automatically and scan all
available weather channels until the strongest channel
is found. This will happen under the following
conditions:
■WX Alert is engaged.
■Radio is in VHF Standby.
■WX received signal level falls below a preset
level.
■Radio is in Power Saver mode.
Weather (WX) Alert Mode Programming
Operating Your Radio
WX Alert On/Off
WX Auto Search (SCAN)
MRHH425VP-Body-Eng.qxp:400_Body 10/26/06 1:37 PM Page 54

55
Nothing Comes Close to a Cobra®
Setup Mode Programming
To Set Specific Area Message Encoding (SAME) Alert
On or Off:
SAME is an advanced weather alert feature. Leave this
set to OFF if you are not sure about your
understanding of its operation.
1. Display will show SAME icon and ON or OFF will be
flashing.
NOTE
If SAME Alert is turned On, the WX Alert will be
turned Off automatically.
2. Press Channel Up/Down button to select ON or
OFF.
3. Press Call/Enter/Setup button to save selection and
move to the next setup programming mode.
Operating Your Radio
SAME Alert On/Off
MRHH425VP-Body-Eng.qxp:400_Body 10/26/06 1:37 PM Page 55

56 English
Setup Mode Programming
To Set SAME FIPS Code Location
1. Display will show COdE, not flashing. SAME icon is
flashing along with the two (2) digits to the right of
COdE.
2. Press Channel Up/Down button to select channel
number.
NOTE
Ten channel locations are available (00-09).
3. Press and release the Call/Enter/Setup button to
enter geographic weather locations as identified by
FIPS (Federal Information Processing System) area
in the United States.
NOTE
FIPS codes identify geographic areas in the United
States as shown on the Internet website:
www.census.gov/datamap/flipslist/allst.txt .
4. The display will show “ ------,” or last entered FIPS
code. One (1) digit in display will be flashing.
5. Press Channel Up/Down button to select first digit.
6. Press and release Call/Enter/Setup button to
advance to next digit code. Press and release
MEM/ESC button to back up. Repeating, press and
release of the MEM/ESC button, will back up to the
top level.
7. Continue steps 5 and 6 until all six (6) digits are
entered.
8. Press and release Call/Enter/Setup button to save
entry.
The code is now saved to one of the 10 allowed in
memory and it is turned On. When the words “Code
01” are shown, then you can choose to have this code
set to ON or OFF.
9. Press and hold Call/Enter/Setup button to toggle
between active and non-active status of FIPS codes.
If the display changes from the FIPS code entered to
HLdSEt, the FIPS code entered is not an active FIPS
code. Try entering the FIPS code again.
10. Press MEM/ESC from SAME Location screen
(example: Code 01) to save setting.
You have now ended WX Alert Setup programming mode
and will enter WX Alert Standby mode.
Operating Your Radio
SAME Code
FIPS Code Set
Invalid FIPS Code
MRHH425VP-Body-Eng.qxp:400_Body 10/26/06 1:37 PM Page 56
57
Nothing Comes Close to a Cobra®
Standby/Receive and
Transmit
Standby/Receive and Transmit •
Marine (VHF), GMRS and WX Alert Standby
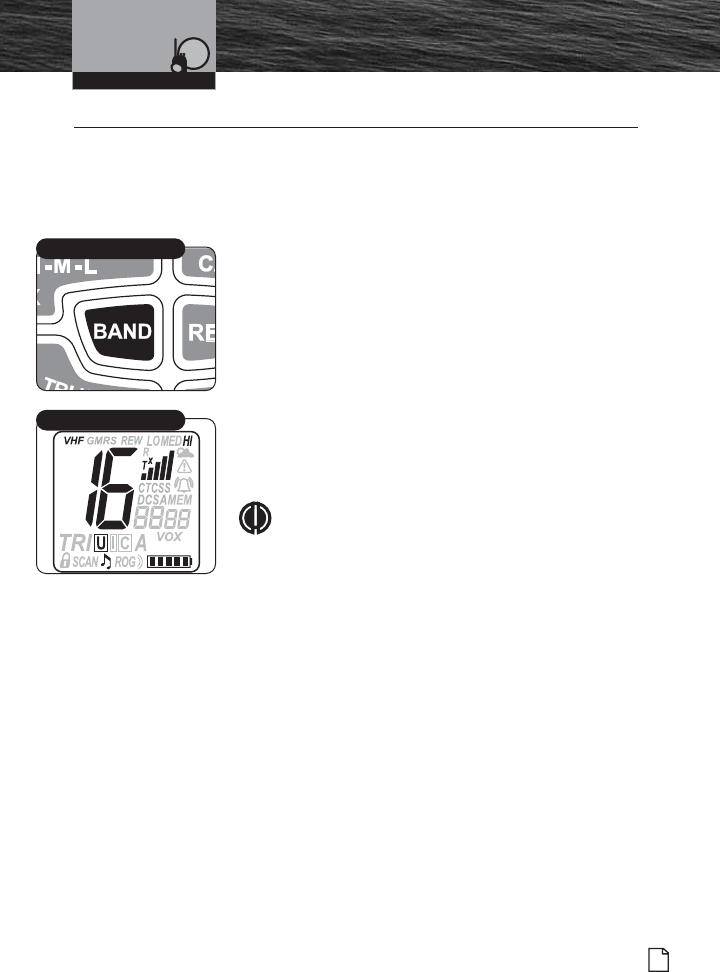
Band Selections
The BAND button allows you to quickly toggle between the
Marine (VHF), GMRS and WX Alert Standby bands.
To Make a Band Selection:
Press BAND button to toggle between the Marine
(VHF) Standby, GMRS Standby or WX Alert Standby
bands.
Marine (VHF) Standby Mode
Marine Standby mode is the default mode for the radio
whenever it is turned On. From this mode, you can change
current settings by becoming familiar with the different key
functions. While in Marine Standby mode, the user will be
able to Transmit (Tx) by pressing the Push to Talk (Talk)
button. Signals in Receive (Rx) mode will be received on
the selected channel(s).
NOTE
Coast Guard alerts are broadcast on Channel 16 and
you need to have the WX Alert or SAME turned On to
receive NOAA weather alerts. While in Marine
Standby mode, you will receive any messages sent
on the channel to which you are tuned.
Operating Your Radio
BAND Button
Marine (VHF) Standby Mode
MRHH425VP-Body-Eng.qxp:400_Body 10/26/06 1:37 PM Page 57
58 English
Introduction
Standby/Receive and
Transmit
GMRS Standby Mode
The GMRS (General Mobile Radio Service) Standby feature
is a land-mobile service available for short-distance, two-
way communications in the USA. You must have a valid FCC
license to communicate on these channels (see page 28).
While in GMRS Standby mode, the user will be able to
Transmit (Tx) by pressing the Push to Talk (Talk) button.
Signals in Receive (Rx) mode will be received on the
selected channel(s).
When in GMRS Standby mode, the radio has the ability to
receive calls as well as transmit calls.
NOTE
As GMRS channels are scrolled, you will see CTCSS
or DCS icons displayed on the LCD screen if the
codes have been previously programmed. You will
only hear transmissions from other radios with the
equivalent subcodes programmed.
When a transmission is received, the following icons will be
displayed.
Receive (Rx) Icon
Bar Graph Icon
Operating Your Radio
GMRS Standby Mode
GMRS Receive
Receive (Rx) Icon
MRHH425VP-Body-Eng.qxp:400_Body 10/26/06 1:37 PM Page 58
Introduction
59
Nothing Comes Close to a Cobra®
Standby/Receive and
Transmit
Transmit (Tx) and Receive (Rx) Modes
Transmit (Tx) and Receive (Rx) modes gives you the ability
to interact with other GMRS radios. When you use this
capability, be sure to follow the procedures and to observe
the courtesies that govern its use so everyone benefits. (See
pages 18 through 27) to help you select the proper
channels.
When a talk transmission occurs, the following icons will be
displayed.
Transmit (Tx) Icon
Bar Graph Icon
To Transmit a Message:
1. Check to see that your radio is set to a proper
channel for the type of message you plan to send.
2. Toggle to the Low Power setting.
3. With the microphone about 2 in. [5 cm] from your
mouth, press and hold the Talk button and speak
into the microphone. The Tx icon will appear on the
LCD.
4. Release the Talk button when you are finished
speaking. Your radio can only operate in either
Transmit (Tx) or Receive (Rx) mode at any given
time. You will not hear the response to your
message unless the Talk button is released. If the
Battery Power icon begins blinking on the LCD
when the Talk button is pressed, the radio will NOT
transmit.
NOTE
If the Talk button is held down for five (5) minutes,
the radio will automatically sound a series of beeps
and cease transmitting to prevent unwanted signal
generation and battery drain. As soon as the Talk
button is released, it can be pressed again to resume
transmission.
Operating Your Radio
Low Power Mode
Check Channel Number
Talk Button
GMRS Transmit
Transmit (Tx) Icon
MRHH425VP-Body-Eng.qxp:400_Body 10/26/06 1:37 PM Page 59
60 English
Introduction
Standby/Receive and
Transmit
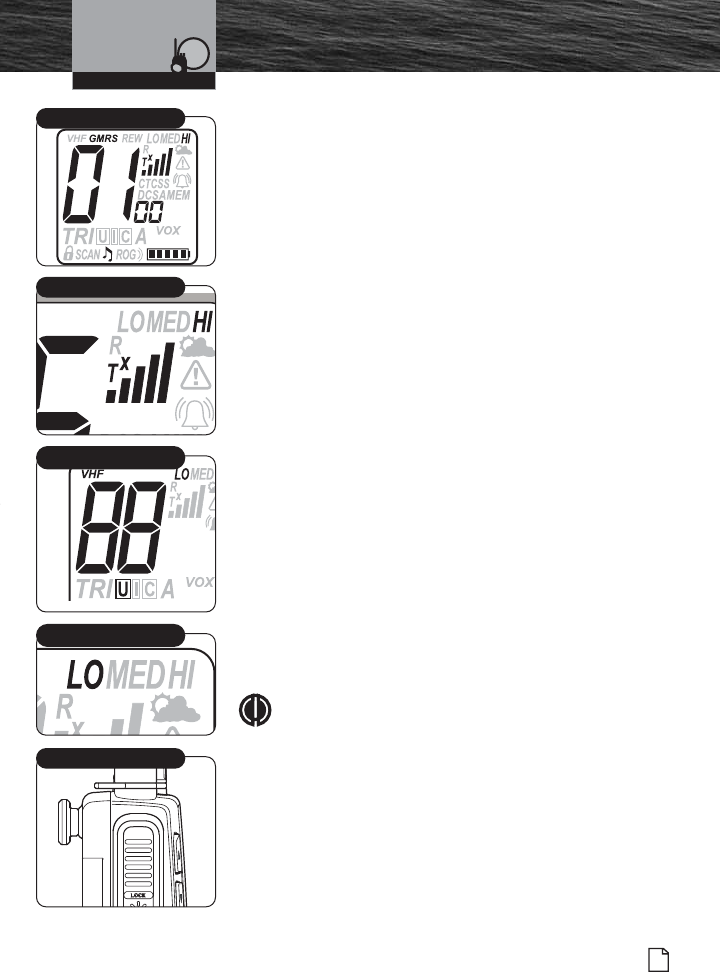
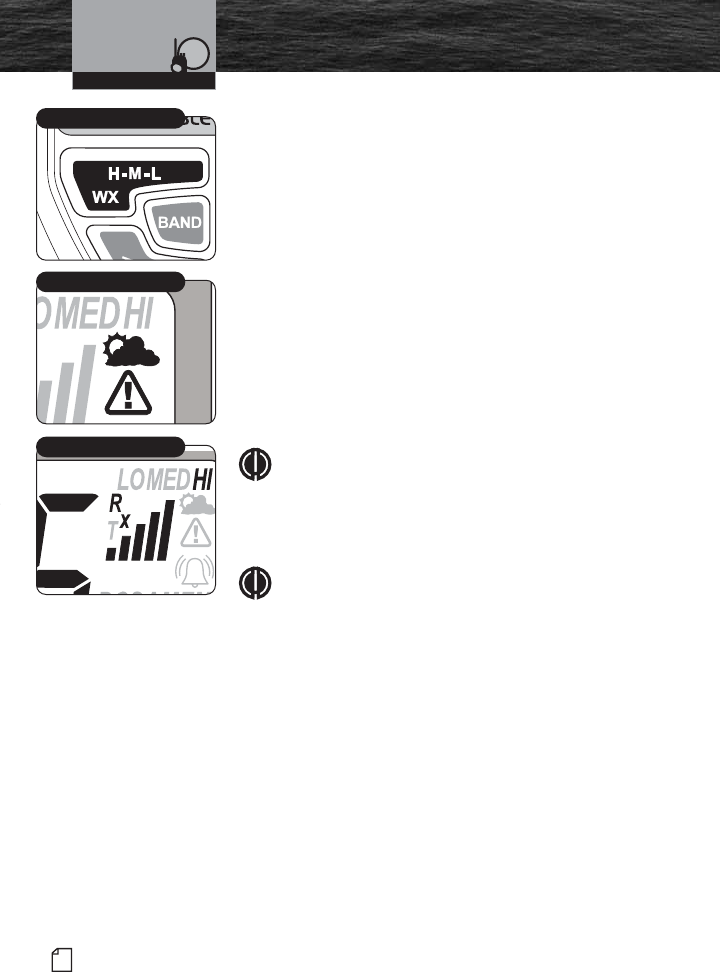
Weather (WX) Standby Mode
To enter the WX Standby mode, press and hold the
WX/H-M-L button. All common operating functions of the
radio will work the same in WX Standby mode as they do in
the normal Marine and GMRS Standby modes.
WX Alert Standby Mode
NOAA broadcasts weather information as described in the
NOAA weather channels section on page 31 of this manual.
When NOAA broadcasts a weather alert signal and your
radio is in WX Alert Standby mode, the following items will
be displayed on the LCD display:
The WX icon (cloud/sun) icon will be displayed.
The last used weather channel will be displayed.
The bar graph will display received signal strength level.
The WX Alert icon (safety triangle) will be displayed).
NOTE
Only one (1) or two (2) of the weather channels will
be operating in any given location (only in Receive
(Rx) mode). You will need to select the channel with
the strongest signal in your location.
NOTE
When in the WX Alert mode, and NOAA sends the
1050Hz alert tone, the radio will sound a series of loud
beeps regardless of the volume control setting.
Operating Your Radio
WX Alert Standby Mode
Receive (Rx) Icon
WX/H-M-L Button
MRHH425VP-Body-Eng.qxp:400_Body 10/26/06 1:37 PM Page 60
Introduction
61
Nothing Comes Close to a Cobra®
Standby/Receive and
Transmit
WX Auto Search (SCAN) Mode Function:
The purpose of the WX Auto Search (SCAN) function is to
enable the receiver to automatically scan for an active WX
channel under the following conditions:
1. WX Auto Search (SCAN) function is On.
2. WX Alert or SAME is On (one or the other but not both).
3. The radio is tuned to a Marine VHF channel and has
entered Power Save mode (meaning there is no signal
activity or user input for 10 seconds).
4. The radio software has detected that the current WX
channel signal level has dropped below a preset minimum
level or is gone completely.
Once these conditions have been met, the software will then
scan the WX channels looking for an active WX channel.
When an active WX channel is found it will stop the scan
and use the new WX channel to look for the standard
1050Hz alert tone or SAME data depending on WX setup.
Operating Your Radio
WX Auto Search (SCAN)
MRHH425VP-Body-Eng.qxp:400_Body 10/26/06 1:37 PM Page 61
62 English
Introduction
Standby/Receive and
Transmit
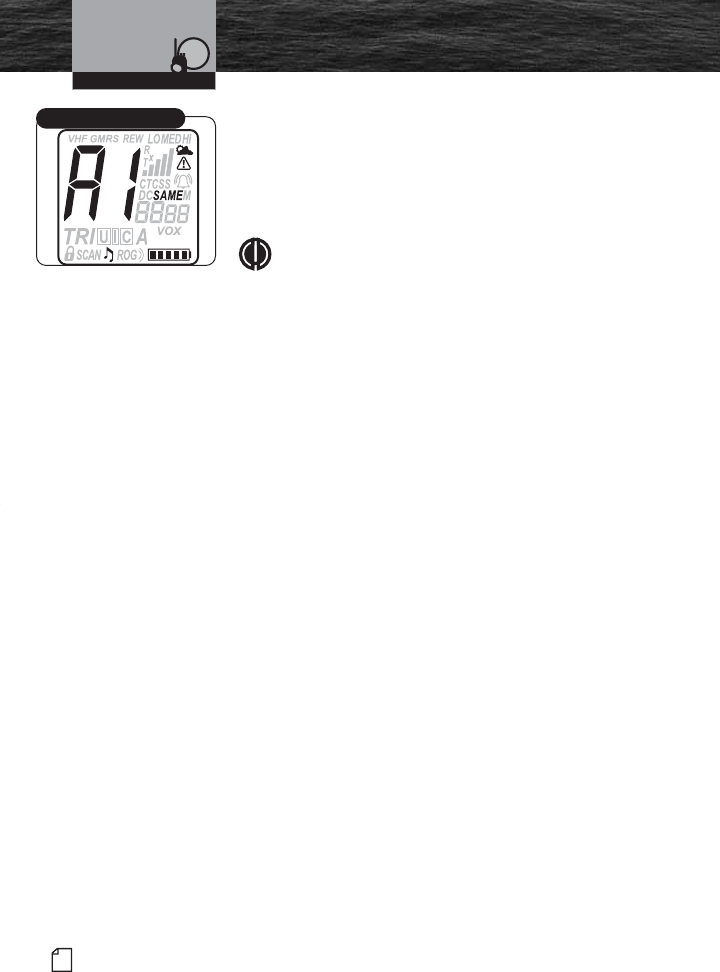
SAME Alert Level Codes
There are four (4) alert level codes that provide important
active weather information. These alert codes are checked
against the FIPS codes location list. When proper “Alert”
conditions are met, the radio will switch to the WX Alert
mode on the WX Alert channel and sound an alarm.
NOTE
When the alarm sounds, the display will show the
Alert icon, SAME letter icons and SAME Alert
letter/numbers flashing.
Alert Level Codes:
A1 = Warning – Those events that pose a significant threat
to public safety and/or property. The probability of
occurrence and location is high and the onset time is
relativity short.
A2 = Watch – Events that meet the classification of Warning
(above), but either the onset time, probability of
occurrence or location is uncertain.
A3 = Statement – A message containing follow up
information to a Warning or Watch.
A4 = Test – Brief Voice text of the weekly test describing the
service provided, area covered, and application of the
warning alarm tone and NWR SAME code. These tests
normally occur on Wednesday between 11 a.m. and
1 p.m. local time with some variations to accommodate
local requirements.
Operating Your Radio
SAME Alert Level Code
MRHH425VP-Body-Eng.qxp:400_Body 10/26/06 1:37 PM Page 62

Introduction
63
Nothing Comes Close to a Cobra®
Advanced Operation
Advanced Operation •
Channel 16/9 Mode
Channel 16/9 mode gives you quick access to calling
Channel 16 and Channel 9 from any operational mode.
To Switch to Channel 16 or Channel 9:
1. Press the Channel 16/9 button to change to
Channel 16.
2. Press the Channel 16/9 button again to change to
Channel 9.
3. Press the Channel 16/9 button a third time and
return to the last used Standby channel.
Operating Your Radio
Channel 16/9 Button
Channel 16 or Channel 9
MRHH425VP-Body-Eng.qxp:400_Body 10/26/06 1:38 PM Page 63
64 English
Introduction Advanced Operation
Tri-Watch Mode
Tri-Watch mode gives you one (1) button access to scan a
total of three (3) channels of most importance to you.
Channel 16 is preprogrammed for you and will always be
one (1) of the scanned locations. Two (2) other channels of
your choice can be stored in the radio. These channels can
be edited and/or recalled for future engagements of the Tri-
Watch mode. Tri-Watch will function in Marine and GMRS
Standby modes.
NOTE
The radio must be squelched for Tri-Watch mode to
function. See page 40 for Squelch procedure.
To Program or Edit the Tri-Watch Locations:
1. Press and hold the TRI-WATCH button for two (2)
seconds to activate Tri-Watch Setup mode. The TRI
and MEM icons on the display will turn On.
NOTE
The main channel number will flash to indicate channel
position. If there is no input activity for 15 seconds, the
radio will sound two (2) beeps and return to Marine or
GMRS Standby mode.
2. Press BAND button to select Marine or GMRS for
the first Tri-Watch programmable channel.
3. Press Channel Up/Down button to select the desired
Tri-Watch channel.
4. Press and release TRI-WATCH button or
Call/Enter/Setup button to confirm entry.
5. Repeat steps 2 through 4 to select second
Tri-Watch programmable channel. The radio will
scan Marine Channel 16 plus two (2) other selected
channels in Marine or GMRS bands.
6. After programming both Tri-Watch memory
channels the radio will immediately engage
Tri-Watch mode.
Operating Your Radio
TRI-WATCH Button
TRI and MEM Icons
Channel Up/Down Button
MRHH425VP-Body-Eng.qxp:400_Body 10/26/06 1:38 PM Page 64

65
Nothing Comes Close to a Cobra®
Advanced Operation
Using Tri-Watch
Tri-Watch Scan Mode:
1. From Marine or GMRS Standby mode, press the
TRI-WATCH button. The TRI icon will appear on the
LCD display and the radio will scan through the
three (3) Tri-Watch memory channels.
2. A signal on any one (1) of the three (3) channels
will stop the scan for 10 seconds to allow you to
listen to the traffic on that location.
NOTE
After the Tri-Watch scan stops to monitor a channel,
as long as you do not press any buttons within 10
seconds, your radio will automatically resume
scanning the Tri-Watch channels.
3. Press the Channel Up/Down button to resume
scanning the Tri-Watch channels or to change the
scan direction.
4. To EXIT the Tri-Watch scan, press the TRI-WATCH
button again. The TRI icon will disappear from the
LCD and the radio will return to Marine or GMRS
Standby mode.
Operating Your Radio
TRI-WATCH Button
Tri-Watch Scan Mode
MRHH425VP-Body-Eng.qxp:400_Body 10/26/06 1:38 PM Page 65

66 English
Advanced Operation
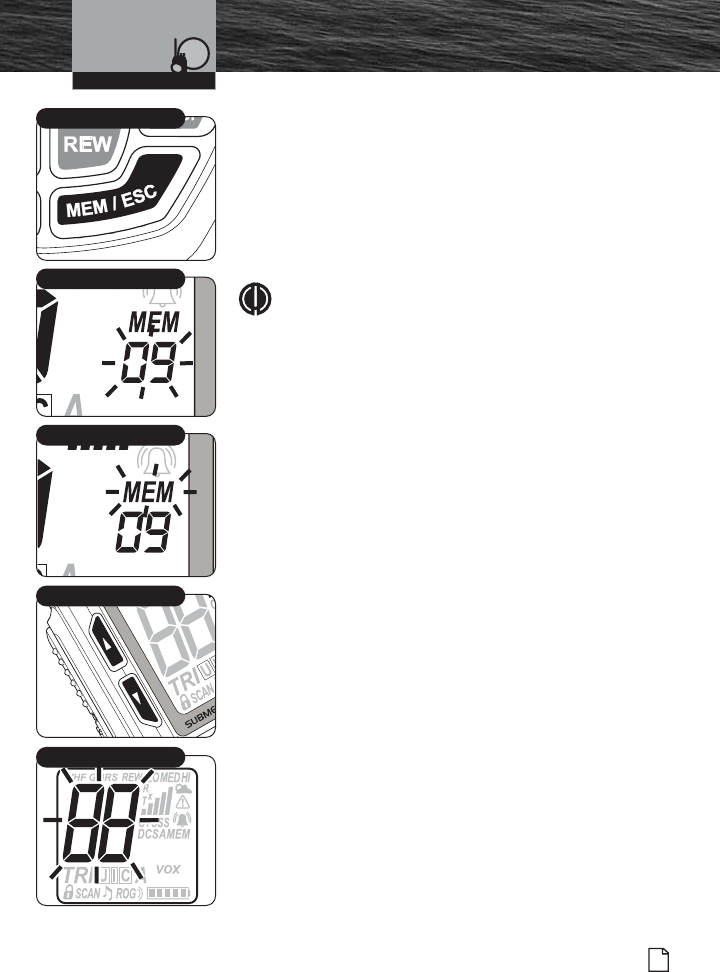
Memory Locations
Your radio has unlimited memory locations for storing your
most frequently used channels. These memory locations can
be selected individually or can be scanned. (See page 69
under Memory Location Scan.) You are also able to change
bands for memory locations and scanning, allowing an
unlimited amount of choice selection.
To Program Memory Locations:
1. Press and hold the MEM/ESC button for two (2)
seconds. The Memory location number will start
flashing and the MEM icon will be turned On.
2. Use the Channel Up/Down button to advance to the
Memory location (00-99) you want to program.
3. Press the MEM/ESC button to select the Memory
location. The Memory channel number will stop
flashing and the channel number will start flashing.
4. Use the Channel Up/Down button to change to the
channel you want to store into the selected Memory
location.
5. Press the MEM/ESC button to program that channel.
The Memory location number will flash again.
Repeat steps 2 through 5 to program as many
additional memories as you want.
6. Press and hold the MEM/ESC button for two (2)
seconds. This will return the radio to the Memory
mode.
7. Press and release the MEM/ESC button again to
return to the Marine or GMRS Standby mode.
Operating Your Radio
MEM/ESC Button
Memory Location Number
Channel Up/Down Button
Channel Number
MEM Icon
MRHH425VP-Body-Eng.qxp:400_Body 10/26/06 1:38 PM Page 66
67
Nothing Comes Close to a Cobra®
Advanced Operation
To Recall a Stored Memory Location:
1. Press the MEM/ESC button. The MEM icon will be
turned On.
2. Press the Channel Up/Down button to select the
memory location. If a memory location has been
programmed, its associated channel will display on
the LCD. Your radio is now in Marine or GMRS
Standby mode on the selected memory location.
NOTE
In addition to using the Channel Up/Down button
when selecting your memory channel, you can use
the BAND button to select channels in the GMRS
band.
To Exit Memory Location Mode:
Press the MEM/ESC button to return the radio to the
Marine or GMRS Standby mode. The last channel used
in Marine or GMRS Standby mode will now be
displayed on the LCD and the MEM icon will disappear.
To Erase Stored Memory Locations:
1. Press and hold the MEM/ESC button for two (2)
seconds. The memory location number will start
flashing and the MEM icon will be turned On.
2. Use the Channel Up/Down button to advance to the
memory location you want to erase.
3. Press the MEM/ESC button to select the memory
location. The memory channel number will stop
flashing and the channel number will start flashing.
4. Use the Channel Up/Down button to change to the
channel to read “00” at the selected memory
location.
5. Press the MEM/ESC button to erase that channel.
Repeat steps 2 through 5 to erase as many additional
memories as you want.
6. Press and hold the MEM/ESC button for two (2)
seconds. This will return the radio to Memory mode.
7. Press and release the MEM/ESC button again to
return to Marine or GMRS Standby mode.
Operating Your Radio
MEM/ESC Button
Memory Location Number
Channel Up/Down Button
Channel Number
MEM Icon
MRHH425VP-Body-Eng.qxp:400_Body 10/26/06 1:38 PM Page 67
68 English
Advanced Operation
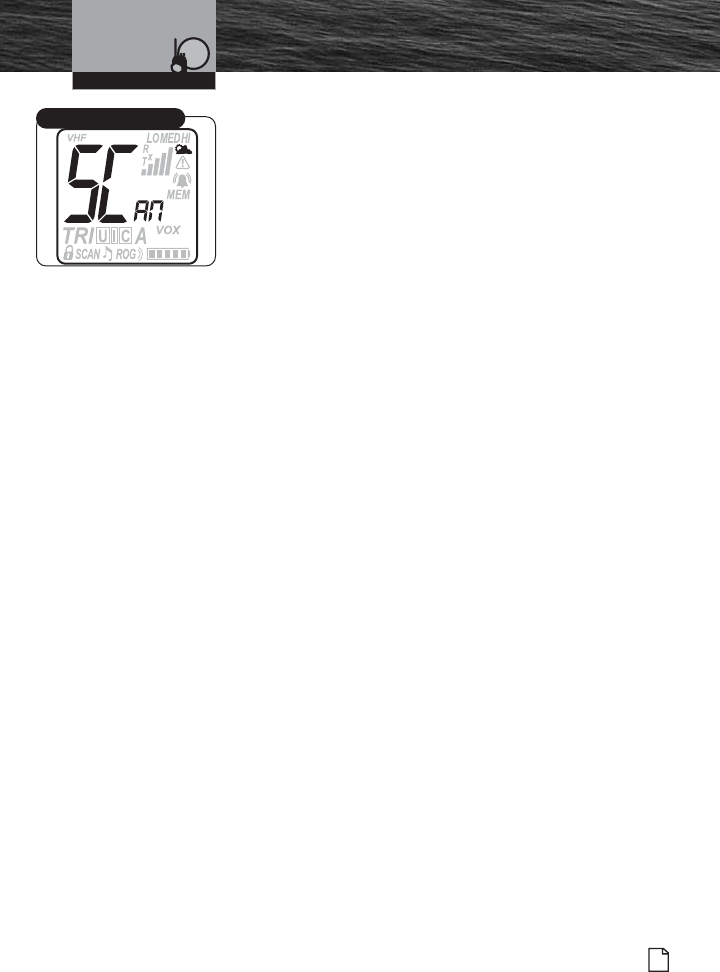
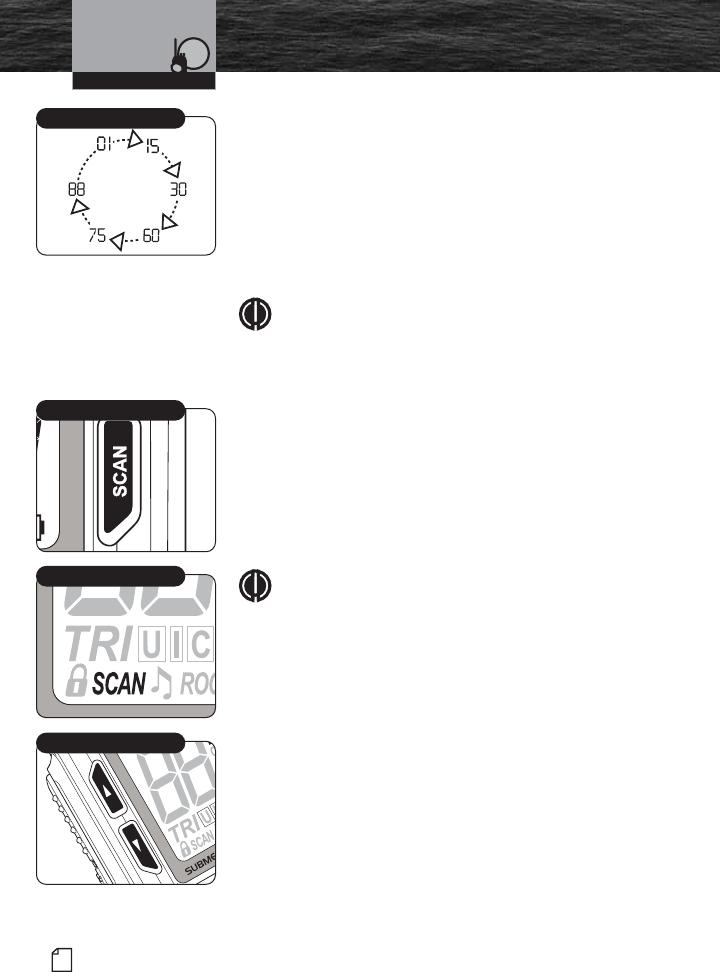
Channel Scan Mode
During Channel Scan mode, the radio will rapidly switch
from channel to channel through all the channels. Whenever
any activity is detected, the radio will stop the scan for 10
seconds to allow you to listen briefly on that channel. The
radio will then continue to scan unless you switch out of the
Channel Scan mode. The radio will perform normal
scanning operations from either Marine (VHF) mode or
GMRS mode, but it will only scan in that band.
NOTE
The radio must be squelched for the Channel Scan
mode to function. See page 40 for Squelch
procedure.
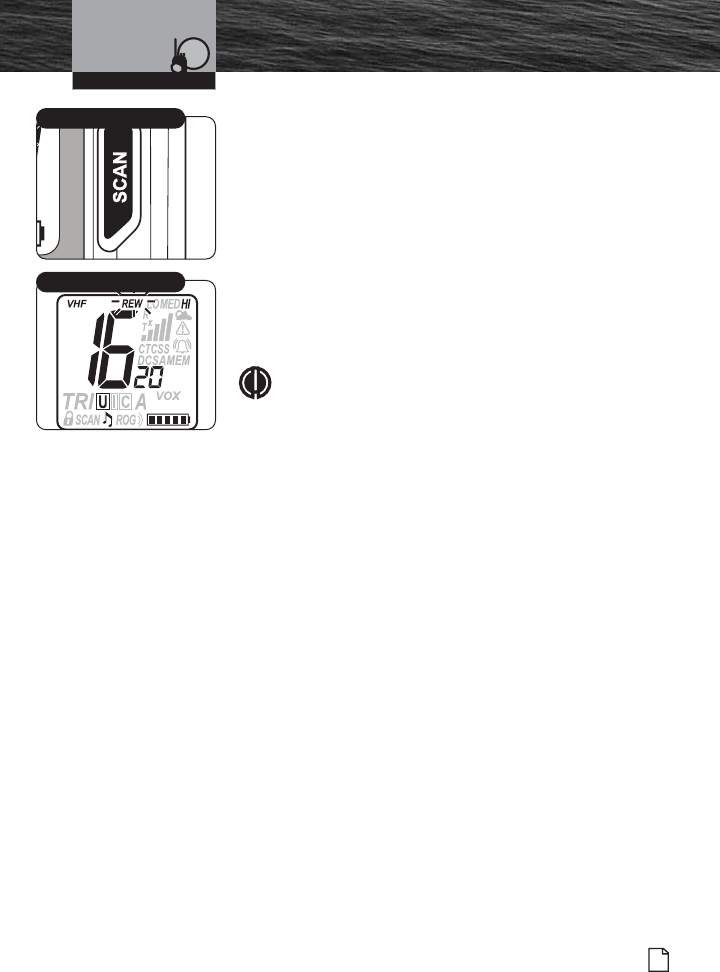
To Enter Channel Scan:
1. From Marine or GMRS Standby mode, press the
SCAN button. The radio will immediately begin to
scan the entire channel map selected in the active
channel map. The SCAN icon will show on the LCD.
2. A signal on any channel will stop the scan for 10
seconds to allow you to listen to the traffic on that
location.
NOTE
After the channel scan stops to monitor a channel, as
long as you do not press any buttons within 10
seconds, your radio will automatically resume
scanning the Channel Scan channels.
3. Press the Channel Up/Down button to resume
scanning the Channel Scan channels or to change
the scan direction.
4. To EXIT Channel Scan mode, press the SCAN
button again. The SCAN icon will disappear from the
LCD and the radio will return to Marine or GMRS
Standby mode.
Operating Your Radio
SCAN Button
SCAN Icon
Scanning
Channel Up/Down Button
MRHH425VP-Body-Eng.qxp:400_Body 10/26/06 1:38 PM Page 68
69
Nothing Comes Close to a Cobra®
Advanced Operation
Memory Location Scan
During Memory Location Scan mode, the radio will rapidly
scan through all pre-assigned memory channels. Whenever
any activity is detected on a channel, the radio will stop the
scan for 10 seconds to allow you to listen briefly on that
channel. It will then continue to scan unless you switch out
of Memory Location Scan mode.
NOTE
The radio must be squelched for the Memory
Location Scan mode to function. See page 40 for
Squelch procedure.
NOTE
If there are fewer than two (2) Memory locations
programmed in the radio, the Memory location scan
option will not be available. To program at least two
(2) memory locations, see page 66.
To Enter Memory Location Scan:
1. From Marine or GMRS Standby mode, press the
MEM/ESC button.
2. Press the SCAN button. The radio will immediately
begin to scan all pre-assigned memory channels.
The SCAN and MEM icons will show on the LCD.
3. A signal on any channel will stop the scan for 10
seconds to allow you to listen to the traffic on that
location.
NOTE
After the Memory Location Scan stops to monitor a
channel, as long as you do not press any buttons within
10 seconds, your radio will automatically resume
scanning the Memory Location Scan channels.
4. Press the Channel Up/Down button to resume
scanning the Memory Location Scan channels or to
change the scan direction.
5. To EXIT Memory Location Scan mode, press the
SCAN button again. The SCAN and MEM icons will
disappear from the LCD and the radio will return to
Marine or GMRS Standby mode.
A
A
Memory Location Scan
MEM/ESC Button
SCAN Button
Operating Your Radio
MRHH425VP-Body-Eng.qxp:400_Body 10/26/06 1:38 PM Page 69
70 English
Advanced Operation
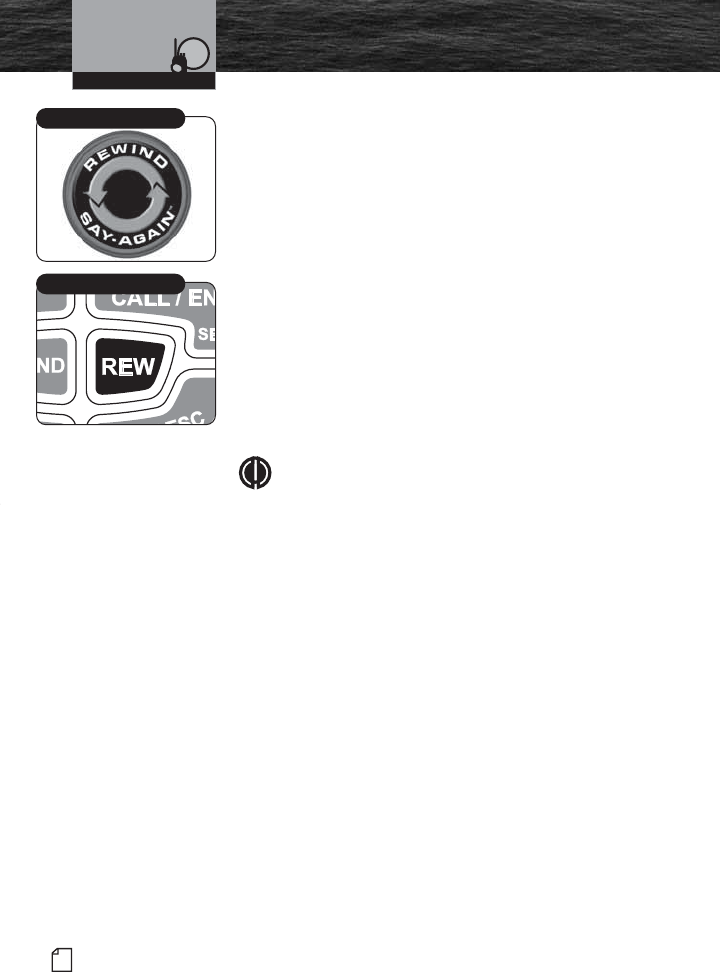
Rewind-Say-Again™ Feature
Use the Cobra exclusive Rewind-Say-Again™ feature to
replay or record the last 20 seconds of an incoming audio
transmission.
Example 1:
When engine noise, music or conversation creates too
much noise to hear an inbound message clearly, press
the REW button to hear the message a second time.
Example 2:
When listening to an urgent distress message of an
excited caller with confusing background noise, press
the REW button to hear the message a second time
and get life saving information. Use this feature to
record call details including position coordinates, call
signs, registration numbers and store details that will
help authorities locate the distressed vessel.
NOTE
Hold in the Rewind button to turn the recording
mode Off and save the currently recorded
transmission.
Using Rewind-Say-Again™
1. During audio transmission, press REW button to listen to
20 seconds of the last recorded audio transmission. The
REW icon will flash during the playing back of the
message and a 20-second countdown begins.
2. Press the TALK, REW or MEM/ESC button during
playback to stop the playback transmission. The radio
returns to Marine or GMRS Standby mode.
Rewind-Say-Again™
Rewind Button
Operating Your Radio
MRHH425VP-Body-Eng.qxp:400_Body 10/26/06 1:38 PM Page 70
71
Nothing Comes Close to a Cobra®
Advanced Operation
Using Rewind-Say-Again™ to Record Audio
Transmission
1. Press and hold SCAN button for two (2) seconds to enter
Record mode.
2. Press and hold Talk button to begin recording from radio
microphone. If Talk button is released, recording stops.
While recording, a 20-second countdown begins on
display. When 20-second countdown time has ended,
recording stops and two (2) beep tones will be heard.
3. Press and hold the SCAN button again for two (2)
seconds or press MEM/ESC button to cancel recording
and return to last operation.
NOTE
When using radio in Record mode, the REW feature
is turned Off to prevent “recording over” previous
message.
SCAN Button Enter Record
Rewind Countdown Timer
Operating Your Radio
MRHH425VP-Body-Eng.qxp:400_Body 10/26/06 1:38 PM Page 71
72 English
Introduction
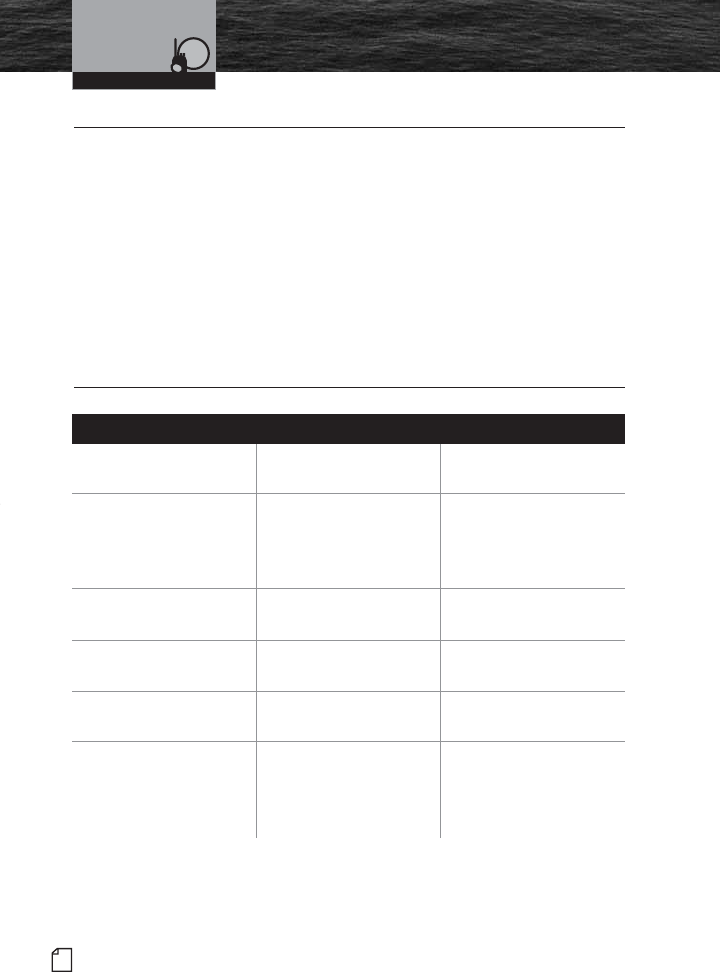
No display on LCD when
radio is turned On
Battery pack is exhausted Recharge or
replace battery pack
Will transmit at
1 watt, but not at
5 watts
Battery pack low
Selected channel is imited
to 1 watt
Recharge or
replace battery pack
Switch to
another channel
Will not transmit Selected channel is
limited to receive only
Switch to
another channel
No sound from speaker Volume level is too low or
squelch level is too deep
Re-adjust volume
and squelch
No response to
button press
Key lock is On Press Backlight/
Key Lock button
No answer to calls Out of range of
other station
Signal is blocked
by terrain
Switch to 3 or 5 watts or
move closer
Move until you have a “line-
of-sight” to the other station
Problem Possible Cause(s) Solution(s)
Maintenance and
Troubleshooting
Operating Your Radio
Maintenance •
Very little maintenance is required to keep your CobraMarine VHF/GMRS radio
in good operating condition:
Keep the radio and charger clean by wiping with a soft cloth and mild
detergent. Do not use solvents or harsh or abrasive cleaners, which could
damage the case or scratch the LCD screen.
If the radio is exposed to salt water, wipe with a soft, moist cloth at least once a day
to prevent buildup of salt deposits, which could interfere with button operation.
If the radio will be stored for a long period, such as over the winter,
remove the batteries from the battery tray and store them in a separate
package. This is especially important if you are using alkaline batteries.
Troubleshooting •
MRHH425VP-Body-Eng.qxp:400_Body 10/26/06 1:38 PM Page 72
Introduction
73
Nothing Comes Close to a Cobra®
Specifications
Specifications •
General
Number of Channels All U.S., Canadian, and International
10 NOAA Weather Channels, 23 GMRS
Channels
Channel Spacing VHF - 25 kHz Max., GMRS - 12.5 kHz
Modulation VHF - 5 kHz Max., GMRS - 2.5 kHz
Input Voltage 7.2 VDC
Battery Life: Lithium-ion: 14 hrs @ 5 watts,
5% TX, 5% RX, 90% Stand-by 23.5 hrs @ 1 watt;
Alkaline: 20 hrs @ 5 watts, 35 hrs @ 1 watt
Current Drain:
Stand-by 40 mA
Receive 200 mA
Transmit 1.8 A @ High power 700 mA @ Low Power
Temperature Range -20˚C to 50˚C
Radio Dimensions 4.8 in. x 2.4 in. x 1.4 in.
(123 mm x 62 mm x 36 mm) not including
antenna
Radio Weight 0 lbs 8 oz. (228 g) without batteries
Receiver
Frequency Range VHF 156.050 to 163.275 MHz
GMRS 462.5500 to 467.7125 MHz
Receiver Type Double Conversion Super-Heterodyne
Sensitivity:
20 dB Quieting 0.35 uV
12 dB Sinad 0.30 uV
Adjacent Channel Selectivity -60 dB
Intermodulation and Rejection -60 dB
Spurious and Image Rejection -60 dB
AF Output 250 mW @ 8 Ohms
Transmitter
Frequency Range: TX VHF 156.025 to 157.425 MHz
GMRS 462.5500 to 467.7125 MHz
RF Output Power 1, 3 and 5 watts
Spurious Emissions -60 dB @ High Power, -55 dB @ Low Power
Microphone Type Condenser
Frequency Stability +/-10 ppm
FM Hum and Noise 40 dB
Operating Your Radio
MRHH425VP-Body-Eng.qxp:400_Body 10/26/06 1:38 PM Page 73

74 English
Introduction
Warranty and Trademark
Acknowledgement
Limited 3-Year Warranty •
For Products Purchased In The U.S.A.
Cobra Electronics Corporation warrants that its CobraMarine VHF/GMRS radio,
and the component parts thereof, will be free of defects in workmanship and
materials for a period of three (3) years from the date of first consumer purchase.
This warranty may be enforced by the first consumer purchaser, provided that the
product is utilized within the U.S.A.
Cobra will, without charge, repair or replace, at its option, defective radios,
products or component parts upon delivery to the Cobra Factory Service
department, accompanied by proof of the date of first consumer purchase,
such as a duplicated copy of a sales receipt.
You must pay any initial shipping charges required to ship the product for
warranty service, but the return charges will be at Cobra’s expense, if the
product is repaired or replaced under warranty. This warranty gives you
specific legal rights, and you may also have other rights which may vary
from state to state.
Exclusions: This limited warranty does not apply:
1. To any product damaged by accident.
2. In the event of misuse or abuse of the product, or as a result
of unauthorized alterations or repairs.
3. If the serial number has been altered, defaced, or removed.
4. If the owner of the product resides outside the U.S.A.
All implied warranties, including warranties of merchantability and fitness for a
particular purpose are limited in duration to the length of this warranty. Cobra
shall not be liable for any incidental, consequential or other damages; including,
without limitation, damages resulting from loss of use or cost of installation.
Some states do not allow limitations on how long an implied warranty lasts and/or
do not allow the exclusion or limitation of incidental or consequential damages,
so the above limitations may not apply to you.
For Products Purchased Outside The U.S.A.
Please contact your local dealer for warranty information.
Trademark Acknowledgement •
Cobra®, CobraMarine®, Nothing Comes Close to a Cobra®, VibrAlert®and the snake
design are registered trademarks of Cobra Electronics Corporation, USA.
Cobra Electronics Corporation™ and Rewind-Say-Again™ are trademarks of Cobra
Electronics Corporation, USA.
Warranty and Trademark
MRHH425VP-Body-Eng.qxp:400_Body 10/26/06 1:38 PM Page 74

Introduction
75
Nothing Comes Close to a Cobra®
Product Service
Product Service •
If you have any questions about operation or installing your
new CobraMarine VHF/GMRS product or if you are missing
parts…
Please call Cobra first! DO NOT RETURN THIS PRODUCT TO THE STORE!
See customer assistance on page A1.
If your product should require factory service, please call Cobra first before
sending your radio. This will ensure the fastest turn-around time on your repair.
You may be asked to send your radio to the Cobra factory. It will be necessary to
furnish the following to have the product serviced and returned:
1. For warranty repair, include some form of proof-of-purchase, such as a
photocopy of a sales receipt. If you send the original receipt, it cannot be
returned.
2. Send the entire product.
3. Enclose a description of what is happening with the radio. Include a typed
or clearly printed name and address of where the radio is to be returned.
4. Pack radio securely to prevent damage in transit. If possible, use the
original packing material.
5. Ship prepaid and insured by way of a traceable carrier such as United Parcel
Service (UPS) or Priority Mail to avoid loss in transit to: Cobra Factory Service,
Cobra Electronics Corporation, 6500 West Cortland Street, Chicago, Illinois
60707 U.S.A.
6. If the radio is in warranty, upon receipt of your radio, it will either be repaired
or exchanged depending on the model. Please allow approximately three (3)
to four (4) weeks before contacting Cobra for status. If the radio is out of
warranty, a letter will automatically be sent informing you of the repair
charge or replacement charge.
7. If your radio is returned for factory repair, it will be returned to you with
default settings restored.
If you have any questions, please call 773-889-3087 for assistance.
Customer Service
MRHH425VP-Body-Eng.qxp:400_Body 10/26/06 1:38 PM Page 75
76 English
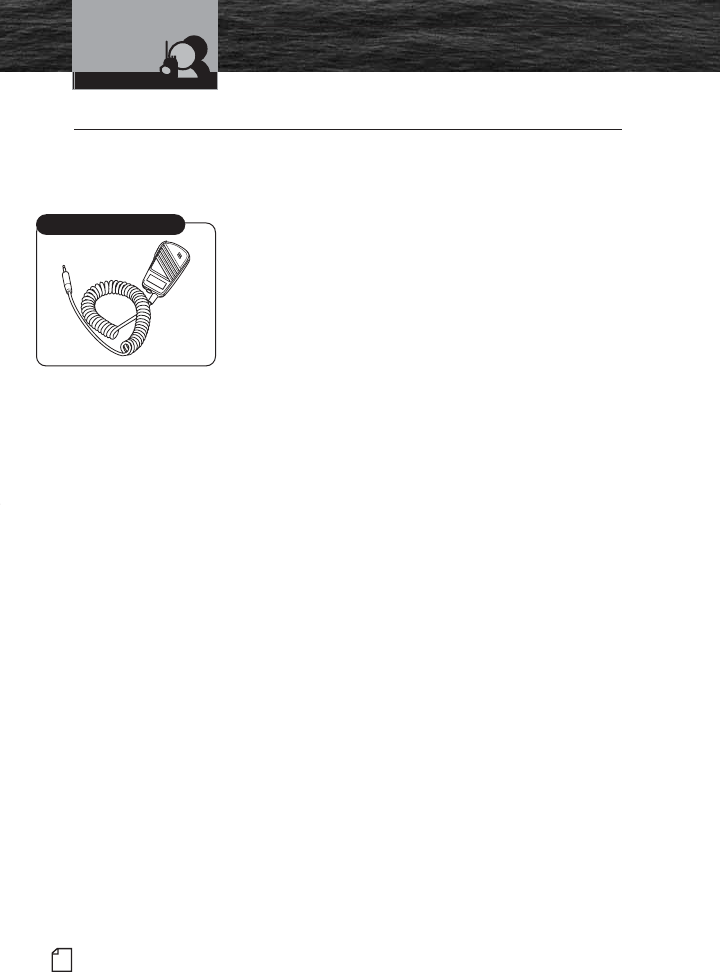
Introduction Accessories
Customer Service
Accessories •
Additional accessories for your Cobra radio can be purchased separately. Each
accessory will enhance the use of the radio and also offer convenience to the end
user.
Lapel Speaker Microphone
A speaker microphone, that attaches to your lapel, by
ordering P/N CM 330-001.
This unique accessory allows you to wear the radio while
still being able to communicate with other vessels. A
small Push to Talk button on the lapel speaker/
microphone allows you to answer any incoming call.
Lapel Speaker Microphone
MRHH425VP-Body-Eng.qxp:400_Body 10/26/06 1:38 PM Page 76