Cochlear CP81000 Wireless Hearing Aid User Manual 195992 Iss3 CP810 user guide 01 nu
Cochlear Limited Wireless Hearing Aid 195992 Iss3 CP810 user guide 01 nu
Cochlear >
Contents
- 1. User Manual 1
- 2. User Manual 2
- 3. User Manual 3
User Manual 1
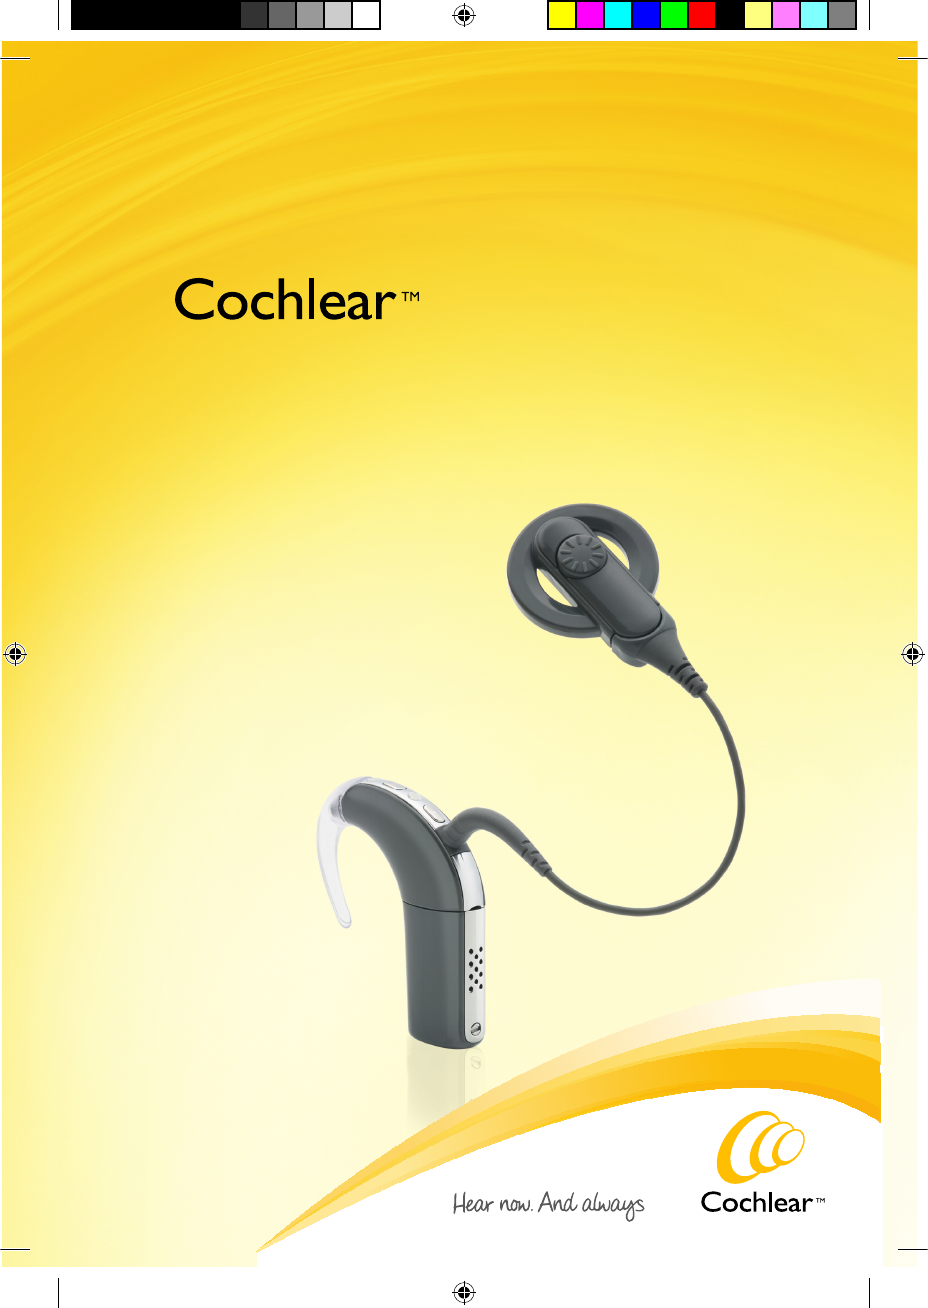
Nucleus® CP810 Sound Processor
User Guide
Front and back cover CP810 Iss3 01.indd 3 13/05/2009 4:56:21 PM

Note
Important information or advice. Can save
inconvenience.
Tip
Time saving hint or saves inconvenience.
Caution (no harm)
Special care to be taken to ensure safety
and effectiveness.
Could cause damage to equipment.
W arning (harmful)
Potential safety hazards and serious
adverse reactions.
Could cause harm to person.
Symbols
195992 Iss3 CP810 user guide 01.indd 2 13/05/2009 4:23:08 PM

Contents
Introduction ....................................................................................................... 7
Purpose of this guide ................................................................................. 7
The Cochlear
Nucleus CP810 Sound Processor .................................... 7
Getting to know your processor .................................................................... 9
Processing unit ............................................................................................ 9
Earhook .......................................................................................................10
Battery module .........................................................................................10
Coil and coil cable .....................................................................................11
Coil magnet ............................................................................................... 12
M icrophone protectors ........................................................................... 12
Processor options .................................................................................... 13
Wearing your processor ................................................................................ 15
Placing your processor on your ear ....................................................... 15
Attaching the coil and coil cable ........................................................... 16
Attaching the coil cable to the coil ................................................. 16
Attaching the coil to the processing unit....................................... 16
A secure and comfortable fi t ...................................................................17
Changing the earhook ............................................................................ 18
Adjusting and replacing the coil magnet ............................................. 18
Adjusting magnet depth .................................................................... 19
Changing magnet strength ............................................................... 19
Changing the coil cable ...........................................................................20
Using the Snugfi t™ for a secure fi t ........................................................22
Attaching and removing the Snugfi t ..............................................23
Changing the w ay you w ear your processor .......................................24
Locking and unlocking the battery module .......................................24
Locking and unlocking the tamper resistant battery cover..............25
Identifying your processors ....................................................................26
Detaching and attaching the battery module .........................................27
Detaching the battery module from the processing unit ................. 27
195992 Iss3 CP810 user guide 01.indd 3 13/05/2009 4:23:08 PM

Attaching the battery module to the processing unit ......................28
Using your processor......................................................................................29
Turning your processor on and off ........................................................29
Changing programs ..................................................................................29
Understanding indicator lights.............................................................. 30
Understanding private tones ..................................................................32
Using the telecoil ......................................................................................33
Using Auto Telecoil .............................................................................33
Using the telephone with your processor ............................................34
Changing loudness of sounds .................................................................34
Controlling microphone sensitivity .................................................35
Controlling microphone volume......................................................35
Locking and unlocking processor buttons ...........................................36
Advanced user interface ..........................................................................36
Checking the coil ......................................................................................37
Replacing and recharging batteries ............................................................39
Replacing disposable batteries ..............................................................39
Recharging the rechargeable battery module..................................... 41
Understanding battery charger indicator lights ...........................43
General warnings and precautions for handling batteries and the
battery charger..........................................................................................43
Batteries ...............................................................................................43
Battery charger ...................................................................................45
Using audio accessories with your processor ............................................47
Connecting and disconnecting audio accessories ..............................50
Changing from an audio accessory to microphones ..................52
Changing from microphones to audio accessory .........................52
General warnings and precautions for the use of
audio accessories ......................................................................................52
Using sound processor covers ......................................................................53
Attaching sound processor covers ........................................................53
195992 Iss3 CP810 user guide 01.indd 4 13/05/2009 4:23:08 PM

Removing sound processor covers ........................................................54
Caring for your processor ..............................................................................55
Wearing your processor in cold or hot temperatures .......................55
Protecting your processor from dust and water damage .................55
Drying your processor .............................................................................56
Cleaning your processor parts ...............................................................57
Replacing microphone protectors ........................................................58
Cleaning the battery charger .................................................................58
Storing your processor when not in use...............................................58
Using the Everyday Case .........................................................................59
General warnings and precautions for the use of your processor ..59
Disposal of electrical components ....................................................... 60
O ther information .......................................................................................... 61
Your warranty and registration form .................................................... 61
Storing your personal details ................................................................. 61
Processor serial number .................................................................... 61
Technical information .............................................................................. 61
Specifi cations ......................................................................................61
Certifi cation and applied standards ......................................................65
Equipment classifi cation .........................................................................65
IP rating of processor ...............................................................................65
FCC (Federal Communications Commission) and Canadian IC
compliance .................................................................................................65
Labelling symbols .................................................................................... 66
Legal statement ....................................................................................... 68
Glossary ............................................................................................................69
Index ..................................................................................................................75
195992 Iss3 CP810 user guide 01.indd 5 13/05/2009 4:23:08 PM

195992 Iss3 CP810 user guide 01.indd 6 13/05/2009 4:23:08 PM

Introduction
Purpose of this guide
This user guide is designed to help recipients, parents and carers
understand how to use and take care of the Cochlear™ Nucleus® CP810
Sound Processor. The guide provides step-by-step instructions for
wearing and using the processor. It also provides guidance on how to
take care of the processor.
It is important that you read and understand the warnings and
precautions information provided in this guide. The Important
Information Booklet included in the document pack you received with
your processor also contains important safety information about the
processor.
The CP810 and CR110 Troubleshooting Guide provided with your
documentation helps you identify and troubleshoot basic processor
problems.
The Cochlear
Nucleus CP810 Sound Processor
The Cochlear Nucleus CP810 Sound Processor is used together with a
cochlear implant to transfer sound to the cochlea, which is the inner ear.
The processor consists of a processing unit, earhook, coil, coil cable and
a battery module. The two buttons on the processing unit allow you to
control the functions of your processor.
You can also use the Cochlear™ Nucleus® CR110 Remote Assistant to
control the functions of your processor. It is an easy-to-use remote
control that allows you to communicate with up to two processors at
the same time. It also provides processor troubleshooting assistance.
For information on how to use the remote assistant with your processor,
refer to the Remote Assistant User Guide provided with your processor
documentation.
© Cochlear Limited 2009 CP810 Sound Processor User Guide - 7
195992 Iss3 CP810 user guide 01.indd 7 13/05/2009 4:23:08 PM

8 - CP810 Sound Processor User Guide © Cochlear Limited 2009
195992 Iss3 CP810 user guide 01.indd 8 13/05/2009 4:23:08 PM
Getting to know your processor
This section helps you familiarise yourself with your processor.
Processing unit
The processing unit, which is the brain of your processor, converts
sound signals for transfer to your implant.
Figure 2: Processing unit with earhook
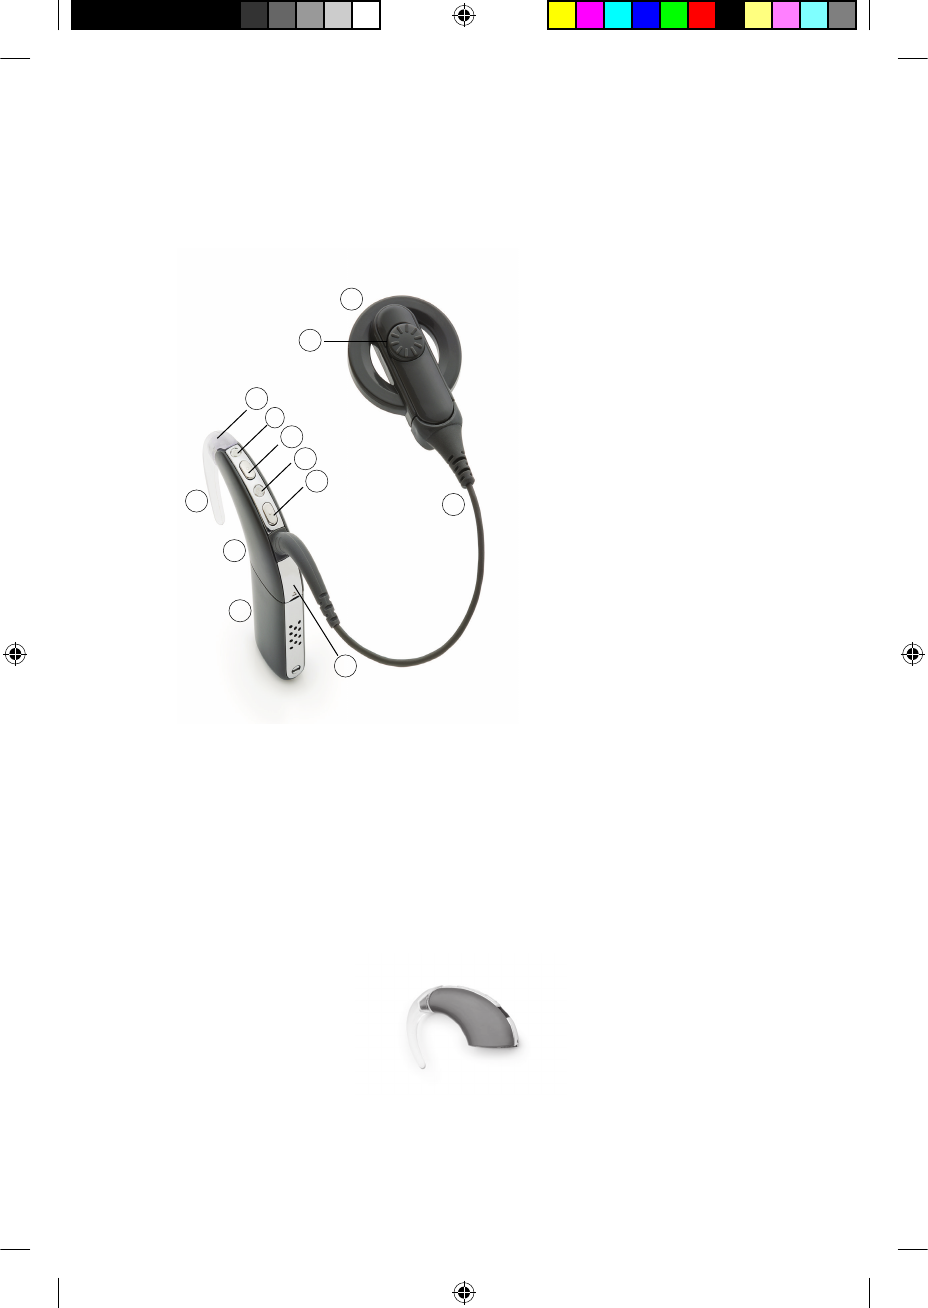
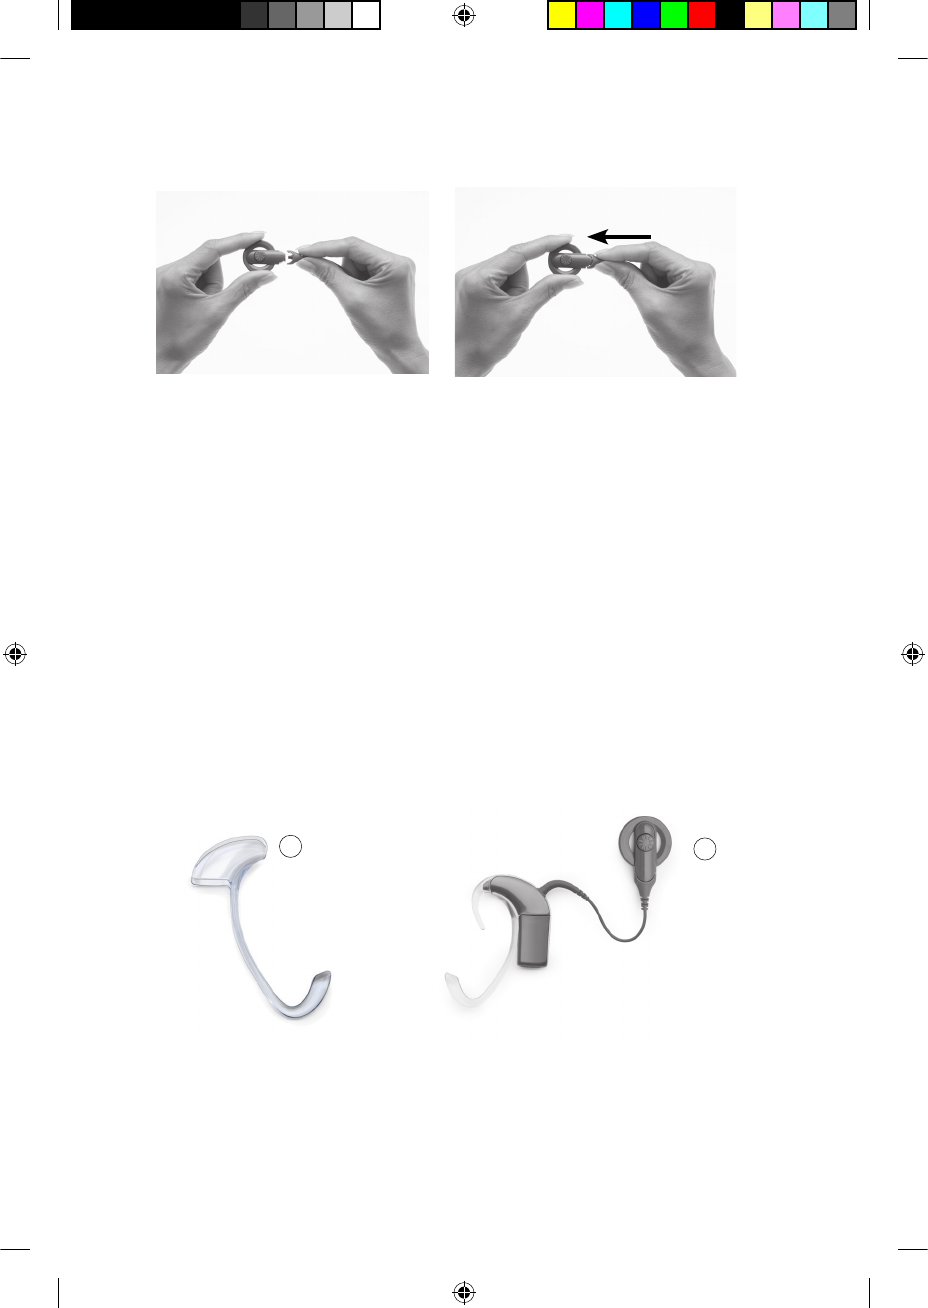
Figure 1: CP810 Sound Processor parts
Coil1.
Coil magnet2.
Coil cable3.
Lower button4.
Microphones5.
Upper button6.
Indicator light7.
Earhook8.
Processing unit9.
Battery module10.
Accessory 11.
socket cover
1
2
3
4
5
6
7
8
9
10
11
5
© Cochlear Limited 2009 CP810 Sound Processor User Guide - 9
195992 Iss3 CP810 user guide 01.indd 9 13/05/2009 4:23:08 PM
The processing unit allows you to perform the following functions:
Turn your processor on and off.•
Change your program (e.g. from Everyday to Noise).•
Turn the telecoil on and off.•
Lock and unlock processor buttons.•
You can change microphone volume and sensitivity using the remote
assistant. If your processor has an Advanced user interface, you can
also change volume or sensitivity using the processing unit. For more
information, see Advanced user interface.
The indicator light on the processing unit provides a visual indication
when you perform a function (e.g. when you change a program), or
when there is a problem with the processor (e.g. processor battery is
empty). For more information, see Understanding indicator lights.
Earhook
The earhook secures the processing unit in place on your ear. It is
attached to the processing unit and is available in a range of sizes. For
more information, see Changing the earhook.
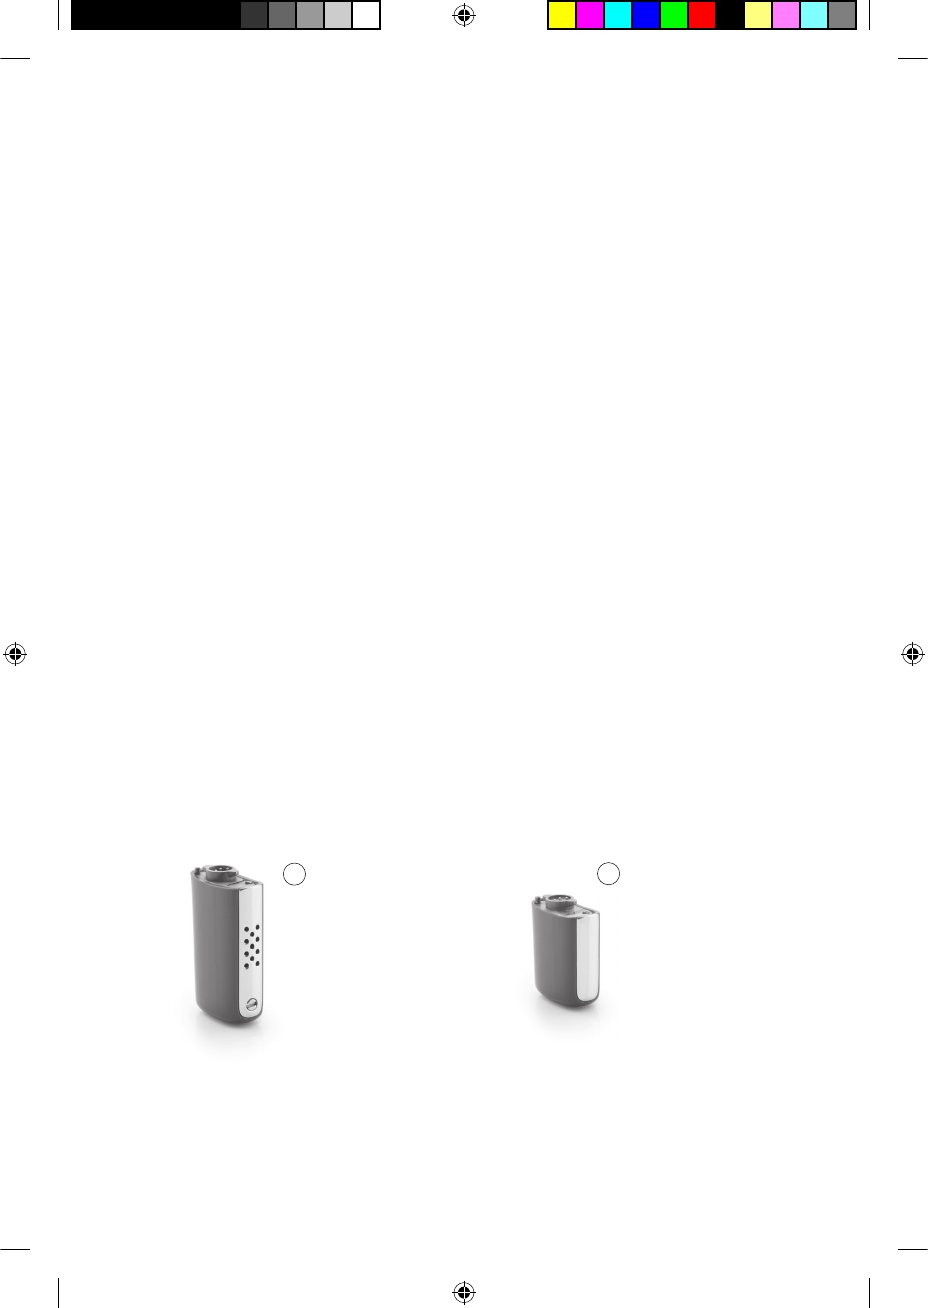
Battery module
You can use a Cochlear™ Nucleus® CP800 Series Standard Battery
Module, which uses two disposable batteries (P675 zinc air batteries), or
a Rechargeable Battery Module to power your processor.
Figure 3: Standard Battery Module (1) and Compact Rechargeable Battery Module (2)
12
10 - CP810 Sound Processor User Guide © Cochlear Limited 2009
Getting to know your processor
195992 Iss3 CP810 user guide 01.indd 10 13/05/2009 4:23:10 PM
The Standard Battery Module consists of a battery holder and a battery
cover.
Figure 4: Battery holder with zinc air batteries (1), tamper resistant battery cover (2)
and battery lock (3)
To prevent children from detaching the battery cover from the battery
holder, you can use the Cochlear™ Nucleus® CP800 Series Tamper
Resistant Battery Cover. You can also lock the standard battery module
or the rechargeable battery module to the processing unit.
Cochlear supplies a battery charger to recharge the rechargeable battery
module. For more information, see Replacing and recharging batteries.
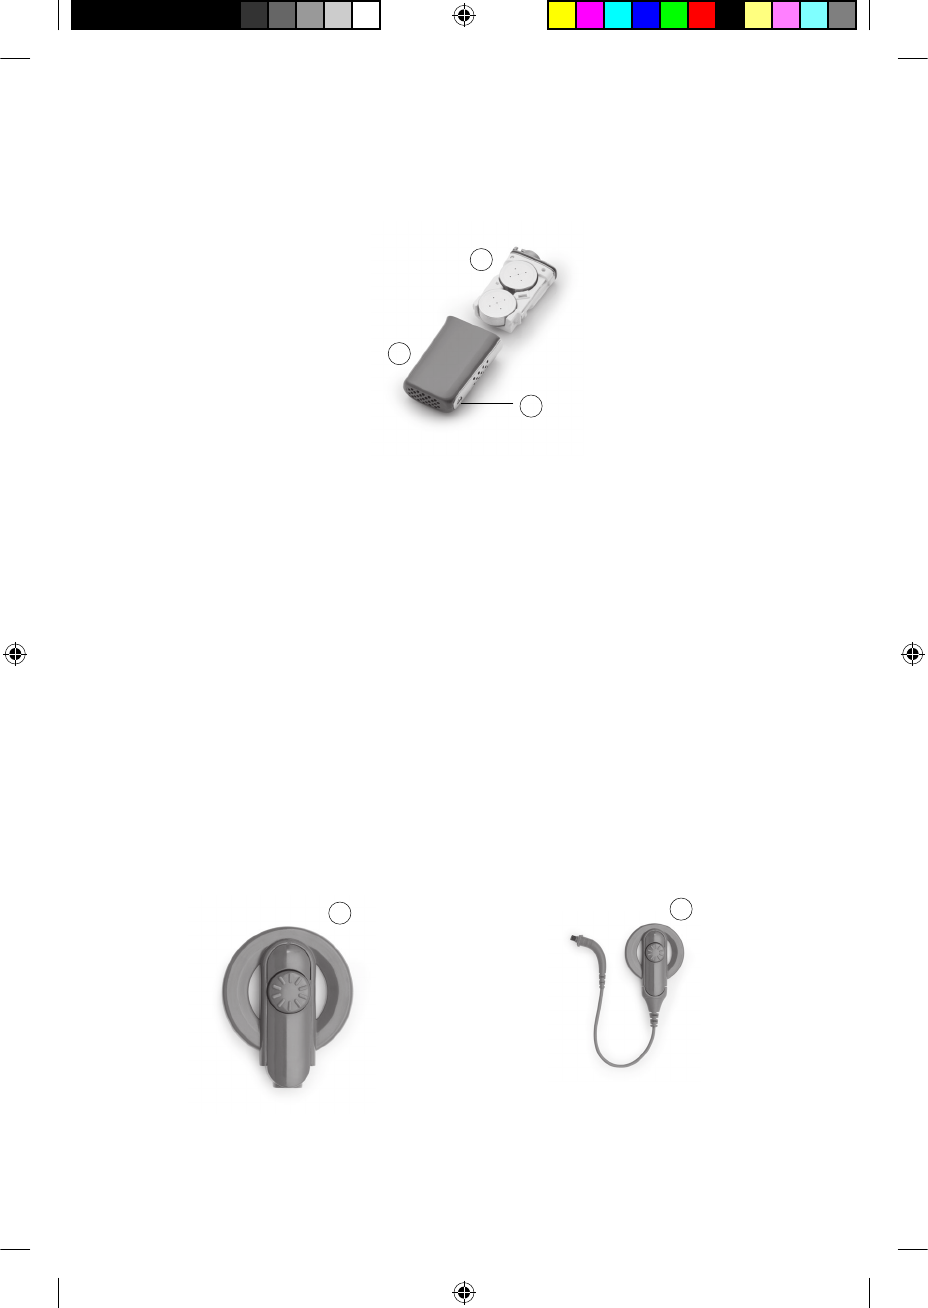
Coil and coil cable
The coil is a small round disk that you place over the implant. It
transfers electromagnetic signals from your processing unit to the
implant. The coil is attached to a removable coil cable, which plugs into
the processing unit. The coil and coil cable are available in a choice of
colours and lengths. For more information, see Changing the coil cable.
Figure 5: Coil only (1) and coil with cable (2)
2
1
3
1
2
© Cochlear Limited 2009 CP810 Sound Processor User Guide - 11
Getting to know your processor
195992 Iss3 CP810 user guide 01.indd 11 13/05/2009 4:23:13 PM
Coil magnet
A magnet holds the coil in place over your implant.
Figure 6: Coil magnet
If your coil falls off often, or if you experience discomfort, you can
change the depth of the magnet in the coil. You can also use a
stronger or weaker magnet. For more information, see Adjusting and
replacing the coil m agnet.
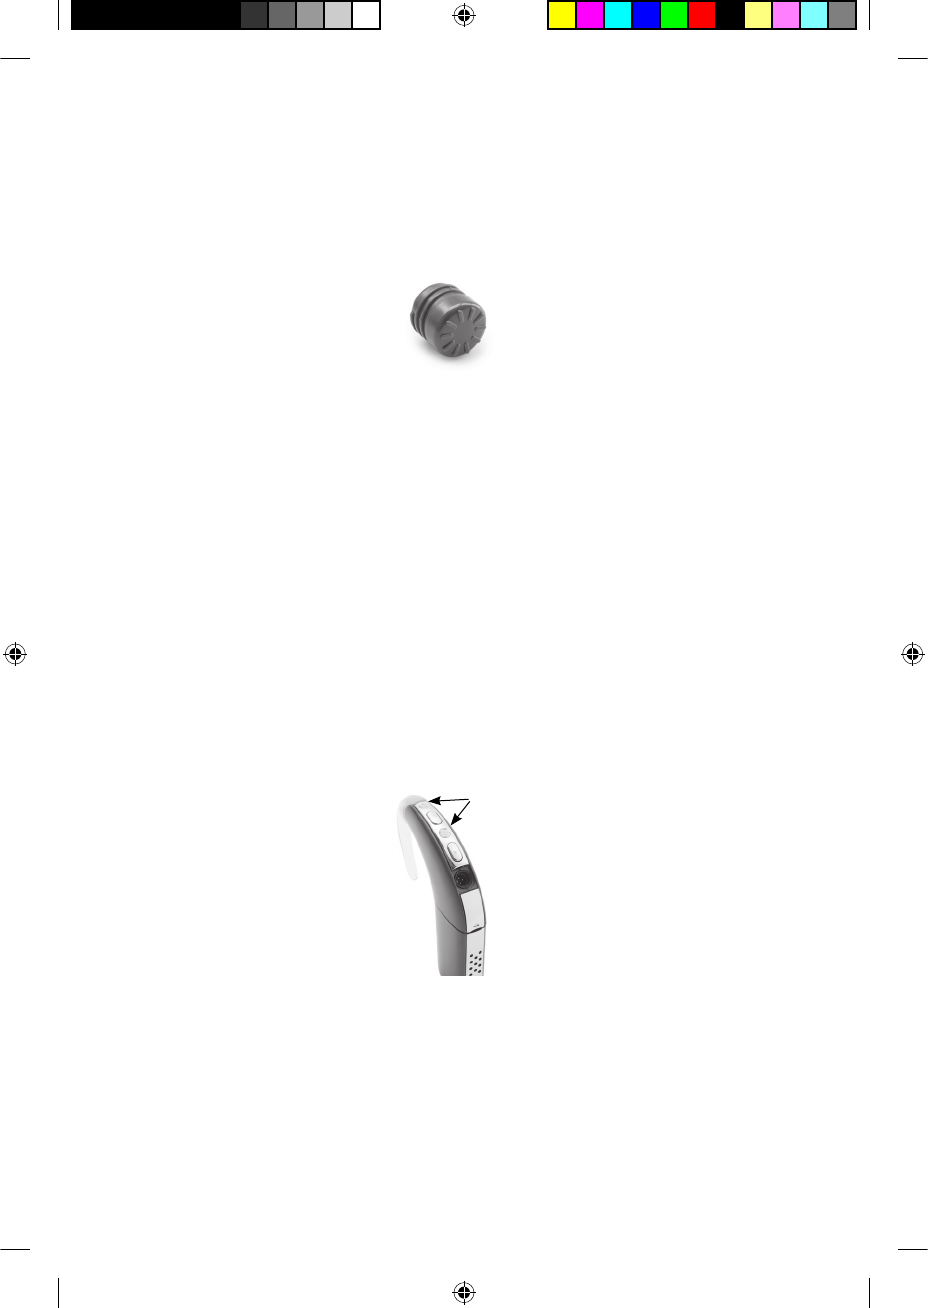
Microphone protectors
The processor microphones capture sound, which is processed by the
processing unit for transfer to the implant. Microphone protectors
are designed to protect the microphones from dirt and moisture. It
is important that you keep the microphone protectors in place at all
times, and replace them once a month.
Figure 7: Microphone protectors
12 - CP810 Sound Processor User Guide © Cochlear Limited 2009
Getting to know your processor
195992 Iss3 CP810 user guide 01.indd 12 13/05/2009 4:23:19 PM

Processor options
Depending on your listening needs, your clinician can enable the
following options on your processor:
• SmartSound™ technologies to improve your hearing. SmartSound
is a suite of four input sound processing technologies. These
technologies are applied to four available programs: Everyday,
Noise, Focus and Music. For more information on these programs,
see Changing programs.
Indicator light fl ashes that you see when you perform a function, •
or when there is a processor problem. For more information, see
Understanding indicator lights.
Private tones that you hear when you perform a function, or when •
there is a processor problem. A private tone can be heard only by
you. For more information, see Understanding private tones.
Microphone sensitivity or volume that you can change (with •
Advanced user interface only). For more information, see Changing
loudness of sounds.
Telecoil/microphones and accessory/microphones mixing ratios •
that you can change using the remote assistant. For more
information, refer to the Remote Assistant User Guide.
Your processor has been programmed for use with your implant only. It
is important that you only use your own processor and never swap your
processor with another person’s processor. If you have two implants,
correctly match your processor to the correct implant.
Components described in this user guide may not be available in
all countries. Please contact your clinician for more information.
© Cochlear Limited 2009 CP810 Sound Processor User Guide - 13
Getting to know your processor
195992 Iss3 CP810 user guide 01.indd 13 13/05/2009 4:23:22 PM

14 - CP810 Sound Processor User Guide © Cochlear Limited 2009
195992 Iss3 CP810 user guide 01.indd 14 13/05/2009 4:23:22 PM

Wearing your processor
Your processor is designed to fi t neatly and comfortably behind your ear.
You can also wear the processing unit behind the ear and attach the
battery module to the body. This provides greater comfort and fl exibility
for both adults and children.
You can change the processor coil cable, coil magnet and earhook for
optimal comfort (e.g. if the coil cable length is too short, you can easily
change the cable to a longer one).
This section describes how to wear your processor and wearing options.
Placing your processor on your ear
To be able to hear sound from the processor, it needs to be placed on
the ear.
To place your processor on your ear:
Place the processing unit over your ear while holding the coil in the 1.
other hand.
Place the coil on your head. The coil magnet should hold it in place 2.
over your implant.
You may fi nd it easier to turn on your processor before placing it on
your ear. To turn it on, press and hold the lower button for at least one
second until you see short fl ashes of green. The number of fl ashes you
see corresponds to the number of your current program (e.g. if your
current program is program 2, you see two green fl ashes).
When you turn on your processor before placing it on your ear, you may
see fl ashes of orange. This indicates that the coil is not placed on your
head. If the fl ashes do not stop even after placing the coil on your head,
see Understanding indicator lights for more information.
© Cochlear Limited 2009 CP810 Sound Processor User Guide - 15
195992 Iss3 CP810 user guide 01.indd 15 13/05/2009 4:23:22 PM
Attaching the coil and coil cable
If the coil is not attached to the processing unit, or the coil cable is
not attached to the coil, you need to attach them before placing the
processor on your ear.
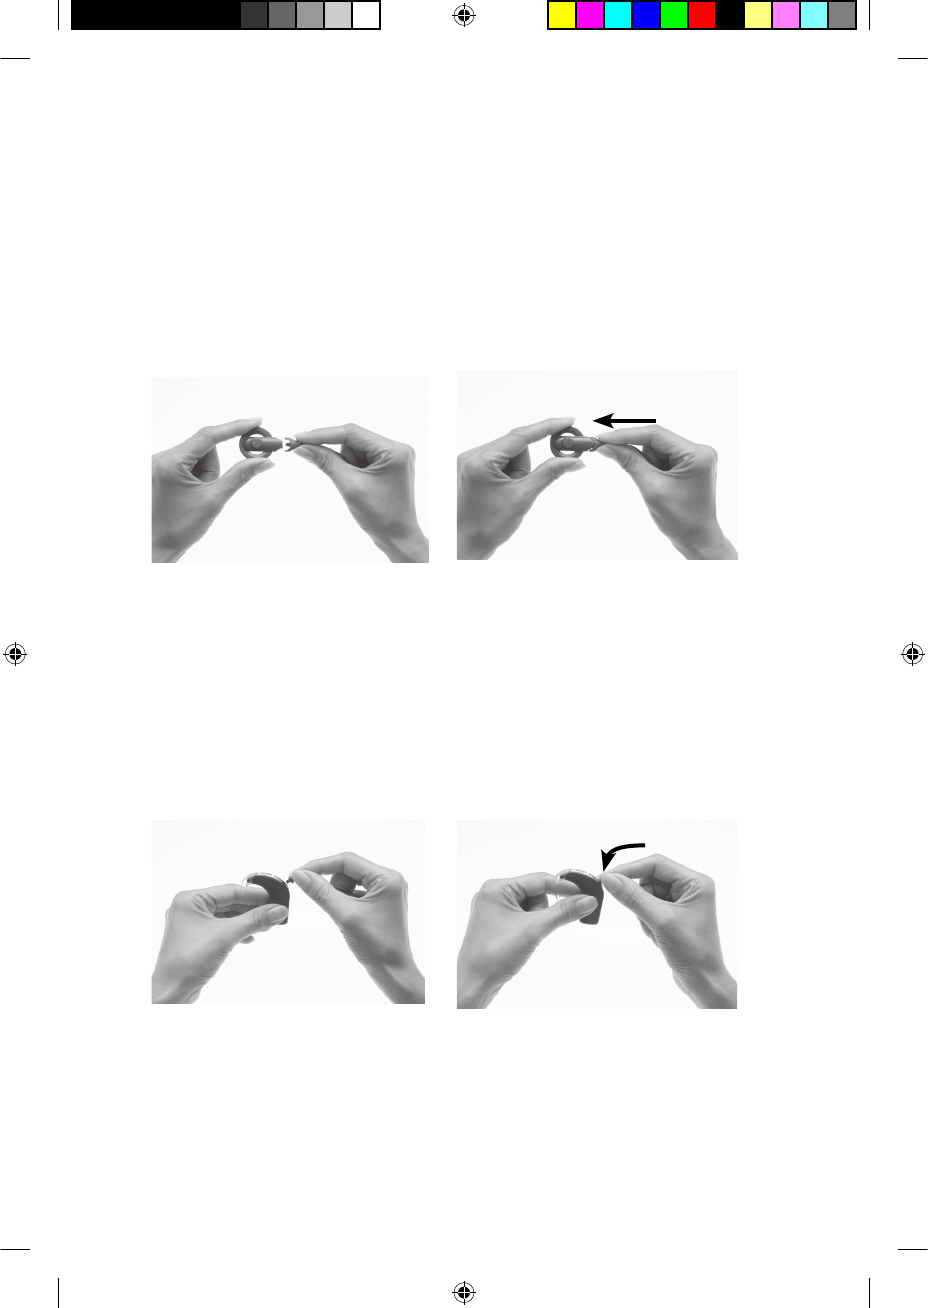
Attaching the coil cable to the coil
To attach the coil cable to the coil:
H old the coil in one hand 1.
and the coil cable plug in the
other hand as shown.
Align the coil end of the coil 2.
cable plug with the coil.
Push the coil cable plug 3.
fi rmly into the coil until it
clicks into place.
Attaching the coil to the processing unit
To attach the coil to the processing unit:
Align the coil cable plug with 1.
the coil cable socket on the
processing unit.
Push the coil cable plug 2.
fi rmly into the socket until it
clicks into place.
16 - CP810 Sound Processor User Guide © Cochlear Limited 2009
Wearing your processor
195992 Iss3 CP810 user guide 01.indd 16 13/05/2009 4:23:22 PM

The coil functions properly only when the coil cable is fully inserted
into the processing unit. To check if the coil is receiving sound signals
from the processor, you can use the in-built coil sensor on the remote
assistant. For more information on how to use the coil sensor, see
Checking the coil.
If you attach the coil to the processing unit when your processor
is turned on, your processor may turn off. If this occurs, turn your
processor back on.
A secure and comfortable fi t
For a more secure or comfortable fi t, you may want to:
Change the earhook size.•
Adjust the coil magnet strength.•
Change the coil magnet.•
Change the coil cable.•
Use the Snugfi t• ™.
Use the LiteWear cable, which allows the battery module to be •
attached to the body.
Read the following sections for more details.
© Cochlear Limited 2009 CP810 Sound Processor User Guide - 17
Wearing your processor
195992 Iss3 CP810 user guide 01.indd 17 13/05/2009 4:23:34 PM
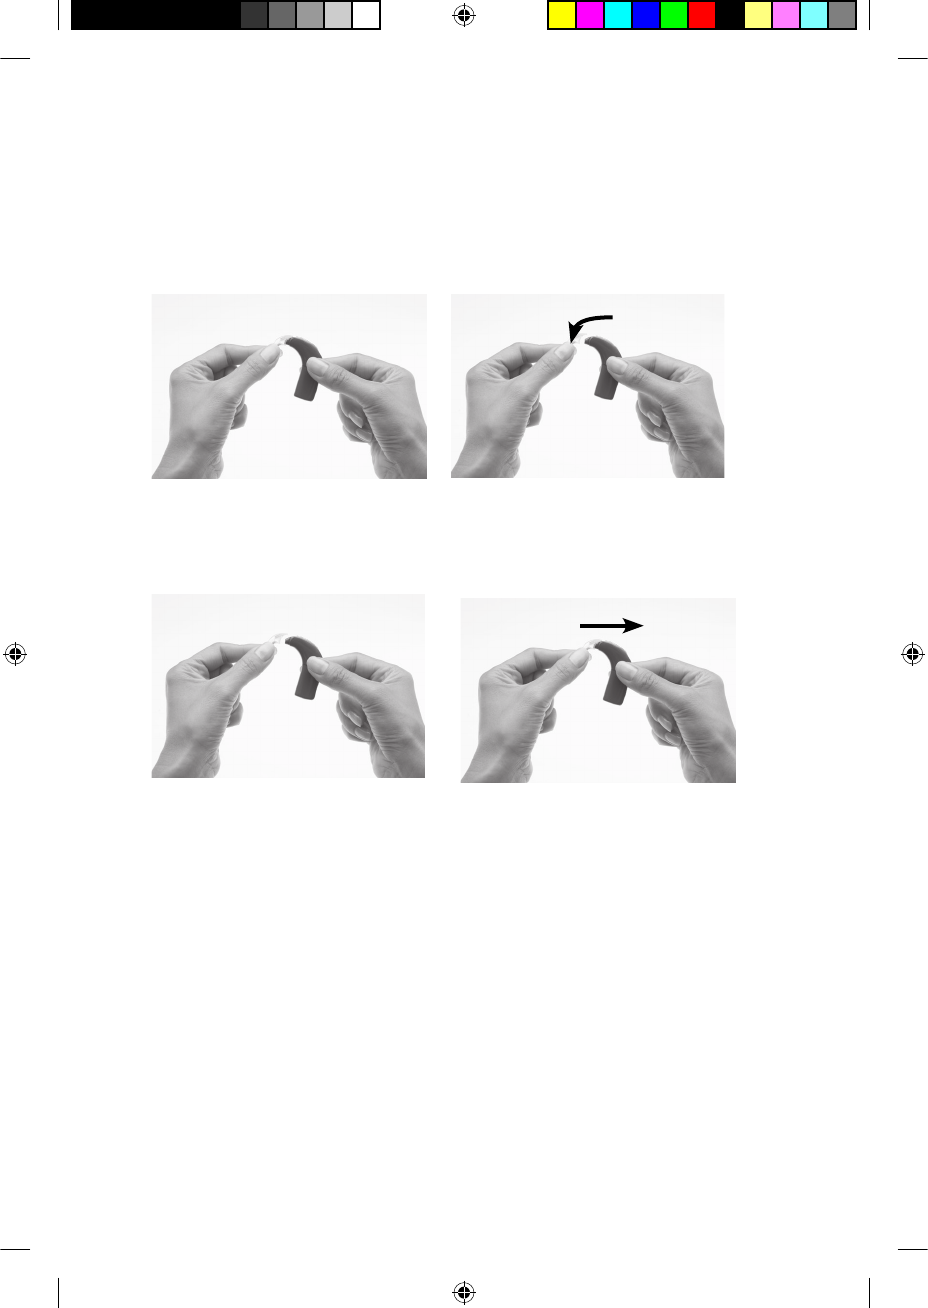
Changing the earhook
Earhooks are available in different sizes. If your earhook becomes loose,
you should replace it.
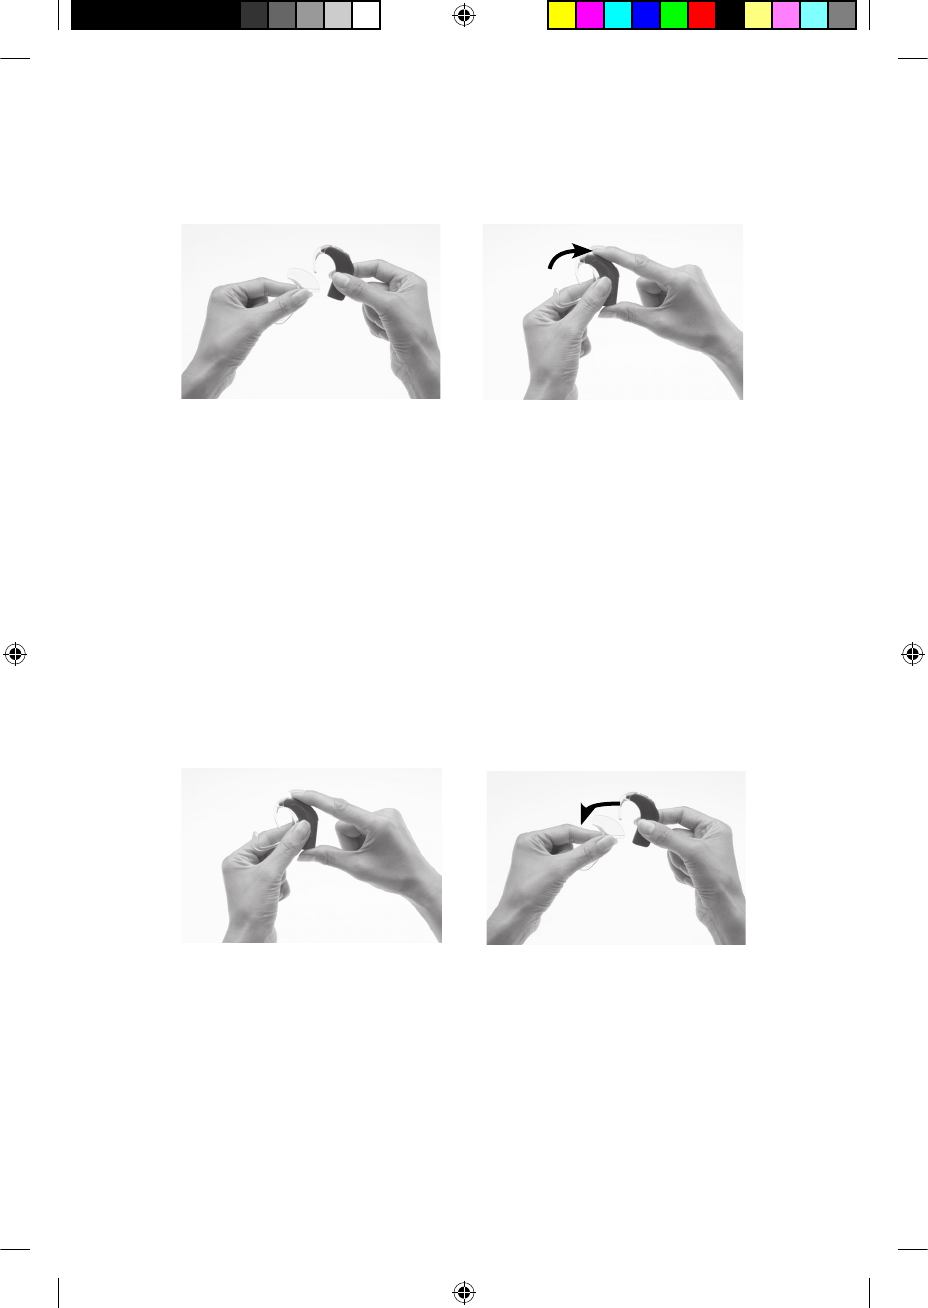
To change the earhook:
Hold your processor and 1.
the earhook as shown.
Rotate the earhook to pull 2.
it away from the processing
unit.
•
Hold the new earhook 3.
in one hand and your
processor in the other hand
as shown.
Attach the earhook by 4.
pushing the lower end of the
earhook onto the processing
unit.
Avoid twisting the earhook as it may become loose.
Adjusting and replacing the coil magnet
If the magnet strength is too weak, the coil may fall off. If it is too
strong, it may cause discomfort or skin irritation. You may consult your
clinician if you are unsure about correct magnet strength.
Make sure the coil is positioned correctly against the implant by placing
it where the coil magnet “pull” feels the strongest. You can change how
fi rmly the magnet sits on your head by adjusting its depth in the coil.
18 - CP810 Sound Processor User Guide © Cochlear Limited 2009
Wearing your processor
195992 Iss3 CP810 user guide 01.indd 18 13/05/2009 4:23:34 PM
If adjusting the depth of the magnet is not suffi cient, you can replace
the magnet with a stronger or weaker magnet.
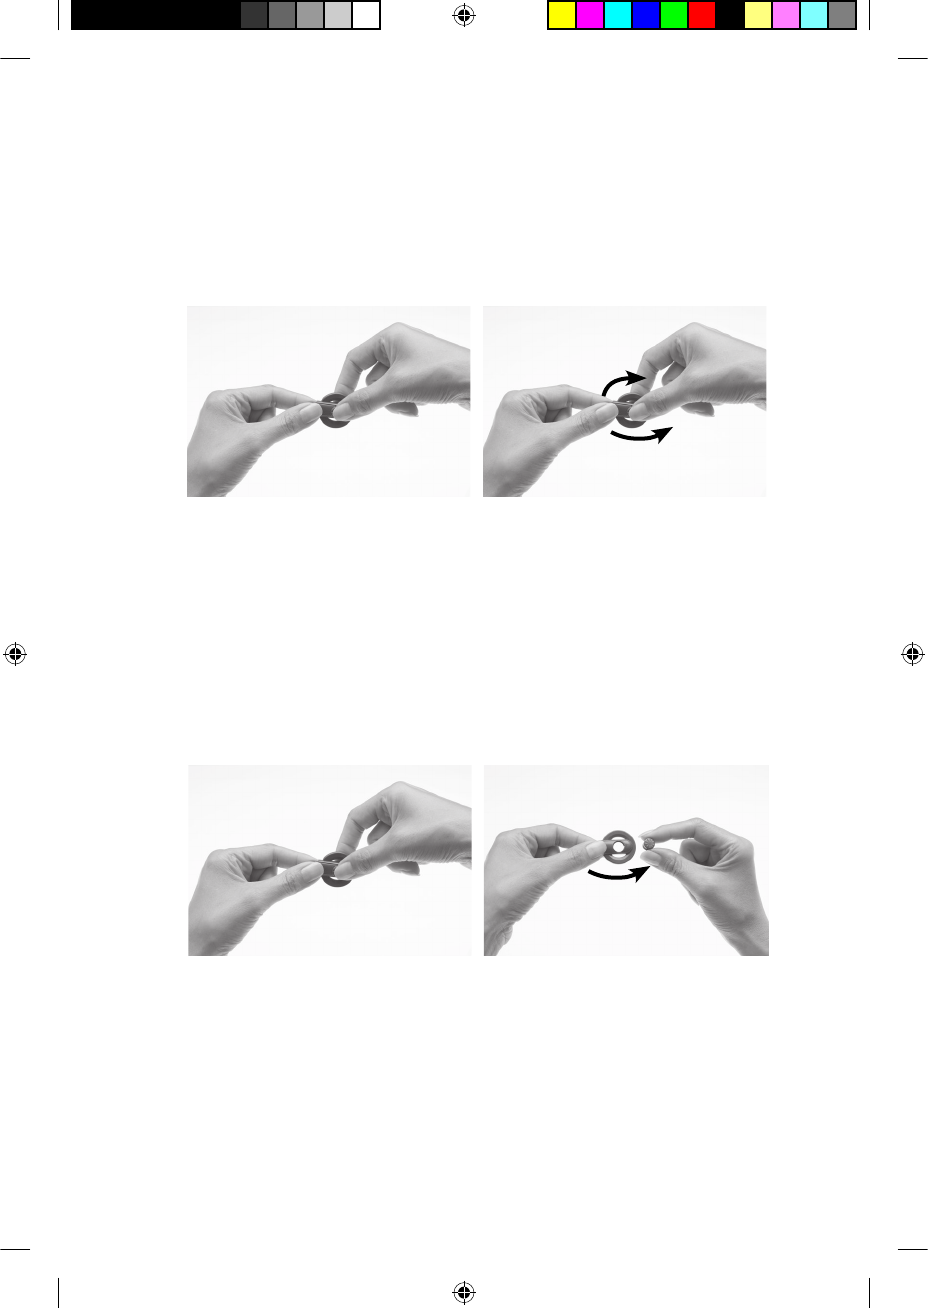
Adjusting magnet depth
To adjust magnet depth:
Place the thumb and index 1.
fi nger on the magnet as
shown.
Turn the magnet in a 2.
clockwise direction to
increase magnet strength,
or in an anti-clockwise
direction to reduce
strength.
Changing magnet strength
To change the magnet to a stronger or weaker one:
Place the thumb on the top 1.
of the magnet and index
fi nger on the underside of
the magnet as shown.
Turn the magnet in an anti-2.
clockwise direction until
you remove it from the
topside of the coil.
© Cochlear Limited 2009 CP810 Sound Processor User Guide - 19
Wearing your processor
195992 Iss3 CP810 user guide 01.indd 19 13/05/2009 4:23:40 PM
Hold the new magnet 3.
between the thumb and
index fi nger as shown.
Hold the coil in the other 4.
hand.
Insert the magnet gently 5.
into the magnet slot on the
topside of the coil. The side
with the star should face
upwards. The magnet fi ts
easily.
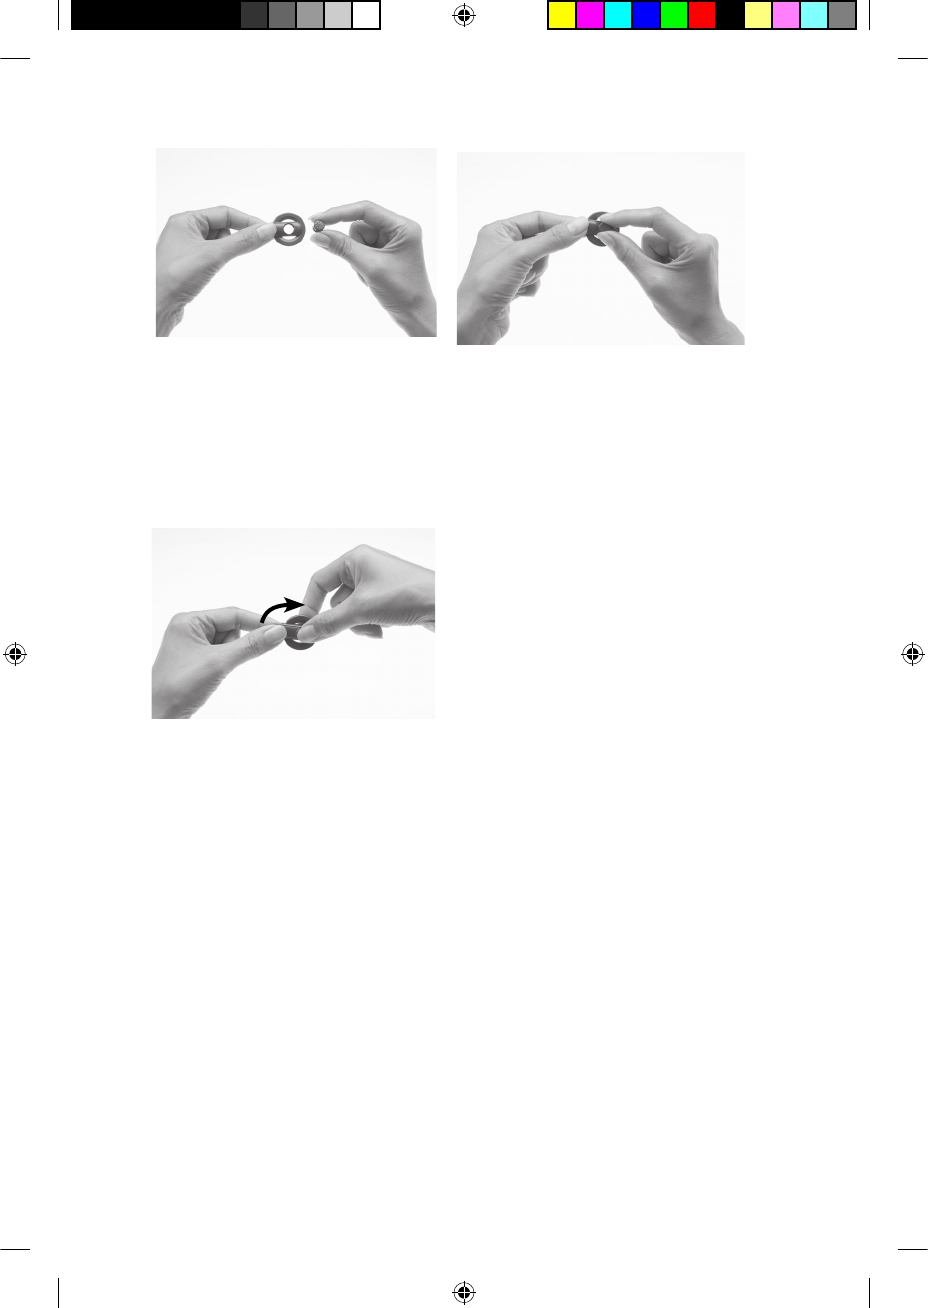
Turn the magnet in a clockwise direction until it is in position. 6.
Do not overtighten the magnet, or force it to turn if it becomes diffi cult
to turn during insertion or removal. The movement should be smooth
and turning should need only a small amount of force. If turning
becomes diffi cult, check that:
The magnet is correctly aligned in the coil.•
You are turning the magnet in the correct direction.•
Changing the coil cable
If you fi nd that the coil cable is too long or short for your comfort, you
can change the coil cable. Regularly check to see if the coil cable is
damaged. If damaged, you will need a new coil cable.
20 - CP810 Sound Processor User Guide © Cochlear Limited 2009
Wearing your processor
195992 Iss3 CP810 user guide 01.indd 20 13/05/2009 4:23:46 PM
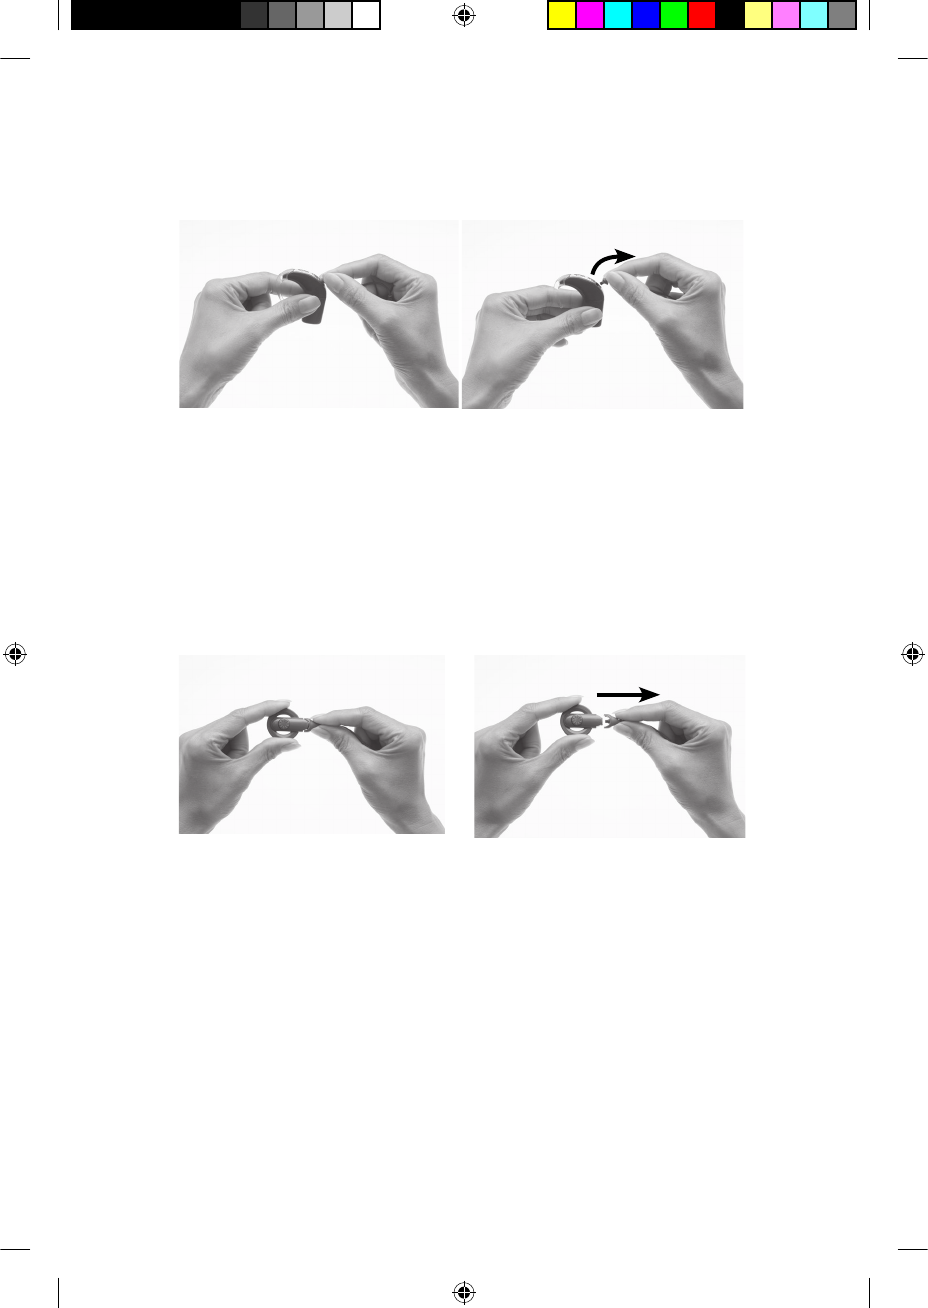
To change the coil cable to a longer or shorter one, do the following:
Remove the coil cable from the processing unit as shown.
Place the thumb and index 1.
fi nger over the fi nger grips
on the processor end
of the coil cable plug as
shown.
Gently pull the coil cable 2.
plug away from the
processor.
You may damage the coil cable, coil cable plug or the processing unit if
you pull on the cable, or twist the cable plug.
Remove the coil cable from the coil as shown.
Hold the coil fi rmly in one 1.
hand as shown.
Place the thumb and index 2.
fi nger of the other hand
over the fi nger grips on the
coil end of the coil cable
plug.
Firmly pull the coil cable 3.
away from the coil.
© Cochlear Limited 2009 CP810 Sound Processor User Guide - 21
Wearing your processor
195992 Iss3 CP810 user guide 01.indd 21 13/05/2009 4:23:50 PM
Attach the new coil cable to the coil as shown.
Hold the coil in one hand 1.
and the coil cable plug in
the other hand as shown.
Align the coil end of the coil 2.
cable plug with the coil.
Push the coil cable plug 3.
fi rmly into the coil until it
clicks into place.
Using the Snugfi t™ for a secure fi t
The Cochlear™ Nucleus® CP800 Series Snugfi t™ helps hold the
processing unit in place more securely than using the earhook alone.
The Snugfi t is available in a choice of different sizes to fi t differently
sized ears. It is easily adjustable, comfortable and robust enough to
withstand an active lifestyle.
You can use the Snugfi t with the Cochlear™ Nucleus® CP800 Series
LiteWear option to provide an even more comfortable and secure fi t.
The LiteWear option allows you to attach the battery module to your
body.
Figure 8: Snugfi t (1) and Snugfi t attached to processor (2)
2
1
22 - CP810 Sound Processor User Guide © Cochlear Limited 2009
Wearing your processor
195992 Iss3 CP810 user guide 01.indd 22 13/05/2009 4:23:58 PM
Attaching and removing the Snugfi t
To attach the Snugfi t to the processor:
Hold your processor in one 1.
hand as shown.
Hold the Snugfi t between 2.
the thumb and index
fi nger of the other hand
and gently squeeze on the
wings. This helps fi t the
Snugfi t more securely on
the processor.
Gently slide the Snugfi t 3.
upwards until the base of
the Snugfi t is aligned with
the base of the processing
unit.
You can further adjust the shape of the Snugfi t by gently bending the
lower part of the bottom hook into the shape you want.
To remove the Snugfi t from the processor:
Hold your processor and the 1.
Snugfi t as shown.
Remove the Snugfi t by 2.
gently pulling it downwards.
© Cochlear Limited 2009 CP810 Sound Processor User Guide - 23
Wearing your processor
195992 Iss3 CP810 user guide 01.indd 23 13/05/2009 4:24:08 PM
Changing the way you wear your processor
The Cochlear Nucleus CP800 Series LiteWear option provides greater
comfort and fl exibility in the way children and adults wear the
processor. It allows the battery module to be attached to the body. The
processing unit is worn behind the ear and is connected to the battery
module by the Cochlear™ Nucleus® CP800 Series LiteWear Cable.
You cannot use the LiteWear cable with the Compact Rechargeable
Battery Module.
You can use the Cochlear™ Nucleus® CP800 Series LiteWear Case to
protect and hold the battery module securely. Cochlear™ Nucleus®
CP800 Series LiteWear Fixing Aids allow you to attach the LiteWear
case to your clothing. You can also use the Snugfi t with the LiteWear
option.
You can lock the LiteWear cable to the processing unit and battery
module. This prevents children from removing the battery module from
the processing unit.
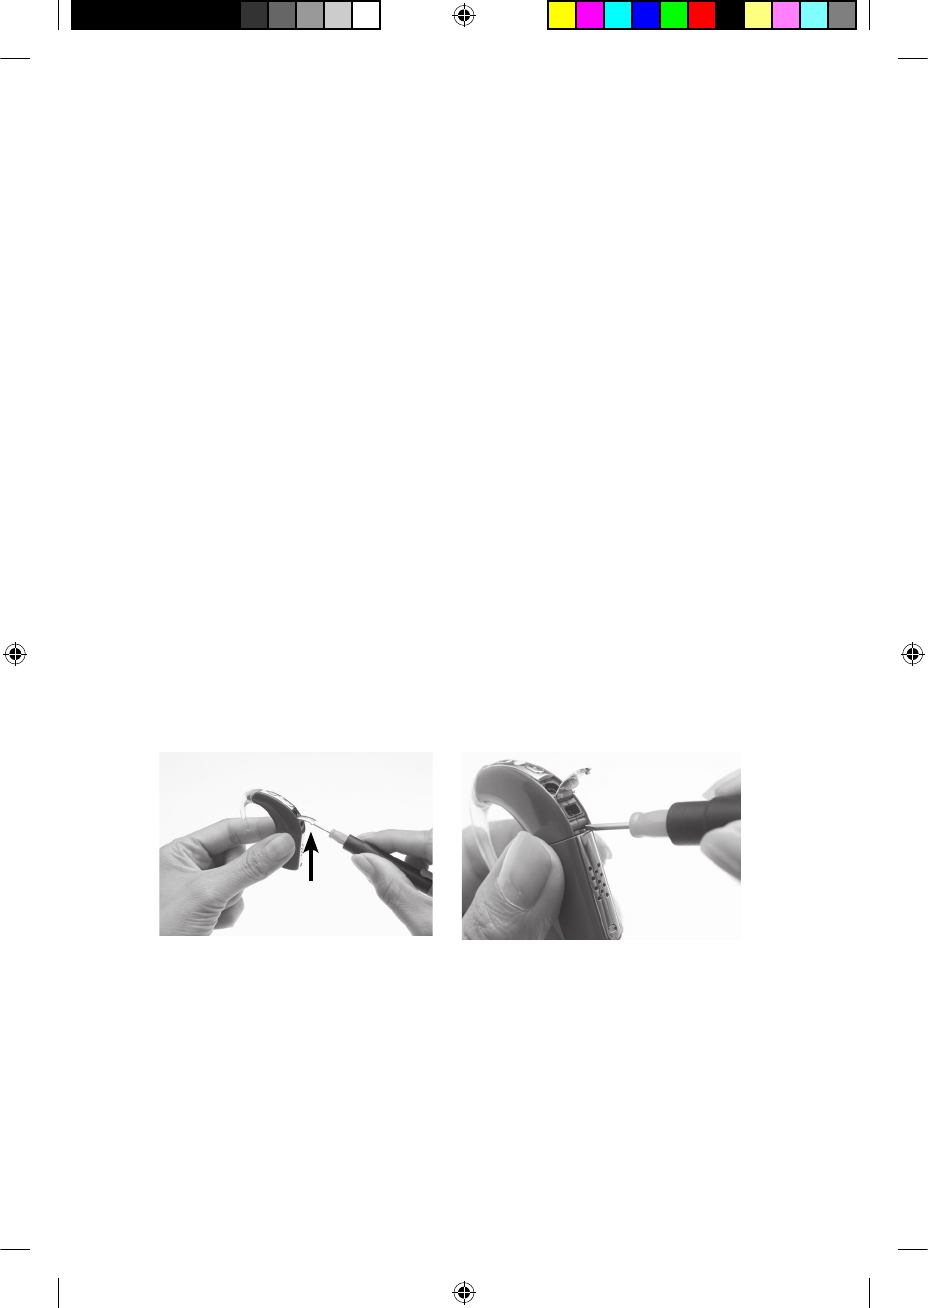
Locking and unlocking the battery module
To prevent children from removing the battery module from the
processing unit, you can lock the battery module to the processing unit.
To lock the battery module to the processing unit:
Lift the accessory socket 1.
cover of the processor to
reveal the lock. It is located
below the accessory socket.
Using a pair of tweezers 2.
or a screwdriver, push the
latch to your left to lock the
battery module.
To unlock, push the latch to your right.
24 - CP810 Sound Processor User Guide © Cochlear Limited 2009
Wearing your processor
195992 Iss3 CP810 user guide 01.indd 24 13/05/2009 4:24:13 PM
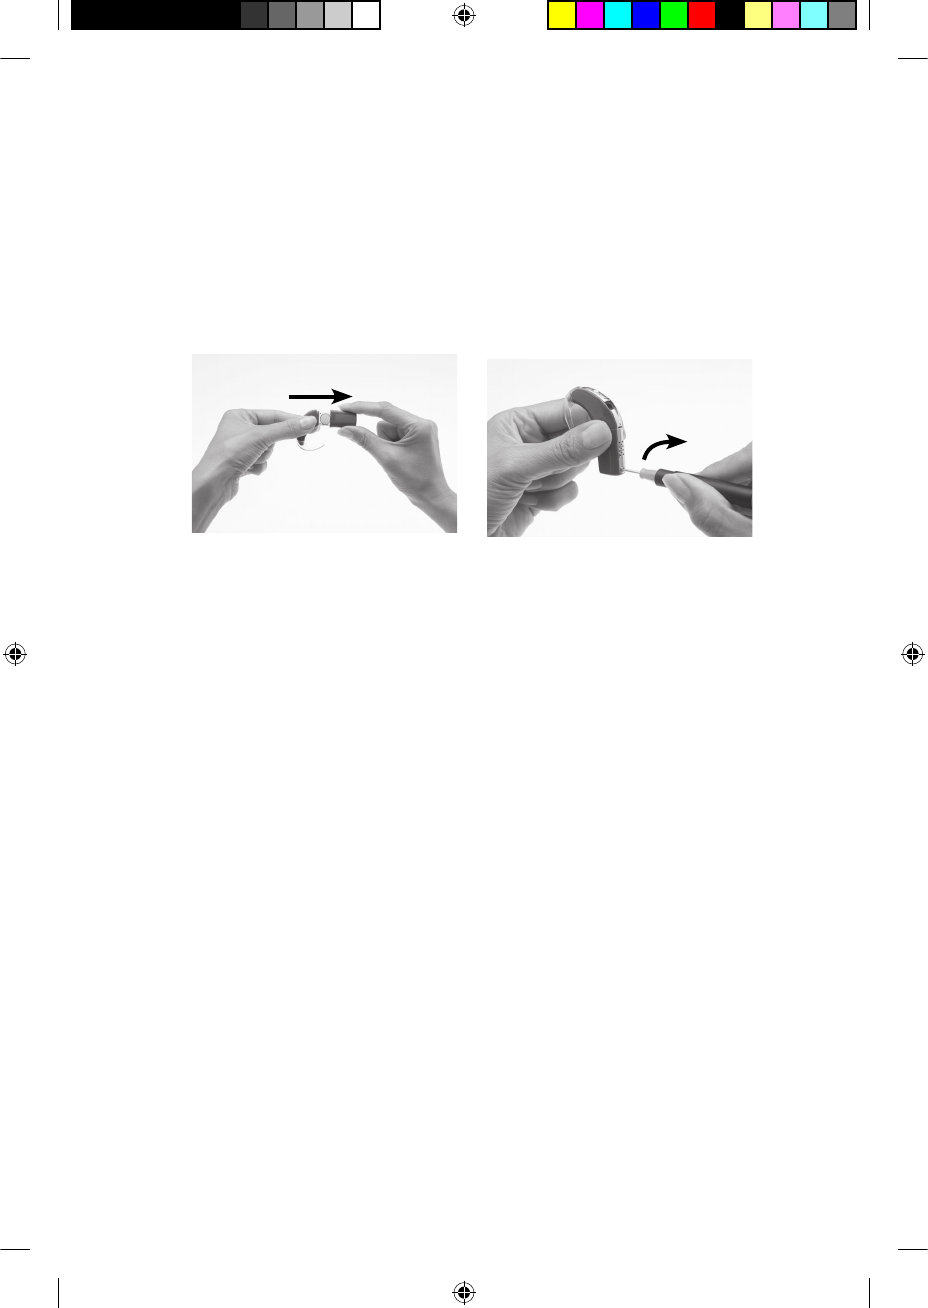
Locking and unlocking the tamper resistant
battery cover
To prevent children from removing the battery holder from the battery
cover, you can lock the tamper resistant battery cover of the Standard
Battery Module to the battery holder.
To lock the tamper resistant battery cover:
Insert the battery holder 1.
into the battery cover as
shown.
Using a screwdriver, 2.
gently rotate the lock in a
clockwise direction until it is
positioned horizontally.
To unlock, gently rotate the lock in an anti-clockwise direction until it is
positioned vertically.
Do not overturn the lock as it could damage the lock.
© Cochlear Limited 2009 CP810 Sound Processor User Guide - 25
Wearing your processor
195992 Iss3 CP810 user guide 01.indd 25 13/05/2009 4:24:18 PM