Comtrend 5374 Multi DSL Wireless Router User Manual UM CT 5374 A2 0
Comtrend Corporation Multi DSL Wireless Router UM CT 5374 A2 0
Comtrend >
Contents
- 1. Users Manual 1 of 3
- 2. User manual 2 of 3
- 3. User manual 3 of 3
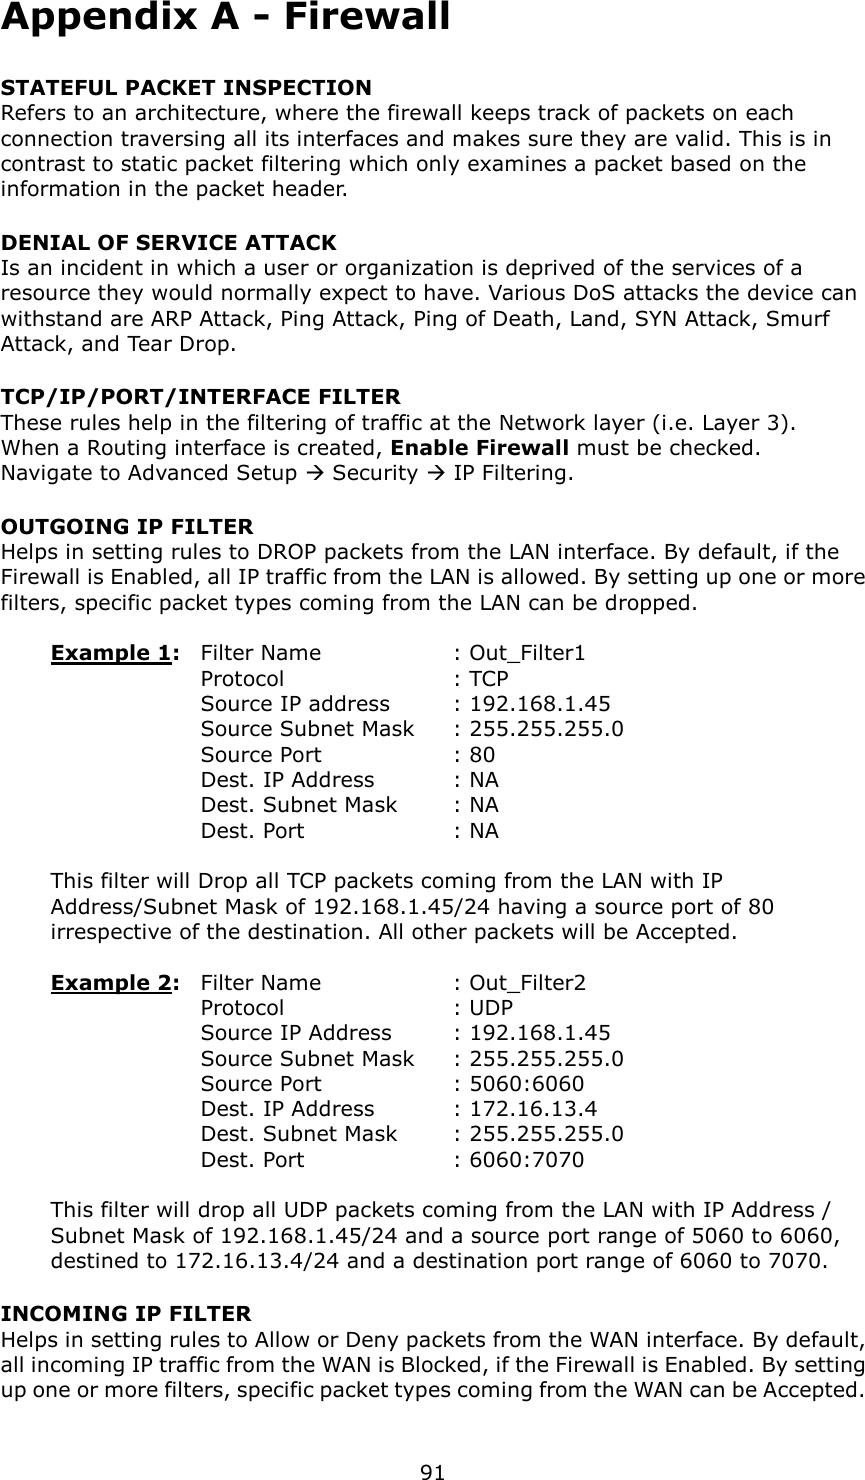
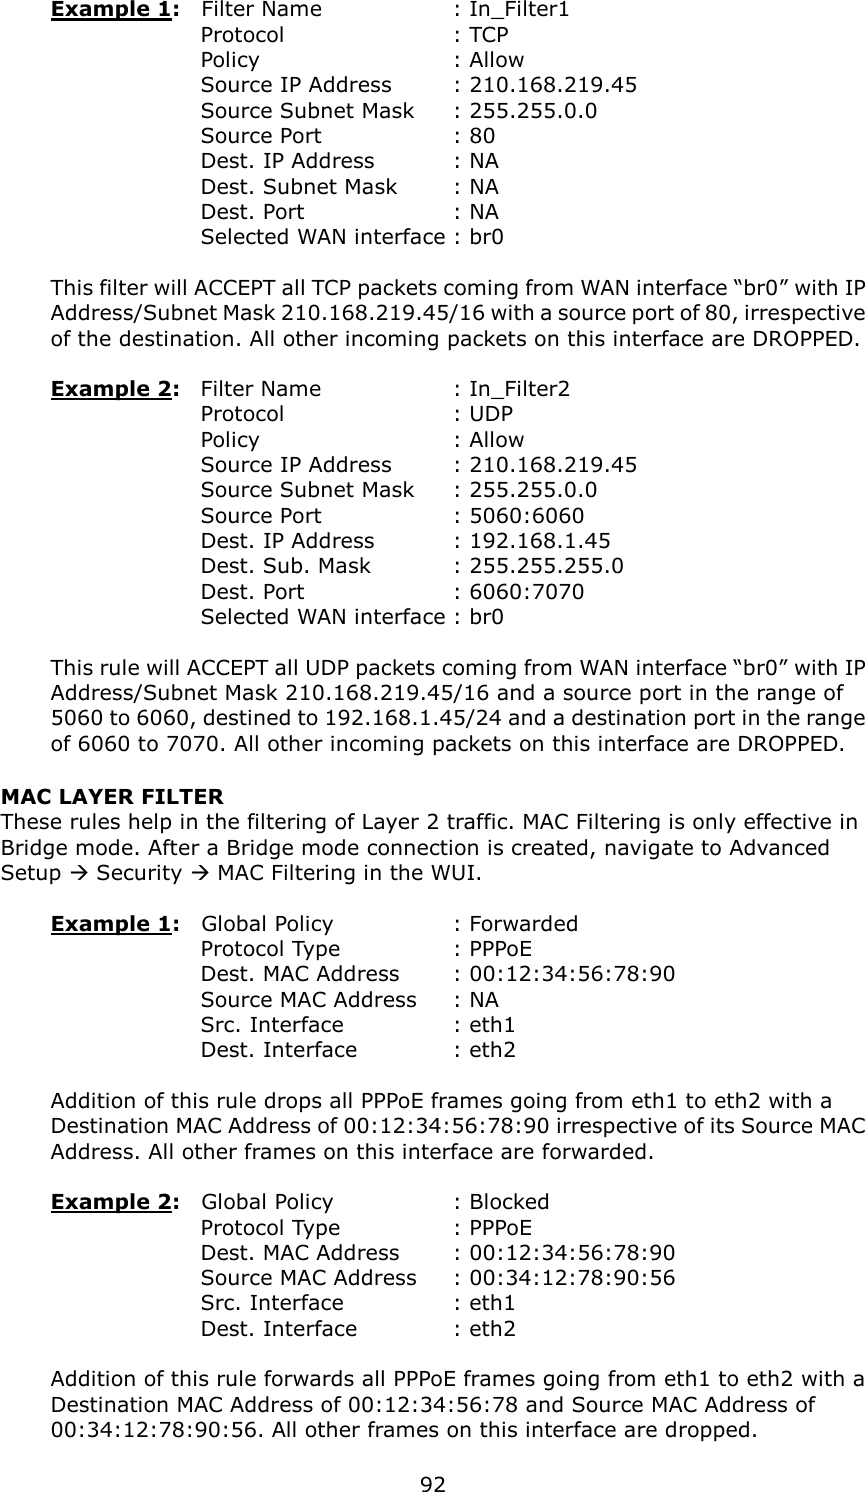
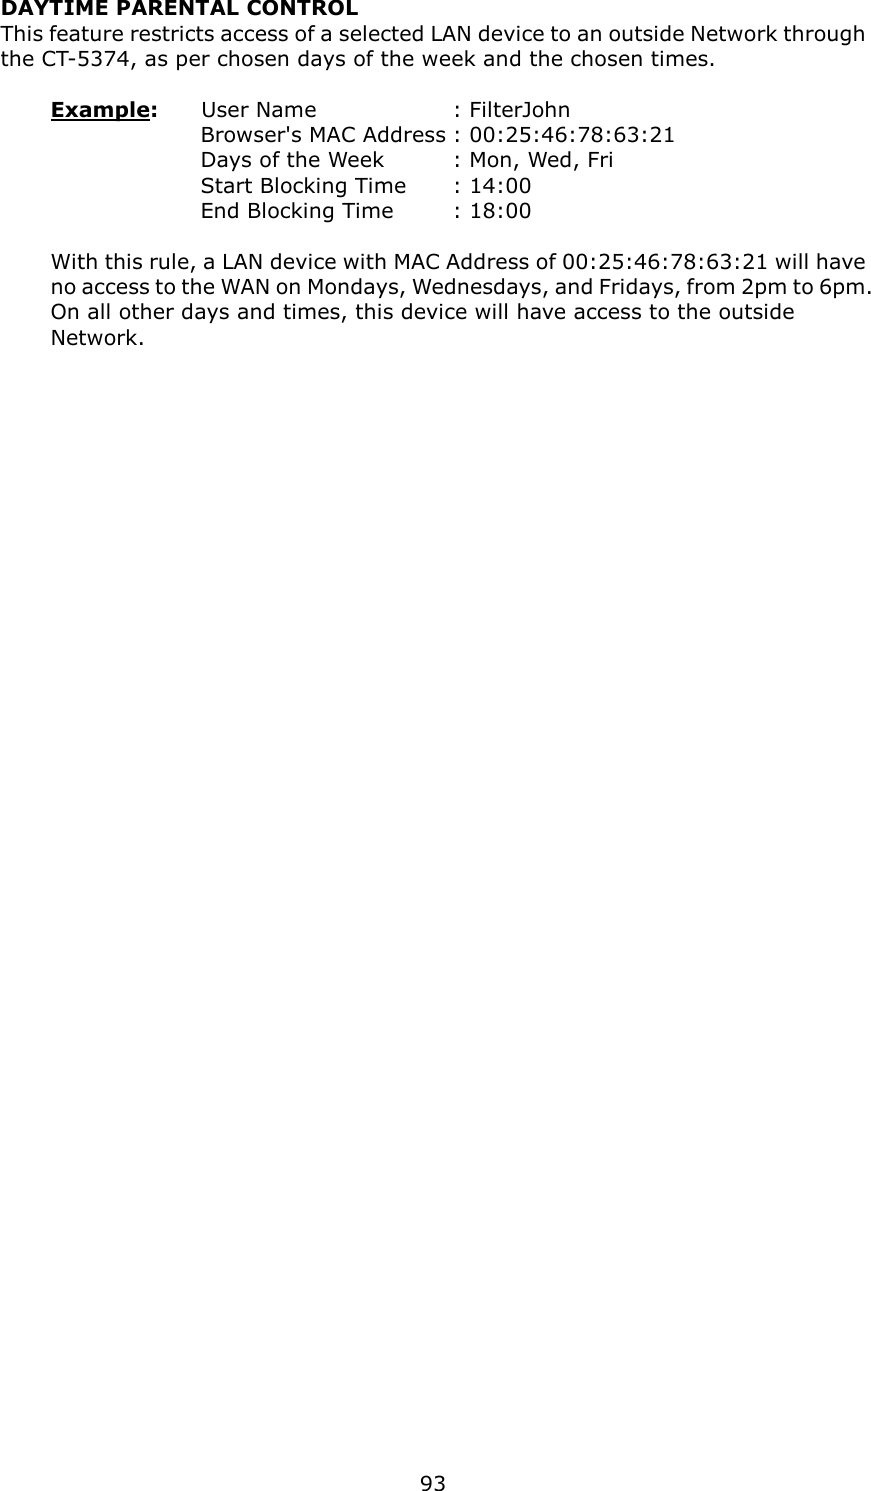
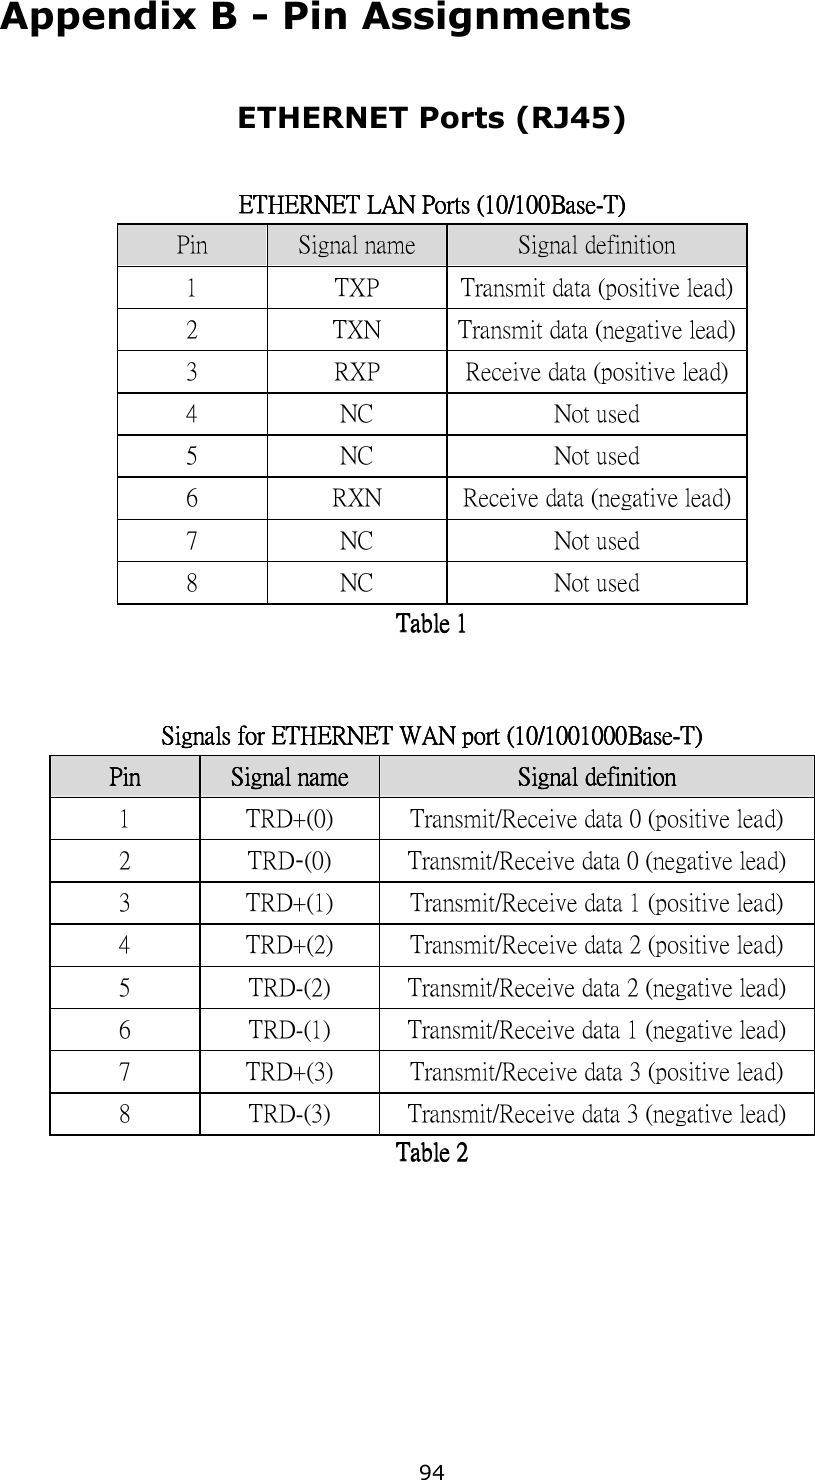
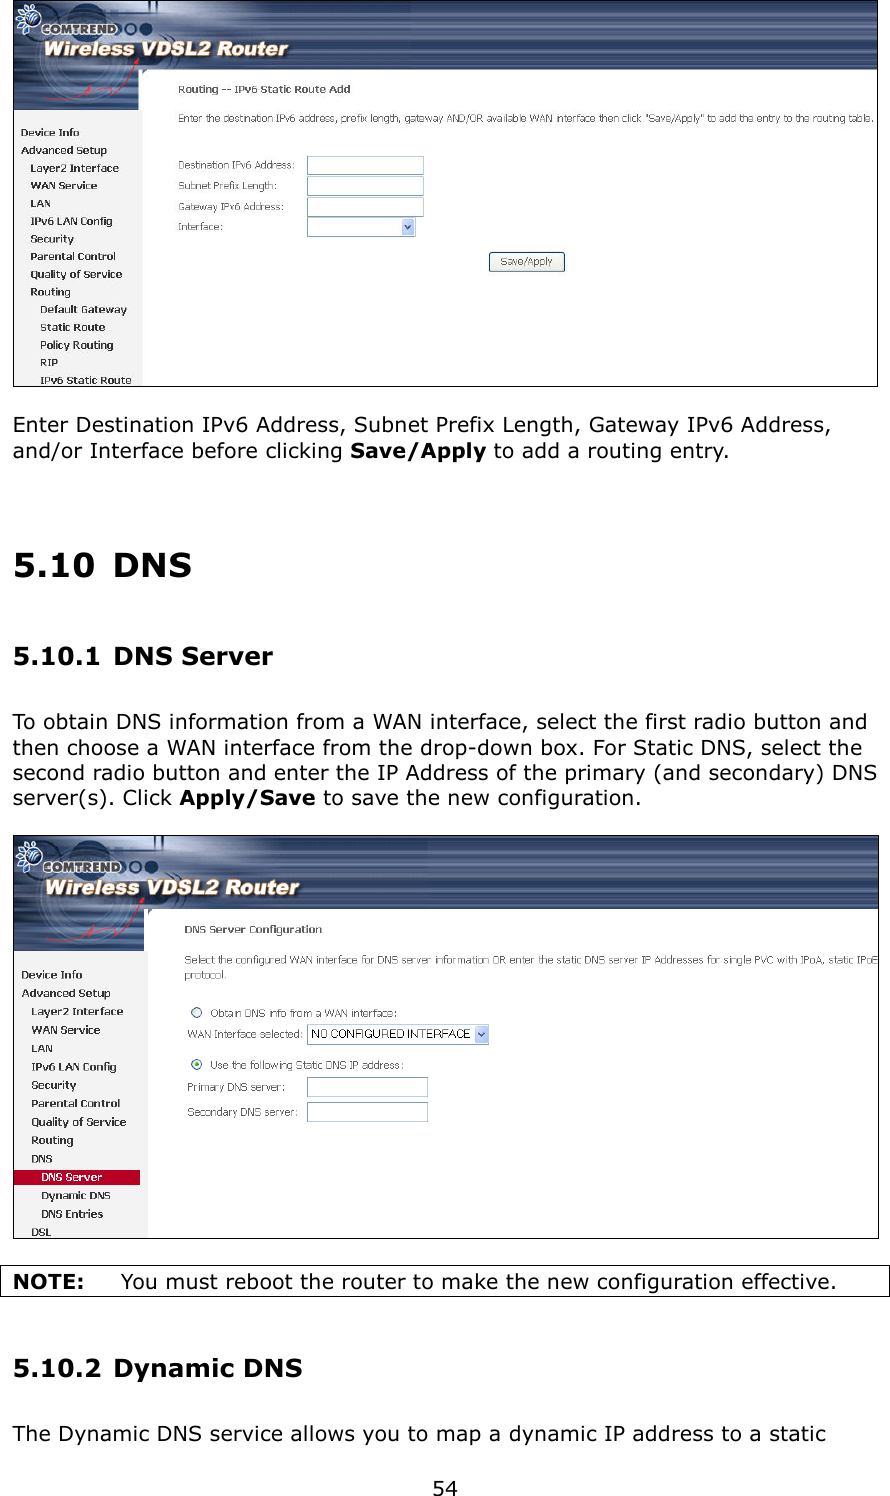
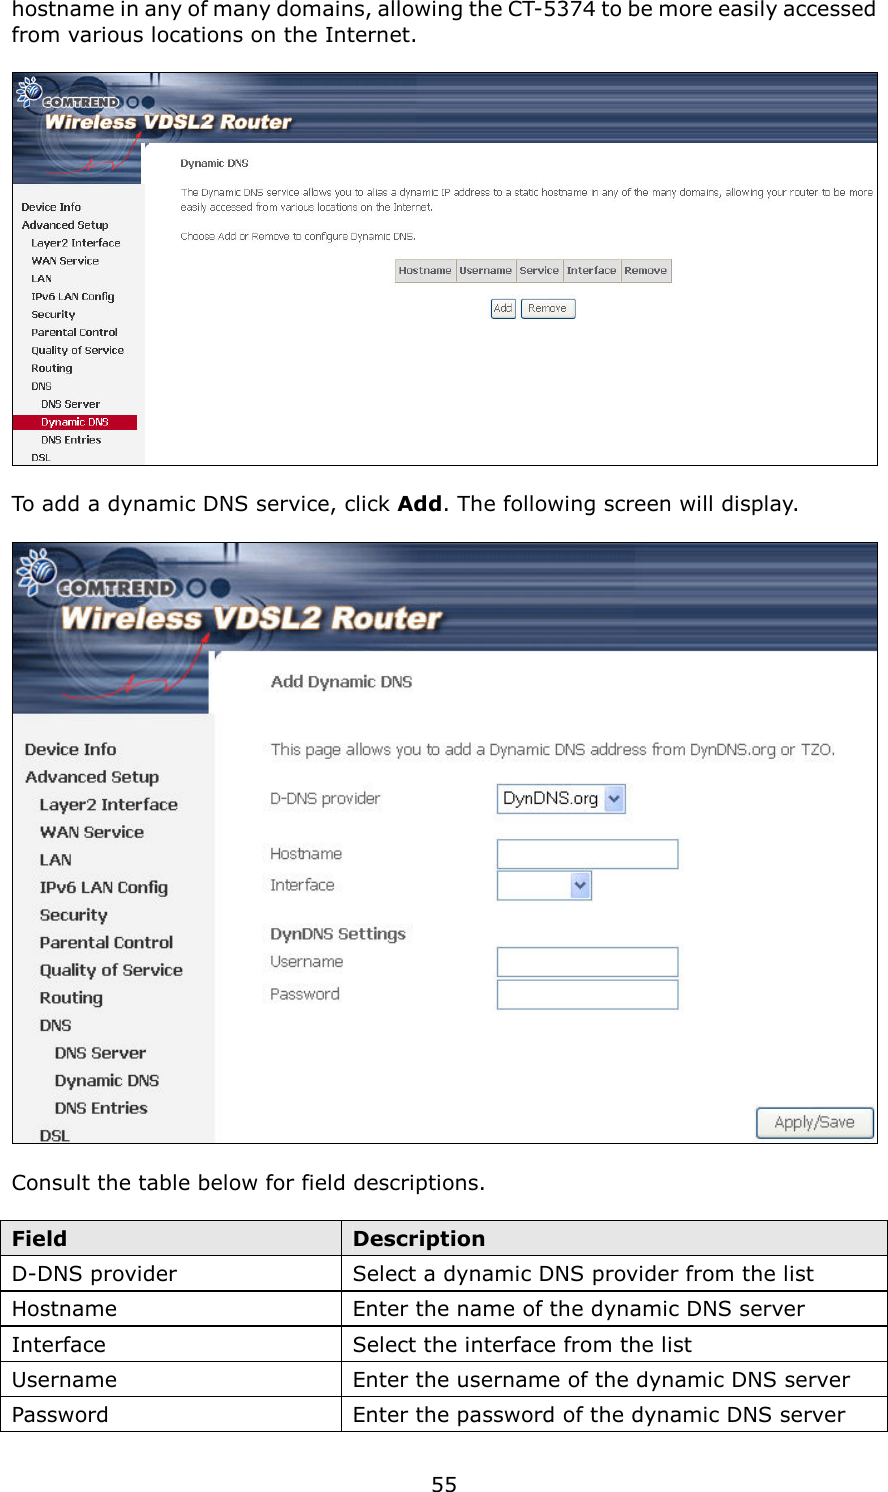
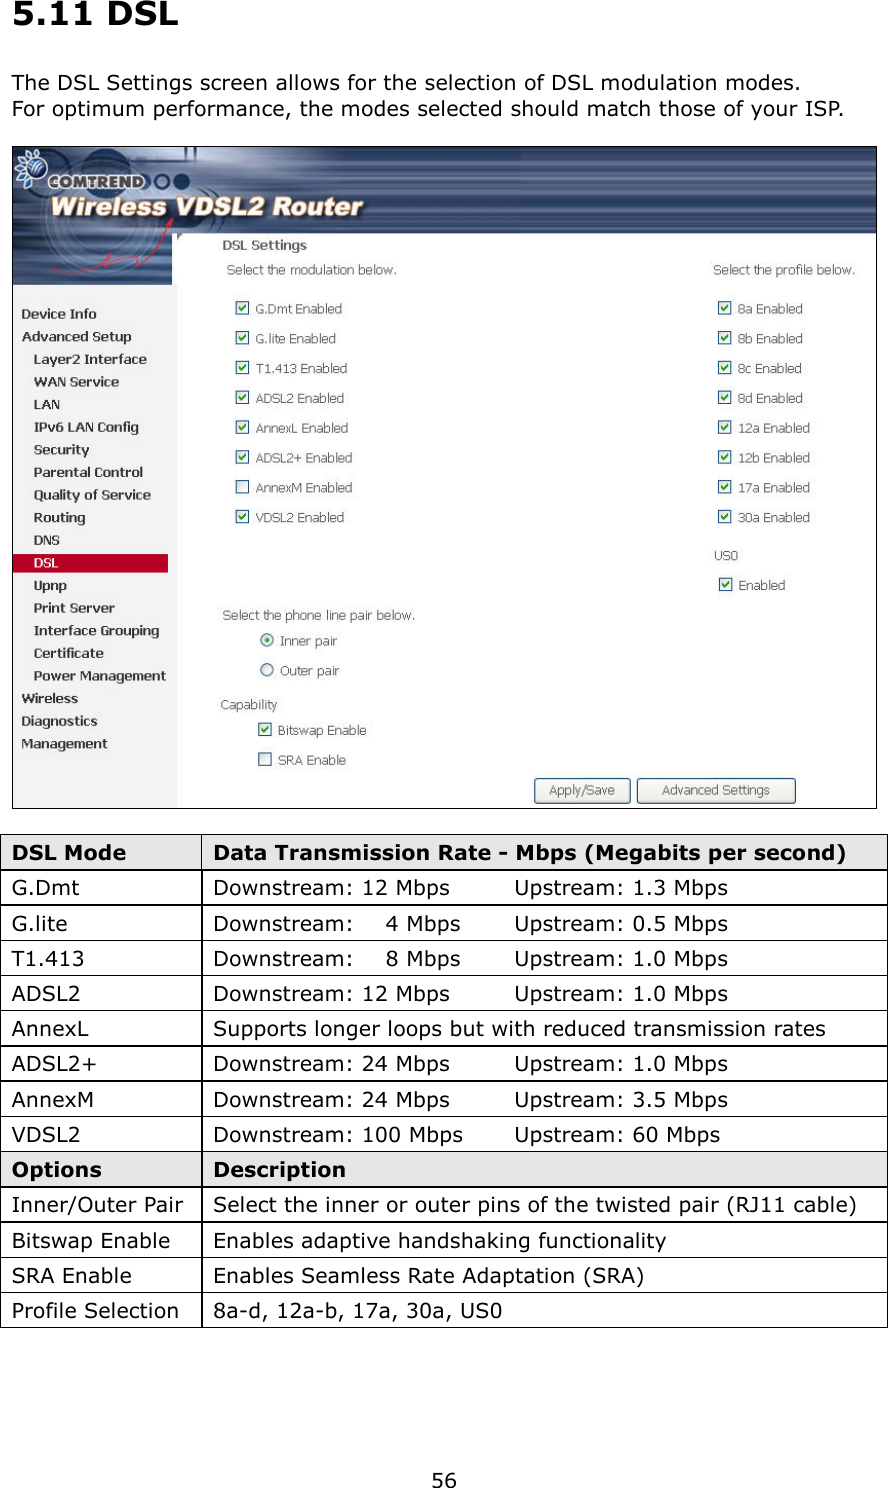
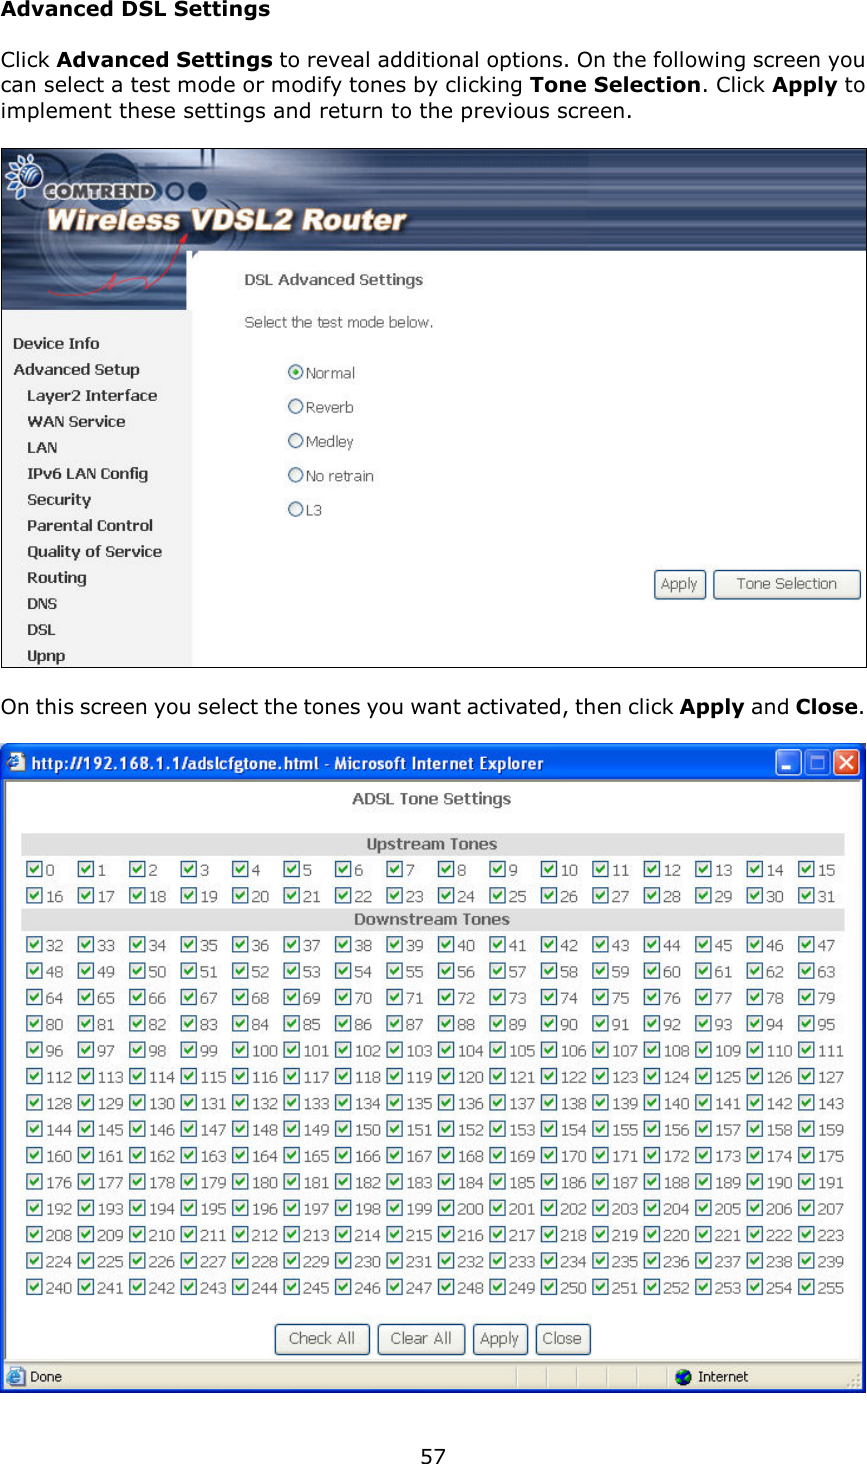
User manual 2 of 3
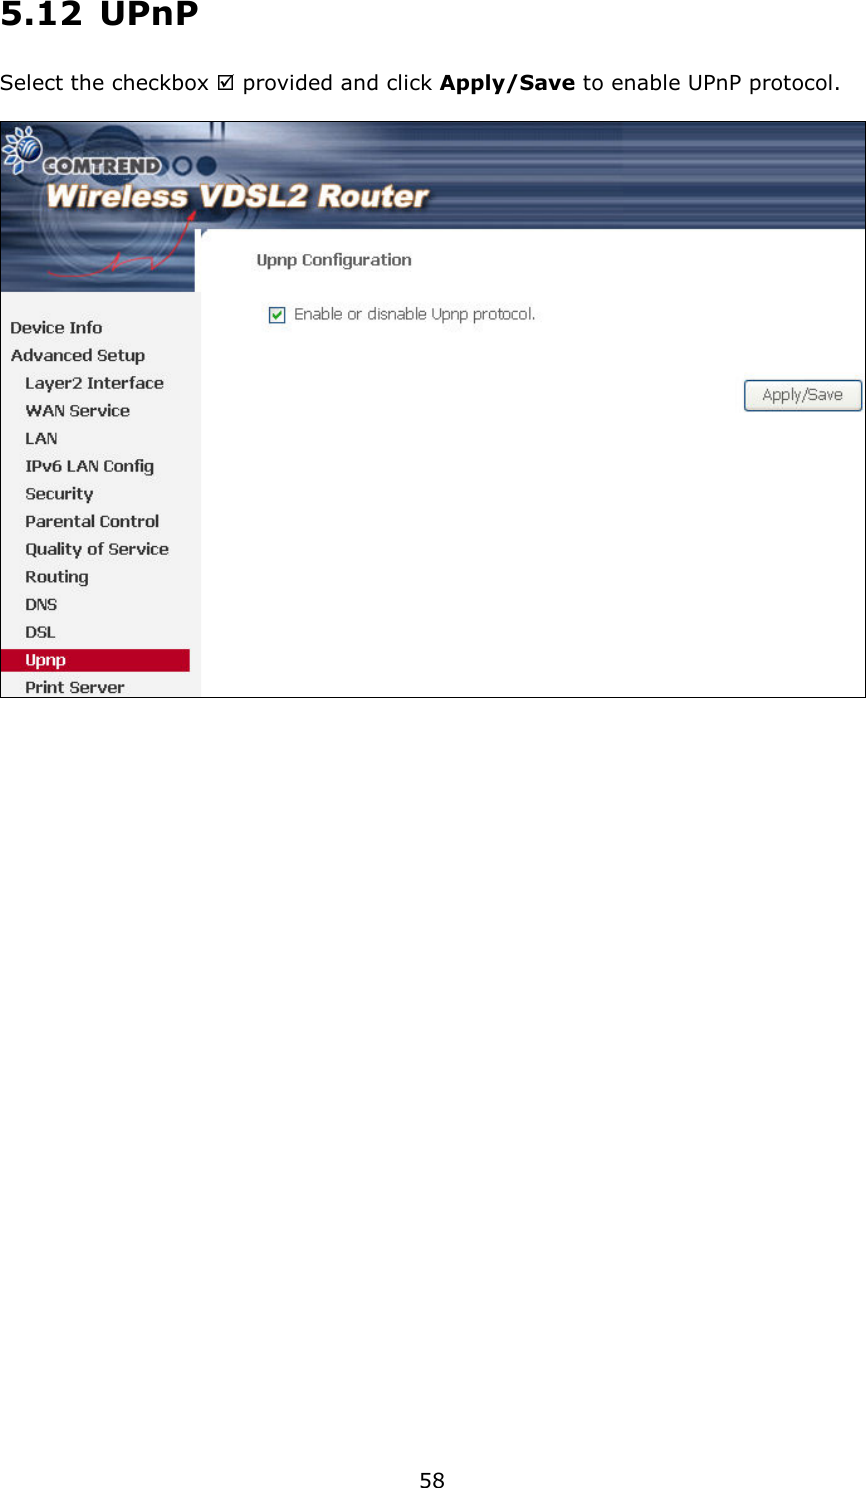
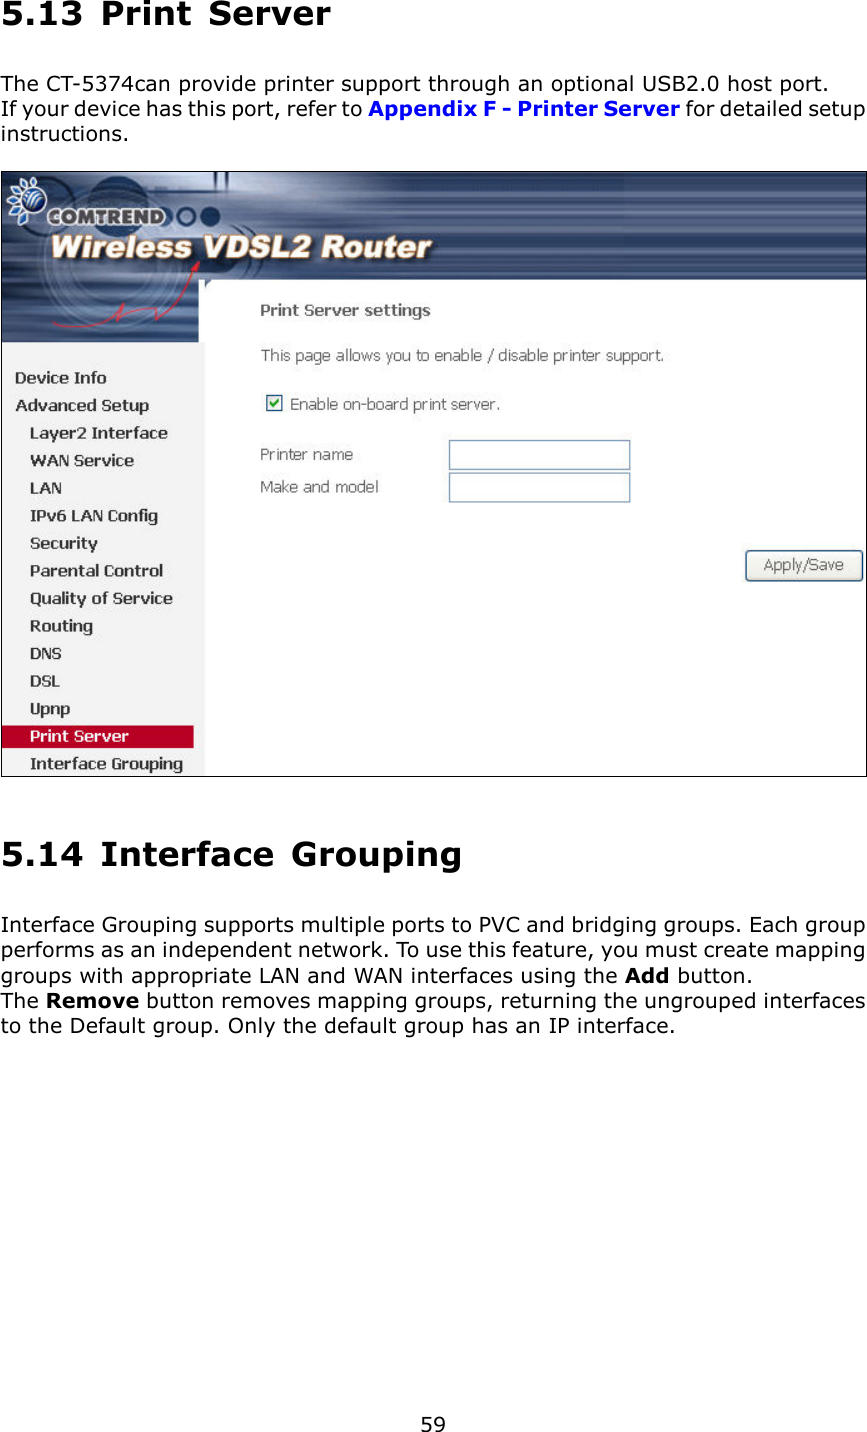


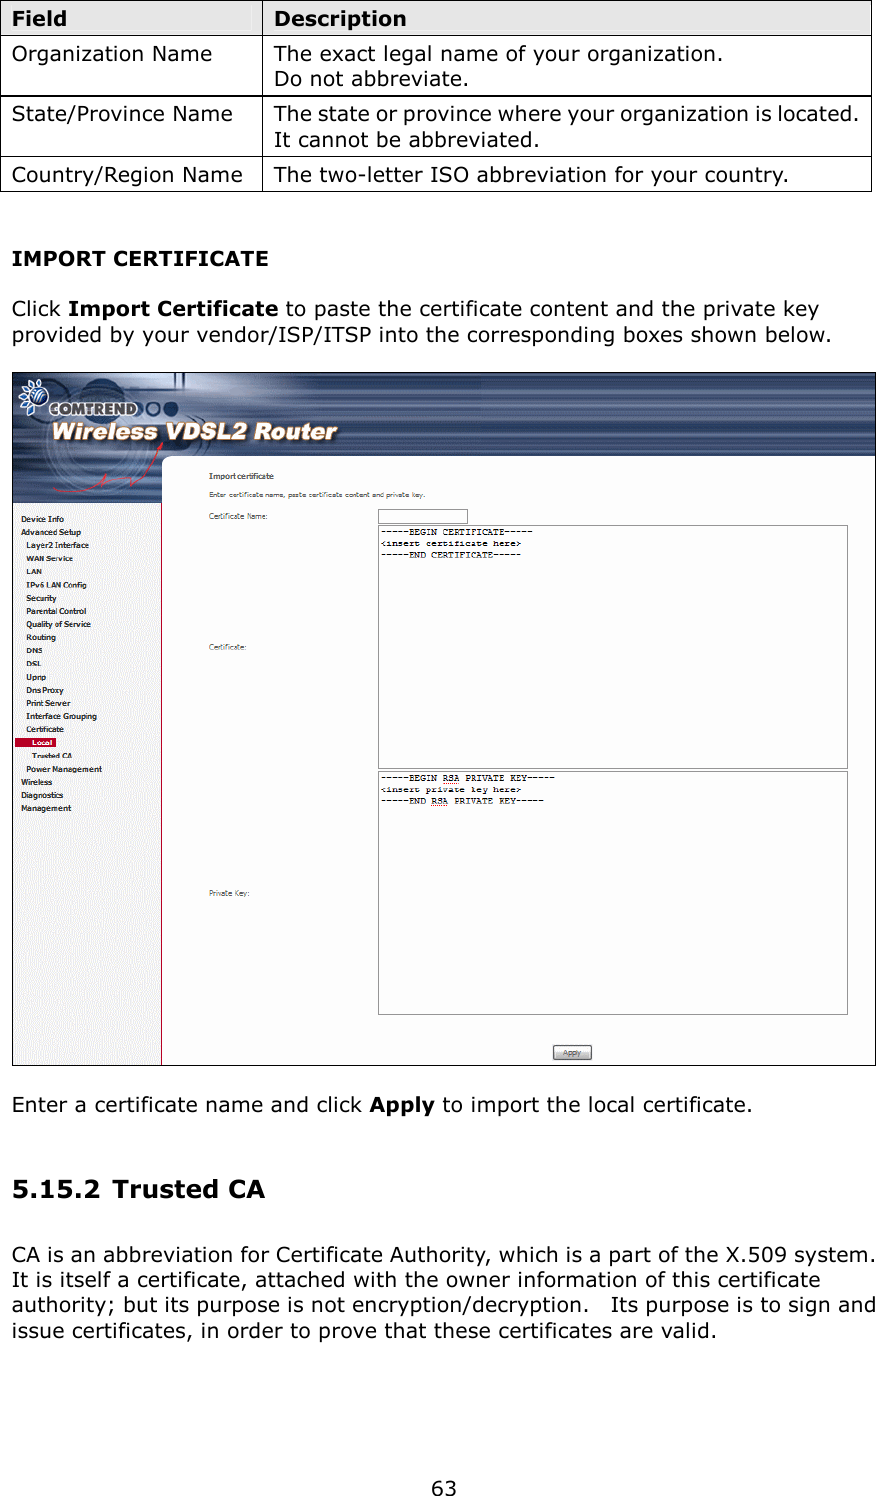
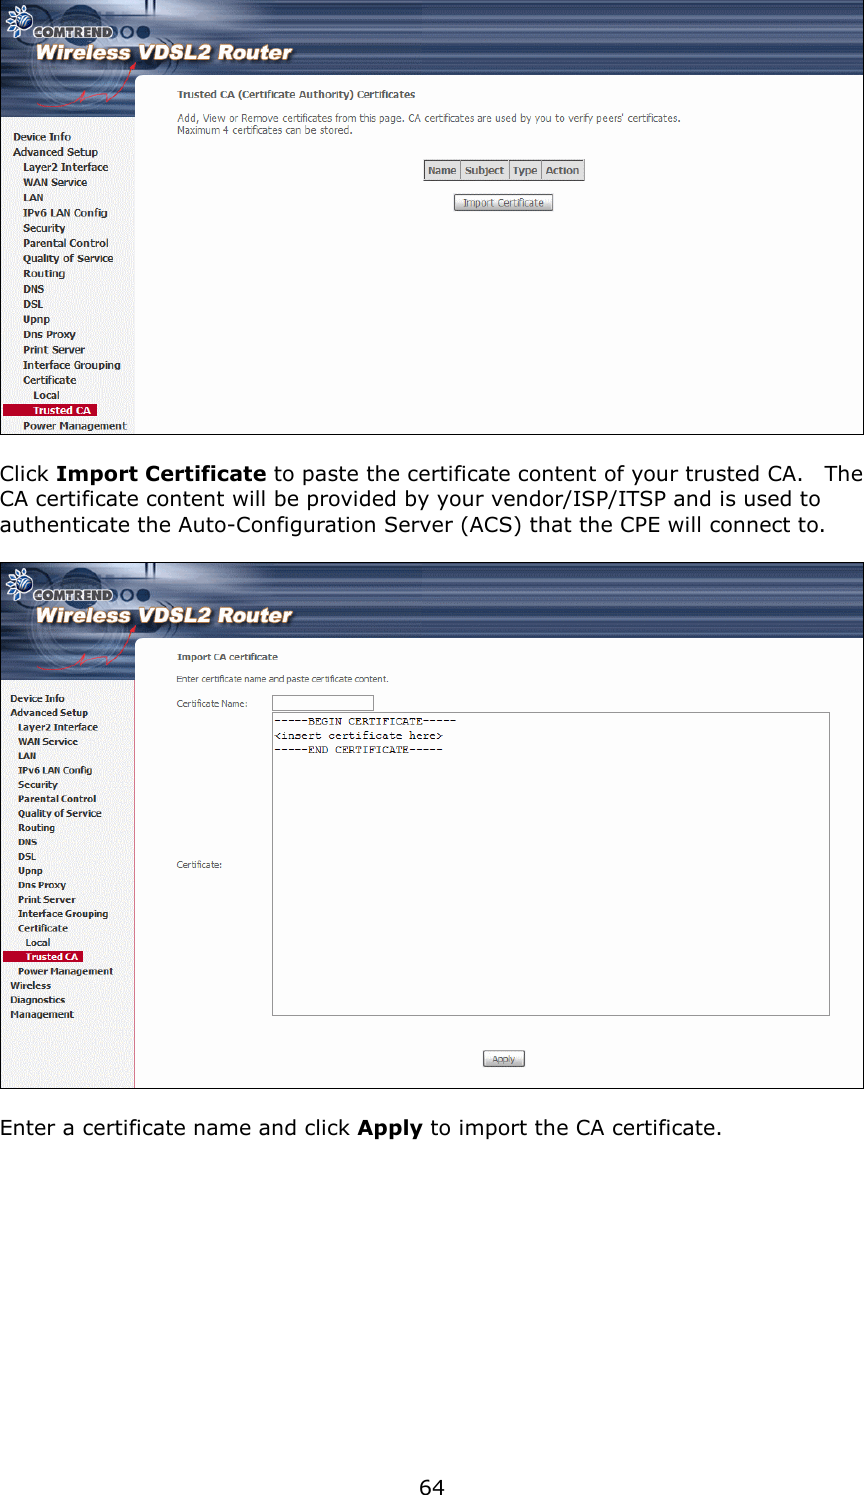
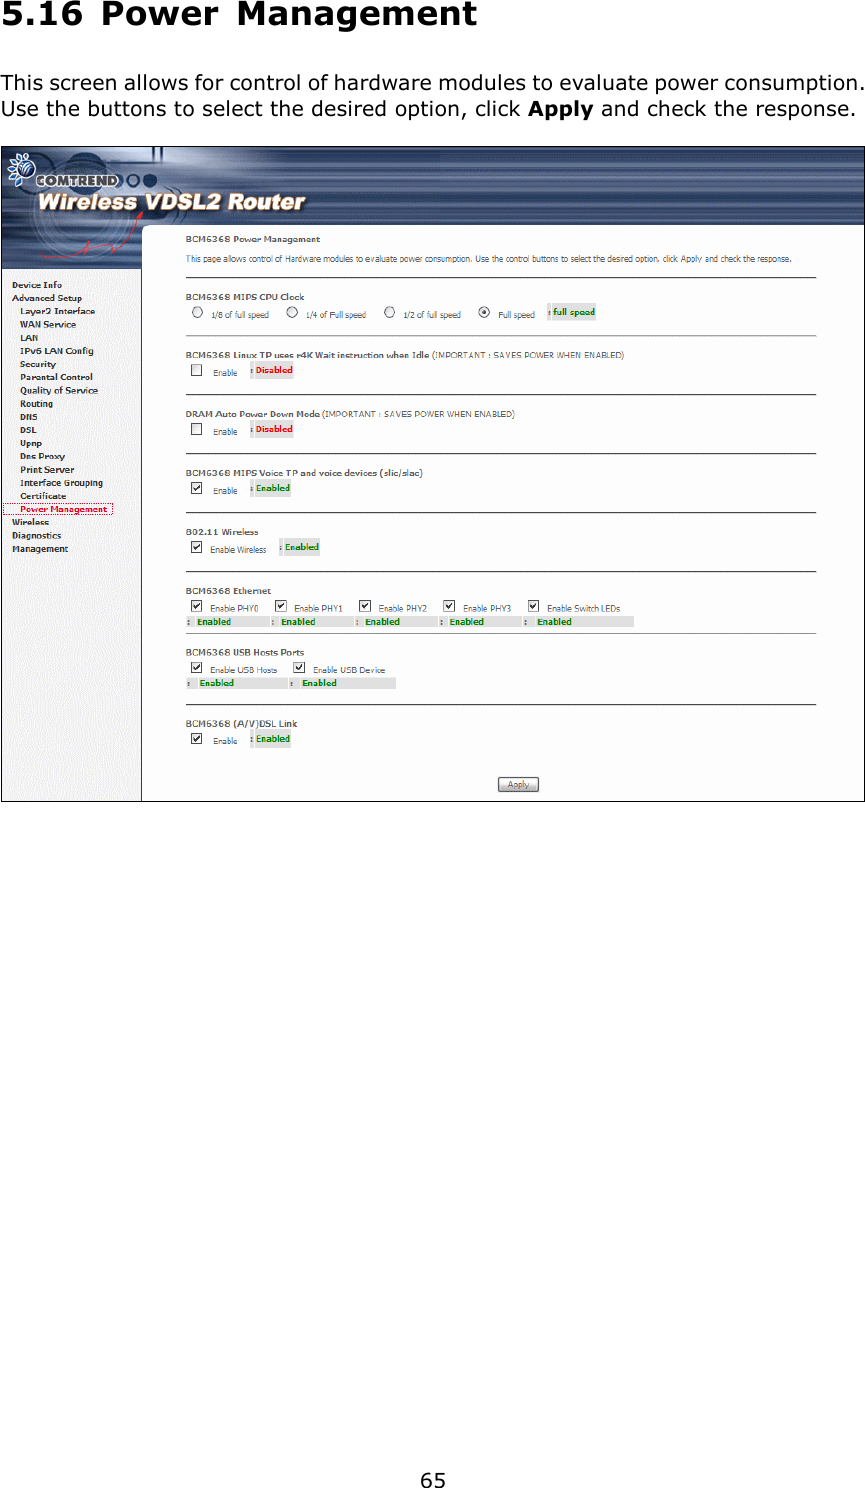
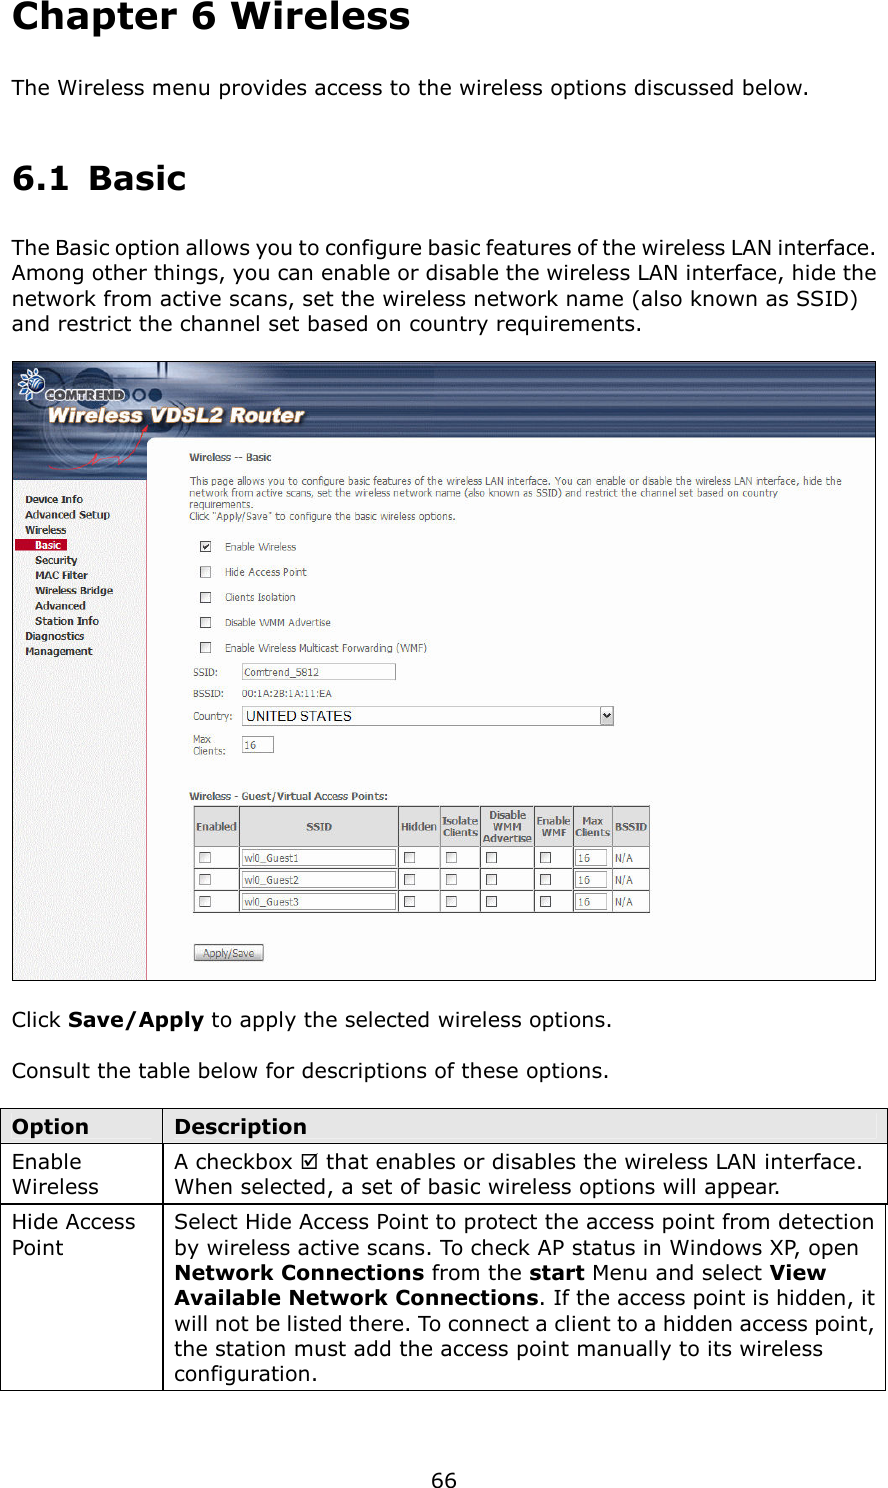
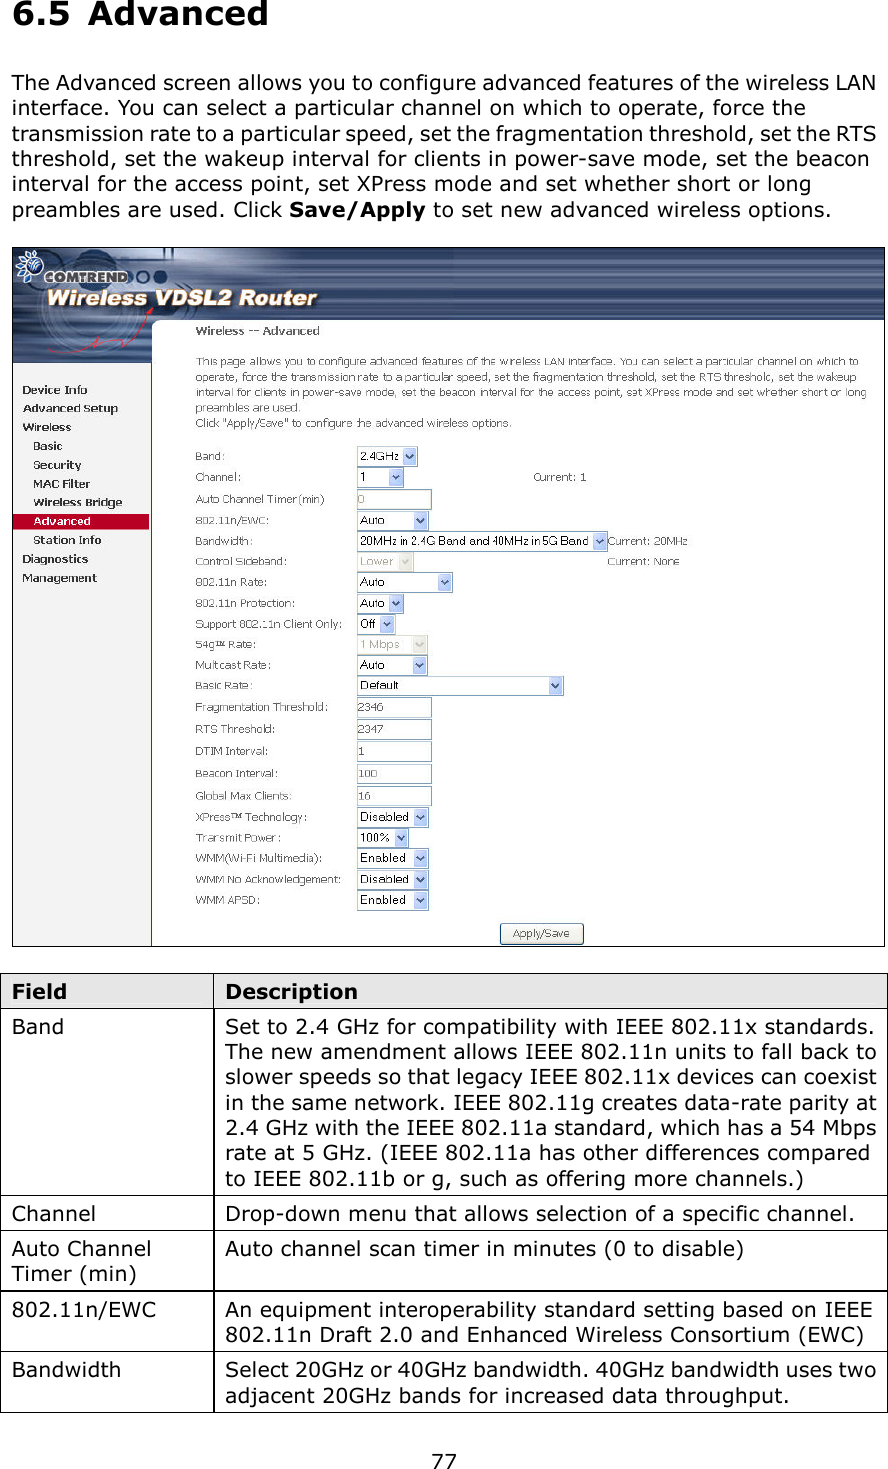
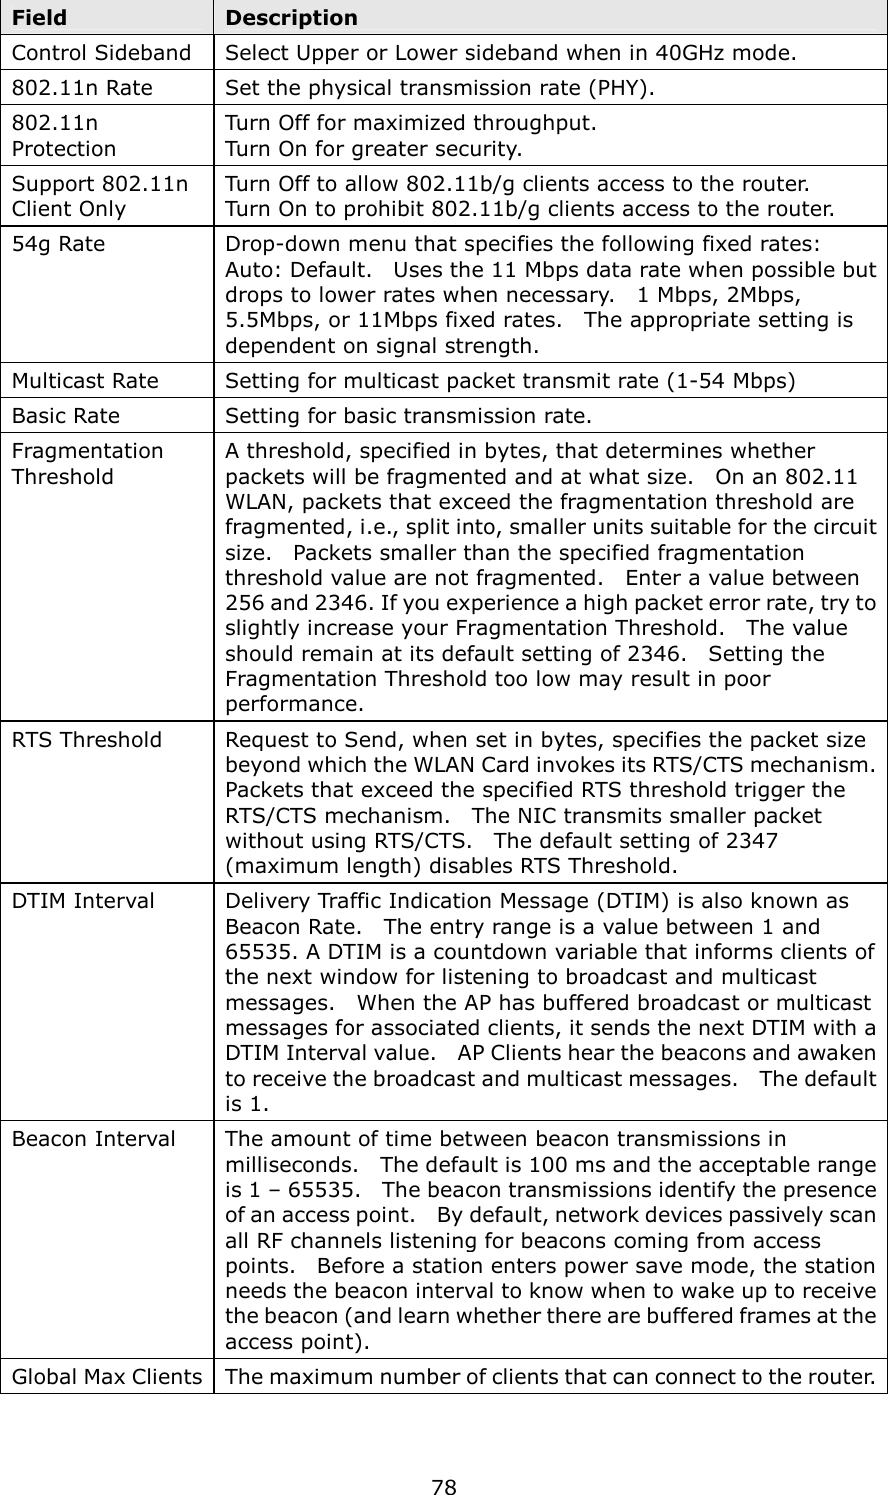
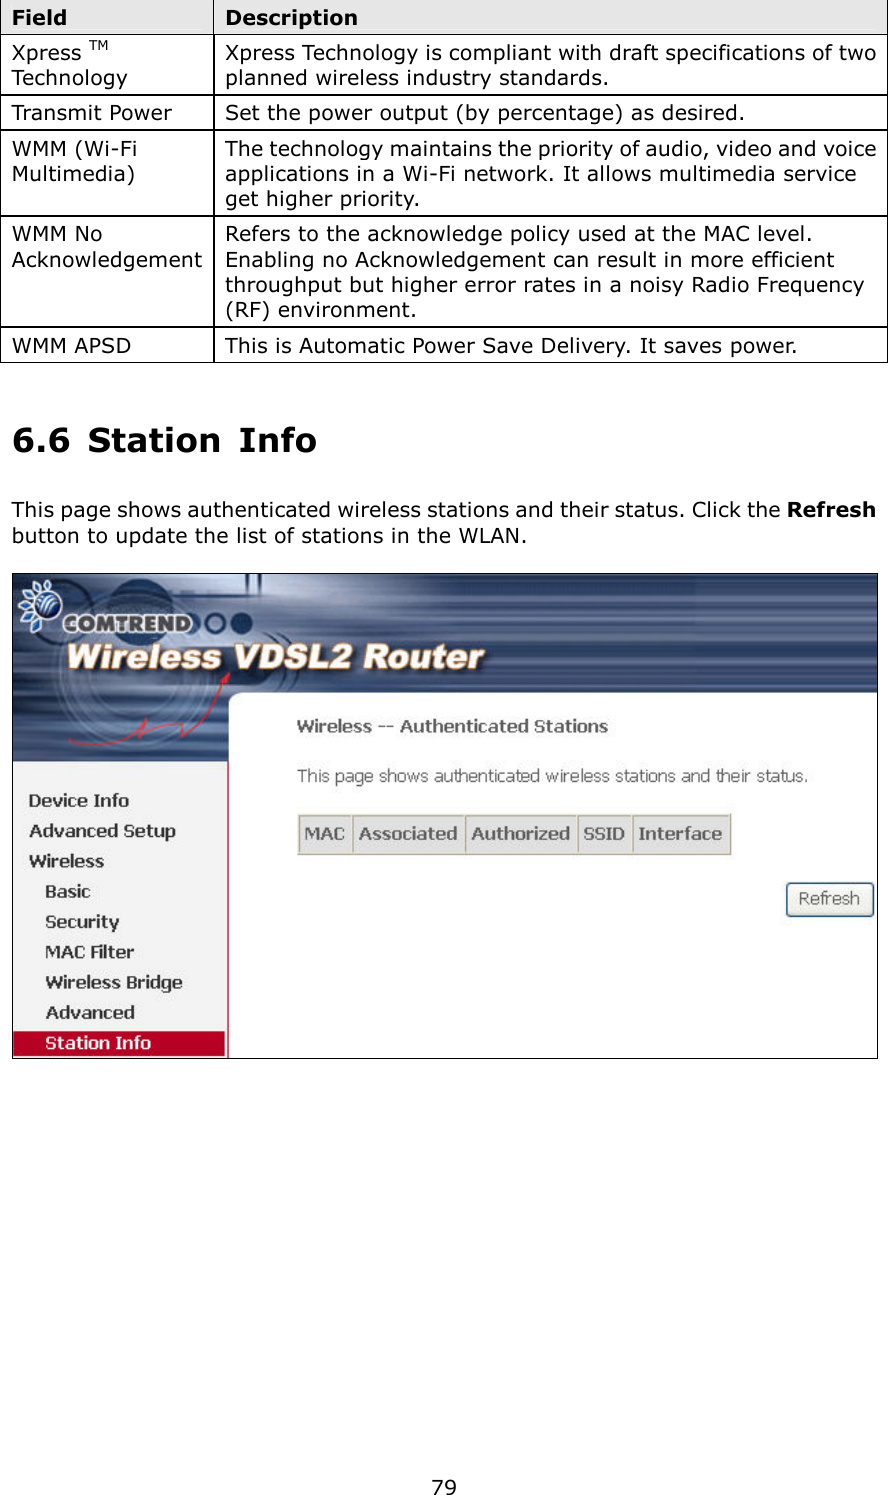
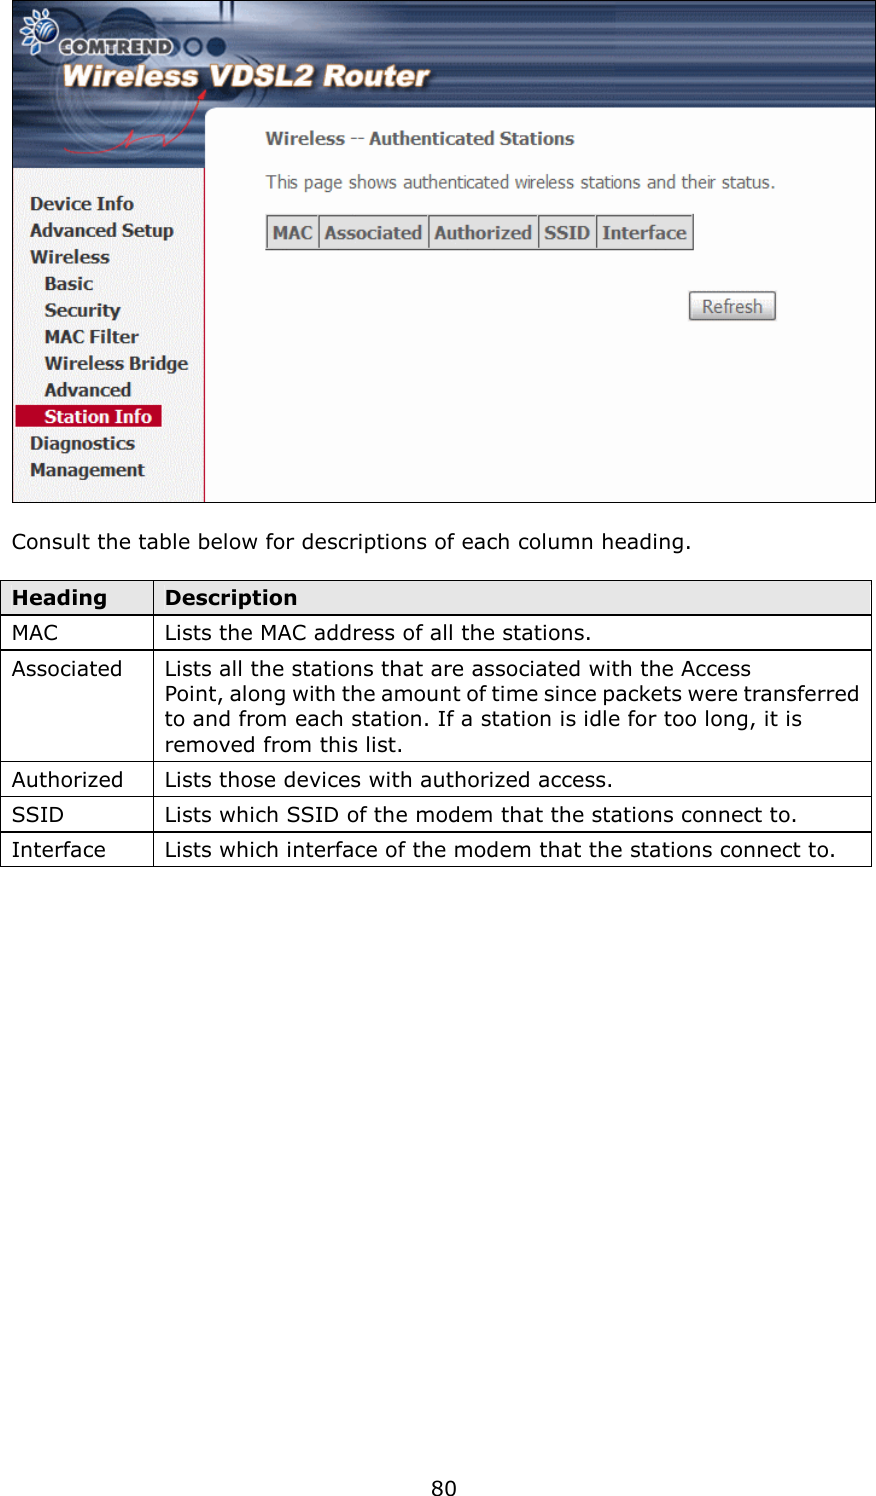
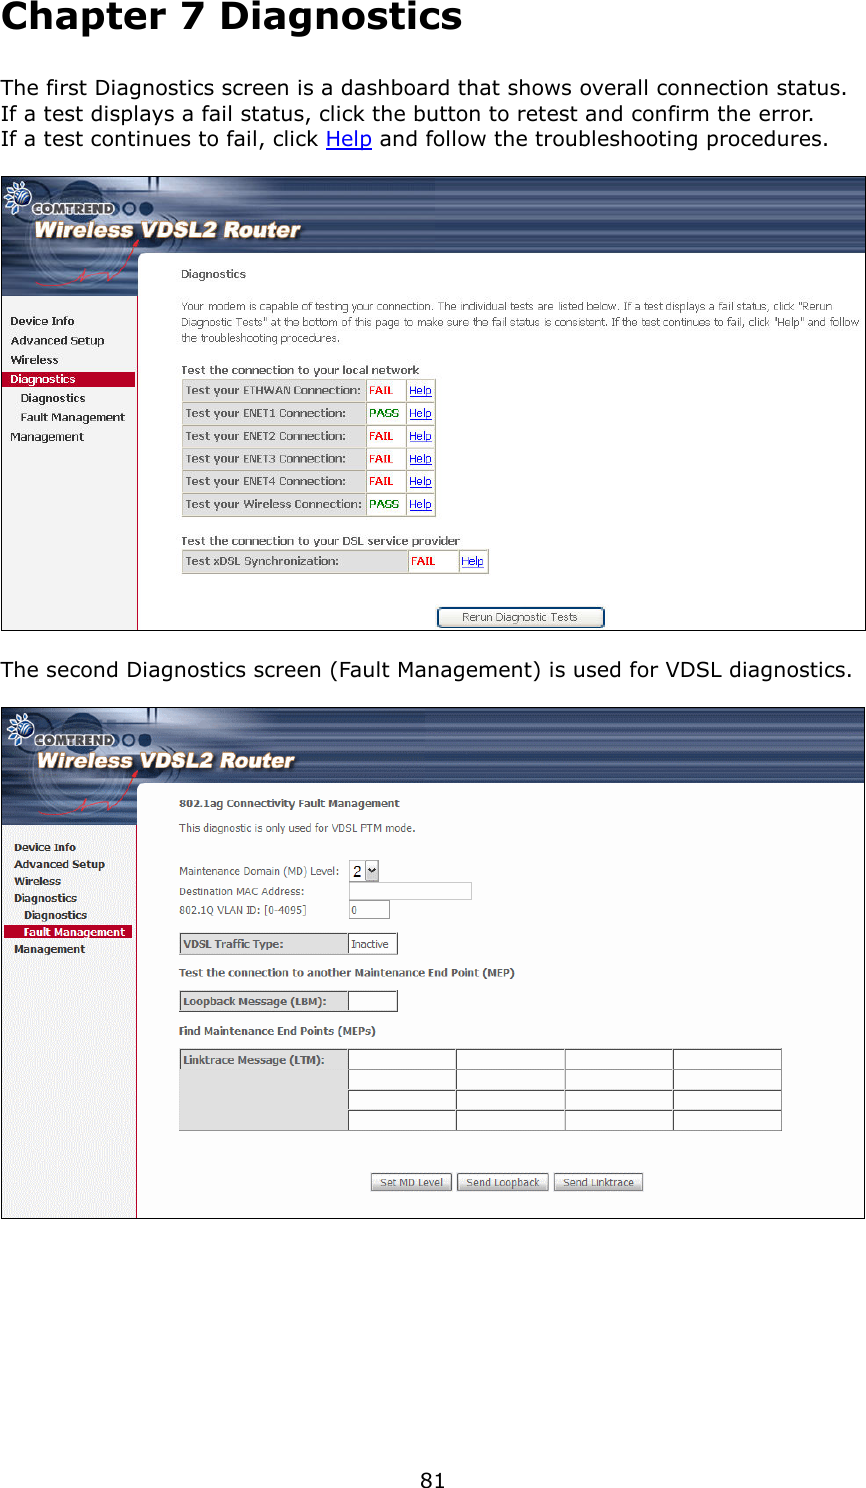
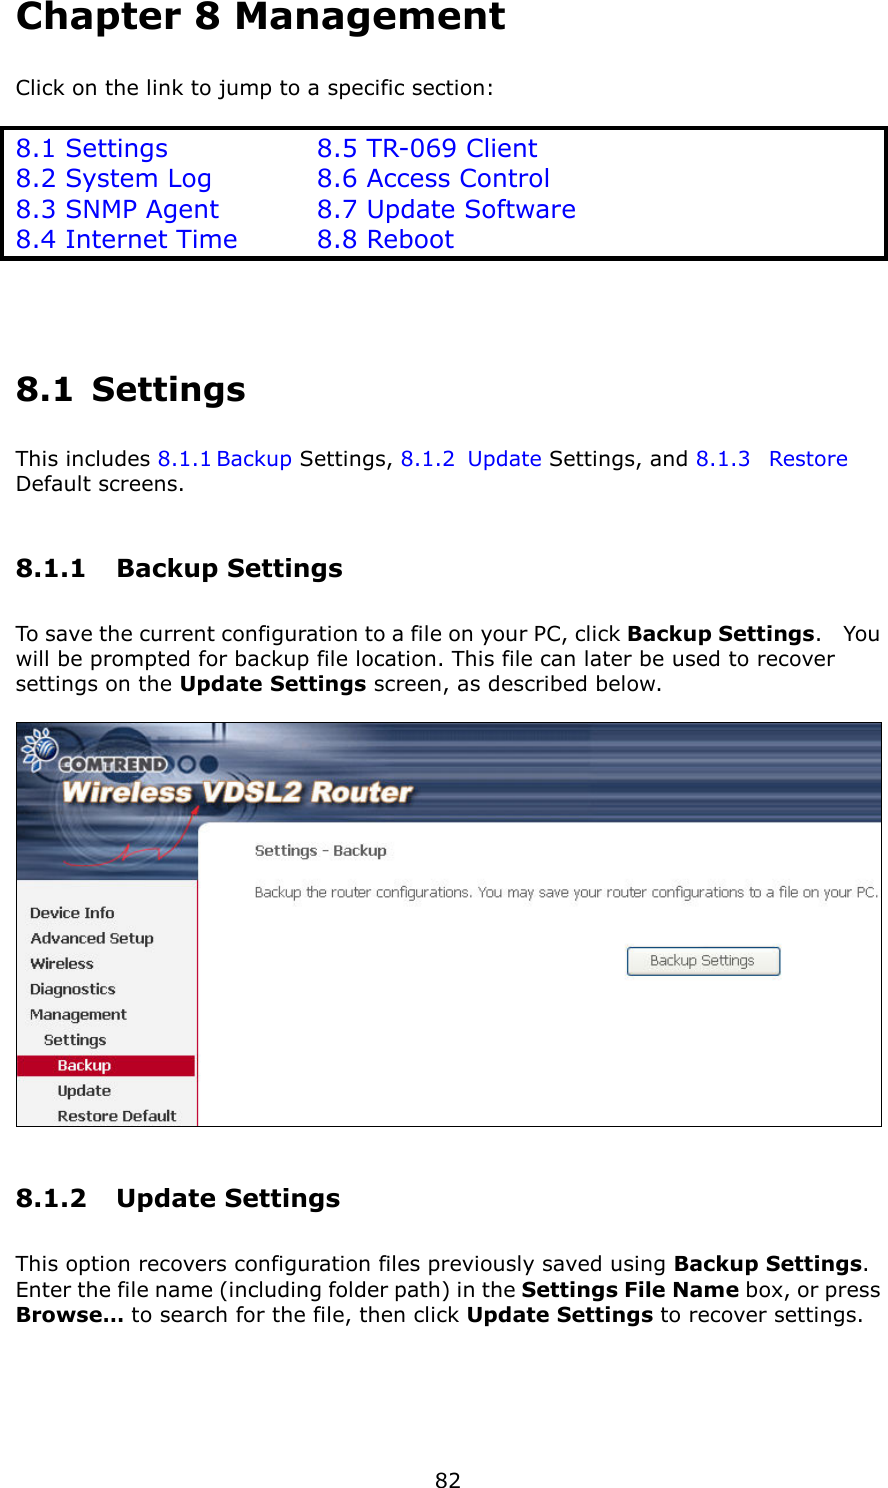
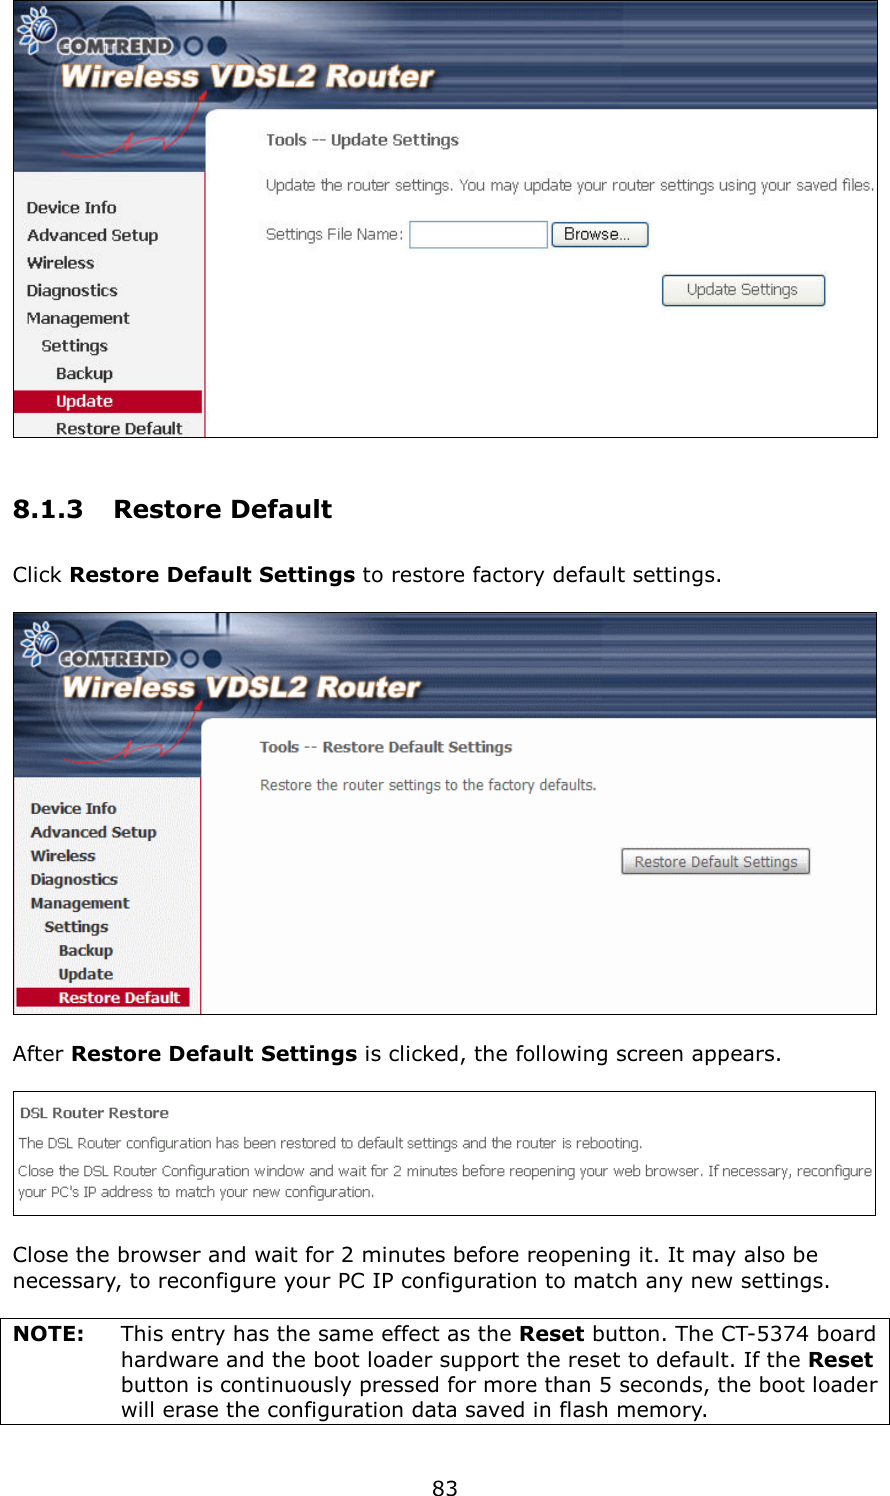
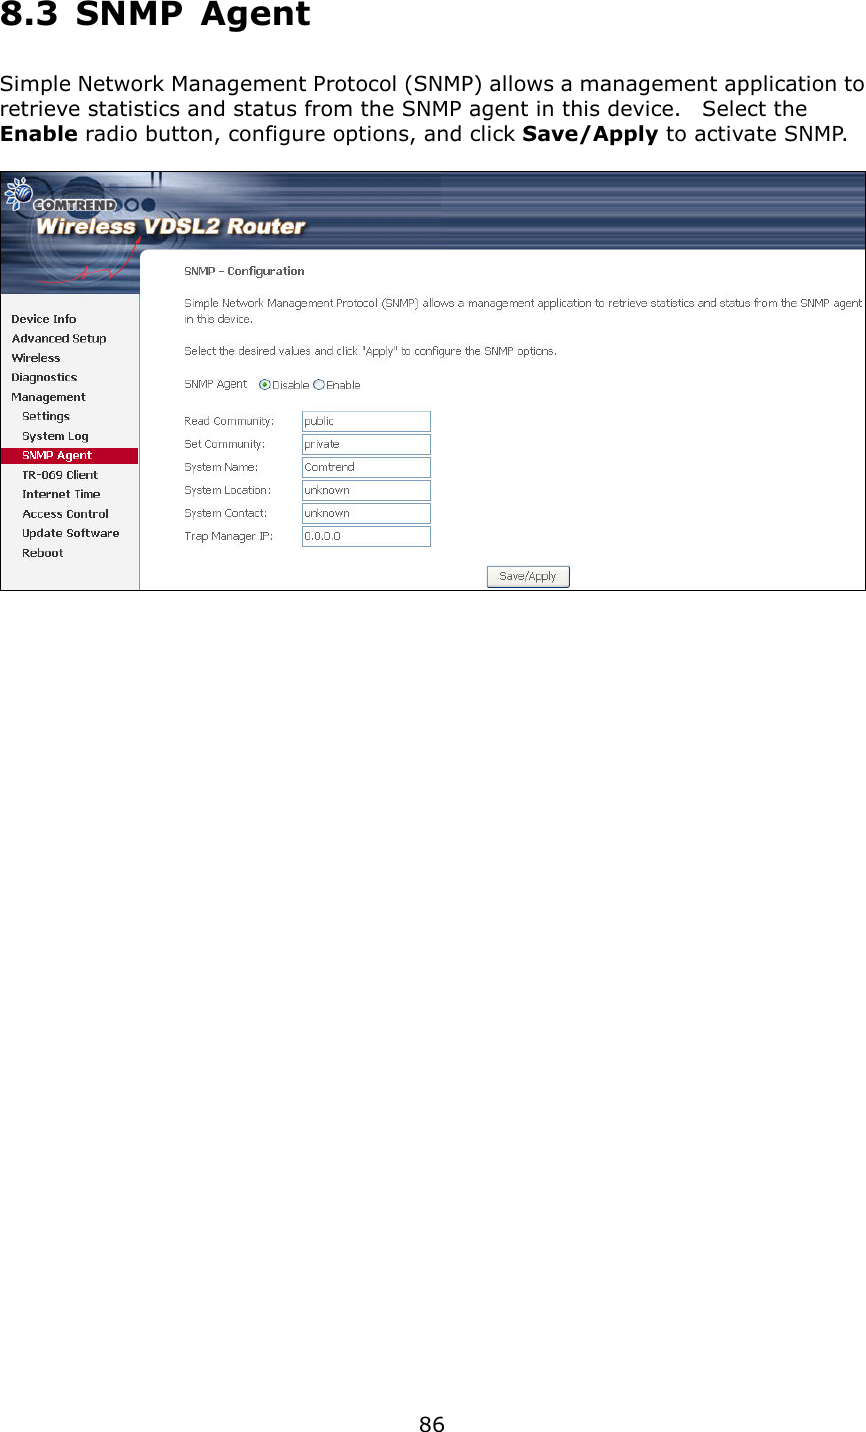
![67 Option Description Clients Isolation When enabled, it prevents client PCs from seeing one another in My Network Places or Network Neighborhood. Also, prevents one wireless client communicating with another wireless client. Disable WMM Advertise Stops the router from ‘advertising’ its Wireless Multimedia (WMM) functionality, which provides basic quality of service for time-sensitive applications (e.g. VoIP, Video). Enable Wireless Multicast Forwarding Select the checkbox to enable this function. SSID [1-32 characters] Sets the wireless network name. SSID stands for Service Set Identifier. All stations must be configured with the correct SSID to access the WLAN. If the SSID does not match, that user will not be granted access. BSSID The BSSID is a 48-bit identity used to identify a particular BSS (Basic Service Set) within an area. In Infrastructure BSS networks, the BSSID is the MAC (Media Access Control) address of the AP (Access Point); and in Independent BSS or ad hoc networks, the BSSID is generated randomly. Country A drop-down menu that permits worldwide and specific national settings. Local regulations limit channel range: US= worldwide, Japan=1-14, Jordan= 10-13, Israel= 1-13 Max Clients The maximum number of clients that can access the router. Wireless - Guest / Virtual Access Points This router supports multiple SSIDs called Guest SSIDs or Virtual Access Points. To enable one or more Guest SSIDs select the checkboxes in the Enabled column. To hide a Guest SSID select its checkbox in the Hidden column. Do the same for Isolate Clients and Disable WMM Advertise. For a description of these two functions, see the previous entries for “Clients Isolation” and “Disable WMM Advertise”. Similarly, for Enable WMF, Max Clients and BSSID, consult the matching entries in this table. NOTE: Remote wireless hosts cannot scan Guest SSIDs.](https://usermanual.wiki/Comtrend/5374.User-manual-2-of-3/User-Guide-1280065-Page-18.png)