Continental Automotive Systems 137830 Tachograph User Manual Manual part1
Continental Automotive Systems, Inc. Tachograph Manual part1
UserManual.wiki
>
Continental Automotive Systems
>
137830 User Manual
>
Manual part1
Contents
1.
Manual part1
2.
Manual part2
3.
Manual part3
4.
Manual part4
5.
Manual part5
6.
Manual part6
7.
Manual part7
Manual part1
Navigation menu
Upload a User Manual
Namespaces
Wiki Guide
HTML
PDF
Info
Views
User Manual
Discussion / Help
Navigation
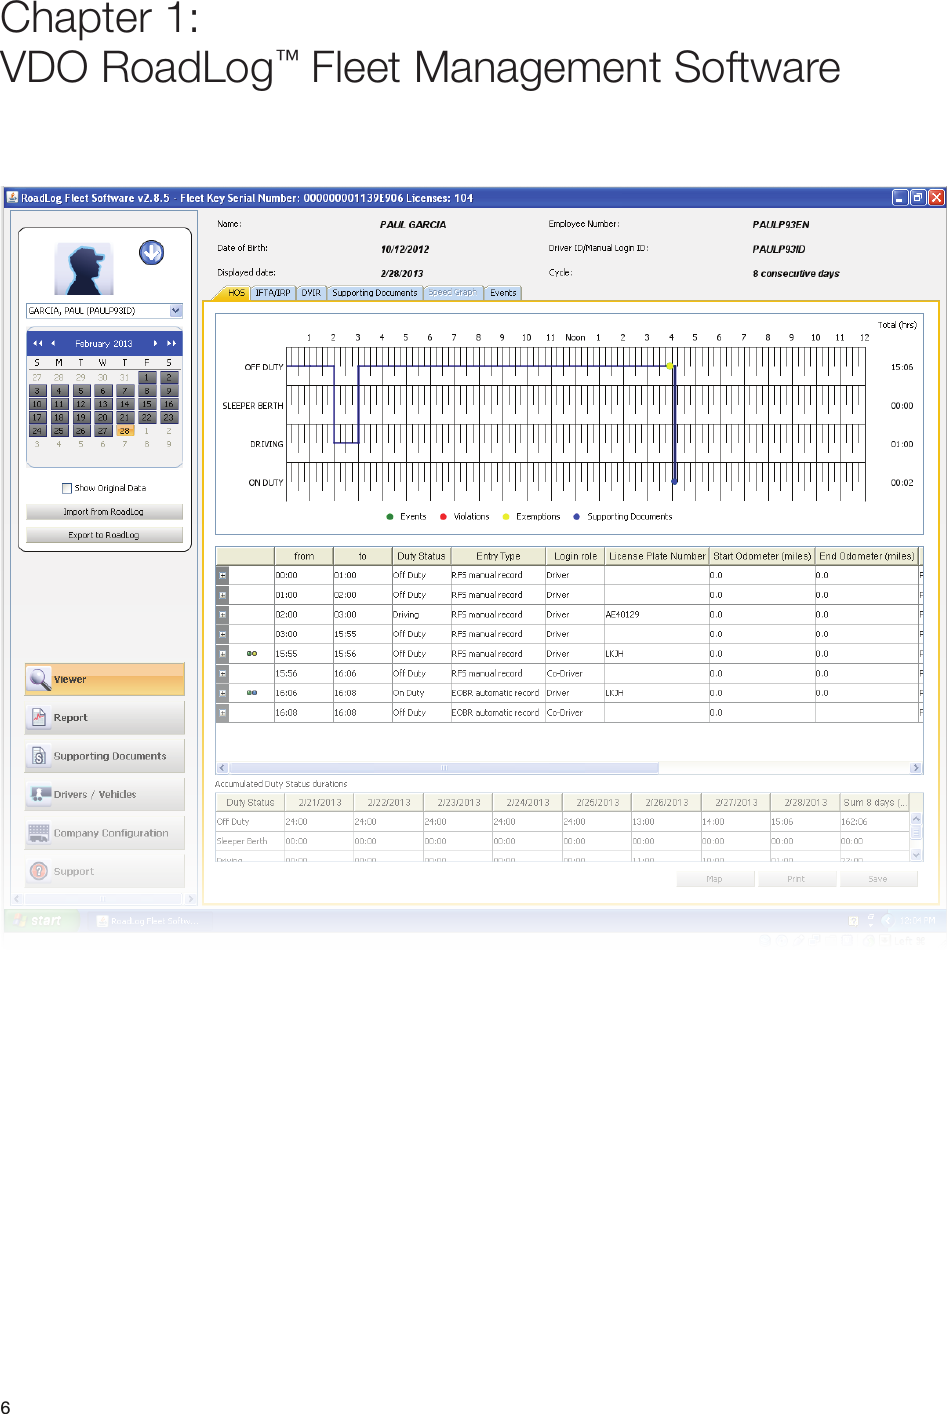


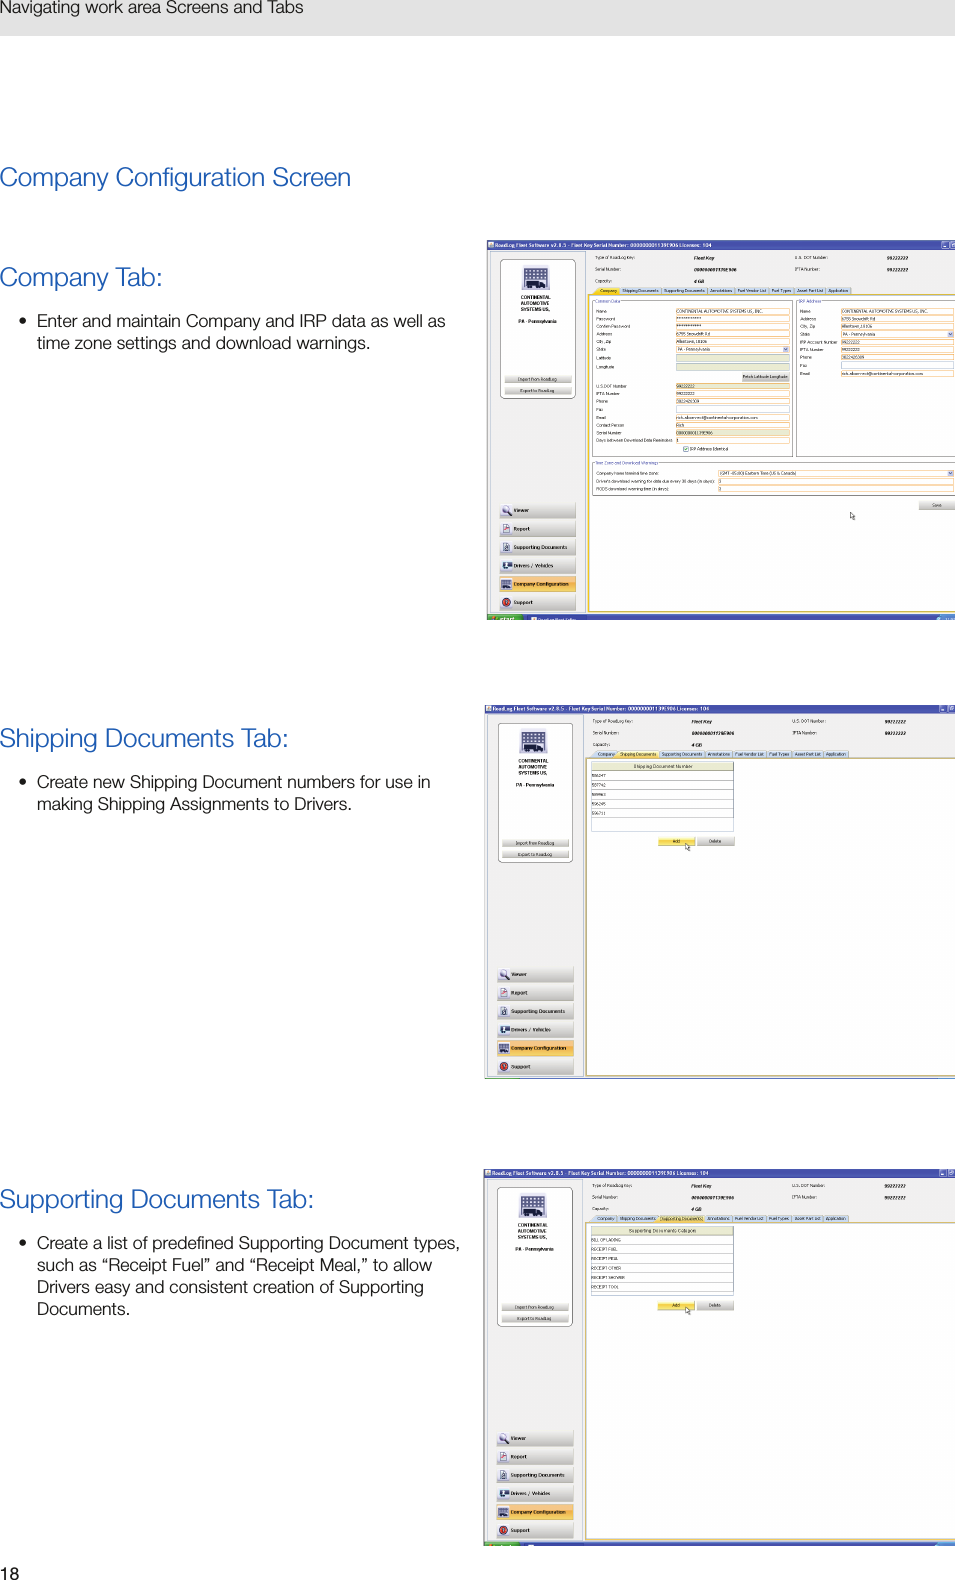
![15Navigating work area Screens and Tabs4. Navigating work area Screens and TabsThe easiest way to understand the Fleet Software’s capabilities is to review the screens and their tabs’ functions. An overview of the functions of each section is described below; a detailed explanation of how to work in the screen and tabs is provided in Screens & Tabs: Features & Functions.Viewer ScreenHOS Tab: • View, edit and print Driver HOS data in logbook, tabular and map form. • View start/end times for Events, Violations, Exemptions and Supporting Documents. • View and edit accumulated times for each Duty Status recorded; Off Duty, Sleeper Berth, Driving and On DutyIFTA/IRP Tab:• [This feature will be implemented in a free upcoming release]DVIR Tab:• View and annotate DVIR records created by the Driver.Supporting Documents Tab:• View Supporting Documents records such as fuel and meal receipts.• Manually create new Supporting Documents.• Add scanned documents to the Supporting Documents records.](https://usermanual.wiki/Continental-Automotive-Systems/137830.Manual-part1/User-Guide-2448711-Page-15.png)
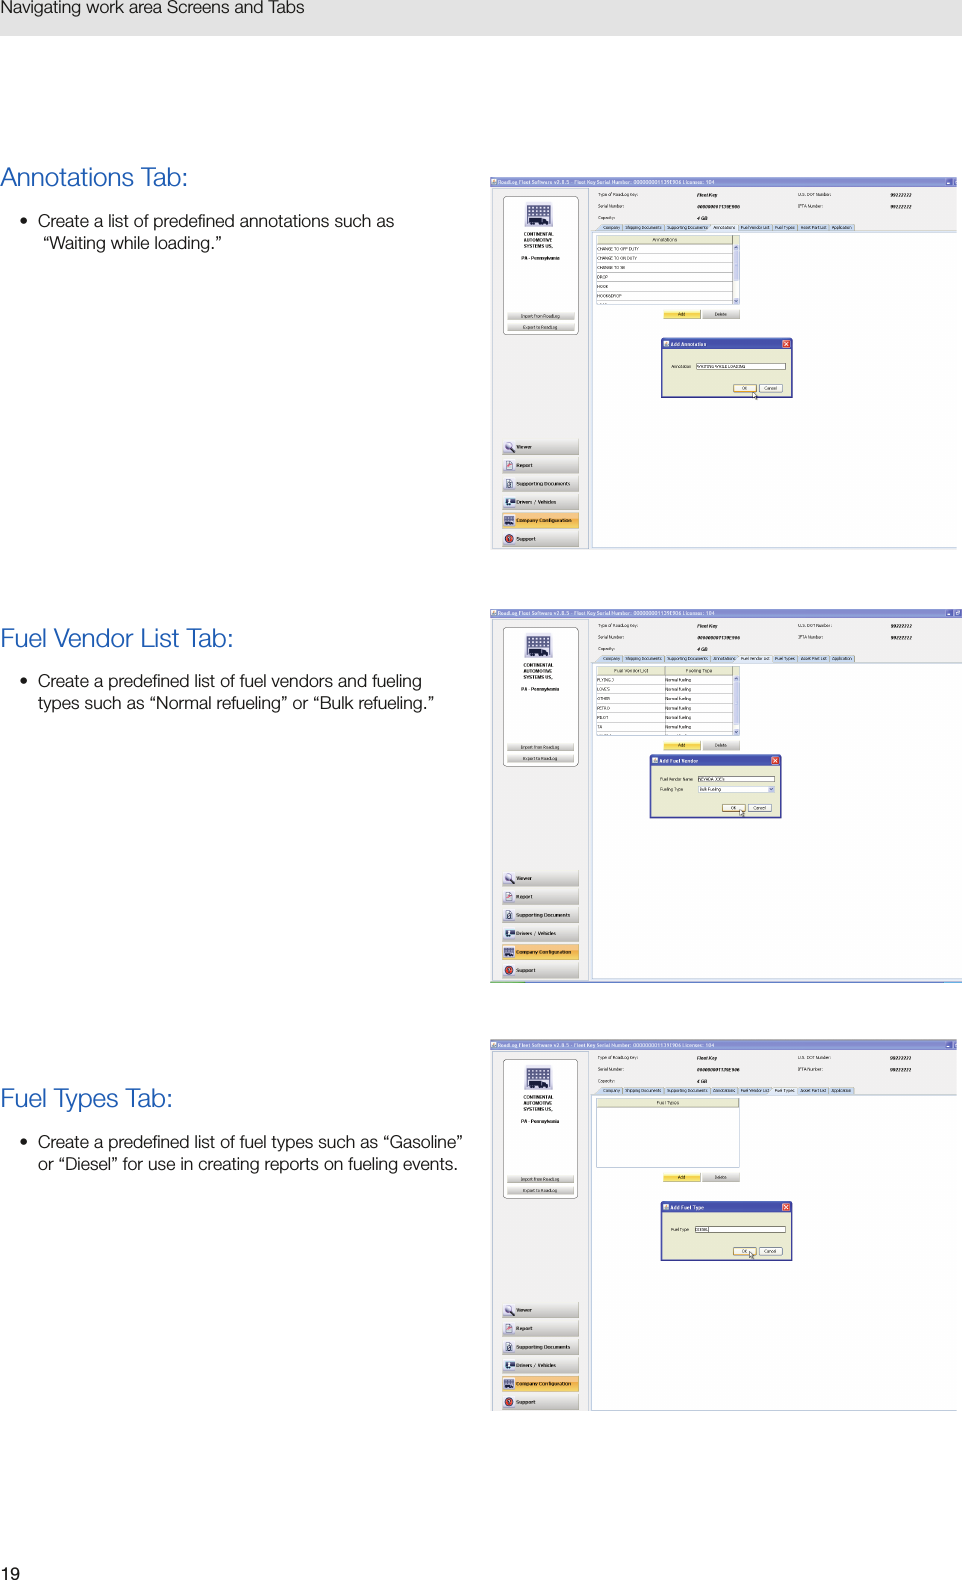
![16Navigating work area Screens and TabsSpeed Graph Tab:• [This feature will be implemented in a free upcoming release]Events Tab:• View a complete list of all events recorded automatically by RoadLog, including vehicle status changes and Driver actions.Report ScreenCreate, view, save and print reports for:• DVIR status.• HOS download reminders.• IRP driven miles [This feature will be implemented in a free upcoming release]. • IRP vehicles list. [This feature will be implemented in a free upcoming release].• Vehicle trips. Supporting Documents Screen• View Supporting Documents records such as fuel and meal receipts.• Add scanned documents to the Supporting Documents records.](https://usermanual.wiki/Continental-Automotive-Systems/137830.Manual-part1/User-Guide-2448711-Page-16.png)

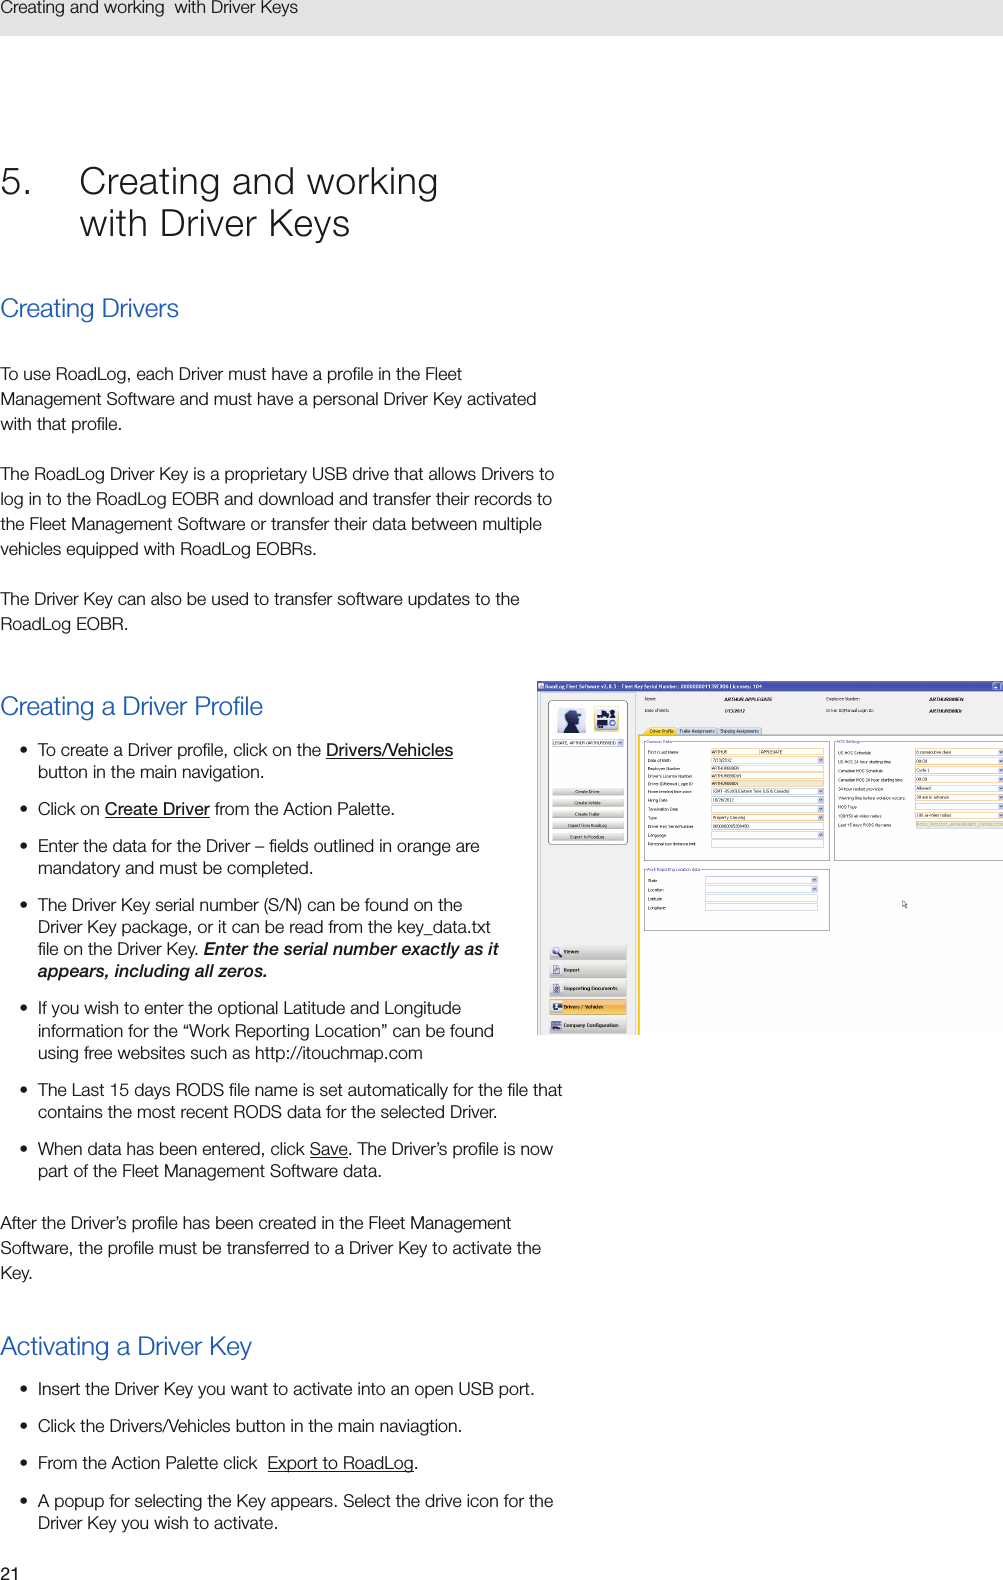
![27Screens & Tabs: Features & FunctionsViolations / ExemptionsViolations are instances where the Driver’s record of duty status has violated FMCSA regulations. Violations are highlighted by red dots on the Logbook Timeline and by red dots in the Events Grid. Clicking on the red dot in the Events Grid reveals a second grid showing details of the Violation including Date / Time, Odometer, Event Code, Type, Short Description and Description.Exemptions are instances where the Driver has encountered circumstances that affected HOS compliance. Exemptions are predefined in the RoadLog EOBR and include Emergency Conditions, Adverse driving conditions, 16 hours extension, 100- or 150-mile radius Driver, and Personal Use. Accumulated Duty Status Durations GridBelow the events grid view, the accumulated Duty Status view shows daily and weekly cumulative totals of each Duty Status, based on the values seen in the logbook and events grid displays.Map View and IFTA / IRP Tabs[These features will be implemented in a free upcoming release]DVIR TabThe DVIR Tab displays Driver Vehicle Inspection Reports recorded by the Driver in the RoadLog EOBR and imported into the Fleet Management Software as well as DVIRs created in the Fleet Management Software. To select the vehicle that you wish to view o r create a DVIR for:• Click on Viewer form the main navigation.• Click on the icon at the top of the Action Palette. Select the vehicle from those shown. • Select the date that you wish to view or create a DVIR for from the interactive calendar in the Action Palette.The drop down menu field below the calendar is self-populated with the times for all the DVIRs created on the selected date. If there is more than one DVIR for a selected date, choose the time from the drop down menu for the DVIR you want to view.At the top of the screen, the work area data displayed reflects the vehicle and the date selected including License Plate Number, VIN, Displayed date, and Make and Model of the vehicle.](https://usermanual.wiki/Continental-Automotive-Systems/137830.Manual-part1/User-Guide-2448711-Page-27.png)