Continental Automotive Systems 137830 Tachograph User Manual Manual part2
Continental Automotive Systems, Inc. Tachograph Manual part2
UserManual.wiki
>
Continental Automotive Systems
>
137830 User Manual
>
Manual part2
Contents
1.
Manual part1
2.
Manual part2
3.
Manual part3
4.
Manual part4
5.
Manual part5
6.
Manual part6
7.
Manual part7
Manual part2
Navigation menu
Upload a User Manual
Namespaces
Wiki Guide
HTML
PDF
Info
Views
User Manual
Discussion / Help
Navigation
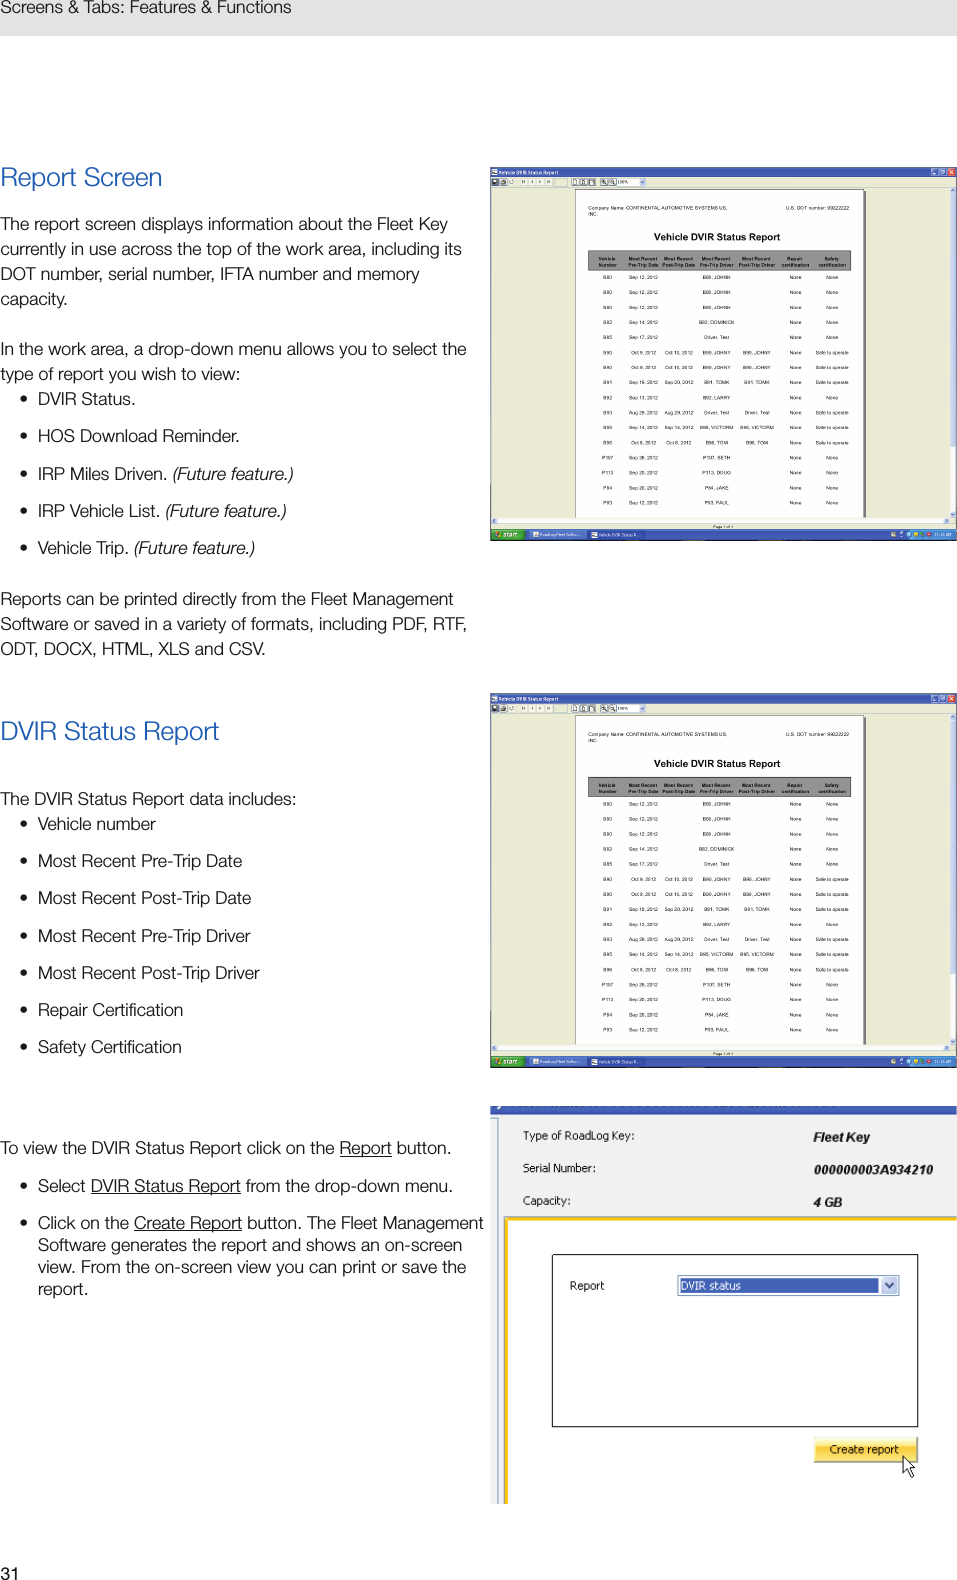
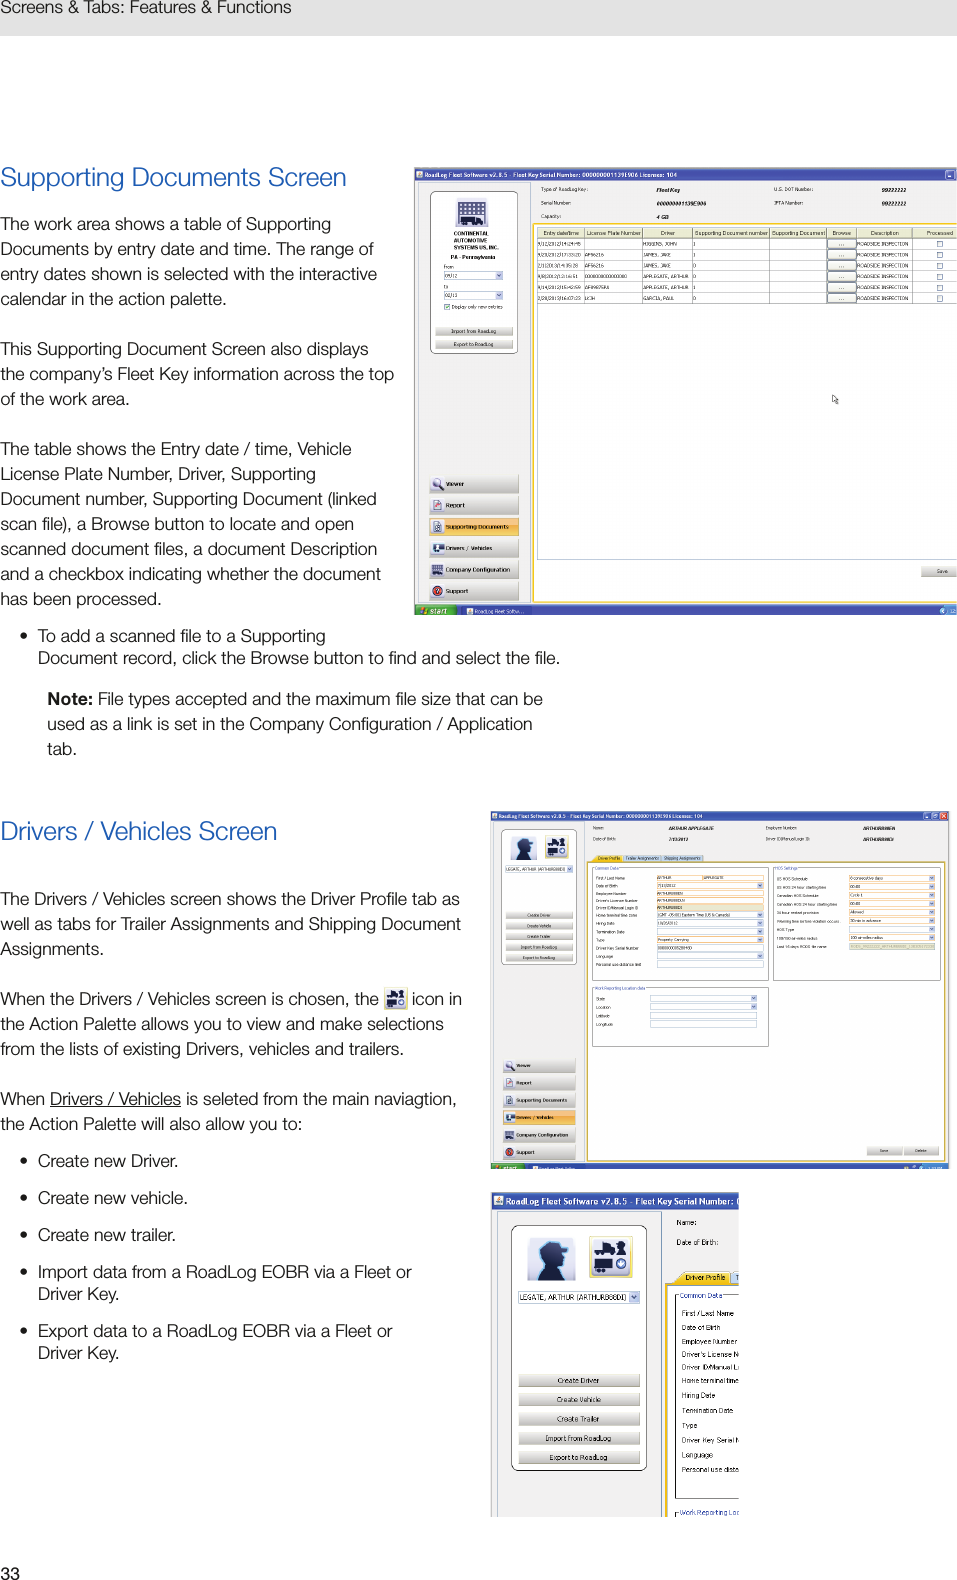
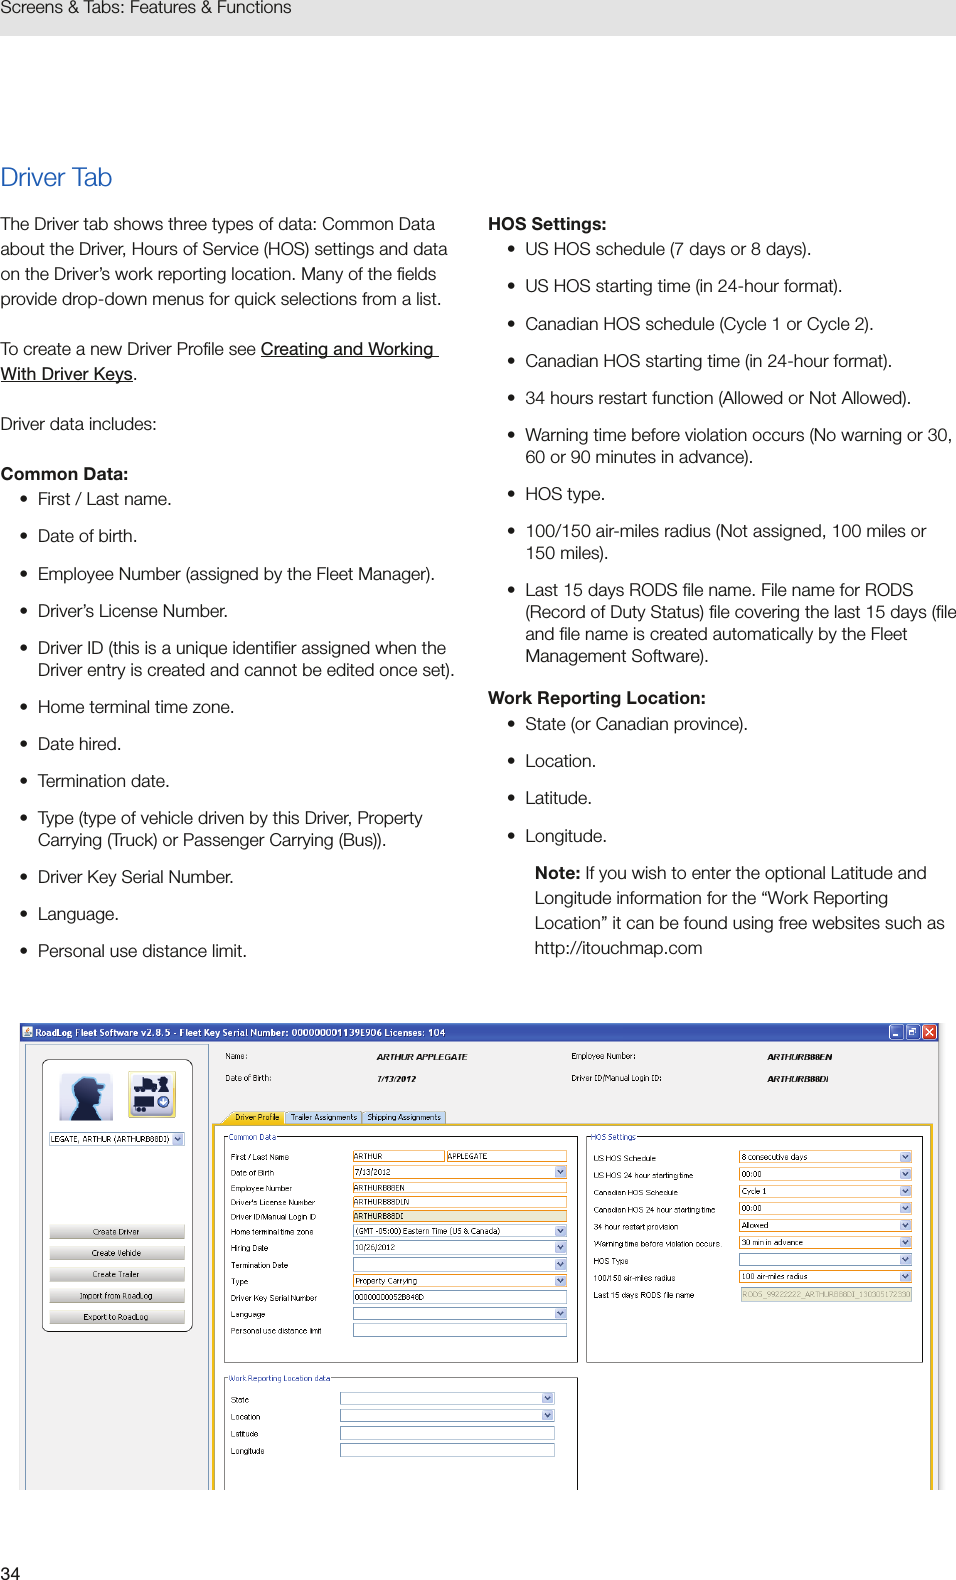
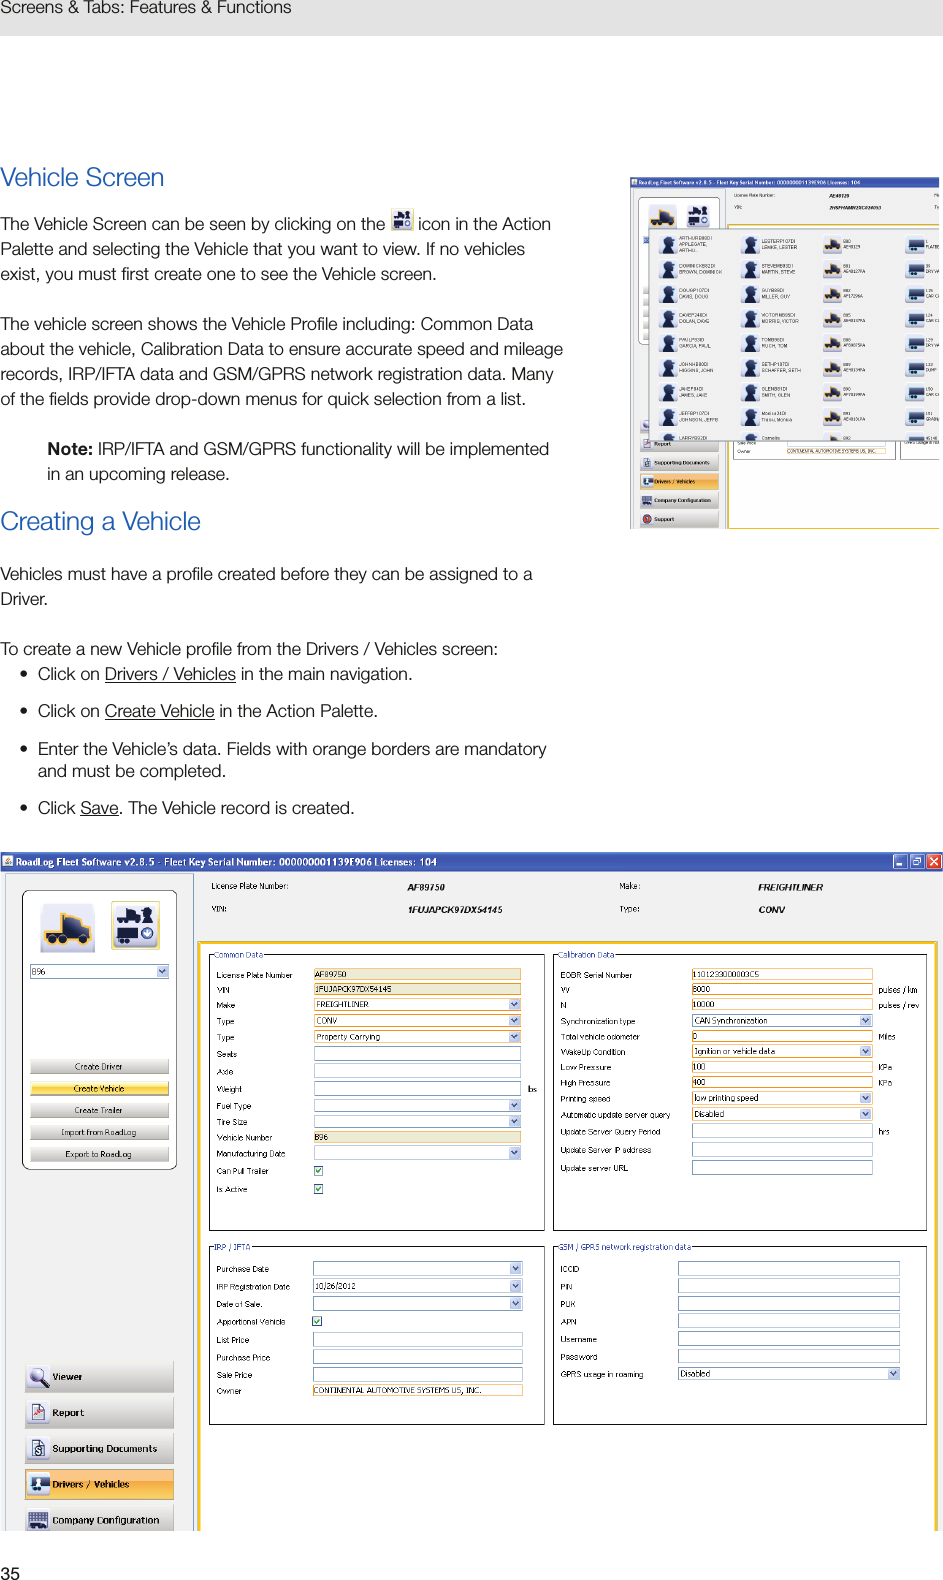
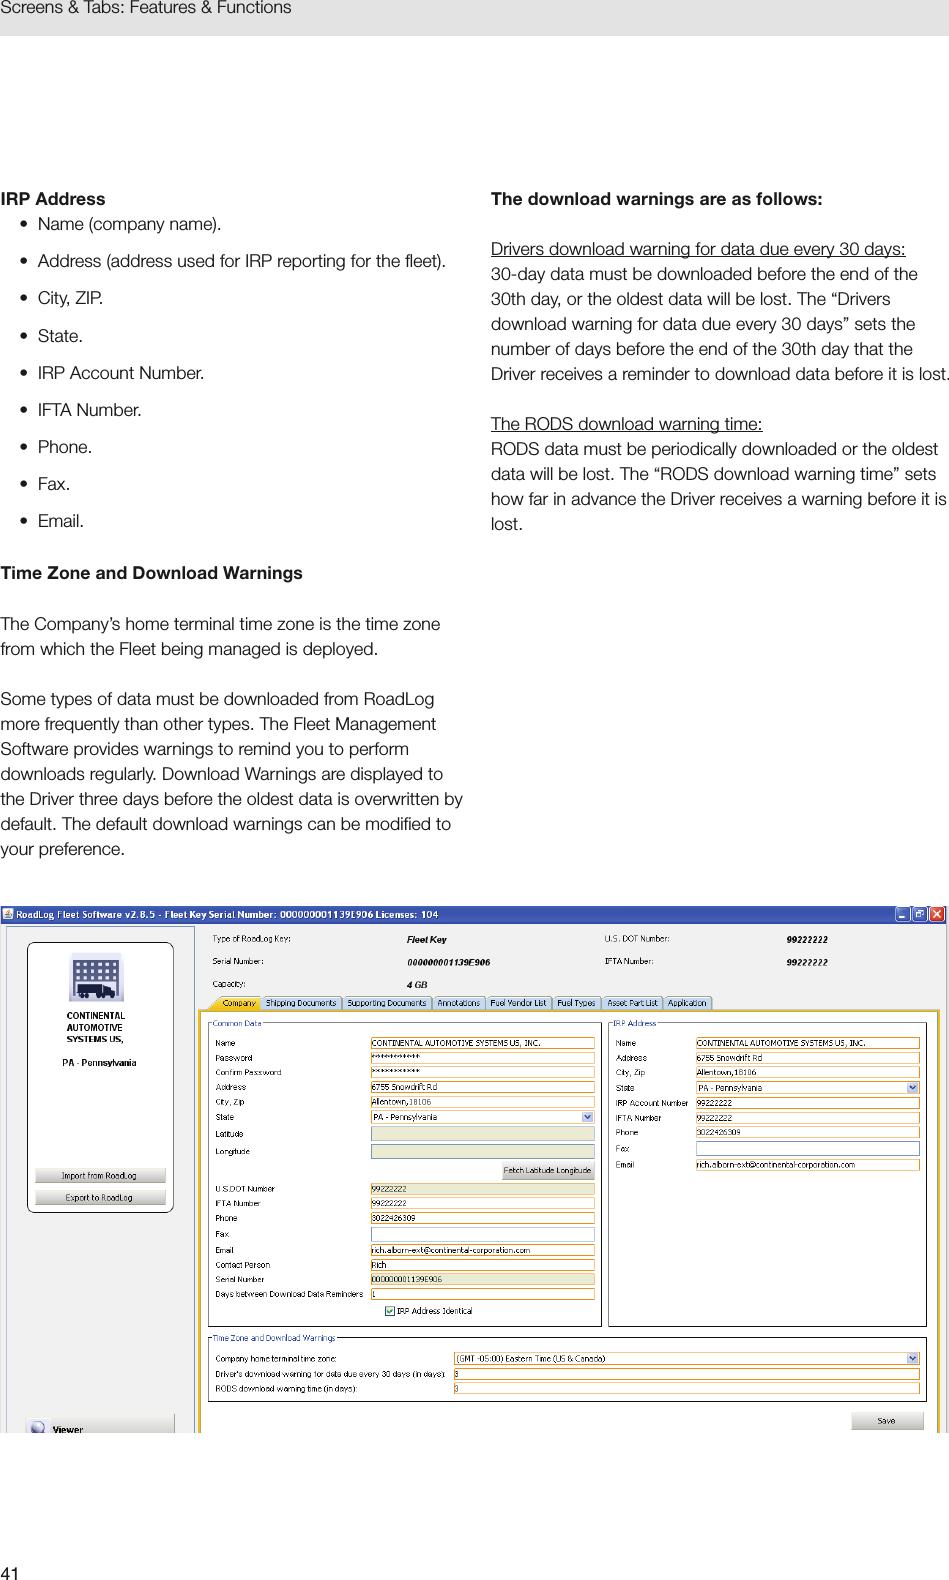
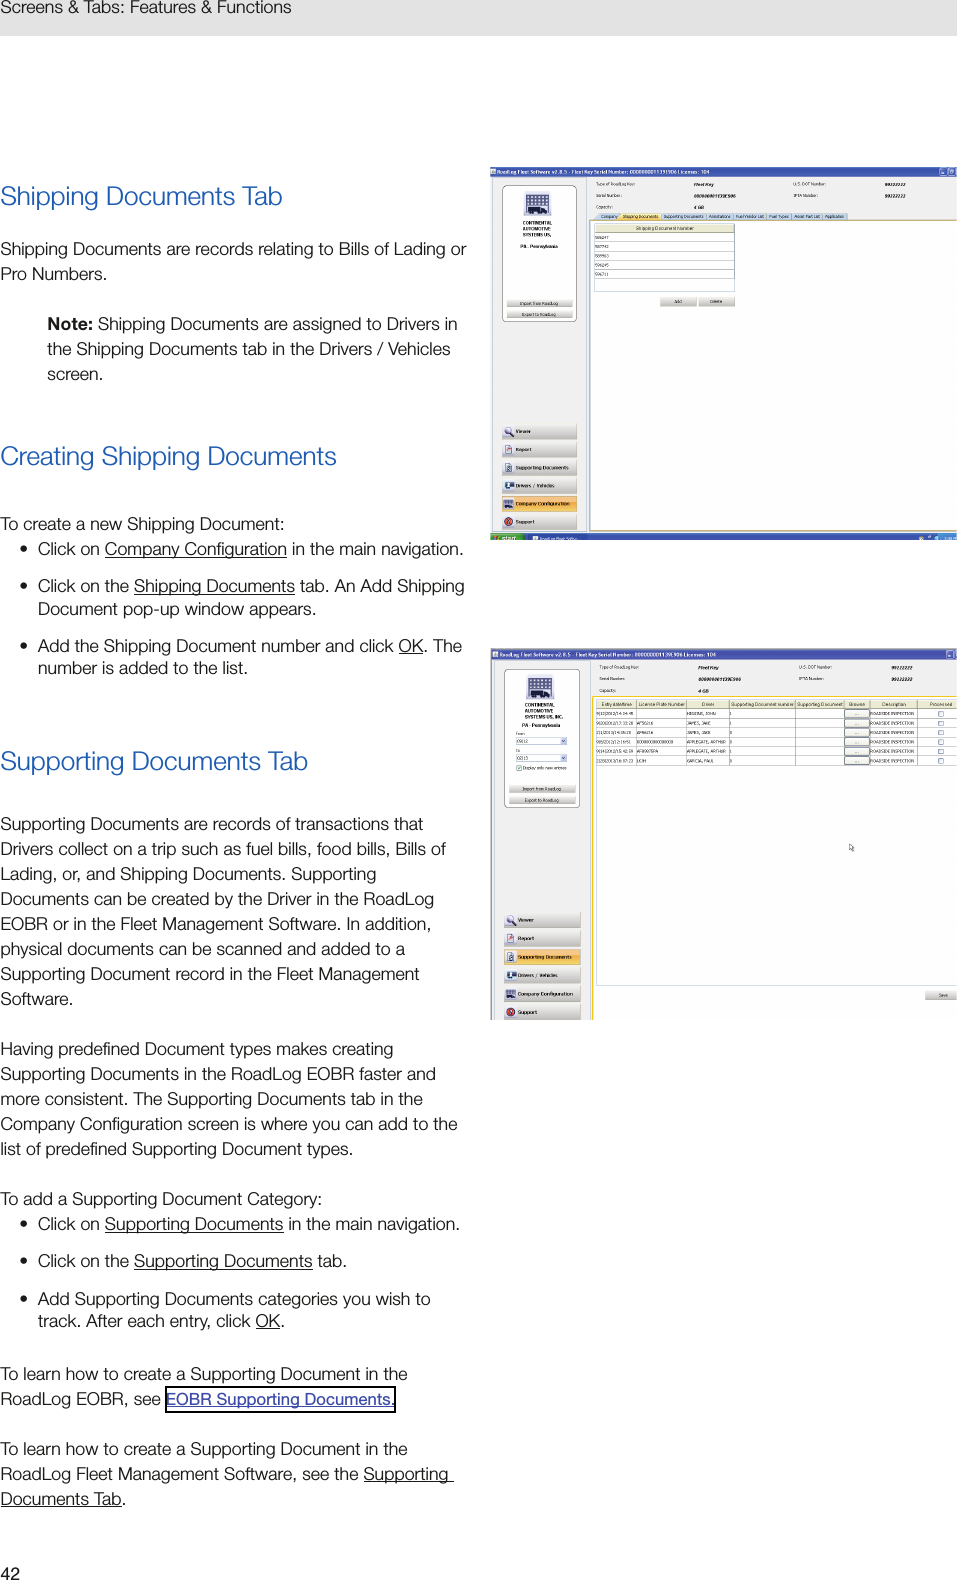
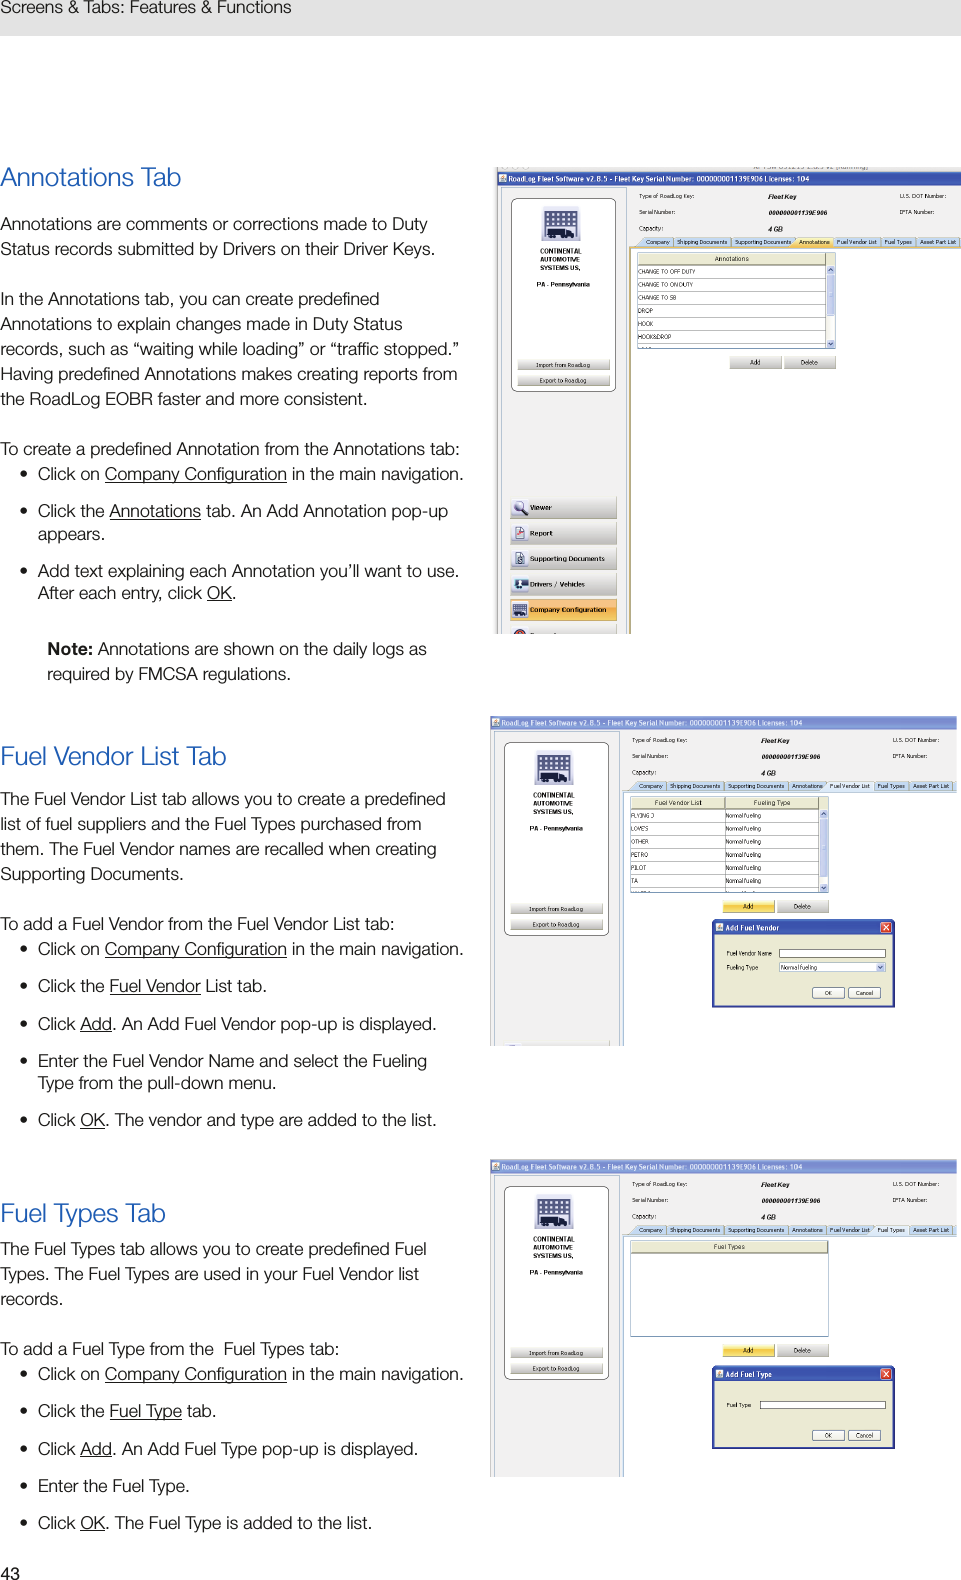
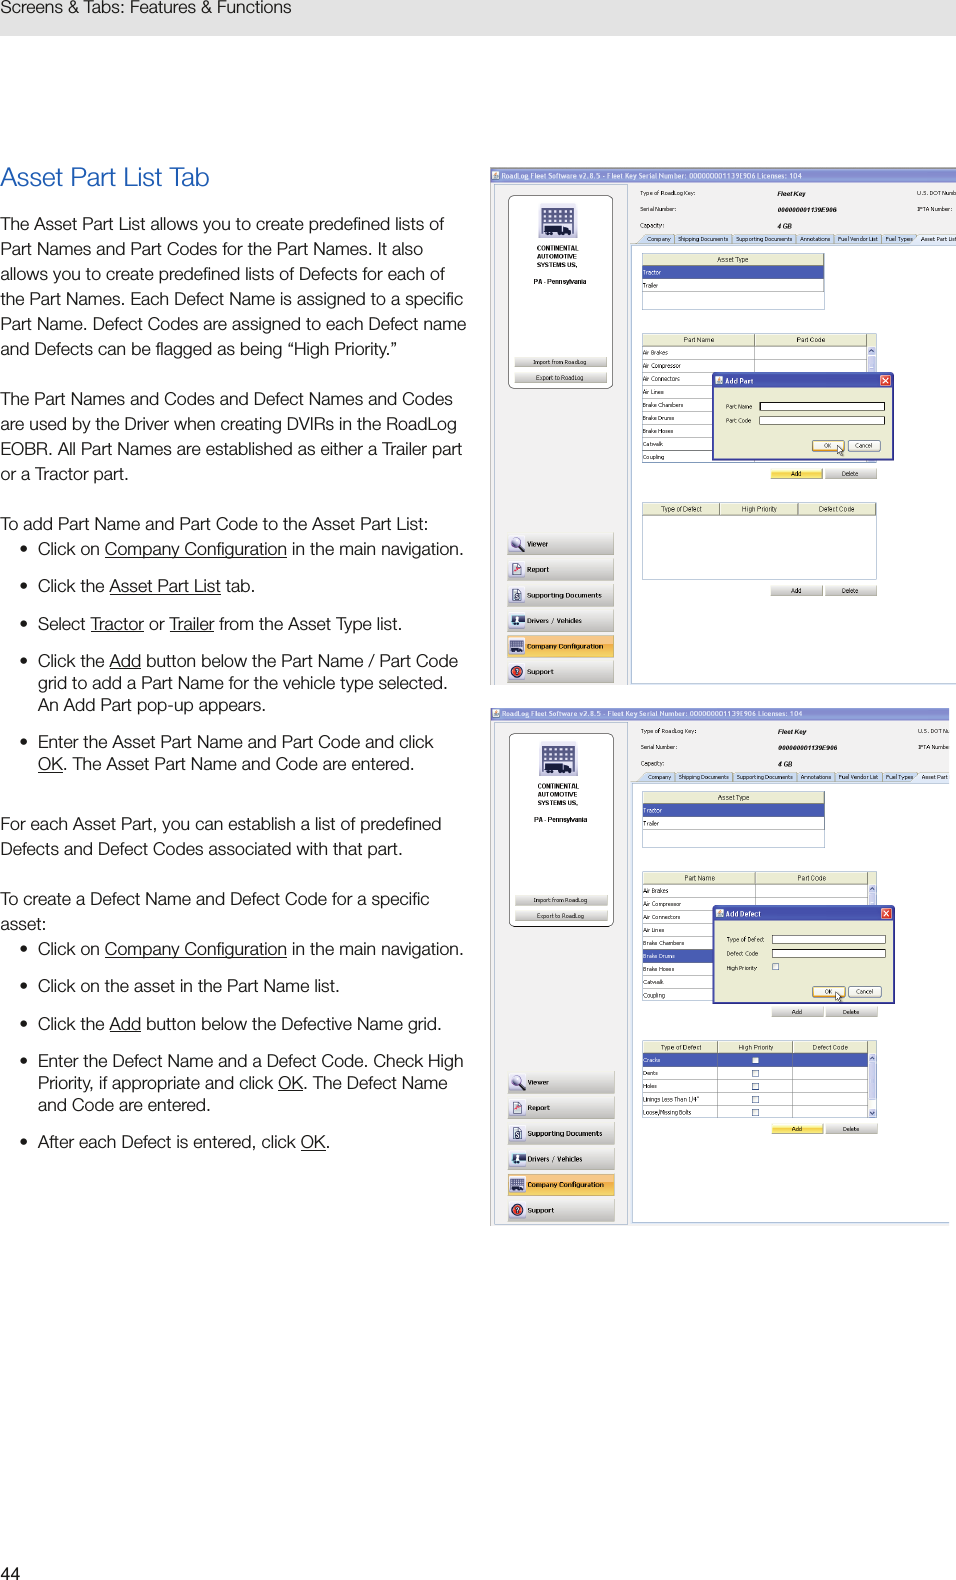
![32Screens & Tabs: Features & FunctionsHOS Download Reminder ReportThe HOS Download Reminder Report shows a list of Drivers and their IDs along with:• Last Downloaded Date• Next Download Due Date• Days until Next DownloadTo view the HOS Download Reminder Report, click on the Report button.• Select HOS Download Reminder Report from the drop-down menu.• Click on the Create Report button. The Fleet Management Software generates the report and shows an on-screen view. From the on-screen view you can print or save the report.IRP Driven Miles and IRP Vehicle List Reports[These features will be implemented in a free upcoming release]Vehicle Trip ReportThe Vehicle Trip Report shows the selected vehicle’s trip data, including state traveled, route used, odometer reading at border crossing(s), distance driven in each state, date of the trip/segment, fuel type used, gallons refueled and fuel price per gallon.• To view the Vehicle Trip Report, click on the Report button.• Select Vehicle Trip Report from the drop-down menu.• Select the vehicle you wish to view from the drop-down menu.• Select a start date and end date from the interactive calendar.• Click in the date field to display the interactive calendar.• Use the double arrows to select the year.• Use the single arrows to select the month.• On the interactive calendar, select your desired date.Note: The Today button provides a shortcut to enter today’s date.• Click on the Create Report button. The Fleet Management Software generates the report and shows an on-screen view. From the on-screen view you can print or save the report.](https://usermanual.wiki/Continental-Automotive-Systems/137830.Manual-part2/User-Guide-2448712-Page-2.png)