Cooper Wiring Devices RF9642Z Z-Wave Plus Accessory Dimmer User Manual
Cooper Wiring Devices Inc Z-Wave Plus Accessory Dimmer
User Manual
ACCESSORY
ACCESSORY
ACCESSORY
White
White
Master Control Accessory
Disconnect Switch
Red
Black Black
Green Green
Switch Identification
Disconnect Switch
Pull out to change bulbs
(Master Dimmer only)
Press to DIM
Light level may be
adjusted with lights
ON or OFF
Press to BRIGHTEN
ON/OFF Button
Light level
indicators
(blue)
LED ON/OFF
indicator (amber)
Hot
Neutral
120V
Green
Ground
White White
White
Black
ACCESSORY
DIMMER
Light Fixture
Black Red
Neutral
120V
Green
Ground
White
White
MASTER
DIMMER
Neutral
Hot
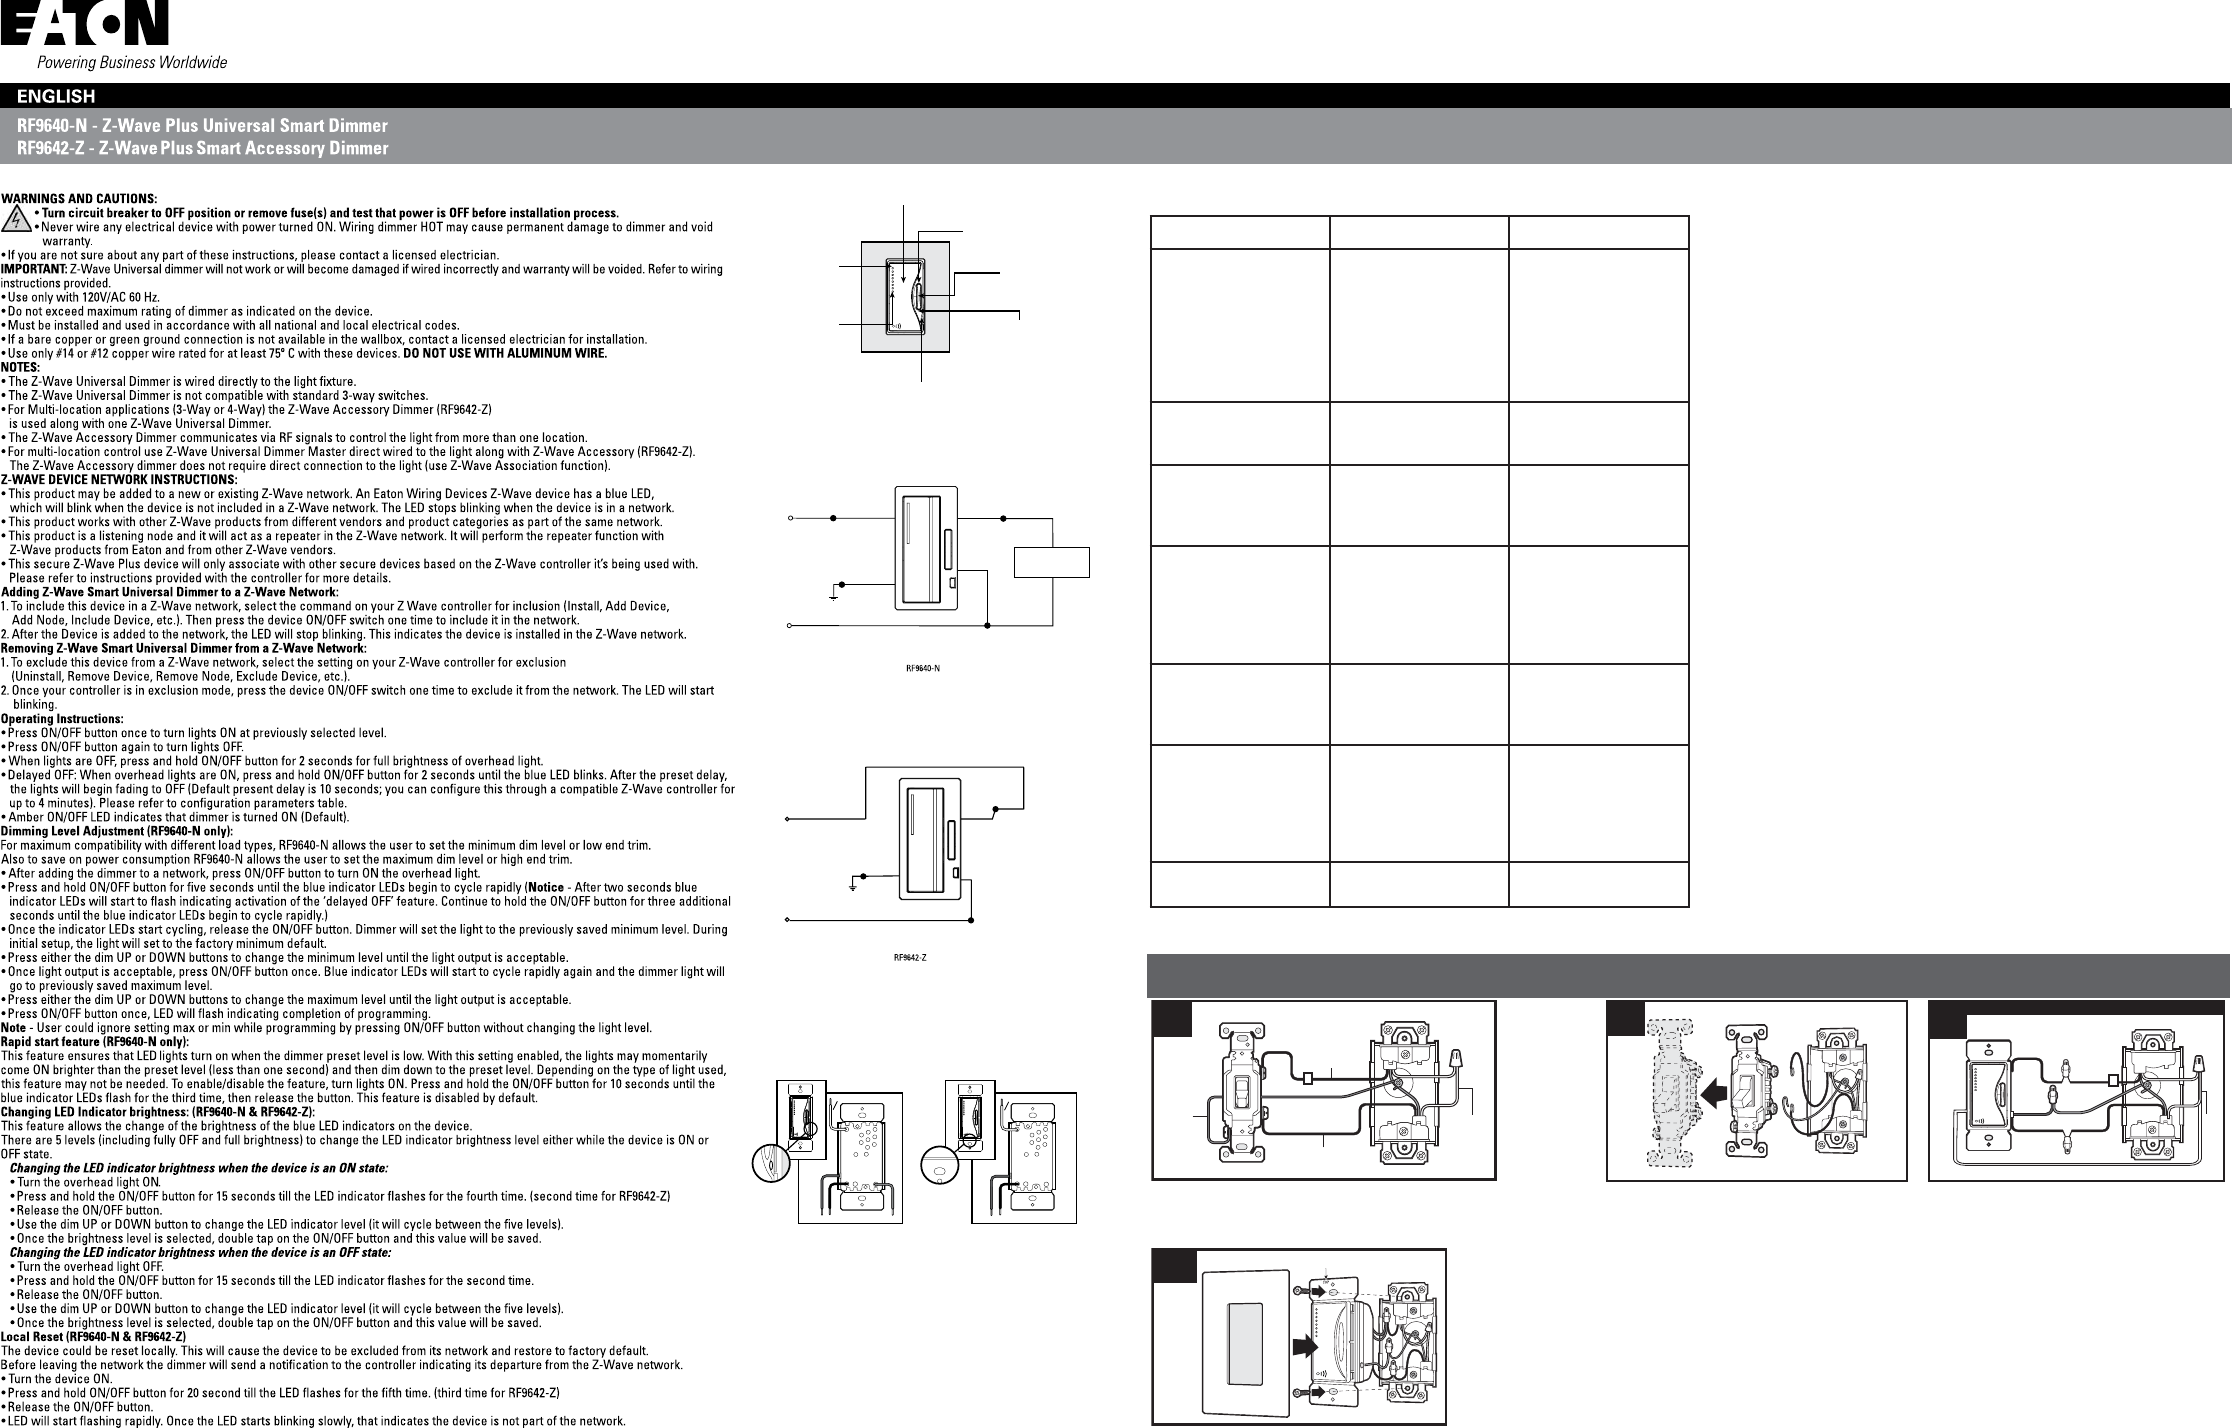
Single Location Control Installation (requires one Master dimmer)
Identify existing wiring (This switch will be a single-pole) and tag “Hot” wire. Use
voltage tester as necessary to confirm “Hot” wire (Voltage will be present at the
“Hot” wire when the lights are off).
Disconnect existing switch and remove. Connect master dimmer as shown by connecting black
wire of dimmer to tagged “Hot” wire. Red wire must
be connected to the wire that goes to the light.
Gently push dimmer into place and secure with mounting screws. Make
sure disconnect switch at bottom of master is fully pushed in
Black
1.3
White
Black
Bare
1.1 1.4
1.2
1.5
Master
Black
Black
Green
Red
Black
White
White
1.3
1.6 TOP
1.4
Tag
-
To Light
Tag
- Hot
Troubleshooting Guide
Symptom Possible Cause Solution
No Function. All LEDs are OFF A) Light bulb(s) burned out
B) Circuit breaker is off or
tripped
C) Disconnect switch on the
dimmer is pulled out to the
OFF position
D) Improper wiring
E) Defective dimmer
A) Replace light bulb
B) Turn on the circuit breaker
C) Push in the disconnect
switch on the dimmer
D) Check and correct wiring
E) Replace dimmer
Erratic operation or flickering
LEDs
A) Loose wiring connections
B) Low dim setting
(RF9640-N)
A) Check and correct wiring
B) Set minimum brightness to
a higher level (RF9640-N)
Lights turns on after long
delay
A) Rapid start feature is
disabled (RF9640-N)
B) Low dim setting
(RF9640-N)
A) Enable rapid start feature
(RF9640-N)
B) Set minimum brightness to
a higher level (RF9640-N)
Functions normally using the
dimmer push buttons but not
from Z-Wave controller and
one of the blue LEDs blinks
ON and OFF about once per
second
Dimmer is not included in
Z-Wave network
Include dimmer in a Z-Wave
network using a Z-Wave
controller. Refer to Z-Wave
controller user manual for
details
Functions normally using the
Master dimmer control but
not from Z-Wave controller
and no LEDs are blinking
Problem with RF communica -
tion on dimmer
Replace dimmer
Functions normally both
locally and from a Z-Wave
controller but can’t be
controlled from a dimmer
accessory switch (RF9642-Z)
or other Z-Wave device
The dimmer accessory or
other Z-Wave device is not
associated with the dimmer
you wish to control
Create an association
between the dimmer acces -
sory or other device and the
dimmer. Refer to your Z-Wave
controller user manual for
details
Dimmer is warm to touch
after a period of time
This is normal No action required
FCC Statement
Any Changes or modifications not expressly approved by the party responsible for compliance could void
the user’s authority to operate the equipment.
This device complies with part 15 of the FCC Rules. Operation is subject to the following two conditions:
(1) This device may not cause harmful interference, and
(2) This device must accept any interference received, including interference that may cause undesired
operation.
Note: This equipment has been tested and found to comply with the limits for a Class B digital device,
pursuant to part 15 of the FCC Rules. These limits are designed to provide reasonable protection
against harmful interference in a residential installation. This equipment generates, uses and can
radiate radio frequency energy and, if not installed and used in accordance with the instructions, may
cause harmful interference to radio communications. However, there is no guarantee that interference
will not occur in a particular installation. If this equipment does cause harmful interference to radio or
television reception, which can be determined by turning the equipment off and on, the user is
encouraged to try to correct the interference by one or more of the following measures:
—Reorient or relocate the receiving antenna.
—Increase the separation between the equipment and receiver.
—Connect the equipment into an outlet on a circuit different from that to which the receiver is
connected.
—Consult the dealer or an experienced radio/TV technician for help.
ISED RSS Warning:
This device complies with Innovation, Science and Economic Development Canada licence-exempt
RSS standard(s). Operation is subject to the following two conditions: (1) this device may not cause
interference, and (2) this device must accept any interference, including interference that may cause
undesired operation of the device.
Le présent appareil est conforme aux CNR d'ISED applicables aux appareils radio exempts de licence.
L'exploitation est autorisée aux deux conditions suivantes:
(1) l'appareil ne doit pas produire de brouillage, et
(2) l'utilisateur de l'appareil doit accepter tout brouillage radioélectrique subi, même si le brouillage
est susceptible d'en compromettre le fonctionnement.
ISED RF exposure statement:
This equipment complies with ISED radiation exposure limits set forth for an uncontrolled environment.
This equipment should be installed and operated with minimum distance 20cm between the radiator&
your body.This transmitter must not be co-located or operating in conjunction with any other antenna or
transmitter. Le rayonnement de la classe b repecte ISED fixaient un environnement non
contrôlés.Installation et mise en œuvre de ce matériel devrait avec échangeur distance minimale entre
20 cm ton corps.Lanceurs ou ne peuvent pas coexister cette antenne ou capteurs avec d’autres.