D Link CS2332LA1 HD Wirless N Outdoor Network Camera User Manual DCS 2332L A1 Manual v1 00 WW 01 11
D Link Corporation HD Wirless N Outdoor Network Camera DCS 2332L A1 Manual v1 00 WW 01 11
UserManual.wiki
>
D Link
>
CS2332LA1 User Manual
User Manual
Navigation menu
Upload a User Manual
Namespaces
Wiki Guide
HTML
PDF
Info
Views
User Manual
Discussion / Help
Navigation

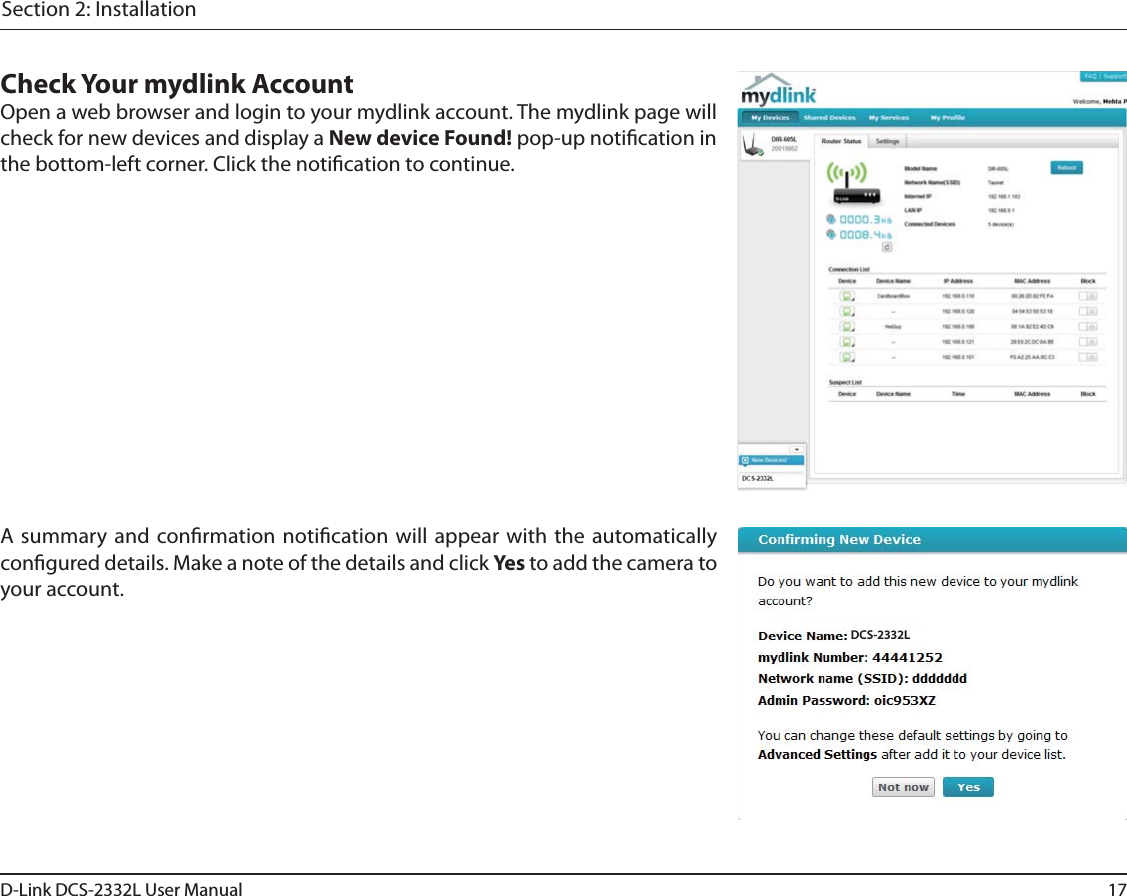


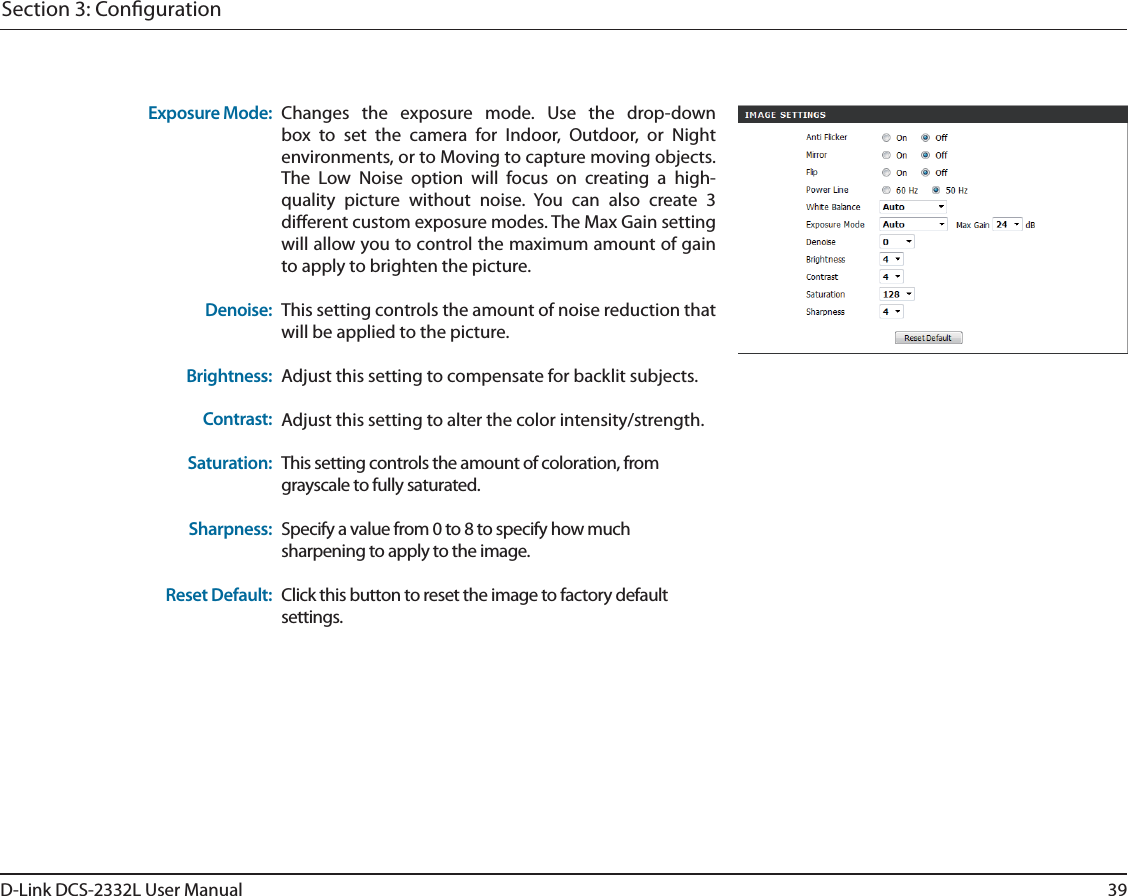
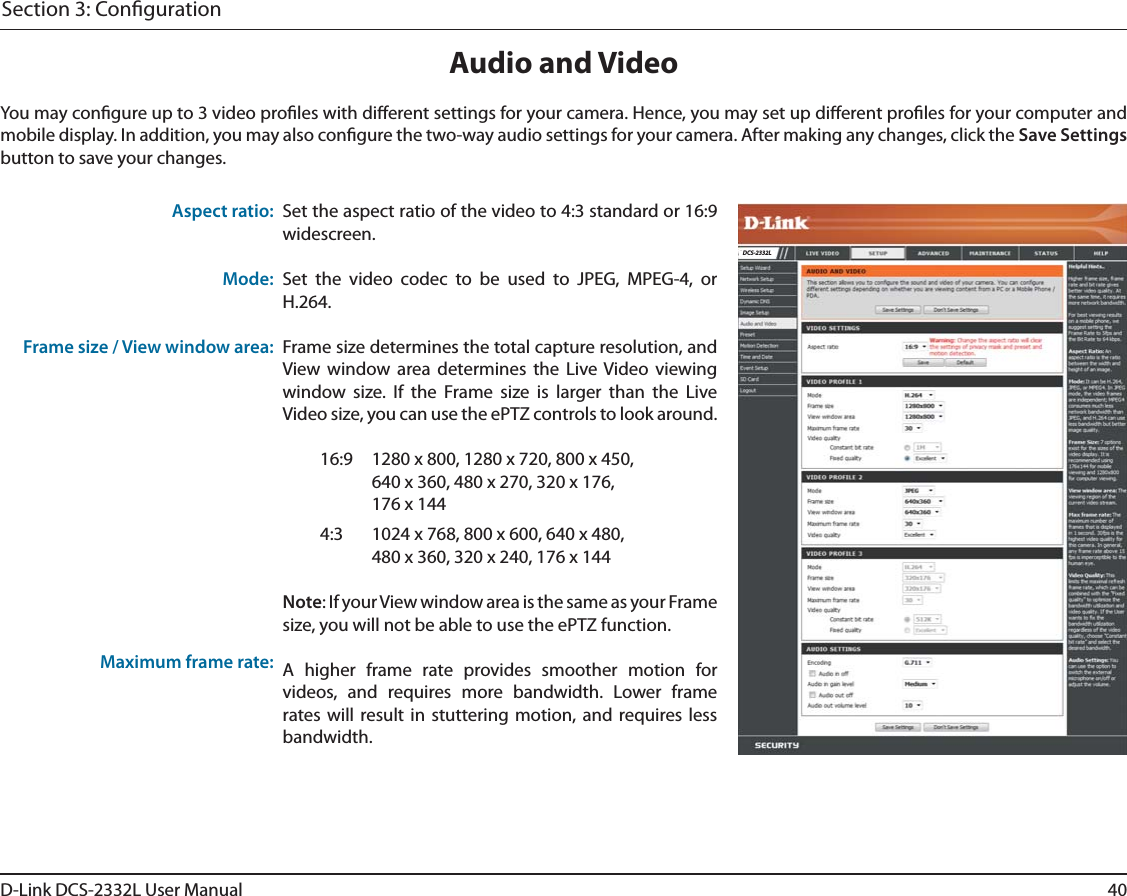
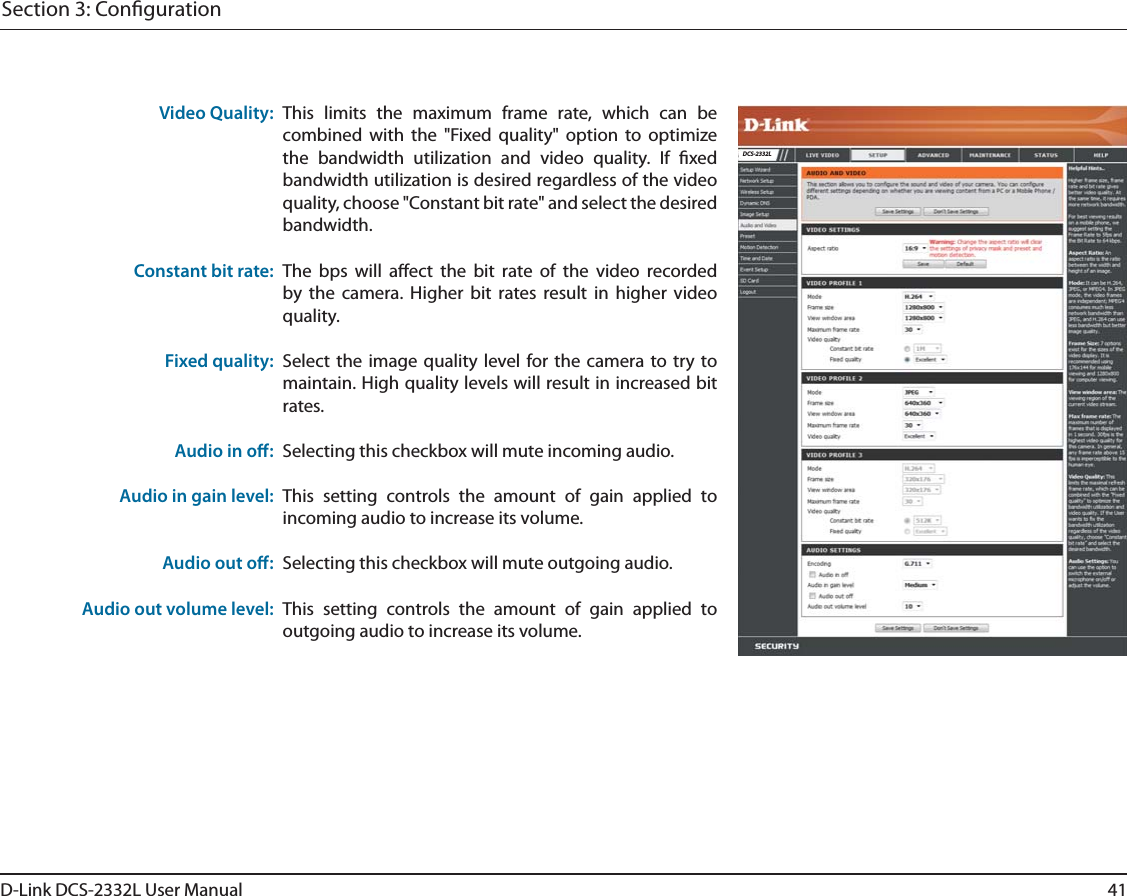
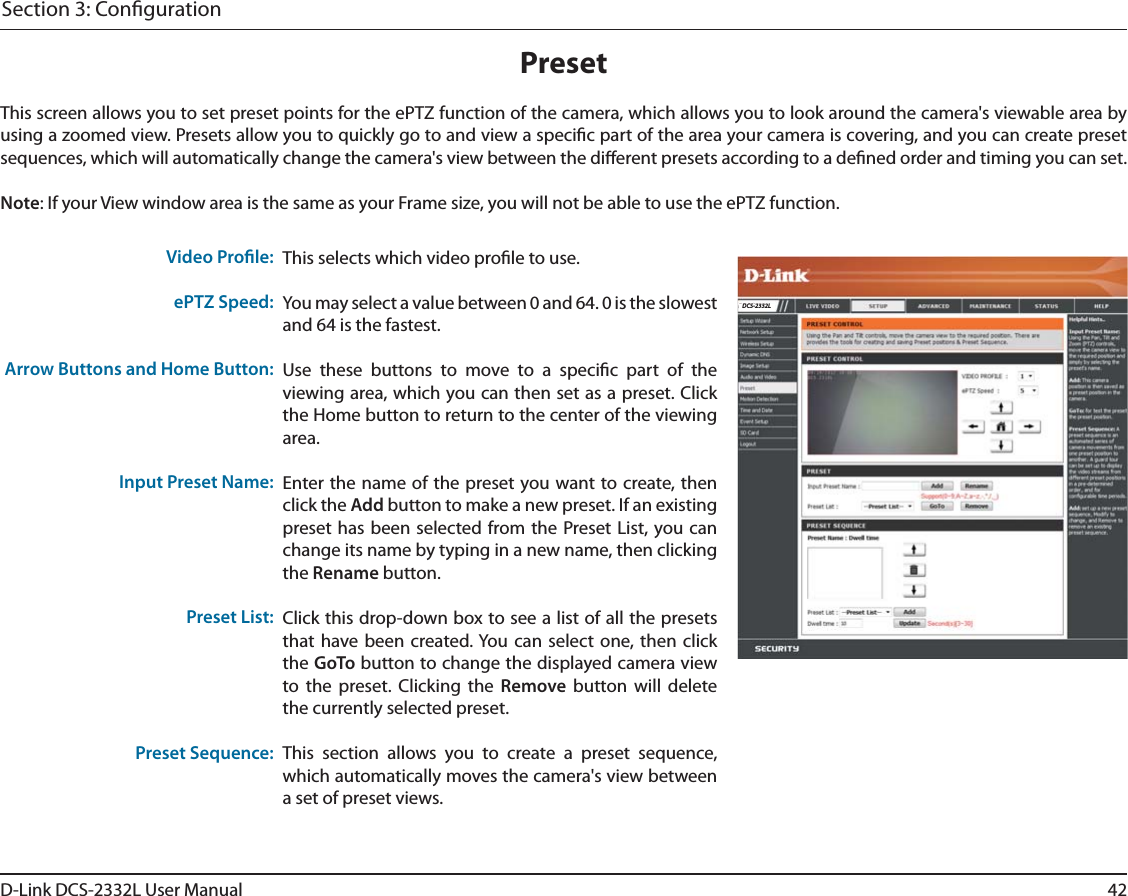

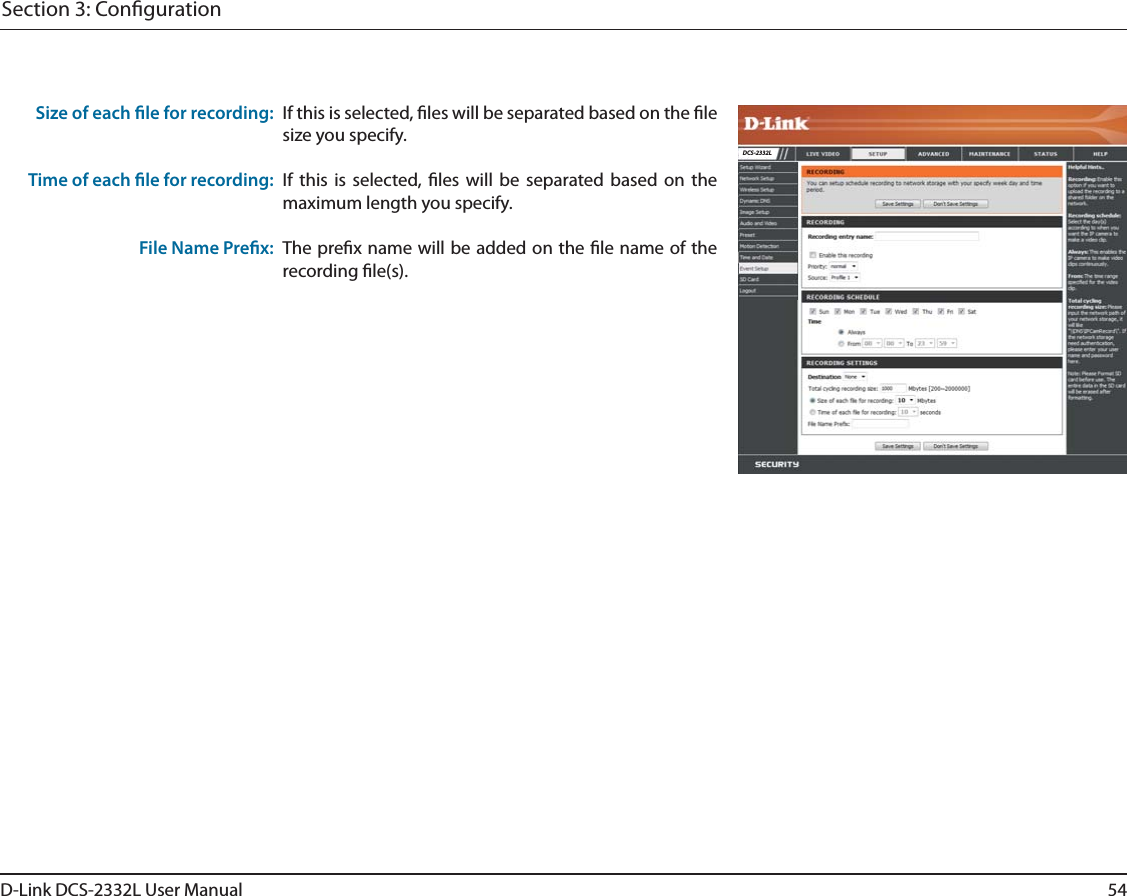
![49D-Link DCS-2332L User ManualSection 3: CongurationAdd MediaMedia Name:Snapshot:Source:Send pre-event image(s) [0~4]:Send post-event image(s) [0~7]:File name prex:Add date and time sux to le name:Enter a unique name for media type you want to create.Select this option to set the media type to snapshots.Set the video prole to use as the media source. Refer to "Audio and Video" on page 40 for more information on video proles.Set the number of pre-event images to take. Pre-event images are images taken before the main event snapshot is taken.Set the number of post-event images to take. Post-event images are images taken after the main event snapshot is taken. You can set up to 7 post-event images to be taken.The prex name will be added on the le name.Check it to add timing information as le name sux.There are three types of media, Snapshot, Video Clip, and System Log. After making any changes, click the Save Settings button to save your changes.DCS-2332L](https://usermanual.wiki/D-Link/CS2332LA1/User-Guide-1880571-Page-49.png)