D Link DIR628A2 RangeBooster N Dual Band Router User Manual 3
D Link Corporation RangeBooster N Dual Band Router 3
D Link >
Contents
User manual 3
31D-Link DIR-628 User Manual
Section 3 - Configuration
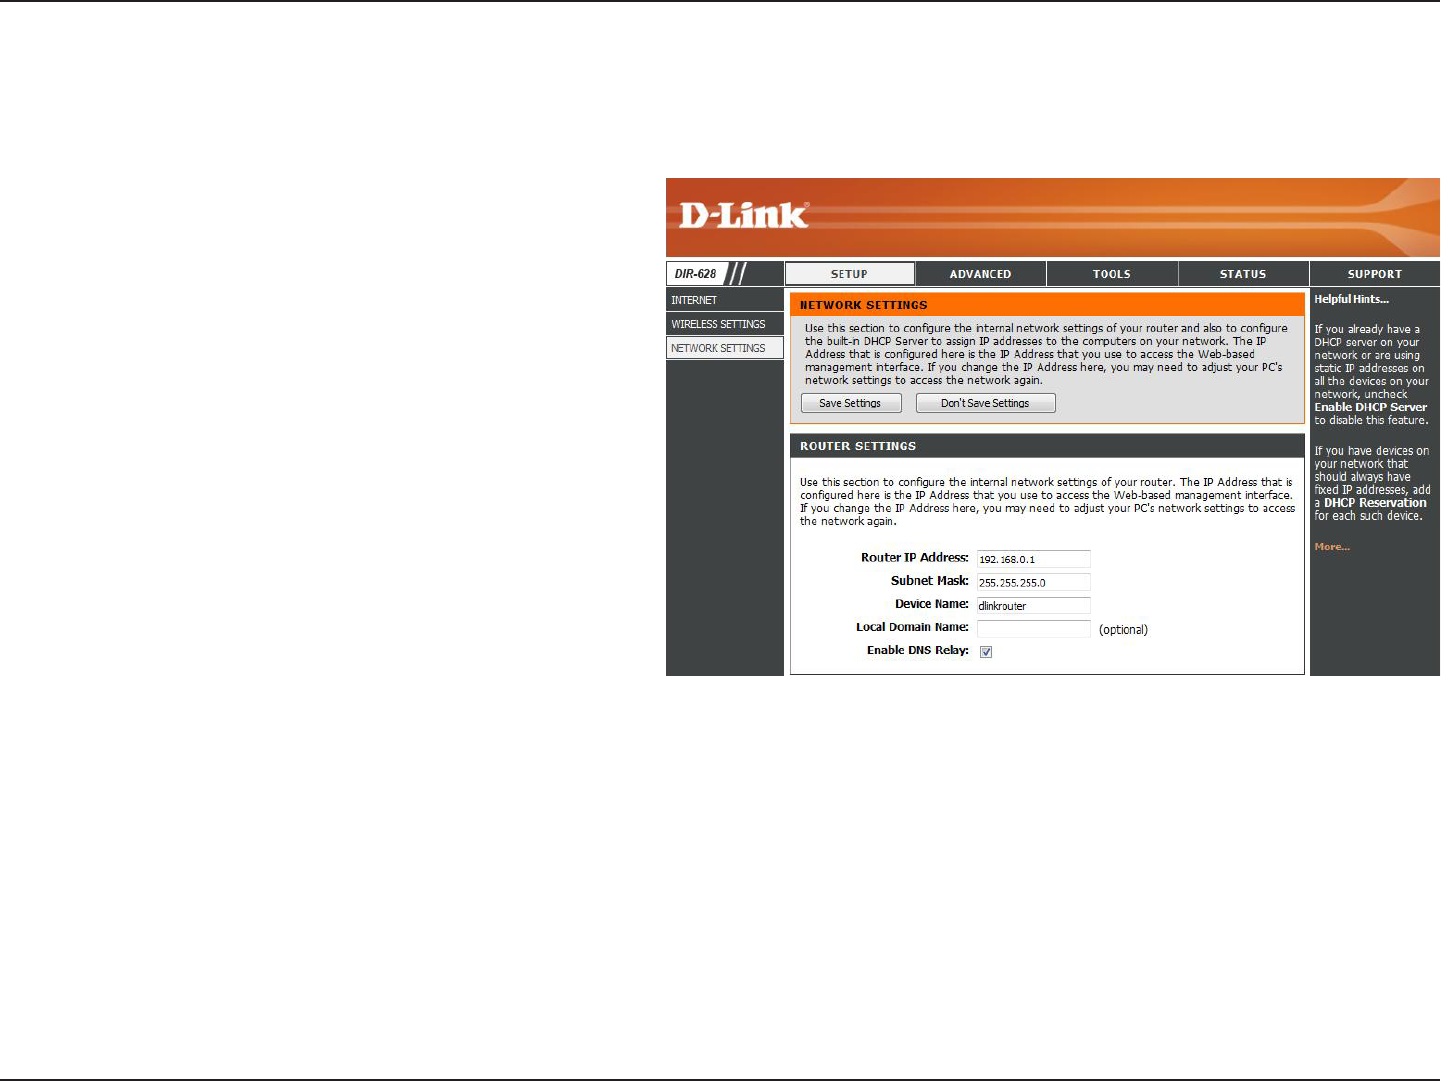
This section will allow you to change the local network settings of the router and to configure the DHCP settings.
Network Settings
Enter the IP address of the router. The default
IP address is 192.168.0.1.
If you change the IP address, once you click
Apply, you will need to enter the new IP
address in your browser to get back into the
configuration utility.
Enter the Subnet Mask. The default subnet
mask is 255.255.255.0.
Enter a name for the router.
Enter the Domain name (Optional).
Uncheck the box to transfer the DNS server
information from your ISP to your computers.
If checked, your computers will use the router
for a DNS server.
IP Address:
Subnet Mask:
Device Name:
Local Domain:
Enable DNS Relay:
32D-Link DIR-628 User Manual
Section 3 - Configuration
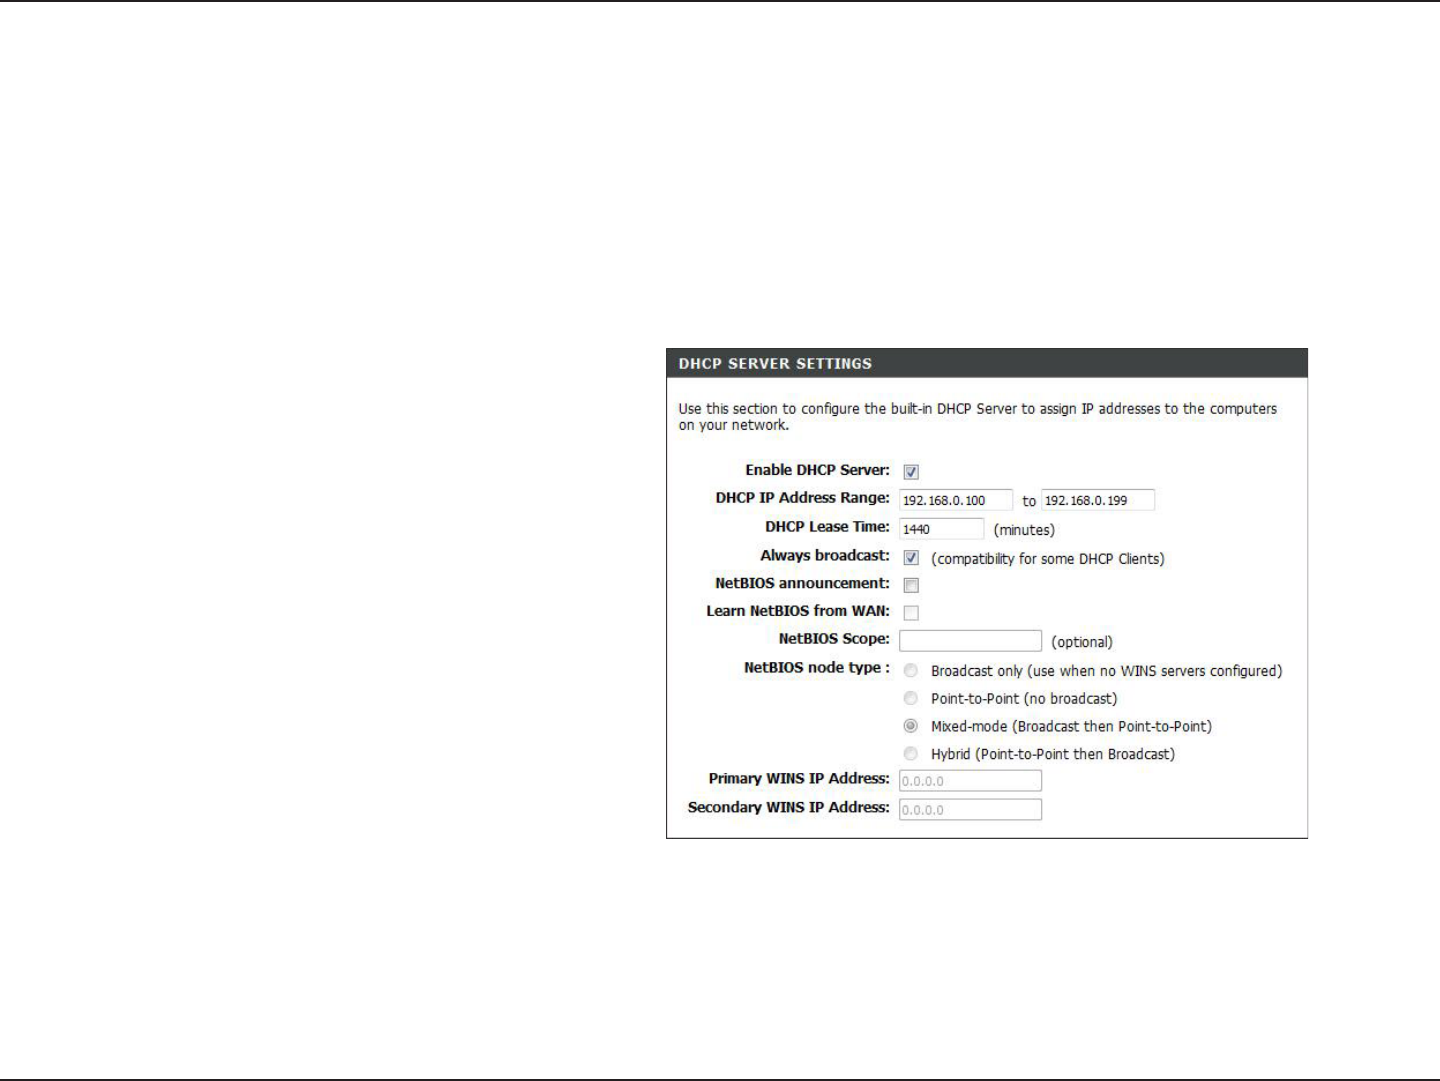
Check this box to enable the DHCP server on
your router. Uncheck to disable this function.
Enter the starting and ending IP addresses for
the DHCP server’s IP assignment.
Note: If you statically (manually) assign IP
addresses to your computers or devices, make
sure the IP addresses are outside of this range
or you may have an IP conflict.
The length of time for the IP address lease.
Enter the Lease time in minutes.
Enable this feature to broadcast your networks
DHCP server to LAN/WLAN clients.
NetBIOS allows LAN hosts to discover all
other computers within the network, enable
this feature to allow the DHCP Server to offer
NetBIOS configuration settings.
Enable this feature to allow WINS information to
be learned from the WAN side, disable to allow
manual configuration.
Enable DHCP
Server:
DHCP IP Address
Range:
DHCP Lease
Time:
Always
Broadcast:
NetBIOS
Announcement:
Learn NetBIOS
from WAN:
DHCP Server Settings
DHCP stands for Dynamic Host Control Protocol. The DIR-628 has a built-in DHCP server. The DHCP Server will
automatically assign an IP address to the computers on the LAN/private network. Be sure to set your computers to be
DHCP clients by setting their TCP/IP settings to “Obtain an IP Address Automatically.” When you turn your computers
on, they will automatically load the proper TCP/IP settings provided by the DIR-628. The DHCP Server will automatically
allocate an unused IP address from the IP address pool to the requesting computer. You must specify the starting and
ending address of the IP address pool.

33D-Link DIR-628 User Manual
Section 3 - Configuration
This feature allows the configuration of a NetBIOS ‘domain’ name under which network hosts operates. This setting has no
effect if the ‘Learn NetBIOS information from WAN’ is activated.”
Select the different type of NetBIOS node: Broadcast only, Point-to-Point, Mixed-mode, and Hybrid.
Enter your Primary (and Secondary) WINS IP address(es).
NetBIOS Scope:
NetBIOS Mode
Type:
Primary/
Secondary WINS
IP Address:
34D-Link DIR-628 User Manual
Section 3 - Configuration
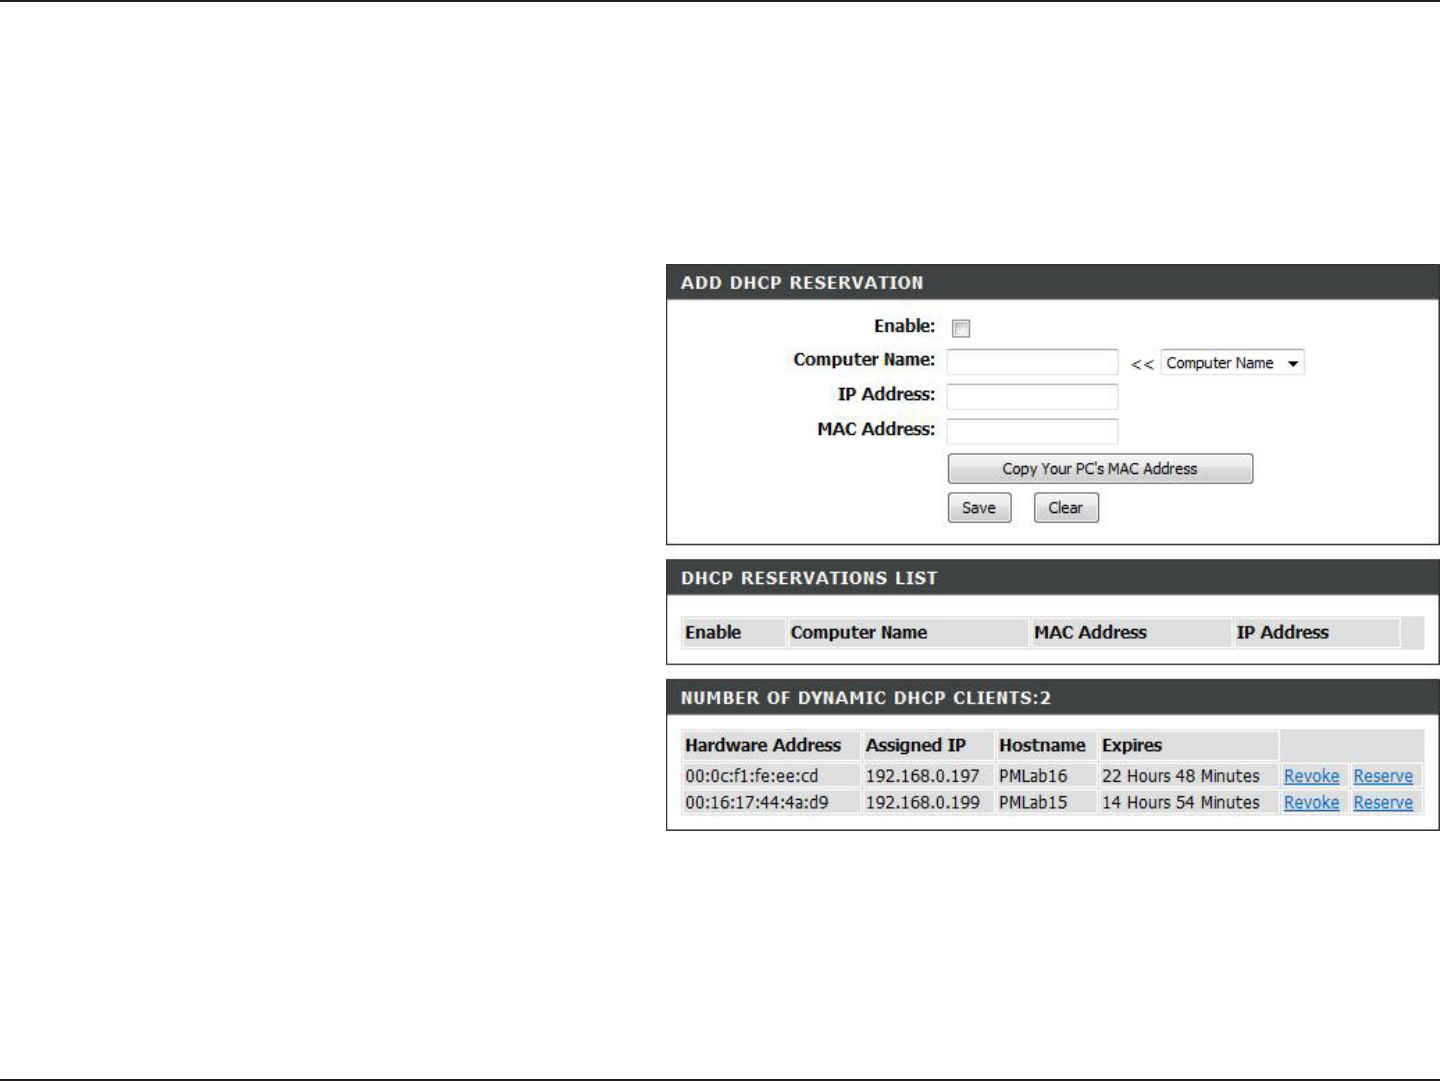
DHCP Reservation
If you want a computer or device to always have the same IP address assigned, you can create a DHCP reservation.
The router will assign the IP address only to that computer or device.
Note: This IP address must be within the DHCP IP Address Range.
Check this box to enable the reservation.
Enter the computer name or select from the
drop-down menu and click <<.
Enter the IP address you want to assign to the
computer or device. This IP Address must be
within the DHCP IP Address Range.
Enter the MAC address of the computer or
device.
If you want to assign an IP address to the
computer you are currently on, click this button
to populate the fields.
Click Save to save your entry. You must click
Save Settings at the top to activate your
reservations.
In this section you can see what LAN devices
are currently leasing IP addresses.
Click Revoke to cancel the lease for a specific
LAN device and free an entry in the lease table.
Do this only if the device no longer needs the
leased IP address, because, for example, it has
been removed from the network.
Enable:
Computer Name:
IP Address:
MAC Address:
Copy Your PC’s
MAC Address:
Save:
Number of
Dynamic DHCP
Clients:
Revoke:

35D-Link DIR-628 User Manual
Section 3 - Configuration
Reserve:
Note: The Revoke option will not disconnect a PC with a current network session from the network; you would need to use
MAC Address Filter to do that. Revoke will only free up a DHCP Address for the very next requester. If the previous
owner is still available, those two devices may both receive an IP Address Conflict error, or the second device may
still not receive an IP Address; in that case, you may still need to extend the “DHCP IP Address Range” to address
the issue, it is located in the DHCP Server section.
The Reserve option converts this dynamic IP allocation into a DHCP Reservation and adds the corresponding entry to the
DHCP Reservations List.

36D-Link DIR-628 User Manual
Section 3 - Configuration
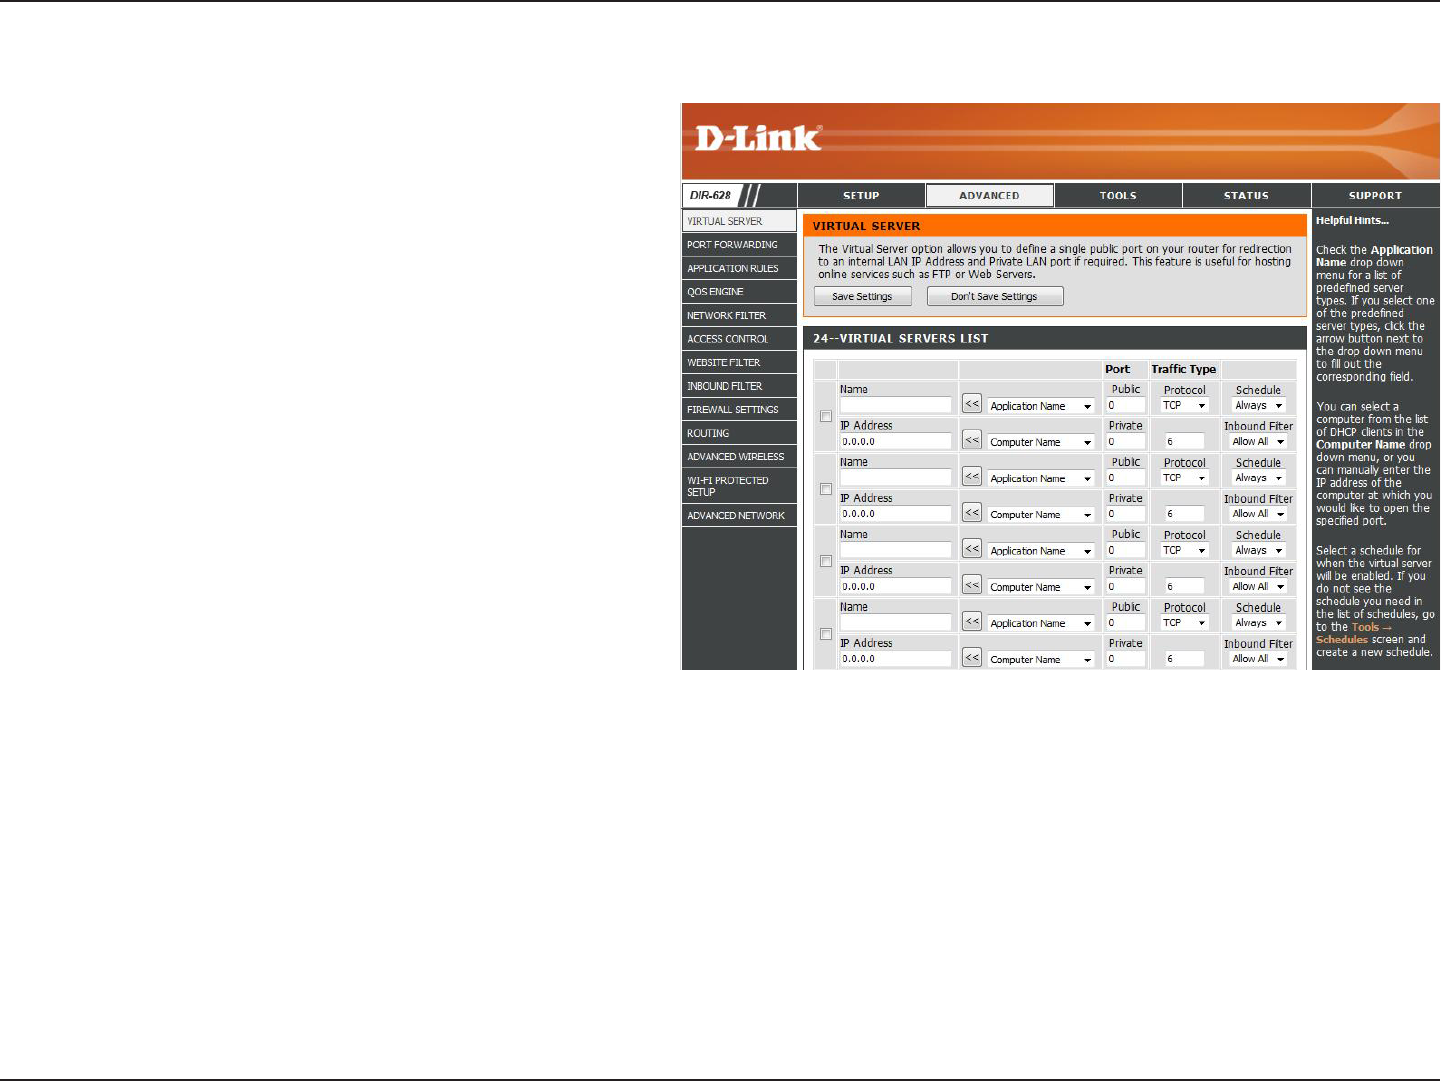
The DIR-628 can be configured as a virtual server so that remote users accessing Web or FTP services via the public
IP address can be automatically redirected to local servers in the LAN (Local Area Network).
The DIR-628 firewall feature filters out unrecognized packets to protect your LAN network so all computers networked
with the DIR-628 are invisible to the outside world. If you wish, you can make some of the LAN computers accessible
from the Internet by enabling Virtual Server. Depending on the requested service, the DIR-628 redirects the external
service request to the appropriate server within the LAN network.
The DIR-628 is also capable of port-redirection meaning incoming traffic to a particular port may be redirected to a
different port on the server computer.
Each virtual service that is created will be listed at the bottom of the screen in the Virtual Servers List. There are
pre-defined virtual services already in the table. You may use them by enabling them and assigning the server IP to
use that particular virtual service.
For a list of ports for common applications, please visit http://support.dlink.com/faq/view.asp?prod_id=1191.
Virtual Server
37D-Link DIR-628 User Manual
Section 3 - Configuration
This will allow you to open a single port. If you would like to open a range of ports, refer to page 35.
Enter a name for the rule or select an application
from the drop-down menu. Select an application
and click << to populate the fields.
Enter the IP address of the computer on your
local network that you want to allow the incoming
service to. If your computer is receiving an IP
address automatically from the router (DHCP),
you computer will be listed in the “Computer
Name” drop-down menu. Select your computer
and click <<.
Enter the port that you want to open next to Private
Port and Public Port. The private and public ports
are usually the same. The public port is the port
seen from the Internet side, and the private port
is the port being used by the application on the
computer within your local network.
Select TCP, UDP, or Both from the drop-down
menu.
Select Allow All (most common) or a created
Inbound filter. You may create your own inbound
filters in the Advanced > Inbound Filter page.
The schedule of time when the Virtual Server
Rule will be enabled. The schedule may be set to
Always, which will allow the particular service to
always be enabled. You can create your own times
in the Tools > Schedules section.
Name:
IP Address:
Private Port/
Public Port:
Protocol Type:
Inbound Filter:
Schedule:
38D-Link DIR-628 User Manual
Section 3 - Configuration
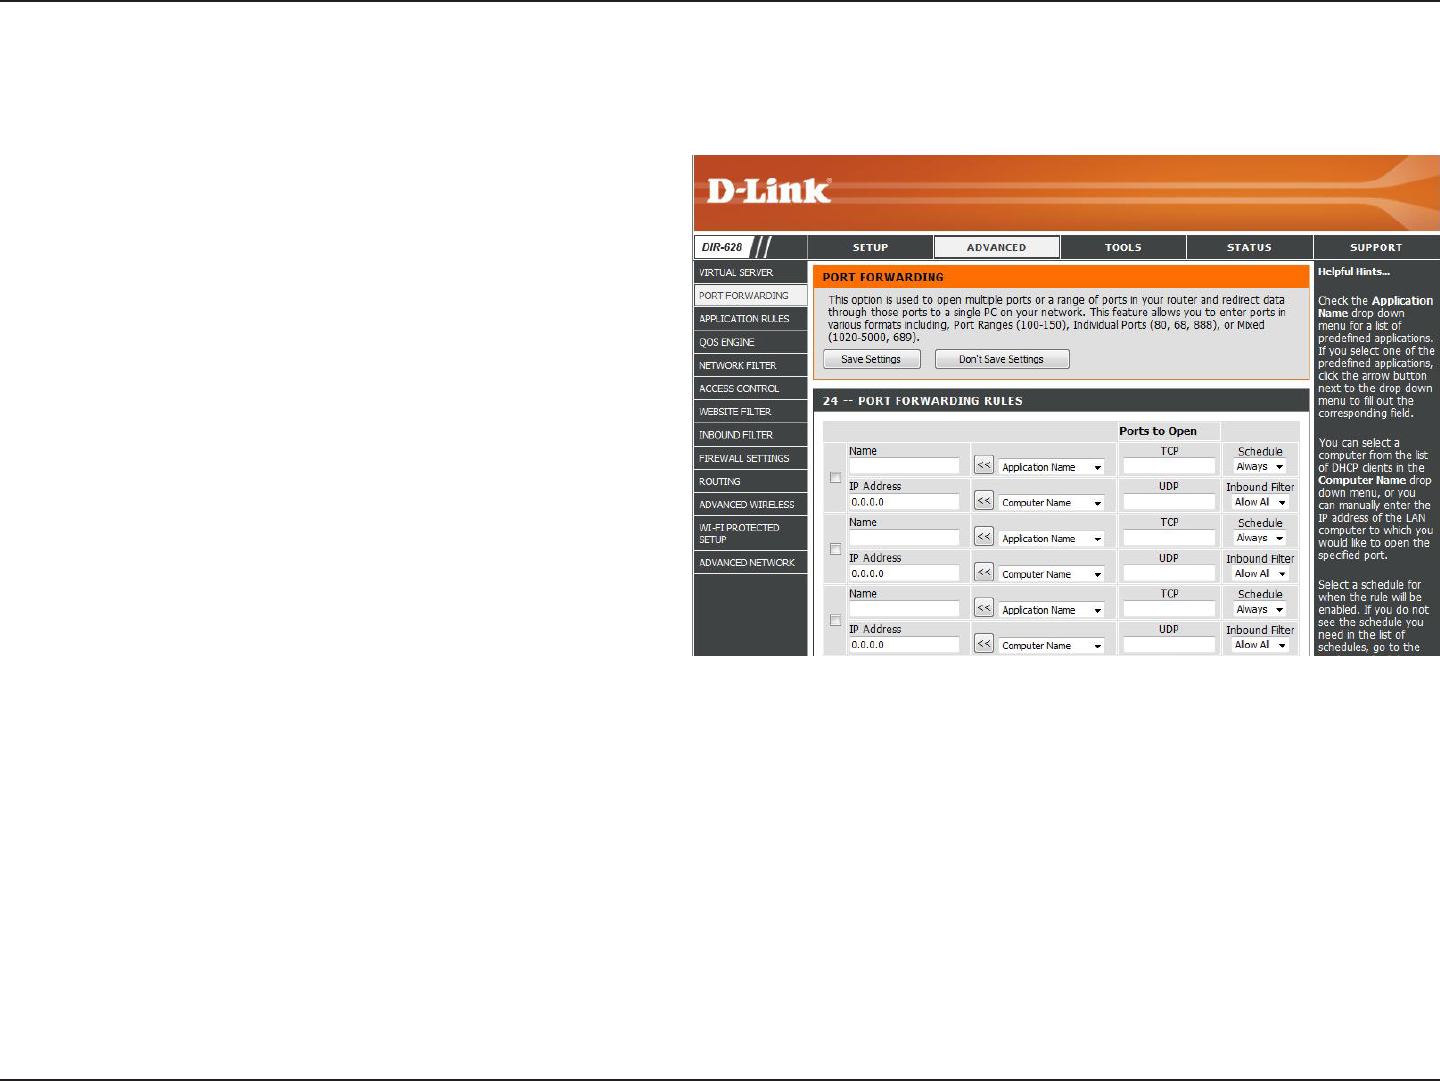
This will allow you to open a single port or a range of ports.
Port Forwarding
Enter a name for the rule or select an application
from the drop-down menu. Select an application
and click << to populate the fields.
Enter the IP address of the computer on your local
network that you want to allow the incoming service
to. If your computer is receiving an IP address
automatically from the router (DHCP), you computer
will be listed in the “Computer Name” drop-down
menu. Select your computer and click <<.
Enter the TCP and/or UDP port or ports that you
want to open. You can enter a single port or a range
of ports. Seperate ports with a common.
Example: 24,1009,3000-4000
Select Allow All (most common) or a created
Inbound filter. You may create your own inbound
filters in the Advanced > Inbound Filter page.
The schedule of time when the Virtual Server Rule
will be enabled. The schedule may be set to Always,
which will allow the particular service to always be
enabled. You can create your own times in the Tools
> Schedules section.
Name:
IP Address:
TCP/UDP:
Inbound Filter:
Schedule:
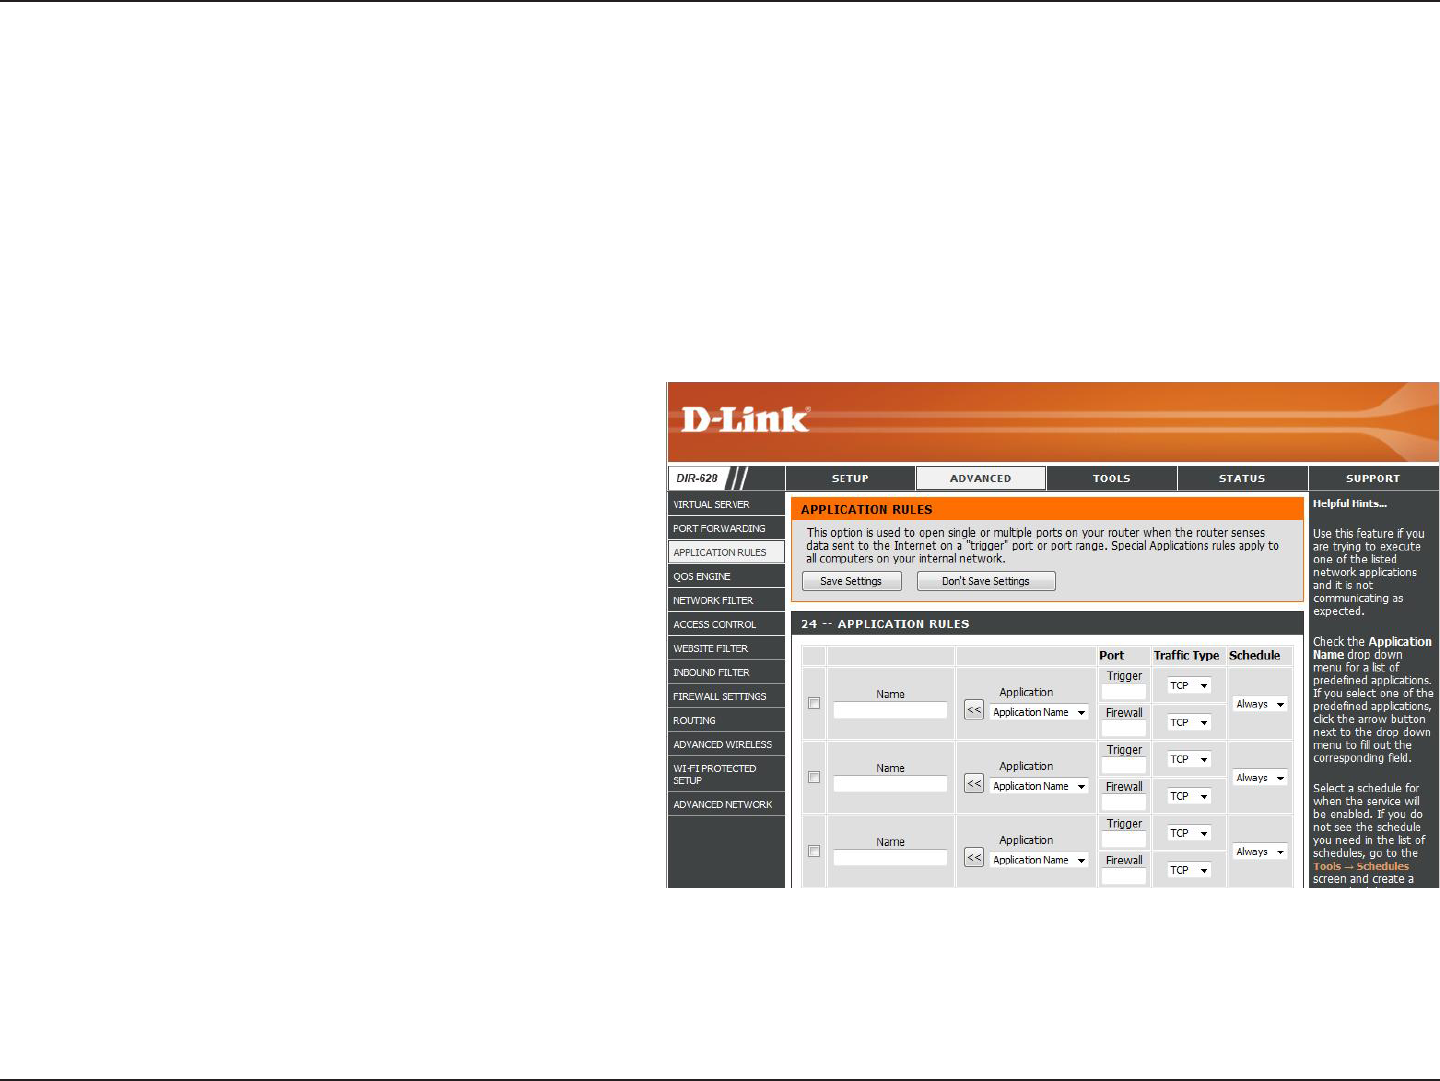
39D-Link DIR-628 User Manual
Section 3 - Configuration
Enter a name for the rule. You may select a
pre-defined application from the drop-down
menu and click <<.
This is the port used to trigger the application. It
can be either a single port or a range of ports.
Select the protocol of the trigger port (TCP,
UDP, or Both).
This is the port number on the Internet side
that will be used to access the application. You
may define a single port or a range of ports.
You can use a comma to add multiple ports or
port ranges.
Select the protocol of the firewall port (TCP,
UDP, or Both).
The schedule of time when the Application Rule
will be enabled. The schedule may be set to
Always, which will allow the particular service
to always be enabled. You can create your own
times in the Tools > Schedules section.
Name:
Trigger:
Traffic Type:
Firewall:
Traffic Type:
Schedule:
Application Rules
Some applications require multiple connections, such as Internet gaming, video conferencing, Internet telephony and
others. These applications have difficulties working through NAT (Network Address Translation). Special Applications
makes some of these applications work with the DIR-628. If you need to run applications that require multiple connections,
specify the port normally associated with an application in the “Trigger Port” field, select the protocol type as TCP or
UDP, then enter the firewall (public) ports associated with the trigger port to open them for inbound traffic.
The DIR-628 provides some predefined applications in the table on the bottom of the web page. Select the application
you want to use and enable it.
40D-Link DIR-628 User Manual
Section 3 - Configuration
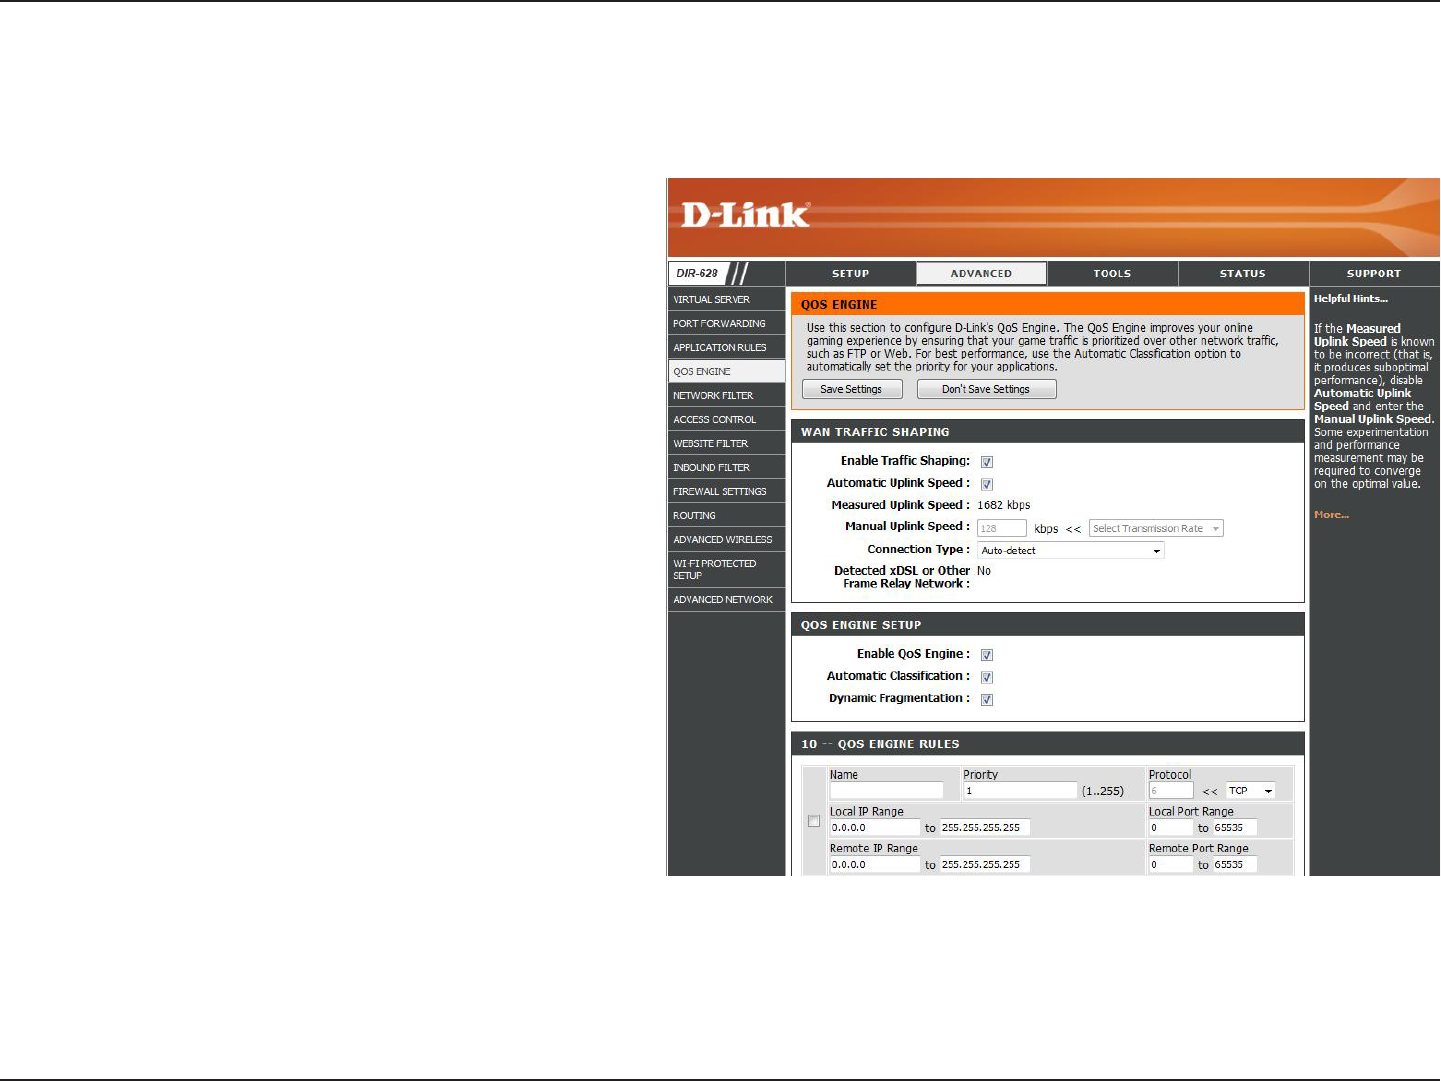
QoS Engine
Traffic Shaping
This option is enabled by default when the Traffic
Shaping option is enabled. This option will allow
your router to automatically determine the uplink
speed of your Internet connection.
This displays the detected uplink speed.
The speed at which data can be transferred from
the router to your ISP. This is determined by your
ISP. ISP’s often speed as a download/upload
pair. For example, 1.5Mbits/284Kbits. Using this
example, you would enter 284. Alternatively you
can test your uplink speed with a service such
as www.dslreports.com.
By default, the router automatically determines
whether the underlying connection is an xDSL/
Frame-relay network or some other connection
type (such as cable modem or Ethernet), and it
displays the result as Detected xDSL or Frame
Relay Network. If you have an unusual network
connection in which you are actually connected
via xDSL but for which you configure either
“Static” or “DHCP” in the Internet settings, setting this option to xDSL or Other Frame Relay Network ensures that the router
will recognize that it needs to shape traffic slightly differently in order to give the best performance. Choosing xDSL or Other
Frame Relay Network causes the measured uplink speed to be reported slightly lower than before on such connections, but
gives much better results.
Enable Traffic
Shaping:
Automatic Uplink
Speed:
Measured Uplink:
Manual Uplink
Speed:
Connection Type:
The QoS Engine option helps improve your network gaming performance by prioritizing applications. By default the
QoS Engine settings are disabled and application priority is not classified automatically.

41D-Link DIR-628 User Manual
Section 3 - Configuration
When Connection Type is set to automatic, the automatically detected connection type is displayed here.
This option is disabled by default. Enable this option for better performance and experience with online games and other
interactive applications, such as VoIP.
This option is enabled by default. This will allow your router to automatically determine the network priority of running
programs.
This option should be enabled when you have a slow Internet uplink. It helps to reduce the impact that large low priority
network packets can have on more urgent ones.
Detected xDSL:
Enable QoS
Engine:
Automatic
Classification:
Dynamic
Fragmentation:
42D-Link DIR-628 User Manual
Section 3 - Configuration
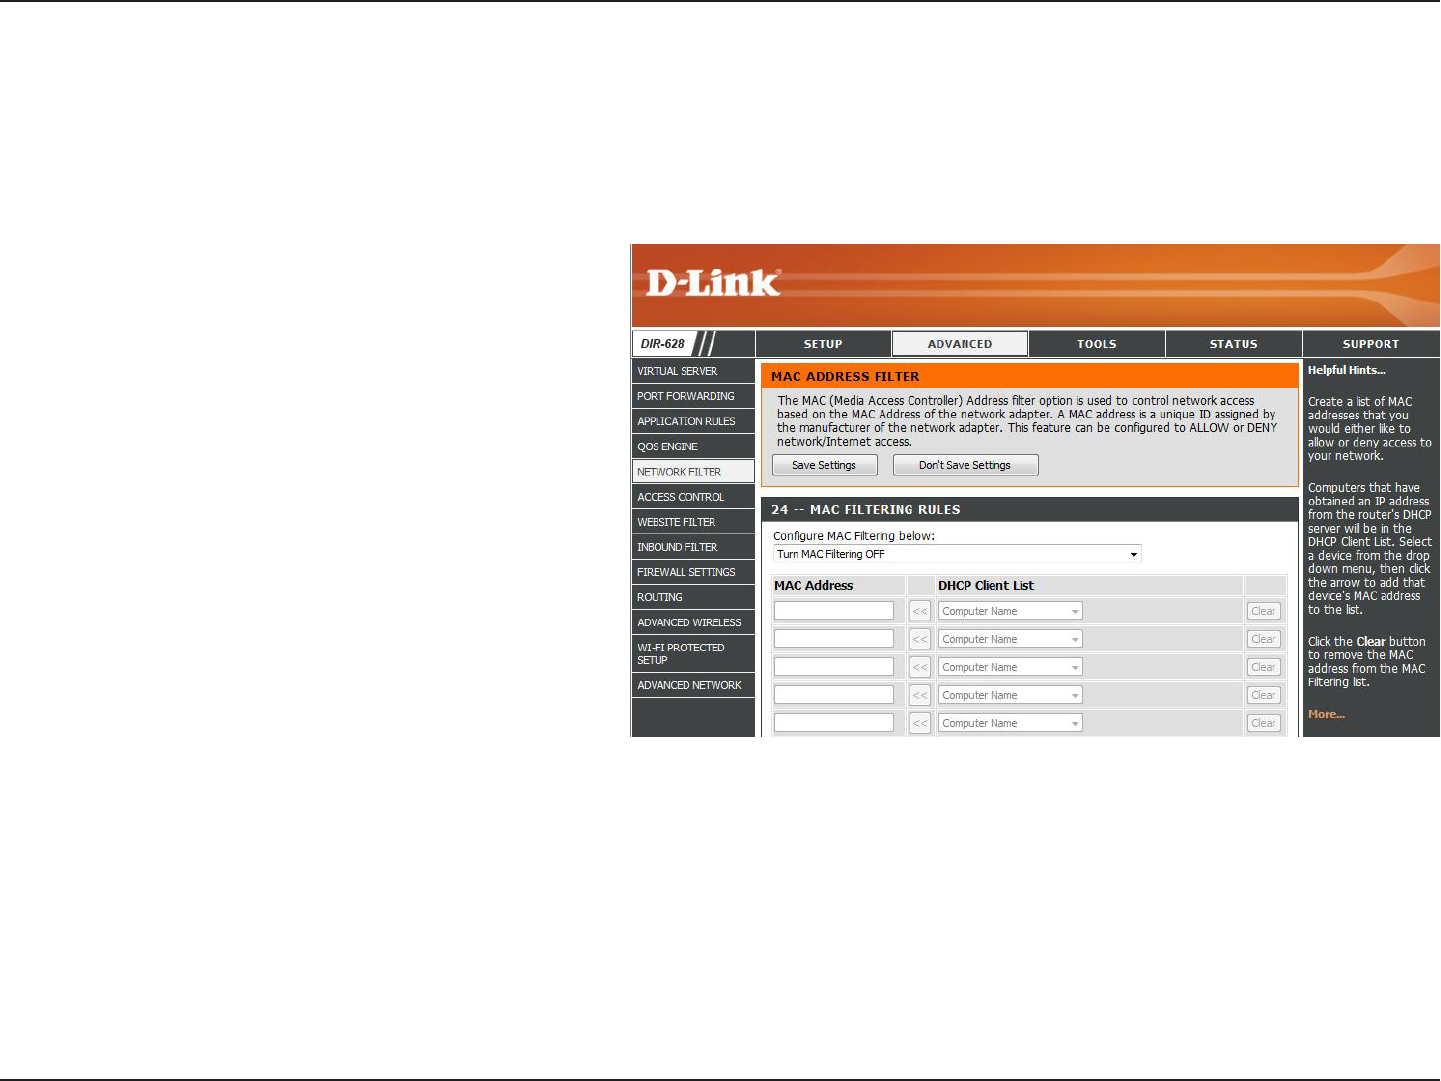
Network Filters
Select Turn MAC Filtering Off, allow MAC
addresses listed below, or deny MAC
addresses listed below from the drop-down
menu.
Enter the MAC address you would like to
filter.
To find the MAC address on a computer,
please refer to the Networking Basics
section in this manual.
Select a DHCP client from the drop-down
menu and click << to copy that MAC
Address.
Configure MAC
Filtering:
MAC Address:
DHCP Client:
Use MAC (Media Access Control) Filters to allow or deny LAN (Local Area Network) computers by their MAC addresses
from accessing the Network. You can either manually add a MAC address or select the MAC address from the list of
clients that are currently connected to the Broadband Router.
43D-Link DIR-628 User Manual
Section 3 - Configuration
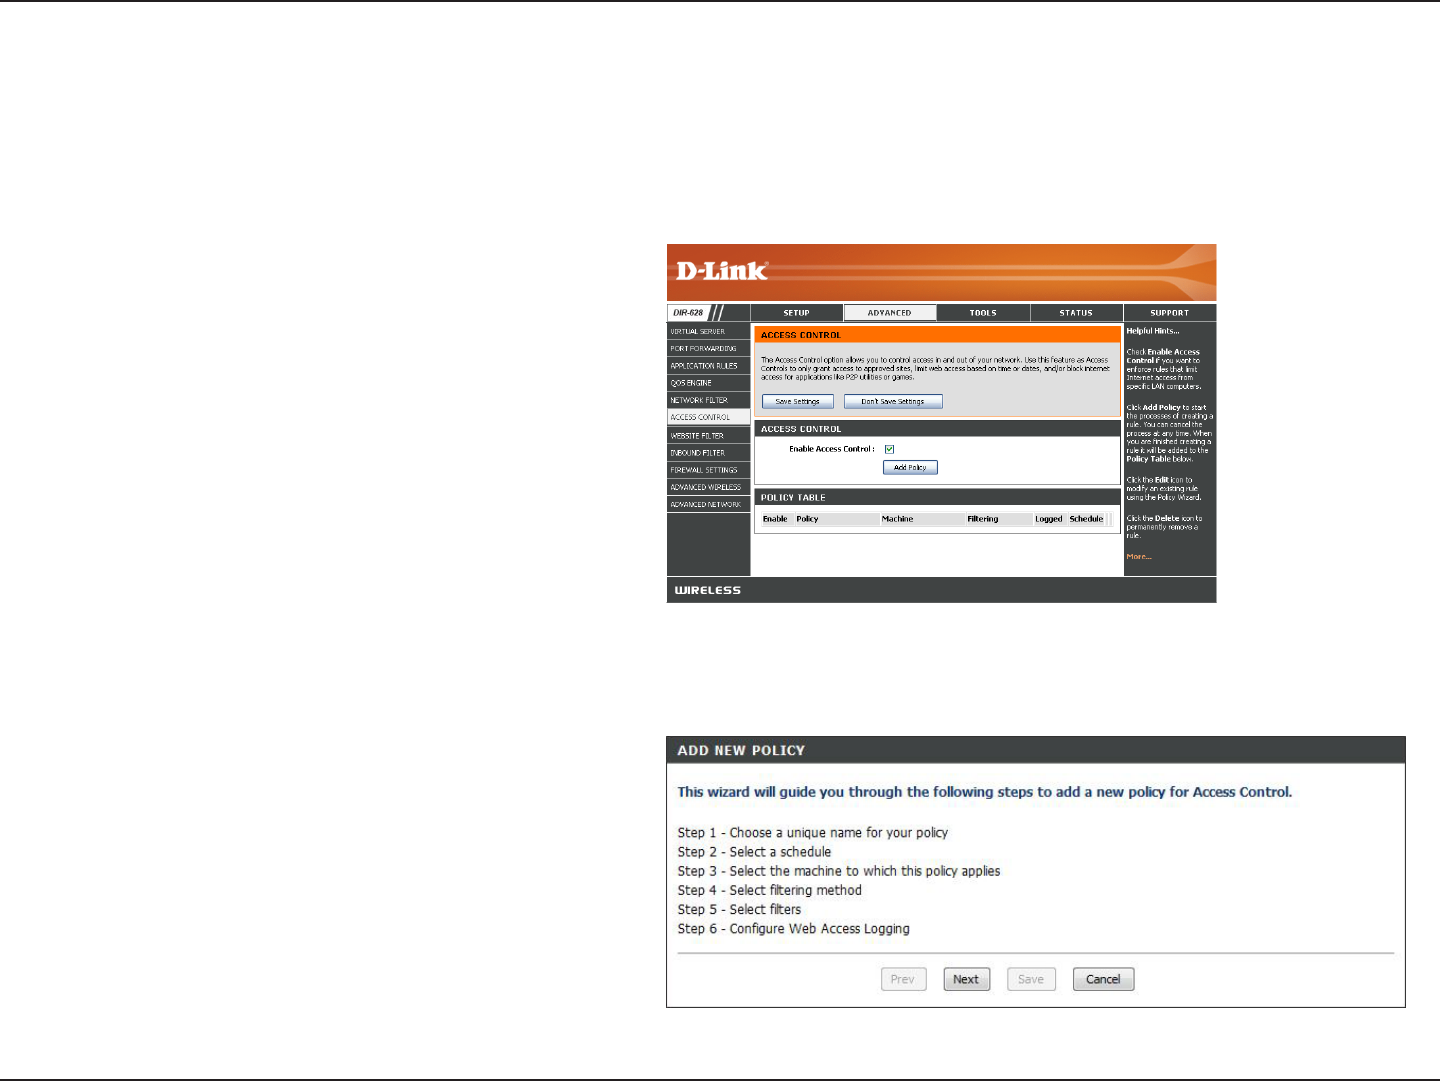
Access Control
Click the Add Policy button to start the Access
Control Wizard.
Add Policy:
The Access Control section allows you to control access in and out of your network. Use this feature as Parental Controls
to only grant access to approved sites, limit web access based on time or dates, and/or block access from applications
like P2P utilities or games.
Click Next to continue with the wizard.
Access Control Wizard
44D-Link DIR-628 User Manual
Section 3 - Configuration
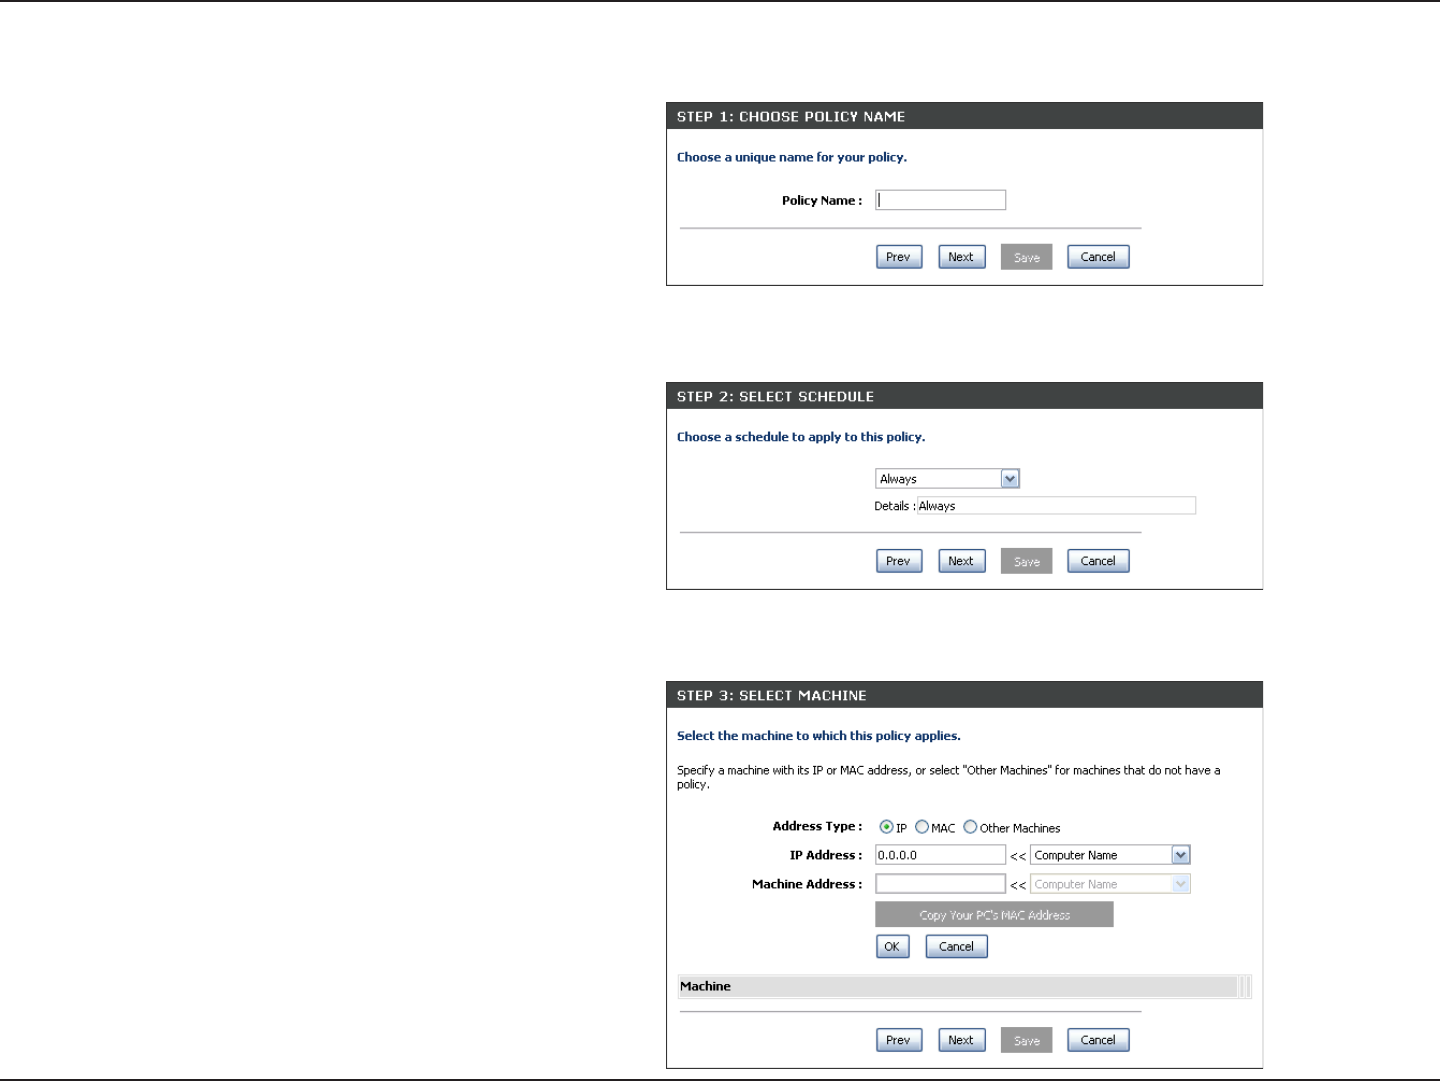
Enter a name for the policy and then click Next to continue.
Access Control Wizard (continued)
Select a schedule (I.E. Always) from the drop-down menu
and then click Next to continue.
Enter the following information and then click Next to
continue.
• Address Type - Select IP address, MAC address, or
Other Machines.
• IP Address - Enter the IP address of the computer
you want to apply the rule to.
45D-Link DIR-628 User Manual
Section 3 - Configuration
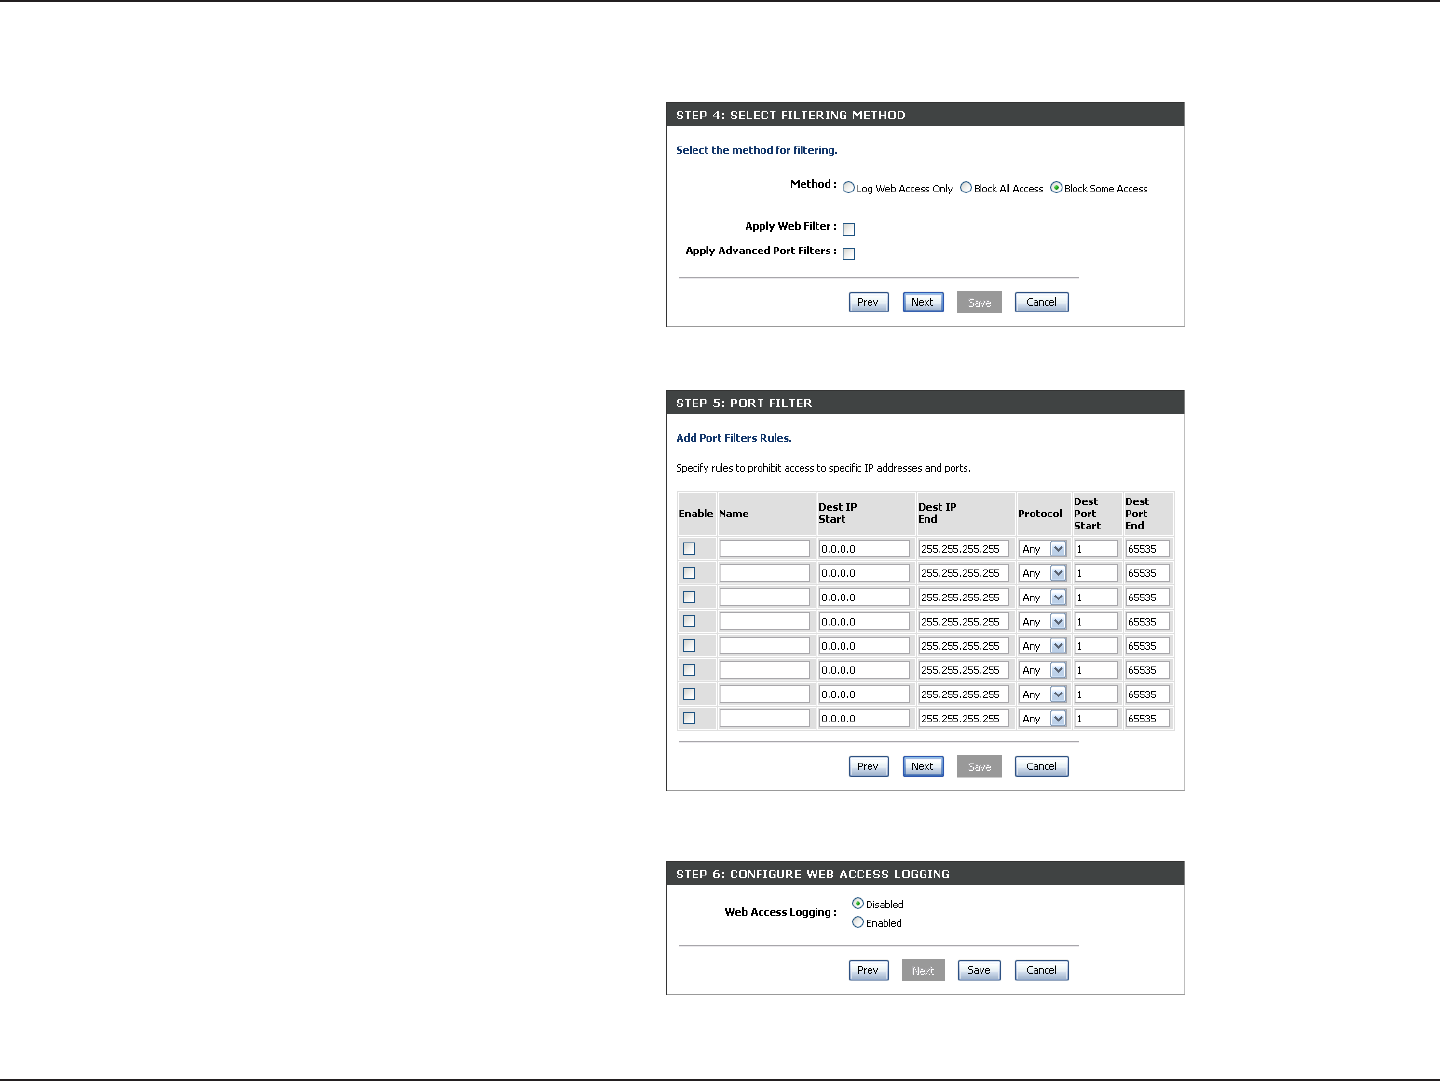
Select the filtering method and then click Next to continue.
Access Control Wizard (continued)
Enter the rule:
Enable - Check to enable the rule.
Name - Enter a name for your rule.
Dest IP Start - Enter the starting IP address.
Dest IP End - Enter the ending IP address.
Protocol - Select the protocol.
Dest Port Start - Enter the starting port number.
Dest Port End - Enter the ending port number.
To enable web logging, click Enable.
Click Save to save the access control rule.
46D-Link DIR-628 User Manual
Section 3 - Configuration
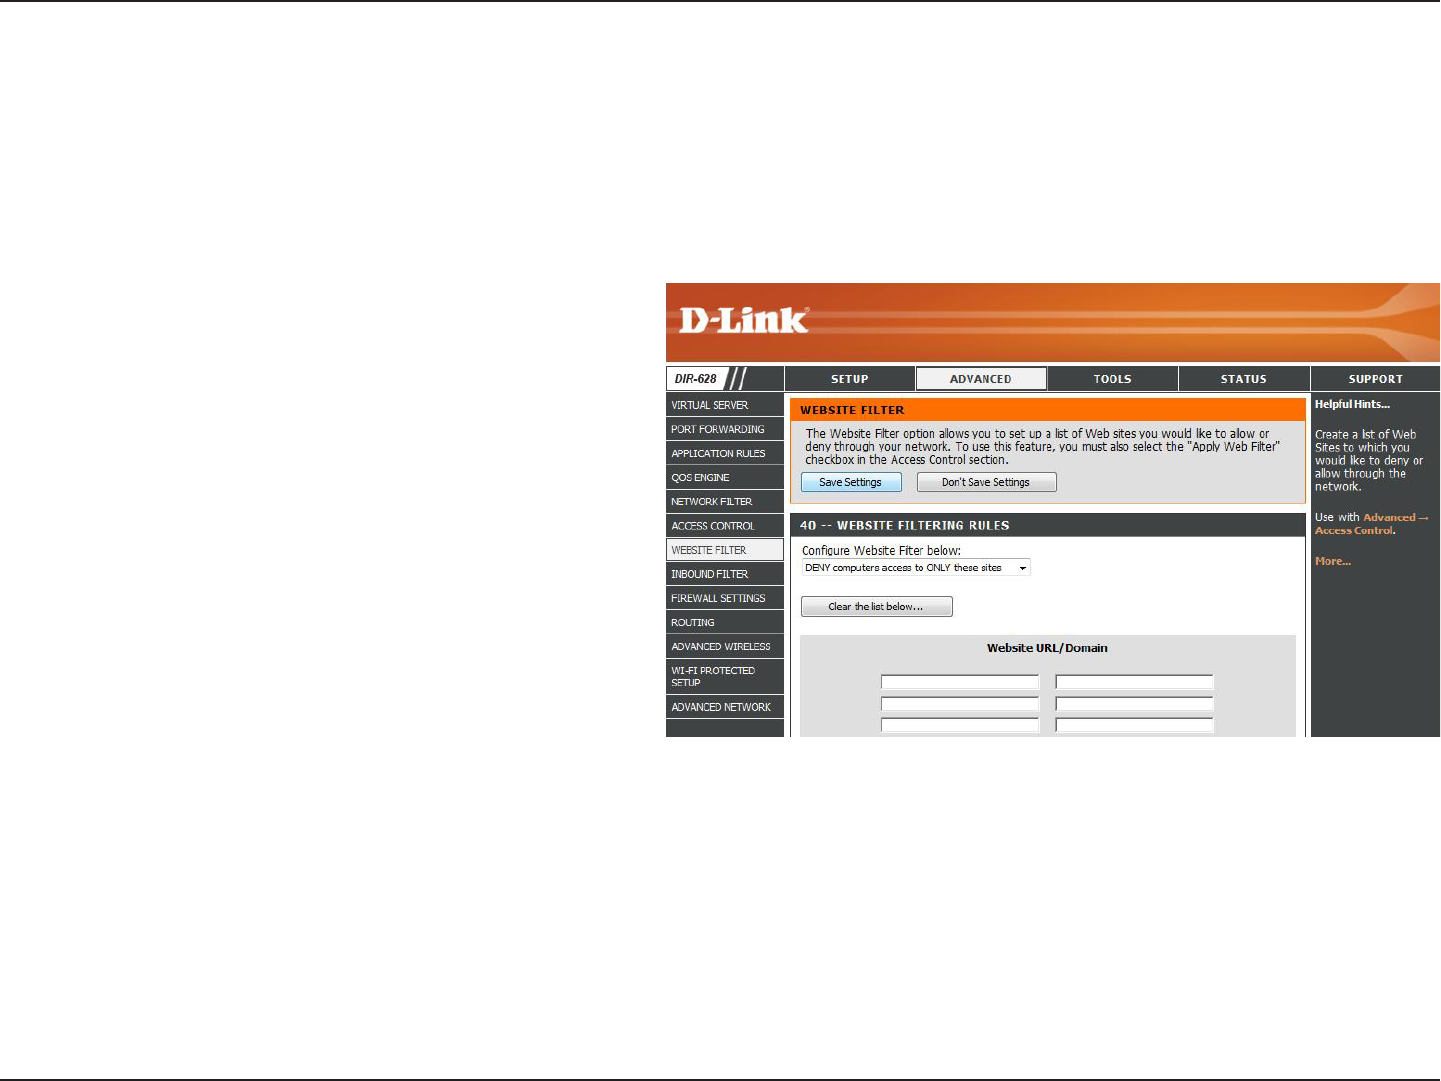
Website Filters
Add Website
Filtering Rule:
Website URL/
Domain:
Select Allow or Deny.
Enter the keywords or URLs that you want to
allow or block. Click Save Settings.
Website Filters are used to allow you to set up a list of allowed Web sites that can be used by multiple users through
the network. To use this feature select to Allow or Deny, enter the domain or website and click Save Settings. You
must also select Apply Web Filter under the Access Control section (page 43).