Contents
- 1. User Manual Part I
- 2. User Manual Part II
- 3. User Manual Part III
User Manual Part I

INSTRUCTION BOOK
PPS11
User Guide
Package Contents
Part Names
Power Management
Charging
Connections
Updating Firmware
Getting Started _01
Basic Operations
Home Screen
Notification Panel
Purchasing or Streaming Music from Store
AK Connect
Listening to Music
Playlist Management
USB DAC Installation
How to Use USB Audio
Settings
Connecting to a Wireless Network
Using Bluetooth
Equalizer Setup
Using the Device _02
CONTENTS
02
03
04
05
06
10
11
15
17
19
20
23
26
29
30
31
36
37
39
Safety Precautions
Troubleshooting
Copyright
Registered Trademarks
Disclaimers
Specifications
Miscellaneous _03
42
44
45
46
46
47
User Guide
Contents may be changed without prior notice to improve the
performance or quality of the product.
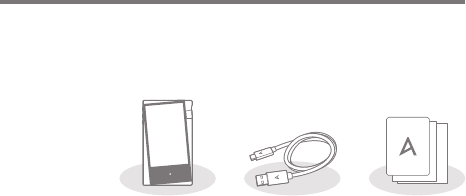
Package
Contents
Getting Started
02
5-Pin Micro-USB Cable: Connects the product to a computer
or utilize to charge the product.
Quick Start Guide: Basic overview of using the product.
Warranty Card: This card is required for customer service
and technical support. Please keep this card.
User Guide: The User Guide can be downloaded from the
Activo website:
[http://www.activostyle.com].
Quick Start Guide
& Warranty Card
5-Pin Micro
-USB Cable
PPS11
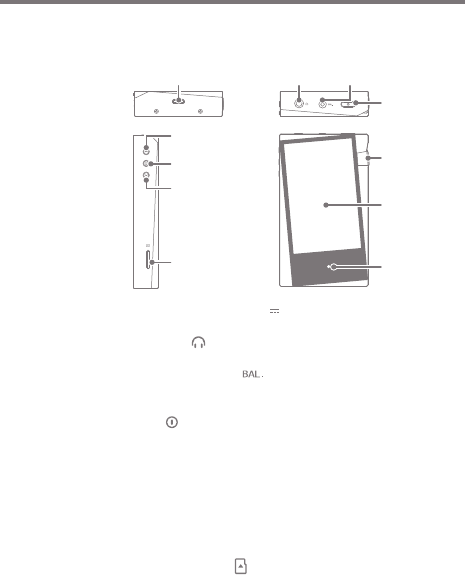
5-Pin Micro-USB Port: - DC Power symbol.
Connect to a computer or recharge the device.
Earphones: - Earphone symbol.
Output sound to connected earphones.
3.5mm Unbalanced: - 3.5mm Unbalanced Port symbol.
Connects earphones or headphones with a 3.5mm unbalanced
jack to output sound.
Power: - Power symbol.
Short-press- Turns the screen on or off.
Long-press - Turn the device on and off.
Previous/Rewind:
Short-press - Plays the previous song or restarts the song.
Long-press - Rewind.
Play/Pause: Play/pause current track.
Next/Fast Forward: Short-press - Plays the next track.
Long-press - Fast-forward current track.
microSD Card Slot: - MicroSD card slot symbol.
Insert a microSD card in the device to access the files on the
microSD card.
Volume: Turn the wheel to adjust volume.
LCD Touchscreen: Activate the screen and touch it to start.
Home Button: Press to return to Home Screen.
Getting Started
03
User Guide
The appearance of the product, as well as the printed and
engraved information, may vary depending on the model.
Part
Names
Previous/Rewind
Next/Fast-
Forward
Play/Pause
microSD
Card Slot
Touchscreen
LCD
Home
Button
Volume
Power
5-Pin Micro-USB Port Earphone Jack 3.5mm Unbalanced
9V 1.67A

User Guide
Getting Started
04
Resetting the device will not affect the stored data or time setting.
Do not use the reset function while the product is in use. Doing so
may corrupt the data on the device.
Reset Function
1. In cases of unexpected device failure or if the device becomes
unresponsive, press [Power] for 7 seconds to force a shutdown.
The device can be restarted after the shutdown is complete.
This device has an automatic screen timeout feature to reduce
battery consumption. The screen will turn off when there is no
user input during the period defined in [Menu - Settings - Power
- Screen Off]. (See Page 34.)
Turning on/off the Screen
1. While the screen is on, short-press the [Power] button to
turn off the screen.
2. Short-press [Power] button again to turn it on.
This device has an automatic power saving function to conserve
battery power. The device will turn off if there is no user input
during the period defined in [Menu - Settings - Power -
Automatic Shutdown]. (See Page 34.)
Turning on/off Power
1. Long-press the [Power] button of the device to turn it ON.
2. While the device is on, long-press the [Power] button to
shut down the device. A confirmation message will appear.
3. Press [OK] to turn off the device.
Power
Manage-
ment

Getting Started
05
User Guide
Depending on computer specifications, the device will charge
only when the computer is turned on.
When charging via computer connection, the charging time may
vary depending on whether the device is turned on or off.
Some computers in power-saving mode may not charge the
device.
The built-in battery will gradually lose capacity over time with
repeated charging/discharging.
Do not use any cables other than the 5-pin micro-USB cable that
is included in the package. Using an unauthorized cable may
cause a malfunction.
Charging via Computer
1. The device will charge automatically when connected to a
computer via the 5-pin micro-USB cable.
Charging Time: Up to 4 hours (When the device is fully discharged
and turned off and a 5V 2A adapter is used)
A 5V 2A charger may be used. Using a fast charging adapter will
not charge the product and may cause malfunctions.
Charging via Adapter
1. Charging is possible by using a 5V 2A output adapter
(sold separately).
Charging
User Guide
Getting Started
06
Connec-
tions
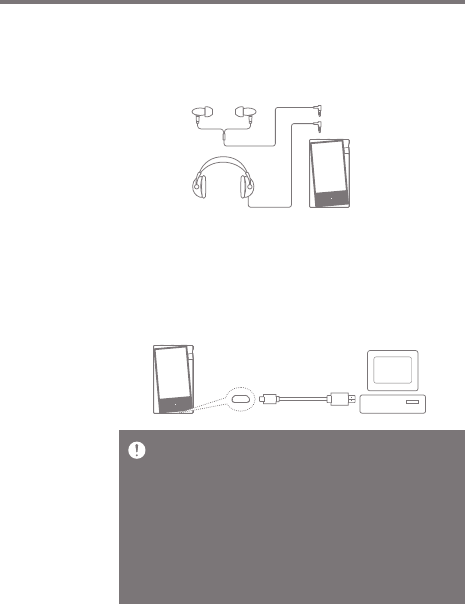
Connecting to a 3.5mm Unbalance Port
1. Connect earphones or headphones to the 3.5mm unbalanced
port.
OR
Connecting to a Computer
1. Turn on the device and your computer.
2. Connect the product to the computer with the 5-pin micro
-USB cable to transfer media files.
For an optimal connection, quit any unnecessary programs
before connecting the device to the computer.
Do not use any 5-pin micro-USB cable other than the one
supplied with the device. Using an unauthorized cable may cause
a malfunction.
Mac users need to download and install the MTP program from
the Activo website in order for the device to pair with a Mac OS.
[http://www.activostyle.com]
Both Windows and Mac, the device is only compatible with USB
2.0.
Getting Started
07
User Guide
Disconnecting from the Computer
1. Disconnect the 5-pin micro-USB cable after the transfer
between the product and computer is completed.
Disconnecting the device from the computer during an operation
(e.g., file transfer) may corrupt data on the device.
Safely remove/eject the device from your computer, if applicable.
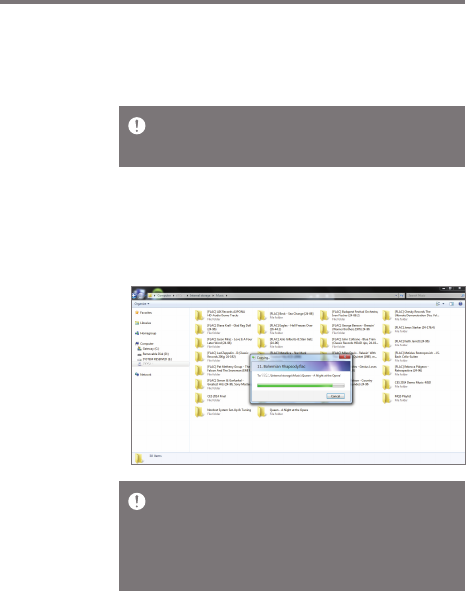
Copy Files/Folders to the Device
1. To copy files/folders from your computer, select the desired
files/folders and drag & drop them into the device folder.
Make sure that the 5-pin micro-USB cable is securely connected.
Note that removing the 5-pin micro-USB cable or turning off the
device or computer during a file transfer may corrupt data on the
device.
File transfer speeds may be affected by the computer and/or the
OS environment.
Getting Started
08
User Guide
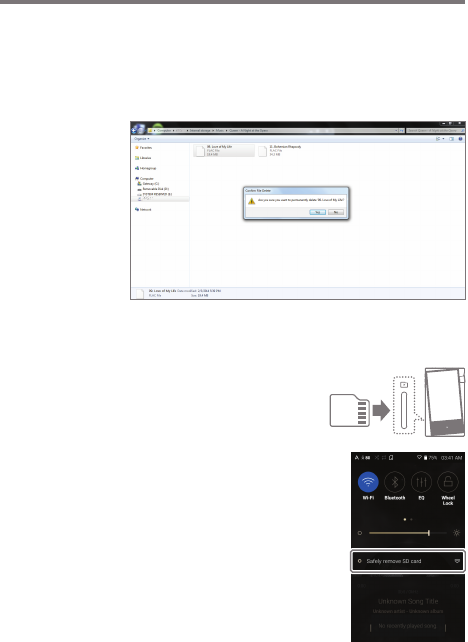
Delete Files (or Folders) from the Device via Computer
1. Right-click the desired file/folder and then select [Delete].
2. Select [Yes] in the [Confirm File/Folder Deletion] window
to delete the selected files/folders.
Insert/Remove a microSD Card
1. Refer to the diagram and
gently insert a microSD
card into the microSD
card slot.
2. To safely remove a microSD
card, on the Home Screen,
select [Safely remove SD
card] from the Notification
Panel or select [Unmount SD
card] from [Menu - Settings -
System Information].
3. Gently press in the microSD card
to release it from the slot.

Getting Started
09
User Guide
Maximum Capacity: 400GB
Notes on Inserting a microSD Card
Do not force the microSD card into the slot.This may cause
malfunction of the product and damage to the card.
Do not repeatedly insert/remove the microSD card.
If not inserted properly, the microSD card may cause product
malfunctions and may get stuck in the product.
Notes on Removing a microSD Card
Be sure to safely remove the microSD card from the device.
Not following the proper procedure may corrupt data and
cause serious damage to the system.
Do not remove the microSD card during use. Doing so may cause
malfunction, delete data and damage the microSD card.
Notes on Using a microSD Card
If the microSD card is not recognized or functions improperly,
format the card, preferably in the FAT32 system.
Using cards other than the recommended microSD card may
cause malfunctions.
A microSD card is not included in the product package.
microSD card must be purchased separately.
Recommended microSD cards
SanDisk, Transcend

Getting Started
10
User Guide
For Wi-Fi connections, see Page 36.
The firmware update may not be successful if the battery level is
too low. (A minimum battery level of 20% is required.)
Do not disconnect from the wireless network while downloading
the firmware update. Doing so may cause data corruption and/or
damage to the system.
If an error occurs or the notice in the Notification Panel disappears
during an update, download the Firmware update can be initiated
again through [Menu - Settings - Update - System].
Wi-Fi Update / OTA (Over-the-Air)
1. Connect to a wireless network.
2. When a new firmware version is available, the screen will
display a Firmware Update Guide window.
3. Select [Update] and choose the items for update.
4. Follow the on-screen directions to update the firmware.
Updating
Firmware
Using the Device
11
User Guide
Basic
Opera-
tions
LCD Touchscreen
1. This device features a LCD touchscreen that allows you to
perform operations by touch.
Interact with the device by touching the screen to access
various features.
To prevent damage to the screen, do not use a sharp object or
excessive force.
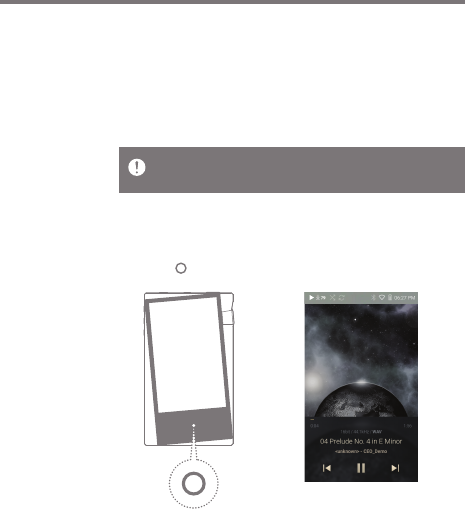
Return to the Home Screen
Home Screen
1. Press [ ] to go to the Home Screen.
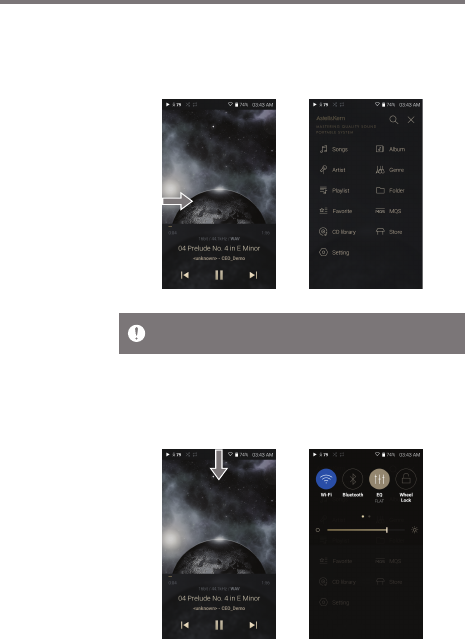
Menus
1. Touch and hold, then drag your finger to the right or left in
the home screen to display menus.
Notification Bar
The CD library menu is displayed when music files are extracted
with AK CD-RIPPER and songs are stored in the Ripping folder.
Using the Device
12
User Guide