Diasonic Technology Co DHD1000 HDD MP3 User Manual
Diasonic Technology Co Ltd HDD MP3 Users Manual
UserManual.wiki
>
Diasonic Technology Co
>
DHD1000 User Manual
>
Users Manual
Contents
1.
Users Manual
2.
Revised user manual
Users Manual
Navigation menu
Upload a User Manual
Namespaces
Wiki Guide
HTML
PDF
Info
Views
User Manual
Discussion / Help
Navigation

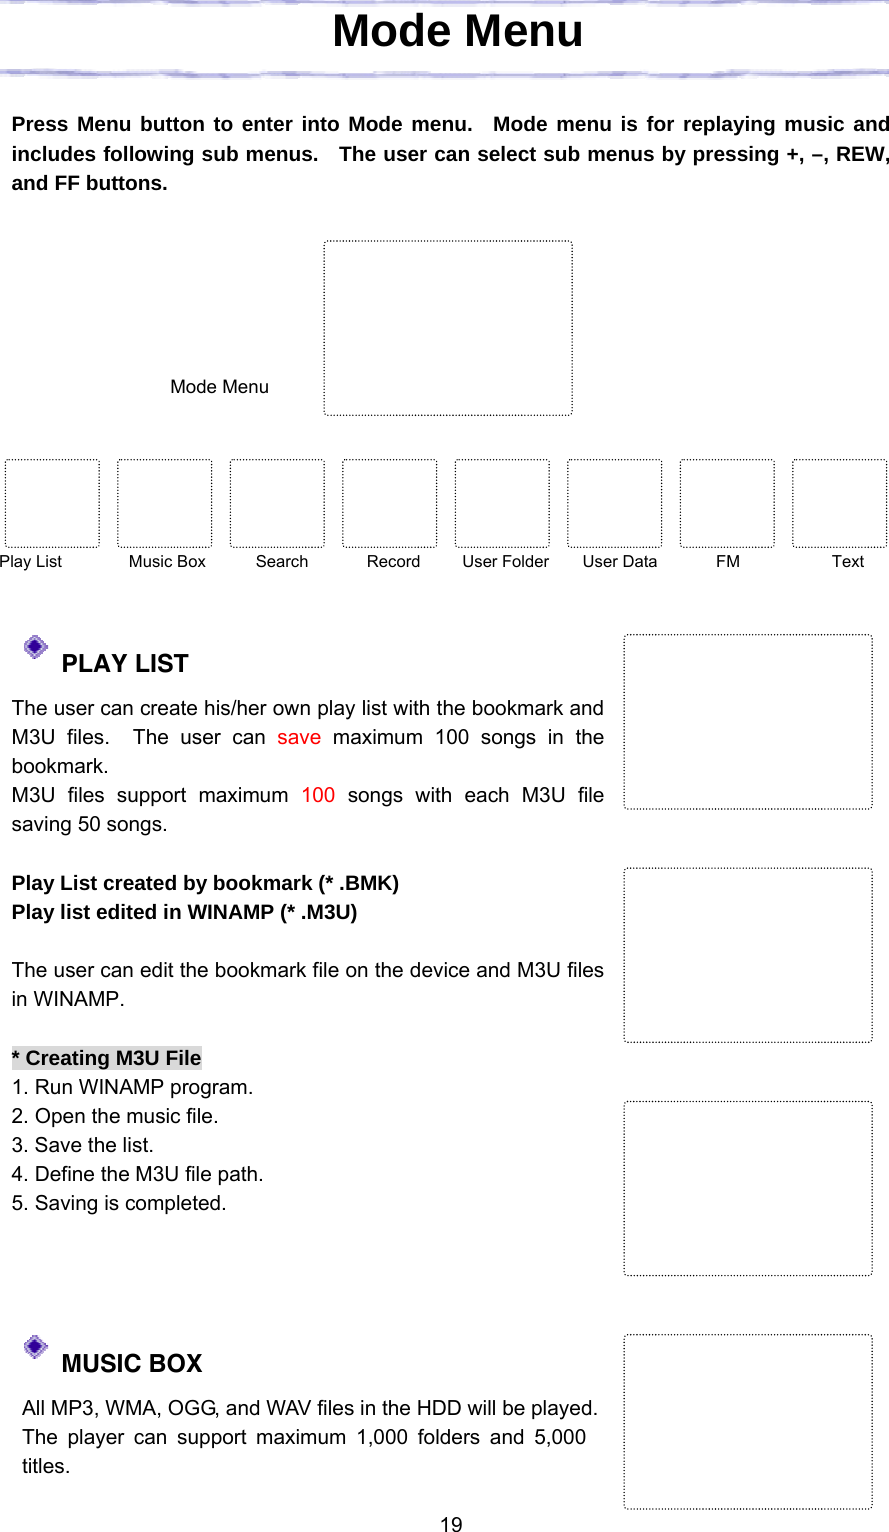
![12 1. Turning On/Off Power Press Play button for a second to turn on the power. After the power is turned on, press Stop button for a while to turn off the power. After power is supplied from an [eternal power source (USB or adapter)], the charging status will be indicated by the LED. Then, press Play button to enter into Charging mode. If charging is being made, the battery level symbol will blink. Press Play button again to enter into normal operation status. 2. Lock Switch When the lock switch is on (or on the right side), the switch will not function. 3. Main Menu Press Menu button for a while, and select the main menu by pressing VOL+, VOL-, FF, and REW buttons. After selecting the menu, press Play button. To cancel menu selection, press Menu button, and to exist Mode menu, press Stop button. 4. Adjusting Volume The user can adjust the volume by pressing VOL+ or VOL- button, and continuously adjust the volume by pressing each button for one second or more. 5. Repeat While playing a song, shortly press A↔B button. Then, the starting point (A) will be defined, and Repeat icon (A↔) will blink on the LCD. Press A↔B again to define the ending point (B). Repeat icon (A↔B) will be displayed on the LCD. The user can turn off Repeat function by pressing A↔B button again. 6. Adjusting Playing Speed 7. Selecting SRS The user can select SRS by pressing SRS button while a song is played in Music Box, Search Play, or Record (Encode or Voice Record) mode. Play List Music Box Search Play FM Radio Text Record USB Data User Folder * Volume levels are from 0 to 30. * When the player is turned on, the volume level will be at 10. Basic Operation](https://usermanual.wiki/Diasonic-Technology-Co/DHD1000.Users-Manual/User-Guide-485946-Page-12.png)


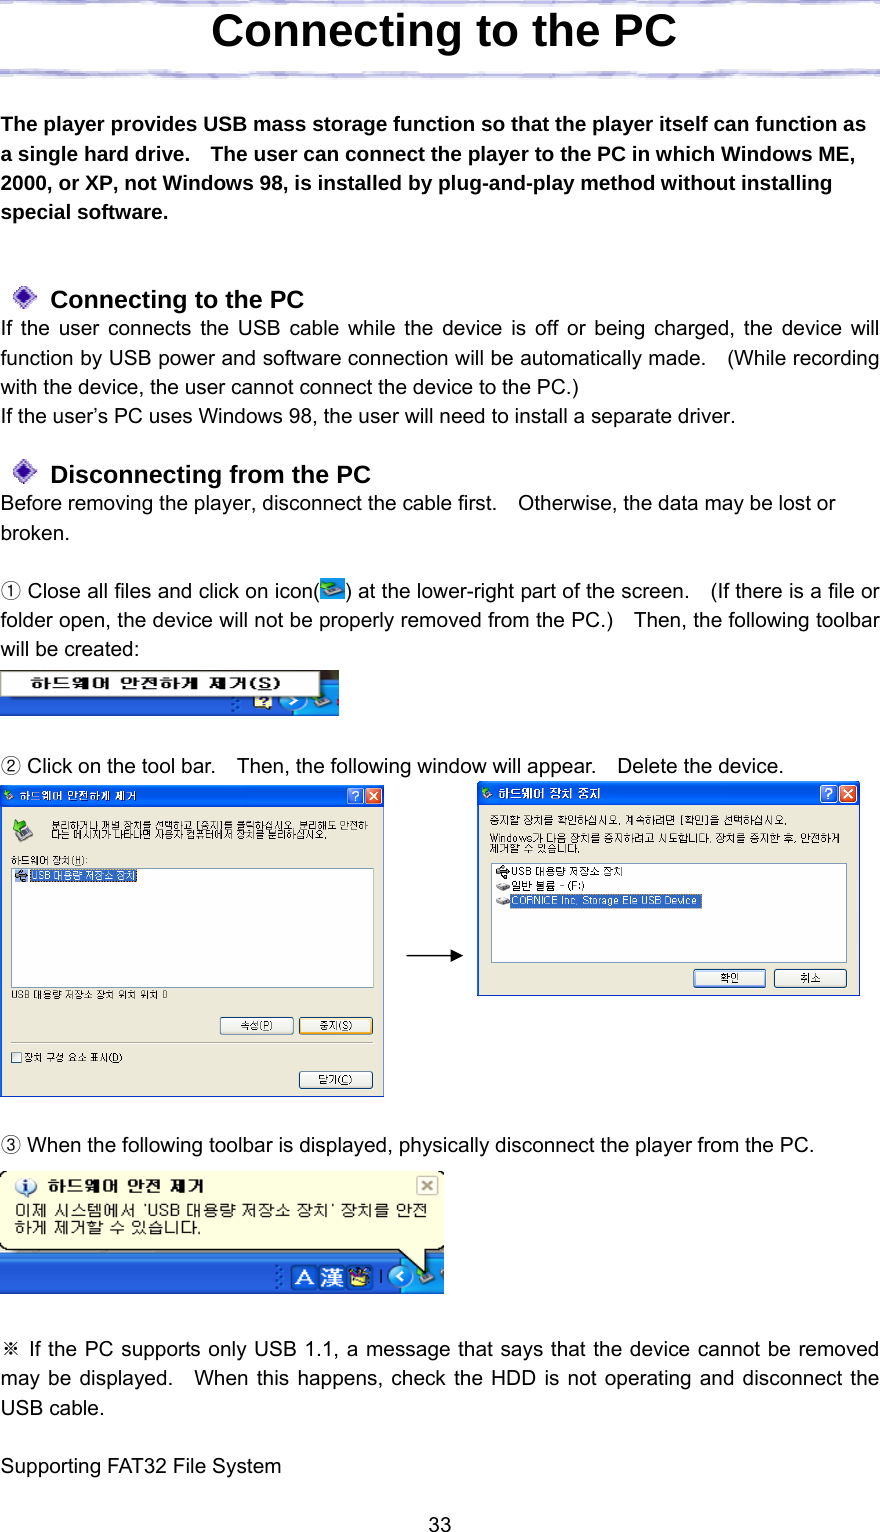
![31 The player provides USB mass storage function so that the player itself can function as a single hard drive. The user can connect the player to the PC in which Windows ME, 2000, or XP, not Windows 98, is installed by plug-and-play method without installing special software. Installing Driver ⑴For Windows ME, 2000, or XP When connecting the player to the PC through the USB cable, “Detect New Hardware” message will be displayed and the driver will be automatically connected. * Click on [My PC], and check if the player is detected as a portable disk. * After the USB driver is normally installed, click on Manager and Device Manager tab. Then, check if the player is displayed as a large-capacity USB storage. (In Windows ME, “?” may be displayed, which is not an error.) Installing Drivers and Uninstalling Di](https://usermanual.wiki/Diasonic-Technology-Co/DHD1000.Users-Manual/User-Guide-485946-Page-31.png)