Digital Cynos DCM-15ST LCD TV User Manual
Digital Cynos Co., Ltd. LCD TV Users Manual
UserManual.wiki
>
Digital Cynos
>
DCM 15ST User Manual
Users Manual
Navigation menu
Upload a User Manual
Namespaces
Wiki Guide
HTML
PDF
Info
Views
User Manual
Discussion / Help
Navigation

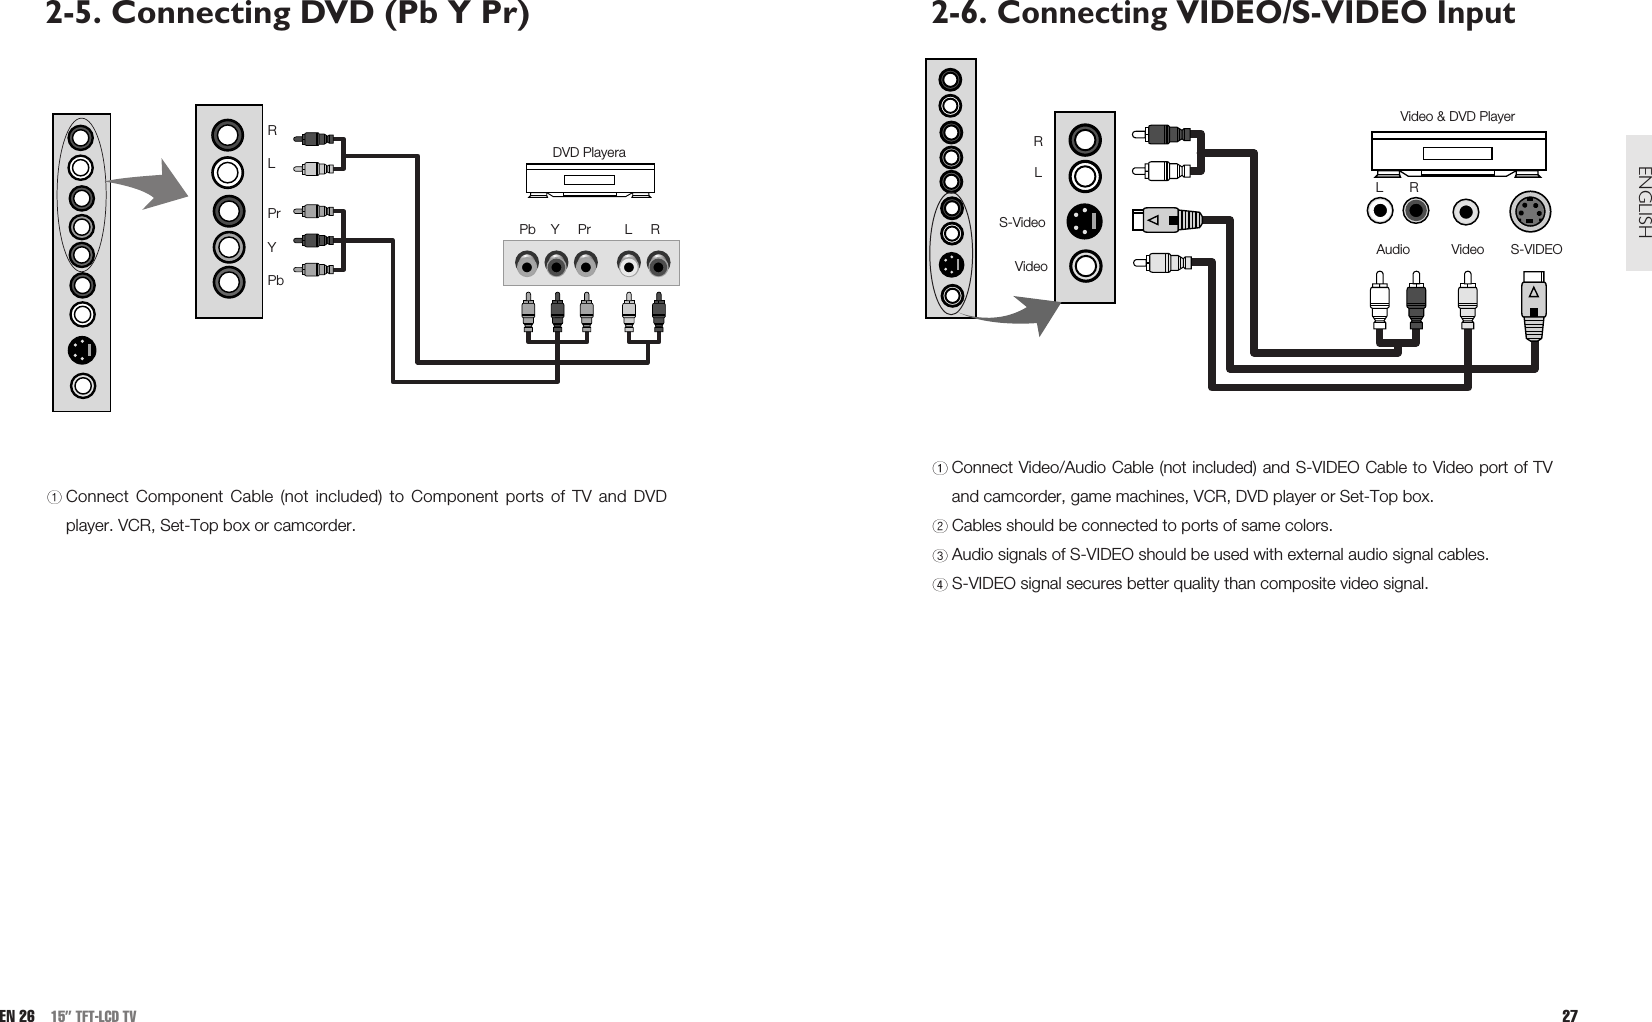
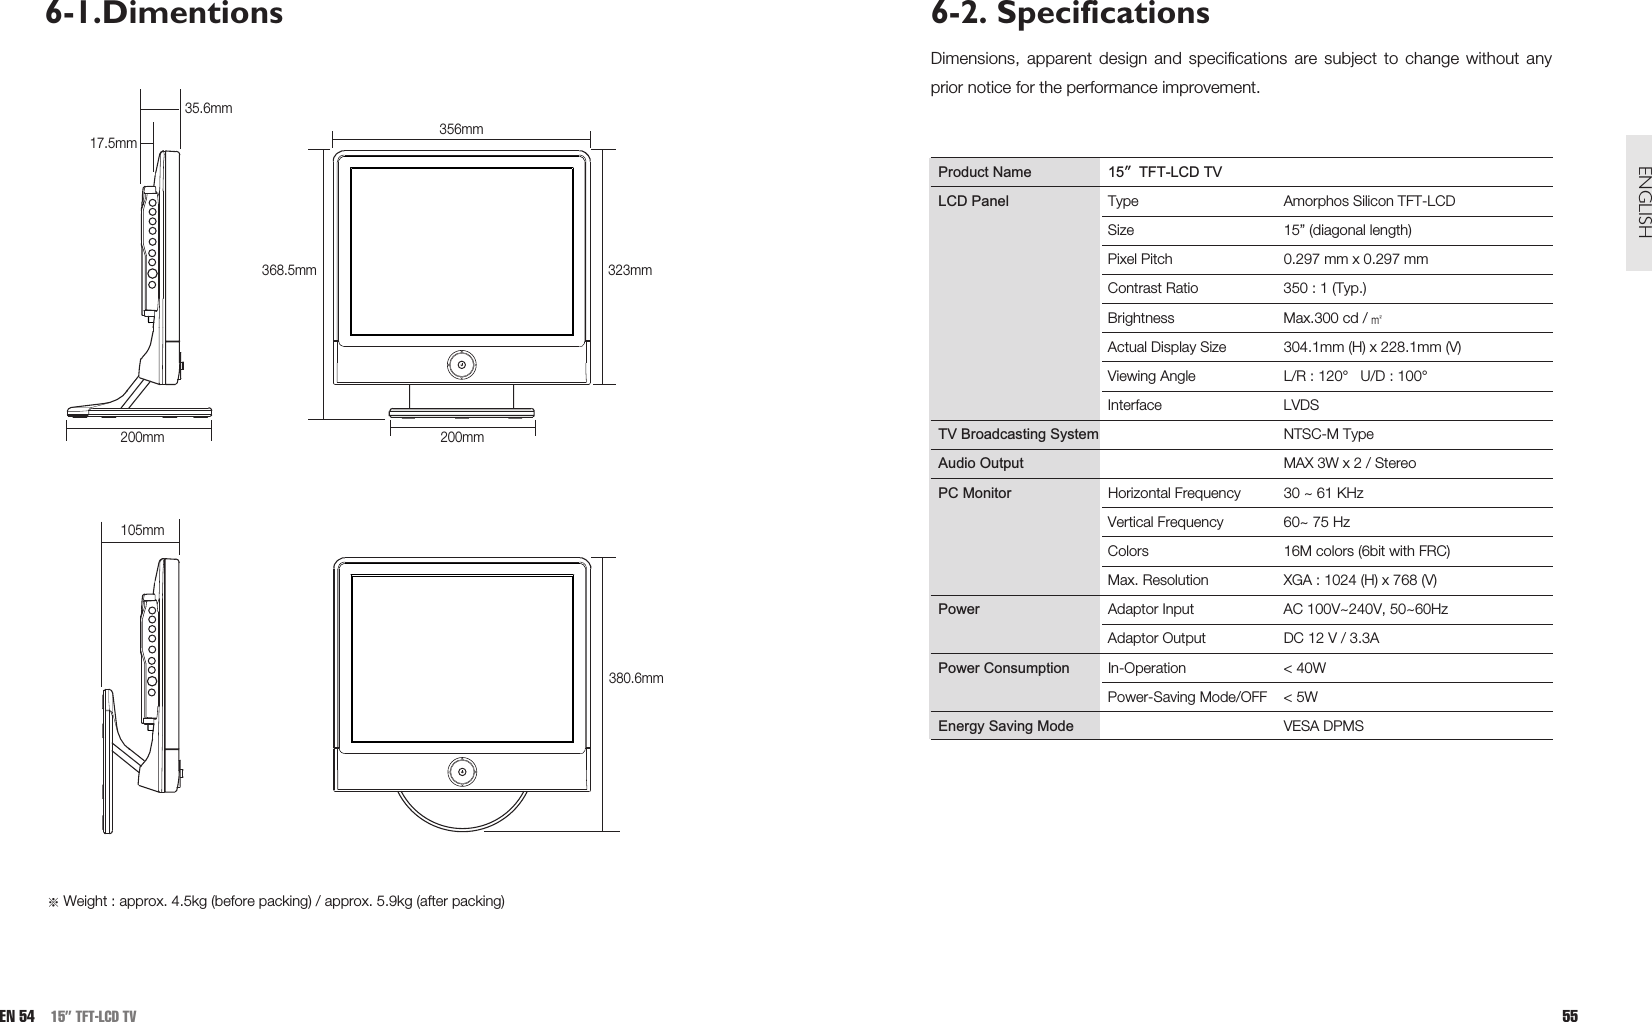
![7ENGLISHOperating Temperature 0~40˚CStorage Temperature -10~50˚COperating Humidity 10~60% RHStorage Humidity 10~90% RHFor dot defect [dead pixel] of LCD ;TFT-LCD produced by using high-end semiconductor technology with precision of 99.9% above isused for this TV (2,359,296 pixels). However the pixels of R.G.B. & White color seem to be right sometimes or some of black pixelscould be seen on the LCD. This is not from bad quality or functional problem and you can use itwithout any problem.When used as a PC monitor ;Optimal Resolution: 1024 768 @ 60Hz. Max. Resolution: 1024 768 @ 75Hz.Available Temperature & HumidityEN 6 15” TFT-LCD TV](https://usermanual.wiki/Digital-Cynos/DCM-15ST/User-Guide-557275-Page-4.png)