Dynabook DCE37529A Tri-Mode Dual Band Mobile Telephone User Manual EA96706 Users Manual Part 2
Toshiba Corporation Tri-Mode Dual Band Mobile Telephone EA96706 Users Manual Part 2
Dynabook >
Contents
- 1. EA96706 Users Manual Part 1
- 2. EA96706 Users Manual Part 2
- 3. EA96706 Users Manual RF Exposure Warning Page
- 4. Users Manual RF Exposure Info
EA96706 Users Manual Part 2
55
Display Features
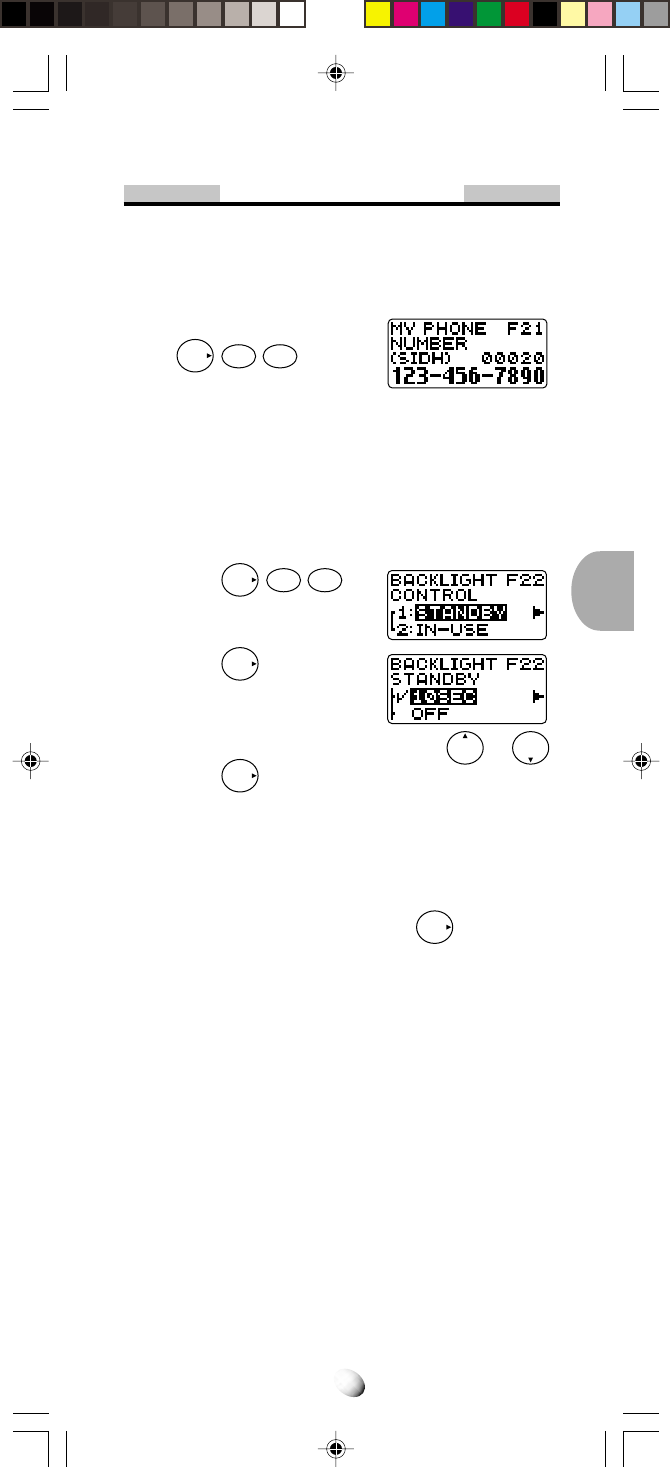
Own Telephone Number Display (F21)
This feature enables you to display your own telephone
number and the ID number (SID) of your “Home” Cellu-
lar System.
Press
F
2ABC
1
.
Backlight Control (Standby) (F22-1)
The LCD display and keypad are backlighted automati-
cally after Power-On.
The backlighting duration can be changed. Four modes
are available.
1. Press
F
2ABC
2ABC
.
2. Press
F
.
3.
You can change the current mode by
or .
4. Press
F
to set.
•
10SEC – 10 Seconds Mode
Backlight is on for 10 seconds after a key is pressed. It
also lights automatically when the power is turned on
and for an incoming call. The duration is variable be-
tween 5 to 30 seconds, by pressing
F
.
•
OFF – Off Mode
Backlight is on momentarily when the power is first
turned on, but remains off thereafter.
•
ALWAYS ON –Always On Mode
Backlight is always on.
Note: You can keep the backlight on while you are en-
gaged in a conversation. See Backlight Con-
trol (In-Use) (F22-2) on page 56.
56
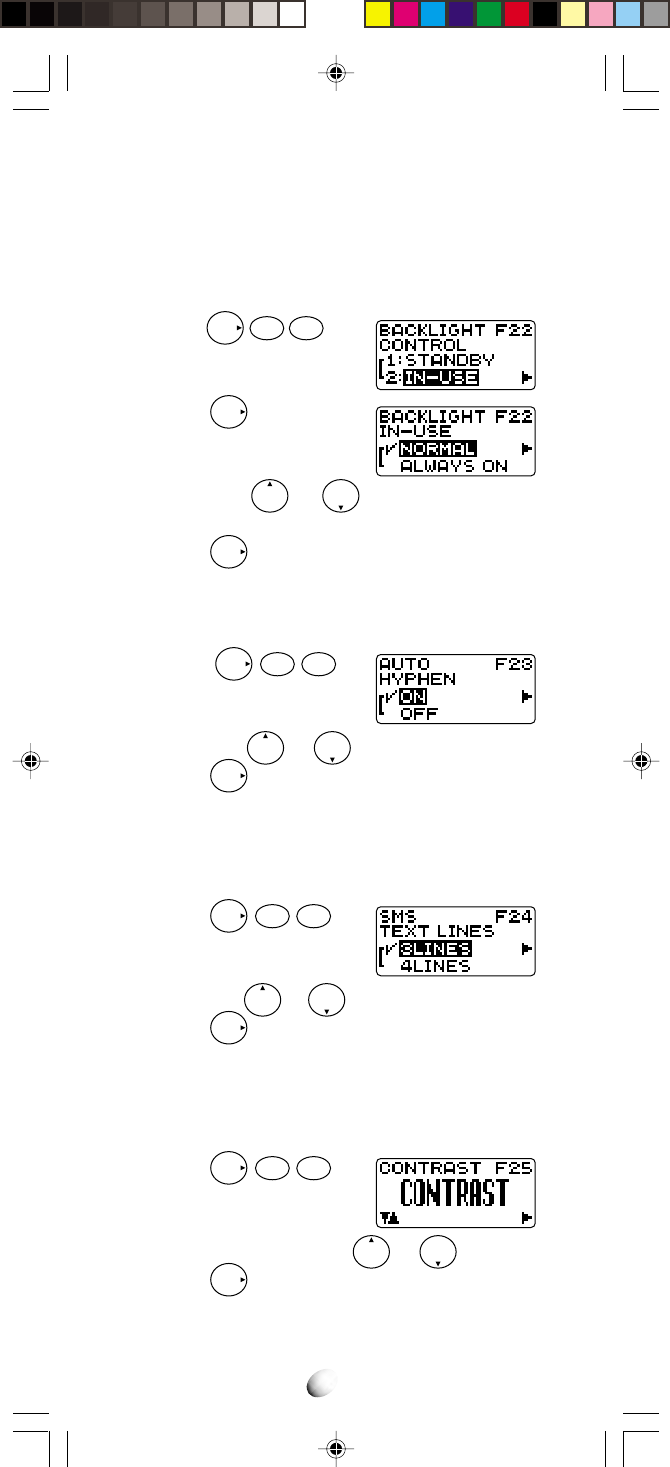
Backlight Control (In-Use) (F22-2)
For ease of operation, you may select to have the back-
light always on while you are engaged in a conversation.
When this feature is set to the “ALWAYS ON” mode, the
backlight is turned on as long as the call is connected.
1. Press
F
2ABC
2ABC
, and
scroll to “IN–USE”.
2. Press
F
.
3. Scroll with or to “NORMAL” or “AL-
WAYS ON”.
4. Press
F
to set.
Auto Hyphenation (F23)
See Auto Hyphenation on page 24.
1. Press
F
2ABC
3DEF
.
2. Scroll with or to “ON” or “OFF”.
3. Press
F
to set.
SMS Text Lines Selection (F24)
You can select to have Text Messages displayed in ei-
ther 3 or 4 lines.
1. Press
F
2ABC
4GHI
.
2. Scroll with or to “3LINES” or “4LINES”.
3. Press
F
to set.
Contrast Control (F25)
The LCD display contrast can be adjusted in 7 steps for
your best condition.
1. Press
F
2ABC
5JKL
.
2. Adjust the contrast with or .
3. Press
F
to set.
57
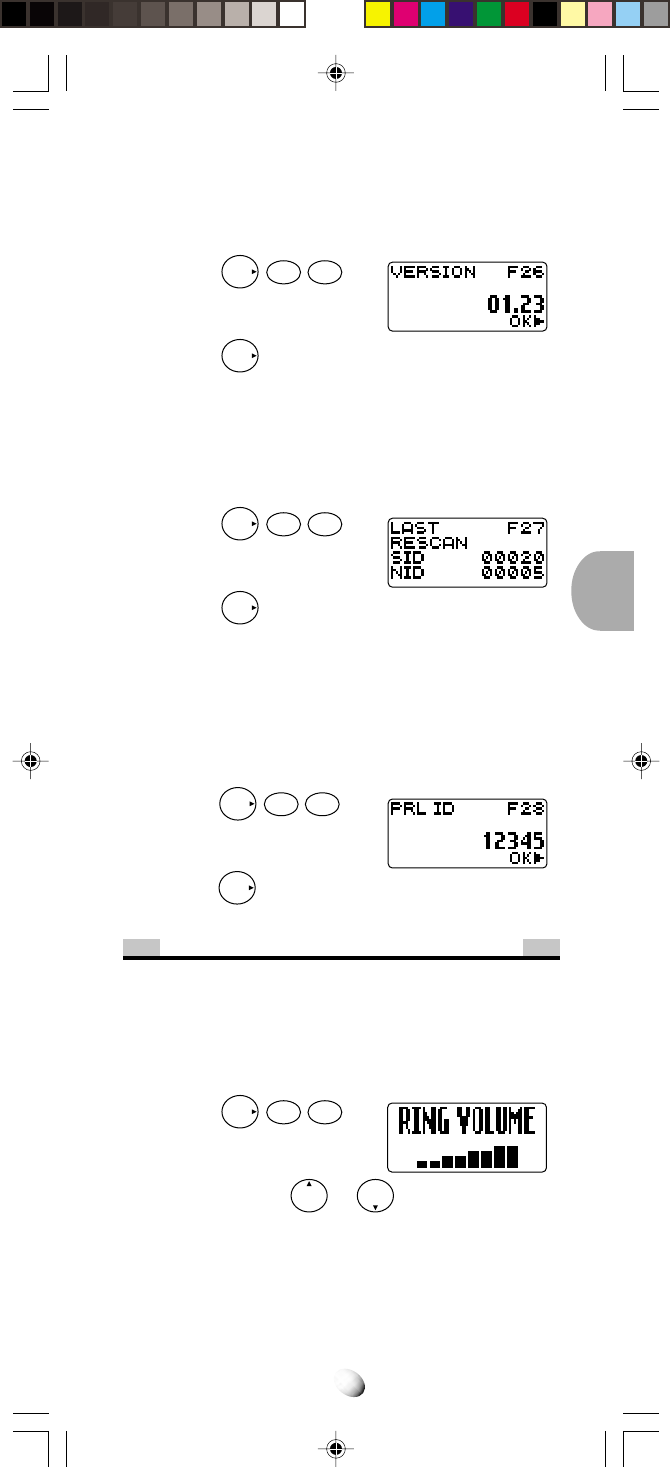
Software Version Review (F26)
This feature permits you to review the software version
which is installed in your phone.
1. Press
F
2ABC
6MNO
.
2. Press
F
to exit.
Last Rescan SID Indicator (F27)
This menu item permits you to view the System Identi-
fication number (SID), which your phone is currently
using.
1. Press
F
2ABC
7
PQRS
.
2. Press
F
to exit.
PRL ID Review (F28)
This menu item permits you to view the Preferred
Roaming List (PRL) version that is programmed in your
phone.
1. Press
F
2
ABC
8
TUV
.
2. Press
F
to exit.
Volume and Tone Controls
Alert Tone Volume Control (F31)
This feature allows you to adjust the ringer/melody vol-
ume. The following adjustment will also change the
sound volume of Clock Alarm and Countdown Timer.
1. Press
F
3DEF
1
.
2. Keep pressing or until you get the de-
sired sound level, or “silent” mode.
Note: In “silent” alert mode, alert tone is not given for
an incoming call. However, if Automatic Answer-
ing feature is ON, alert tone is given with the
lowest available volume.
58
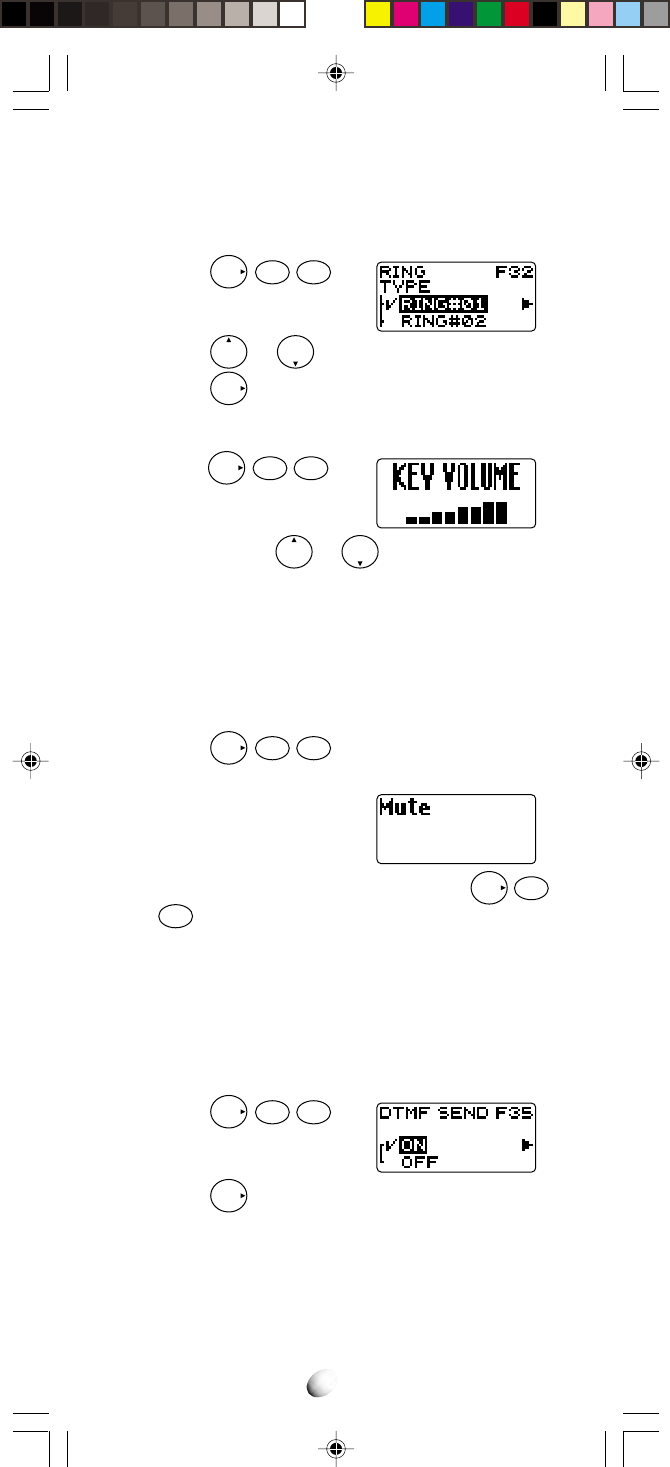
Ring Type Selection (F32)
This feature permits you to select an alert tone pattern
from 15 options including melody ringers.
1. Press
F
3DEF
2ABC
.
2. Press or to select the alert tone.
3. Press
F
to set.
Key Tone Volume Control (F33)
1. Press
F
3
DEF
3
DEF
.
2. Keep pressing or until you achieve the
desired sound level, or “silent” mode.
Note: Key tone will be off in “silent mode”, but tone will
be heard on the other side of the line.
To Mute a Phone Conversation (F34)
You can mute your conversation at any time during a call.
1. Press
F
3DEF
4GHI
.
2. Then the “Mute” indicator is displayed. The transmit
audio will be muted but the
receive audio will still be
heard from the receiver.
3. To return to normal conversation, press
F
3
DEF
4GHI
again.
4. Mute is reset when the call is terminated.
Sending DTMF (F35)
This feature allows you to activate or deactivate Send-
ing DTMF (Touch Tone™) when you enter a number
during a call.
1. Press
F
3DEF
5JKL
.
2. Scroll to “ON” or “OFF” to
select.
3. Press
F
to set.
59
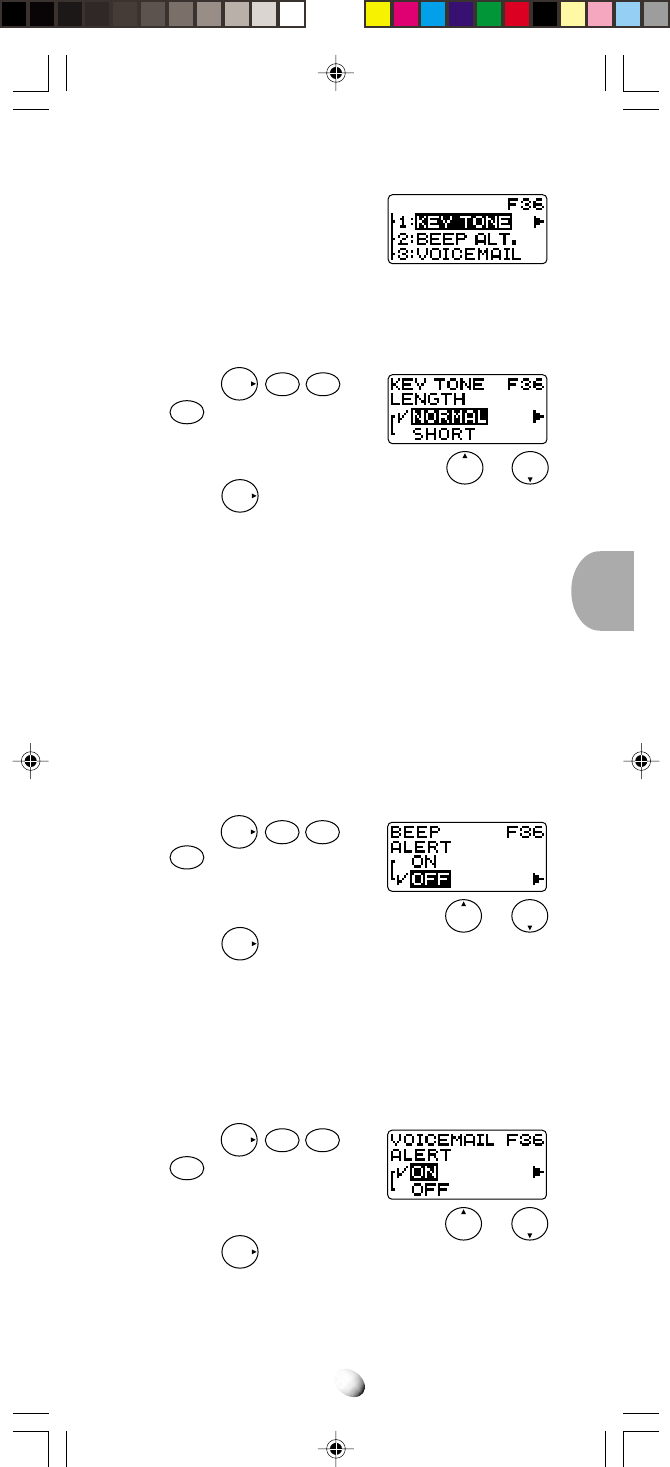
Setting Tones (F36)
This is a group of 9 functions
related to the setting of tones.
Key Tone Length (F36-1)
This feature selects the duration of the tone length when
a key is pressed.
1. Press
F
3
DEF
6
MNO
and
1
.
2.
You can change the current mode by
or .
3. Press
F
to set.
•
NORMAL – Normal Mode
Tone is heard as long as the key is being pressed.
•
SHORT – Short Mode
Tone is heard for a short time even if the key remains
pressed.
Single Alert Beep Tone (F36-2)
This feature is used to signal an incoming call with only
a single beep. This feature can only be used with the
“silent” alert mode. See Alert Tone Volume Control
(F31) on page 57.
1. Press
F
3DEF
6MNO
and
2ABC
.
2. You can turn this feature on/off by or .
3. Press
F
to set.
Voice Mail Alert (F36-3)
This feature audibly alerts you when a Voice Mail Noti-
fication is received. A Voice Mail Notification is received
if your Voice Mail contains messages that have not been
reviewed.
1. Press
F
3
DEF
6
MNO
and
3DEF
.
2. You can turn this feature on/off by or .
3. Press
F
to set.
60
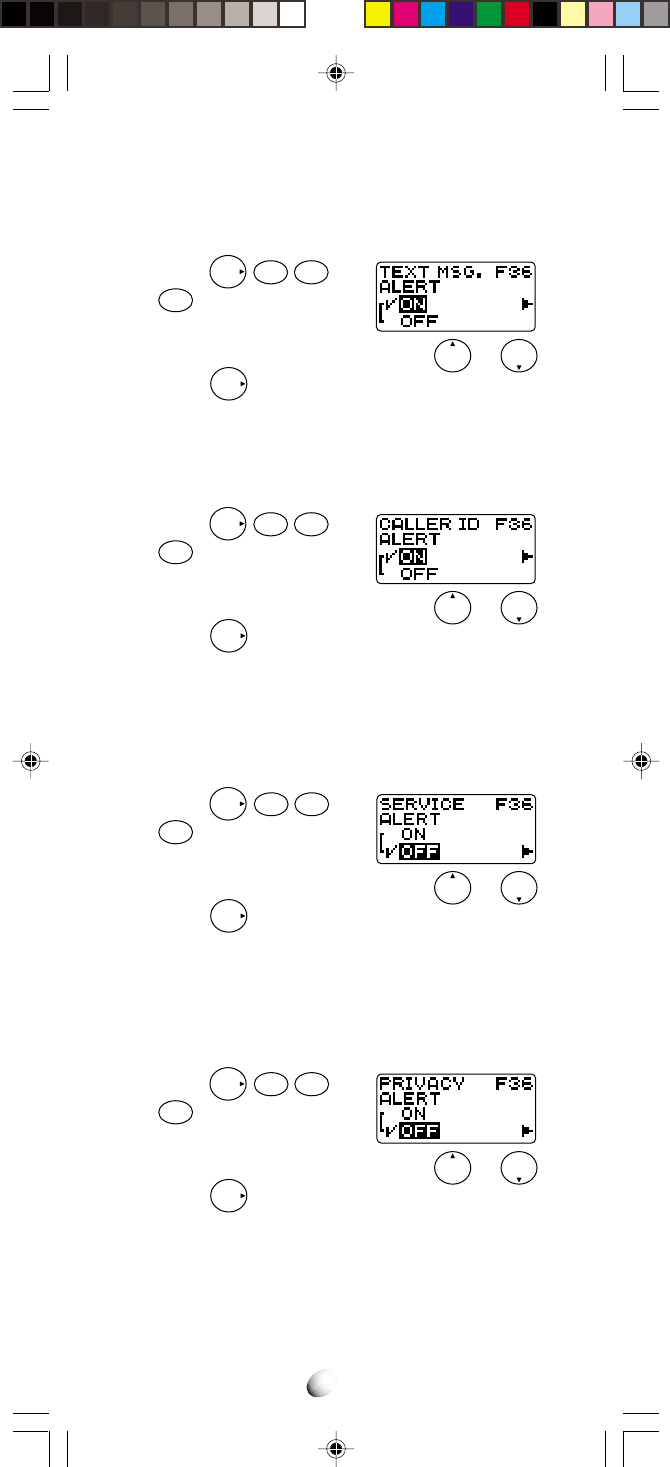
Text Message Alert (F36-4)
This feature audibly alerts you when a Text Message is
received.
1. Press
F
3DEF
6MNO
and
4
GHI
.
2. You can turn this feature on/off by or .
3. Press
F
to set.
Caller ID Alert (F36-5)
This feature audibly alerts you when a Caller ID is re-
ceived.
1. Press
F
3DEF
6MNO
and
5
JKL
.
2. You can turn this feature on/off by or .
3. Press
F
to set.
Service Mode Alert (F36-6)
With this feature on, an audible tone alerts you when
the service mode changes from Digital to Analog, or
vice versa.
1. Press
F
3
DEF
6
MNO
and
6MNO
.
2. You can turn this feature on/off by or .
3. Press
F
to set.
Voice Privacy Alert (F36-7)
This feature audibly alerts you when the voice privacy
service is provided, and also when the service is can-
celed.
1. Press
F
3DEF
6MNO
and
7
PQRS
.
2. You can turn this feature on/off by or .
3. Press
F
to set.
61
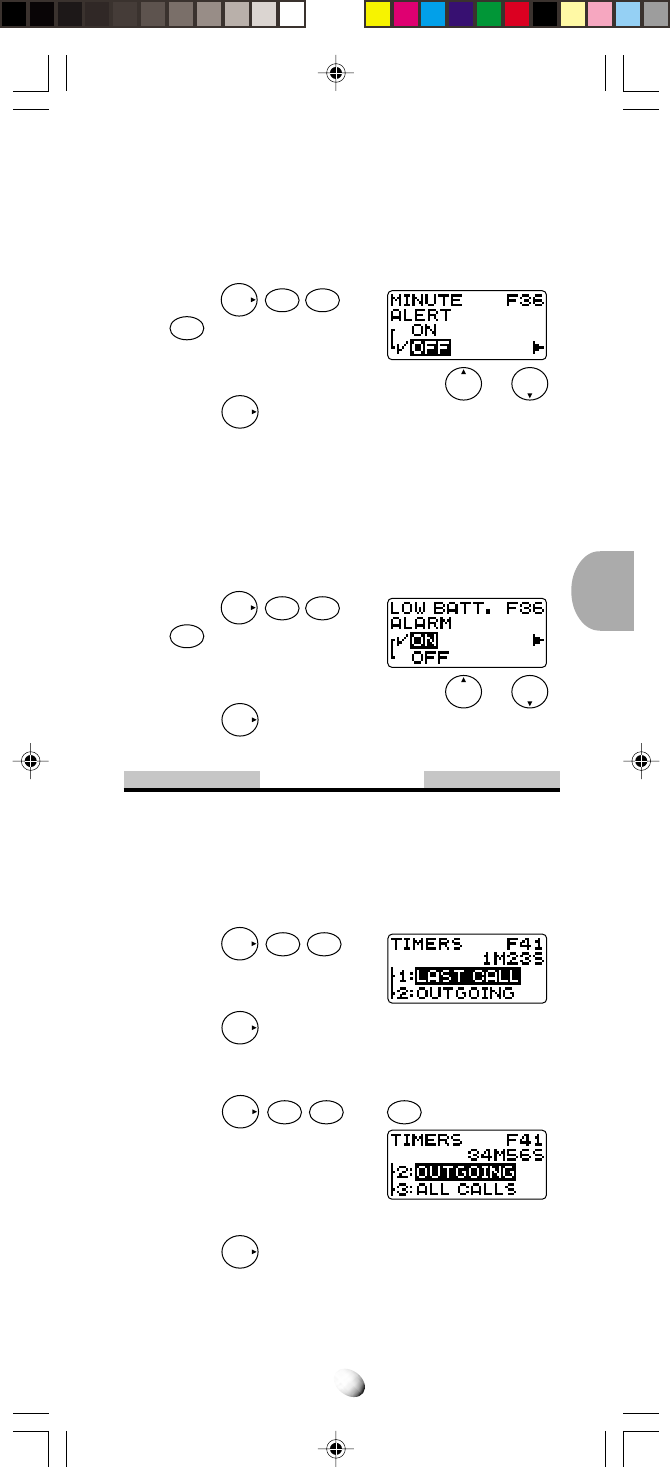
One Minute Beep Tone (F36-8)
With this feature on, you will be notified during a call,
once every minute by a short beep tone. In addition,
two beep tones will sound every five minutes.
1. Press
F
3
DEF
6
MNO
and
8TUV
.
2. You can turn this feature on/off by or .
3. Press
F
to set.
Low Battery Alarm (F36-9)
When activated, this feature warns by an audible alarm
when the battery level is low.
If the alarm is given, recharge the battery or replace it
with a fully charged battery.
1. Press
F
3DEF
6MNO
and
9
WXYZ
.
2. You can turn this feature on/off by or .
3. Press
F
to set.
Call Timers
To help you manage your calls, your phone is equipped
with several Call Timers.
Last Call Timer (F41-1)
1. Press
F
4GHI
1
.
The talk time of the last
call will be displayed.
2. Press
F
to exit.
Outgoing Call Timer (F41-2)
1. Press
F
4GHI
1
and
2ABC
. The cumulative
talk time of all outgoing
calls will be displayed.
Web access call will not be
added in this timer.
2. Press
F
to exit.
62
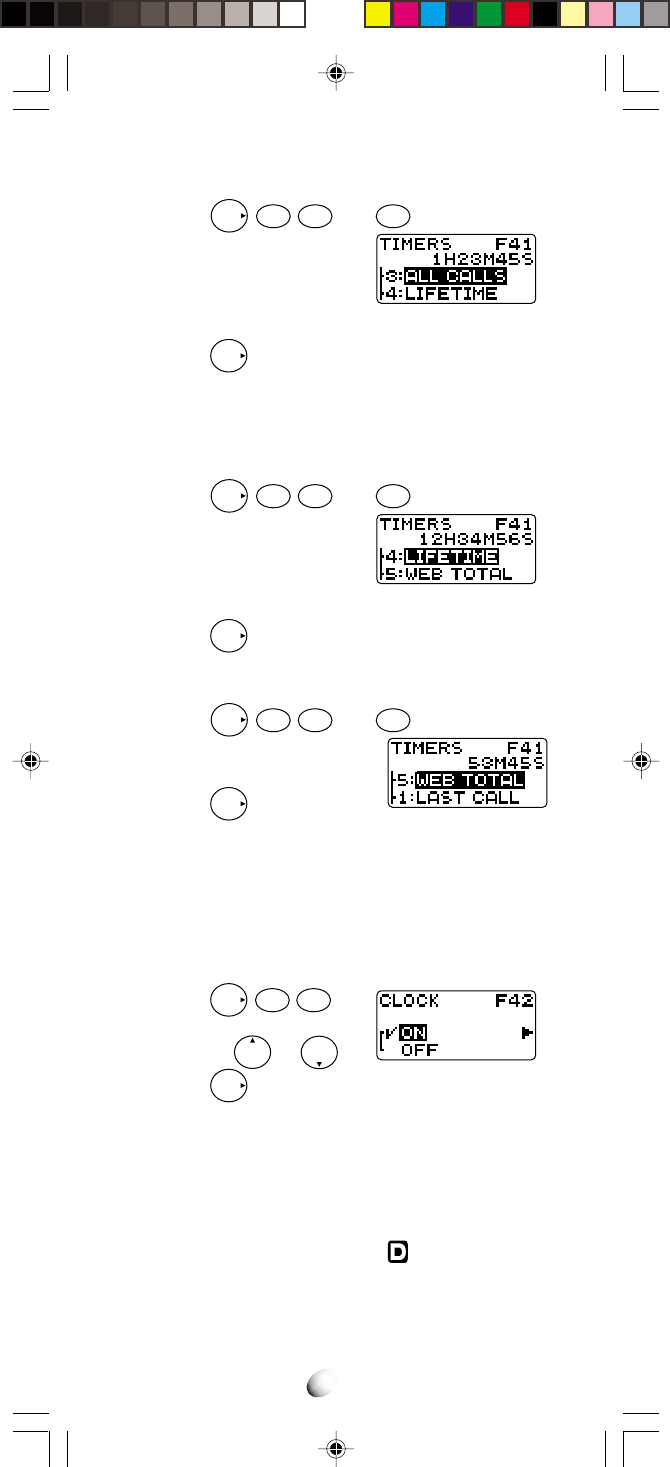
All Calls Timer (F41-3)
1. Press
F
4
GHI
1
and
3
DEF
. The cumulative
talk time of all incoming
and outgoing calls will be
displayed. Web access call
will not be added in this timer.
2. Press
F
to exit.
Note: The above three timers can be reset to zero by
using Call Timer Reset (F65-1) on page 72.
Lifetime Timer (F41-4)
1. Press
F
4GHI
1
and
4GHI
. The cumulative
“lifetime” talk time of all in-
coming and outgoing calls
will be displayed.
This timer cannot be reset to zero.
2. Press
F
to exit.
Web Total Timer (F41-5)
1. Press
F
4
GHI
1
and
5
JKL
. The cumulative
time of web access call will
be displayed.
2. Press
F
to exit.
Note: This timer can be reset to zero by using Call
Timer Reset (F65-1) on page 72.
Clock Indicator (F42)
Date and Time are automatically displayed, if this fea-
ture is enabled.
1. Press
F
4GHI
2ABC
.
2. You can turn this feature
on/off by or .
3. Press
F
to set.
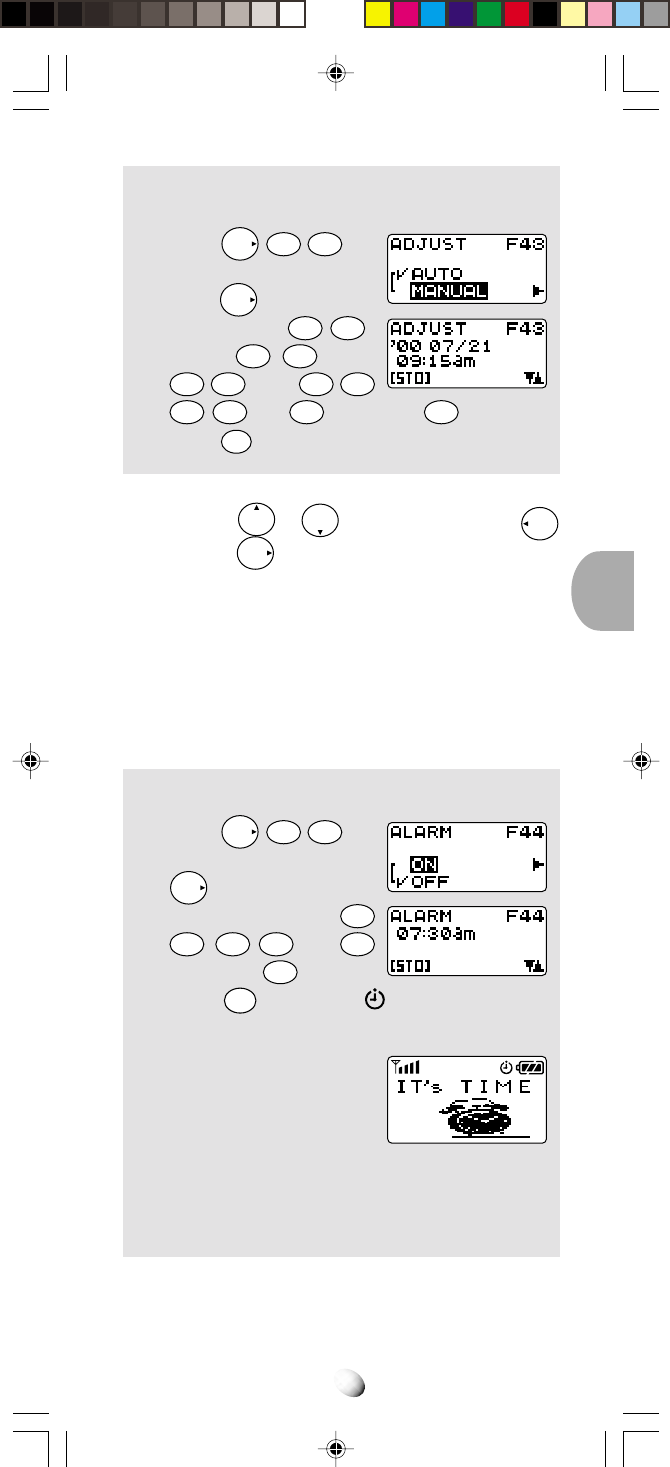
Clock Adjustment (F43)
You can use your clock in AUTO or MANUAL mode.
In AUTO mode, your clock synchronizes to the base
time of the CDMA system and displays the local time of
the area where you are, while the indicator is on.
In MANUAL mode, your clock always works alone, and
can be adjusted manually.
63
Example: To set the time to 9:15 a.m. Jul. 21, 2000
in MANUAL mode.
1. Press
F
4GHI
3DEF
.
2. Scroll to “MANUAL” and
press
F
.
3. Enter the year
0
OPER
0
OPER
,
month
0
OPER
7
PQRS
, day
2
ABC
1
, time
0
OPER
9
WXYZ
1
5JKL
and
1
for a.m. (or
2ABC
for p.m.)
4. Press
STO
to set.
Notes: 1. In the step 3 above, you can correct a digit
by or , moving the cursor by
Rcl
or
F
.
2. The clock works internally during power off,
and will display the time in the same mode
when you turn the power on.
Clock Alarm (F44)
This feature alert you repeatedly at the alarm time that
you programmed.
Example: To set the alarm time to 7:30 a.m.
1. Press
F
4GHI
4GHI
.
2. Scroll to “ON” and press
F
.
3. Enter the alarm time
0
OPER
7
PQRS
3DEF
0
OPER
and
1
for a.m. (or
2
ABC
for p.m.)
4. Press
STO
to set. The indicator will be dis-
played.
5. At the alarm time, the
alarm will ring for one
minute with animation.
6. Press any key to stop ring-
ing.
7. The clock alarm will repeat to ring every day until
you cancel the feature.
Notes: 1. If it is a time to alarm during a call, the clock
alarm will ring after the call.
64
2. The clock alarm does not ring during power
off, but this feature will be activated again
when you turn the power on.
3. The clock alarm may not ring in AUTO mode,
if you skip the alarm time traveling into an
area with the different local time.
4. See Alert Tone Volume Control (F31) on
page 57 to change the alarm sound volume.
5 In place of the alarm sound, you can use
Vibrator Alert (F8) on page 75.
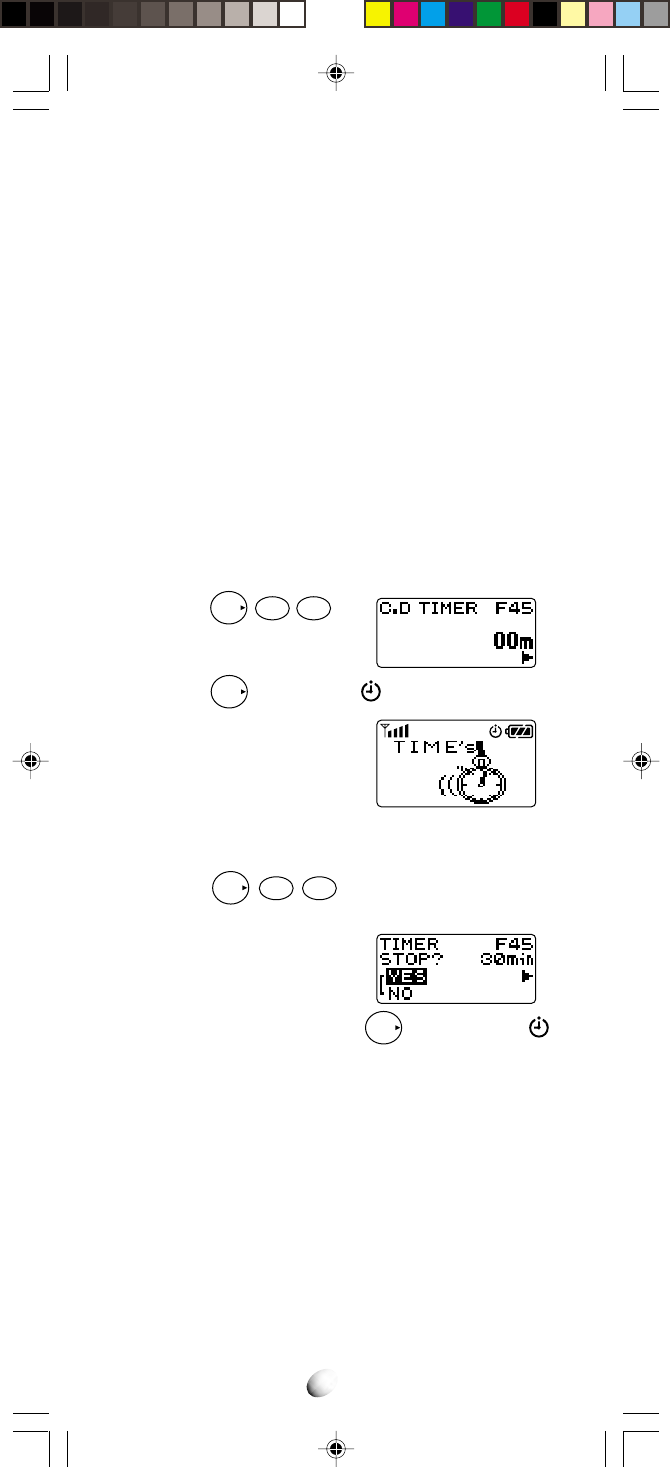
Countdown Timer (F45)
This feature alerts you when the countdown timer ex-
pires. The timer can be set to 1 through 99 minutes.
To Start the Countdown Timer.
1. Press
F
4GHI
5JKL
.
2. Enter the duration, 1 to 99
minutes.
3. Press
F
to start. The indicator will be dis-
played.
4. When the timer expires,
the alarm will ring for one
minute with animation.
5. Press any key to stop ringing.
To Cancel the Countdown Timer
1. Press
F
4
GHI
5
JKL
again after the timer has
started.
2. “TIMER STOP?” is dis-
played with the remaining
minutes to expire.
3. Scroll to “YES” and press
F
to cancel. The
indicator will go out.
Notes: 1. If the timer expires during a call, the alarm
will ring after the call.
2. When you turn the power off, the countdown
timer will be canceled.
3. See Alert Tone Volume Control (F31) on
page 57 to change the alarm sound volume.
4. In place of the alarm sound, you can use
Vibrator Alert (F8) on page 75.

65
System Features
A/B System Selection (F51)
This feature permits you to select which Cellular sys-
tem (A or B) your phone uses. When you turn the phone
on, it remembers the last A/B setting and will scan the
radio channels based on that setting.
Leave this setting as it has been preprogrammed un-
less you have a reason to alter the system selection.
To alter the system selection:
1. Press
F
5
JKL
1
.
The current mode will be
displayed.
2.
You can change the current mode by
or
.
3. Press
F
to set.
• AUTO ROAM – Auto Roam Mode
The phone will scan the priority systems first, and then
non-priority systems. For more information as to how
this mode works, see Enhanced Roaming below.
•
HOME ONLY – Home Only Mode
You can place or receive calls only within your home
area or home affiliated area.
•
A-ONLY – A-System Only Mode
The phone will scan the A-system only and prevents
switching over to the B-system.
•
B-ONLY – B-System Only Mode
The phone will scan the B-system only.
Note: If your LCD displays “AUTO ROAM ONLY”, your
phone has been pre-programmed to operate in
the Auto Roam Mode only.
Enhanced Roaming
Cellular systems are identified by a number called System
Identifier or SID. Your phone is equipped with a Preferred
Roaming List (PRL) which can be programmed by your
Carrier to take advantage of the families of cellular system
(SIDs) that your Carrier owns, or has special billing ar-
rangements with, in different cities.
In your Home System Area, both “ ” and “
Rm
” are off in
your display. Outside of the Home System in Service Ar-
eas closely associated with your Carrier, the phone’s dis-
play may appear the same as when operating in the Home
System.
66
In areas where your Carrier has Roaming agreements,
your phone will display a steady “
Rm
” indication. If your
display indicates a flashing “
Rm
”, you are in a cellular
system which is not associated with your Carrier (you
can still make or receive calls).
If your display indicates a flashing “ ”, you may have to
change your A/B System Selection or NAM Selection in
order to obtain service. If your display indicates “ ”, you
are in an area where there is no cellular service.
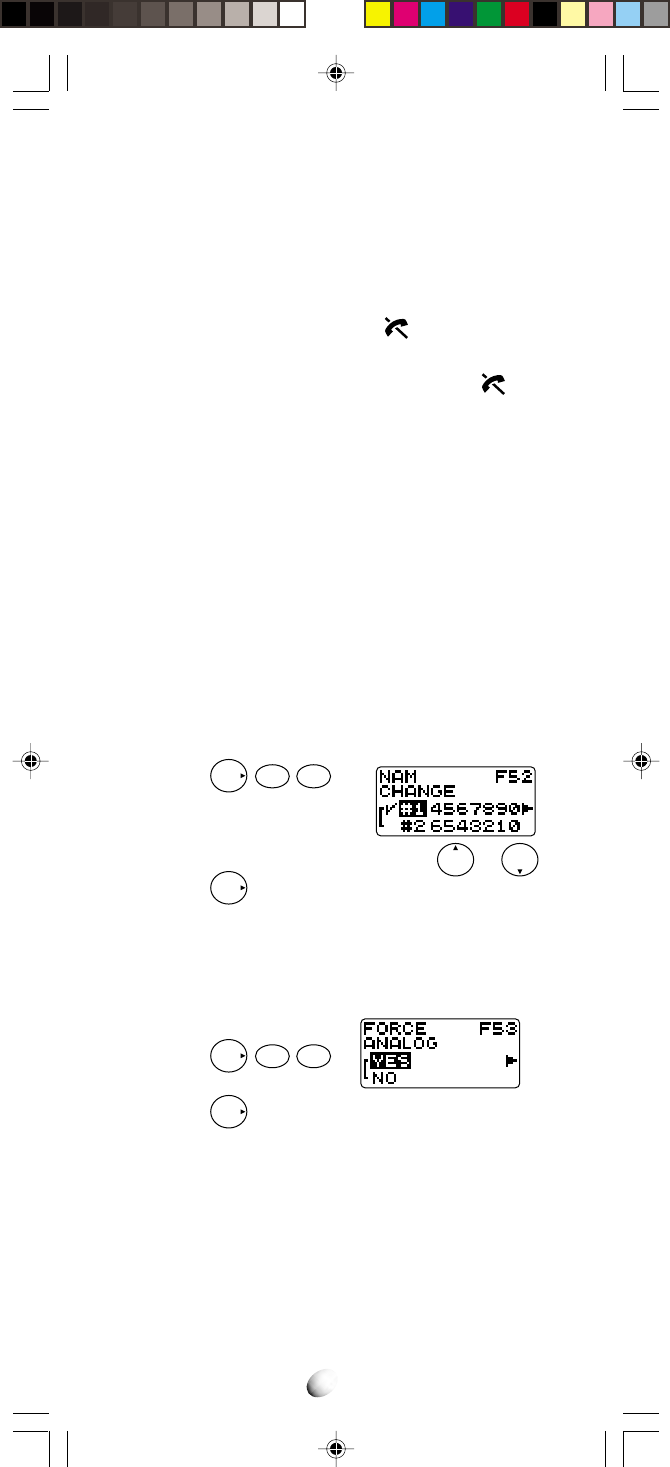
NAM Selection (F52)
Some Cellular users may find it beneficial to register
their phones with multiple numbers, for different cities
where they may frequently travel. To provide this ability,
your phone has two NAMs (Number Assignment Mod-
ules) enabling up to two registrations.
If you have multiple registrations, the NAM Selection
feature enables you to change the NAM being used by
your phone. Do not use this feature, if you do not have
multiple registrations.
To change NAMs:
1. Press
F
5JKL
2ABC
.
2.
You can change the current NAM by or .
3. Press
F
to set.
Force Analog Call (F53)
This feature temporarily directs the phone to use the
Analog Mode even if the Digital Mode has been previ-
ously selected.
1. Press
F
5
JKL
3
DEF
.
2. Press
F
when scanning the Analog Mode.
Notes: This feature automatically ends if:
1) The phone is turned off.
2) An outgoing call is made.
3) An incoming call is received.
4)
After 10 minutes if items 1) ~ 3) did not occur.
67
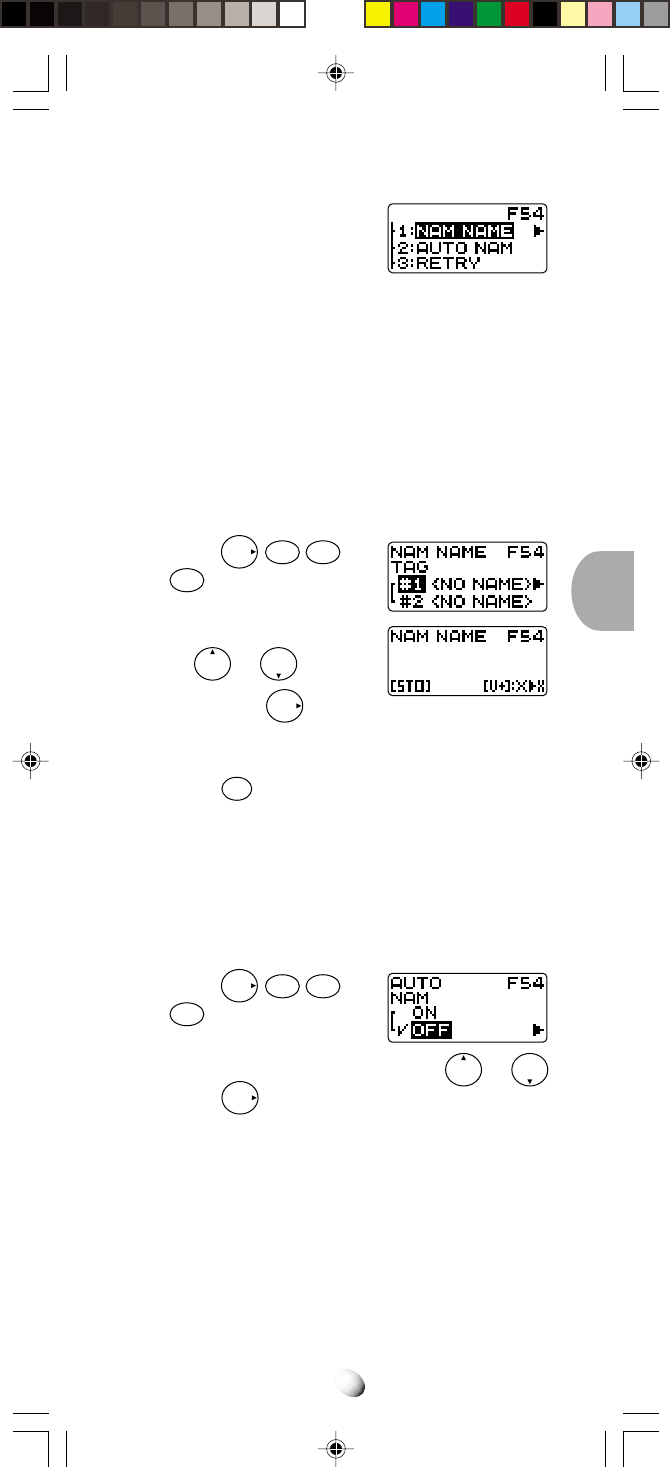
System Settings (F54)
This is a group of several func-
tions for settings related to the
system.
NAM Name Display (F54-1)
You can program a greeting or a name of a maximum
10 to 12 characters in the second line of your LCD dis-
play. This will be displayed when the phone is turned on
or when you change the NAM. (See NAM Selection
(F52) on page 66.) As you can program different name
for each NAM, you can tell which NAM is currently ac-
tive when you turn the phone on.
1. Press
F
5
JKL
4
GHI
and
1
.
2. You can select other NAM
by or .
Then press
F
to edit.
3. Enter your message.
(See Alpha Mode on page 27.)
4. Press
STO
to store the message.
Automatic NAM (F54-2)
If you have multiple NAM registrations (see previous de-
scription), your phone will recognize NAMs for which you
are registered. The phone will then automatically switch
to the proper NAM for the area in which you are in.
1. Press
F
5JKL
4GHI
and
2
ABC
.
2. You can turn this feature on/off by or .
3. Press
F
to set.
Automatic Retry (F54-3)
With this feature on, your telephone will automatically
make up to seven call attempts when the first try is not
successful.
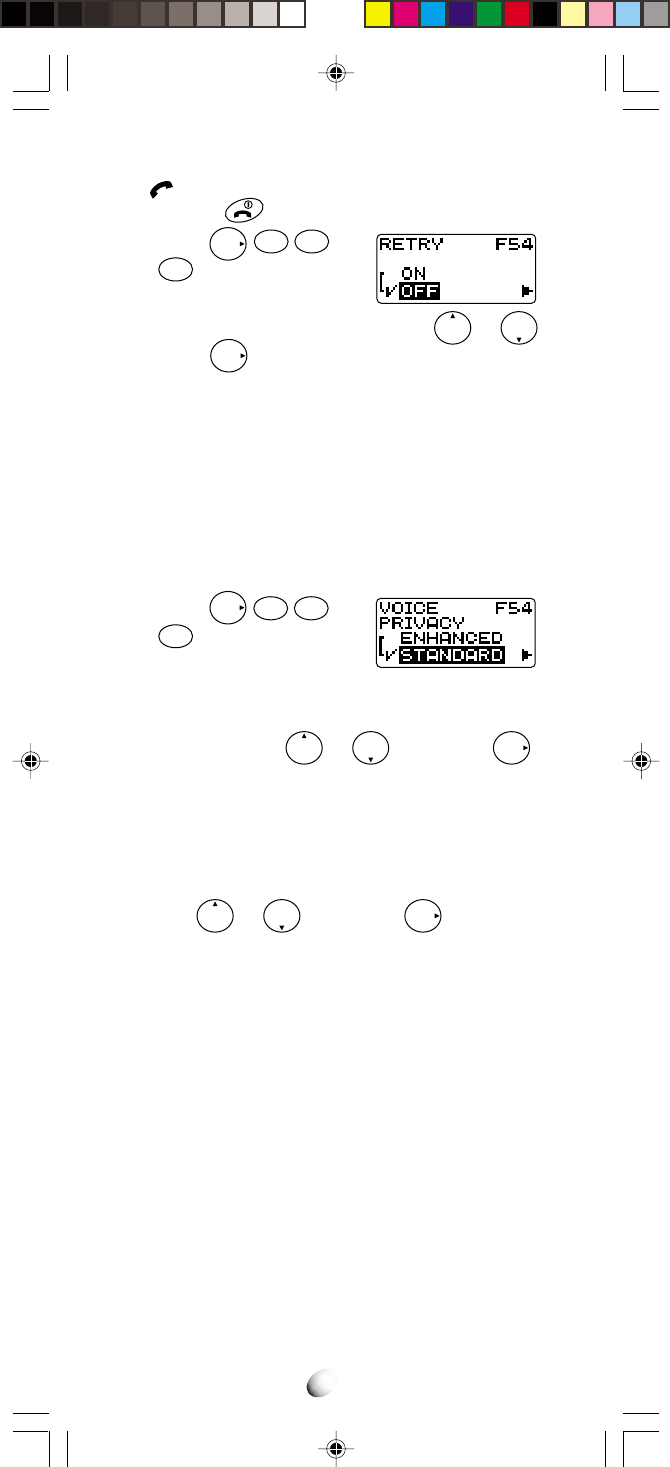
68
The indicator will stay on, and the speaker will be
muted. Press to cancel the Automatic Retry.
1. Press
F
5
JKL
4
GHI
and
3DEF
.
2. You can turn this feature on/off by or .
3. Press
F
to set.
Enhanced Voice Privacy Service (F54-4)
(Digital Mode Only)
This feature requests the cellular system to provide the
enhanced voice privacy service. This service can only
be provided in the Digital Mode, and its availability de-
pends on the cellular system and your service provider.
To Set the Enhanced Voice Privacy Mode:
1. Press
F
5JKL
4GHI
and
4
GHI
.
2. To request the cellular system to provide the en-
hanced voice privacy service, select “EN-
HANCED” with or , and press
F
.
3. When the phone is operating in the Enhanced
Voice Privacy Mode, “VP” appears in the upper
line of the display during talking.
4. To request the cellular system not to use the en-
hanced voice privacy service, select “STANDARD”
with or , and press
F
.
Notes: 1. This feature must be activated before the call
is initiated.
2. Even if the standard mode is selected, the
cellular system may direct the phone to use
the Enhanced Voice Privacy Mode.
Anti Fraud Security Features
Your new Audiovox Cellular telephone has been engi-
neered with the latest technology to help protect from
the fraudulent use of your cellular telephone number.
Your phone is equipped with Authentication and PIN
(Personal Identification Number) Dialing. (Availability of
these features depends on your Service Provider).
Should your Service Provider require use of a PIN, your
PIN can be sent manually or programmed into the phone
for more convenient use.
69
To Place a Call with the Manual PIN Entry
1. Enter the number you are calling, or recall the
number from a specific memory location.
2. Press . Your call will be processed. Listen for
a double beep, which will prompt you to send your
PIN.
3. Enter your PIN number, and press . Your call
will then be placed.
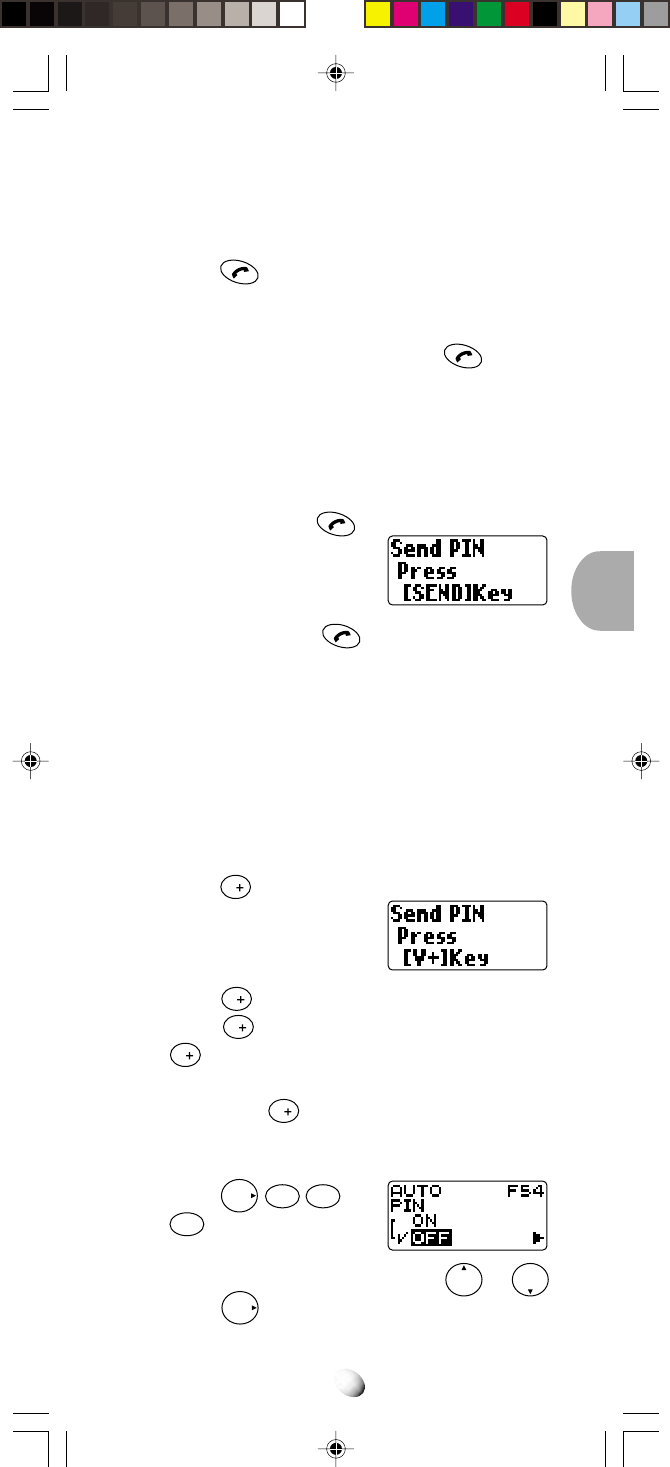
To Place a Call with the Automatic PIN Feature
1. Enter the number you are calling, or recall the
number from a specific memory location.
2. Press “SEND” key . As your call is being pro-
cessed, you will have the
display:
3. Press “SEND” key again. Your call will then
be placed.
Note: Before you can use this feature, you must pro-
gram your PIN and turn the Automatic PIN fea-
ture on. (See procedures below.)
To Place a Call to Voice Mail using the
Automatic PIN Feature
(See Voice Mail Dialing on page 48.)
1. Press
V
for more than one second. As your call
is being processed, you
will have the display:
2. Press
V
again, your PIN will be sent.
3. Press
V
again. The second number stored in
V
will be sent in Touch Tone™ signals. The sub-
sequent numbers, if any, can be sent sequentially
by pressing
V
.
To Turn the Automatic PIN Feature On/Off (F54-5)
1. Press
F
5JKL
4GHI
and
5
JKL
.
2. You can turn this feature on/off by or .
3. Press
F
to set.
70
Memory Location
1
2
3
Preset Emergency Number
911
911
Blank
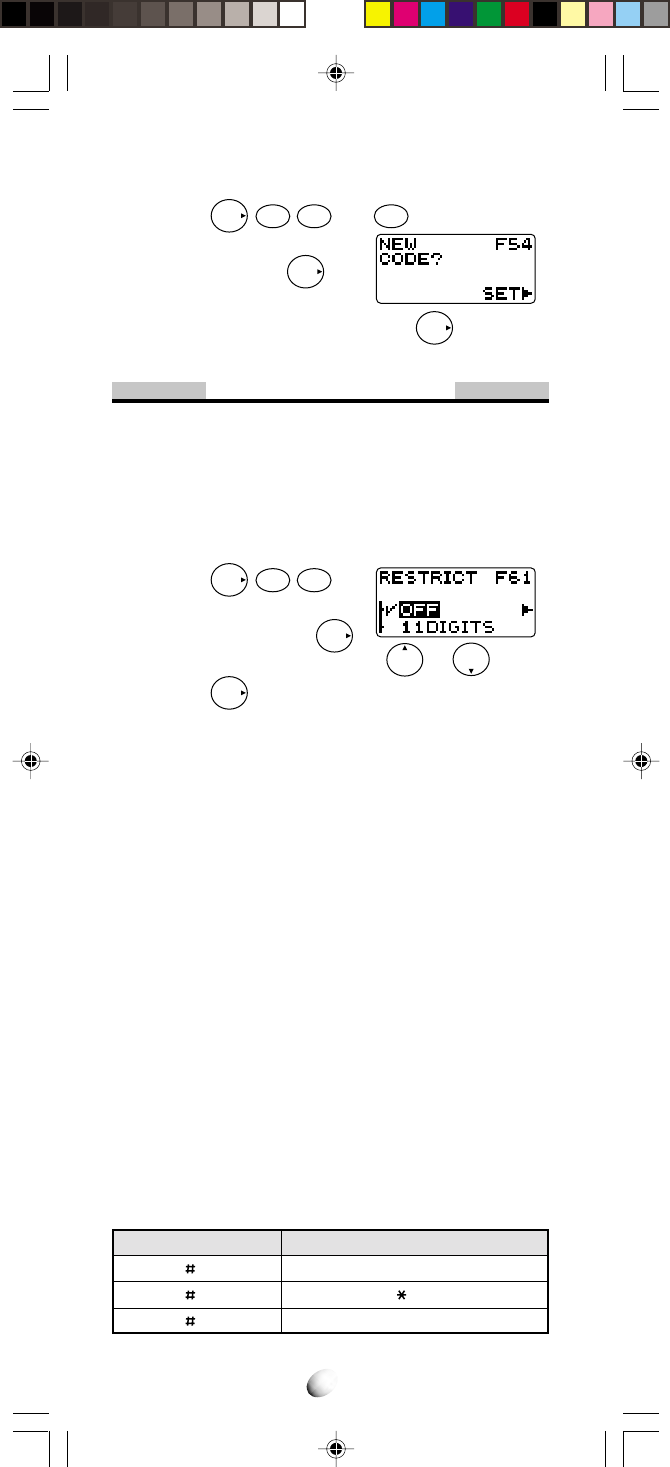
To Program or Change your Automatic PIN (F54-6)
1. Press
F
5
JKL
4
GHI
and
6
MNO
.
2. Enter the four-digit security
code and press
F
.
3. Enter your new PIN Code. Press
F
to program.
Security Features
Call Restriction (F61)
This feature permits you to impose various kinds of re-
strictions on outgoing calls. Emergency numbers can
be placed even when this feature is on.
To Set Call Restriction Mode
1. Press
F
6MNO
1
.
2. Enter the four-digit secu-
rity code and press
F
.
3. You can select the mode by or .
4. Press
F
to set.
The available Restriction modes are as follows:
•
11DIGITS – 11 Digits Mode
Only phone numbers of 11 digits or less are accepted.
Operator assisted dialing is prohibited.
•
7DIGITS – 7 Digits Mode
Only phone numbers of 7 digits or less are accepted.
Operator assisted dialing is prohibited.
•
OPERATOR – Operator Mode
Operator assisted dialing (0 Origination Call) is prohibited.
•
RCL01-09 – Phonebook Address Mode
Only outgoing calls to the numbers stored in the phonebook
address range 01 – 09 can be made. If there is a need to
expand this range of addresses please ask your dealer.
•
OFF – Off Mode
No restriction.
To Change Emergency Numbers (F62)
You can program your own emergency numbers. Up to
3 numbers of maximum 32 digits can be stored.
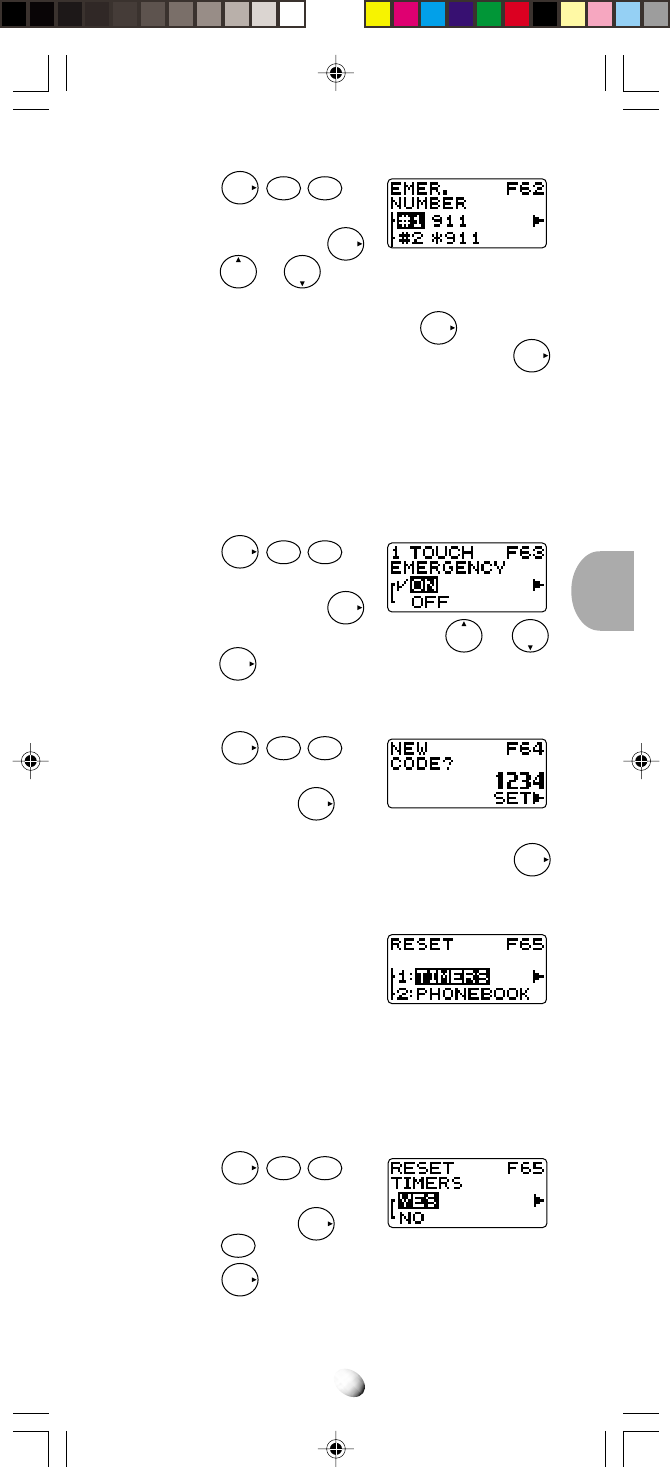
71
1. Press
F
6MNO
2ABC
.
2. Enter the four-digit secu-
rity code and press
F
.
3. Press or to select the emergency num-
ber memory location (1, 2 or 3) that you want to
change or program, and press
F
.
4. Enter the new emergency number, and press
F
.
Note: The emergency number in memory location 1
will be dialed when the OneTouch Emergency
Call feature is used.
To Turn On/Off OneTouch Emergency
Call Feature (F63)
1. Press
F
6
MNO
3
DEF
.
2. Enter the four-digit secu-
rity code and press
F
.
3. You can turn this feature on/off by or .
4. Press
F
to set.
To Change the Security Code (F64)
1. Press
F
6MNO
4GHI
.
2. Enter the four-digit security
code and press
F
.
3. The current security code is displayed.
4. Enter a new four-digit security code and press
F
.
Reset Functions (F65)
This is a group of several func-
tions for Function/Memory Re-
set.
Call Timer Reset (F65-1)
This feature resets all the following four Call Timers;
Last Call Timer, Outgoing Call Timer, All Calls Timer
and Web Total Timer.
1. Press
F
6MNO
5JKL
.
2. Enter the four-digit security
code and press
F
.
3. Press
1
.
4. Press
F
to reset the call timers.
72
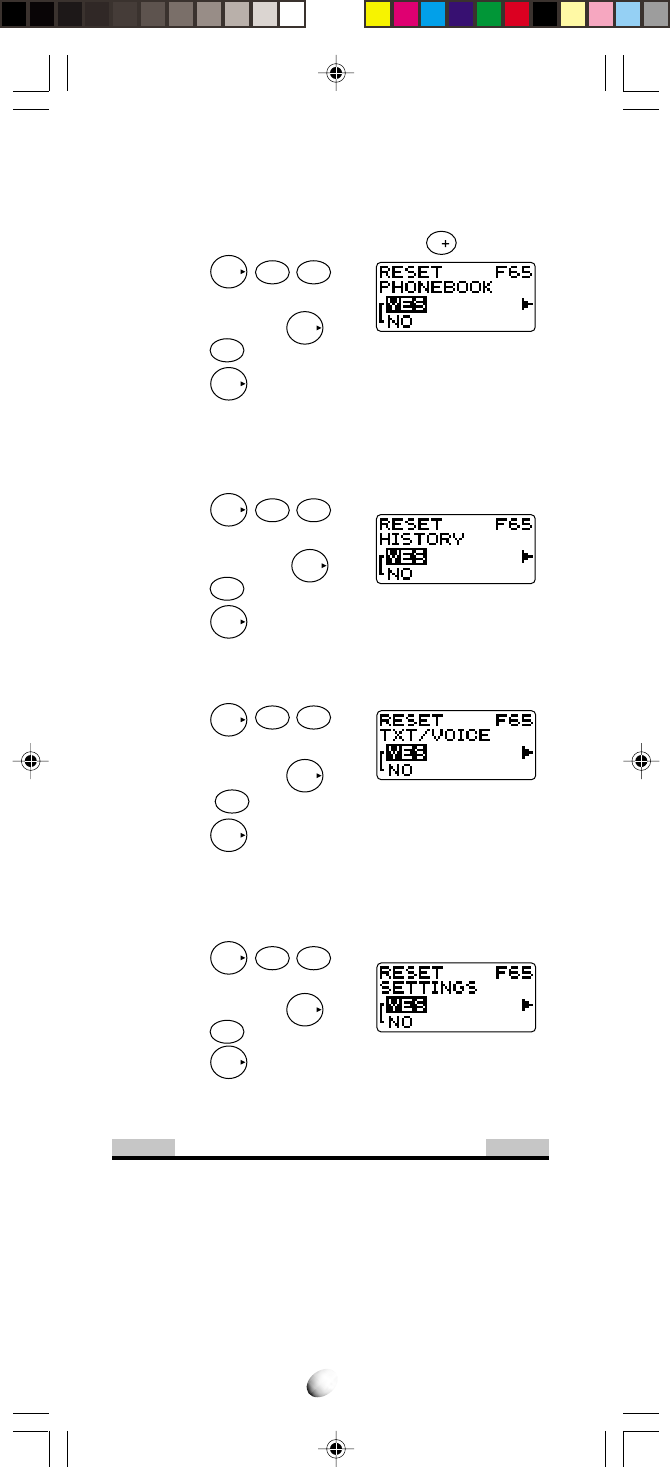
Phonebook All Clear (F65-2)
This feature clears all of Phonebook locations (01 to
99) and the voice mail dialing memory
V
.
1. Press
F
6MNO
5JKL
.
2. Enter the four-digit security
code and press
F
.
3. Press
2ABC
.
4. Press
F
to clear the memory.
Call History All Clear (F65-3)
This feature clears all call history for outgoing and in-
coming calls including Caller ID.
1. Press
F
6
MNO
5
JKL
.
2. Enter the four-digit security
code and press
F
.
3. Press
3
DEF
.
4. Press
F
to clear the history.
Text Message & Voice Mail All Clear (F65-4)
This feature clears all Text Messages and the Voice Mail number.
1. Press
F
6MNO
5JKL
.
2. Enter the four-digit security
code and press
F
.
3. Press
4GHI
4. Press
F
to clear the message.
Function Reset (F65-5)
This feature permits you to reset the User-Program-
mable functions to their initial settings.
1. Press
F
6MNO
5JKL
.
2. Enter the four-digit security
code and press
F
.
3. Press
5
JKL
.
4. Press
F
to reset.
Note: See Function Reset Status on page 76.
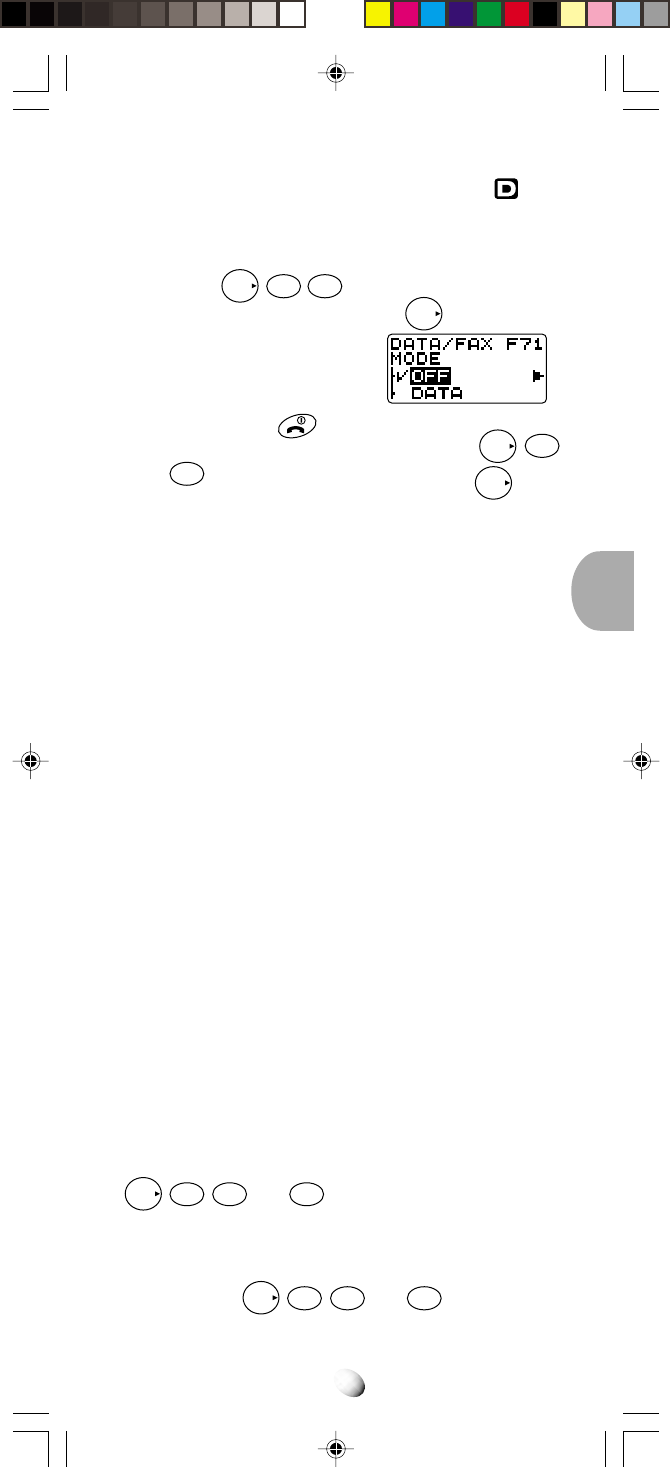
Data Communications
Data/Fax Mode (F71)
Your CDM-9000 will work as wireless modem, if con-
nected to a PC with the optional data cable (DIC-4000).
When operating in the Digital mode, the phone can be
used for Async Data or Fax at the speed of up to
14.4kbps. Your CDM-9000 also supports QNC (Quick
Network Connection) for faster internet access.
73
The data/fax features are available while the indi-
cator is on.
To Receive Data/Fax Call
1. Press
F
7
PQRS
1
.
2. Scroll the menu, and press
F
to select one
of the modes described
below.
3. During data/fax calls, you
can use only key.
4. To exit from the data/fax mode, press
F
7
PQRS
1
, and scroll to “OFF”, then press
F
.
DATA:
Data mode until the power is turned off.
FAX:
Fax mode until the power is turned off.
DATA ONCE:
Data mode for one call only.
FAX ONCE:
Fax mode for one call only.
Notes: 1. “DATA ONCE” or “FAX ONCE” mode will be
automatically reset to “OFF” mode after re-
ceiving data/fax once, or in 10 minutes.
2. You can not receive voice calls in data/fax
modes.
3 For additional details on connecting your
phone to your PC, please refer to instruc-
tions in the DIC-4000 Data Cable Kit.
4. To place data/fax call or access internet
through a PC, it is not necessary to set the
phone in data/fax mode.
Web Browser Setup (F72)
The following features are to set up the Web Browser in
your phone.
Web Lock (F72-1)
You can lock the unauthorized access to the internet. If
the browser is locked by this feature, you will need to
enter your 4 digit Security Code to access the web. Press
F
7
PQRS
2
ABC
and
1
to set.
Web Backlight (F72-2)
You can turn on/off the backlight setting during the web
access. Press
F
7
PQRS
2ABC
and
2ABC
to set.
74
Web Idle Timer (F72-3)
If there is no network activity within a specific time, the
web access call is automatically terminated. Press
F
7
PQRS
2ABC
and
3DEF
to change the timer setting.
To deactivate this feature, set the timer to zero.
Web Link IP Addresses (F72-4) (F72-5)
Your phone can have up to 4 sets of the server IP
(Internet Protocol) addresses and Port numbers to ac-
cess your service provider’s website. These may already
be preset or be advised by your service provider.
To install two IP addresses into “Web Link A”;
1. Press
F
7
PQRS
2
ABC
and
4
GHI
.
2. Enter your 4-digit Security Code and press
F
.
3. “LINK A PRI.” is displayed.
4. Enter the primary IP address and press
F
.
5. Enter the primary port number and press
F
.
6. Now “LINK A SEC.” is displayed.
7. Enter the secondary IP address and press
F
.
8. Enter the secondary port number and press
F
.
To install more IP addresses into “Web Link B”;
Press
F
7
PQRS
2ABC
5JKL
, and follow the above steps
from 2 to 8 for “LINK B PRI.” and “LINK B SEC.”
Notes: 1. An IP address must be 12-digit long to en-
ter. If you have, for example, 123.45.67.8,
then enter
1
2
ABC
3
DEF
,
0
OPER
4
GHI
5JKL
,
0
OPER
6MNO
7
PQRS
,
0
OPER
0
OPER
8TUV
.
2. Your phone may display the stored IP ad-
dresses or Port numbers in the above steps.
Then press
F
to keep them unchanged.
Web User Name (F72-6)
Press
F
7
PQRS
2ABC
and
6MNO
. You may program the
User Name.
Web Password (F72-7)
Press
F
7
PQRS
2ABC
and
7
PQRS
. You may program a
password.
Web Link Change (F72-8)
You may select “Web Link A” or “Web Link B”.
1. Press
F
7
PQRS
2ABC
and
8TUV
.
2. Scroll to “WEB LINK A” or “WEB LINK B”.
3. Press
F
to set.
75
Web Browser (F73)
Press
F
7
PQRS
3
DEF
to start the Web Browser.
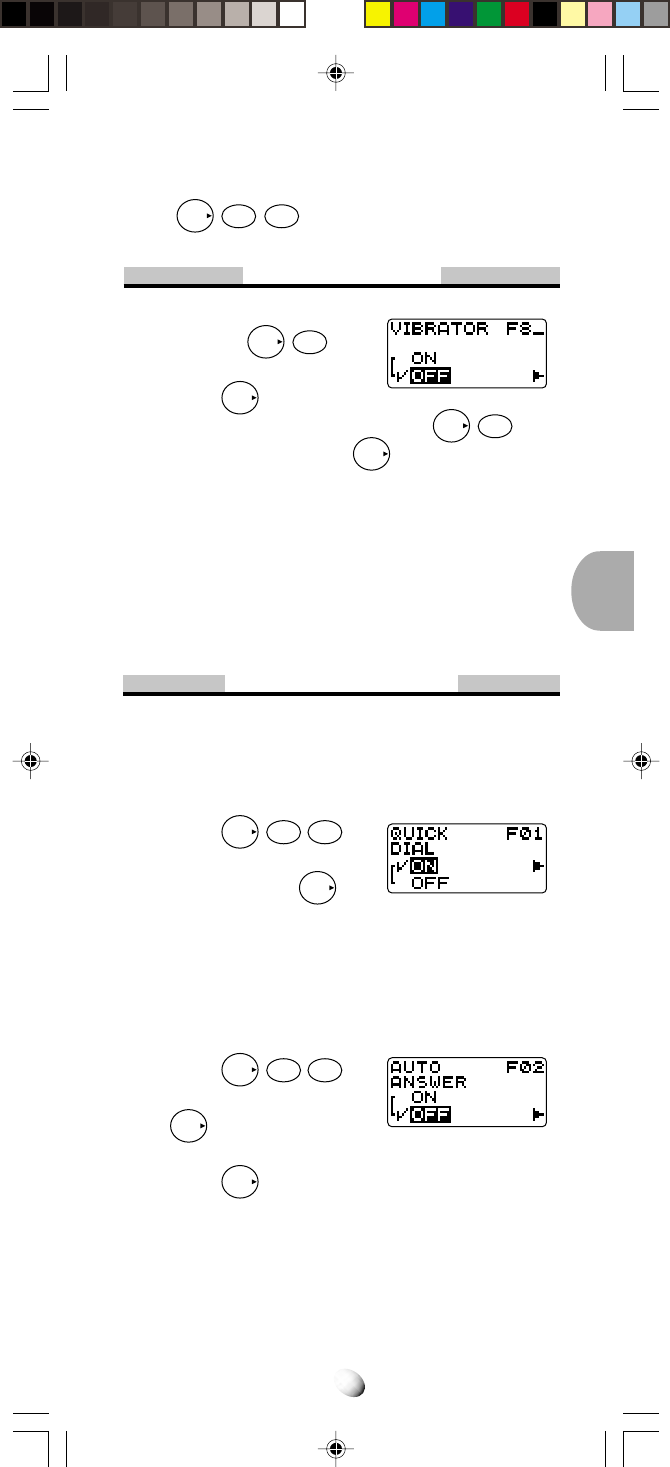
Vibrator Alert
1. To turn the vibrator alert
on, press
F
8
TUV
, then
scroll to “ON”.
Press
F
to select.
2. To turn the vibrator alert off, press
F
8
TUV
, then
scroll to “OFF”. Press
F
to select.
Notes: 1. When the Vibrator Alert feature is on, the
audible ringer/melody will be muted.
Also the alarm sound will be muted for Clock
Alarm and Countdown Timer.
2. Be sure to turn the Vibrator Alert feature off
when you use the phone in Car Kit option.
Other Functions
Quick Dialing (F01)
When this feature is on, the primary number in your
phonebook address 02 to 09 can be dialed with just a
single press of the key.
1. Press
F
0
OPER
1
.
2. Scroll to “ON” or “OFF” you
want and press
F
.
Automatic Answering (F02)
With this feature on, incoming calls will be automati-
cally answered after a preset duration of alert tones.
This feature may be convenient when your telephone is
installed in the handsfree car kit.
1. Press
F
0
OPER
2ABC
.
2. Scroll to “ON” and press
F
.
3. Enter duration (5 to 30) in seconds.
4. Press
F
to set.
Note: This feature will not function if the phone is in
“Phone Lock”, or “Keypad Lock” mode.

76
Function Reset Status
The following functions will return to the initial settings
after Function Reset.
Functions
Automatic Lock (F13)
Backlight Control Portable Use
(Standby) (F22-1) With Car Kit
Backlight Control (In-Use) (F22-2)
Auto Hyphenation (F23)
Text Lines Selection (F24)
Contrast Control (F25)
Earpiece Volume Control
Alert Tone Volume Control (F31)
Ring Type Selection (F32)
Key Tone Volume Control (F33)
Sending DTMF (F35)
Key Tone Length (F36-1)
Single Alert Beep Tone (F36-2)
Voice Mail Alert (F36-3)
Text Message Alert (F36-4)
Caller ID Alert (F36-5)
Service Mode Alert (F36-6)
Voice Privacy Alert (F36-7)
One Minute Beep Tone (F36-8)
Low Battery Alarm (F36-9)
Clock Indicator (F42)
Time Adjustment (F43)
Clock Alarm (F44)
Countdown Timer (F45)
A/B System Selection (F51)
NAM Selection (F52)
Automatic NAM (F54-2)
Automatic Retry (F54-3)
Voice Privacy Service (F54-4)
Automatic PIN Mode (F54-5)
Call Restriction (F61)
OneTouch Emergency Call (F63)
Data/Fax Mode (F71)
Web Lock (F72-1)
Web Backlight (F72-2)
Web Idle Timer (F72-3)
Initial Setting
OFF
10 Seconds
Always ON
Normal
ON
3 Lines
Standard
Level 3 (Max = 4)
Level 4 (Max = 4)
Ring #1
Level 3 (Max = 4)
ON
Normal
OFF
ON
ON
ON
OFF
OFF
OFF
ON
ON
Auto
OFF
0 minute
Auto Roam
NAM #1
OFF
OFF
Standard
OFF
OFF
ON
OFF
OFF
Always ON
2 minutes

77
* Affects Handsfree operation only.
Refer to Handsfree Car Kit (HF-4000T) manual.
Functions
Vibrator (F8)
Quick Dialing (F01)
Automatic Answering (F02)
*Call in Absence Indicator (F03)
*Safety Timer (F04)
Initial Setting
OFF
ON
OFF
OFF
8 hours

78
MEMO

79
INDEXINDEX
A
Alpha Mode ....................... 27
Any Key Answering ......... 19
Automatic Answering ...... 75
Automatic Calls-in-Absence
Indicator .................................
20
B
Backlight Control
In-Use ............................ 56
Standby .......................... 55
Battery
Alarm ............................. 61
Attach/Detach ................ 12
Recharge ....................... 12
C
Call
Place .............................. 17
Receive .......................... 19
Terminate ....................... 17
Call History ....................... 42
All Clear ......................... 72
Call Restriction ................. 70
Call Timers ........................ 61
Reset.............................. 71
Call Waiting ....................... 21
Caller ID ............................ 20
Alert ............................... 60
Clock Alarm ................ 21, 63
Clock Indicator ........... 21, 62
Contrast ............................ 56
Countdown Timer ....... 21, 64
D
Data/Fax ............................ 72
Distinctive Ringing .......... 20
DTMF ................................. 58
E
Emergency Call ................ 19
One Touch ................ 19, 71
Emergency Number
Change .......................... 70
Enhanced Roaming ......... 65
F
Force Analog Call ............ 66
Function Menu
Access ........................... 51
Tree ................................ 52
Function Reset ................. 72
H
Hyphenation
Auto.......................... 24, 56
Manual ........................... 25
K
Keypad Lock ..................... 53
L
Link Dialing ....................... 38
M
Mute............................. 17, 58
N
NAM
Automatic ....................... 67
Selection ........................ 66
Name Display ................... 67
O
Own Telephone
Number ............................. 55
P
Phone Lock....................... 54
Automatic ....................... 54
Unlock ............................ 54
Phonebook
All Clear ......................... 72
Phonebook Edit
Change Priority .............. 36
Erase .............................. 36
Modify ............................ 34
Move .............................. 35
Phonebook Entry
Automatic Storing ........... 25
Dual Numbers ................ 26
Name ............................. 27
Number .......................... 23
Overwrite........................ 24
Ring Type ....................... 29
Phonebook Recall
Address Mode ................ 31
Key Word
Search Mode.................. 32
Sort Scroll Mode ............ 31
PIN
Automatic ................. 69, 70
Manual ........................... 69
Prepending Dialing .......... 33
PRL .............................. 57, 65
Q
Quick Dialing .............. 18, 75
R
Recall Menu ...................... 30
Retry .................................. 67
Ring Type .......................... 58
Ringing Tone ..................... 20
S
Scratch Pad ................ 20, 44
Secret Memory ................. 37
Security Code ............. 53, 71
Short Message
Service .............................. 49
SID ............................... 57, 65
Speed Dialing ................... 18
System Selection ............. 65
T
Talk Timer .......................... 21
Text Messages .................. 49
Alert ............................... 60
All Clear ......................... 72
Touch Tone™
from Display ................... 22
from Memory .................. 22
U
Unlock Code ............... 53, 54
V
Vibrator Alert .................... 75
Voice Activated Dialing.... 40
Voice Mail
Alert ............................... 59
All Clear ......................... 72
Dialing ............................ 48
Notification ..................... 47
Voice Privacy .................... 68
Alert ............................... 60
Volume
Alert Tone ....................... 57
Earpiece ......................... 20
Key Tone ........................ 58
W
Web Browsing .................. 45

80
WA R N I NGWA R N I NG
When using your cellular telephone, please note that
the following offenses are punishable by fine, imprison-
ment, or both:
• Using obscene, indecent, or profane language.
• Using the phone to give off false distress calls.
• Wiretapping or otherwise intercepting a telephone
call, unless that person has first obtained the con-
sent of the parties participating in the call.
• Making anonymous calls to annoy, harass, or mo-
lest other people.
• Charging to an account without authorization to
avoid payment for service.
• Refusing to yield line when informed that it is
needed for an emergency call (It is also unlawful
to take over a line by stating falsely that it is needed
for an emergency).
The CDM-9000 is using one or more of the
following US patents licensed by
QUALCOMM Incorporated:
4,901,307
5,056,109
5,101,501
5,109,390
5,228,054
5,257,283
5,265,119
5,267,261
5,267,262
5,289,527
5,309,474
5,103,459
5,099,204
5,107,225
5,283,536
5,280,472
5,337,338
5,339,046
5,341,456

81
12 MONTH LIMITED WARRANTY12 MONTH LIMITED WARRANTY
AUDIOVOX COMMUNICATIONS CORP. (the Com-
pany), warrants to the original retail purchaser of
this Audiovox Handheld Portable Cellular Tele-
phone, that should this product or any part thereof
(except the items listed below), under normal use
and conditions, be proven defective in material or
workmanship within the first twelve (12) month pe-
riod from the date of purchase, such defect(s) will
be repaired or replaced (with new or rebuilt parts)
at the Company’s option, without charge for parts
or labor directly related to the defect(s).
The keypad and display are similarly warranted for
ninety (90) days from date of purchase.
The accessories consisting of the antenna and re-
chargeable battery pack, desktop charger are simi-
larly warranted for twelve (12) months from origi-
nal purchase.
This Warranty does not apply to batteries, fuses,
or costs incurred for testing or checking, or to any
product or part hereof which has suffered through
alteration, serial number defacement, improper in-
stallation, excessive temperature or humidity, envi-
ronmental conditions, mishandling, misuse, neglect
or accident. This Warranty is not assignable or trans-
ferable.
To obtain repairs or replacement within the terms
of this Warranty, the product should be delivered
with proof of warranty coverage, specification of
defect(s), transportation prepaid, to the Company
at the address shown below. For TRAVELERS
WARRANTY SERVICE.
Call toll free to (800) 229-1235 (in N.Y. State, (631)
233-3410) for reference to an Authorized Warranty
Station in your area.
THE EXTENT OF THE COMPANY’S LIABILITY
UNDER THIS WARRANTY IS LIMITED TO THE
REPAIR OR REPLACEMENT PROVIDED ABOVE
AND, IN NO EVENT, SHALL THE COMPANY’S LI-
ABILITY EXCEED THE PURCHASE PRICE PAID
BY PURCHASER FOR THE PRODUCT.

82
The Company disclaims liability for geographic cov-
erage, inadequate signal to antenna, communica-
tions range or operation of the Cellular System as
a whole.
ANY IMPLIED WARRANTIES, INCLUDING ANY
IMPLIED WARRANTY OF MERCHANTABILITY
SHALL BE LIMITED TO THE DURATION OF THIS
WRITTEN WARRANTY. ANY ACTION FOR
BREACH OF ANY WARRANTY HEREUNDER IN-
CLUDING ANY IMPLIED WARRANTY OF MER-
CHANTABILITY MUST BE BROUGHT WITHIN A
PERIOD OF 24 MONTHS FROM DATE OF ORIGI-
NAL PURCHASE. IN NO CASE SHALL THE COM-
PANY BE LIABLE FOR ANY CONSEQUENTIAL
OR INCIDENTAL DAMAGES FOR BREACH OF
THIS OR ANY OTHER WARRANTY, EXPRESS OR
IMPLIED, WHATSOEVER.
No person or representative is authorized to as-
sume for the Company any liability other than ex-
pressed herein in connection with the sale of this
product.
Some states do not allow limitations on how long
an implied warranty lasts or the exclusion or limita-
tion of incidental or consequential damage so the
above limitation or exclusions may not apply to you.
This Warranty gives you specific legal rights, and
you may also have other rights which vary from state
to state.
IN U.S.A.: AUDIOVOX COMMUNICATIONS
CORP.
555 Wireless Blvd., Hauppauge,
New York 11788
(631) 233-3300
IN CANADA: AUDIOVOX CANADA LTD.
405 Britannia Road East,
Mississauga, Ontario L4Z3E6
(905) 712-9299
83
Quick Reference
Quick Reference
Basic Operation
Turn On/Off (more than one second)
Place a Call Phone Number,
Terminate a Call
Receive a Call Any Key (except and
Rcl
F
)
Clear Last Digit
CLR
(less than 0.5 sec.)
Clear All Digits
CLR
(more than 0.5 sec.)
Earpiece Volume or during a call
Convenience Features
Store Number in Phonebook
CLR
, Phone Number,
STO
STO
,
Phonebook Address
Phonebook Dialing
Rcl
, Phonebook Address,
Speed Dialing Phonebook Address,
Last Number Redial
Rcl
VAD
Dial last Number Received
Rcl
Web
Messaging Features
Review Voice Mail Number
F
Review Text Messages
F
, then or for scroll
Basic Operation
Turn On/Off Press and hold .
Place a Call Phone Number,
Terminate a Call
Receive a Call
Any Key (except and
Rcl
F
)
Clear Last Digit
CLR
(less than 0.5 sec.)
Clear All Digits
CLR
(more than 0.5 sec.)
Earpiece Volume or during a call
Convenience Features
Store Number in Phonebook
CLR
, Phone Number,
STO
STO
, Phonebook Address
Phonebook Dialing
Rcl
, Phonebook Address,
Speed Dialing Phonebook Address,
Last Number Redial
Rcl
VAD
Dial last Number Received
Rcl
Web
Messaging Features
Review Voice Mail Number
F
Review Text Messages
F
,
then
or
for scroll
84
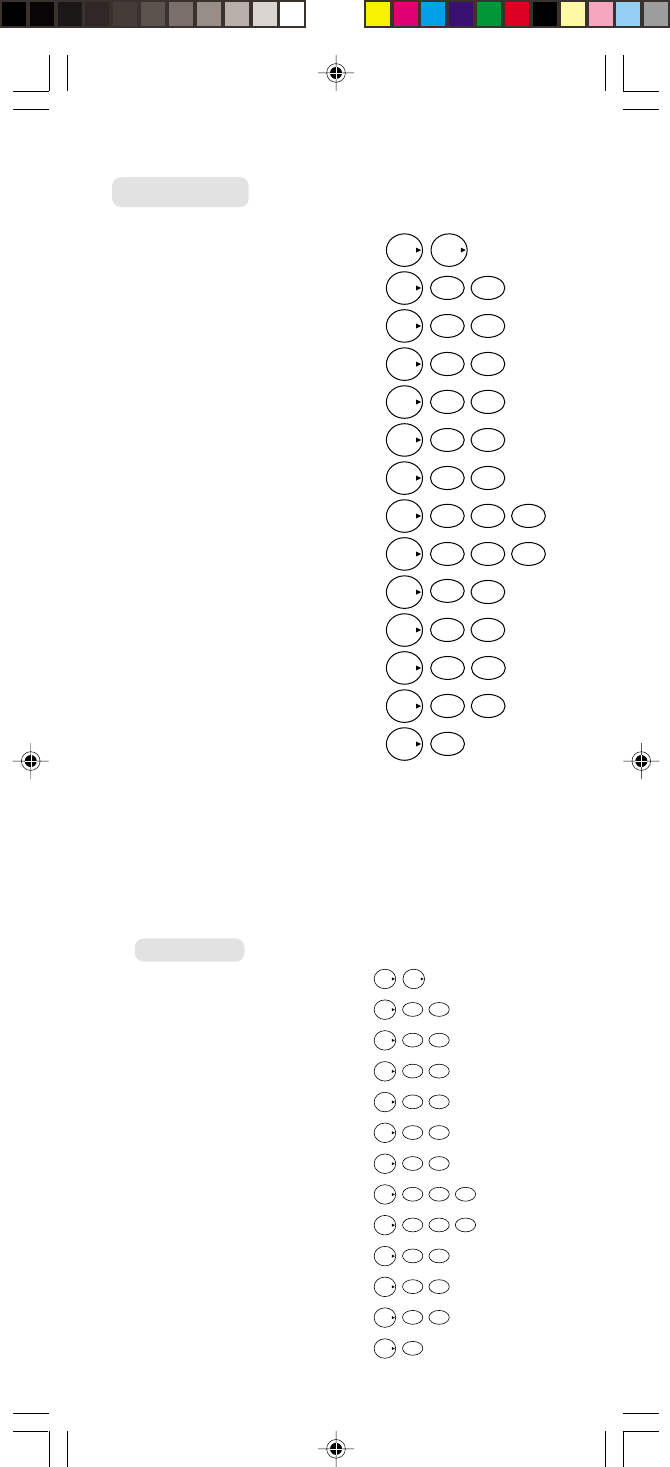
Functions
Mute/Unmute
F
F
Keypad Lock
F
1 1
Lock the Phone
F
1 2ABC
Automatic Lock
F
1 3DEF
Display Own Phone Number & SID
F
2ABC 1
Backlight Control
F
2ABC 2ABC
Last Call Time Display
F
4GHI 1
Outgoing Call Time Display
F
4GHI 1 2ABC
All Calls Time Display
F
4GHI 1 3DEF
Automatic Answering
F
0
OPER
2ABC
A/B System Selection
F
5JKL 1
Data/Fax Mode
F
7
PQRS
1
Vibrator Alert
F
8TUV
Functions
Mute/Unmute
F
F
Keypad Lock
F
1
1
Lock the Phone
F
1
2
ABC
Automatic Lock
F
1
3DEF
Display Own Phone Number & SID
F
2ABC
1
Backlight Control
F
2
ABC
2
ABC
Last Call Time Display
F
4GHI
1
Outgoing Call Time Display
F
4GHI
1
2ABC
All Calls Time Display
F
4
GHI
1
3
DEF
Automatic Answering
F
0
OPER
2ABC
A/B System Selection
F
5JKL
1
Force Analog Call
F
5
JKL
3
DEF
Data/Fax
Mode
F
7
PQRS
1
Vibrator Alert
F
8TUV

BTE-4000
Extended Lithium
Ion Battery
DTH-4000
Desktop Holder
CNR-4000
AC Adapter
EM-425
Earphone Microphone
DTC-4000
Desktop Charger with AC Adapter
CDM-9000
TRI-MODE, WEB BROWSING DIGITAL CDMA TELEPHONE
ACCESSORIES
BTR-4000
Standard Lithium
Ion Battery
DIC-4000
Data Interface Cable

86
PROTECT YOUR WARRANTY
AUDIOVOX COMMUNICATIONS CORP.
555 Wireless Blvd., Hauppauge, New York 11788, 631-233-3300
16808 Marquardt Avenue, Cerritos, California 90701, 562-802-5100
Audiovox Canada
405 Britannia Rd. East, Ste 101, Mississauga, Ontario,
Canada L4Z3E6, 905-712-9299
Audiovox Pacific Pty Ltd
110 Rocky Point Road, Kogarah, NSW 2217, Australia,
02-9587-0000
Audiovox New Zealand Pty Ltd
Unit B, 6 Henderson Place, Auckland, 6496345720
Audiovox Singapore Pte Ltd
268 Orchard Road, #07-07, Singapore, 238856, 65-733-5902
http://www.audiovox.com
© 2000 Audiovox Corporation
PROTECT YOUR WARRANTY
Read your Warranty carefully, with the special
consideration to paragraph seven of the Lim-
ited Warranty for your unit.
“Warranty does not apply to...or to any
product or part thereof which has suffered
through alteration... mishandling, misuse,
neglect, or accident”.
Many companies are making look-alike acces-
sories and in some cases, promoting that their
product is equal to or better than the Audiovox
product. Be careful. Some of these products
may not be compatible for use with your
Audiovox product and may damage the unit or
cause it to malfunction. If service is required
on your unit, and it is determined that a non-
Audiovox accessory has created the problem
with your unit, the Warranty will not apply. In
addition, if the unit has already suffered irre-
versible damage by reason of a non-compat-
ible accessory, the Warranty will be voided. To
protect your Warranty, use only compatible ac-
cessories which cannot damage or interfere
with the functioning of your Audiovox product.