E F Johnson 2425112 5100 ES Series VHF Radio User Manual User operating manual
E. F. Johnson Company 5100 ES Series VHF Radio User operating manual
Contents
- 1. Manual
- 2. User operating manual
- 3. User operating manual 2
- 4. User operating manula 3
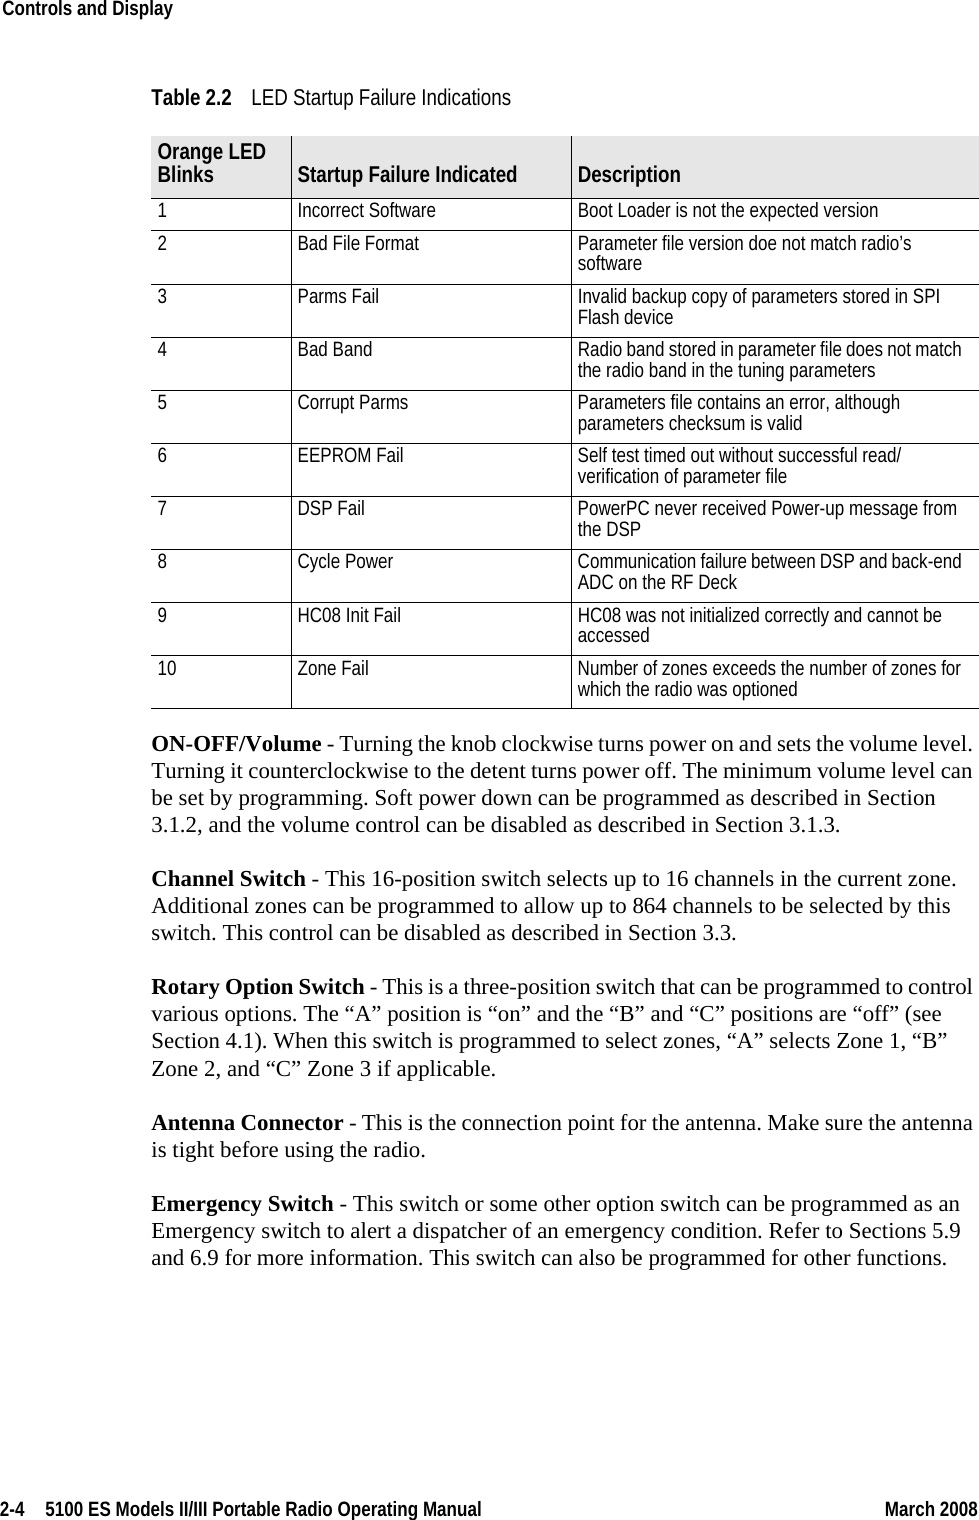
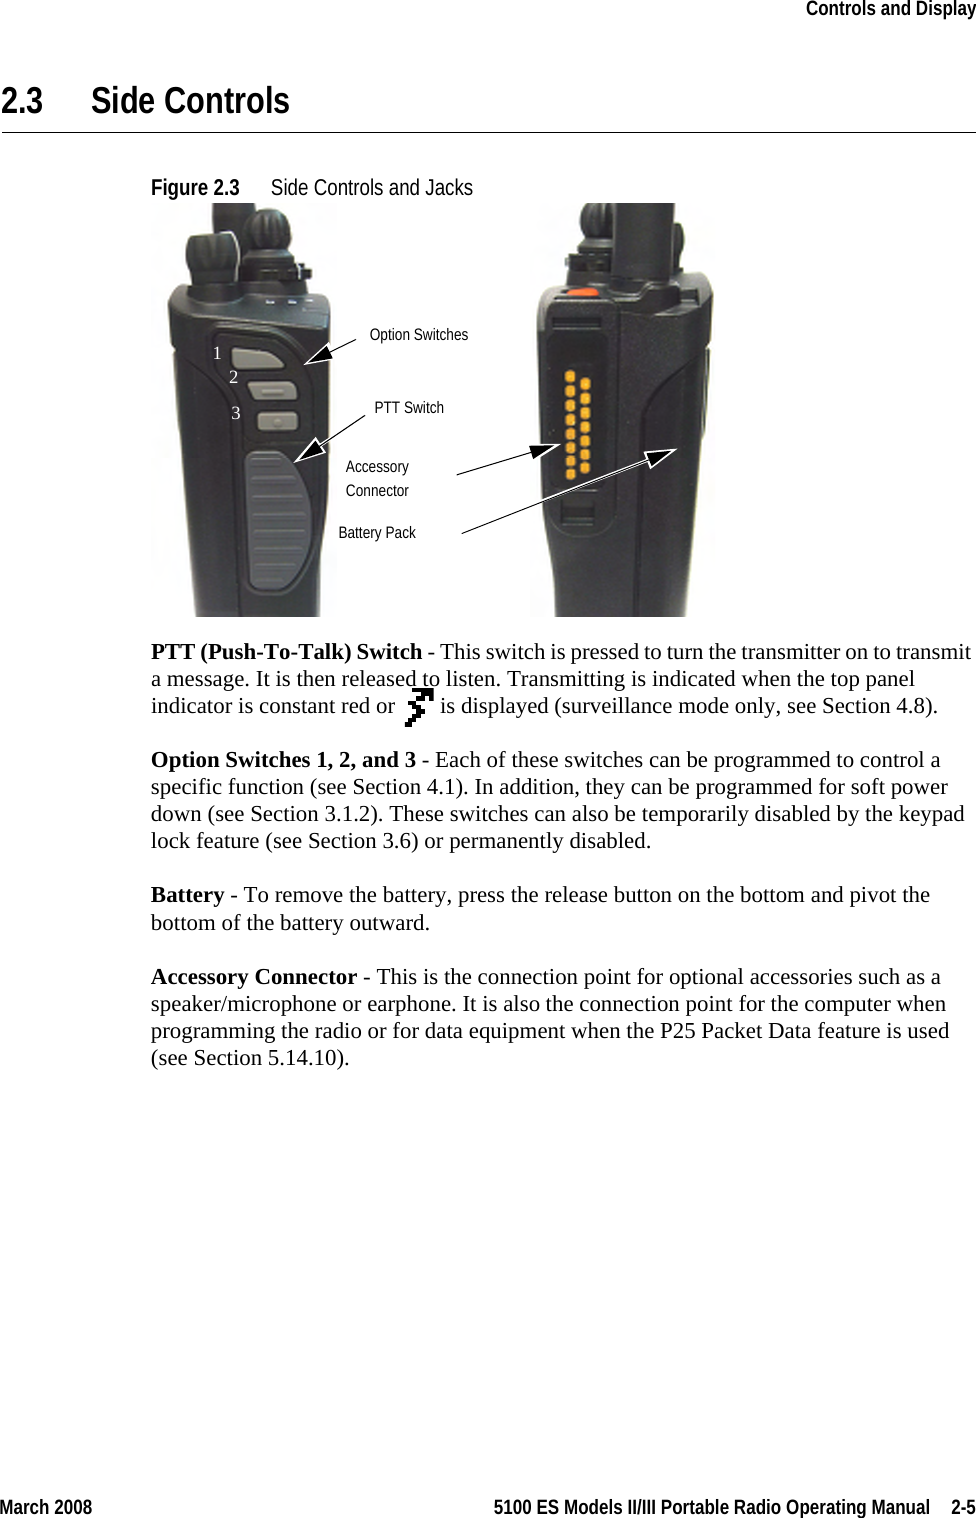
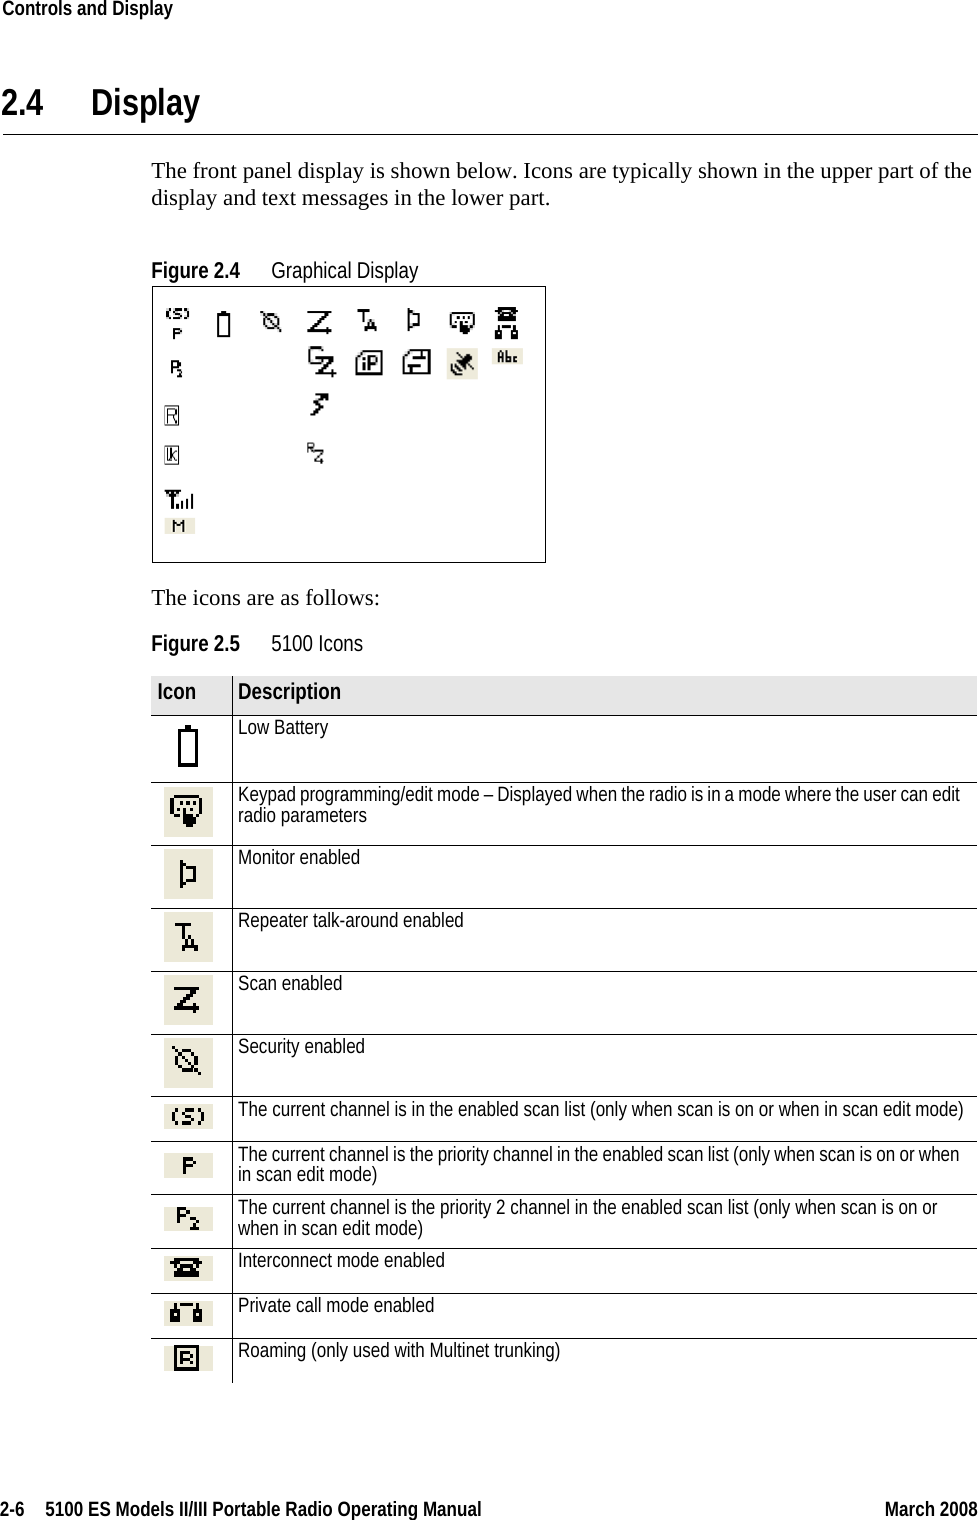
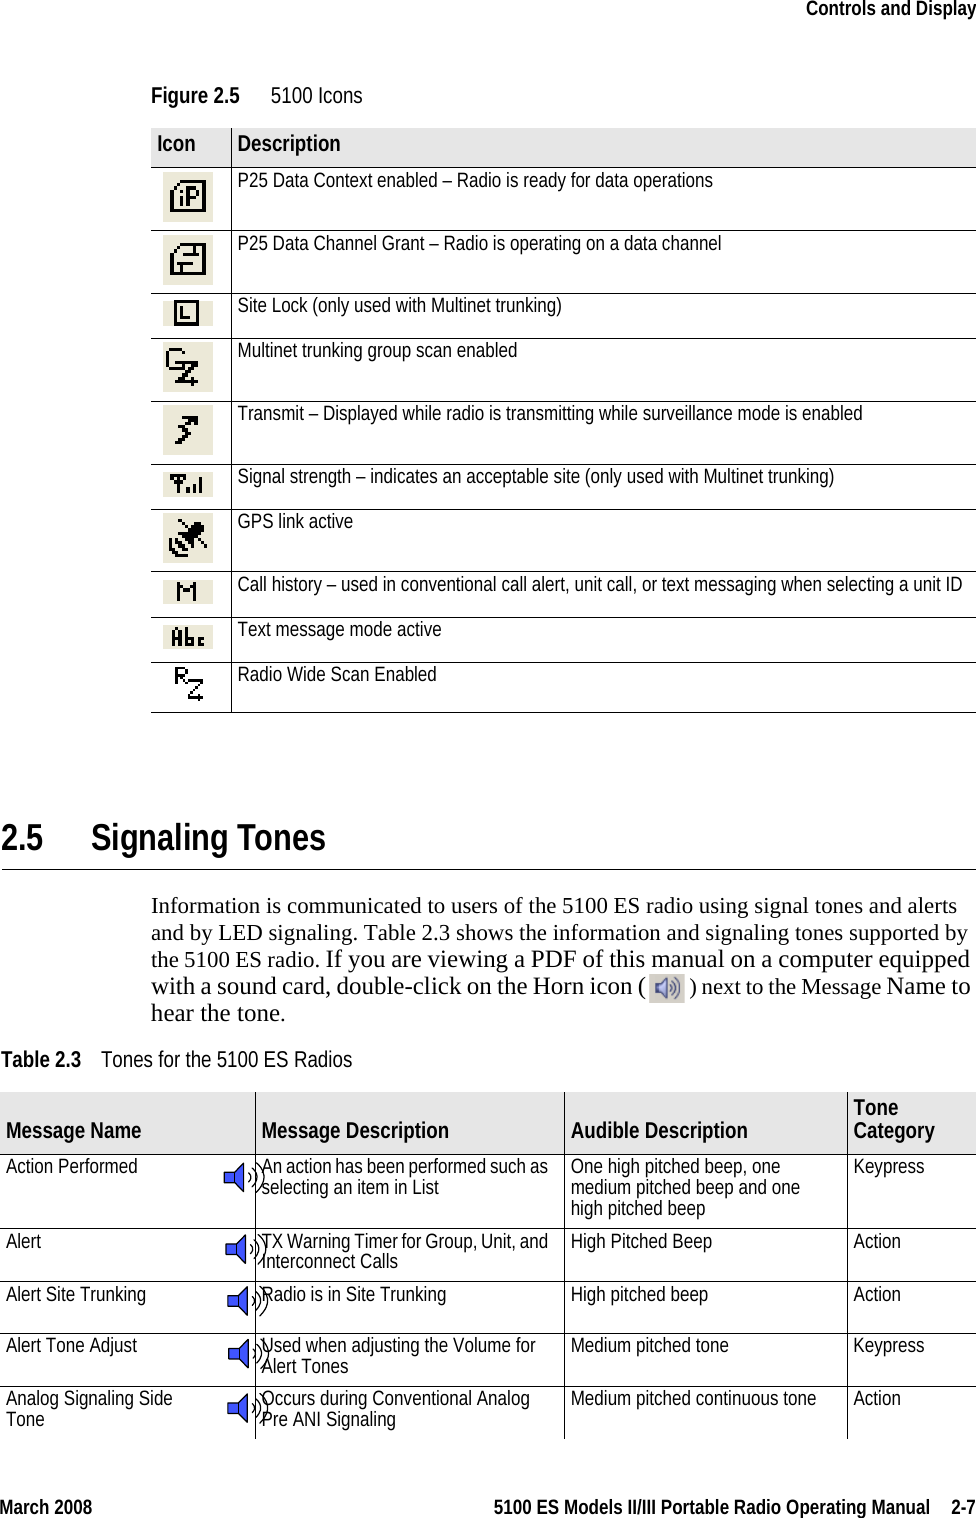
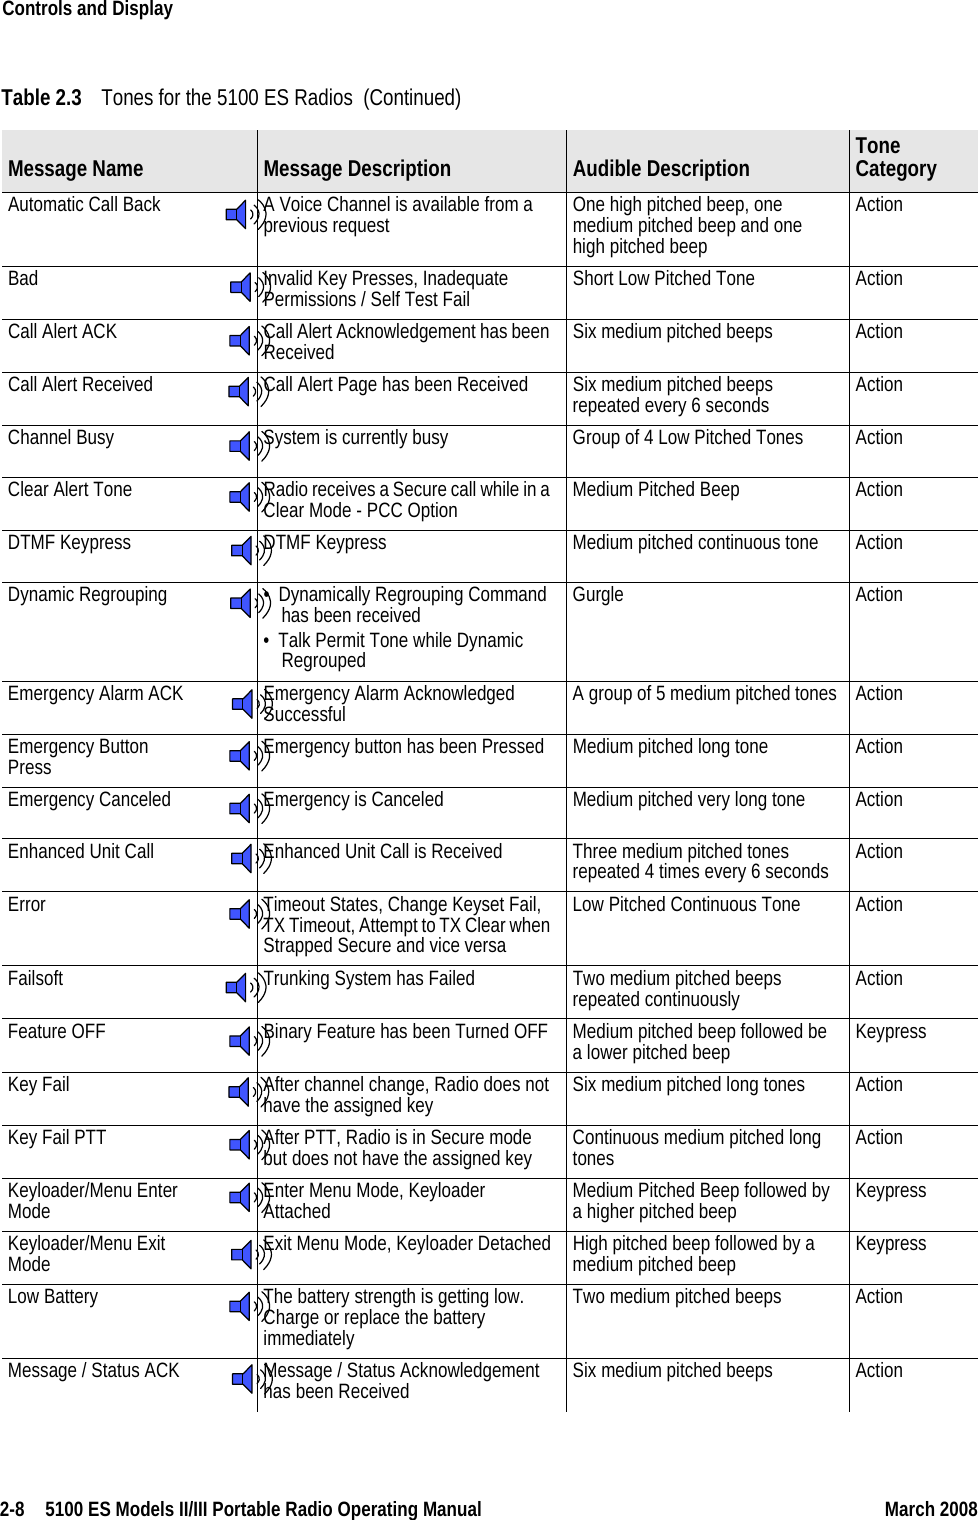
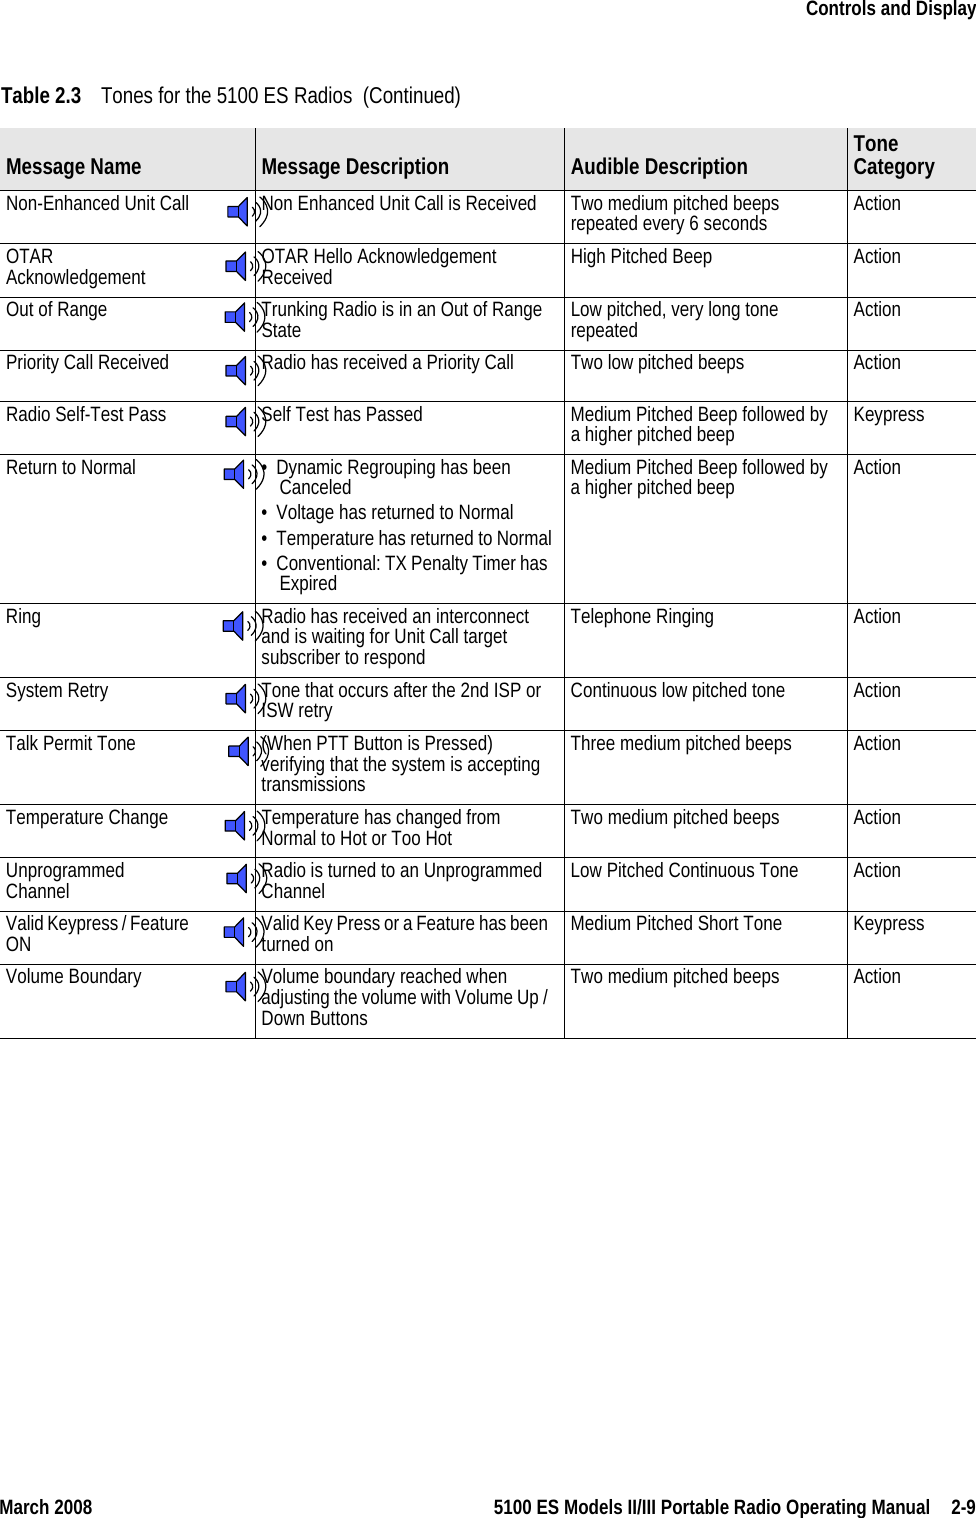
User operating manual