ECI Satellite Communication A S RTU4120A Iridium Telephone System User Manual B4150GB1 0 p65
ECI Satellite Communication A/S Iridium Telephone System B4150GB1 0 p65
Contents
User manual Iridium

IRIDIUM ICHU1000
Operating Instructions
Iridium Satellite LLC
8440 South River Parkway
Tempe, AZ 85284 USA
Tel. Toll Free
1-866-947-4348
Local or International
1-480-752-5155
E-mail info@iridium.com
ii
0125
iii
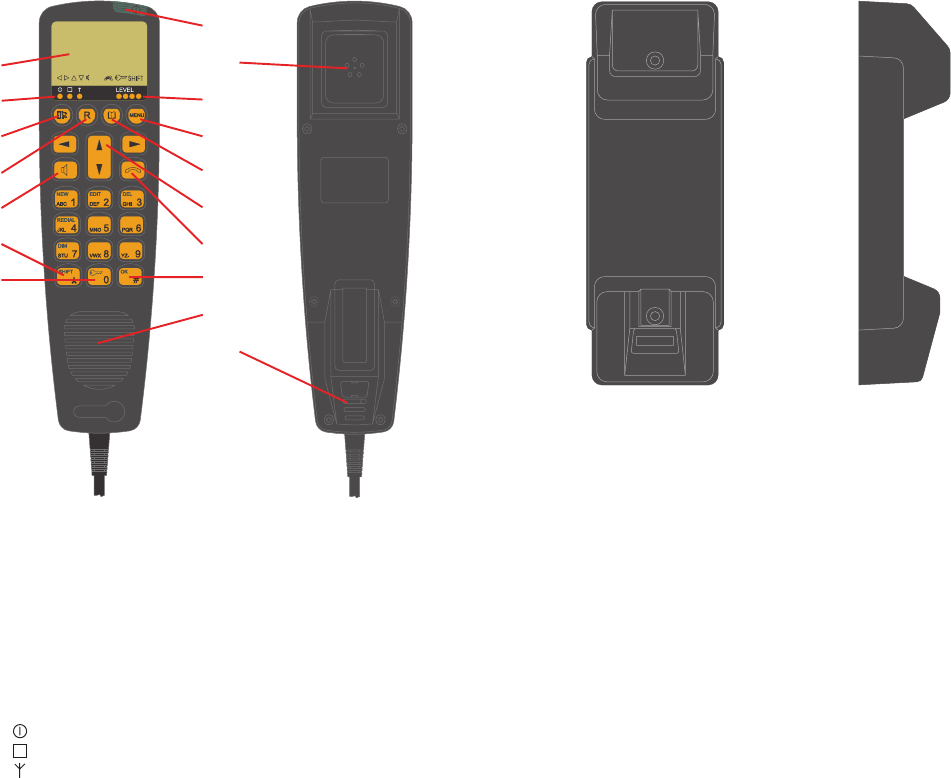
Handset
What Is What?
1. Display
2. Indicator lamps
Power
Call
Network
3. Escape key
4. Call transfer key
5. Loudspeaker on/off key
6. Shift key
7. Lock on/off key
8. On/off button
9. Earpiece
10. Signal level
11. Opens menu
12. Opens phone book
13. Volume control
14. Hook on/off key
15. OK key
16. Loudspeaker
17. Microphone
1
2
3
4
5
6
7
8
9
10
11
12
13
14
15
16
17
0125

iv
Introduction
Congratulations on your new Iridium equipment.
Your Iridium equipment is a modular system that consists of an
antenna, transmitter/receiver, control handset and/or fixed control
unit, and optional PSTN telephone/PBX.
You can operate the Iridium equipment in voice mode from a control
handset, fixed control unit, and/or PSTN telephone. To the system
you can connect up to four handsets or fixed control units and one
PSTN telephone or PBX switchboard.
Important!
For FCC RF exposure compliance, the antenna must be
installed with a minimum distance of 0.61m (2 feet) away
from all persons.
About this Manual
This manual provides instructions on how to operate a control
handset and telephone.
Basically, the manual consists of two main parts: The first deals with
simple operation, which includes e.g. making and answering calls.
The second part describes the more advanced functions of the
system.
All functions of your Iridium equipment can be tested by following the
step by step procedures described in this manual. Each procedure is
an explicit sequence of key presses that has to be carried out.
Unless otherwise specified, the description of the individual proce-
dures has been based on the assumption that the CU is enabled and
has returned to idle state. See section “Handset Enabling/Disabling”
under “Handset Simple Operation” on how to enable and disable the
handset.
Returning to Idle State on an Enabled CU:
1. Press , if necessary, a number of times until one of the
following idle texts are shown in the display:
• Ready
• Occupied
• Internal Call
• External Call
• Locked
and possibly time, date and time or position depending on the status
of your Iridium equipment. Alternative idle texts are specified in
section “SIM Card Messages” under “SIM Card Handling”.
2. Make sure that the CU is hooked on. Place the handset in the
cradle and press if the icon is shown in the
display.
We recommend that you read the manual before using the equip-
ment.
Please note
Any responsibility or liability for loss or damage in connection with
the use of this product and the accompanying documentation is
disclaimed. The information in this manual is furnished for informa-
tional use only, is subject to change without notice, may contain
errors or inaccuracies, and represents no commitment whatsoever.
This agreement is governed by the laws of Denmark.
Doc. no.: B4150GB1 Issue: C/0303
0303
1
Contents
Handset ................................................................................ iii
What Is What? ............................................................................. iii
Introduction ......................................................................... iv
About this Manual .............................................................. iv
Iridium Satellite System ...................................................... 1
Abbreviations ....................................................................... 1
Using a Telephone ............................................................... 2
Handset Simple Operation ................................................. 3
Handset States ............................................................................. 3
Handset Enabling/Disabling ......................................................... 3
Pin Code ....................................................................................... 3
Unlocking Handset........................................................................ 3
Call Functions ............................................................................... 4
Making a Manual Call ................................................................... 5
Answering a Call ........................................................................... 6
Call Transfering ............................................................................. 6
Transferring AFTER Answering .................................................... 6
Automatic Transferring BEFORE Answering ............................... 6
Handset Advanced Operation ............................................ 7
Menu System ................................................................................ 7
Phone Book ................................................................................... 8
Deleting a Stored Entry in the Phone Book ................................. 9
Calling a Number from the Phone Book ...................................... 9
Redialling .................................................................................... 10
Security Lock Function ............................................................... 10
User ID/User Name List ............................................................. 10
Disabling Security Lock .............................................................. 10
Enabling Security Lock ............................................................... 11
Password .................................................................................... 11
Users ........................................................................................... 12
Call Log ....................................................................................... 13
Setting Time and Date ................................................................ 14
Setting Dimmer and Contrast ..................................................... 15
GPS ............................................................................................. 15
Display ........................................................................................ 16
SIM Card Handling ..................................................................... 16
Enabling and Disabling PIN Codes ............................................ 16
Entering the PIN Code ................................................................ 17
Changing the PIN Code .............................................................. 17
Unblocking a Blocked SIM Card ................................................ 18
Ringing Tone ............................................................................... 18
Extension .................................................................................... 18
Call Answer ................................................................................. 19
Call Forwarding ........................................................................... 19
Voice Mail .................................................................................... 20
Call Barring ................................................................................. 21
Call Waiting ................................................................................. 22
Call Hold ...................................................................................... 22
Conference Calling ..................................................................... 22
Software Version ......................................................................... 23
Resetting ..................................................................................... 23
Tone Signalling ............................................................................ 24
Appendix A ......................................................................... 25
Tone Signalling............................................................... 25
Appendix B ........................................................................ 26
Function Menu Overview ............................................................ 26
Dimmer/Contrast Menu .............................................................. 28
Iridium Satellite System
Iridium is a global satellite network for telecommunications. It
consists of 66 satellites providing world-wide coverage.
The Iridium system makes it possible for any two locations on Earth
to establish wireless global telephone contact.
Abbreviations
CU Control unit
GPS Global Positioning System
DTMF Dual Tone Multiple Frequency
LBT L-Band Transceiver
PBX Public Branch Exchange
PSTN Public Switched Telephone Network
UTC Universal Time Coordinated (app. the same as Greenwich
Mean Time)
RTU Receiver and Transmitter Unit (also called Transceiver)
0125
2
Using a Telephone
To your Iridium equipment, you can connect a PSTN telephone or a
PBX. Many of the system’s more advanced features, like the security
lock function, are however not accessible from a telephone. Neither
is any SIM card action. Therefore, when using the telephone, the
SIM card has to be operational. This means that the pin code has to
be disabled on the card, or the pin code must be entered from a CU
before the telephone is used. A CU is either a handset control unit or
a desk mounted control unit.
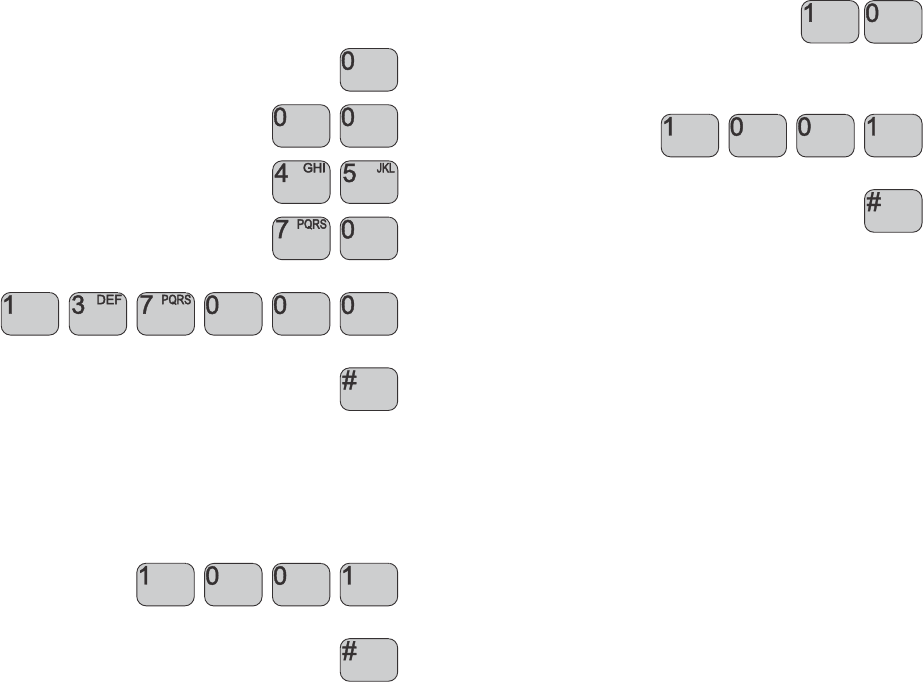
Telephone Call Syntax
For external calls, entering a telephone number on a PSTN
telephone follows the syntax of this example:
1. Pick up phone: ready tone.
2. External call 0
3. Prefix for automatic call 0 0
4. Country code, e.g. 4 5
5. Area code, e.g. 7 0
6. Subscriber’s number, e.g. 1 3 7 0 0 0
7. To confirm you want to make the call,
press #
For internal calls, entering a telephone number on a PSTN
telephone follows the syntax of this example:
1. Pick up phone: ready tone.
2. Internal number, e.g. 1001
3. To confirm you want to make the call,
press #
Factory setup of extension numbers are:
PSTN/PBX: 1000
CU 1: 1001
CU 2: 1002
CU 3: 1003
CU 4: 1004
Up to four control units and a telephone/PBX can be connected to
the transceiver at the same time. Note that if connecting a PBX to
the transceiver, the PBX must function as a PSTN telephone.
To dial control unit 1 from a local telephone connected to your Iridium
equipment via a PBX, first pick up the phone, then:
1. Dial the number for the outgoing line connected to the trans-
ceiver, eg. 10
2. When you hear the ready tone, dial the extension number of
control unit 1: 1001
3. To confirm you want to make the call,
press #
DTMF Tones - Limitations:
When used for internal calls, control units do not generate DTMF
tones. Therefore the PBX cannot be set up for using DTMF tones to
access extension numbers.
0125
3
Handset Simple Operation
To the Iridium system you can connect up to four handsets.
A handset can be in one of two states: enabled or disabled.
Handset States
In each of the two states, the handset’s normal display and signalling
can be described as follows:
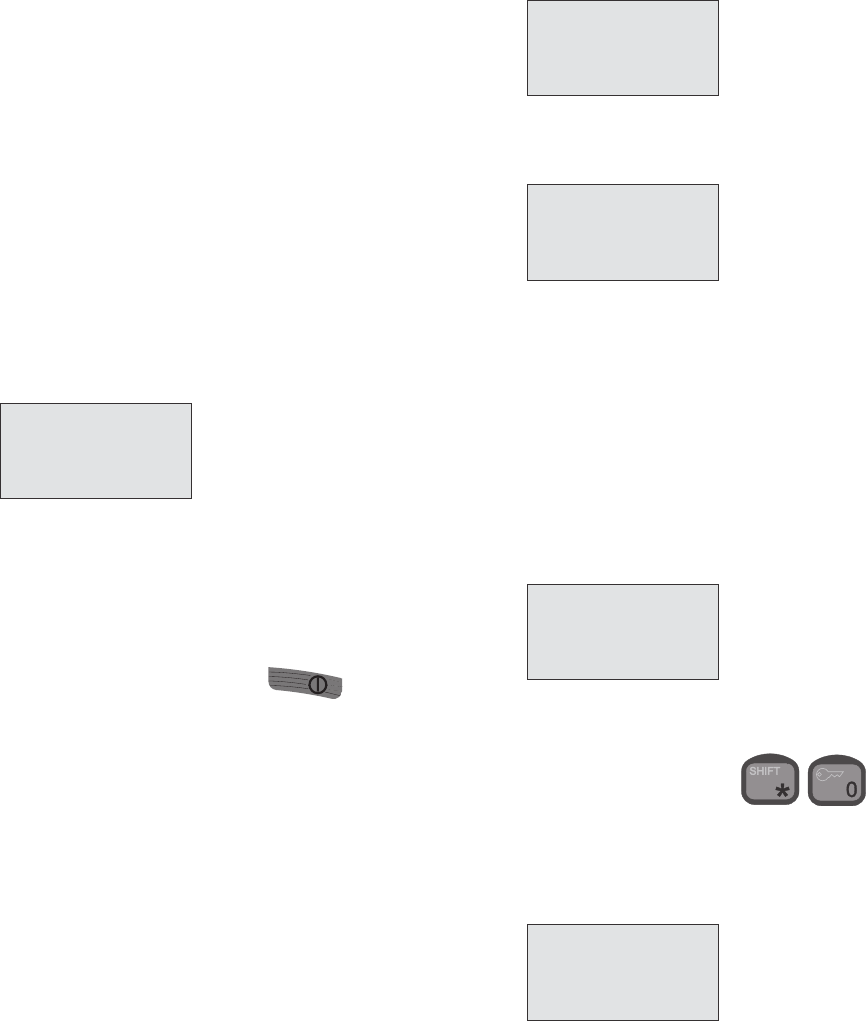
Disabled State:
• The display is cleared and the light is off.
• The indicator lamp Power is flashing briefly every 5 seconds.
Enabled State:
• In the enabled state, various information is shown on the display.
An example:
• The indicator lamp Power is on.
Handset Enabling/Disabling
To enable/disable the handset:
1. Press and hold the on/off button.
2. Wait until you hear the continuous tone signalling or see that the
indicator lamps Power, Call and Network are turned on
simultaneously.
3. Release the on/off button.
Pin Code
Each time a valid SIM card with an enabled PIN code is inserted,
you are asked to enter your pin code:
Key in the pin code supplied with the SIM card (see the installation
manual). If the pin code keyed in is correct, the handset enters ready
state also called idle state:
If any internal or external call is in progress or if for some reason the
Iridium network is not available at the time, a different text is shown
in the display.
If you did not key in the correct pin code, you will have to try again. If
you keyed in a wrong pin code three times in a row, you will have to
enter the PUK code (also supplied with the SIM card). See section
“SIM Card Handling” under “Handset Advanced Operation” for
further details.
Unlocking Handset
If the handset is locked, you have to unlock it before it can be used.
To unlock the handset:
1. Press:
The display shows a list of user names. Your user name (I.e. the
current value of the associated priority level) determines which
facilities you have access to. Furthermore, the user name that is
used for unlocking the handset is the name stored in the call log
each time an external call is made.
Ready
01.01.1999
23:59:59
Ready
7/9/1999
12:00:49
Enter PIN
7/9/1999
12:00:48
>Captain
Commander
Crew
Officer
Locked
7/9/1999
12:05:06
0125
4
2. To find the right user name on the list, eg. Commander,
use:
3. Confirm:
4. Key in the password that corresponds to the selected user
name.
5. Confirm:
Call Functions
Speaker, Earpiece and Microphone
The earpiece is always turned on. The speaker and microphone are
always in opposite states, i.e. if the speaker is on, the
microphone is off, and vice versa.
You can toggle the speaker and microphone states by
means of the speaker key. The speaker icon appears on the display
when the speaker is on, and disappears when the microphone is on.
Hands free operation is not possible. You can call or receive a call,
and toggle the speaker on - for listening purposes only.
Note: When the speaker is off, you can see that you are being
called (the display will show “Incoming Call”) - but there will be
no sound in the speaker.
Hooking On/Off
Before a call can be initiated, the handset must be hooked off. To do
so, either remove the handset from the hook or use the on/off-hook
key.
The handset icon on the display indicates three states, depending on
whether the handset has been hooked on or off.
1. Handset removed from hook,
but hooked on by hook key.
2. Hook off.
3. No icon: Handset placed in hook, and hook on.
Volume
During a conversation, the speaker and earpiece volume can be
adjusted by means of:
Manual Telephone Call Syntax
For external calls, entering a telephone number on the handset
follows the syntax of this example:
1. Hook off either by removing the handset from the hook
or by pressing the hook key
2. External call 0
3. Prefix for automatic call 0 0
4. Country code, e.g. 4 5
5. Area code, e.g. 7 0
6. Subscriber’s number, e.g. 1 3 7 0 0 0
7. Confirmation #
Password for
Commander
_
0125
5
Enter number
_
Type 0 for
ext. calls
Enter number
_
Internal
calls only
Connecting
Connected to
0 0 0 4 5 7 0 1 3 7 0 0
0 _
For internal calls, entering a telephone number on the handset
follows the syntax of this example:
1. Hook off either by removing the handset from the hook
or by pressing the hook key
2. Internal number, e.g. 3 4 4
3. Confirmation #
Making a Manual Call
Provided that no internal or external calls are in progress and that
the CU is enabled and unlocked, it is possible to make an internal
call.
Furthermore, if a valid SIM card has been inserted into the SIM card
slot and the correct PIN code has been entered or the PIN code has
been disabled, it is also possible to make an external call.
In order to be able to make a manual call, the CU must either be in
idle state or inside the phone book. For a description on how to
return to idle state, see section “About this Manual”. If the idle text
differs from ‘Ready’ (e.g. SIM card messages) only internal calls are
possible.
Now in order to make a manual call, do the following:
1. Hook off.
If the system is occupied, a busy tone is heard in the earpiece/
speaker, and the display shows either
or
depending on whether an internal or external call is in progress.
If the system is ready to make a call, a ready tone is heard in the
earpiece/speaker, and the display shows:
or
2. Use the numeric keys to key in the number you want to dial.
For external calls, first key: 0
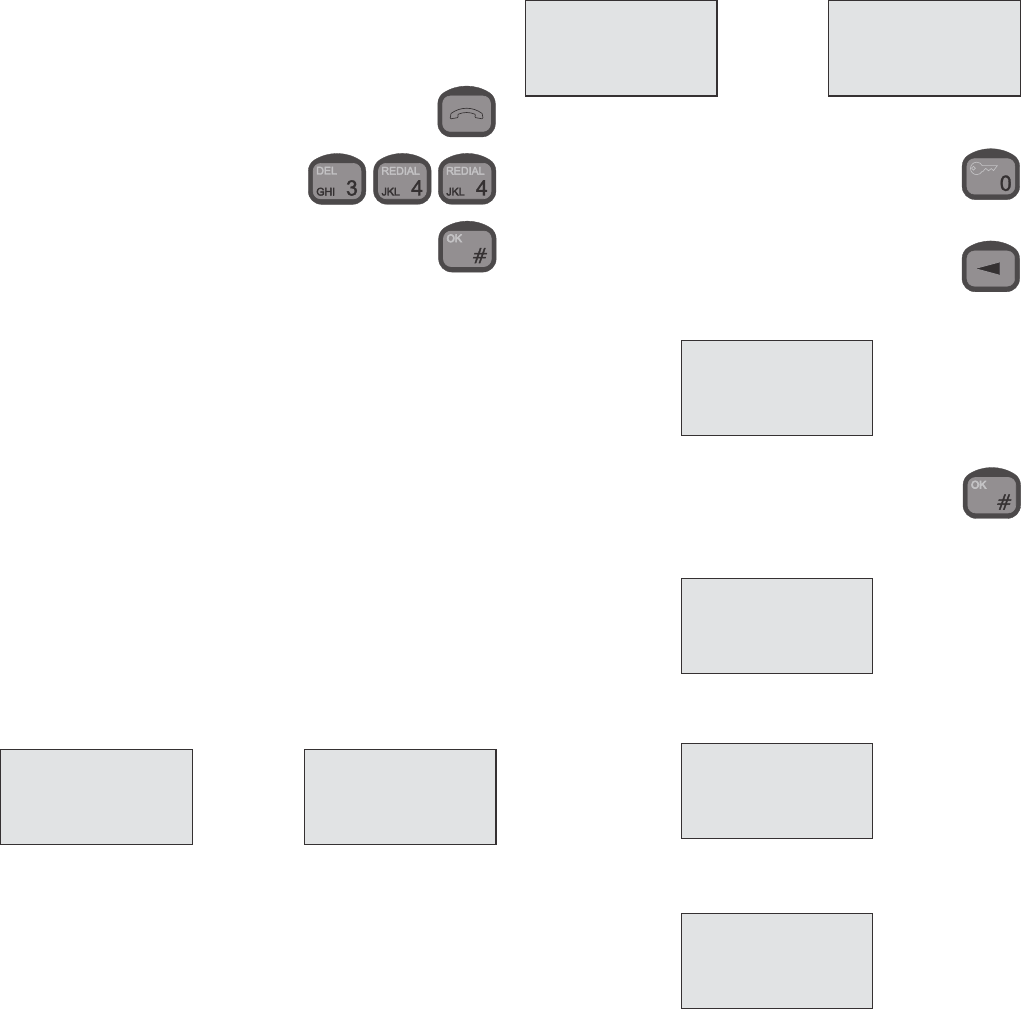
To delete the previous digit, if desired, press:
An Example:
3. Confirm the call and start dialling by pressing:
4. A calling tone is heard from the earpiece/speaker, and the
display shows:
5. When the connection has been established, the display shows:
6. When one of the communicating parties hooks on, the display
indicates that the other user should do the same by the words:
Enter number
0 0 0 4 5 7 0 1 3 7 0 0
0 _
Internal
call External
call
Call
terminated
0125
6
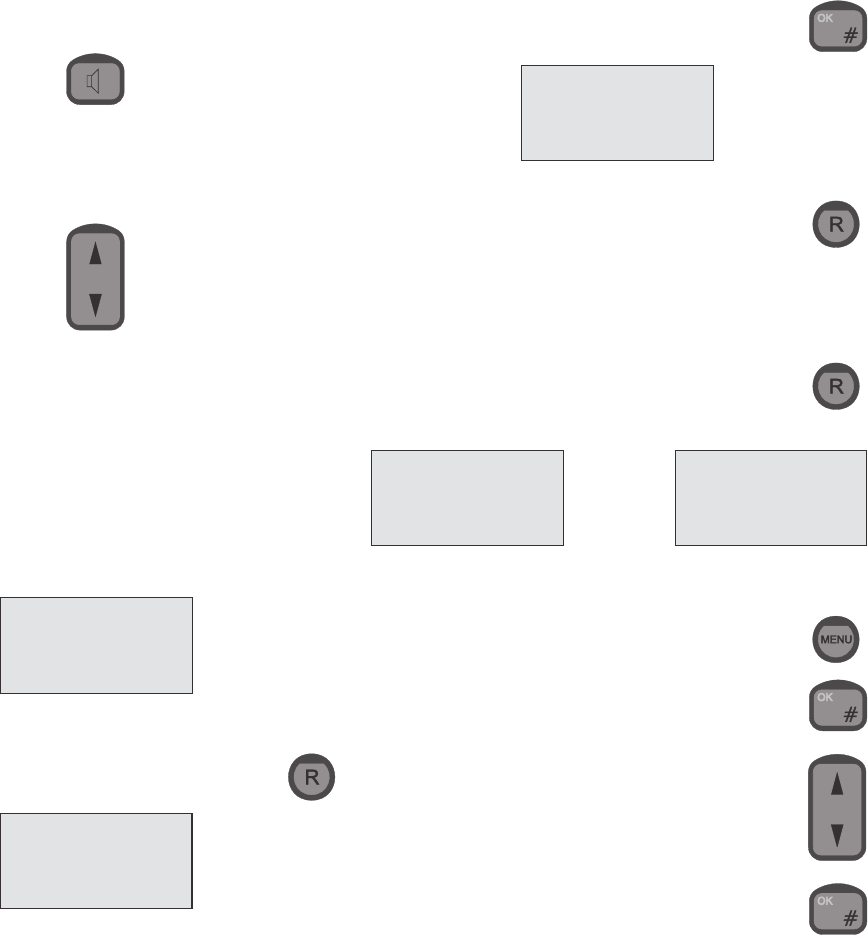
Answering a Call
NOTE: When the speaker is off you can see that you are being
called, (the display will show “Incoming Call”) but there will be
no sound in the speaker. The speaker can be toggled on and off
using:
1. When the handset rings, remove it from the hook and communi-
cate as on an ordinary telephone.
2. Adjust the volume in the earpiece or loudspeaker by means of:
3. When you want to stop communicating, or when you hear a busy
tone, hang up.
Call Transfering
A call can be transfered to another CU. The procedure depends on
whether or not the call is answered before it is transferred.
Transferring AFTER Answering
When you answer a call, the display shows:
To transfer the call:
1. Press:
2. Now, key in the extension number to which the call should be
transferred.
3. To transfer the call, press:
- or:
To cancel transferring the call, press:
Automatic Transferring BEFORE Answering
A call can be transferred to another CU automatically before it is
answered. To see if the auto transferring function is enabled,
press:
The display will show eg.:
or
The auto transferring parameters can be set up individually for each
handset in the function menu:
1. To enter the function menu, press:
2. To select the “Setup” item, press:
3. To find the “Transfer” item, use:
and press:
Connected
Enter number
_
Call is
transferred
Call trans-
fer enabled
Local: 1001
Delay: 0 sec 10
Call trans-
fer disabled
0125
7
4. To select “Enable” or “Disable”, use :
and press:
The function has now been enabled or disabled depending on your
choice.
To select to which extension number(s) incoming calls should be
transferred, follow the steps described above. In step 4, however,
select “Extension”, after which you can key in and confirm the
wanted extension number.
To specify the time in seconds (0-60) that the call should ring before
it is transferred to the specified unit, follow the steps described
above. In step 4, however, select “Delay”. If the delay is set to 0
seconds, the call is transferred immediately; before the first handset
rings, the call is transferred to the chosen transfer destination.
Handset Advanced Operation
The system features a large number of special functions. For those
of the functions that are likely to be used the most, there are special
buttons or shifted functions in connection with the numeric keys. The
functions used less often can be found in the menu system.
Menu System
The handset contains several functions for changing the system
settings, showing the status of certain system parameters, configura-
tions, and testing the system.
The menu system can always be entered from an enabled and
unlocked CU which is in idle state. See section “About this Manual”
on how to return to idle state.
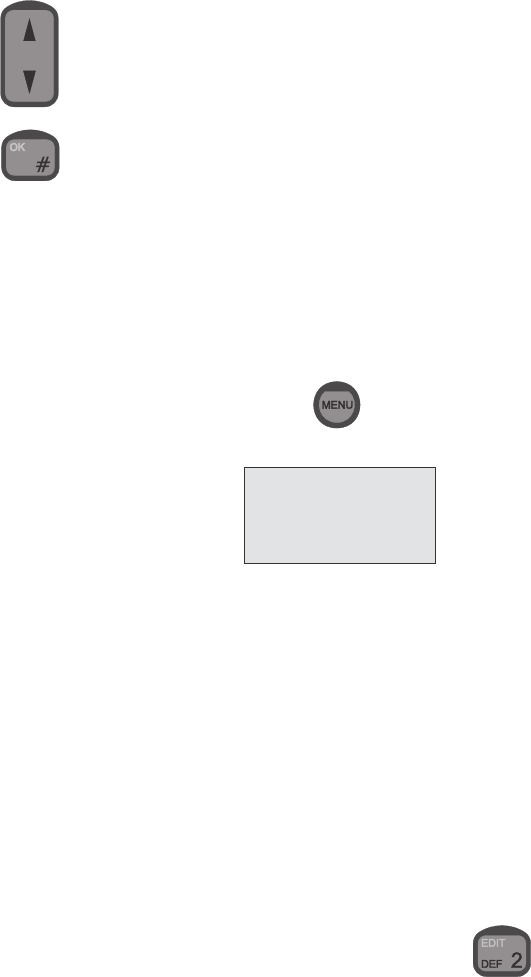
To enter the function menu system, press the following key:
The function menus appear:
The “Setup” menu contains all functions for changing the system
parameters, such as volume, ringing tone, user names and pass-
words.
The “Call log” menu contains information on each call made,
including details about when the call was made, its duration, and the
receiver’s telephone number.
The “System” menu contains all functions needed for the system
administrator/super user to test and configure the system.
Keying in Names and Numbers
When keying in letters and numbers in the phone book, or in
connection with user names and passwords, you will need to know
how many times to press each key. Pressing the key once,
MENU
> Setup
Call log
System
0125
8
for instance, will give a “D”; pressing the key twice, will give an “E”,
etc. 1st push: D
2nd push: E
3rd push: F
4th push: d
5th push: e
6th push: f
7th push: 2
After each character keyed in, wait a little while to go to the next
character (the cursor appears when it is ready), or use the right
arrow key. The left arrow key deletes the last character entered.
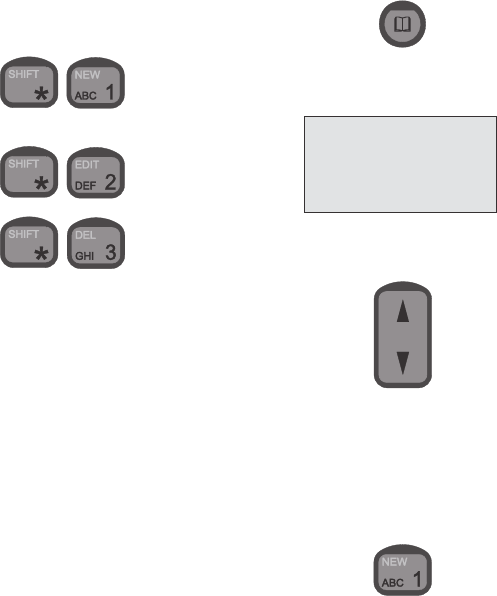
When inside the phone book or user list;
• to create a new entry, press:
• to begin editing the entry selected on the list,
press:
• to delete the entry selected on the list, press:
Phone Book
The phone book offers the following facilities:
• Up to 100 entries with names and numbers can be stored. A
telephone number may consist of up to 20 digits, and a name
may contain a maximum of 11 characters.
• Any of the 100 stored telephone numbers can be used to initiate
a call.
• Each entry in the phone book can be deleted.
• New entries can be added to the phone book as long as some of
the 100 entries are free.
• The name and/or number stored in every entry can be changed.
• The stored entries can be searched alphabetically.
• The current extension/local number for all connected control
units are stored in the phone book. However, only one control
unit at a time can operate in new, edit, or delete mode. If a
control unit tries to enter one of these modes, and another
control unit has done the same, the display will show: Phone
book occupied.
The phone book can always be entered from an enabled and
unlocked CU which is in idle state. See section “About this Manual”
on how to return to idle state.
Searching the Phone Book
When you need to find a stored entry, first open the phone book by
pressing:
The display then shows a list beginning with the first entry in the
phone book:
To find previous/following entries, use:
When you have reached the last entry, the phone book begins from
number one again.
Alphanumeric Search
You can also search the phone book by means of the alphanumeric
keys. When inside the phone book, pressing e.g.
moves the cursor to the first entry beginning with an A. If no entry
begins with an A, or if the key is pressed twice, the cursor moves on
to the first entry beginning with a B, etc.
>Andrew
Brian
Claus
Dennis
0125
9
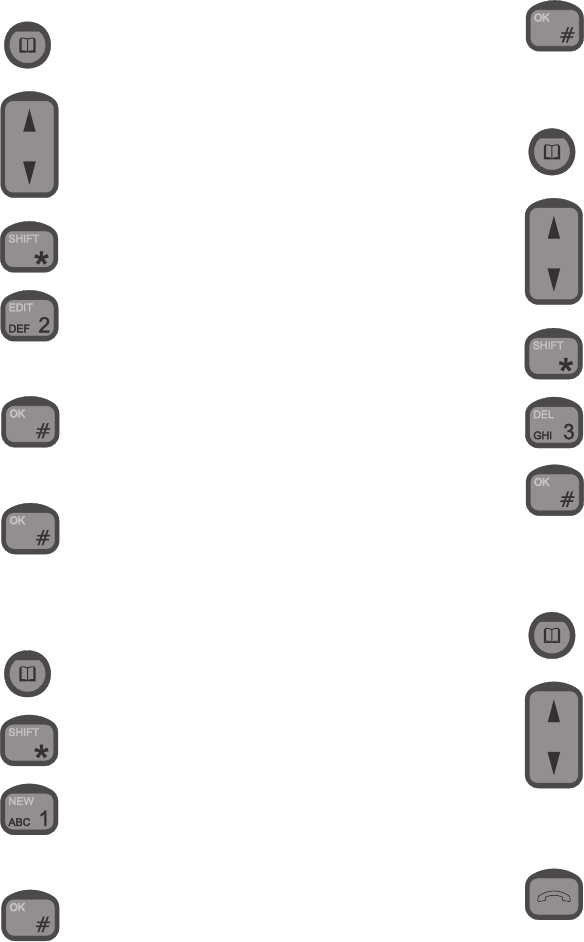
Changing a Number Stored in the Phone Book
To edit a stored number in the phone book:
1. To enter the phone book, press:
2. To select the desired entry in the phone book, press:
3. To enter the shifted functions, press:
4. To select the edit mode, press:
5. Key in the name that corresponds to the number.
6. To store the name, press:
7. Key in the number using of the numeric keys.
8. To store the new number, press:
Storing a New Entry in Phone Book
To store a new entry (name and number) in the phone book:
1. To enter the phone book, press:
2. To enter the shifted functions, press:
3. To select the new mode, press:
4. Key in the name that corresponds to the number.
5. To store the name, press:
6. Key in the number using of the numeric keys.
7. To store the number, press:
Deleting a Stored Entry in the Phone Book
1. To enter the phone book, press:
2. To select the desired entry in the phone book, press:
3. To enter the shifted functions, press:
4. To select the delete mode, press:
5. To confirm deleting the selected entry, press:
Calling a Number from the Phone Book
To call a number stored in the phone book:
1. To enter the phone book, press:
2. To select the desired entry in the phone book, press:
3. To prepare for making the call:
• Lift the handset
or
• Press:
Now, follow the steps described in connection with “Making a manual
call”, beginning with step 3.
0125
10
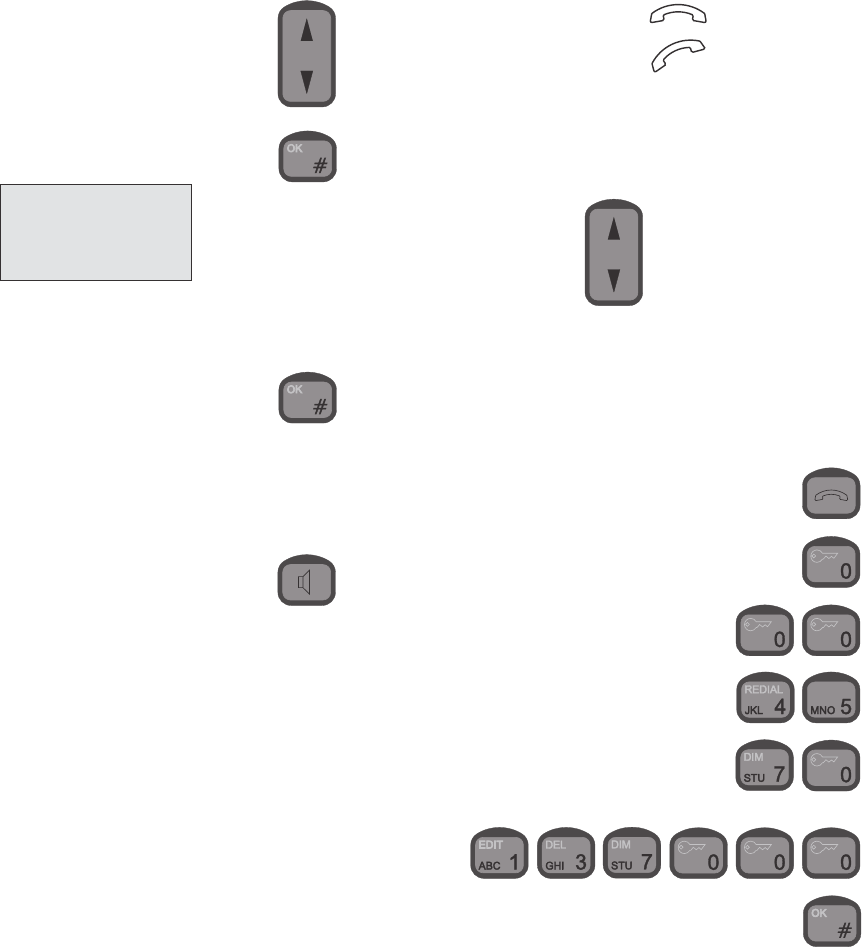
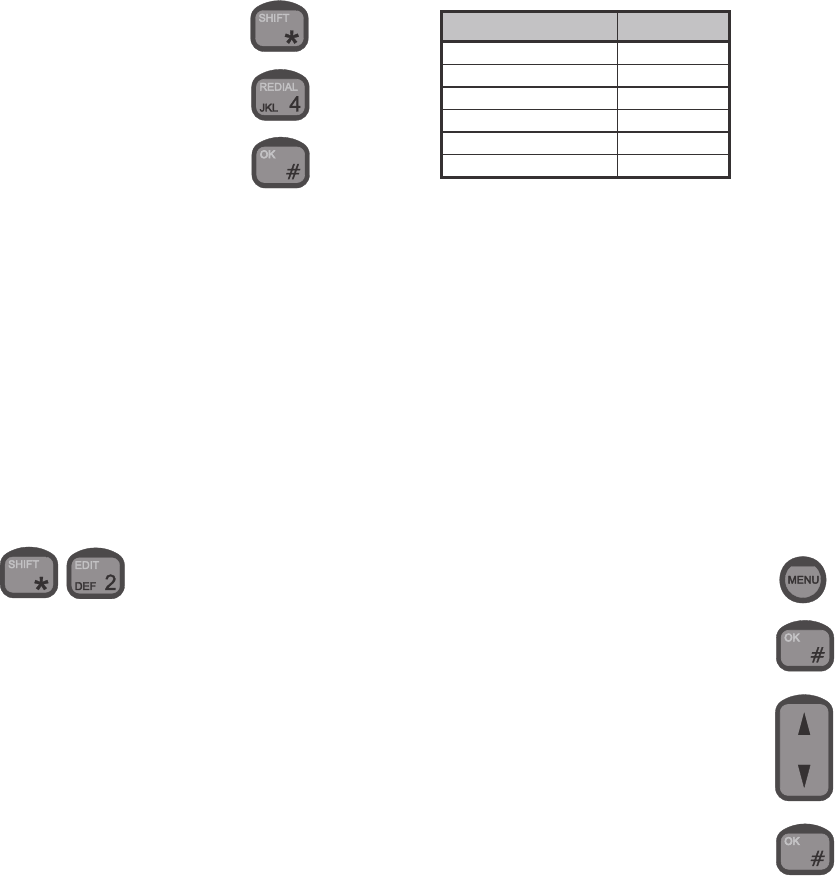
Redialling
It is possible to redial the last number dialled by the current user. To
do so:
1. Hook off.
2. Press:
3. Press:
4. To initiate the call, press:
A ringing tone is now heard from the handset. To go on with the call,
follow the steps described in connection with “Making a manual call”,
beginning with step 4.
Security Lock Function
The handset can be protected against unauthorized use via the
security lock function. This works together with the list of user names
and corresponding passwords. The security lock requires that the
user selects his user name from the list, and then keys in his
personal password before the handset can be used for making calls.
The default password for all the users on the user list is “password”,
i.e. 61778562. Passwords can be edited in the Setup/Password
menu (the user’s own password) or in the /Setup/Users menu using
(Passwords of users with a lower priority than the current user).
The security lock function ensures that only users recognized by the
system can unlock the handset and make calls through the Iridium
system.
Answering incoming calls is not protected by the security lock.
Note that from a PSTN phone (stand alone or via PBX), the security
lock is not an option.
The security lock function affects all control units. That means that if
one control unit disables the lock, the lock is disabled on all control
units connected. The same goes for enabling the lock.
User ID/User Name List
Every user specified in the system is given a priority value. The
priority value determines what the user is allowed to do in the
system. By default, the user list contains 6 entries with different
priority values. The 6 default users are shown below.
User ID/User Name Priority value
SUPER USER 0
Captain 1
Commander 4
Officer 10
Crew 100
Passenger 200
The super user has the highest priority in the system and is therefore
not restricted in any action. The super user can edit all other users. A
user can create, edit, and delete users of a lower priority; e.g. a user
of priority value 4 may create, edit, and delete users of priority
values 10, 100, and 200.
Each facility/function in the handset has a priority value. The priority
value of the facility/item and the user’s priority value determine
whether the user has access to the item or not.
The user ID is written in the call log so it is possible to identify who
has made which calls.
Disabling Security Lock
To disable the security lock, the user has to be identified with a
priority value of 4 or less (Commander, Captain, or SUPER USER).
To disable the security lock:
1. To enter the function menu, press:
2. To select the “Setup” item, press:
3. Find the “Lock” item using:
and press:
0141

11
4. Find the “Disable” item using :
and press:
5. Find the right user name using:
and press:
6. Key in the password, and press:
The security lock function is now disabled. This means that the
handset is ready for use for everyone without any identification of the
user. To avoid misuse of the handset, the user who disables the
security lock is asked to set the priority value. This is done by
selecting a user name from the user list and keying in the associated
password. That user name is then used as the default user of the
unlocked system. Information about subsequent outgoing calls from
any CU will be logged under this default user name.
.
Enabling Security Lock
If the security lock function has been disabled, it can be enabled by
users with a priority value of 4 or less:
1. To enter the function menu, press:
2. To select the “Setup” item, press:
3. Find the “Lock” item using:
and press:
4. To select the “Enable” item, press:
5. Find a user name of priority level 4 or less, using:
and press:
6. Enter the password using the numeric keys, and press:
The handset from which the system lock was enabled, is not actually
locked before an explicit lock is issued via pressing:
and confirming by
This action can only be carried out if the CU is in idle state. See
section “About this Manual” on how to return to idle state.
When the lock is enabled, all other control units are automatically
locked if they are in idle state (no call in progress and not inside the
menu system or phone book). If one of these control units is not in
idle state, it is automatically locked when returning to idle state.
Password
A user may change his password at any time. To do so:
1. To enter the function menu, press
0125

12
2. To select the “Setup” item, press
3. To find the “Password” item, use:
4. To confirm, press:
5. Key in the old password and confirm by pressing
6. Key in the new password and confirm by pressing
7. Re-enter the new password and confirm by pressing
Users
Up to 25 users can be registered in the system by manually creating
an entry for each user. Both a user name and a temporary password
must be entered for each user.
A user may create, edit, and delete users with a priority value higher
than the user’s own priority value.
Adding a New User to the System:
1. To enter the function menu, press:
2. To select the “Setup” item, press:
3. To find the “Users” item, use and confirm by
4. To create a new user, press:
5. Key in the new user name, and confirm by
6. Key in the password, and confirm by
A new user has now been added to the system with a default priority.
The priority is one of the properties that can be edited using the
procedure described next.
Editing the Properties of an Existing User:
1. To enter the function menu, press:
2. To select the “Setup” item, press:
3. To find the “Users” item, use and confirm by
4. To find the user to be edited, use:
5. To edit the user, press:
6. To go to the user property to be edited, use
and confirm
by
Deleting an Existing User:
1. To enter the function menu, press:
0125

13
2. To select the “Setup” item, press:
3. To find the “Users” item, use and confirm by
4. To find the user to be deleted, use:
5. To delete the user, press
6. Confirm by
Call Log
Information about all outgoing calls are logged. Information about the
latest 50 outgoing calls can be found in the call log. Furthermore,
information about the duration of the last outgoing call can be
retrieved.
Viewing the Last Call:
1. To enter the function menu, press:
2. Find the item “Call Log” using
and confirm by
3. Find the item “Last Call” using and confirm by
Viewing the Last Private Call Log:
The call log for the current user can be retrieved as shown in the
following:
1. To enter the function menu, press:
2. Find the item “Call Log” using
and confirm by
3. Find the item “Private” using and confirm by
4. Find the item “Outgoing” using and confirm by
A list showing the phone numbers of the outgoing calls made by the
current user now appears on the display.
To see more details about a specific call, find the call using
and confirm by
The total account of the current user can be retrieved by choosing
“Account” instead of “Outgoing” at step 4.
Viewing the Global Call Log:
The global call log for all users in the system can be retrieved as
shown in the following:
1. To enter the function menu, press
0125

14
2. Find the item “Call Log” using
and confirm by
3. Find the item “Global” using and confirm by
A list of all outgoing calls made from the system can now be
retrieved by choosing the item “Outgoing” and pressing
To see more details about a specific call, find the call using
and confirm by
Alternatively, the account of each user can be retrieved as shown
below:
1. Follow steps 1-3 above.
2. Find the item “Account” using and confirm by
The available items are now:
To select e.g. a specific user, choose “Users” and press
Now, find the user by means of and press
Setting Time and Date
Time and date can be displayed and adjusted manually. The time is
used in the call log. Adjusting the time requires that the user is
identified with a priority value of 4 or less (Commander, Captain, or
SUPER USER).
1. To enter the function menu, press:
2. Go to the “System” item using:
and press:
3. Go to “Time/date” using:
and press:
You can now choose between “Status”, “Set”, “System update”, and
“GPS update”
Status: Shows current time and date (from system).
Set: Allows you to edit time and date manually, using the numeric
keys.
DATE-TIME
>Status
Set
Sys.update
>Users
Phone
Unknown
Deleted Users
0125

15
Sys. update: If this option is chosen, the time written in the display
is updated using only the internal circuitry of the RTU itself. Conse-
quently, if your Iridium system is turned off and the on again, the
clock will be reset to a default time. The correct time must then be
set again manually each time.
GPS update: If this option is chosen, the time written in the display
is updated using the connected GPS, if any. Consequently, even if
your Iridium system is turned off and then on again, the clock will still
be adjusted to the correct time each time a GPS update is received.
If no GPS is available, it makes no sense choosing this option.
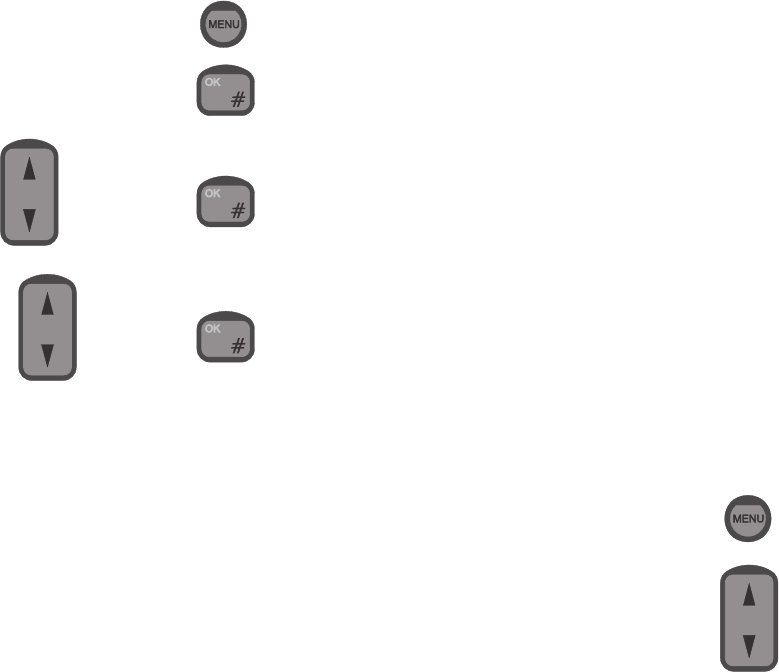
Setting Dimmer and Contrast
To adjust the background light and the contrast level, first press the
two keys:
The dimmer/contrast menu appears:
Now, move to the desired item – dimmer or contrast – by means of:
Then, to select the item, press:
An Example
When you select dimmer in the dimmer/contrast menu, the display
shows the dimmer menu:
To enable or disable the light, select the On or Off item respectively.
To adjust the dimmer level, select the Level item.
Then, to increase or decrease the dimmer level, use:
For the changes to take effect, press:
The dimmer/contrast menu may also be entered via the “Setup”
menu as follows:
1. To enter the function menu, press:
2. To select the “Setup” item, press:
3. Find the “Light” item using and press:
GPS
Via this menu item, it is possible to obtain the geographical position
in terms of longitude and latitude if an optional GPS receiver is
connected via the transceiver. If this is the case, the position is
available by going through the following steps:
1. To enter the function menu, press:
2. To select the “Setup” item, press:
3. Find the “GPS” item using and press:
DIM/CONTRAST
>Dimmer
Contrast
DIMMER
>On
Off
Level
0125
16
Display
For each handset, the user may select the information to be shown
in the display when the handset is in idle state. However, the state of
the system will always be shown in the display. The available
choices are:
•Time/date: Both the time (hours, minutes, seconds) and the date
is shown.
•Time: Only the time (hours and minutes) is shown.
•Position: If a GPS receiver is connected to the transceiver,
choosing “Position” will show the geographic position in terms of
latitude and longitude.
•State only: Only the state of the transceiver is shown.
If for instance you want to choose time/date;
1. To enter the function menu, press:
2. To select the “Setup” item, press:
3. Find the “Display” item using and press:
4. Find the “Time/date” item using and press:
To see the effect, exit the menu system.
SIM Card Handling
Your Iridium equipment monitors the SIM card status. The status
information is shown in the display of each handset in idle state.
SIM Card Messages
As long as one of the following messages are seen in the display,
the SIM card currently inserted in the RTU cannot be used for
making external outgoing calls.
•SIM card blocked: This message indicates that a wrong pin
code has been entered three times in a row with the current SIM
card inserted into the transceiver. To unblock the SIM card, enter
the correct PUK1 code.
•Card blocked permanently: This message indicates that a
wrong PUK1 code has been entered ten times in a row. The SIM
card is now permanently blocked and cannot be unblocked.
•Check SIM card: This message indicates that your Iridium
equipment has detected that some item has been inserted into
the SIM card slot. It has not, however, recognized this item as a
SIM card.
•SIM card defective: This message indicates that your Iridium
equipment has detected that a SIM card has been inserted into
the SIM card slot. For some reason, however, the Iridium
equipment cannot communicate with the SIM card.
•SIM card validation: This message indicates that a valid SIM
card has been inserted into the SIM card slot, and that the pin
code just entered is being validated by the Iridium system.
NOTE: The following features for sim card handling are only
available with RTU software version 3.0.0 and higher.
Enabling and Disabling PIN Codes
Each SIM card has an associated PIN code. In order to prevent
unauthorized use of SIM cards, your Iridium equipment is capable of
enabling and disabling the associated PIN codes.
When the PIN code from a given SIM card is enabled, the user must
enter the current value of this PIN code each time the SIM card is re-
entered into the SIM card holder in the RTU. When the PIN code for
a given SIM card is disabled, the SIM card can be used for making
external outgoing calls, provided that it is not defect or blocked.
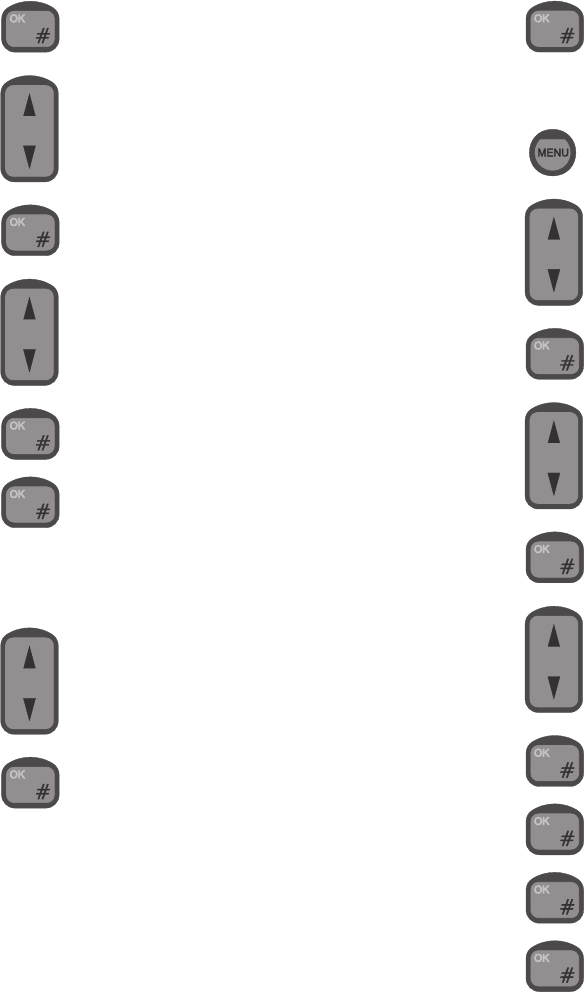
Enabling the PIN Code
1. To enter the function menu, press:
2. Find the “System” item using:
0125
17
and press:
3. Find the “SIM Card” item using:
and press:
4. Find the “PIN enable” item using:
and press:
5. Key in the PIN code and press:
Disabling the PIN code
Follow steps 1 – 5 above with the following substitution:
4 Find the “PIN disable” item using:
and press:
Entering the PIN Code
Each time a valid SIM card with an enabled PIN code is inserted into
the SIM card holder, the current value of the associated PIN code
must be entered using the alphanumeric keys. The PIN code must
be a number consisting of 4 to 8 digits.
In order to enter the PIN code, do the following:
1. Key in the 4-8 digit PIN code and press:
Changing the PIN Code
1. To enter the function menu, press:
2. Find the “System” item using:
and press:
3. Find the “SIM Card” item using:
and press:
4. Find the “Change PIN” item using:
and press:
5. Enter the current PIN code and press:
6. Enter the new PIN code and press:
7. Reenter the new PIN code and press:
0125
18
Unblocking a Blocked SIM Card
If a wrong PIN code has been entered 3 times in a row, the RTU
blocks the SIM card. If a blocked SIM card is inserted into the SIM
card holder or if a SIM card already in the SIM card holder is
blocked, the display will show “SIM Card blocked” when the CU is in
idle state. In order to unblock a blocked SIM card:
Follow step 1 – 3 above.
4. Find the “PUK Code” item and press:
5. Enter the correct PUK code and press:
6. Enter a new 4-8 digit PIN code and press:
7. Re-enter the new PIN code and press:
Ringing Tone
When configuring each handset, the user can choose among a
number of different ringing tones.
The procedure is to choose one of the following 4 ringing tones:
• Deep
• High
• Alternating slowly
• Alternating fast
The ringing tone for internal incoming calls as well as the ringing
tone for external incoming calls are both affected by this single
choice. Therefore they cannot be set independently.
For external incoming calls, resulting tones are respectively:
• Deep
• High
• Alternating slowly
• Alternating fast
For internal incoming calls (local calls), the resulting tones are
respectively:
• Deep dual
• High dual
• Deep dual
• High dual
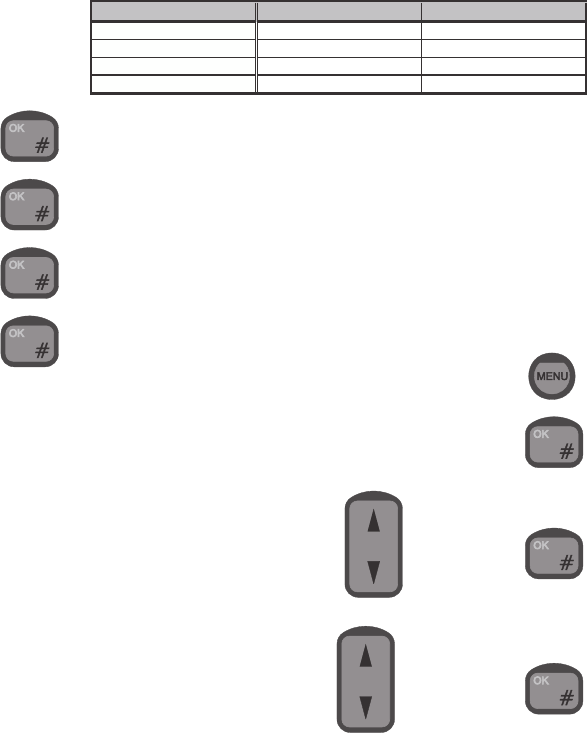
As mentioned above, choosing a ringing tone affects both the
external incoming ringing tone and the internal incoming (local call)
ringing tone according to the following table:
Choice of ringing tone External incoming calls Internal incoming calls
Deep Deep Deep dual
High High High dual
Alternating slowly Alternating slowly Deep dual
Alternating fast Alternating fast High dual
An internal incoming call (local call) can always be recognized by
two equal consecutive tones (hence the term “dual” in the table)
followed by a pause. The tones may be deep or high.
An external incoming call can always be recognized by a single
continuous sound sequence (deep, high, alternating slowly or
alternating fast), followed by a pause.
An example: To set the external incoming ringing tone to alternating
slowly, and the internal incoming ringing tone to deep dual (remem-
ber that they cannot be set independently as described above):
1. To enter the function menu, press:
2. To select the “Setup” item, press:
3. Find the “Ring tone” item using and press:
4. Find the “Slow alt.” item using and press:
Extension
At any time, each handset is uniquely characterised by an extension
number. That is, only one handset at a time may have a given
extension number. The extension numbers may be changed, but no
two handsets can have the same extension number simultaneously.
To change the extension number of a handset do the following:
0125

19
1. To enter the function menu, press:
2. To select the “Setup” item, press:
3. Find the “Extension” item using and press:
4. Key in a number below 10,000 that is not in use by any other
control unit, and press:
Call Answer
If your Iridium equipment includes more than one control unit or a
control unit and a PSTN telephone, you may configure the answering
of external incoming calls in a number of different ways. The
available choices are:
•One CU: Choosing this option, you must specify the extension of
the control unit to which you want external incoming calls to be
directed automatically.
•PSTN: If there is a PSTN telephone connected to your Iridium
equipment, selecting this option will direct external incoming
calls to your PSTN telephone.
•All: Choosing this option will make all control units and the
PSTN telephone (if any) ring when your Iridium equipment
receives an external incoming call. Any of these units may be
used for answering the call.
An example: If you want all external incoming calls to be directed to
a control unit with the extension number 1001:
1. To enter the function menu, press:
2. Find the item “System” using and press:
3. Find the item “Call Answer” using and press:
4. Find the item “One CU” using and press:
5. Find the extension number of the handset to which you want all
external incoming calls to be directed, using
and press:
Alternatively, if you want to direct external incoming calls to your
PSTN telephone (if any), follow steps 1-3 above, and proceed as
follows:
4. Find the item “PSTN” using and press:
5. Press again to confirm that external incoming calls
should be directed to the PSTN telephone.
Call Forwarding
NOTE: This feature is only available with RTU software
version 3.0.0 and higher.
The Iridium network offers the possibility of forwarding incoming calls
to another phone number. This facility can be configured from your
Iridium equipment. The call forwarding can be divided into the
following two categories:
0125

20
•Forward all calls: All external incoming calls will immediately be
forwarded to the number you specify when you activate this
category.
•Forward on not reachable: When your Iridium equipment has
been turned off or cannot for some reason be contacted by the
network or when the line of your Iridium equipment is occupied,
either by an internal or an external call, external incoming calls
will be forwarded to the number you specify when you activate
this category.
Note: By default, the above two categories of calls will all be
forwarded to your personal mailbox. When you activate a category,
the calls in this category will be forwarded to the number that you
specify and no longer to your personal mailbox.
In the following, the procedures for activating, restoring and review-
ing settings for the above two categories are described. As usual,
when manually dialing a number to call, this must be done from idle
state.
Forwarding all Calls
Activate:
1. Hook off
2.
[country code] [telephone number]
Deactivate:
1. Hook off
2.
Forwarding on no Answer
Setting a new number to forward to:
1. Hook off
2
[country code] [telephone number]
Reactivaiting forwarding to personal mailbox:
1. Hook off
2.
[personal mailbox retrieval number]
Reviewing the number to forward to:
1. Hook off
2.
Voice Mail
NOTE: This feature is only available with RTU software
version 3.0.0 and higher.
Voice mail allows callers to leave a voice message in your personal
mailbox. As described in section “Call Forwarding”, by default
external incoming calls are forwarded to your personal mailbox if the
call is not answered, if your equipment is switched off, if your Iridium
system is occupied by an internal or external call or cannot, for some
reason, be contacted by the Iridium network. Therefore these calls
will be forwarded to your personal mailbox unless you set a new
telephone number to transfer to.
0125

21
You may record a personal greeting which the callers will hear when
they are forwarded to your mailbox. After hearing your personal
greeting, callers can leave a voice mail message which is stored in
your mailbox.
Your personal mailbox has a lot of features which can be configured
by you. The caller also has a number of facilities to choose between
when forwarded to your mailbox. See the “Iridium Services User
Guide” that comes together with your Iridium equipment.
Call Barring
NOTE: This feature is only available with RTU software
version 3.0.0 and higher.
Call barring allows you to bar either all external incoming or all
external outgoing calls. If you bar external incoming calls, your
Iridium equipment will not receive external incoming calls. If you bar
external outgoing calls, nobody will be able to place external
outgoing calls from your Iridium equipment
Note: External incoming calls will not be sent to your personal
mailbox if call barring of external incoming calls is active.
Before activating call barring, disable all types of call forwarding:
1. Hook off
2.
Reactivating call forwarding and restoring your previous settings:
1. Hook off
2.
Barring external incoming calls:
Activate:
1. Hook off
2.
[password]
Deactivate:
1. Hook off
2.
[password]
Barring external outgoing calls:
Activate:
1. Hook off
2.
[password]
Deactivate:
1. Hook off
2.
[password]
If you want to change the call barring setting you must enter your
password. The initial password will be supplied by your service
provider.
Changing Your password :
1. Hook off
0125

22
2.
[ old password] [new password]
[new password]
Call Waiting
NOTE: This feature is only available with RTU software
version 3.0.0 and higher. Contact your service provider to find
out when this feature will become available.
Call waiting allows you to answer an external incoming call while you
are connected to another external number.
Activate:
1. Hook off
2.
Deactivate:
1. Hook off
2.
To put the current call on hold and answer a second call:
To switch between two calls:
Call Hold
NOTE: This feature is only available with RTU software
version 3.0.0 and higher. Contact your service provider to find
out when this feature will become available.
Putting a call on hold allows you to place a second call without
ending the first.
To put the current call on hold and place a second call:
Put the current call on hold:
Place the second call: [telephone number to call]
To switch between two calls:
To end the current call and return to the held call:
To end both calls:
To combine both calls creating a conference call:
Conference Calling
NOTE: This feature is only available with RTU software
version 3.0.0 and higher. Contact your service provider to find
out when this feature will become available.
You can link up to 6 parties, including yourself, to a conference call.
To create a conference call:
0125

23
Activate:
1. Hook off
2. Establish a call to the first party.
For each new party to add to the conference call, do the following:
3. [telephone number of next party]
To end the conference call, press:
Software Version
Primarily for service purposes, it is possible to get information about
the version of the software for the following pieces of hardware in
your Iridium equipment:
•Transceiver: This software handles the configuration of your
Iridium equipment, audio routing, the information to be shown on
the displays, communication with your SIM card, etc.
•LBT: This software handles the communication between the
global Iridium network and your Iridium equipment.
•Control Unit (CU): This software consists of low level drivers
(for each control unit) that control the dot matrix display, the key
pad, the status indicator lamps, and the microphone, earpiece
and speaker.
To get information on these software modules, go through the
following steps:
1. To enter the function menu, press:
2. Find the item “System” using and press:
3. Find the item “SW version” using and press:
4. Choose the hardware whose software version you want informa-
tion on, using and press:
Resetting
Primarily for service and test purposes, it is possible to reset your
Iridium equipment to force it into a well-defined state. The following
two different levels of resetting are available:
•Restart: No configuration information or user data (call log, user
list, phone book) are deleted. When this command is issued/
chosen, all control units are forced back to idle state regardless
of their current state.
•Factory reset:
NOTE!
ALL (!) configuration information AND
(!) user data (call log, user list, phone book) are deleted. When
this command is issued, your Iridium equipment returns to the
state it was in when leaving the factory.
To restart your system:
1. To enter the function menu, press:
2. Find the item “System” using and press:
3. Find the item “Reset” using and press:
0125

24
4. Find the item “Restart” using and press:
5. To confirm that you want to restart the equipment, press:
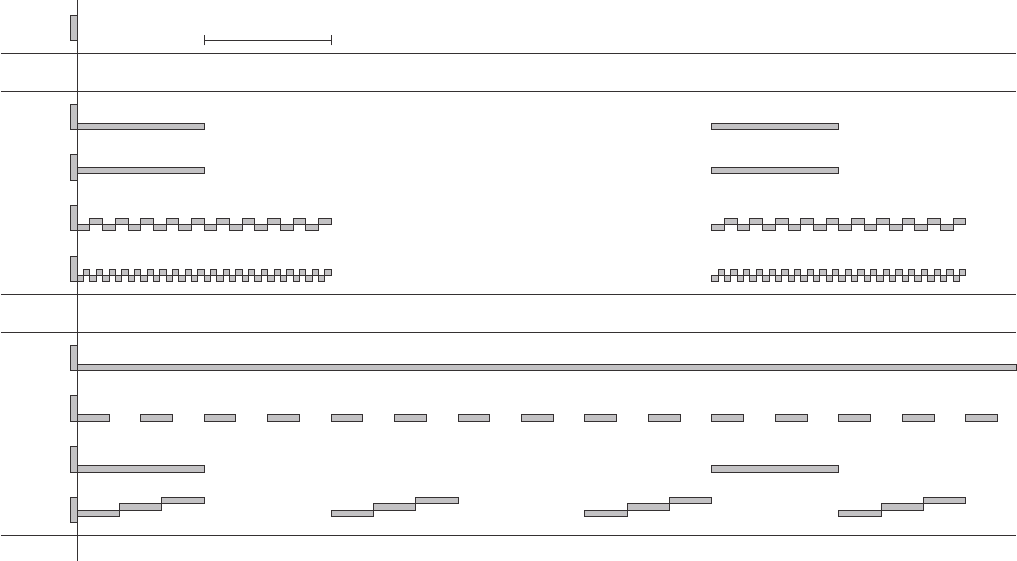
Tone Signalling
The system will give you information on its status as well as
instructions by means of tone signalling. This is done on four
different frequencies: 450, 900, 1440 and 1800 Hz. Appendix A
illustrates what the various tone signalling sounds like.
0125
25
1800 Hz
1440 Hz
900 Hz
450 Hz 1 sec.
DEEP
HIGH
BUSY
READY
CONNECTION
WAITING FOR
NON
EXISTING
RECEIVING CALLS
TRANSMITTING CALLS
36329B
ALTERNATING
SLOWLY
ALTERNATING
FAST
Appendix A
Tone Signalling
0125

26
Appendix B
Function Menu Overview
To access the function menus, press:
To move about in the menus, use the arrow keys:
To confirm that you want to select an item, use the OK key:
To regret the last step, use the Escape key:
Functions marked with an asterisk (*) concern the specific handset.
All other functions are global, i.e. they concern the whole system.
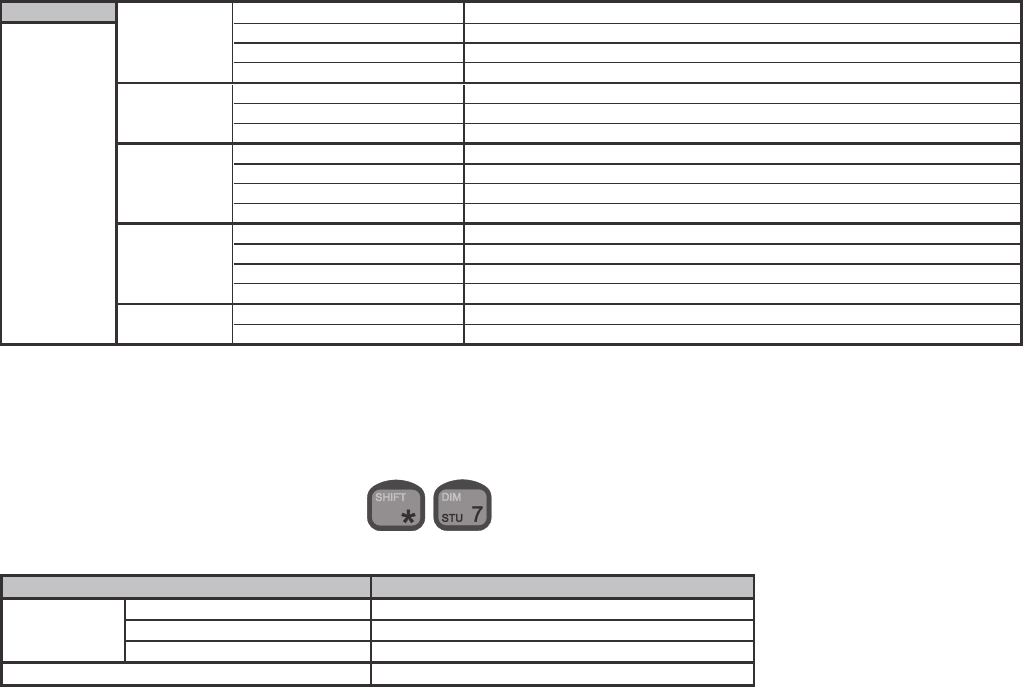
The following table contains a total list of the entries in the function
menu system.
0125

27
Menu 1st submenu 2nd submenu 3nd submenu Action
Setup Ringing tone Deep Sets ringing tone to deep (see Appendix A).
High Sets ringing tone to high (see Appendix A).
Slow alt. Sets the ringing tone to alternating slowly (see Appendix A).
Fast alt. Sets the ringing tone to alternating fast (see Appendix A).
Ring test External Generate external ringing tone in order to test the setting of this sound.
Internal Generate internal ringing tone in order to test the setting of this sound.
Ring vol. (*) Sets the volume of the ringing tone.
Speaker vol. (*) Sets the speaker volume.
Key beep (*) Enable Turns on the key beep function: When a key is pressed, a beep is heard.
Disable Turns off the key beep function: When a key is pressed, no beep is heard.
Volume Sets the volume of the beep heard when a key is pressed.
Lock Enable Requires users to log in. When selecting this function, the user is prompted to
log in.
Disable Does not require users to log in. This function can only be selected by users
with certain priorities. When selecting the function, the user is asked to state
a default user priority level that decides what all users will be allowed to do.
This default priority level cannot be higher than that of the user disabling the lock.
Password Sets the current user’s password.
Users Userlist + Add Browses the user list, and adds new users, entering names and passwords.
Userlist + Edit Name Browses the user list, and edits user names.
Password Browses the user list, and edits user passwords.
Priority Browses the user list, and edits user priorities.
Clear account Browses the user list, and clears user account records.
Userlist + Del. Browses the user list, and deletes users from the list.
Extension (*) Selects the extension number of the current handset.
Transfer (*) Enable Enables the auto transfer function.
Disable Disables the auto transfer function.
Extension Selects the extension number(s) to which calls are to be transferred.
Delay Time Selects the delay time before a call is transferred.
GPS Shows the current position.
Display (*) Time/date Displays the time and date when the handset is idle.
Time Displays the time (hour and minute) when the handset is idle.
Position Displays the position when the handset is idle.
State only Displays only the state of the system when the handset is idle.
Light Dimmer On Turns the display backlight on
Off Turns the display backlight off
Level Adjusts the level of the display backlight
Contrast Adjusts the display contrast
Call log Global Outgoing Userlist Browses the log of all outgoing calls.
Account Users Browses the user list, and shows the accounts of selected users.
Phone Shows the account of the PSTN phone.
Del. Users Shows the accounts of deleted users.
Unknown Shows the accounts of unknown users.
Private Outgoing Browses the log of the current user’s calls.
Account Views the current user’s account.
Last call View the duration of the last call
0125
28
Dimmer/Contrast Menu
To access the dimmer/contrast function menu, press:
System Time/date Show Shows the time and date.
Set Sets the time and date.
Sys.update Sets the system to update the time and date.
GPS update Sets the GPS to update the time and date.
SW versions Transceiver Displays the software version number of the transceiver.
LBT Displays the software version number of the LBT.
Ctrl unit Displays the software version number of the handset.
Call answer Status Shows the status of Call Answer, i.e. who is set to receive incoming calls.
All Incoming calls go to all control units and the PSTN phone.
One CU Incoming calls go to a specific control unit.
PSTN Incoming calls go to the PSTN phone.
SIM Card PIN enable Enable PIN code
PIN disable Disable PIN code
Change PIN Change PIN code
PUK code Enter PUK code
Reset Restart Restarts the system (works like switching the power off and on again).
Factory res Restarts the system and reloads all factory settings.
Menu Action
Dimmer On Turns the display backlight on.
Off Turns the display backlight off.
Level Adjusts the level of the display backlight.
Contrast Adjusts the display contrast.
0125

EuroCom Industries A/S
Porsvej 2
DK-9200 Aalborg SV
Denmark
Tel. +45 7013 7000
Fax +45 4474 8501
E-mail eci@eci.dk