ELITEGROUP COMPUTER SYSTEMS G610IABG Notebook with 11abg WLAN User Manual 610 E V1
Elitegroup Computer Systems Co., Ltd Notebook with 11abg WLAN 610 E V1
Contents
- 1. Manual Pt1
- 2. Manual Pt2
Manual Pt2
59
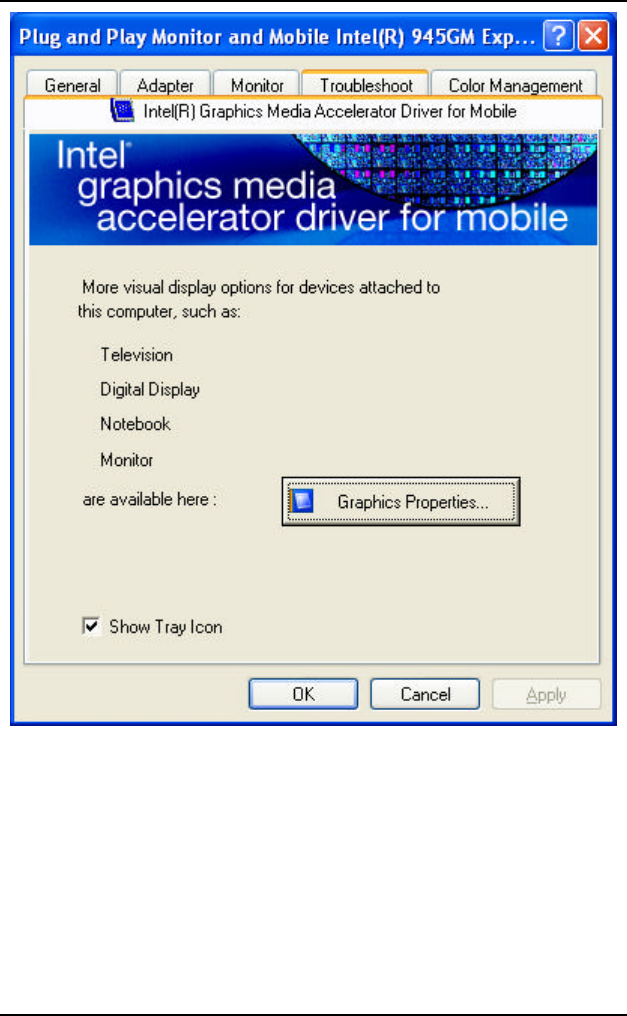
VGA UTILITIES
Intel Graphics
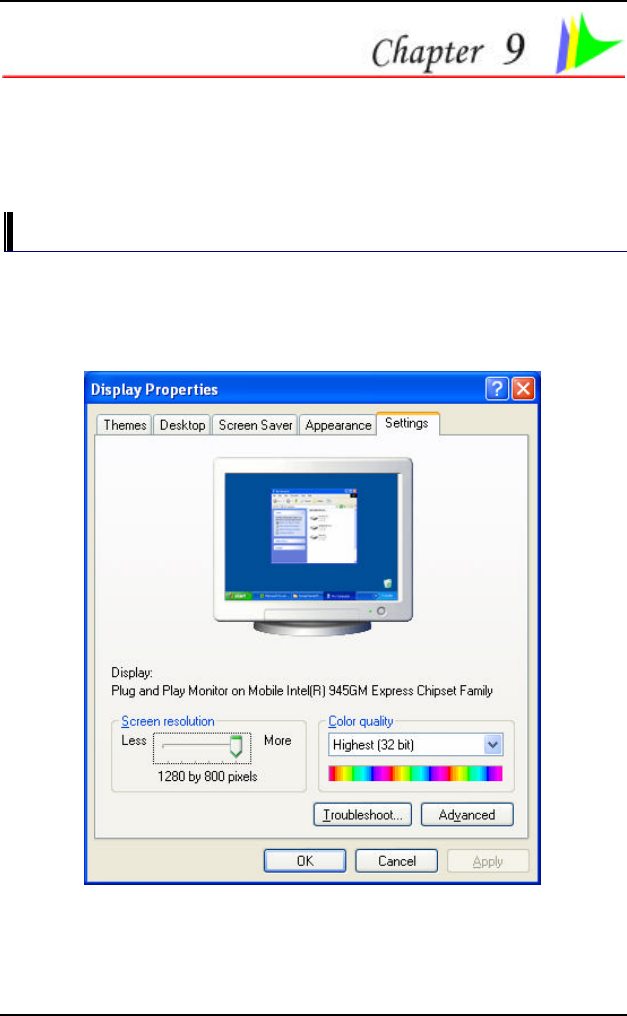
After you have restarted Windows, open the “Control Panel” and double
click on the “Display” icon. From the “Display Properties” window,
select the “Settings” tab and click on the “Advanced” tab to enter the
“Plug and Play Monitor on Mobile Intel® 945GM Express Chipset
Family”.
60
61
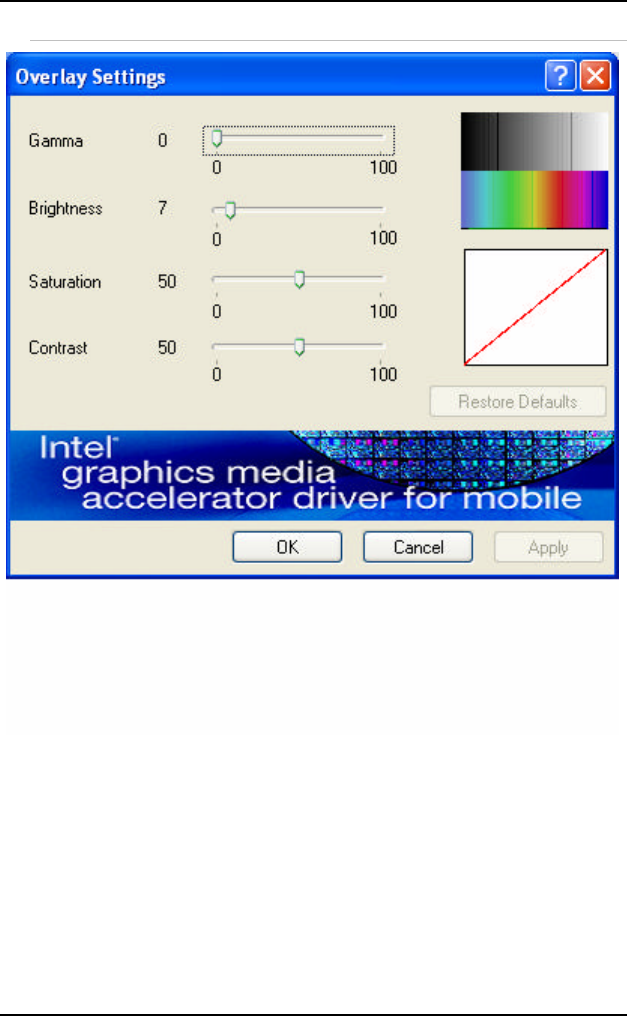
Overlay Settings
62
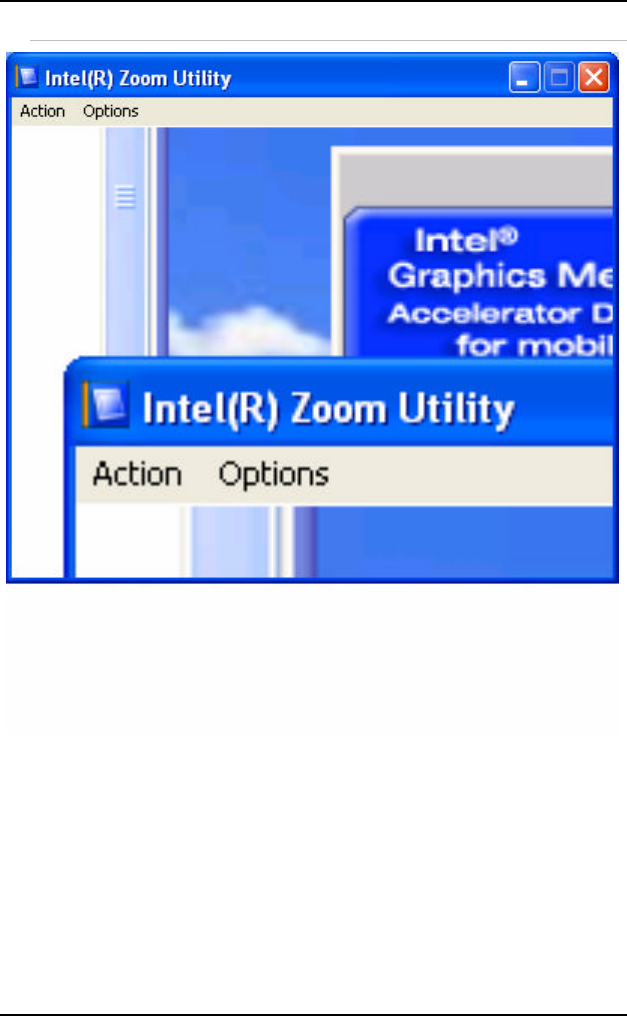
Launch Zoom
63
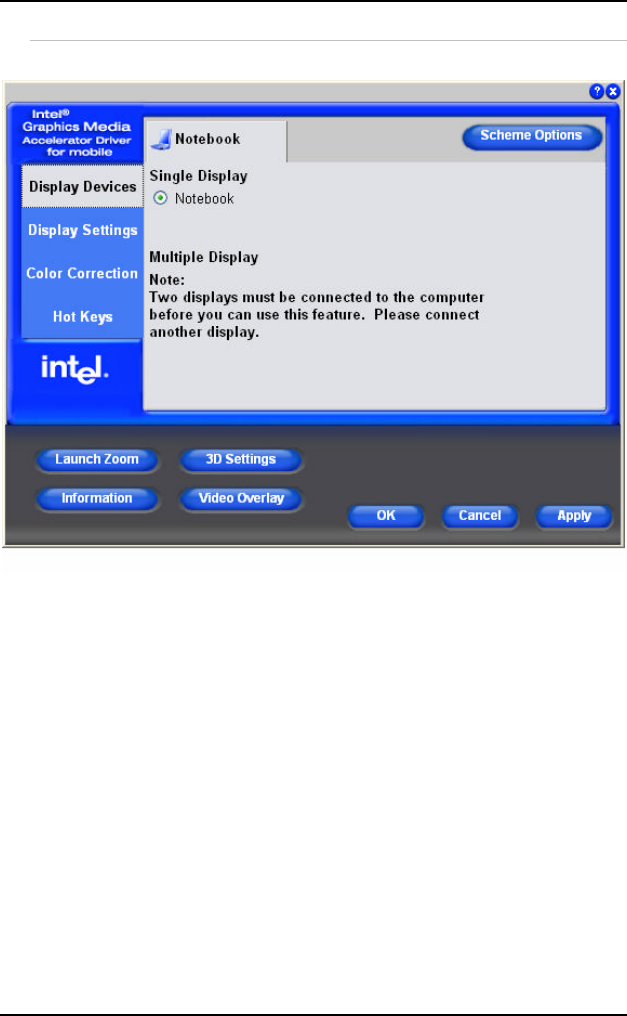
Display Devices
You can adjust the right resolution for your screen display.
64
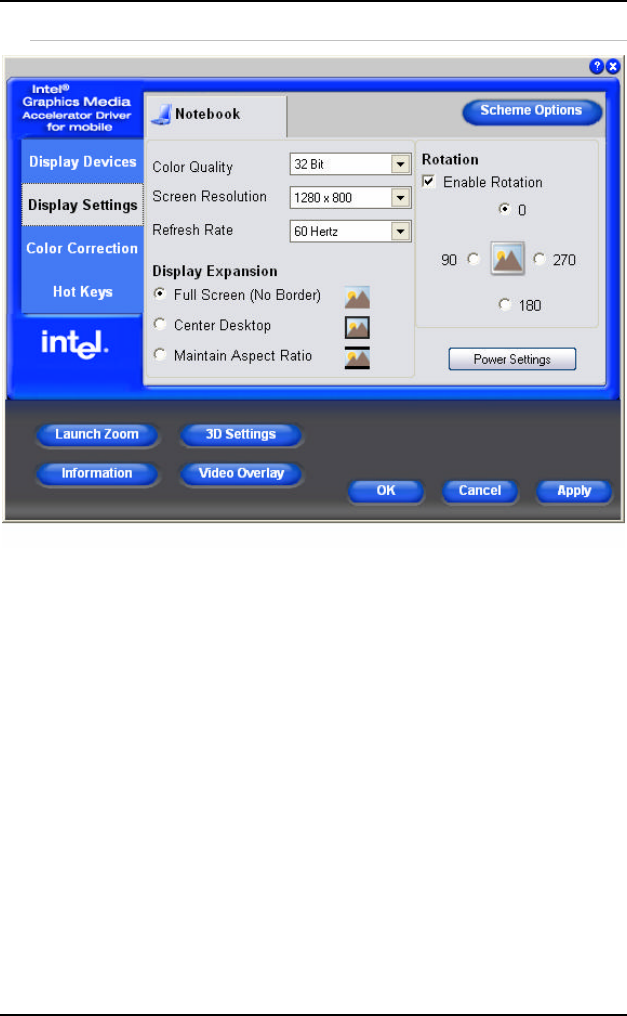
Display Settings
65
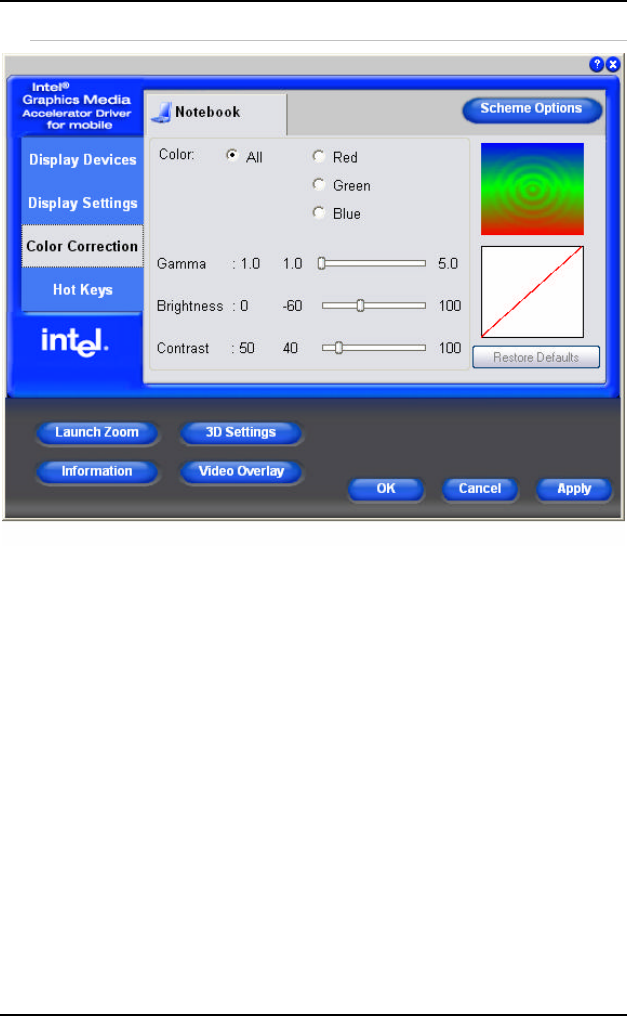
Color Correction
66
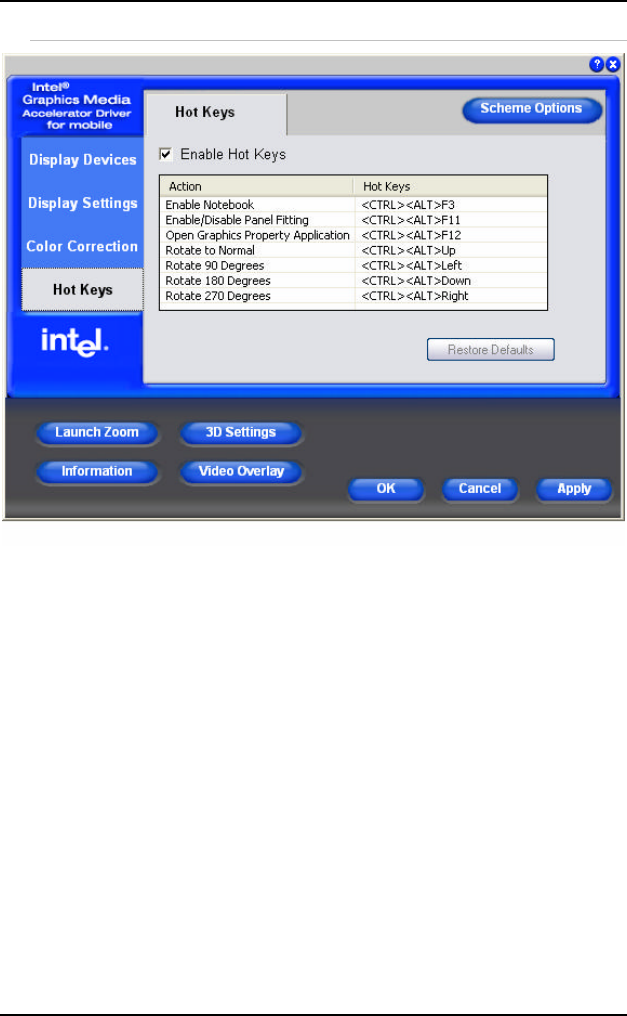
Hot Keys
67
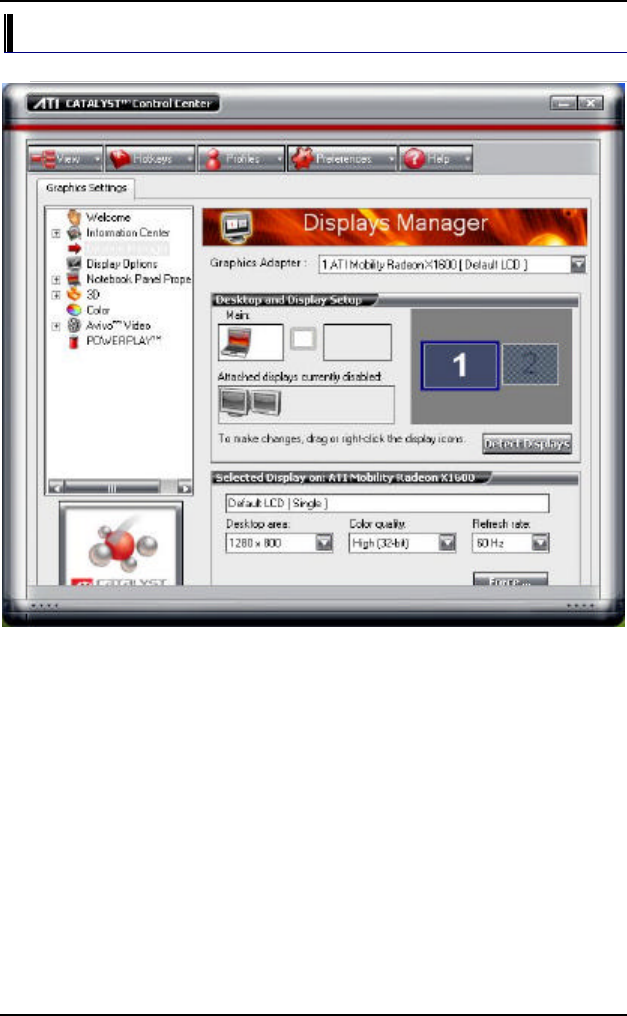
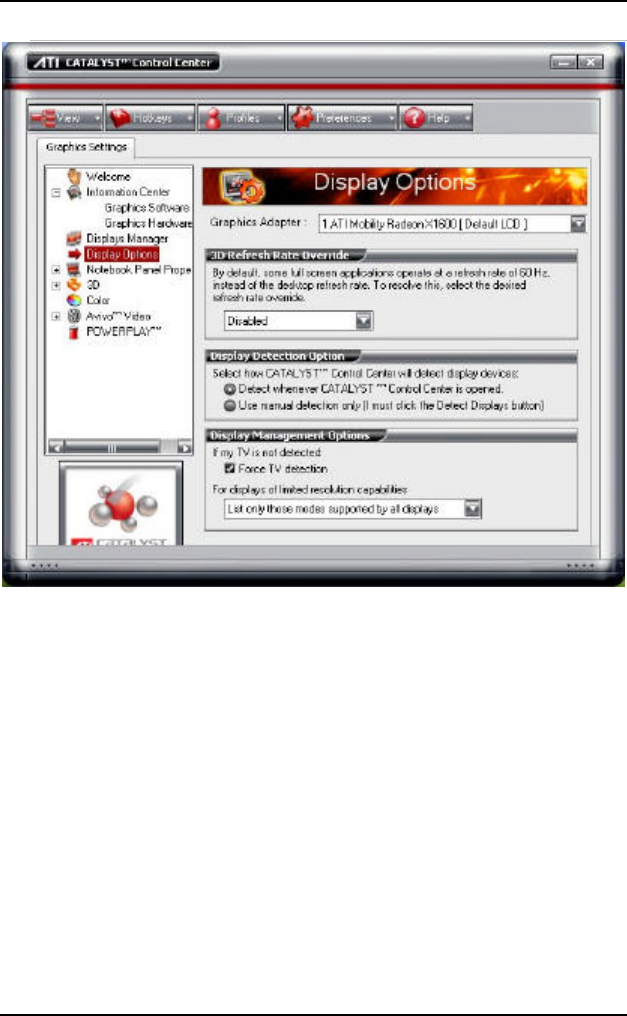
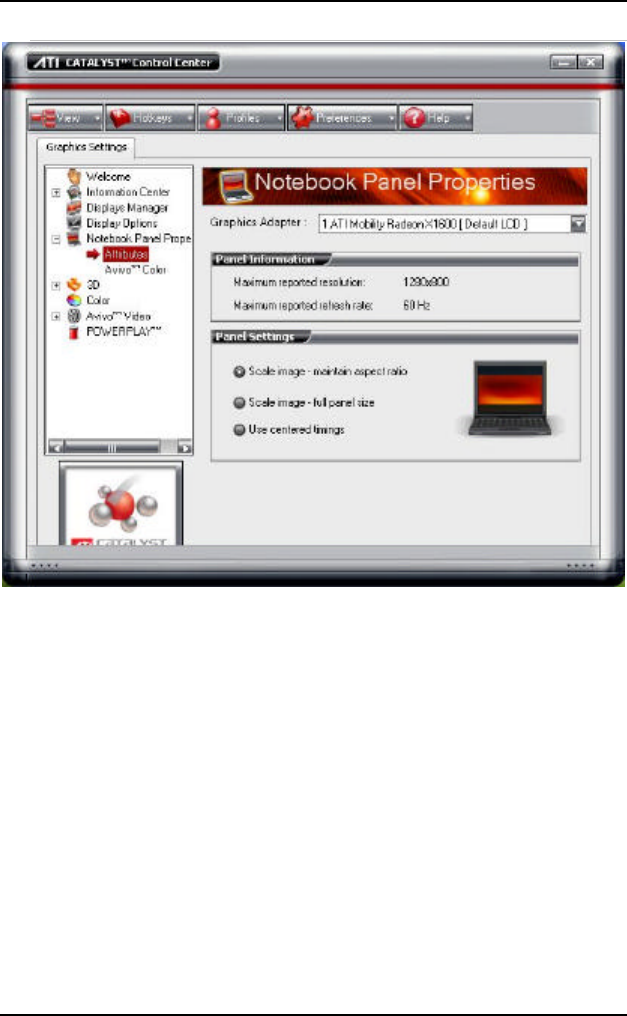
ATI Graphics
Display Managers
68
Display Options
69
Notebook Panel
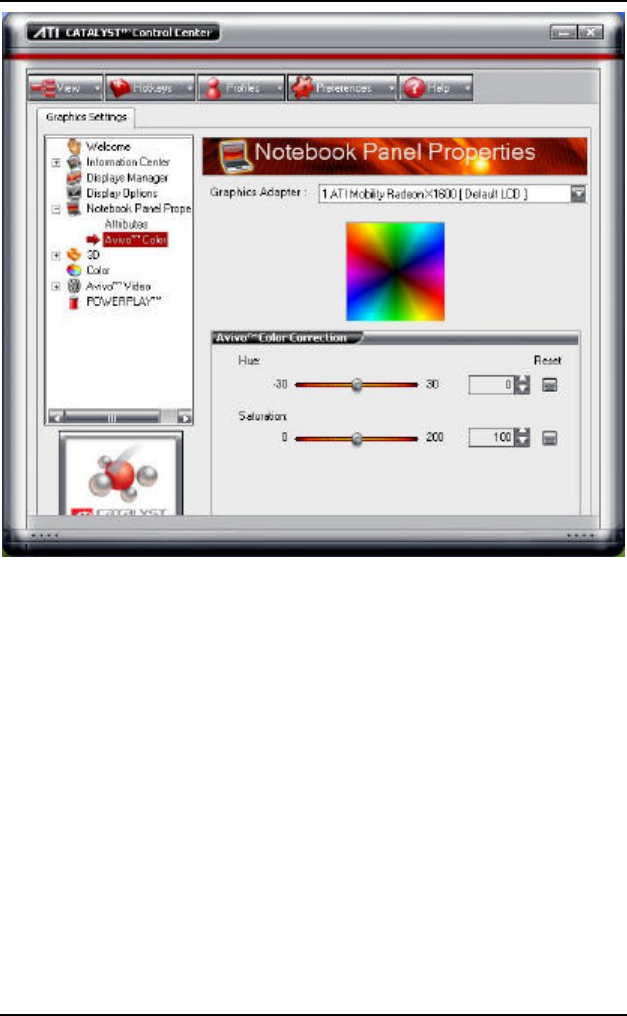
70
71
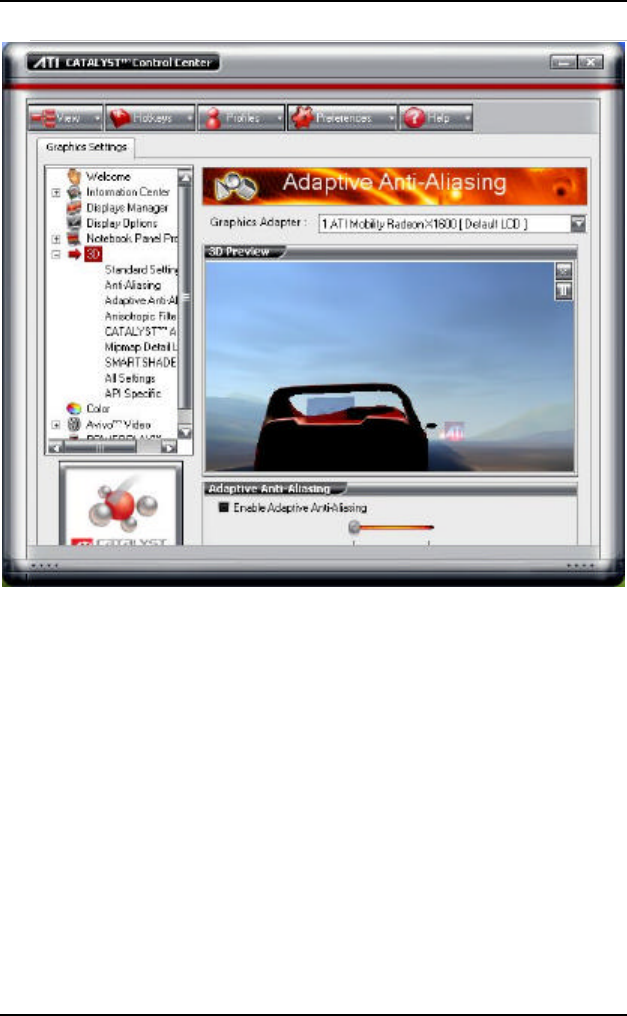
3D
72
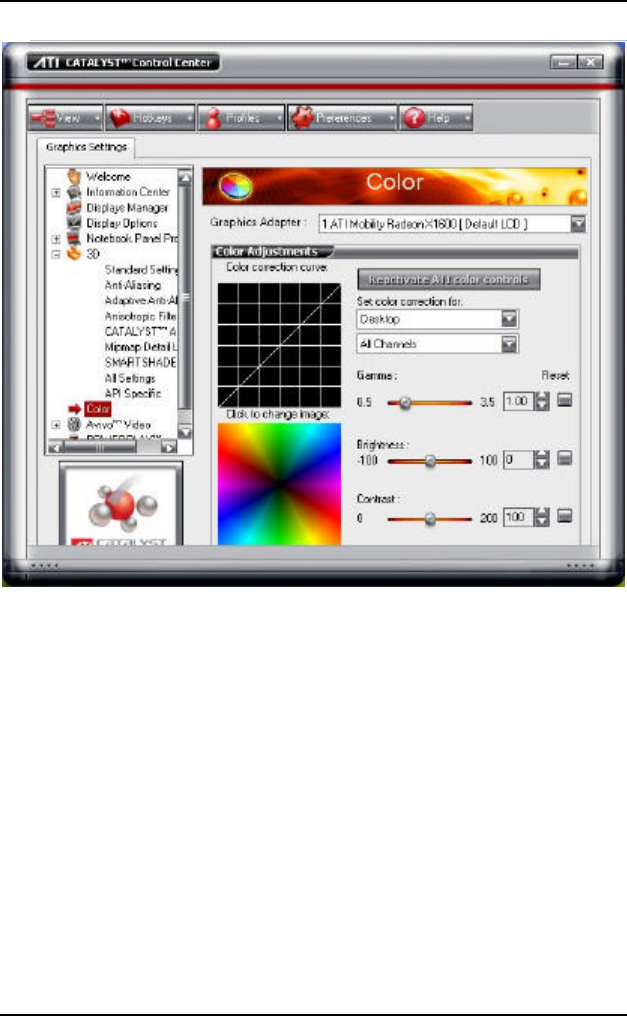
Color
73
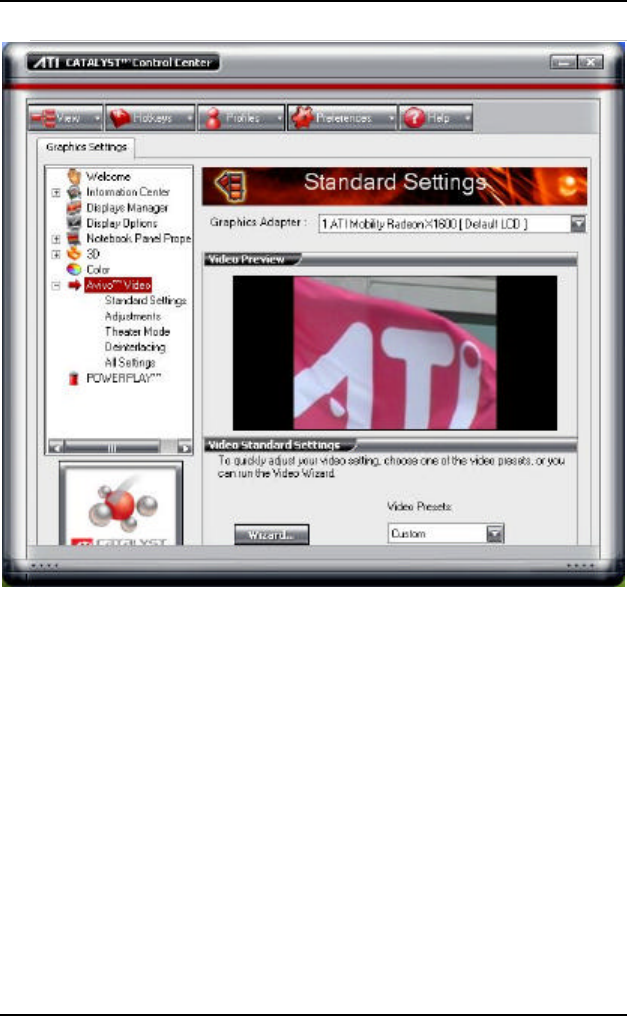
Avivo Video
74
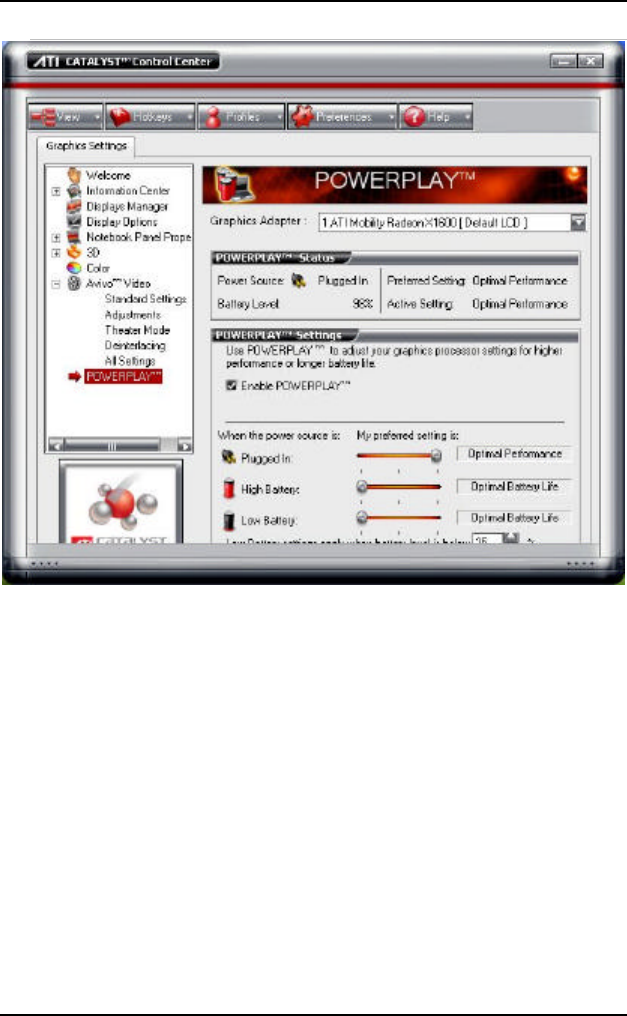
PowerPlay

75
VIEWING LIVE VIDEO (OPTION)
The Utility allows you to access the entire range of display controls and
configuration options. Its live video can co-exist with other applications
running at the time. In addition, you have the choice of keeping the
default video window size, scaling it to any other size or using the entire
screen for video display. You can either sit in front of your monitor,
controlling the video with menu commands, toolbar buttons as well as the
TV Tuner, or lay back in your chair with the remote control pad in your
hand.
For more detailed information on the function for
each individual mode on the Remote Control, please refer to
the Remote Control Guide user’s manual.
76
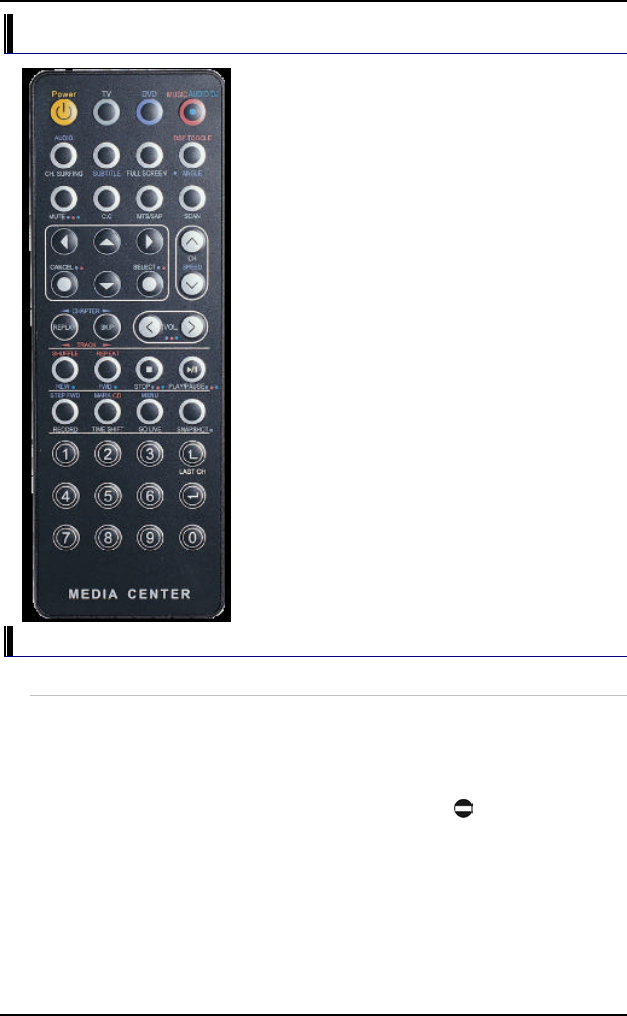
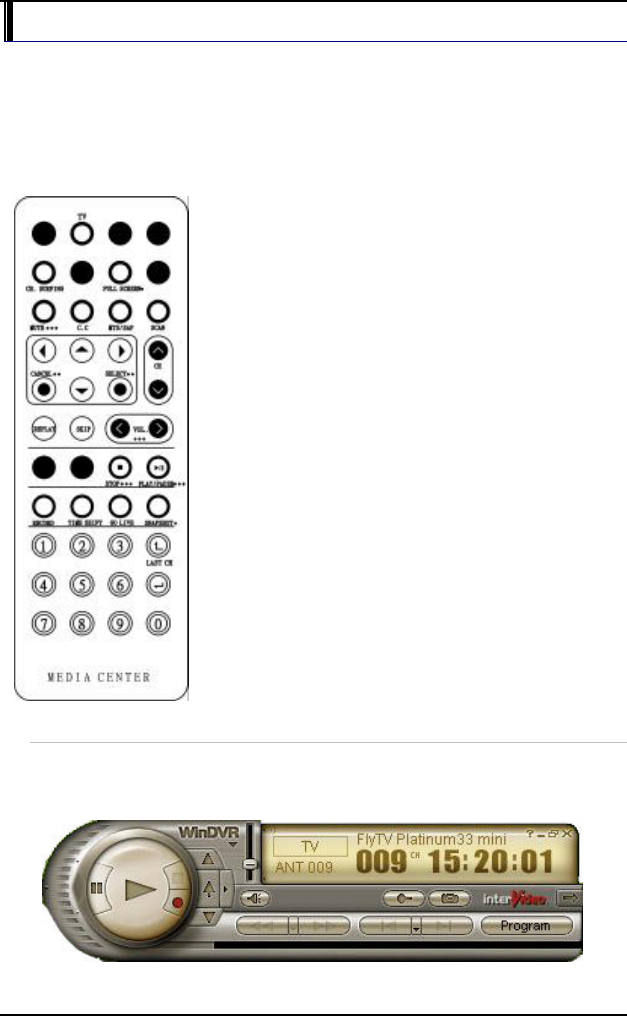
Using the Remote Control
The Remot
e Control comes with three
multimedia softwares: WinDVR
,
WinDVD, and WinRip
. These softwares
use only one remote control; the function
of each buttons will vary on different
software.
• DVR Mode Button - Press the DVR
button if you want to use the
WinDVR software. “WinDVR” gives
you high-quality digital recording of
your favorite TV shows on your PC.
• DVD Mode Button - Press the DVD
button if you want to use the
WinDVD software. “WinDVD” uses
the power of your PC to bring DVDs
to life.
• RIP Mode Button - Press the Music
button if you want to use the WinRIP
software.
WinDVR Mode
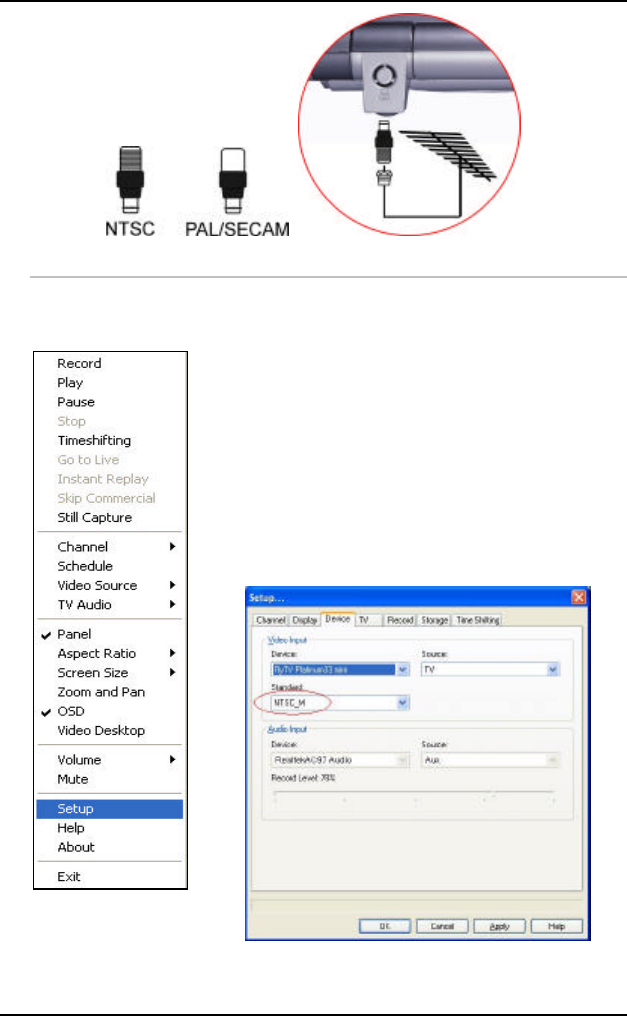
Cable Connection
Your notebook supports three video standard namely: NTSC, PAL and
SECAM. Ask your local dealer on the type of standard being used in
your respective country of origin.
• Remove the cover on the cable TV connector at the rear of
the computer with the aid of a screwdriver .
• Connect one end of the cable wire to the RF connector of
the computer while the other end is connected to the wall
socket or directly to the antenna.
77
Defining the Video Source
Select the PAL, NTSC or SECAM, depending on which standard the
selected source is using. The factory default is the standard used by your
purchase country, and normally there is no need to change this setting.
If you are working outside your country, you
are required to adjust the setting of our video
source. From the WinDVR window, click on
your mouse right button and select the “Setup
”
item.
From the “Setup” dialog window, click on the
“Standard” selection items and dra
g down the
arrow to select on the type of TV standard
based on your respective country of origin. For
“Source”, select “Aux”.
78
Application buttons in DVR mode
• TV - Launch the WinDVR application
• Channel Surfing - Surf channels by displaying 16 channels at
once.
• Full screen - Change display size to full screen.
• Mute - Mute or restore sound when watching TV.
• C.C. (Close Caption) - Display overlay text caption.
• MTS/SAP - Switch TV sound mode to
mono stereo or SAP
• Scan (Auto scan) - Scans all available
channels for context.
• Cancel - Cancel.
• Select – OK button.
• CH Up & Down - Selects next higher or
lower channel in channel memory.
• Volume (Volume up and down) -
Increase and decrease sound.
• Stop - Stops functions such as record,
play, rewind, forward and pause.
• Play/Pause - Plays or pauses a scene.
• Record - Records TV and encodes it into
MPEG I/II format.
• TimeShift - Pauses live TV.
• Real Screen (Go Live) - Return to the
current time of the program.
• Snapshot - Captures a favorite screen
shots from the program.
• Numeric Keypad (0-9) - Select a channel
up to 99 by pressing two numbers.
Playing Audio Files
When first using the WinDVR application, please follow these
instructions to get the best sound results from the audio files you produce.
• Click on the “WinDVR” icon
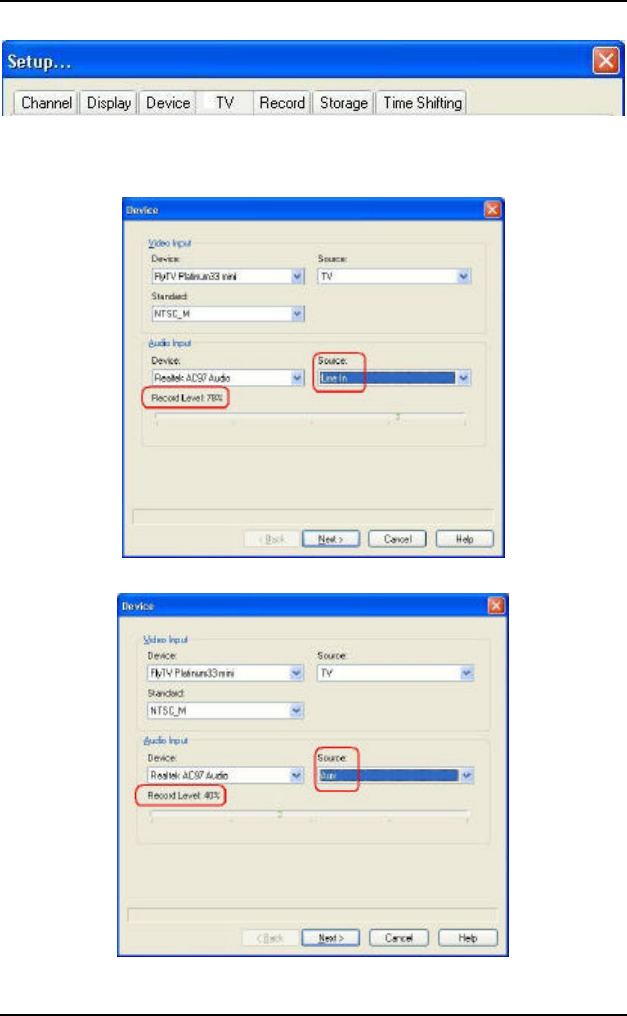
79
• A “Setup” window will then appear
• Click on the “Device” tab to display the “Device” setup
window
• Choose “Aux” from the “Source” pull-down menu.
Before
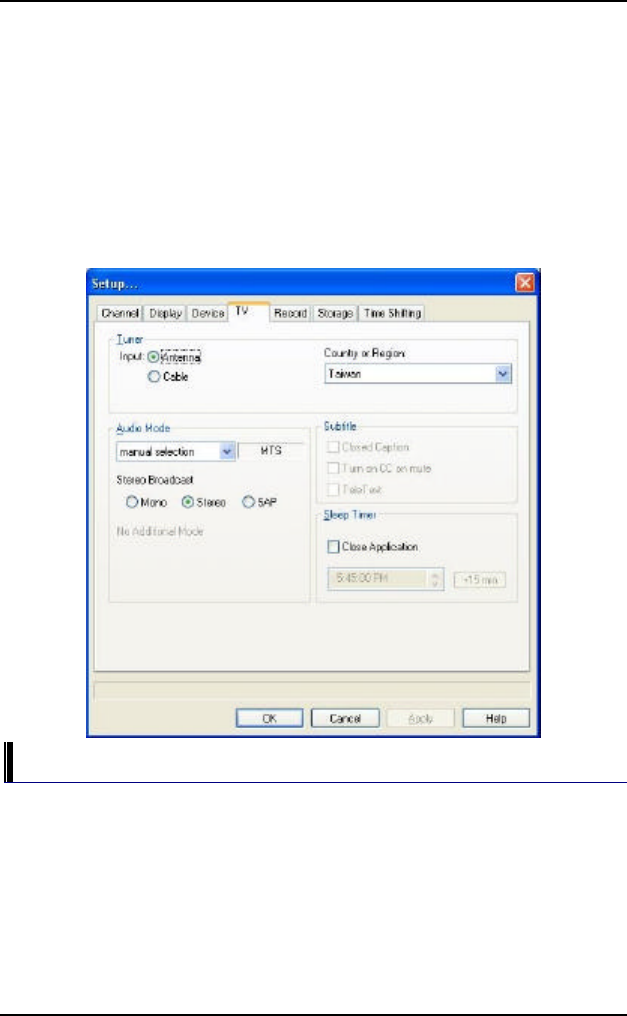
80
After
• To set the recording level, slide the fader left to decrease and
right to increase the sound level
• A recording level of 40% is recommended for music files.
• After you have made the corresponding adjustments, you
must then select your country or region.
• Click on the “TV” tab and the “Setup” window will appear.
• Select the country where you are located from the Country or
Region pull-down menu.
• Click on the “OK” button to finish the setting application
Application buttons in DVD mode
• DVD - Launch the WinDVD application.
• Audio Selection - Display language selection.
• Subtitle - Activates language subtitles.
• Full screen - Change display size to full screen.
• Angle (Angle Selection) - Display multiple angle viewing (Only on
film that support this function)
81
• Mute - Mute or restore sound when
watching CD title or MPEG file.
• Cancel - Cancel.
• Select – Repeat/OK.
• Speed - Speed up the play.
• CHAPTER (Previous & Next) - Selects
previous or next chapter.
• Volume (Volume up and down) -
Increase and decrease sound.
• REW - Play disc in fast reverse mode.
• FWD - Play disc in fast forward mode.
• Stop - Stops the current play.
• Play/Pause - Starts or pause the disc.
• Step Fwd Single frame advance while in
pause mode.
• Mark - Instantly mark your favorite
scene.
• Menu - Opens DVD title main menu.
• SnapShot - Captures still images of
current playback.
• Numeric Keypad (0-9) - Inputs chapter
number to playback.
Please take note that when you are playing the DVD
applicaton, you will only be able to use the Remote Control
DVD button if your system support the InterVideo WinCinema
application.If your system support the WinXPMCE application,
you will have to use the “Microsoft Remote Control” that
comes with your package.
Use Lunch key to chosoe between these two applications,
please proceed to BIOS Setup and select the “Advanced”
menu.
82
From the “Shortcut Key Working With” selection item, select
the “InterVideo” if your system only support the ”InterVideo”
application or the “WinXP MCE” application if your system
support the Microsoft’s WinXP MCE application.
To ensure an excellent quality performance when playing a
DVD file, we would recommend you to refrain from playing
under battery-operated mode. Playing a DVD file under
battery-operated mode would only cut back the playtime thus
affect its performance. It is best for you to play a DVD file
under AC power mode.
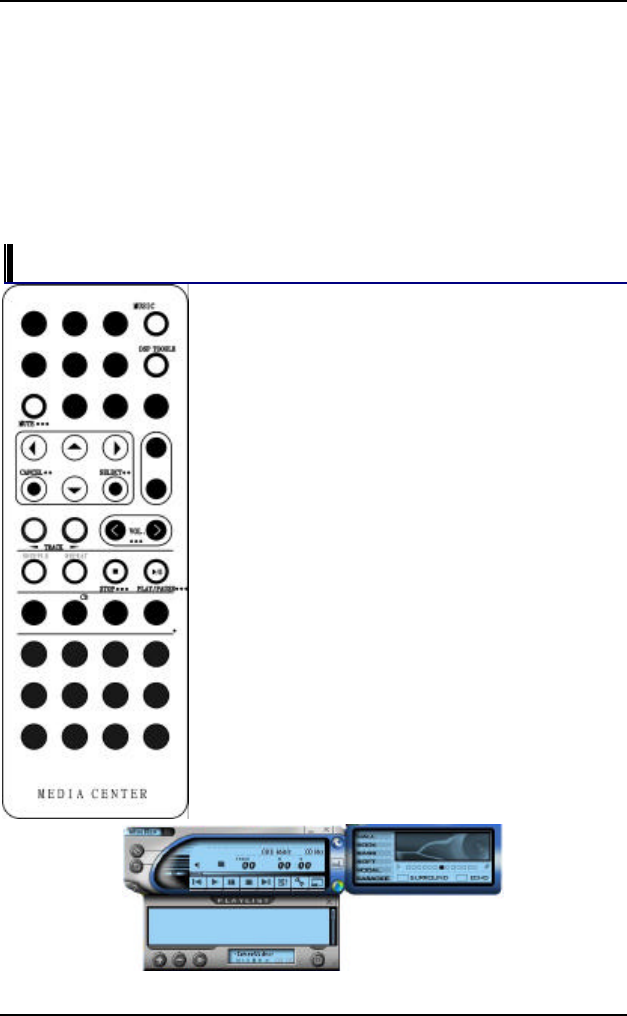
Application buttons in Music mode
• Music - Launch the WinRIP application.
• DSP Toggle – Let you enable or disable
the DSP window when the WinRIP
application is launched.
• Mute - Mute or restore sound when
playing music.
• Cancel - Cancel.
• Select - Repeat.
• Track (Previous & Next) - Plays previous
or next track in the list.
• Volume (Volume up and down) - Increase
and decrease sound.
• Shuffle - Play tracks in random order.
• Repeat - Repeat current track or all
tracks.
• Stop - Stop playback.
• Play/Pause - Play or pause a music track.

83
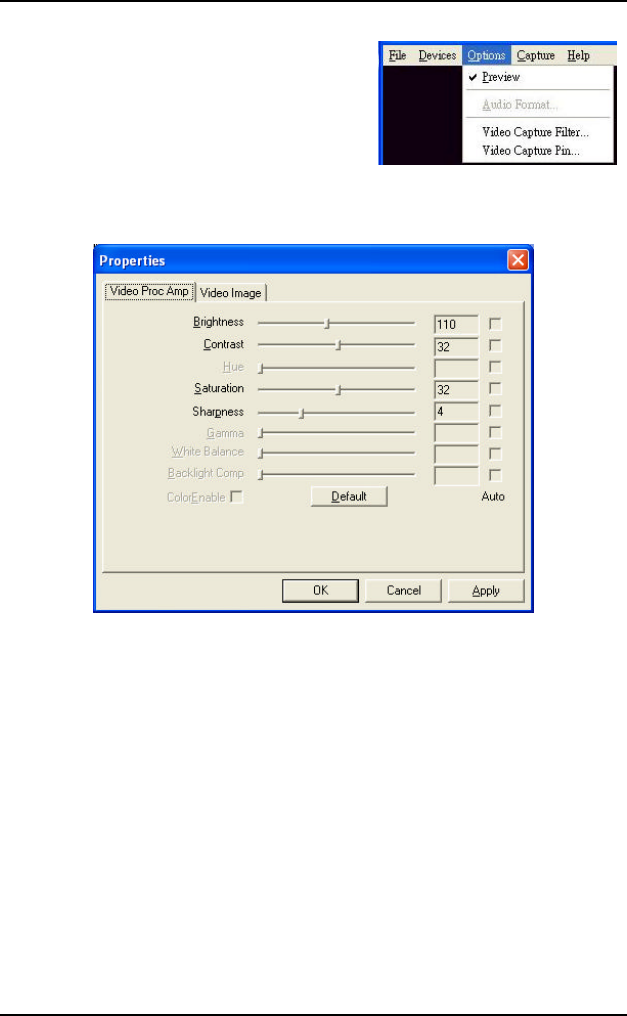
VIDEO CONFERENCING (OPTION)
This application offers video conferencing capabilities to work and
communicate in real-time with one or more participants through
streaming video, from any location. You can click on the icon on the
Windows screen display to run the capture application.
Application
Use the hot key of [Fn] + [F6] to capture the image that
appear on your application’s screen. You are allowed to capture
the image for a number of times until you save it by selecting the
“Set Capture File…” in the “File” menu.
84
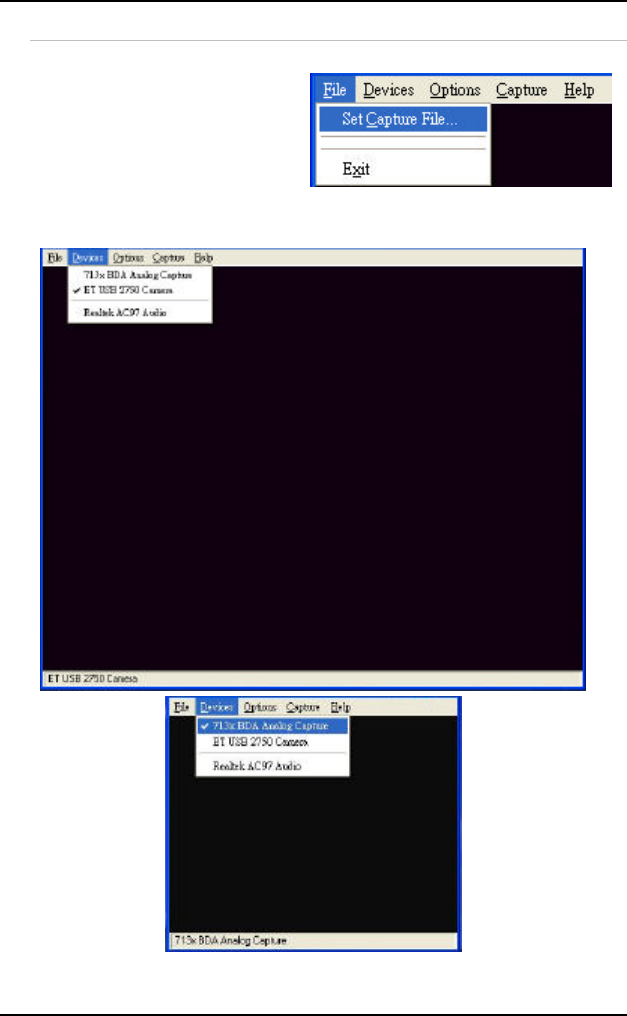
Using Commands and Buttons
The File Menu Commands and Buttons
• Set Capture File - Set
to save directory and
video file name.
• Exit - Exit the
application.
The Device Menu Commands and Buttons
This set the size of the window screen of your capture application
85
The Options Menu Commands
• Preview -
Set preview in screen
or not.
• Video Capture Filter - Set
Properties.
• Video Capture Pin - settings of stream format.
You can set the corresponding feature for Environment, Frequency,
Rotation and Extension of your captured image file.
Ø Brightness/Contrast/Hue/Saturation/
Sharpness/Gamma/White Balance/Backlight Comp
- To adjust video settings and show value.
Ø Default - Reset all settings in this page to default.
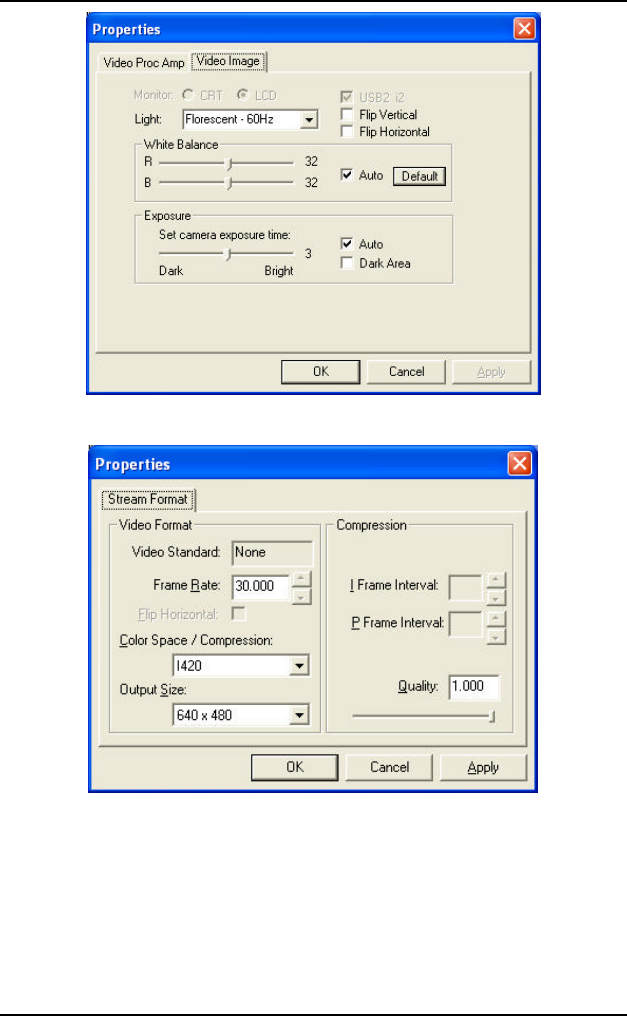
86
Ø Exposure - De-select the check mark on the box if you
want to change the value.
Ø Frame Rate - This function is to set video frame rate. If
your utility rate of CPU is too high, you can choose the low
frame rate to reduce the CPU’s utility rate.
Ø Output Size - Change the output size.
87
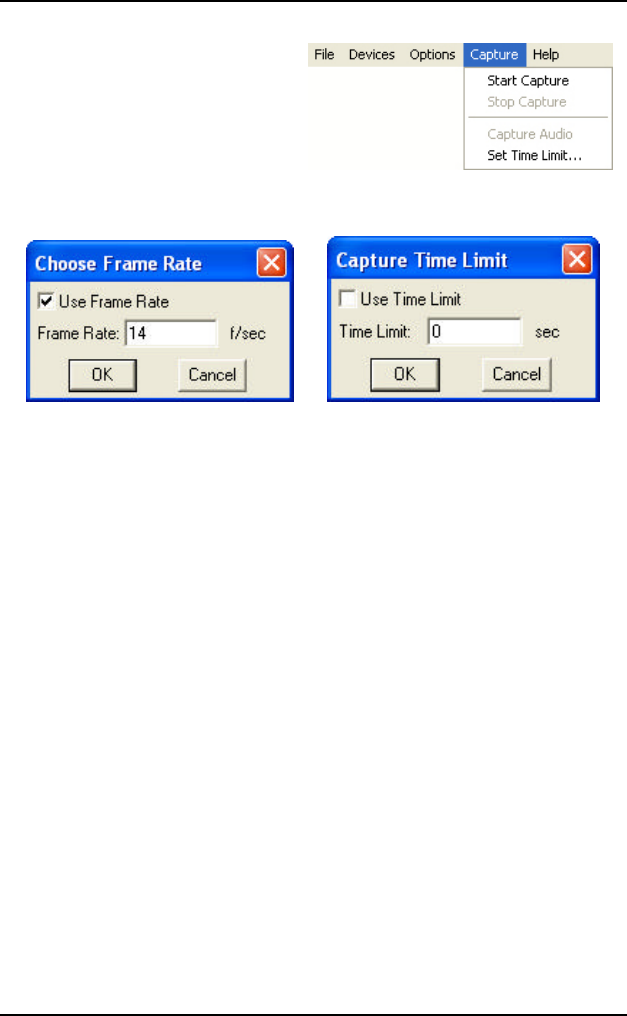
Capture Menu Commands and Buttons
• Start Capture - start
capture video
stream.
• Stop Capture - stop
capture video
stream.
• Set Frame Rate - set frame rate while capturing a video.
• Set Time Limit - set time limit of capture stream.

88
Page intentionally left blank

89
TROUBLESHOOTING
This chapter describes locating and solving problems that you may
encounter while using your computer.
Locating a Problem
Problems with your computer can be caused by something as minor as an
unplugged power cord – or as major as a damaged hard disk. The
information in this chapter is designed to help you find and solve minor
problems. If you try all the suggested solutions and you still have a
problem, make a list of what steps you have taken to correct the problem
and contact your dealer.
Successful troubleshooting is the result of careful observation, deductive
reasoning, and an organized approach to solving the problem.
The problems that you will encounter can be divided into two basic
categories: hardware problems and software problems. Hardware
problems can be further divided into electrical and mechanical problems.
You will know you have a hardware problem if the screen is dark, the
computer cannot read the disk drives, or you get an error message during
the Power-On Self Test (POST).
Software errors can occur at several levels. The ROM BIOS and the
operating system can give you a large number of error messages. On top
of this, each application software package has its own set of error
messages. It is important to determine whether the software error message
you are getting is from the application or the operating system. Once you
know this, you can look in the respective manual for a solution to the
problem.
Checking Cables and Connections
Start by performing a careful visual inspection of the exterior of the
computer. If no LEDs are illuminated, make sure that your computer and
its peripherals are getting power and communicating with each other
properly.

90
To check the power cables, and connections:
1. If you have been using battery power, connect the Notebook to an
external power source and make sure that the battery has a charge.
2. If you are using the Notebook with the AC adapter, check the power
outlet, the power cord, and any power switches that may affect your
computer.
Ø Check the wall outlet or power strip with an item that you
know is functioning properly. A lamp or radio is a
convenient item for checking the power. You may also
need to check the fuses and breakers in your electric box.
Ø If the outlet is controlled by a wall switch, make sure that
the switch is on.
Ø If the outlet is controlled by a dimmer switch, use a
different outlet.
Ø If your computer is plugged into a power strip with an
On/Off switch, make sure the switch is on.
3. With the computer’s power switched off, check all cable connections.
If the computer is connected to any peripheral devices, look for loose
or disconnected cables.
Ø If the computer is too close to a wall, a cable connection
may be loose or the cables may be crimped.
Ø Do not substitute cables for different devices (other than the
manufacturer recommended cables) even if they look
exactly alike. The wiring inside the cable may be different.
4. When you are certain that you have power available and all
connections are good, turn the computer on again. If the computer
still does not start, you may have a hardware problem.
The Power-On Self Test
The Power-On Self Test (POST) runs every time you turn on or reset the
Notebook. The POST checks memory, the main system board, the display,
the keyboard, the disk drives, and other installed options.
A few seconds after you turn on your computer, a copyright message
appears on your display screen. A memory test message appears next; as
the test continues, memory size increases until all installed memory is
tested. Normally, the only test routine visible on the screen will be the
memory test.
Two classifications of malfunctions can be detected during the POST:

91
• Error messages that indicate a failure with either the
hardware, the software, or the Basic Input/Output System
(BIOS). These critical malfunctions prevent the computer
from operating at all or could cause incorrect and apparent
results. An example of a critical error is microprocessor
malfunction.
• Messages that furnish important information on the power-on
and boot processes (such as memory status). These non-
critical malfunctions are those that cause incorrect results
that may not be readily apparent. An example of a non-
critical error would be a memory chip failure.
In general, if the POST detects a system board failure (a critical error),
the computer halts and generates a series of beeps. If failure is detected in
an area other than the system board (such as the display, keyboard, or an
adapter card) an error message is displayed on the screen and testing is
stopped. It is important to remember that the POST does not test all areas
of the computer, only those that allow it to be operational enough to run
diagnostic programs.
If your system does not successfully complete the POST, but displays a
blank screen, emits a series of beeps, or displays an error code, consult
your dealer.
General Hardware Problems
A few common hardware problems and suggested solutions are presented
in the table below:
Problem: The capacity of the battery is between 95 to 99% but
can not fully charged.
Solution: Please discharged to less than 95% of its capacity
then recharge the battery.
Problem: Failure in the installation of the Audio driver.
Solution: Be sure to first remove the current audio device from
your system. Please follow the instruction on the installation of
audio driver.
Problem: The display screen is dark
Solution: Make sure that the computer is not in Suspend mode.
Check the Brightness controls for the screen. If the controls are
turned too far down, the screen will be dark.
Problem: An incorrect date and time are displayed.

92
Solution: Correct the date and time using the DOS DATE and
TIME commands or the options in the Setup Utility. If the date and
time become incorrect after a short time, your CMOS battery may
be depleted. Contact your dealer to change the battery.
Problem: You hear irregular beeps during operation of the
Notebook and the system halts.
Solution: The problem is beyond the scope of this manual.
Contact technical support.
Problem: An unidentified message is displayed.
Solution: Reboot the computer and run the BIOS system setup.
Confirm the Setup parameters. If the same message is displayed
after booting up again, contact technical support for assistance.
Problem: The system cannot access the DVD-ROM drive.
Solution: Check that a CD is properly inserted in the drive.
Make sure that you are using the correct program for that kind of
CD. For example, the system cannot read a data CD using an
audio program.
Problem: You cannot operate the printer.
Solution: Check the printer USB cable connection. Ensure that
the printer power switch is turned on. Confirm that the printer is
on-line.
Problem: You cannot use the mouse.
Solution: Check the cable connection.
Check the mouse with another application to see if there is a
software incompatibility problem.
If possible, check the mouse with another computer to see if it
works. If it doesn’t operate on a different system, the mouse might
be broken.
Problem: The fan does not stop operating when the system
enters the suspend mode.
Solution: Before entering the suspend mode, the fan still
operates in full speed to lower down the temperature of the system.
When the system temperature reduces into normal condition then
the fan will gradually slow down into its normal speed.

93
Contacting Your Dealer
If you still have a problem after reading the preceding sections, the next
step is to contact your dealer. Your dealer can determine if the problem is
something that requires the computer to be taken to the shop. Before you
call your dealer, however, prepare the following information:
• How is your computer configured? Your dealer needs to
know what peripheral devices you are using.
• What messages, if any, are on the screen?
• What software were you running at the time?
• What have you done already to try to solve the problem? If
you have overlooked a step, your dealer may be able to
solve the problem over the phone.

94
Page intentionally left blank
95
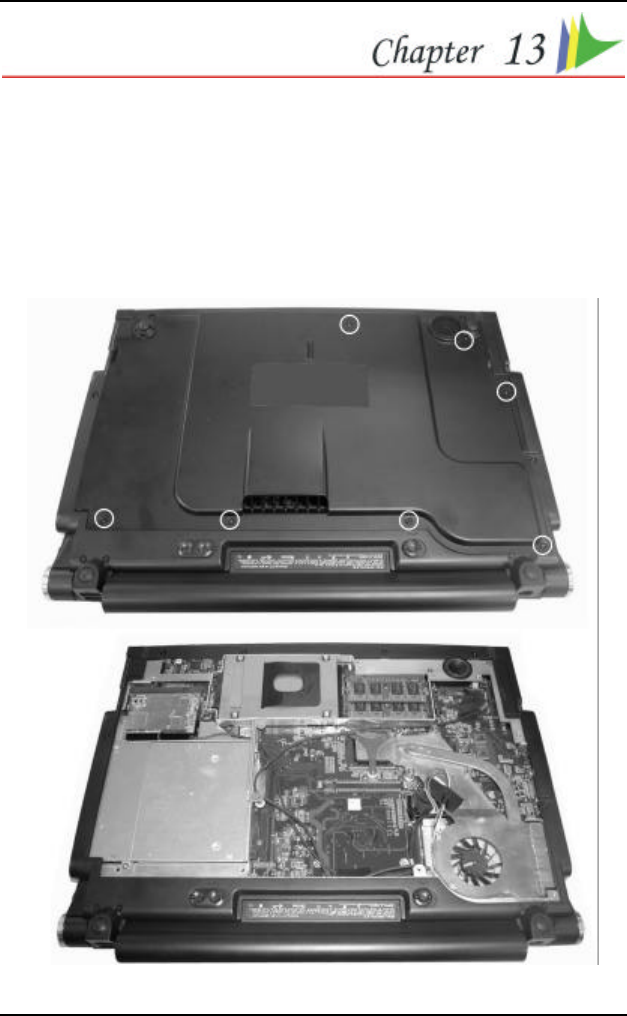
HOW DO I EXPAND MY
NOTEBOOK
Turn off the computer; disconnect the AC adapter and all peripherals.
With your computer turning upside down, remove all the screws that are
encircled and shown on the illustration.

96
Upgrading your Memory
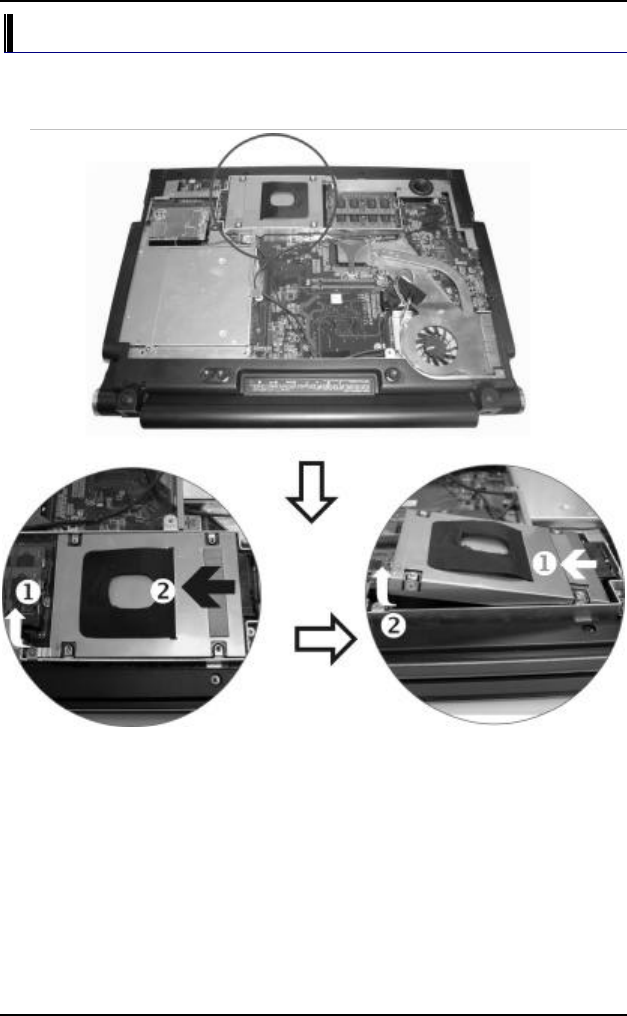
97
Easy to Upgrade HDD Module
The hard drive in your notebook computer is made to be easily swapped
out for upgrading.
How to Remove your Hard Drive

98
Page intentionally left blank

99
SPECIFICATION
Detailed Notebook Specifications
Processor
• Intel® Yonah® with Single/Dual core, Celeron® (3rd
Generation Mobile Microarchitecture, 2MB/1MB L2 cache,
speed up to 2.33 GHz, 667/ 533MHz FSB)
• 478pin mFCPGA Package
Operating System Compliance
• Microsoft® Windows® XP Media Center Edition
• Microsoft® Windows® XP Professional Edition/ Microsoft®
• Windows® XP Home Edition
Core Logic
• Intel® 945PM/GM(Calistoga)+ ICH7-M
Memory
• Expansion 2 slots of 200pin SO-DIMM DDR2 module,
expandable up to 2GB system memory
• Support DDR2 400/533/667 MHz module
LCD Display
• 15.4"WXGA (1280x800) TFT LCD display
Video & Graphics
• Graphic controller: NVIDIA® (G73/G72/G72-V, MXM-II) or
ATi® (M56, M54, M52, MXM-II), PCI-Express X16
(changeable)
• External 64/128/256MB DDR VRAM on VGA board
Hard Drive
• 2.5" 9.5mm height, S-ATA

100
Optical Drive
• 5.25" 12.7 mm height Combo Drive (DVD-ROM + CD-RW),
DVD Dual (DVD+/-RW), Super Multi (DVD-RAM+DVD+/-RW)
AV Feature
TV Tuner
• Mini PCI TV Tuner w/ Coaxial connector, support PAL, NTSC,
SECAM
Built-in
Remote
• Multi-function remote control to enjoy TV program
Pointing Device
• Touchpad
Application Launch Key
• E-mail, Internet, WLAN, TV, DVD, Power
LED Status Indicator
• Power, Suspend/Resume, Battery Charging Staus, Hard Disk
Access, NumLock mode, CapsLock mode, ScrollLock mode
Keyboard
• 3.0mm travel, Inverted-T, 88 keys with Windows keys
PCMCIA
• One Type II PCMCIA slot (PCI-E card)
Camera (option)
• CMOS Camera, 1.3Mega Pixels
Accelerometer sensor
• HDD freefall protection & system alarm (option)
Ambient light sensor
• Change LCD backlight according to environment illumination
Audio
• Azalia, 5.1 channel SPDIF support
• Built-in two high quality stereo speakers
AC Adapter
• Input: 100-240V AC, 50-60Hz, 1.5A, Universal
• Output: 19V DC, 4.74A, 90W
Battery
• 8 cell battery

101
BIOS
• AMI, Support PnP, password ,Bootable from USB
Disk/Optical device
Card Reader
• 4-in-1 Card Reader (SD/MS/MS Pro/MMC card)
Communication
• 10/100/1000 Intel Gigabit Ethernet on board
• Built-in MDC V.90 56Kbps Fax/Modem
• Intel® PRO/Wireless 3945ABG (802.11a/b/g) network
connection (Mini card) (WM3945ABG)
• TV-Turner Mini-PCI interface, support PAL/NTSC/SECAM
(optional)
• Web CAM with 1.3 Mega pixel resolution CMOS image
(optional)
Power Management
• PC 2001 and ACPI compliance
• Support Stand-by, Suspend to Disk, Suspend to RAM, Smart
Battery System support
Security
• Kensington Lock
Size
• 363 x 281 x 27/30 (mm)
Weight
• Approximately 3kg with panel, battery and Optical drive
installed
Accessories
Packing Accessories
• Quick Guide, Support CD (Driver, Utility, Manual), AC
Adapter, Power Cord, Battery Pack
Factory Option
• Intel® PRO/Wireless 3945ABG (802.11a/b/g) network
connection (Mini card) (WM3945ABG)
• Optical Device: Combo Drive, DVD Dual, Super Multi
• Web CAM with 1.3 Mega pixel resolution CMOS image
• VGA MXM module changeable upon demand

102
Spec subject to change without notice
Battery life will vary depending on your specific hardware and
software configuration