Edgecore Networks SMCWPCI-N5 2.4GHz 300Mbps Wireless PCI Adapter User Manual SMCWPCI N5 UG REV2
Edgecore Networks Corporation 2.4GHz 300Mbps Wireless PCI Adapter SMCWPCI N5 UG REV2
UserManual.wiki
>
Edgecore Networks
>
SMCWPCI N5 User Manual
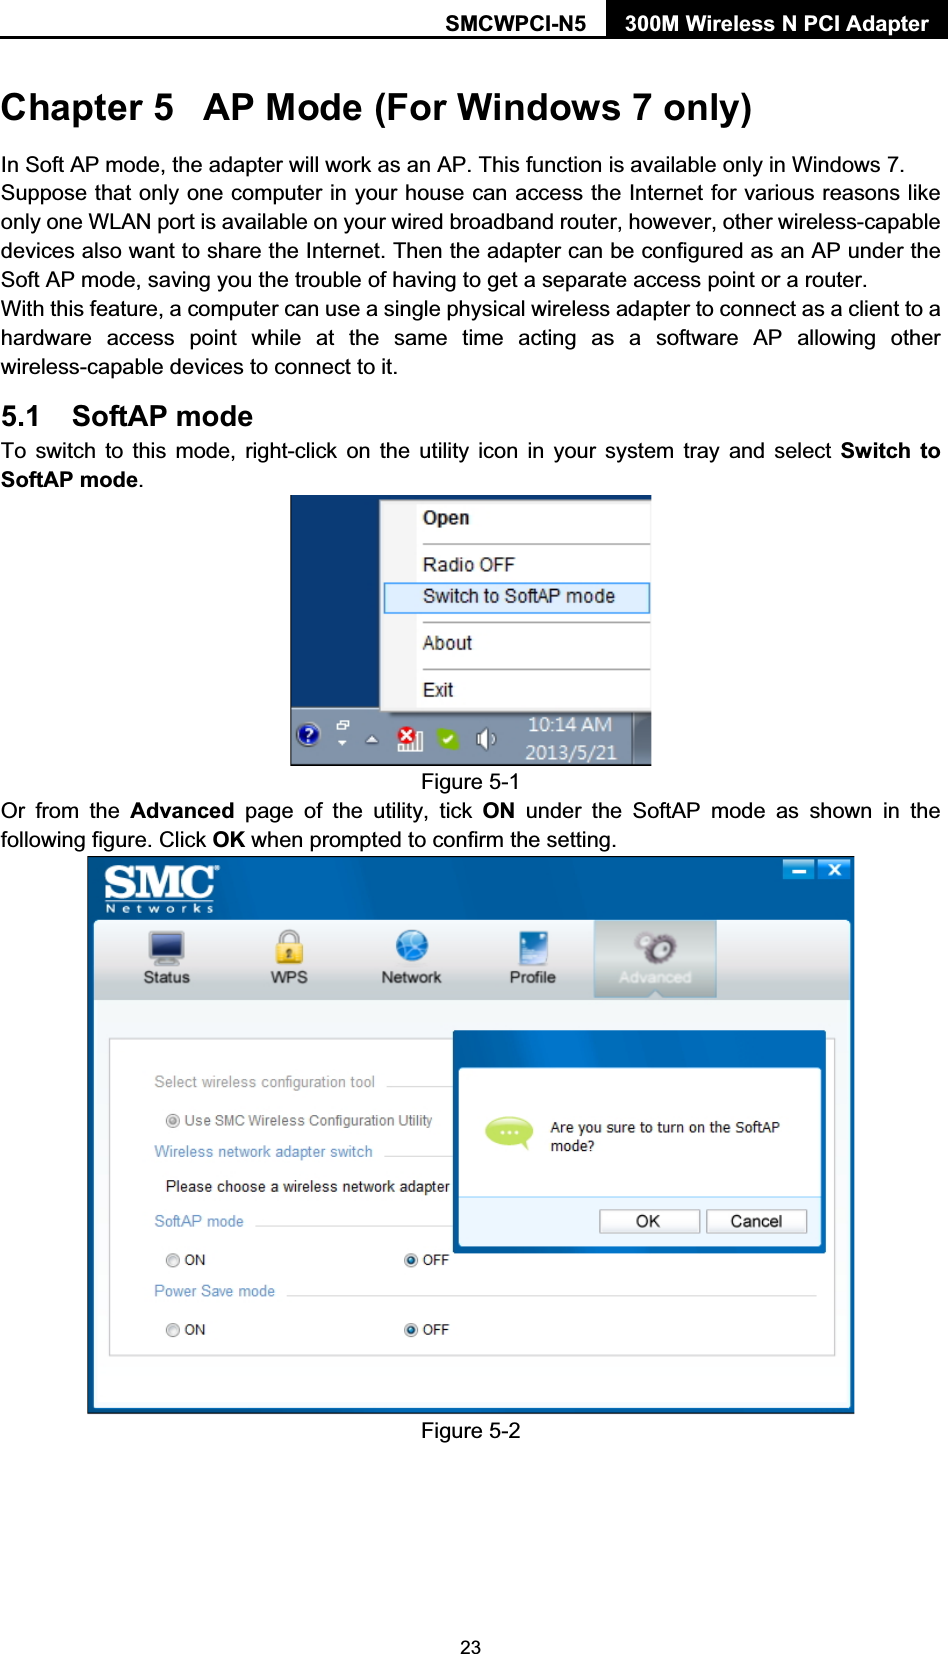
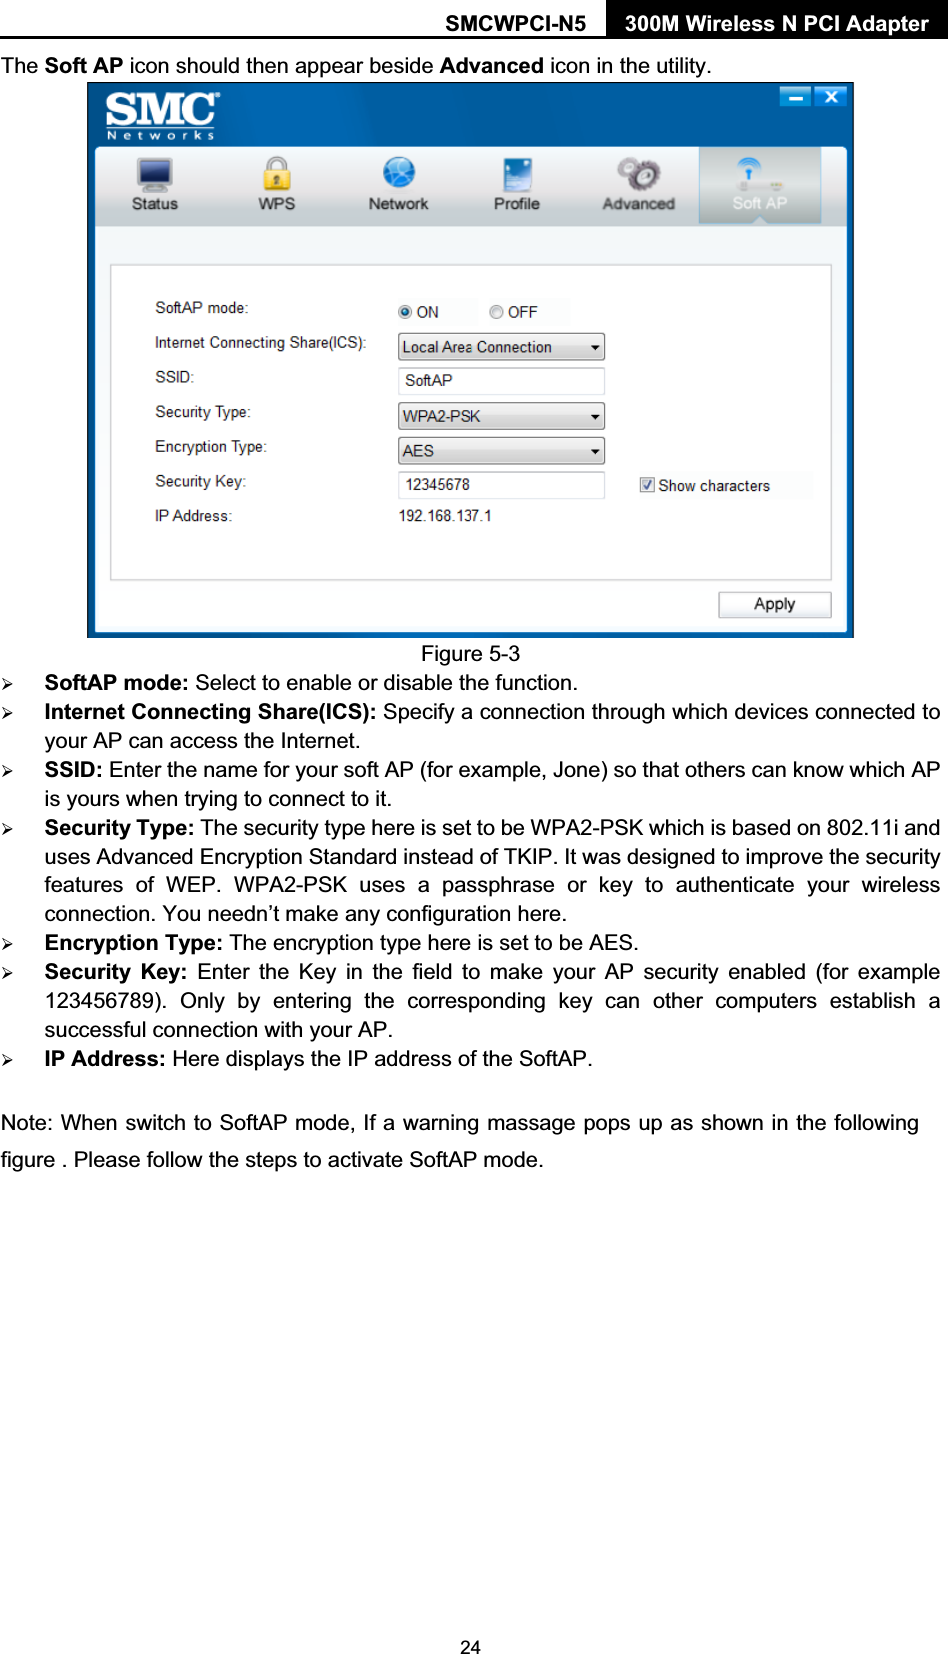
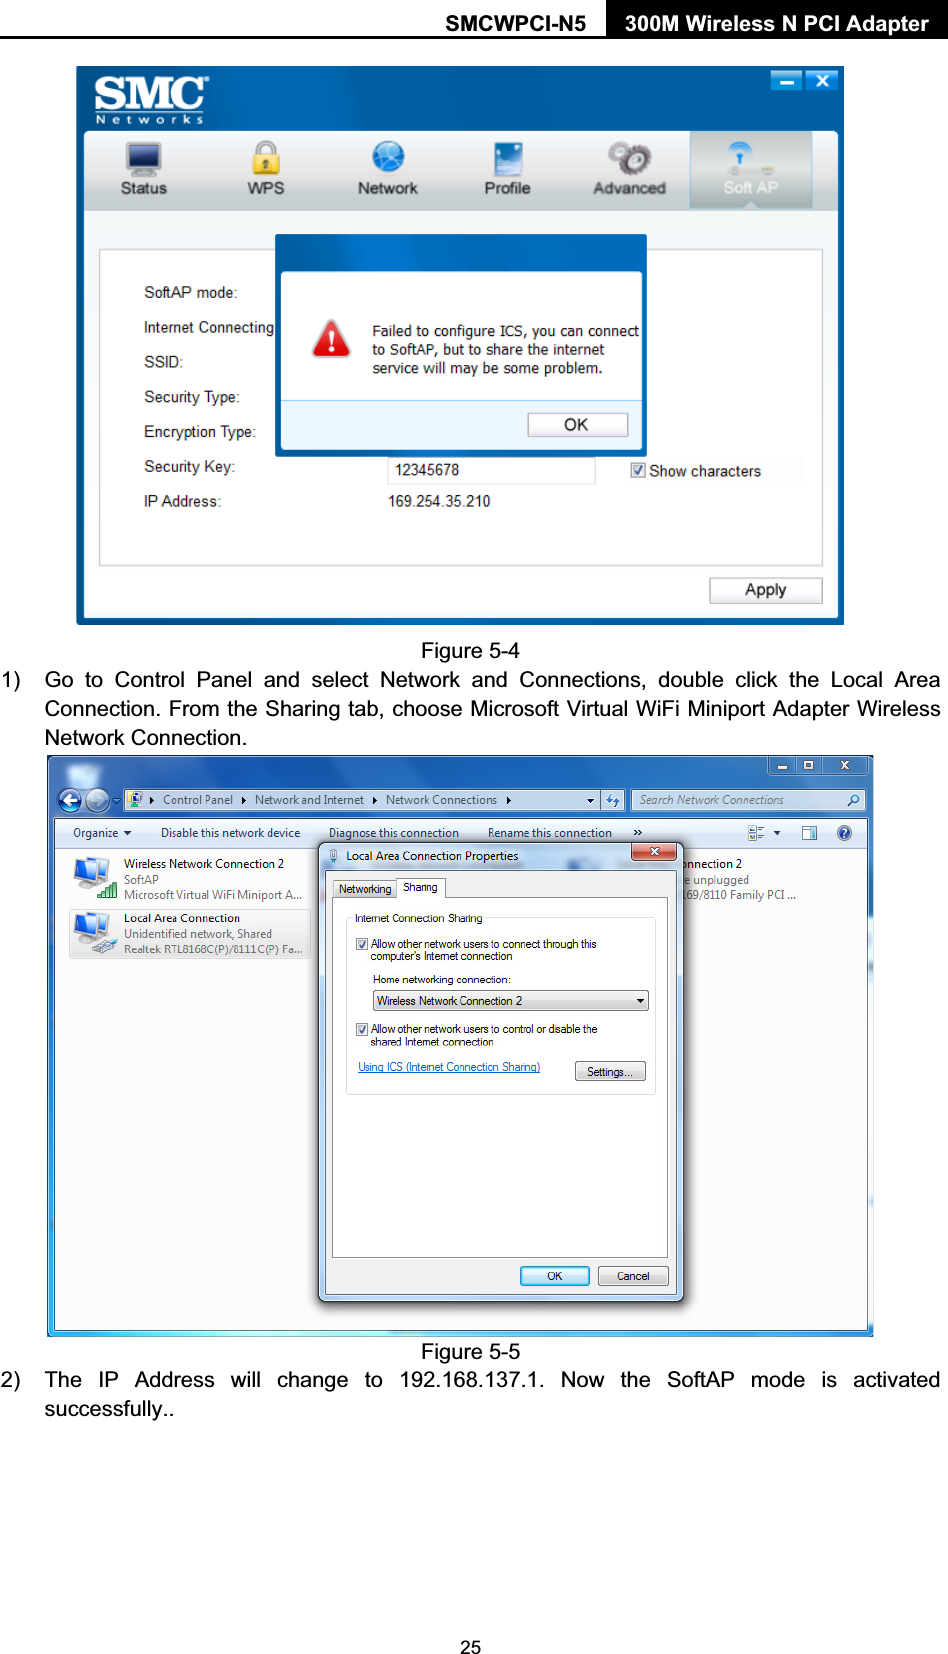
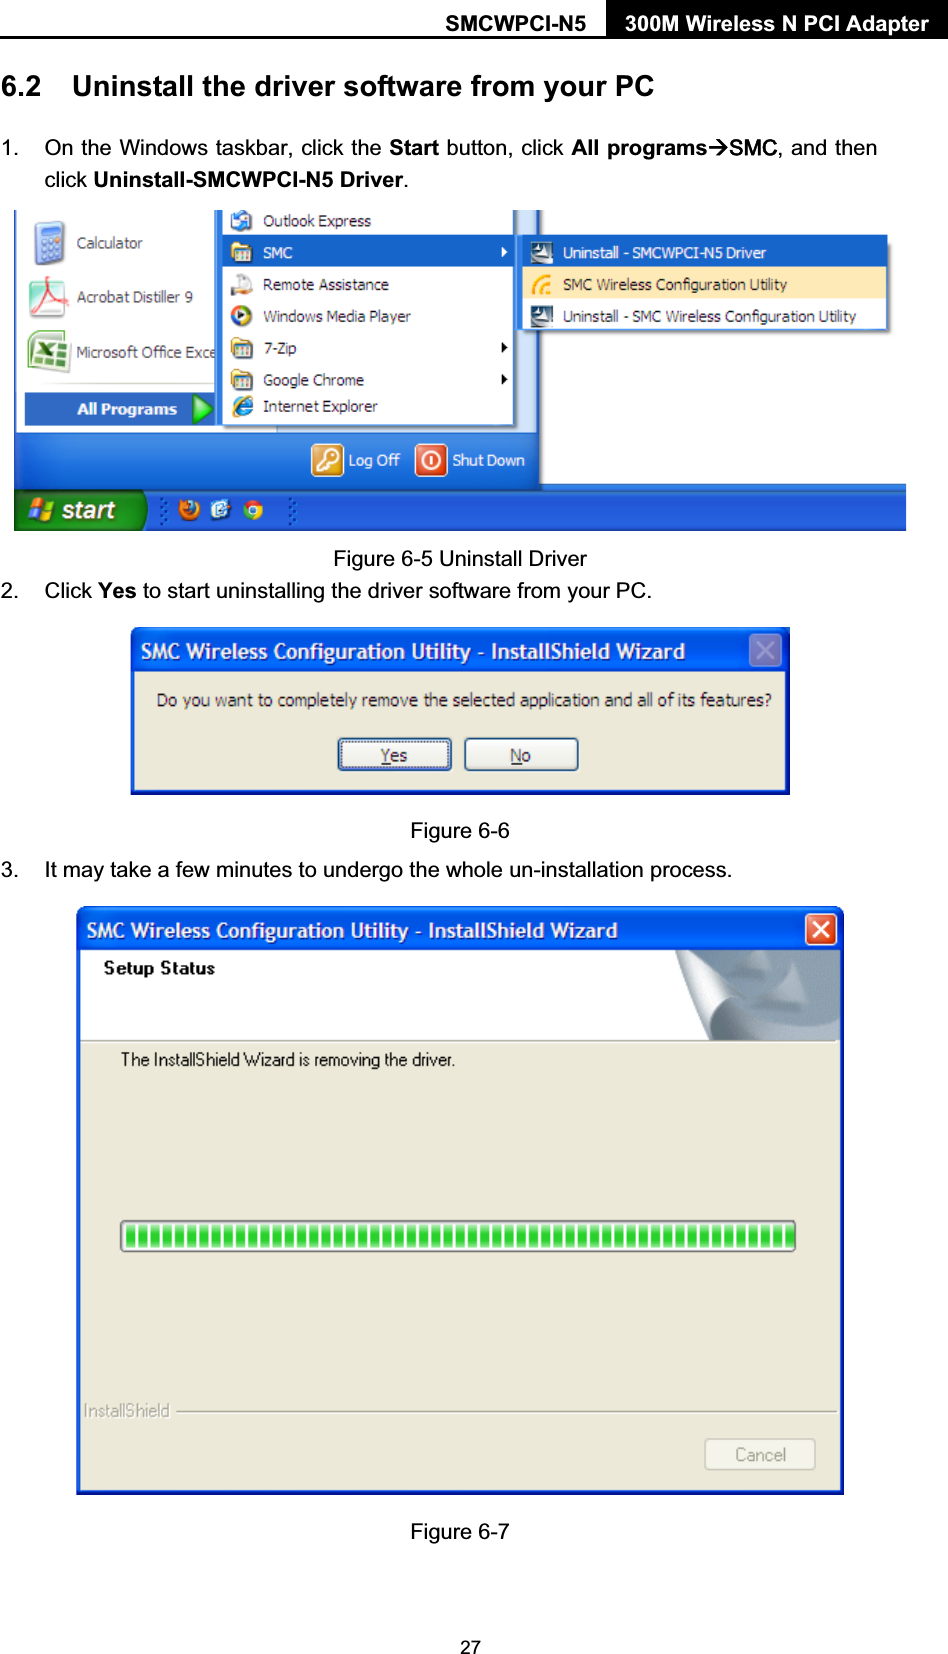
SMCWPCI-N5_UG _REV2
Navigation menu
Upload a User Manual
Namespaces
Wiki Guide
HTML
PDF
Info
Views
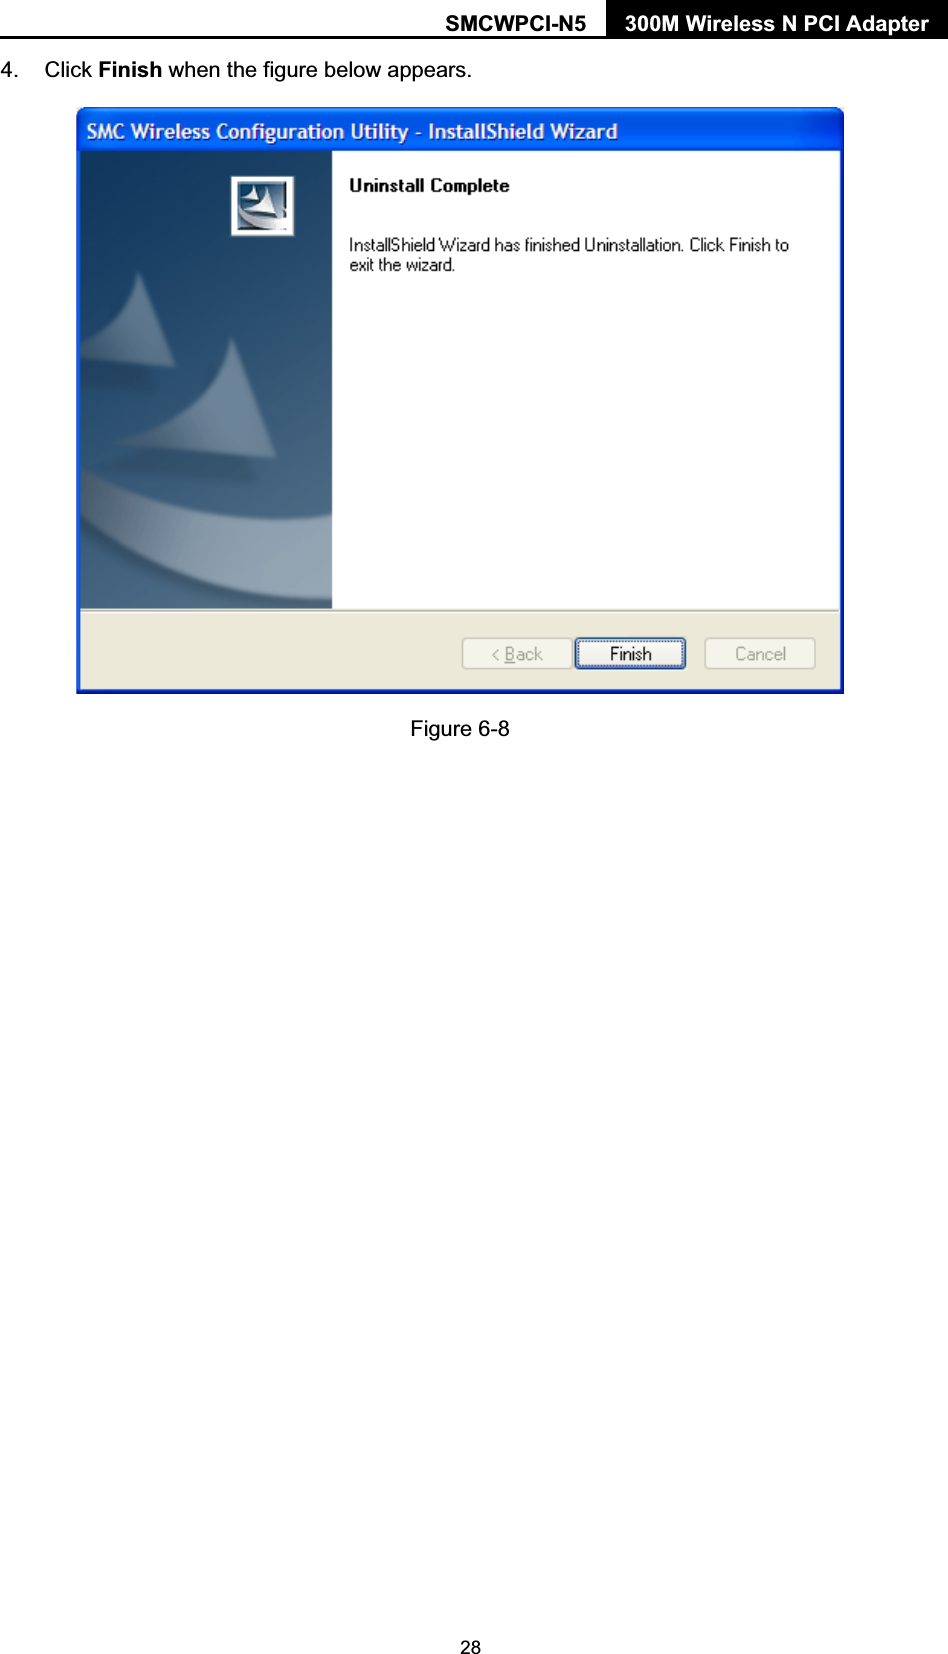
User Manual
Discussion / Help
Navigation
![Bulgarian , SMC Networks , 1999/5/EC. Czech esky SMC Networks tímto prohlašuje, že tento Radio LAN device je ve shod se základními požadavky a dalšími píslušnými ustanoveními smrnice 1999/5/ES. Danish Dansk Undertegnede SMC Networks erklærer herved, at følgende udstyr Radio LAN device overholder de væsentlige krav og øvrige relevante krav i direktiv 1999/5/EF Dutch Nederlands Hierbij verklaart SMC Networks dat het toestel Radio LAN device in overeenstemming is met de essentiële eisen en de andere relevante bepalingen van richtlijn 1999/5/EG Bij deze SMC Networks dat deze Radio LAN device voldoet aan de essentiële eisen en aan de overige relevante bepalingen van Richtlijn 1999/5/EC. English Hereby, SMC Networks, declares that this Radio LAN device is in compliance with the essential requirements and other relevant provisions of Directive 1999/5/EC. Estonian Eesti Käesolevaga kinnitab SMC Networks seadme Radio LAN device vastavust direktiivi 1999/5/EÜ põhinõuetele ja nimetatud direktiivist tulenevatele teistele asjakohastele sätetele. Finnish Suomi Valmistaja SMC Networks vakuuttaa täten että Radio LAN device tyyppinen laite on direktiivin 1999/5/EY oleellisten vaatimusten ja sitä koskevien direktiivin muiden ehtojen mukainen. French Français Par la présente SMC Networks déclare que l'appareil Radio LAN device est conforme aux exigences essentielles et aux autres dispositions pertinentes de la directive 1999/5/CE German Deutsch Hiermit erklärt SMC Networks, dass sich dieser/diese/dieses Radio LAN device in Übereinstimmung mit den grundlegenden Anforderungen und den anderen relevanten Vorschriften der Richtlinie 1999/5/EG befindet". (BMWi) Hiermit erklärt SMC Networks die Übereinstimmung des Gerätes Radio LAN device mit den grundlegenden Anforderungen und den anderen relevanten Festlegungen der Richtlinie 1999/5/EG. (Wien) Greek !##$%*<= ?@ J$% QXZ[\]X SMC Networks ^$#_%@* [J* radio LAN device ]\??[Z`_%@JX* QZ[] J*] [\]*_^@*] XQX*J$]@*] <X* J*] #[*Q@] ]{@J*<@] ^*XJX|@*] J$] [^$}*X] 1999/5/@<. Hungarian Magyar Alulírott, SMC Networks nyilatkozom, hogy a Radio LAN device megfelel a vonatkozó alapvetõ követelményeknek és az 1999/5/EC irányelv egyéb elõírásainak. Italian Italiano Con la presente SMC Networks dichiara che questo Radio LAN device è conforme ai requisiti essenziali ed alle altre disposizioni pertinenti stabilite dalla direttiva 1999/5/CE.](https://usermanual.wiki/Edgecore-Networks/SMCWPCI-N5/User-Guide-2018920-Page-6.png)