EpiCom SXT-800U CDMA 1x WLL Terminal User Manual Terminal
EpiCom Co., Ltd. CDMA 1x WLL Terminal Terminal
UserManual.wiki
>
EpiCom
>
SXT 800U User Manual
Users Manual
Navigation menu
Upload a User Manual
Namespaces
Wiki Guide
HTML
PDF
Info
Views
User Manual
Discussion / Help
Navigation


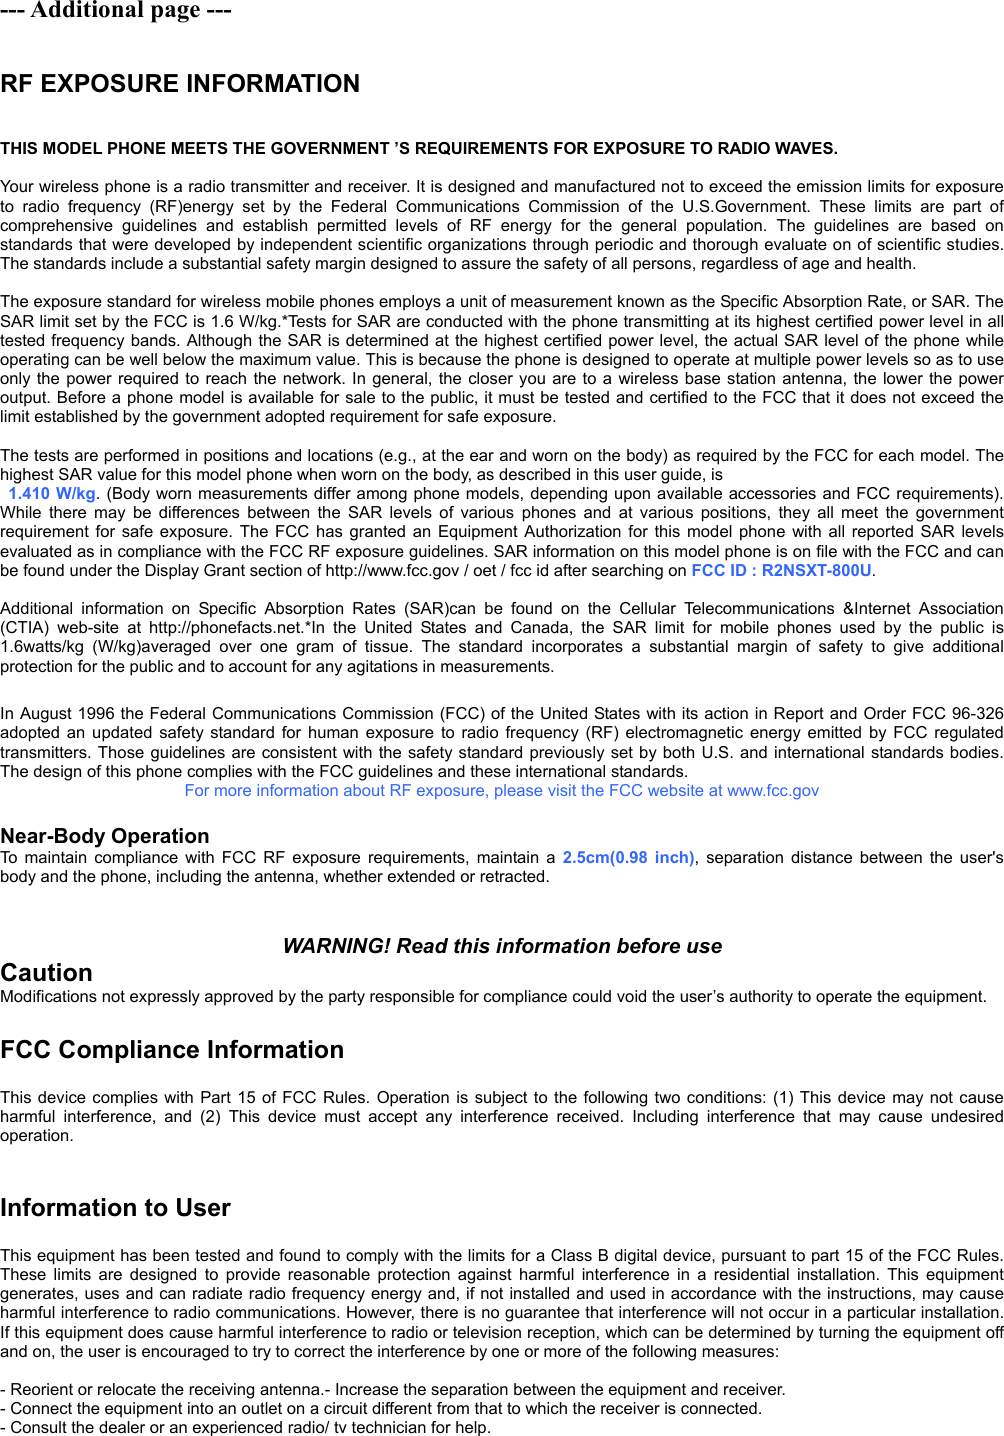
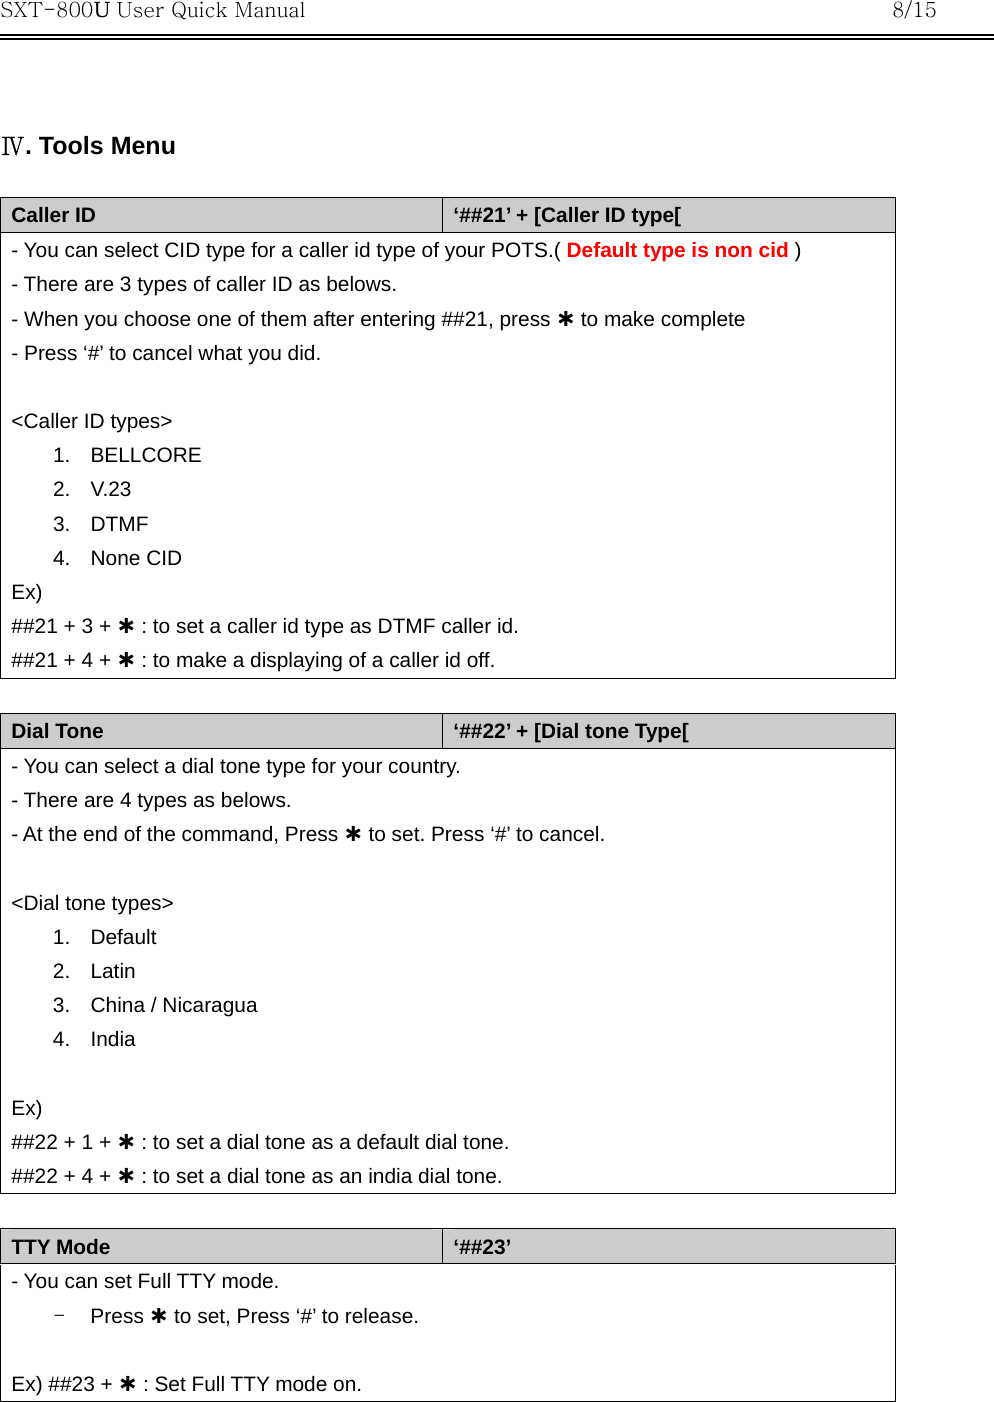
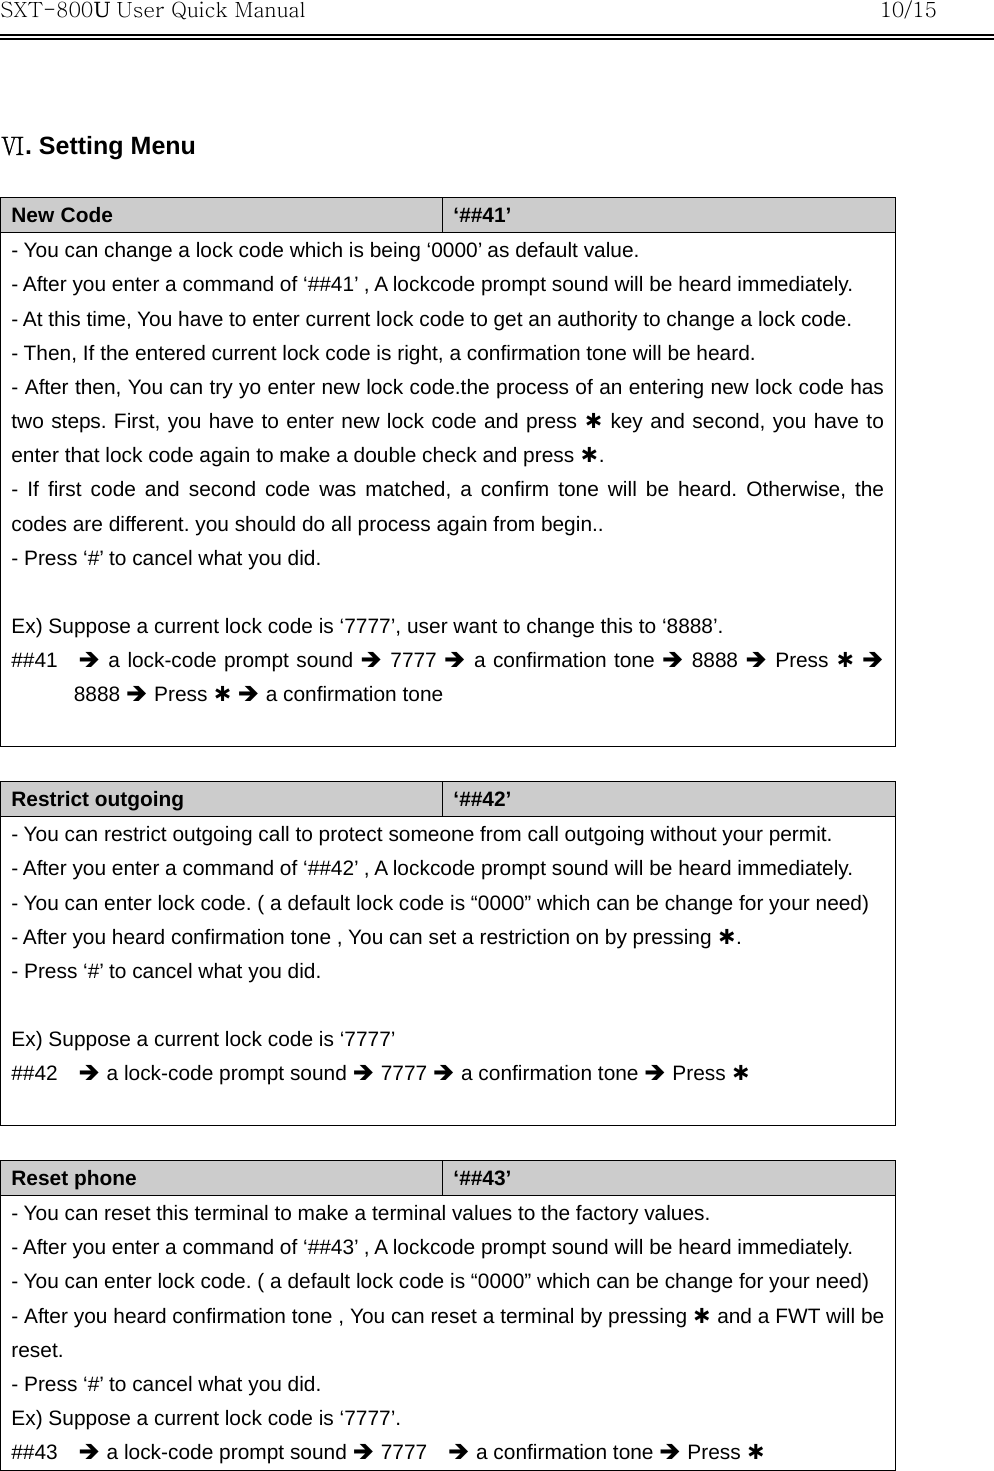
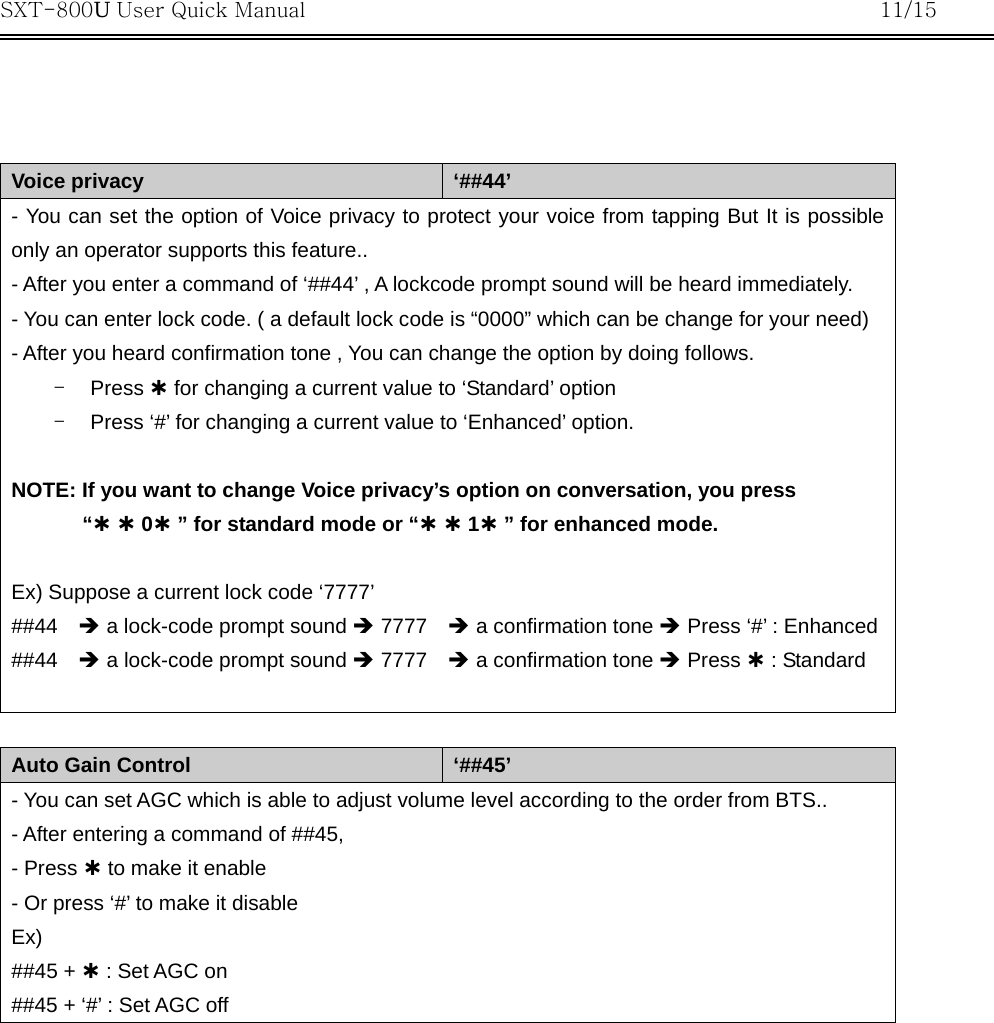
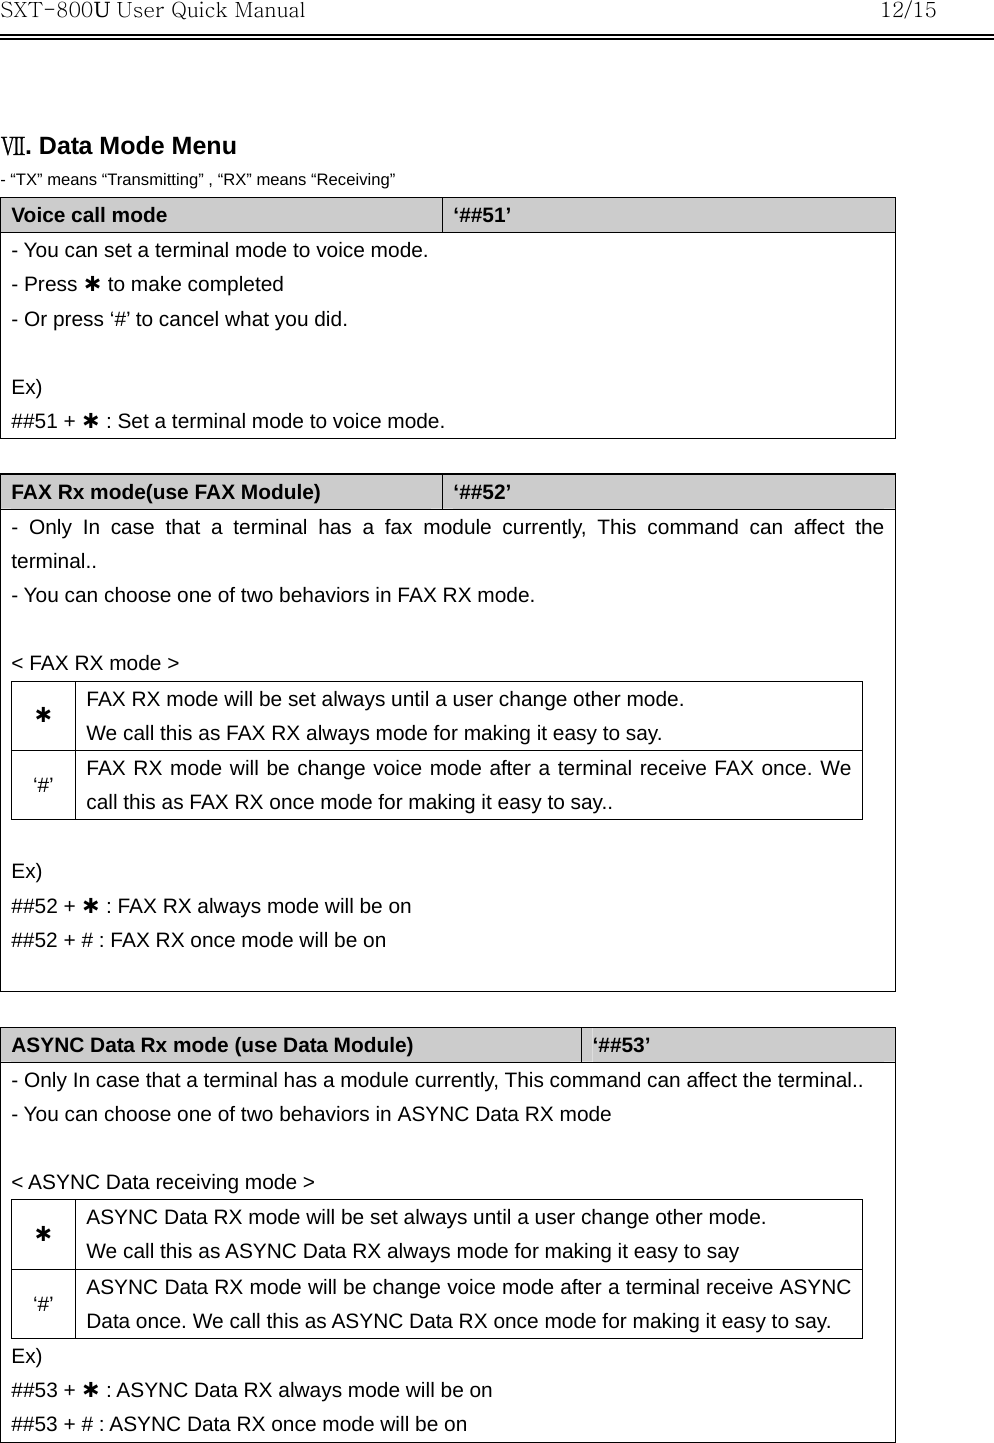
![SXT-800U User Quick Manual 3/15 1. New Code 2. Restrict outgoing 3. Reset Phone 4. Voice Privacy 5. Auto gain control 4. Setting 1. Voice Call Mode 2. FAX Rx mode(use fax module) 3. ASYNC Data Rx mode(use data module) 4. PC FAX Rx mode 5. PC ASYNC Data Rx mode 6. FAX Tx mode(use fax module) 7. ASYNC Data Tx mode(use data module) 8. FAX Type Setting 5. Data Mode 9. FAX only Ⅱ. Hidden Menu SIO ‘##01’ + [ Functions ] - You can change SIO configuration for your needs. - As belows, SIO configuration has a DM/DS and port rate information. - You can choose one of configurations listed at below table.. - After then, press À to make done. - Otherwise rather than pressing À , the values will be back originally. That means “Cancel” for what you did. <Configuration list> 1 UART1 115,200 bps Serial DM to PC 2 UART1 9,600 bps Serial DS to PC 3 UART1 19,200 bps Serial DS to PC 4 UART1 38,400 bps Serial DS to PC 5 UART1 115,200 bps Serial DS to PC 6 UART1 19,200 bps DS to FAX 7 FAX 19,200 bps to PC 8 UART2 38,400 bps Serial DM to PC 9 USB DS Ex) ##01 + 1 + À : To use UART1 for DM with 115,200 bps rate.](https://usermanual.wiki/EpiCom/SXT-800U/User-Guide-499160-Page-3.png)
![SXT-800U User Quick Manual 4/15 Emergency ‘##02’ + [Index] - You can set upto 3 Emergency numbers which has up to 16 digits. - After ##02, Following number is a [ index ] from 1 to 3 associated each emergency number. - After you enter a index, A lockcode prompt sound will be heard immediately. - At this time, You can enter lock code. ( a default lock code is “0000” which can be change for your need) - After you heard confirmation tone for a right lock code, You can set one of Emergency numbers.. - And then press À to store it in a memory for preserving it from power-on/off cycle. - If you press ‘#’ instead of À, What you did will be canceled.. Ex) ##021 Î lockcode prompt sound Î lock code Î911 Î À – Sets and store a emergecny number #1 as 911 Hotline ‘##03’ - In the Hotline Menu, you can set hotline number which will be dialled automatically whenever you pick up handset. - Lockcode prompt sound follows a entering a command of “##03”. - You can enter lock code. ( a default lock code is “0000” which can be change for your need) - After you heard confirmation tone for a lock code , You can set a Hotline number.. - And then press À to store it in a memory for preserving it on power-on/off cycle. - If you press ‘#’ instead of À, it will be canceled. Ex) ##03 Î enter lock code Î 39533447 + À – Sets and store a hotline as 39533447. Mirroring ( will be used in a factory ) ‘##04’ - In the Mirroring menu, you can backup/restore system configuration values of Terminal. - Lockcode prompt sound follows a entering a command of “##04”. - You can enter lock code. ( a default lock code is “0000” which can be change for your need) - After you heard confirmation tone for a lock code , You can press À for backing up and ‘#’ for restoring a stored values. - if it is succeeded, a confirmation tone will be heard and after then, a terminal will be reset. Ex) ##04 Î enter lock code Î À – Performs backing up system values ##04 Î enter lock code Î ‘#’ – Performs restoring system values .](https://usermanual.wiki/EpiCom/SXT-800U/User-Guide-499160-Page-4.png)
![SXT-800U User Quick Manual 5/15 A Key ‘##05’ - In the A Key menu, you can set 26 digits A Key on FWT.. - A short go-ahead tone follows a entering a command of “##05”. - Input A Key of 26 digits . - Pressing À will store A Key safely on FWT’s memory.. - If the entered A key is valid, you can hear confirmation tone. Otherwise, you can not.. Ex) ##05 Î 26 digits (20 digits + 6 digits checksum) Î À Master Clear ( will be used in a factory ) ‘##06’ + [ DS Baud Rate ] - Before packing just a made product, In a factory, a phone has to makes changed value for testing to a default values . At this time, this commands make a FWT has default values predifined by a operator. a command of À or ‘#’ has to follow “##06” for proper DS rate for your system configuration. This option is needed due to FAX usually supports 19,200 rate. - After done, the Terminal will be reset. <Master Clear Mode> À Master clear to 115,200 DS Mode ‘#’ Master clear to 19,200 DS Mode for a FAX Ex) ##06 + À : Master clear with 115,200 option ##06 + ‘#’ : Master clear with 19,200 option Test Call ( will be used in a lab like CDG2 ) ‘##07’ + [Option] Pressing À needs for make completed. [Option] 1 NEW 8K MARKOV 6 FULL TDSO 2 NEW 13K MARKOV 7 SO54 MARKOV 3 8K LOOP BACK 8 SO55 LOOP BACK 4 13K LOOP BACK 9 SORS2 MARKOV 5 SIMPLE TDSO 0 SORS2 MARKOV Ex) ##07+1+ À : Test a call for New 8K MARKOV](https://usermanual.wiki/EpiCom/SXT-800U/User-Guide-499160-Page-5.png)
![SXT-800U User Quick Manual 6/15 Ⅲ. Ring / Sound Menu Ring Type ‘##11’ + [Ring type Index] - In the Ring type menu, you can choose one of 9 ring types. - A ring type index is needed after ##11 and a ring type index has from 1 to 9 linked by a specific ring tone. At this moment, you can listen your choosed ring tone on your speaker or a handset of your POTS. If you choose zero,0, It will be canceled. - During playing a choosed ringtone, Pressing À is needed to make done. Also, choosed ring tone will be stored on a FWT’s memory. If you press ‘#’ instead of À, it will be canceled. Ex) ##11+0: Canceled what you did. it will make a terminal idle. ##11+1 Î assigned ring tone Î À : Index 1’s ring tone will be selected. ##11+9 Î assigned ring tone Î À : Index 9’s ring tone will be selected. ##11+9 Î assigned ring tone Î # : Canceled what you did. Volume level ‘##12’ - With this command, You can stay on a volume level menu until you press ‘0’ to save a adjusted volume level. - During staying on a volume level menu, Whenever you press À key, A voice volume will be increased. When you press ‘#’ key, A voice volume will be decreased. Also a volume level will be started again from a minimum level by a pressing À when last volume level reached maximum level. - When you meet your voice volume level, press ‘0’ to save and make done. - If you want to cancel what you did, just press other key rather ‘0’. DTMF ‘##13’ + [ DTMF Type] - In the DTMF menu, you can select DTMF tone length. - Press À to make it long, press ‘#’ to make it short. Ex) ##13 + À : To make DTMF tone long ##13 + # : To make DTMF tone short](https://usermanual.wiki/EpiCom/SXT-800U/User-Guide-499160-Page-6.png)
![SXT-800U User Quick Manual 7/15 1 Min Alert ‘##14’ + [On/Off] - you can set 1 Min alert on or off. If this option set on, An alert tone will be heared every 1 minute during a call. - To make this alert on, a pressing À key has to follow ##14. - To make this alert off, a pressing ‘#’ key has to follow ##14. Ex) ##14 + À : to make a 1 min alert on ##14 + # : to make a 1 min alert off Service Alert ‘##15’ + [On/Off] - You can set Service alert on or off. If this option set on, An alert tone will be heared whenever FWT lost a signal or is getting a network. - To make this alert on, a pressing À key has to follow ##15. - To make this alert off, a pressing ‘#’ key has to follow ##15. Ex) ##15 + À : to make a service alert on ##15 + # : to make a service alert off](https://usermanual.wiki/EpiCom/SXT-800U/User-Guide-499160-Page-7.png)
![SXT-800U User Quick Manual 9/15 Ⅴ. Time Menu Alarm ‘##31’ + [HHMM] - You can set the alarm time. - After entering ##31, immediately short go-ahead tone will be heard. - Enter 4-digits for an alarm time like as ‘HH-MM’ of 24 hour type. - After entering an alarm time. press À to alarm on. - To turn an alarm off, Press ‘#’ key after entering this command of ##31. Ex) ##31 + 1540 + À : to set an alarm time to PM 3 oclock 40 minute. . ##31 + # : to cancel predefined alarm time. ( means turn an alarm off ) Auto send time ‘##32’ + [Index of Time Table] - You can set auto send time which is setting as 5 secs defaultly.. - Auto send time will be able to be set as from 1 sec to 10 secs according to a index as below..- After entering a time index, press À to set. - Press ‘#’ to cancel what you did, <Time table> 1 2 3 4 5 6 7 8 9 0 1sec 2sec 3sec 4sec 5sec 6sec 7sec 8sec 9sec 10sec Ex) ##32 + 7 + À : to set an auto send time to 7 secs. . ##32 + 0 + À : to set an auto send time to 10 secs Flash time ‘##33’ - To recognize a flash key of your POTS well, you can adjust this period time with an experimental results. - After entering ##33, a short go-ahead tone will be heard. - At this time, you can enter your flash time between 50 ms and 800 ms. - If you entered an excessive time lke more then 800 ms, What you did will be canceled with an alert tone. - To set an entered flash time, Press À. Or press ‘#’ to cancel what you did. Ex) ##33 + 200 + À : to set a flash time to 200 ms](https://usermanual.wiki/EpiCom/SXT-800U/User-Guide-499160-Page-9.png)
![SXT-800U User Quick Manual 15/15 FAX Type ‘##58’ + [ Fax Type] - You can choose one of two fax types according to your service provider. - A.4 and A.7 came from IS707 standard. < FAX Type> À FAX A.4. It usually be used at PC FAX ‘#’ FAX A.7 Ex) ##58À : To set a fax type to A.4 ##58# : To set a fax type to A.7 FAX Only ‘##59’ - Only In case that a terminal has a fax module currently, This command can affect the terminal. - Actually, this mode is included FAX Tx mode and FAX Rx mode. So, At receiving time or sending time, a user is able to send ot receive a fax data freely without any command. - You can set and cancel this mode as a following table. <ASYNC Data Tx mode> À FAX only mode will be set ‘#’ FAX only mode will be canceled. A terminal mode will be back to a previous mode. VIII. Phone Book You can make a quick dial supported up to 99. [Sequence to make it] - pick up the handset. - Press phone number. - Press “À À”. - Press address number. - Press “À À”. - Confirmation tone is heard. Ex) Suppose you want to make a quick dial of 1 memory address for 01032083343 no. 01032083343 Î À À Î 01 Î À À Î confirmation tone. After this, Just pressing ‘1’ for a around 1 sec will make a call to 01032083343 immediately.](https://usermanual.wiki/EpiCom/SXT-800U/User-Guide-499160-Page-15.png)