FUJIFILM Business Innovation YIA-7 Printer cartridge toner level reader User Manual Chapter0
Fuji Xerox Corporation Limited Printer cartridge toner level reader Chapter0
UserManual.wiki
>
FUJIFILM Business Innovation
>
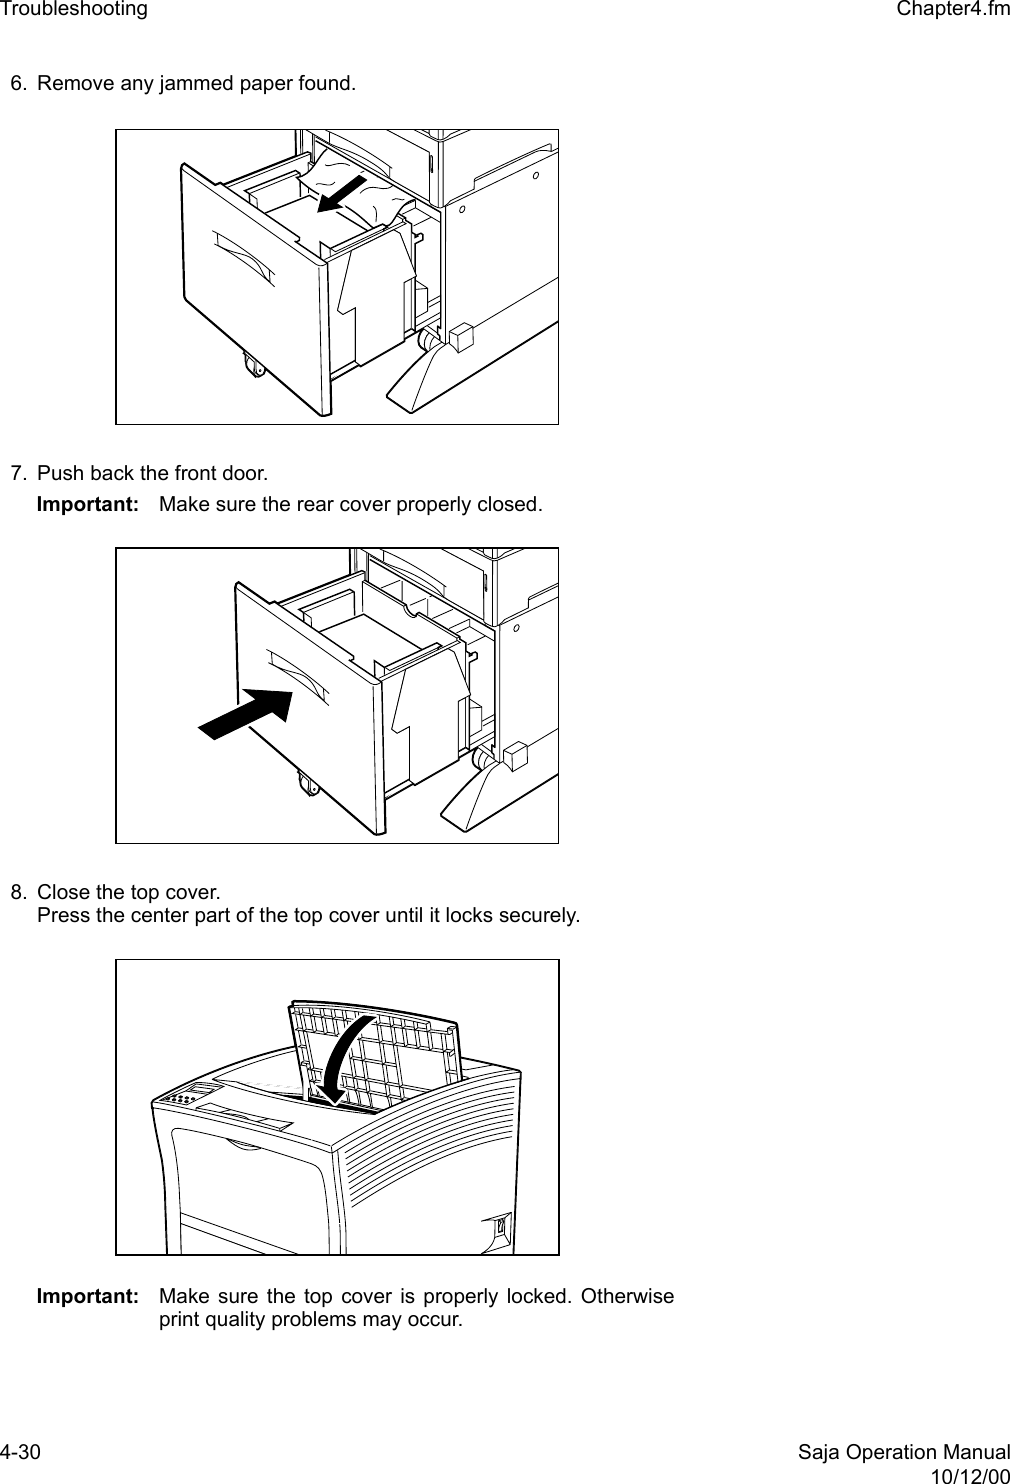
YIA-7 User Manual
>
User Manual Part 2
Contents
1.
User Manual Part 1
2.
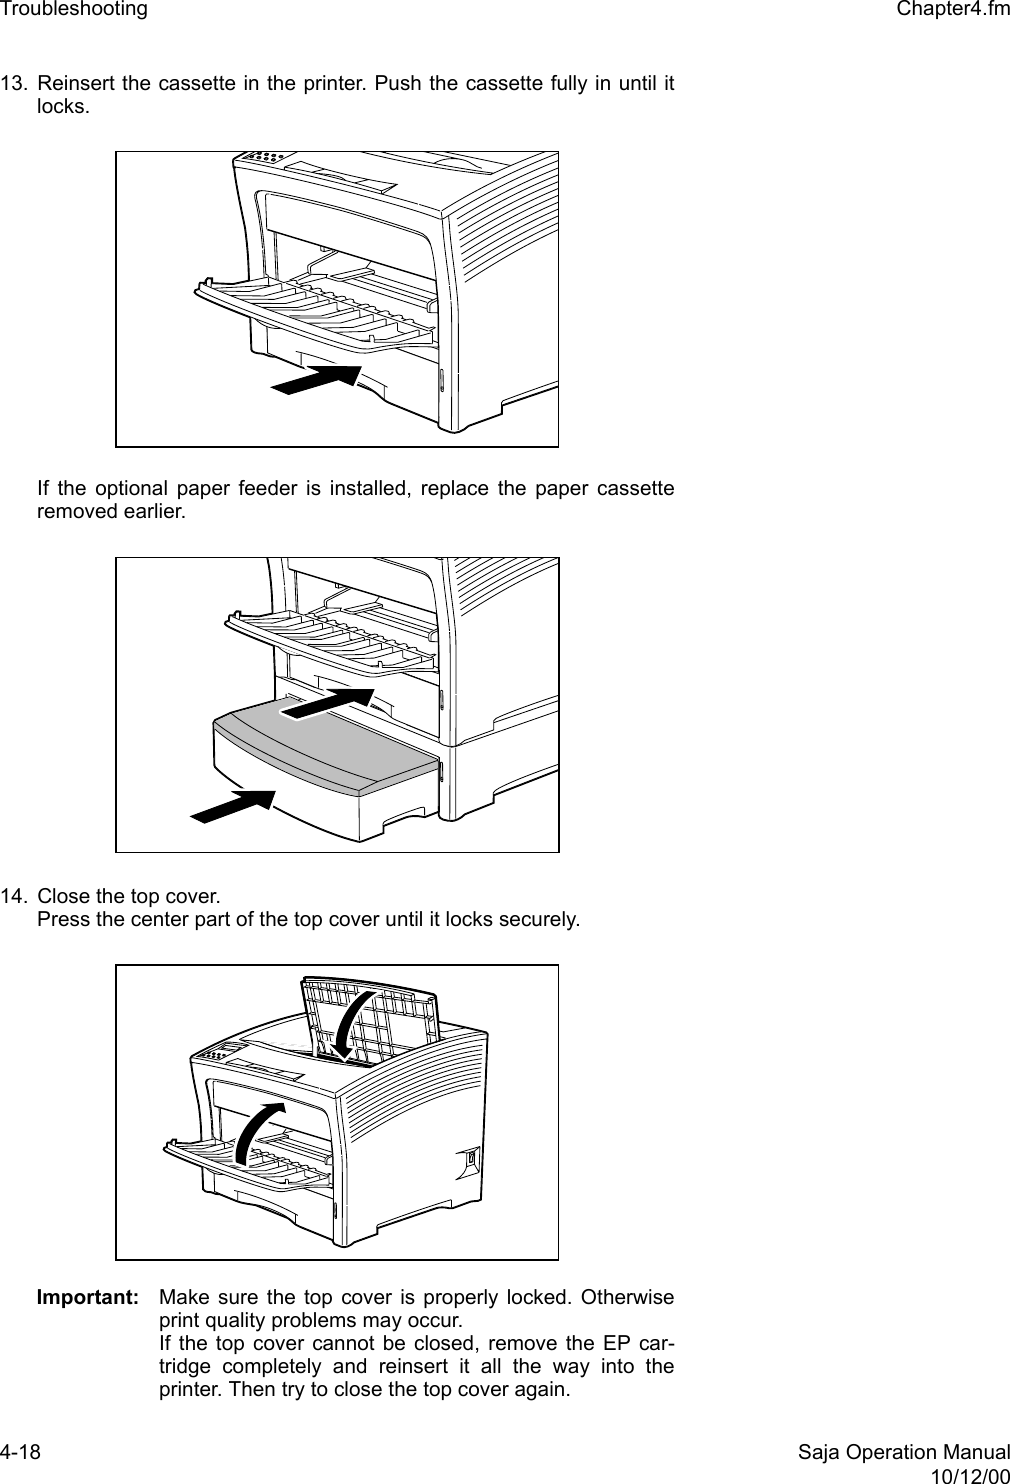
User Manual Part 2
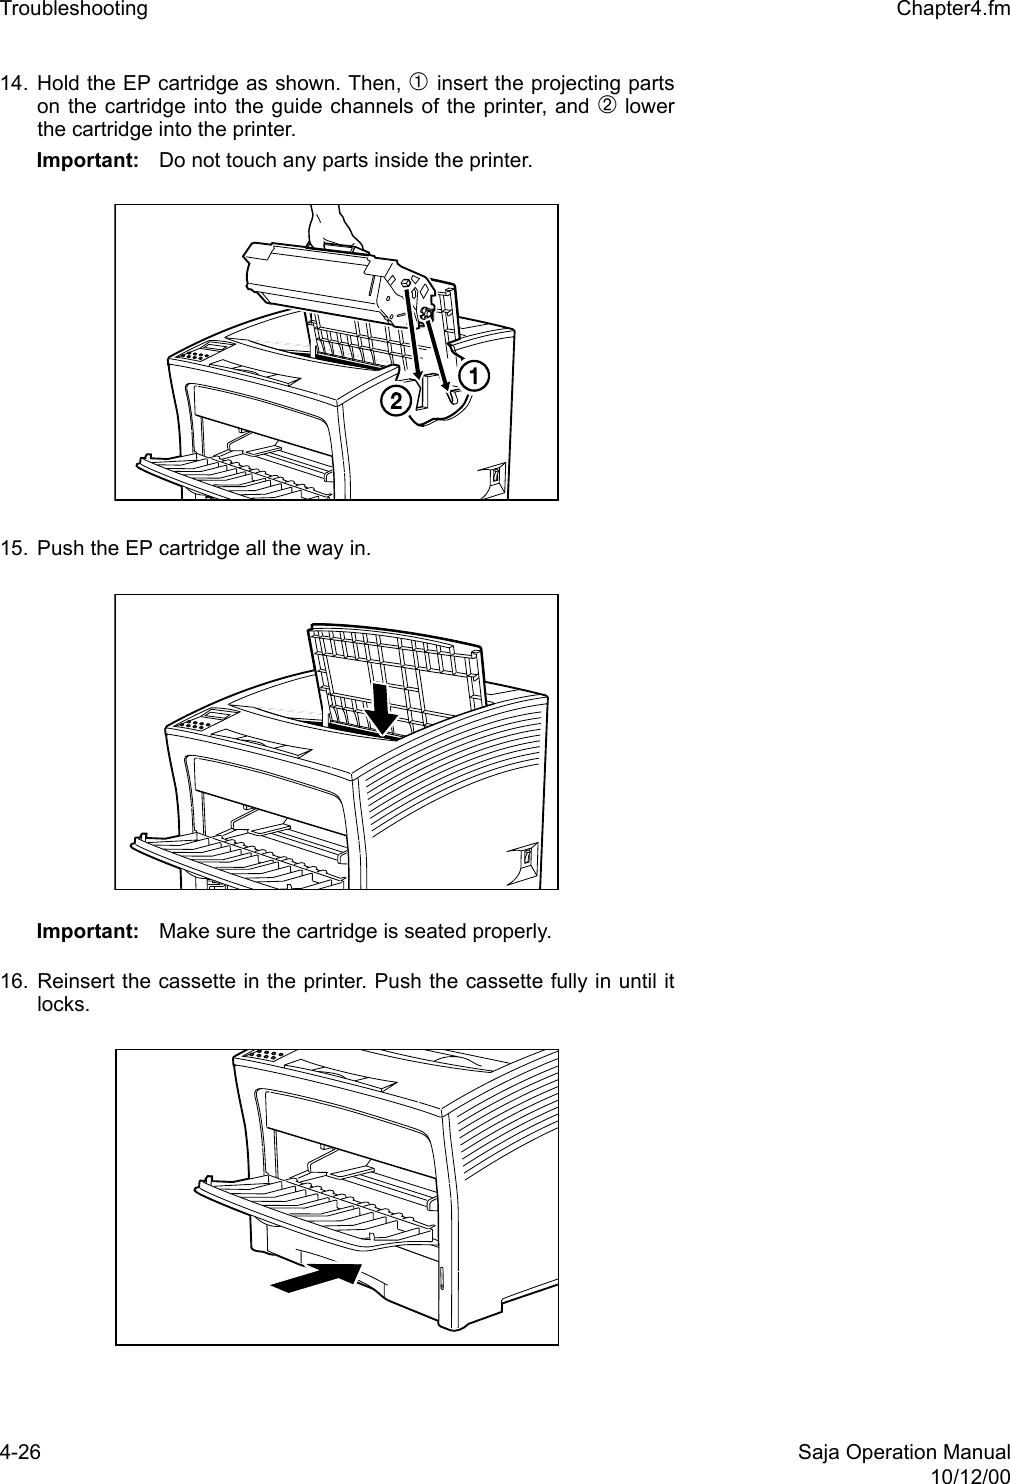
User Manual Part 2
Navigation menu
Upload a User Manual
Namespaces
Wiki Guide
HTML
PDF
Info
Views
User Manual
Discussion / Help
Navigation
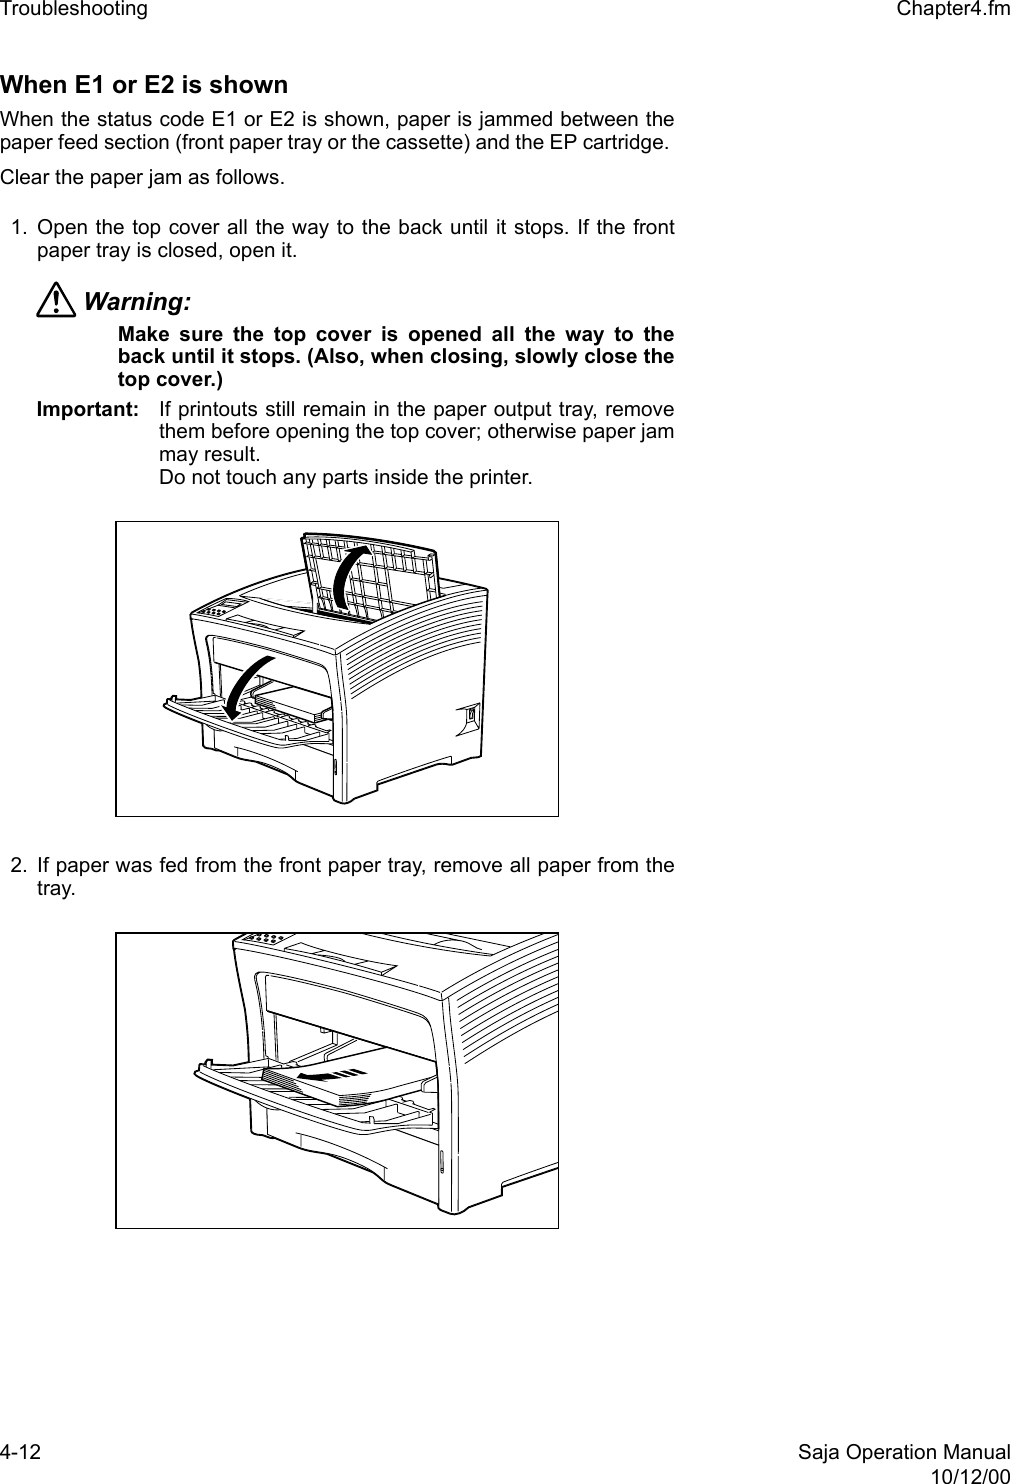
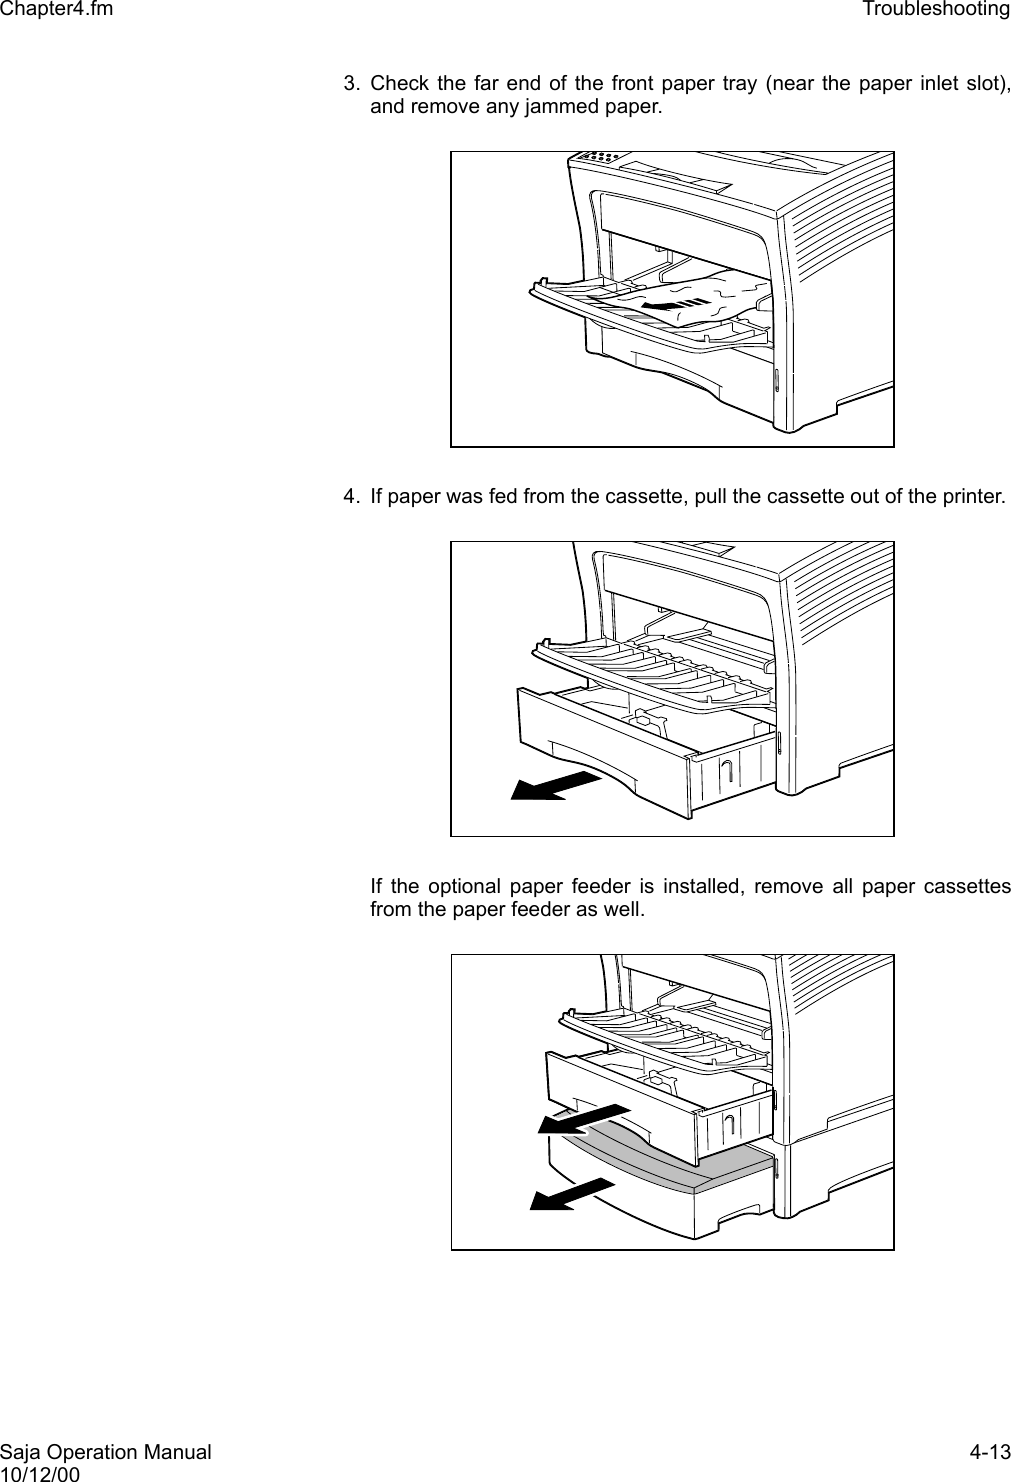
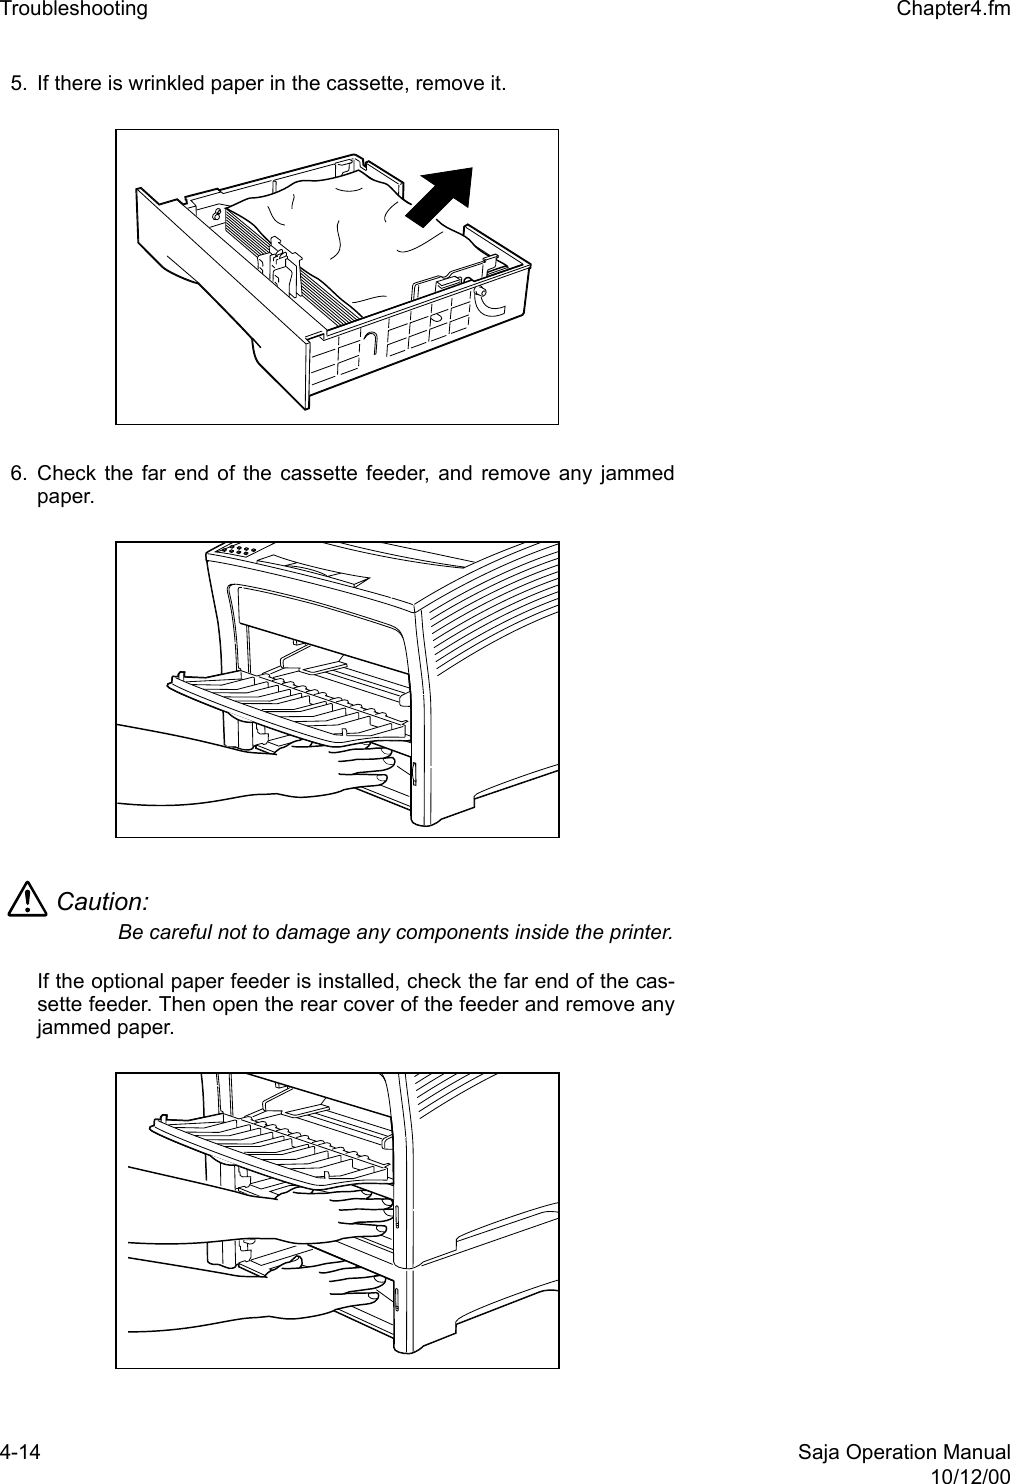
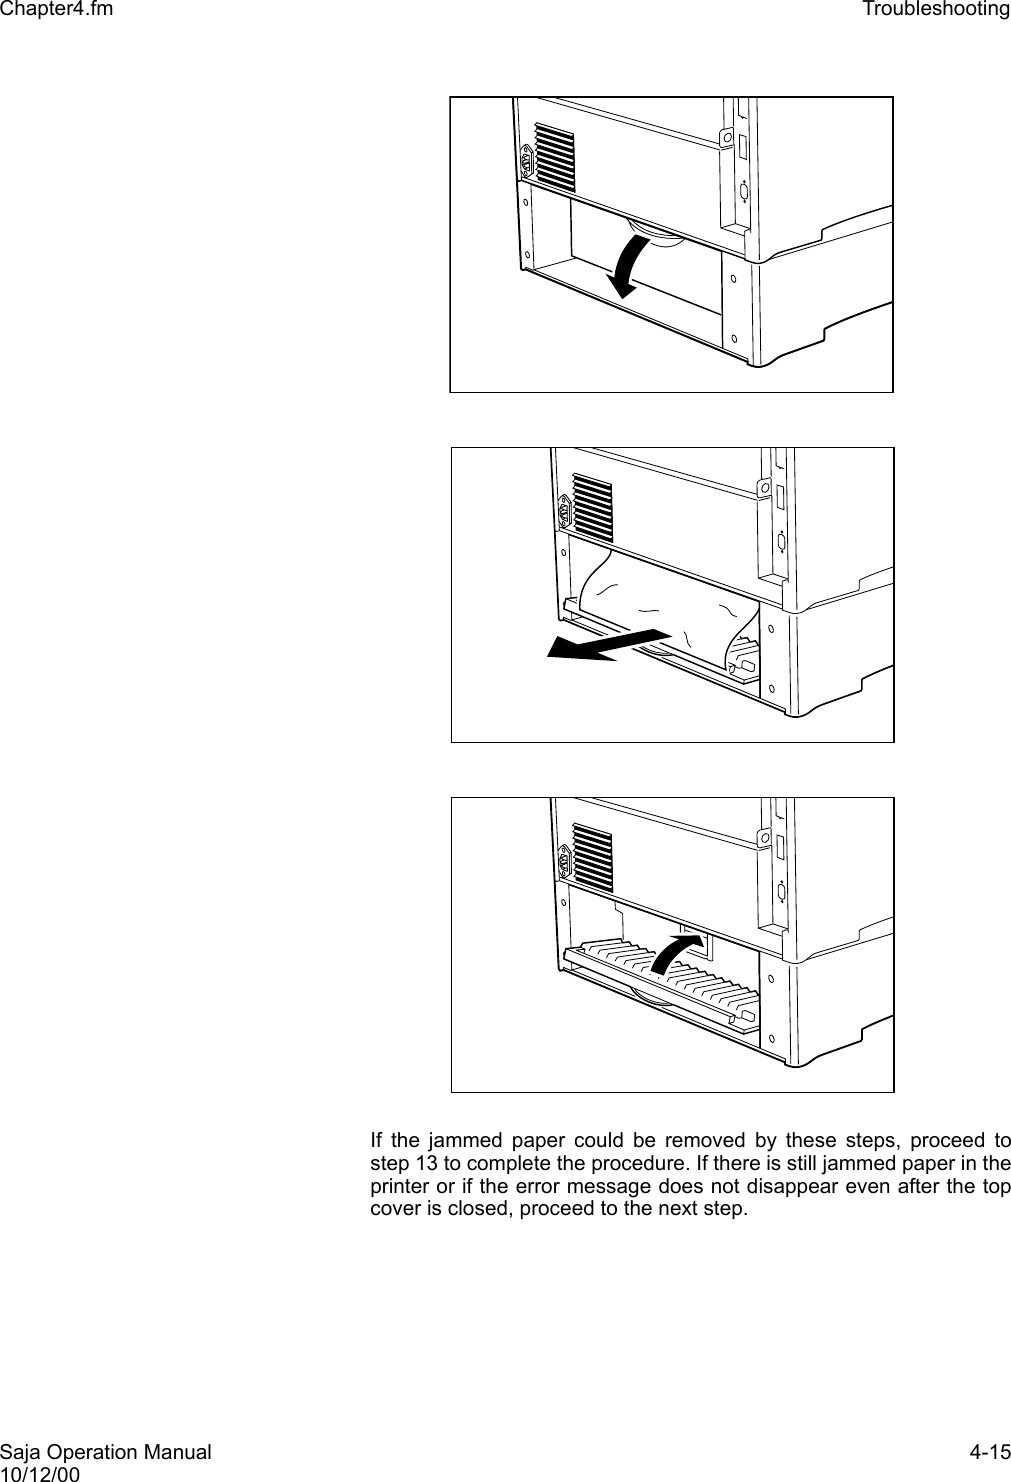
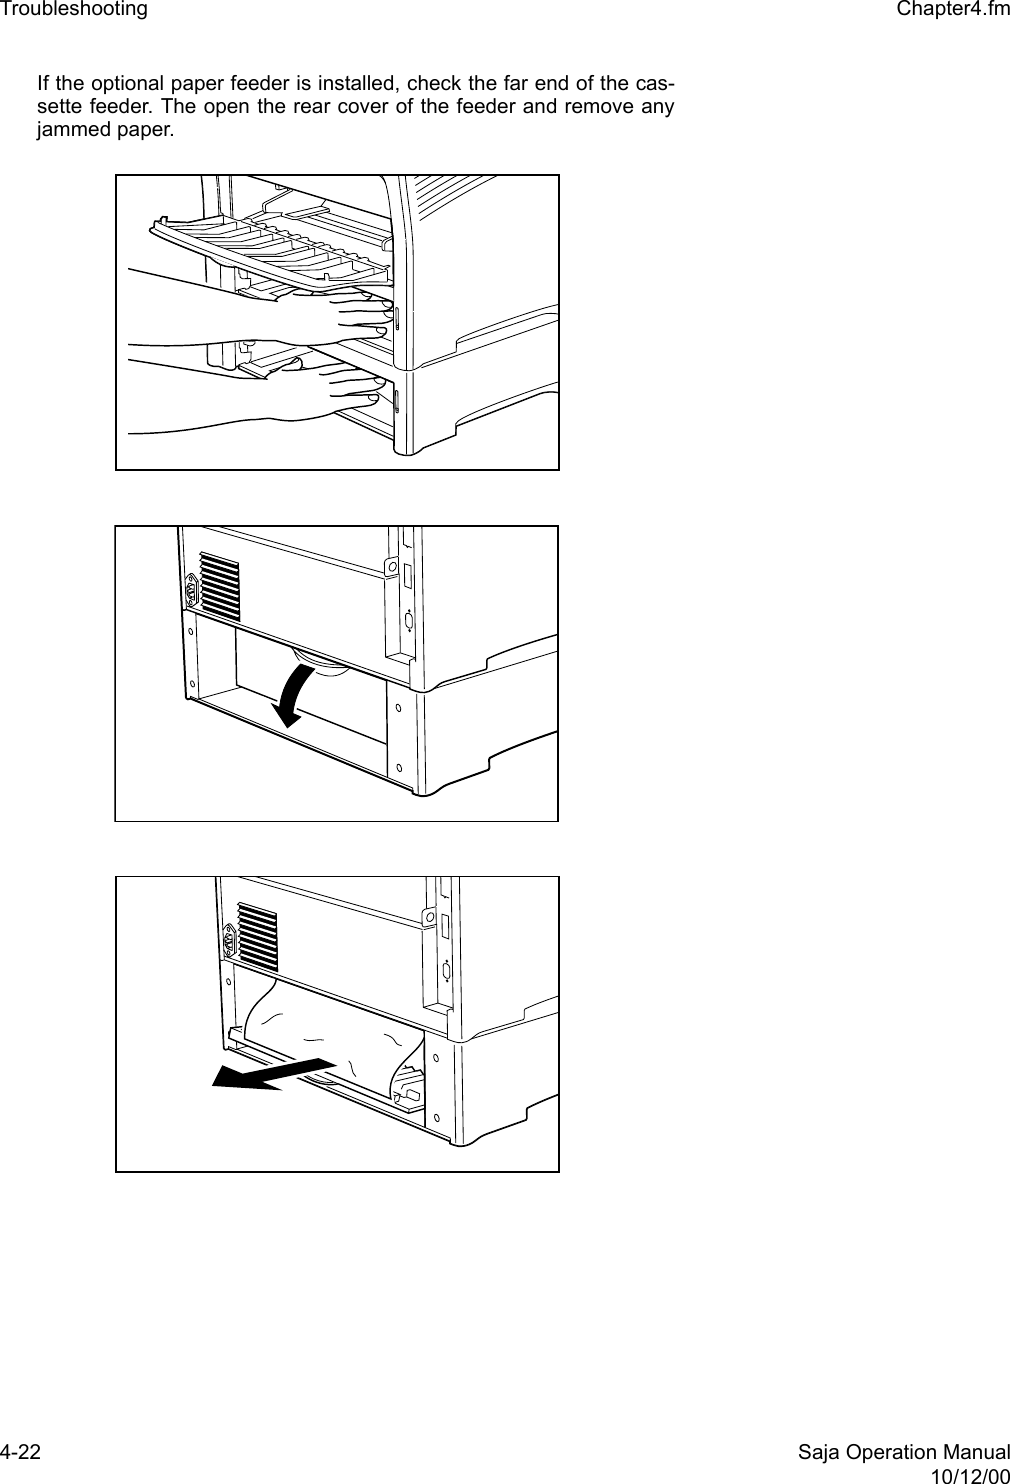
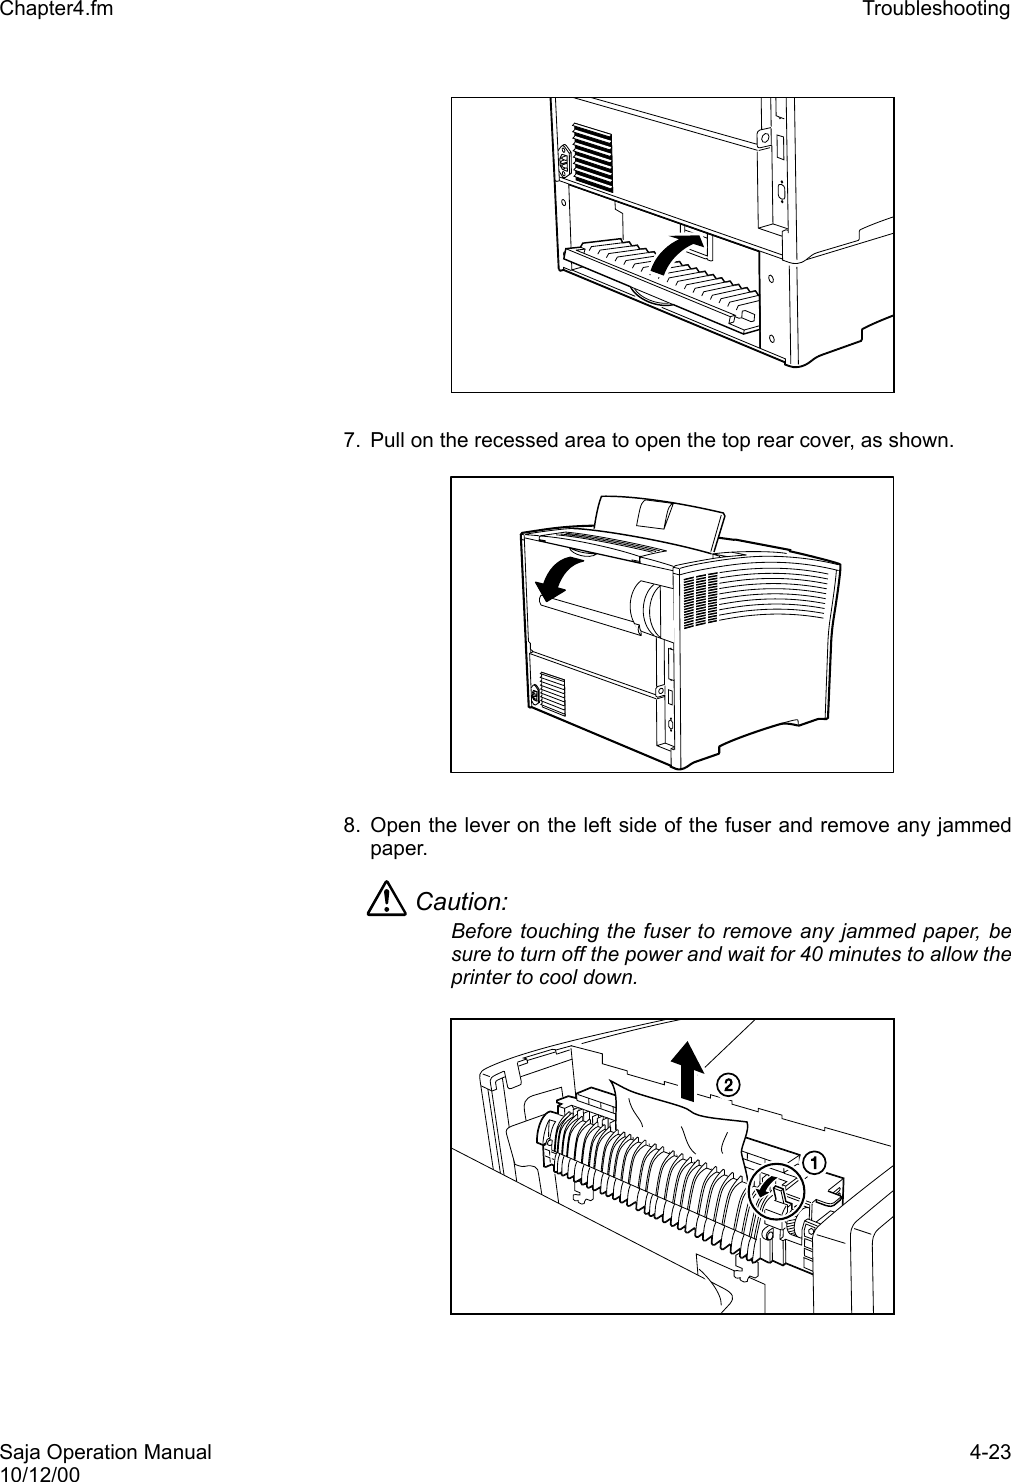
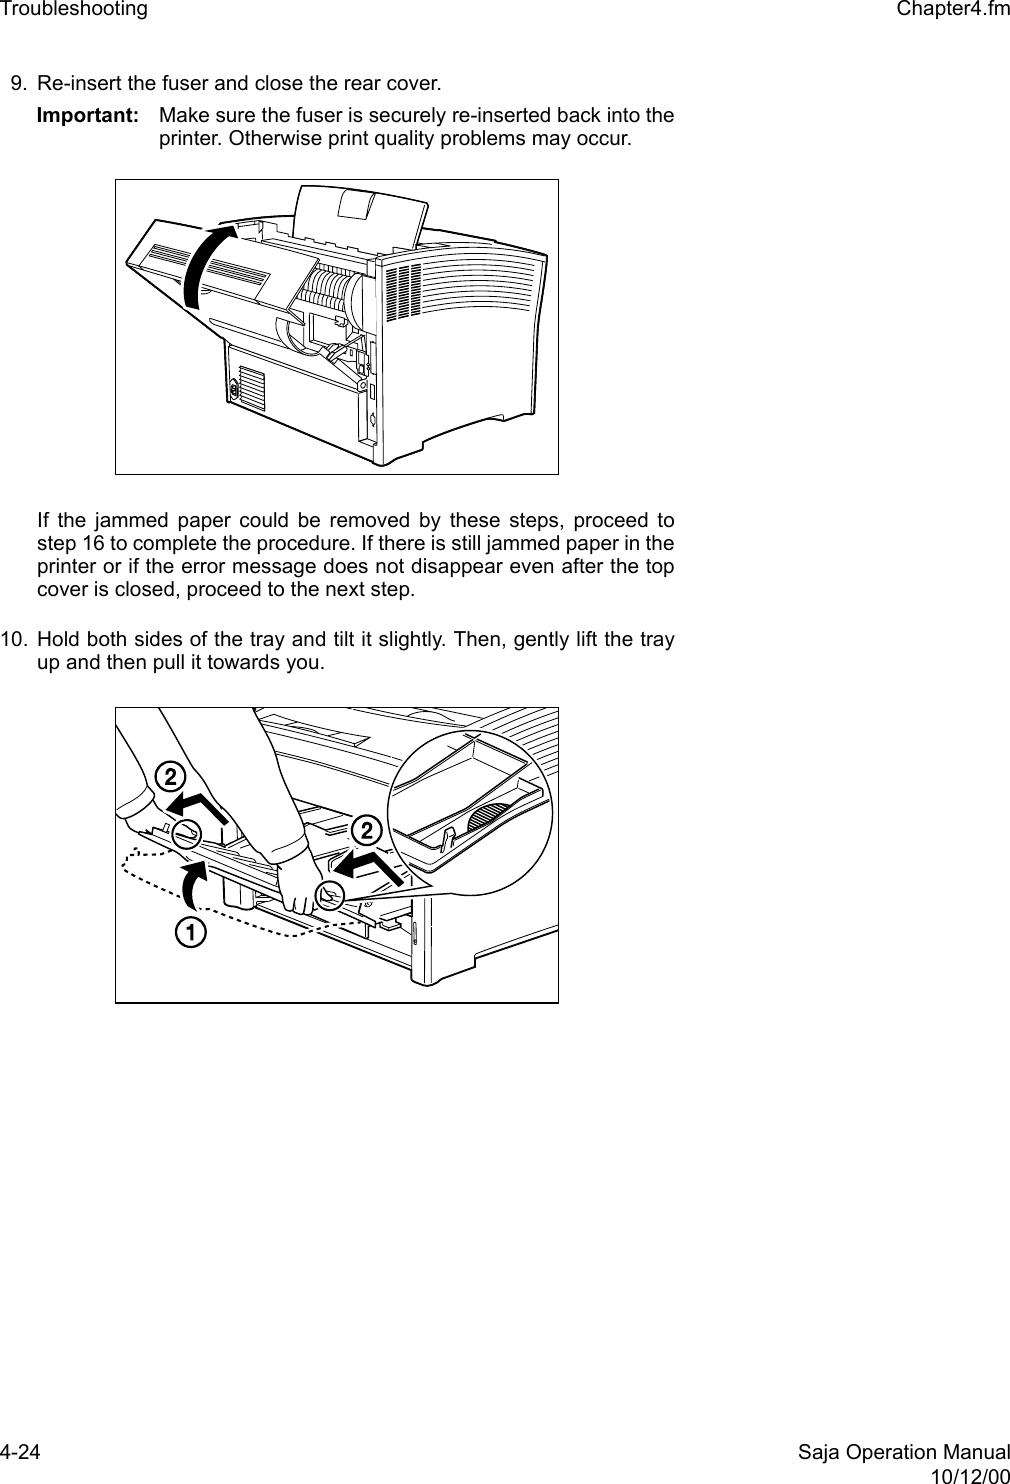
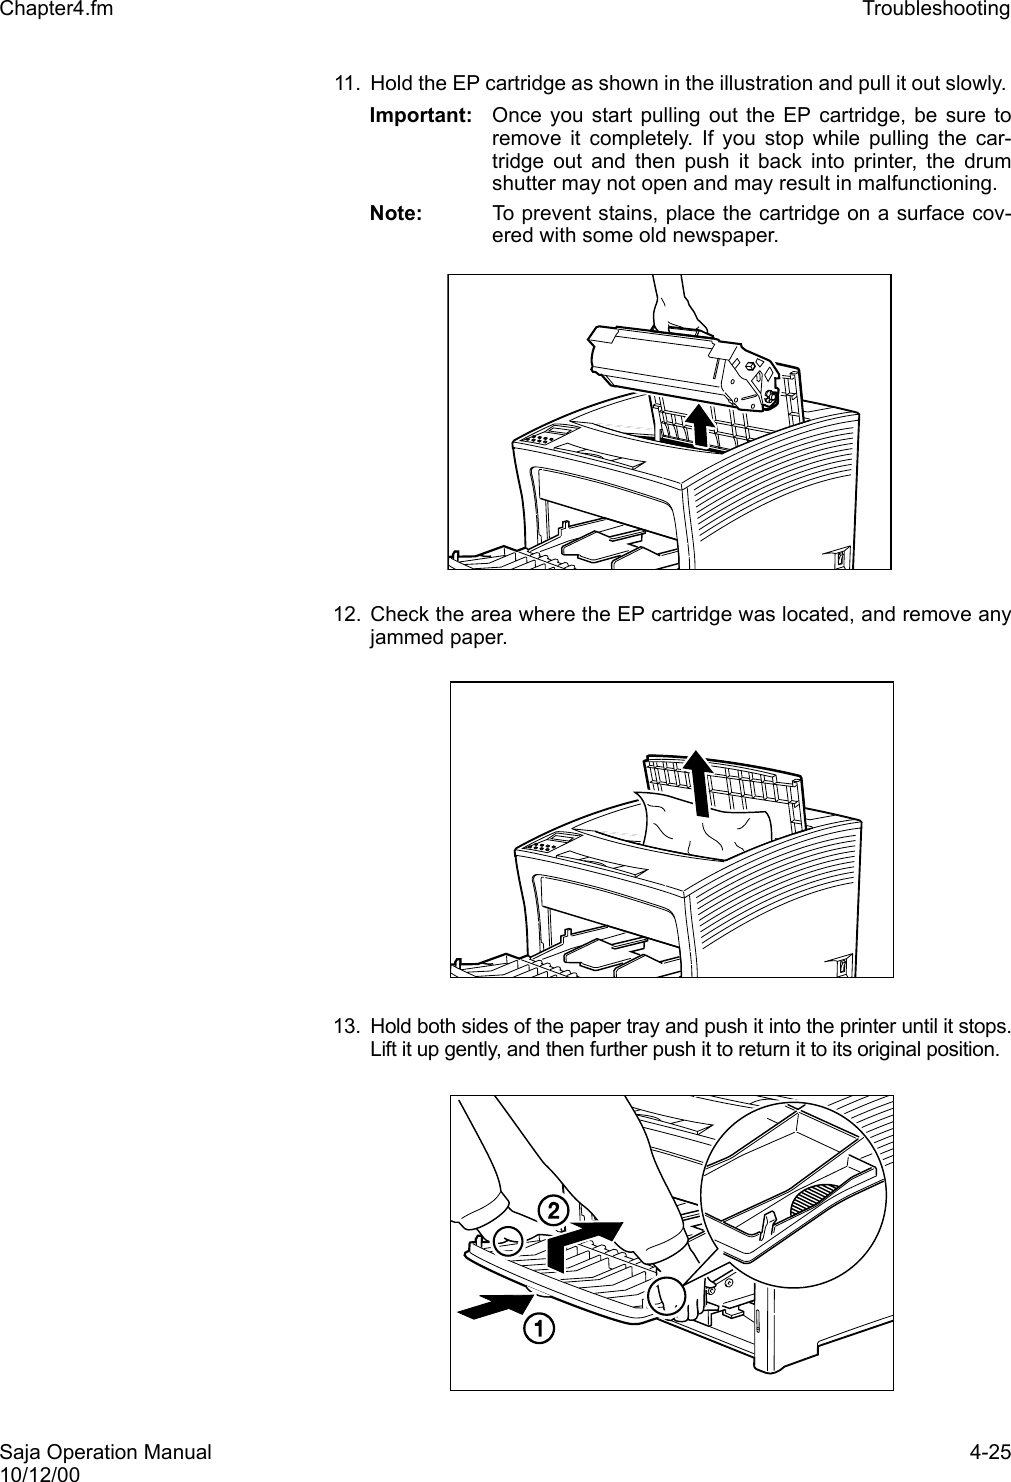
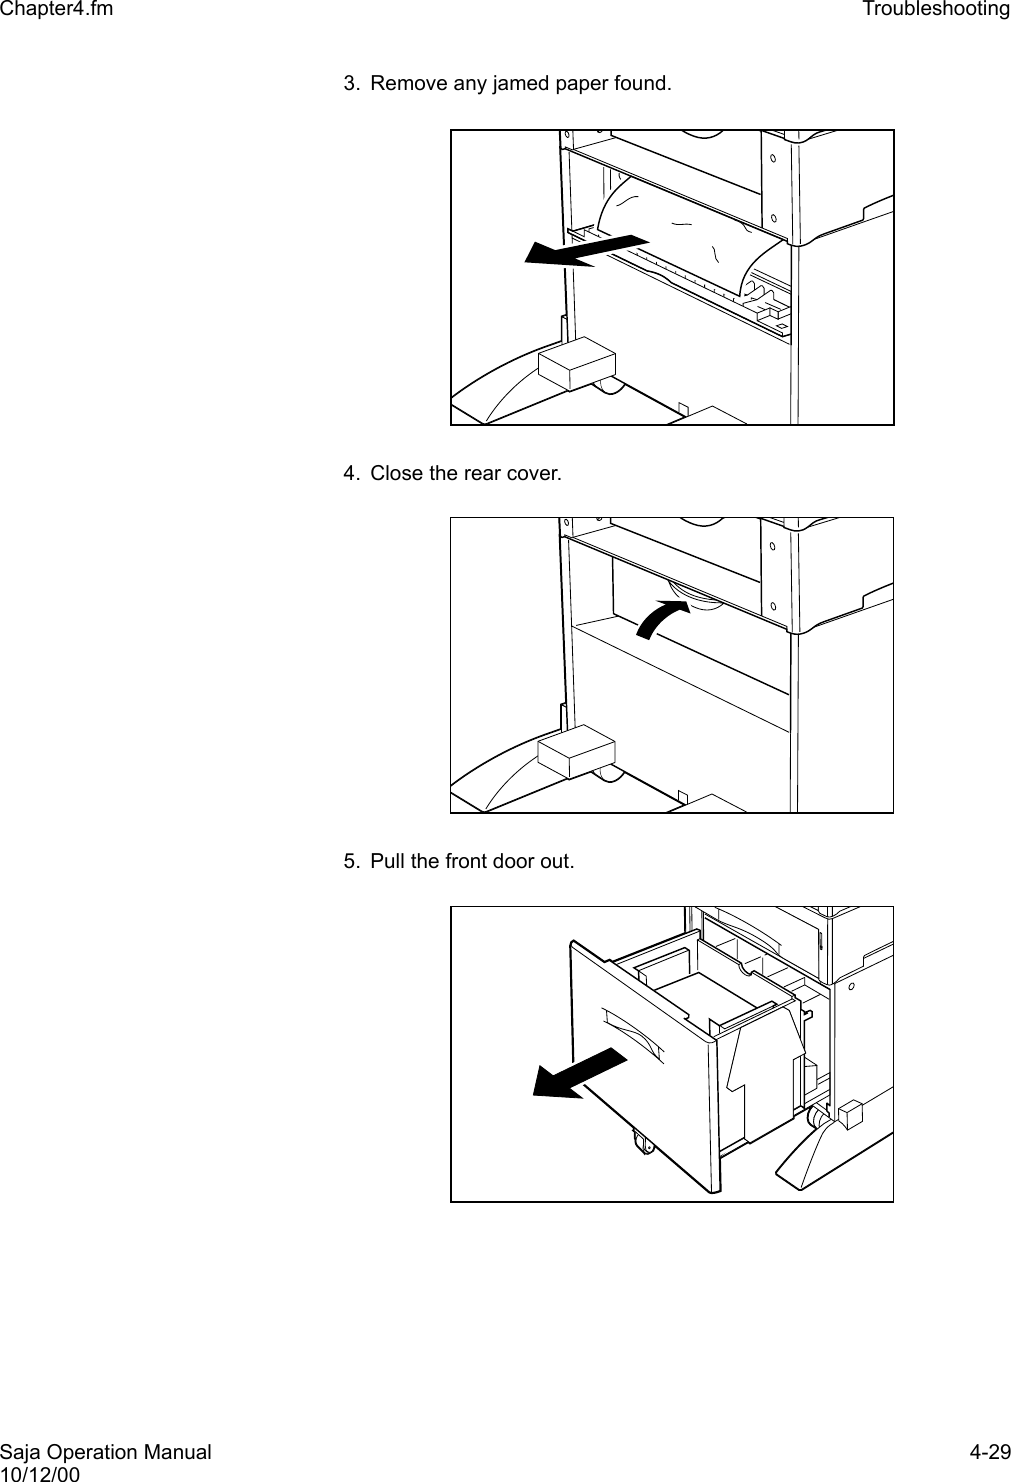
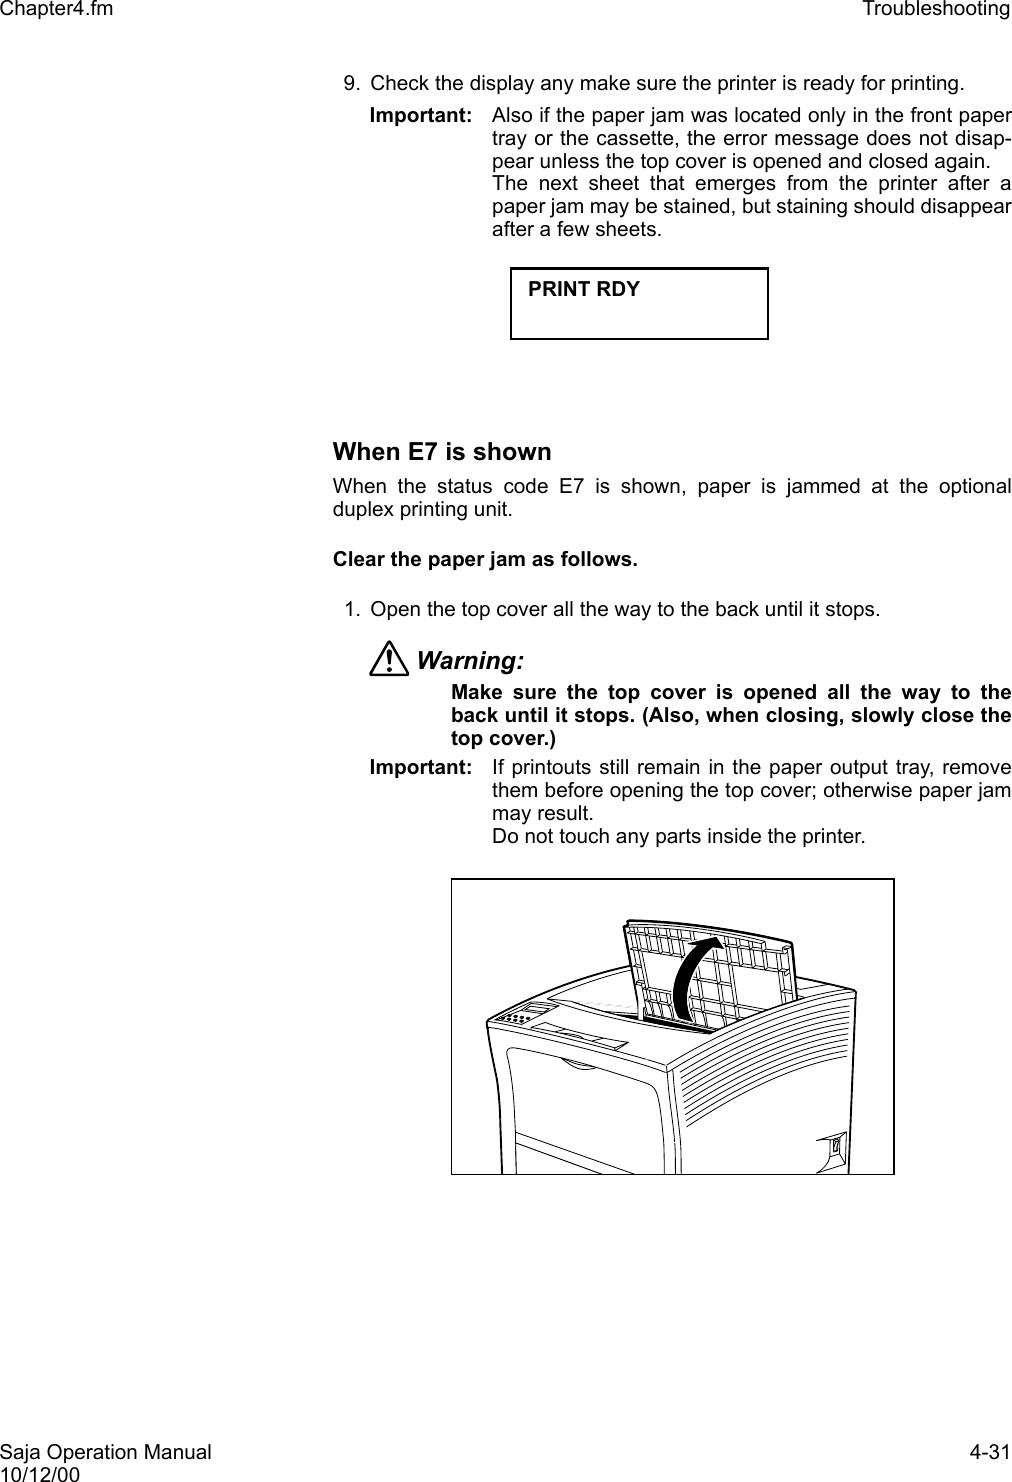
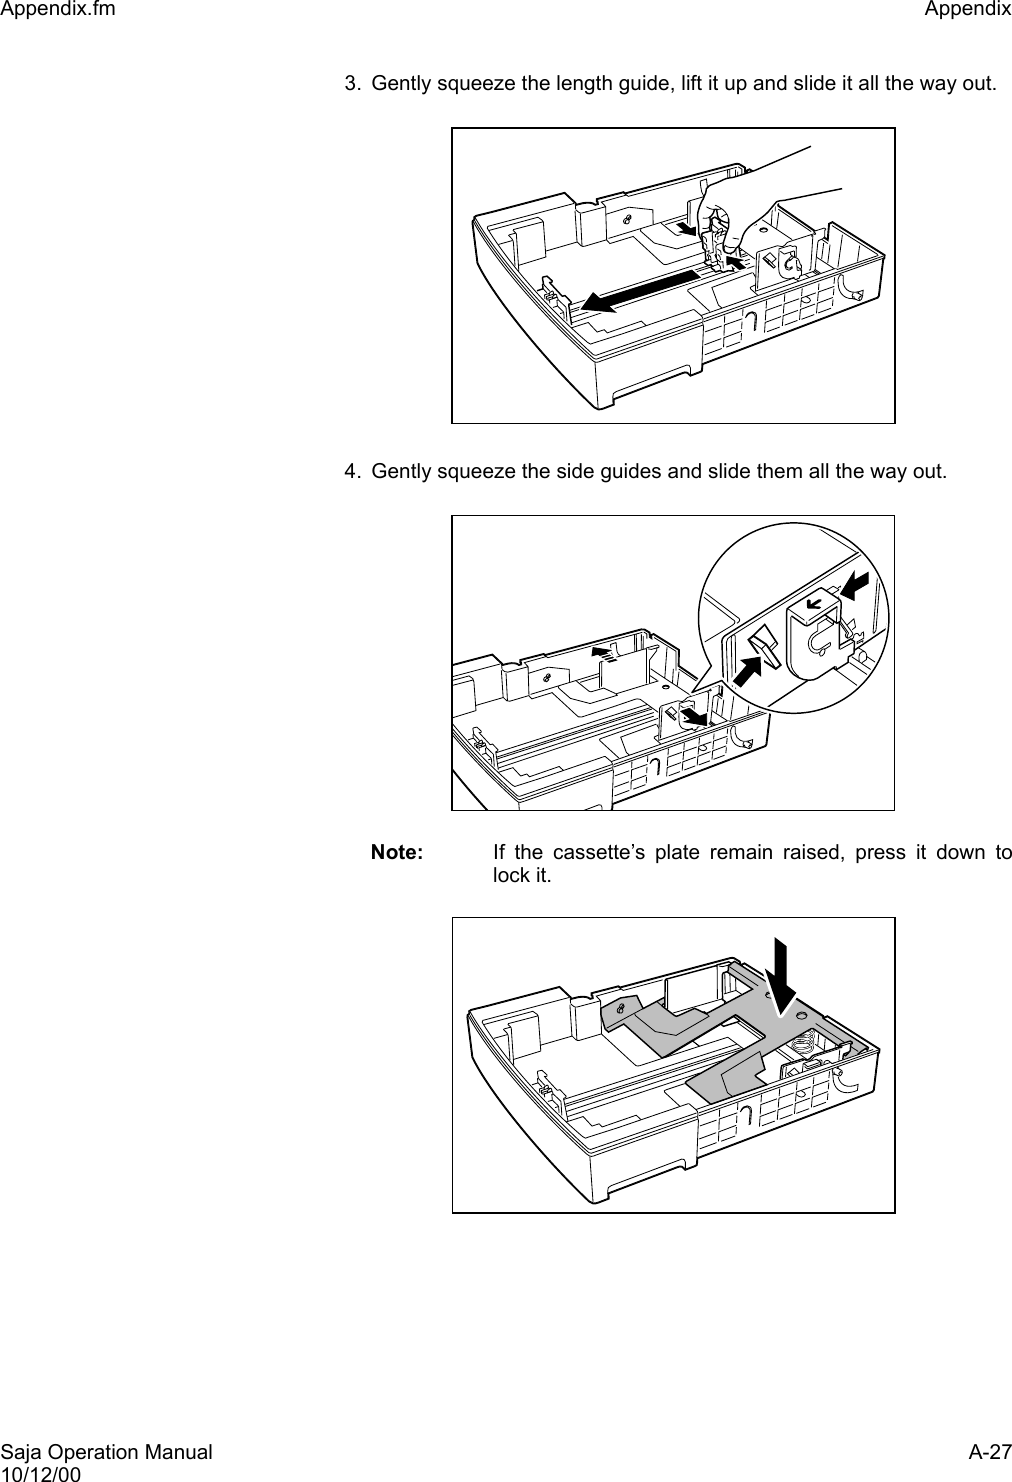
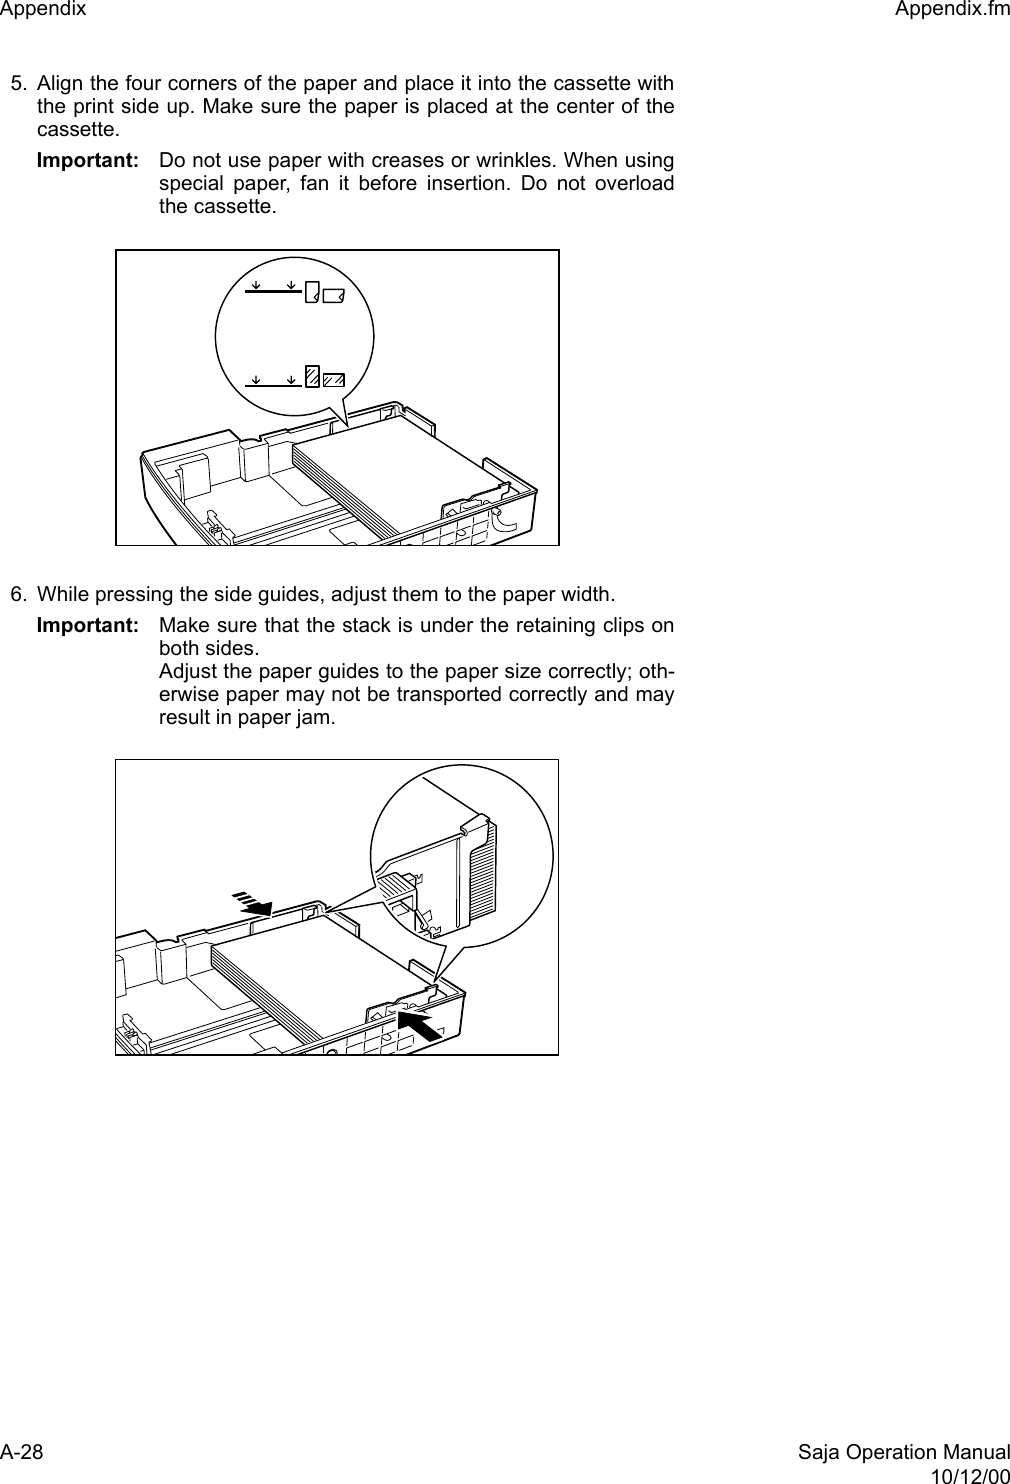
![Saja Operation Manual 4-3710/12/00Chapter4.fm Troubleshooting 4.5 Other Problems Unusual noise This section describes possible reasons for noise problems during print-ing. Go through the list below to find the condition that most resembles theproblem, and follow the recommended action. If the trouble persists, turnthe printer off, disconnect the power cord from the AC outlet, and contactyour dealer or an authorized service station. Cassette is jammed This section describes possible reasons for cassette jamming. Follow therecommended action to resolve the problem. If the trouble persists, turnthe printer off, disconnect the power cord from the AC outlet, and contactyour dealer or an authorized service station. Note: To prevent the cassette from being dropped, there is a catchthat stops it before being fully removed from the printer. Thisis not a defect. Simply lift the cassette slightly and then care-fully pull it out all the way. During insertion of the cassette, the paper holder descendsautomatically, which is felt as a slight resistance when push-ing the cassette in. This is also not a defect. Possible Cause ActionThe printer is not placed on a level surface.Place printer on a level surface. See “2.1 Installation Precautions” and “3.10 Relocating the Printer”.The top cover is open. Close the top cover firmly. The cassette is not inserted properly.Insert the cassette completely into the printer.Foreign object is inside the printer.Turn the printer off and remove the foreign object. Important: If the object cannot be removed easily, contact your dealer or an authorized service station.Possible Cause ActionThe top cover was opened or the power switch was turned off during printing. Do not try to remove the cassette by force. Turn the power off, wait for a few seconds, and then turn the power back on again. When the display shows [READY TO PRINT], try to remove or insert the cassette.](https://usermanual.wiki/FUJIFILM-Business-Innovation/YIA-7.User-Manual-Part-2/User-Guide-267241-Page-26.png)
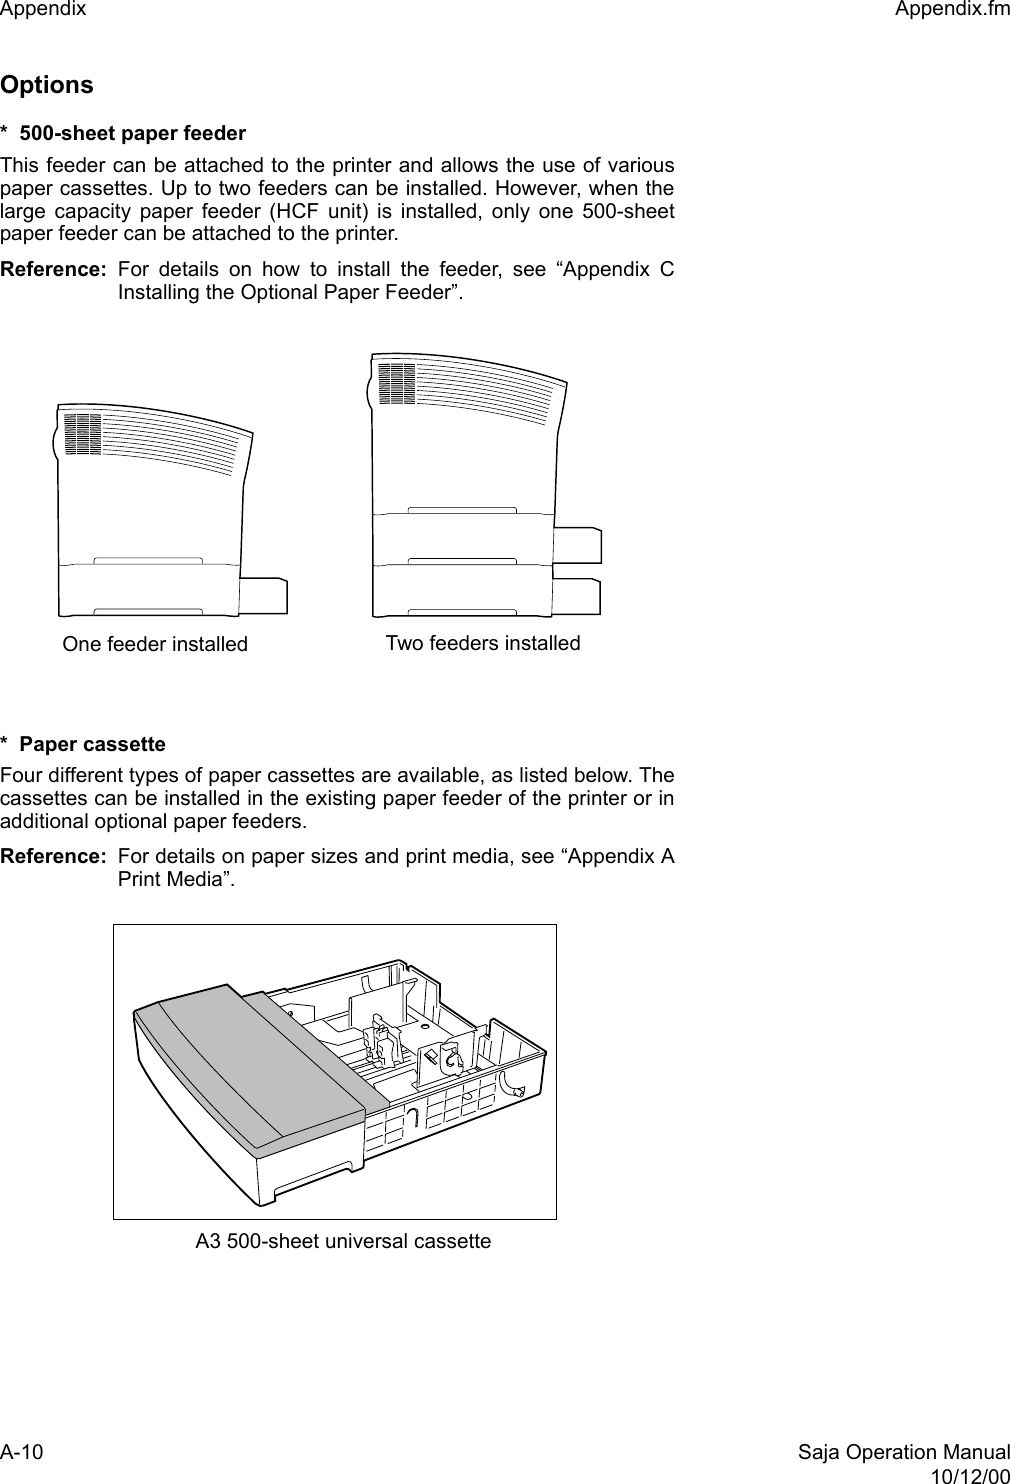

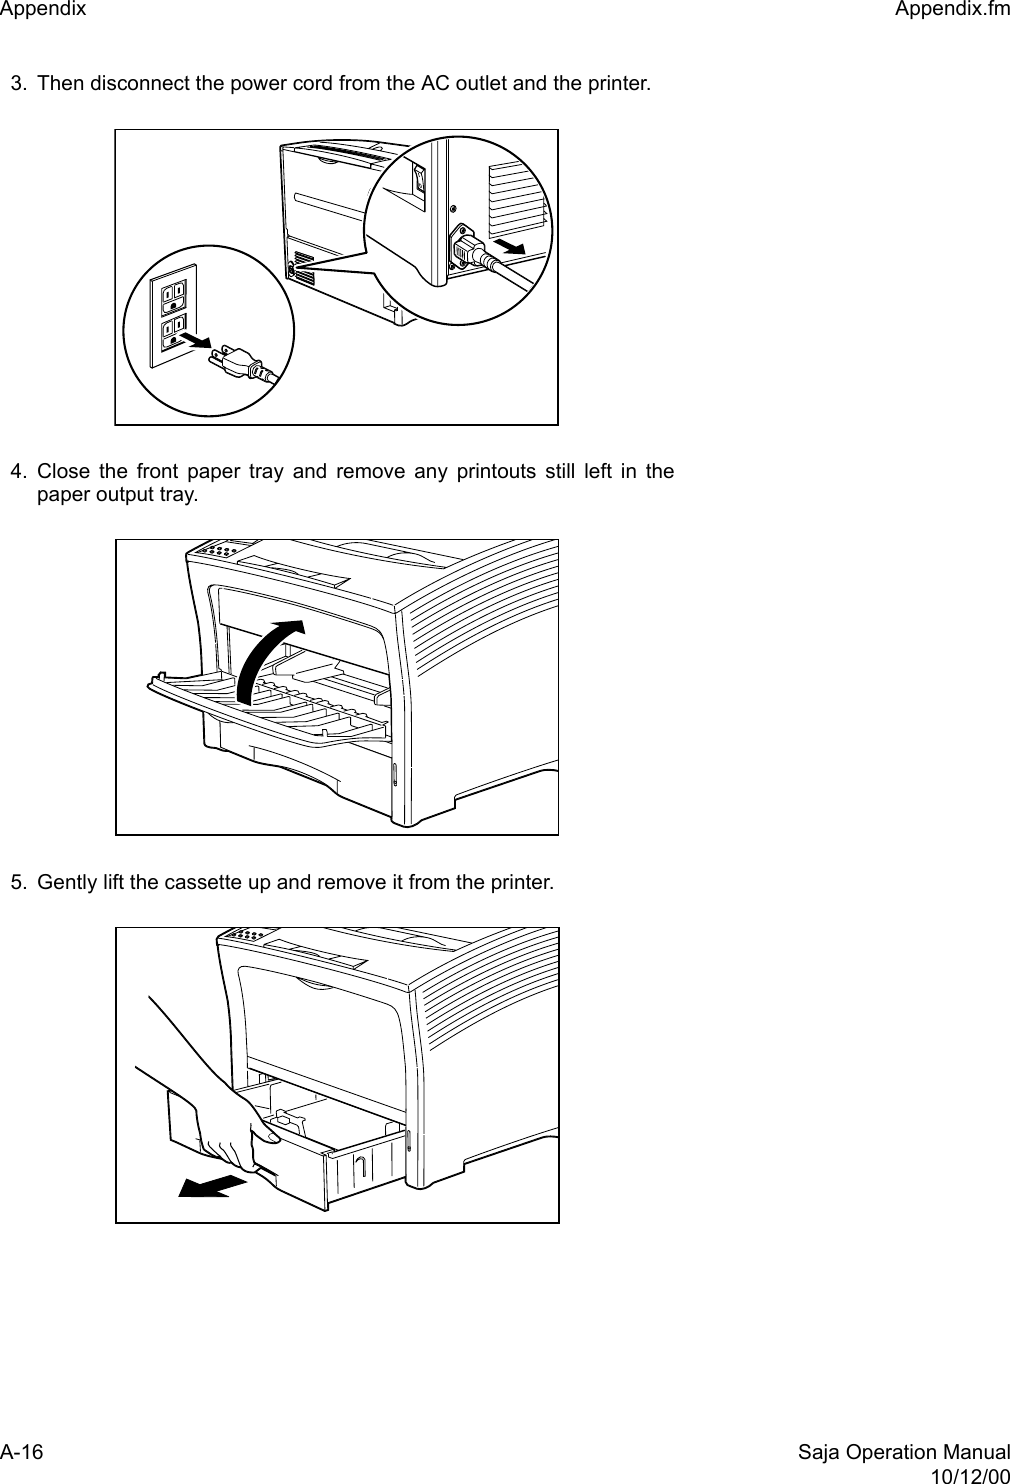
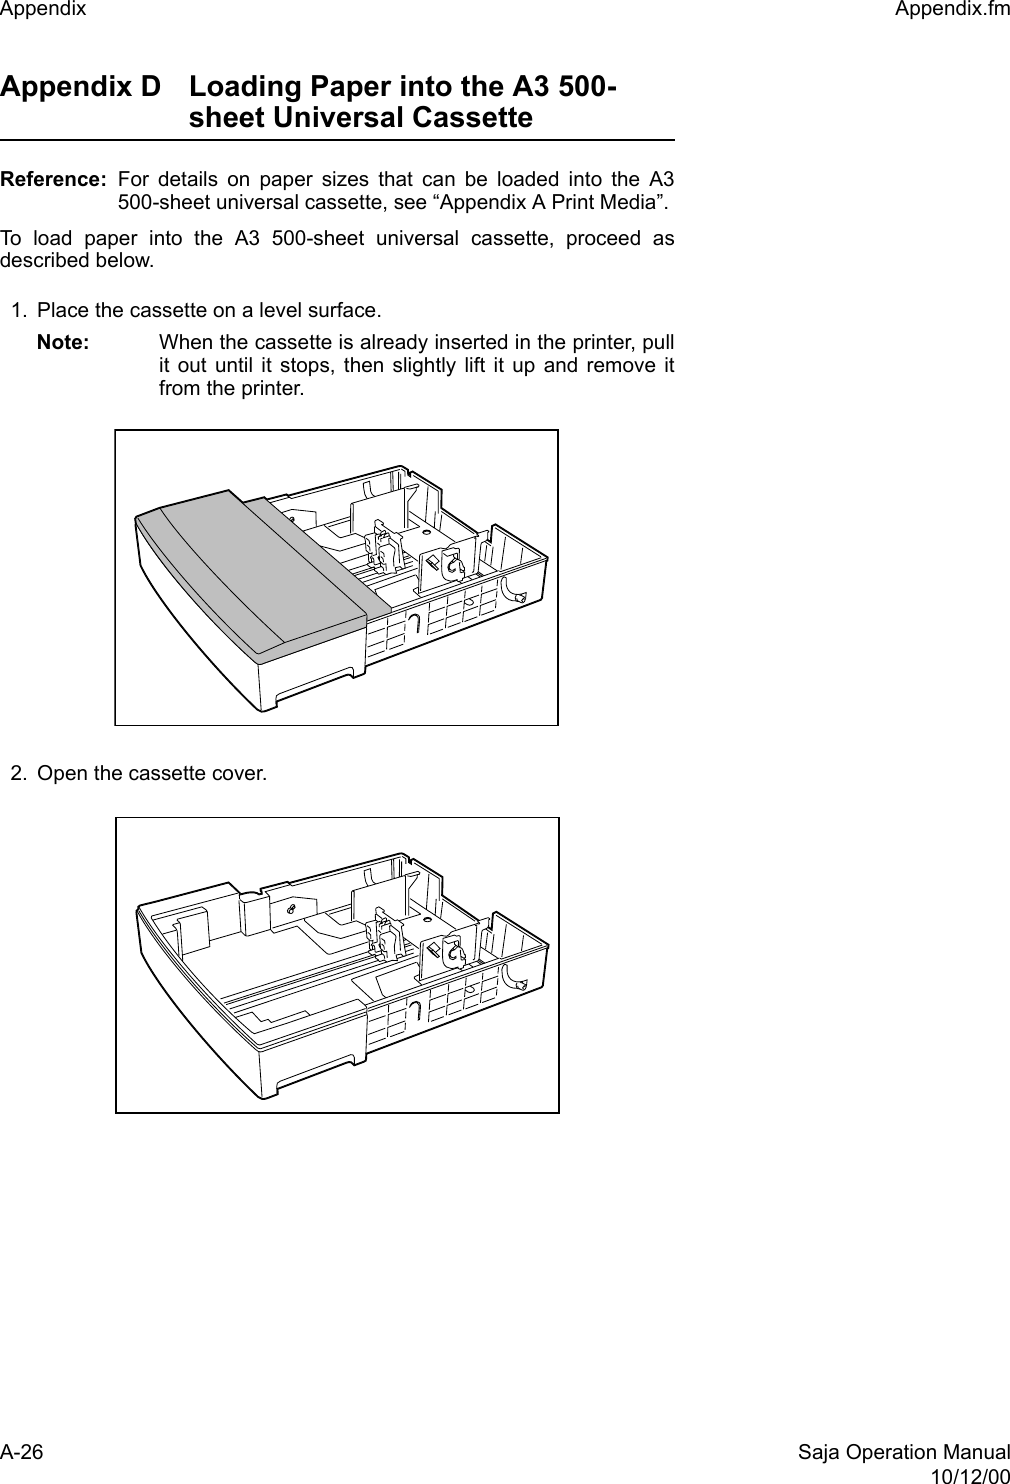
![Saja Operation Manual A-1510/12/00Appendix.fm Appendix Installing one paper feederTo install one paper feeder, proceed as described below. 1. Place the paper feeder on a sturdy, level surface. Important: Do not move the printer when the paper feeder is installed.2. Set the power switch on the right side of the printer to [ O ] to turn offthe printer. Important: If the paper feeder is installed while the power switch is setto [ I ] (on), the printer or paper feeder may be damaged.](https://usermanual.wiki/FUJIFILM-Business-Innovation/YIA-7.User-Manual-Part-2/User-Guide-267241-Page-42.png)
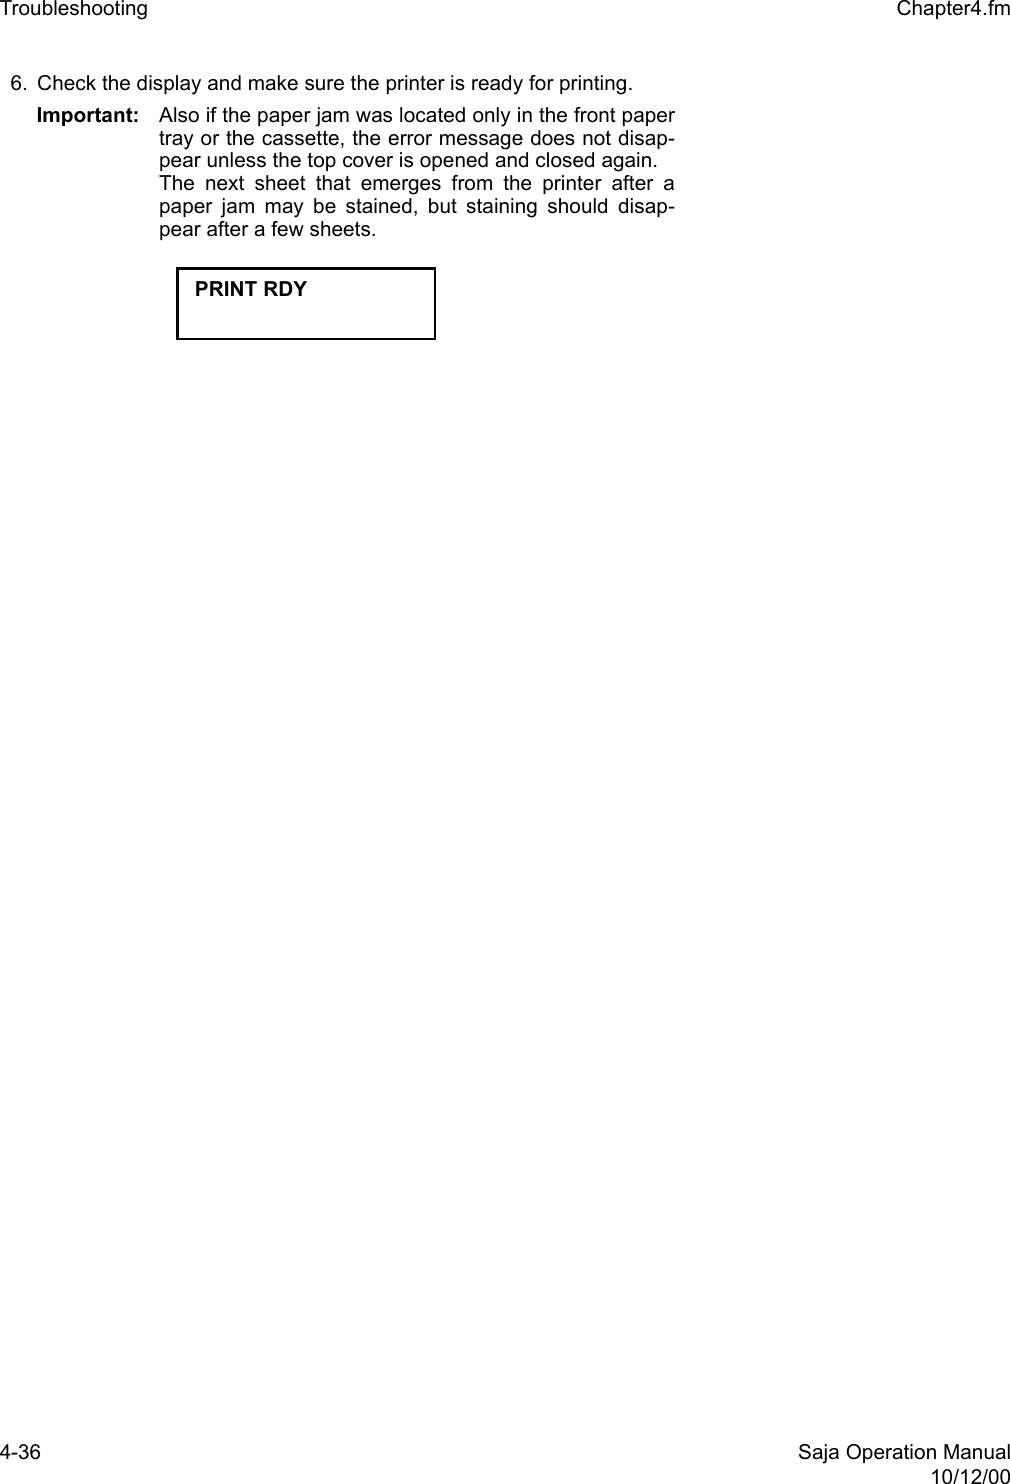
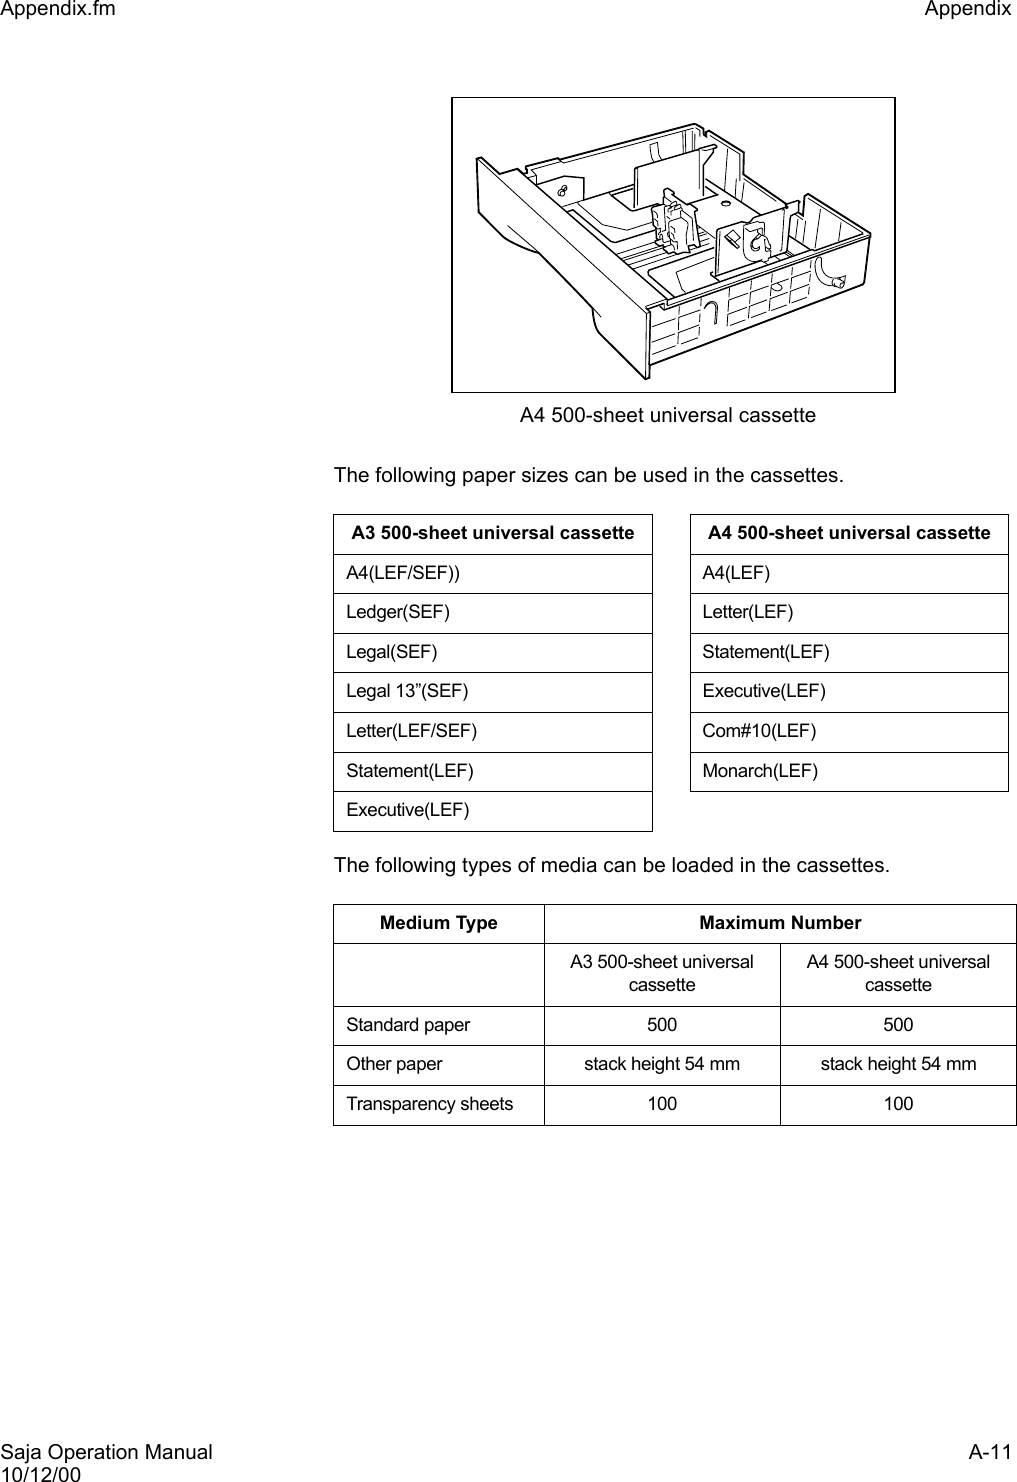
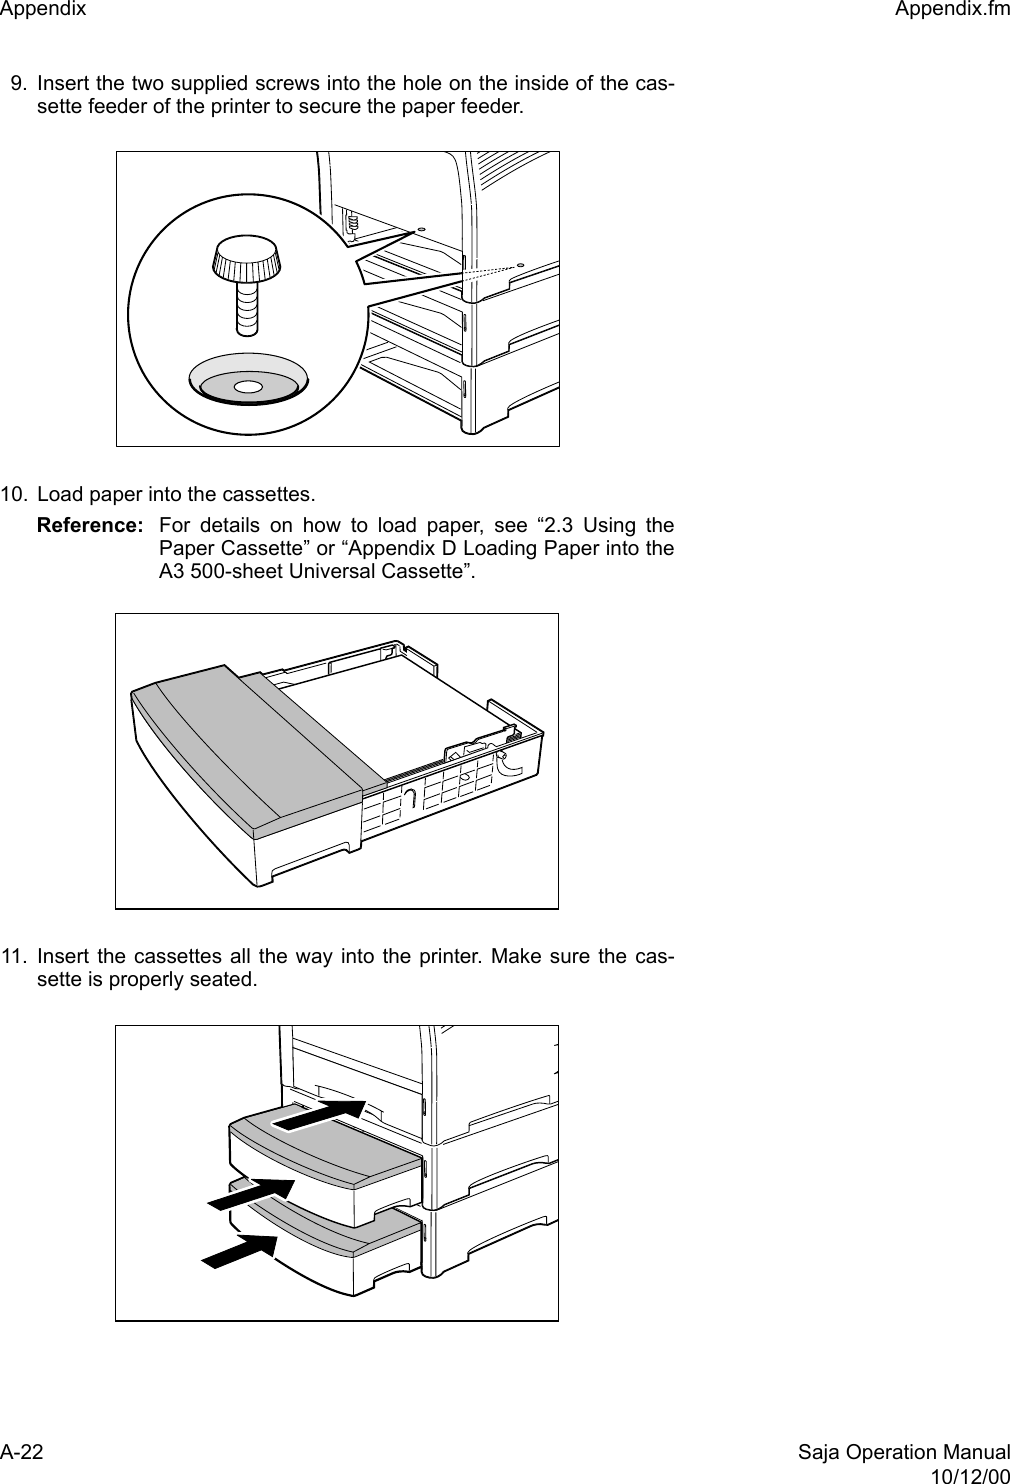
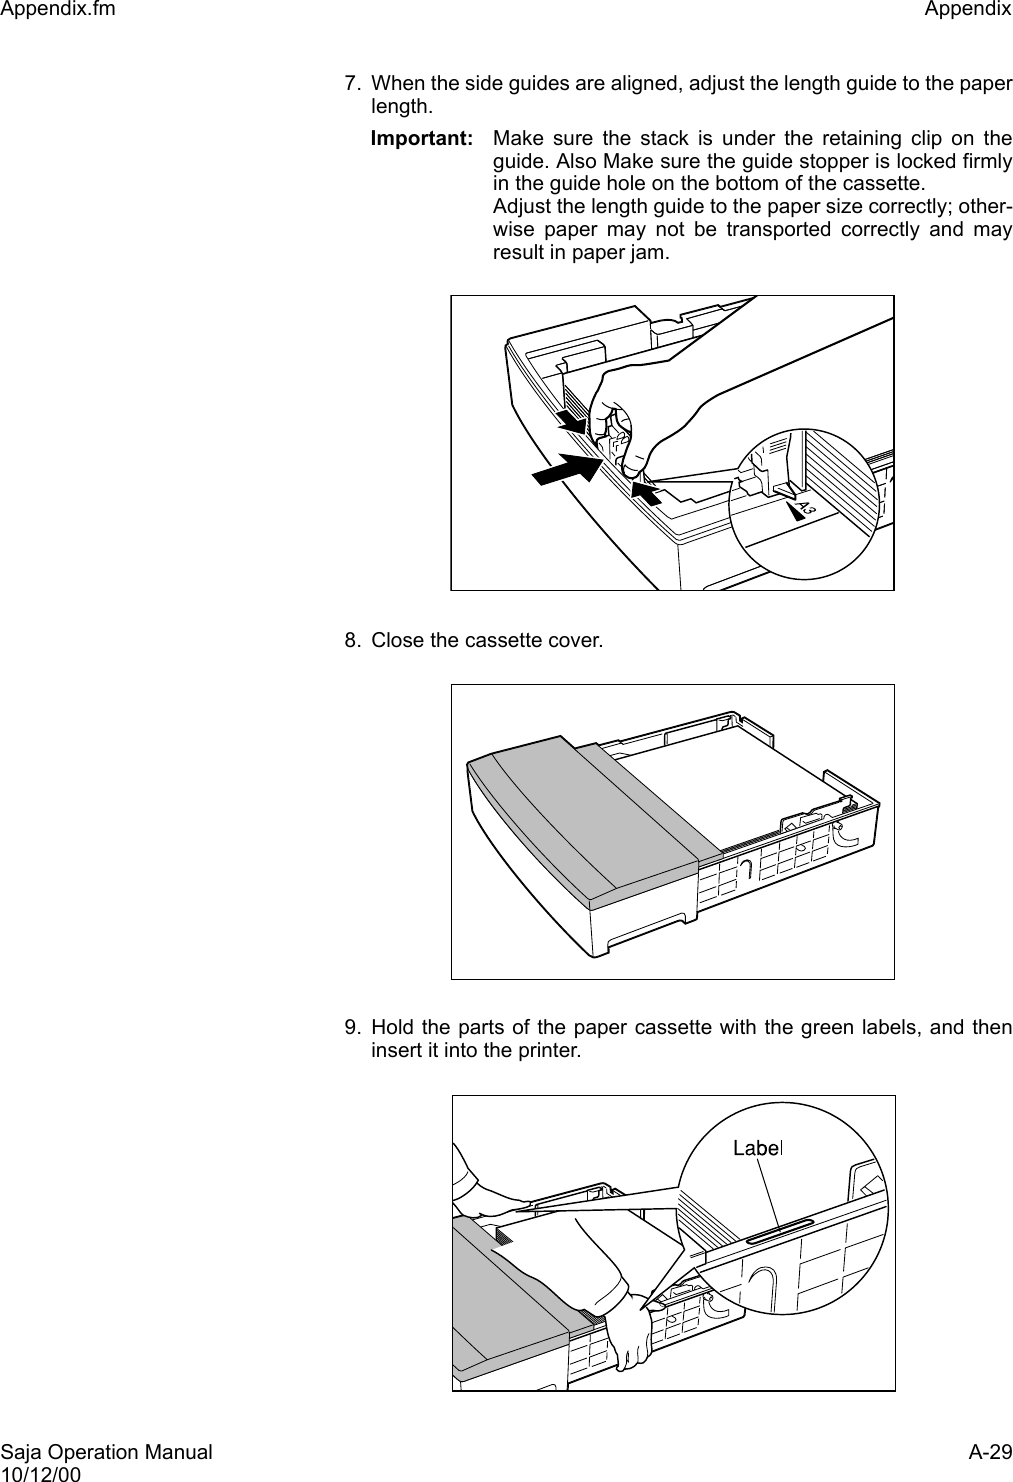
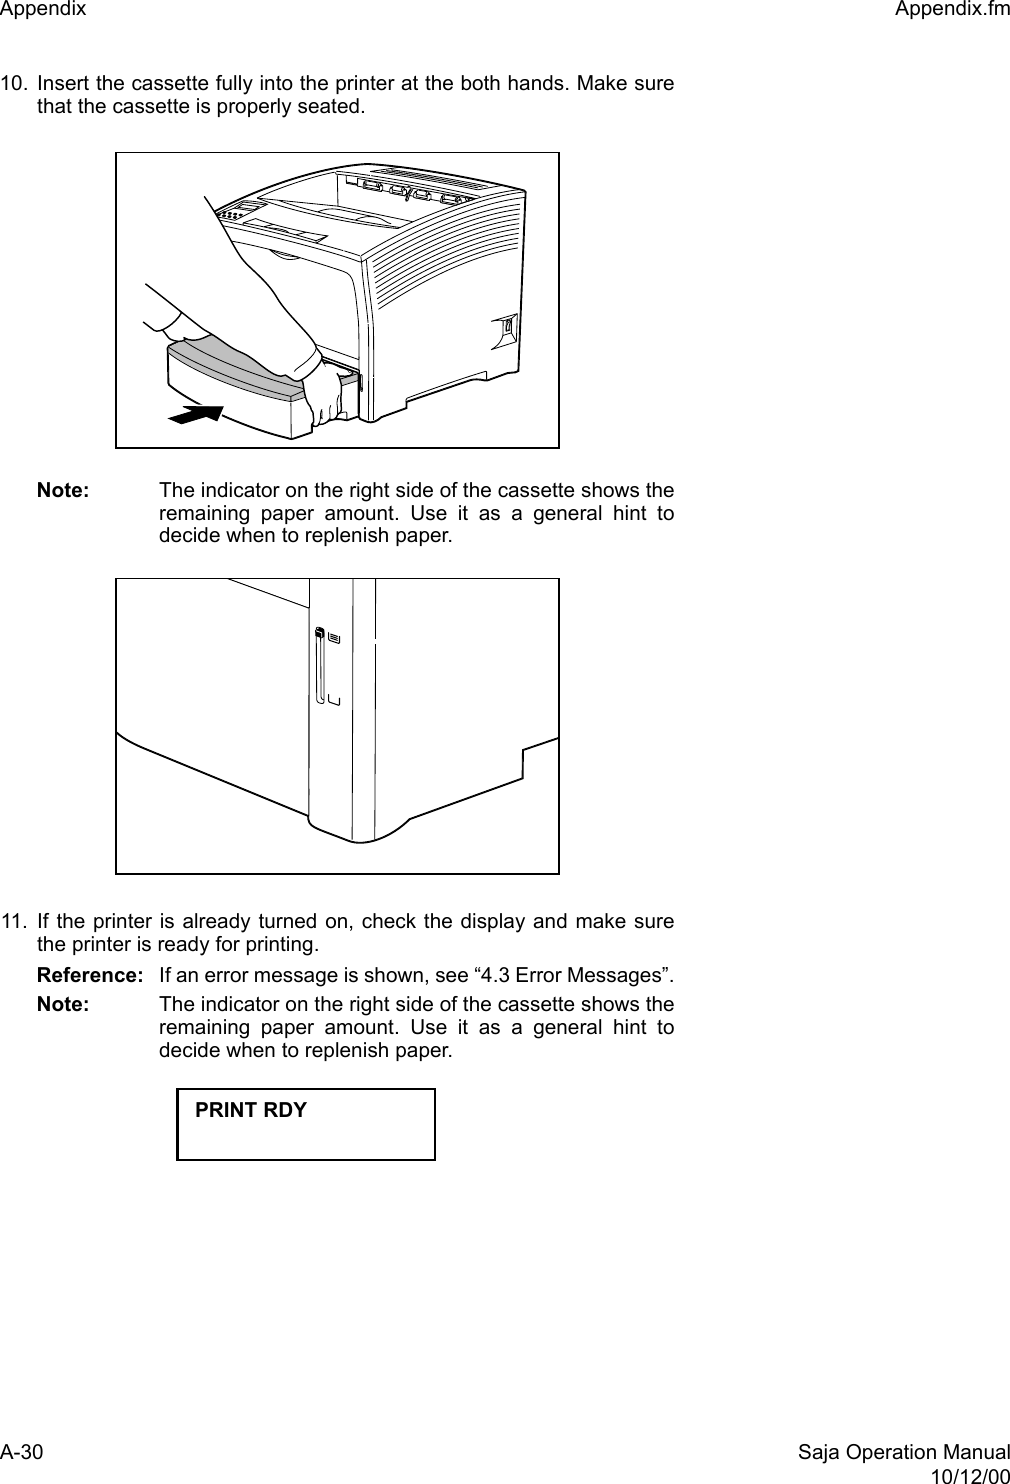
![A-18 Saja Operation Manual10/12/00Appendix Appendix.fm8. Load paper into the cassette. Reference: For details on how to load paper, see “2.3 Using thePaper Cassette” or “Appendix D Loading Paper into theA3 500-sheet Universal Cassette”.9. Insert the cassette all the way into the printer. Make sure the cassetteis properly seated. 10. Insert the plug of the power cord into the AC outlet.Set the powerswitch on the right side of the printer to [ I ] to turn on the printer.11. Check the display and make sure the printer is ready for printing. Important: If an error message is shown, see “4.3 Error Messages”. PRINT RDY](https://usermanual.wiki/FUJIFILM-Business-Innovation/YIA-7.User-Manual-Part-2/User-Guide-267241-Page-45.png)
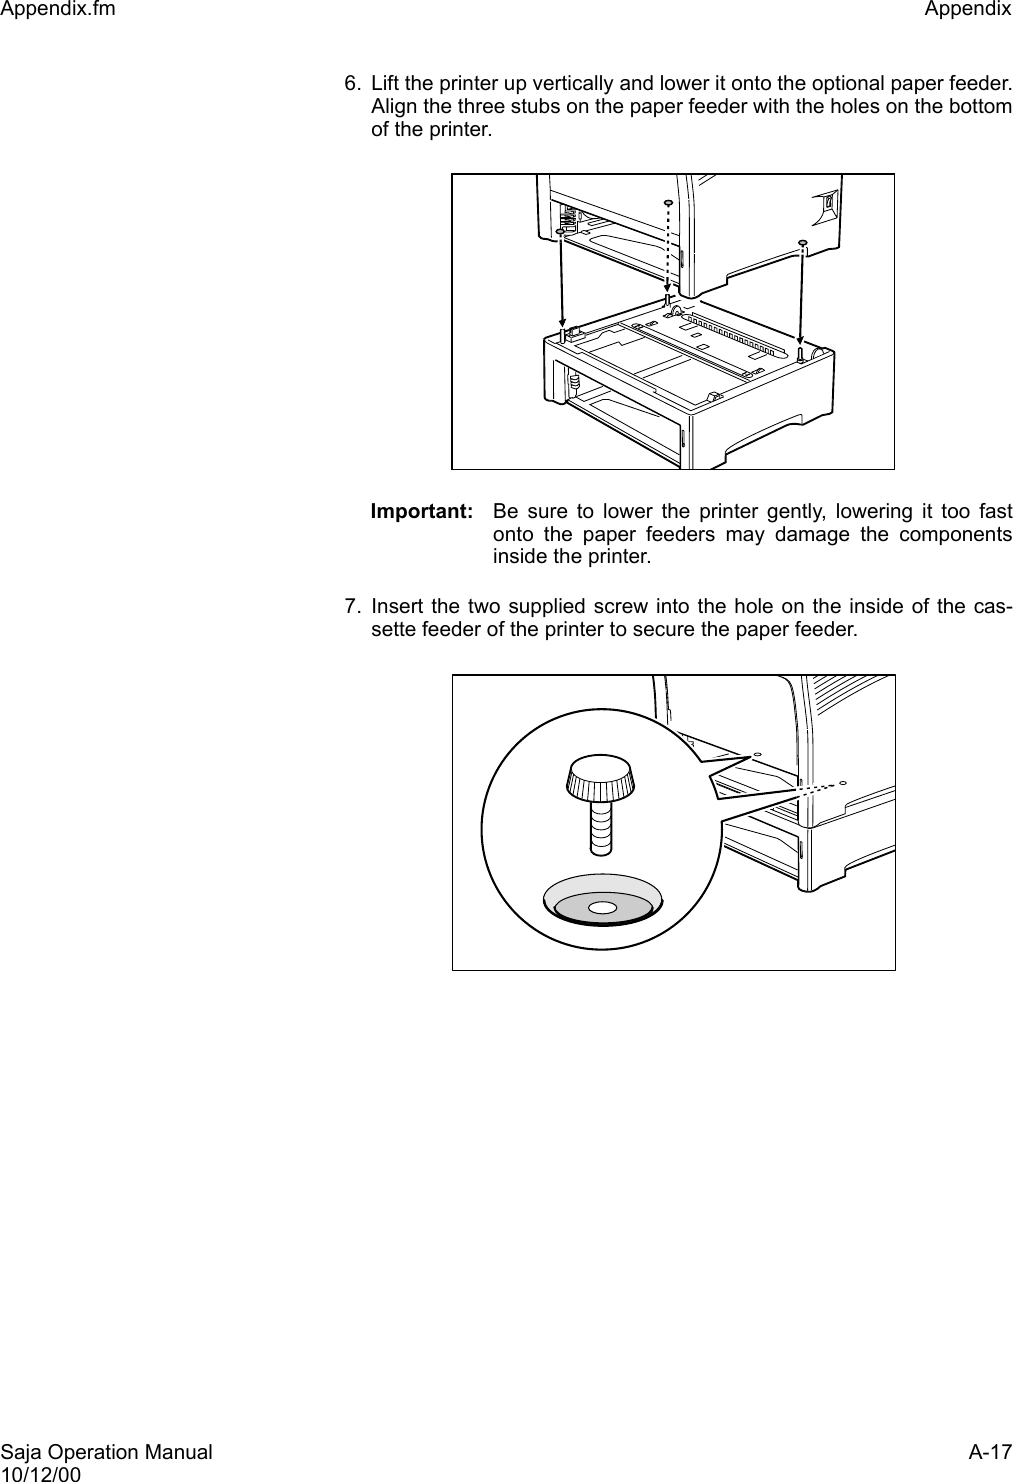
![A-20 Saja Operation Manual10/12/00Appendix Appendix.fm3. Insert the supplied screws into the two holes on the inside of the 1stfeeder to secure it.4. Set the power switch on the right side of the printer to [ O ] to turn offthe printer. Important: If the paper feeder is installed while the power switch isset to [ I ] (on), the printer or paper feeder may be dam-aged. 5. Then disconnect the power cord from the AC outlet and the printer.](https://usermanual.wiki/FUJIFILM-Business-Innovation/YIA-7.User-Manual-Part-2/User-Guide-267241-Page-47.png)

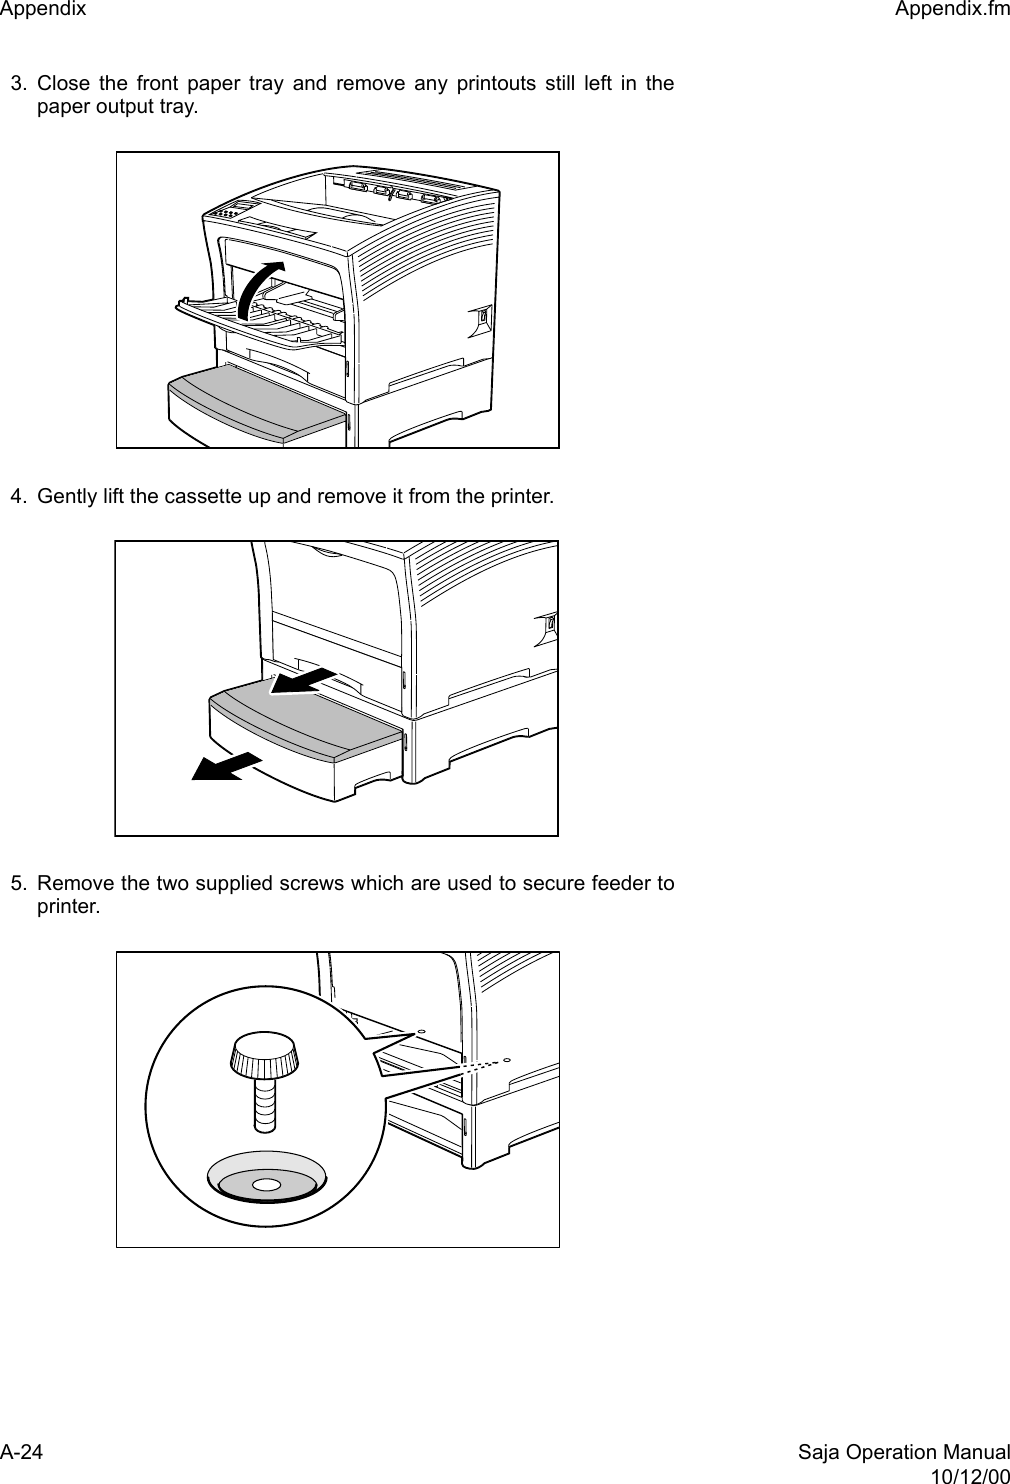
![Saja Operation Manual A-2310/12/00Appendix.fm Appendix 12. Insert the plug of the power cord into the AC outlet. Set the powerswitch on the right side of the printer to [ I ] to turn on the printer.Check the display and make sure the printer is ready for printing. Important: If an error message is shown, see “4.3 Error Messages”. Removing the paper feederTo remove the paper feeder, proceed as described below. 1. Set the power switch on the right side of the printer to [ O ] to turn offthe printer.Important: If the paper feeder is installed while the power switch isset to [ I ] (on), the printer or paper feeder may be dam-aged. 2. Then disconnect the power cord from the AC outlet and the printer. PRINT RDY](https://usermanual.wiki/FUJIFILM-Business-Innovation/YIA-7.User-Manual-Part-2/User-Guide-267241-Page-50.png)
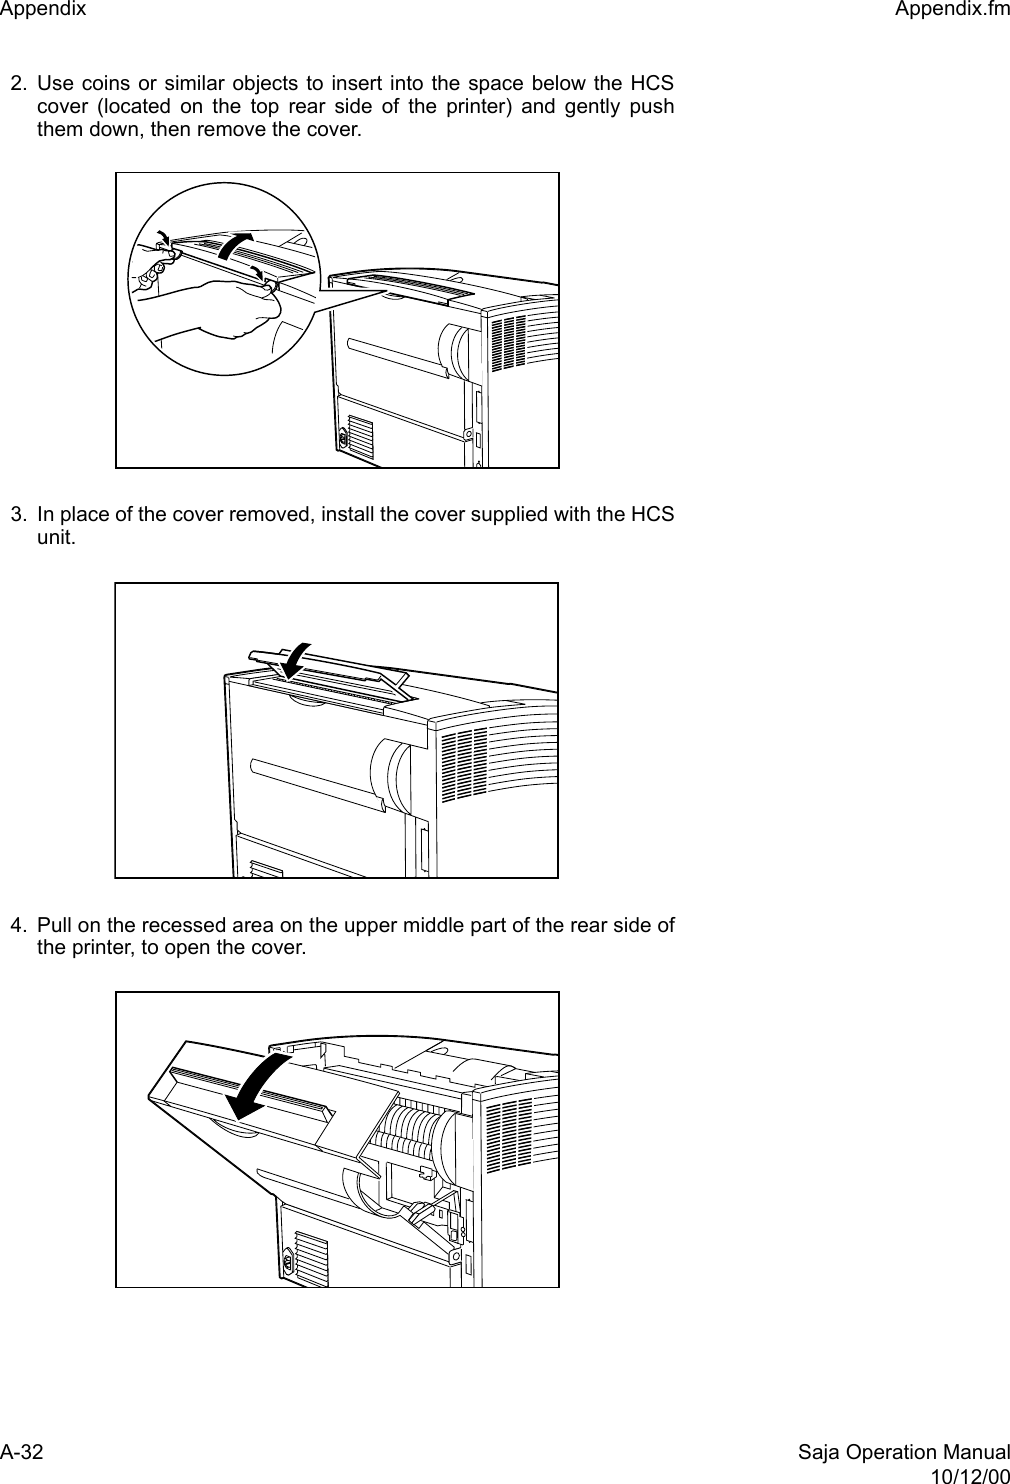
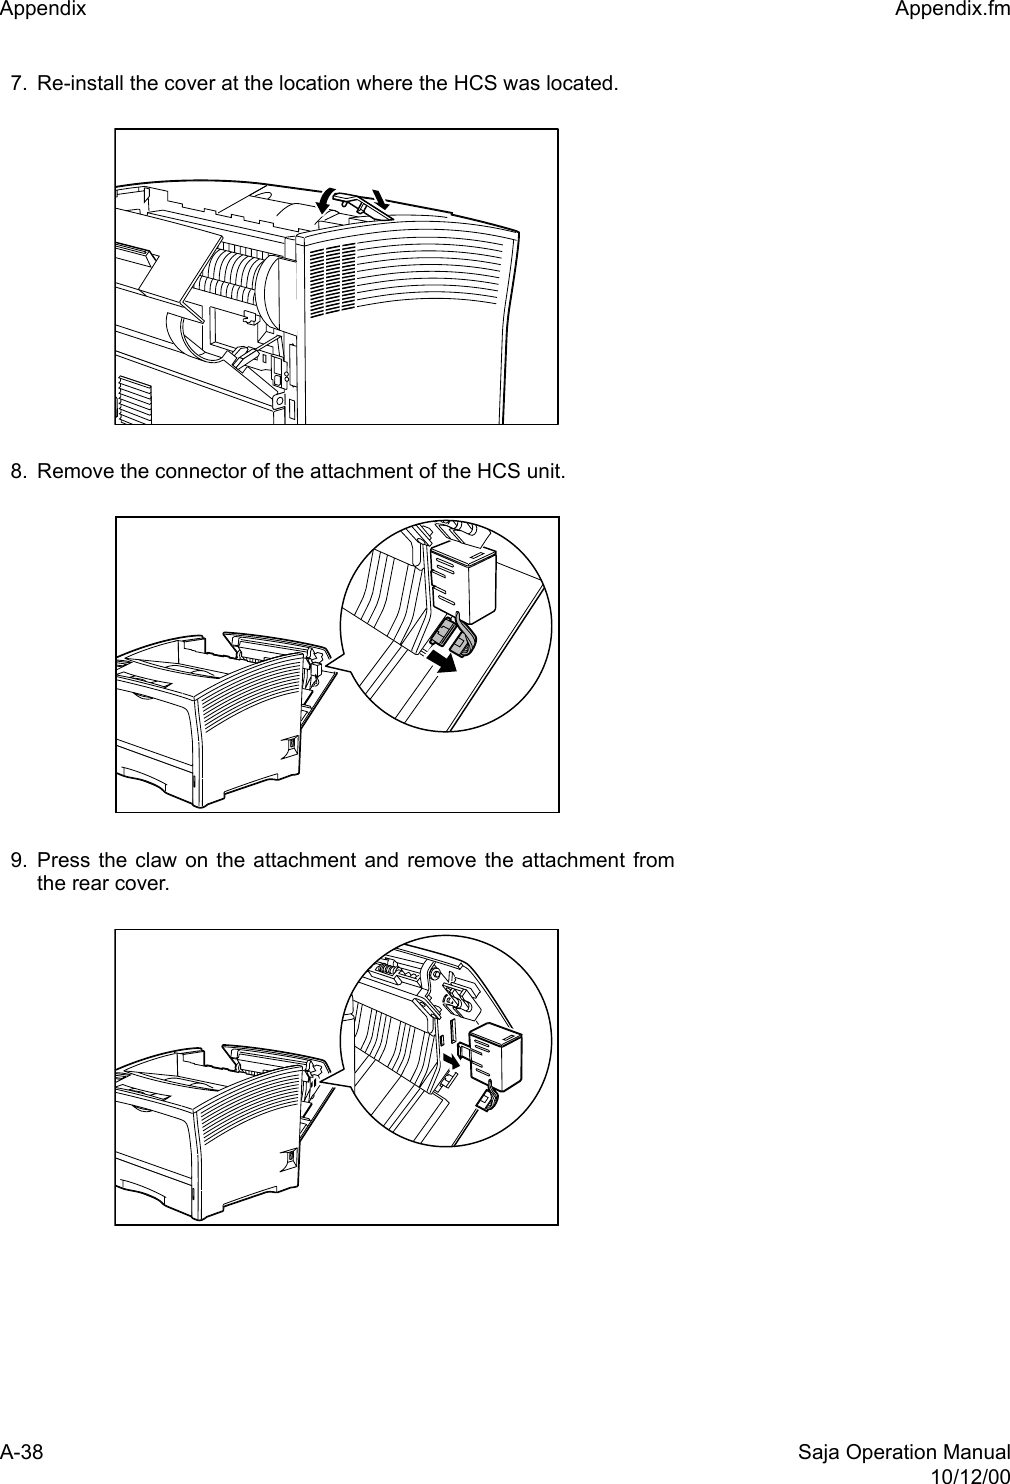
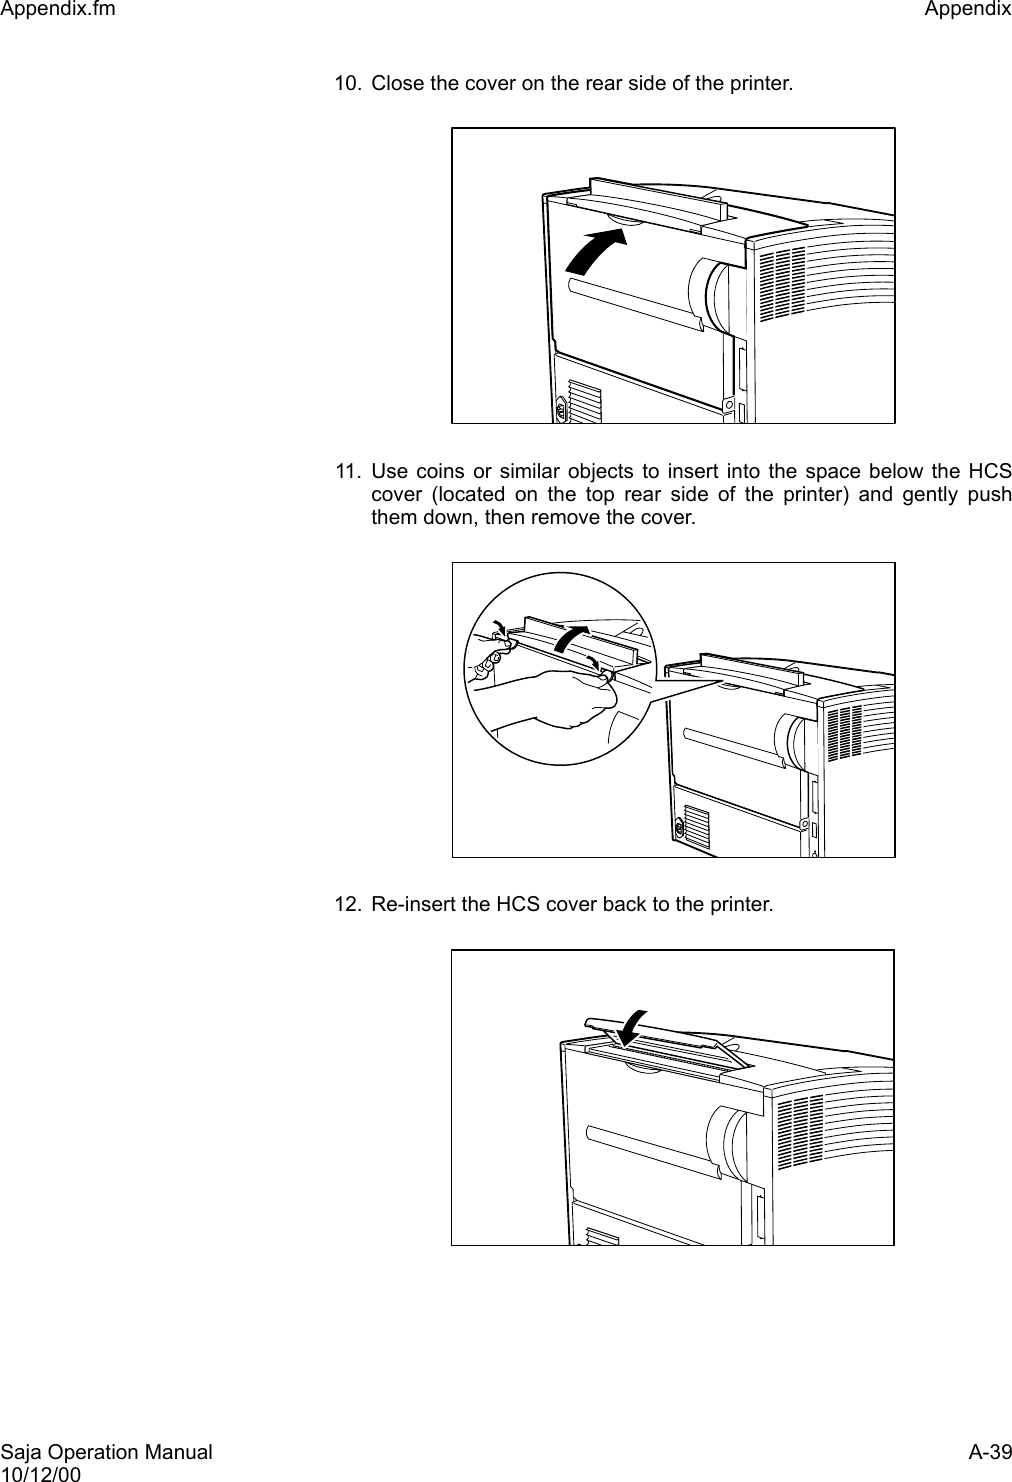
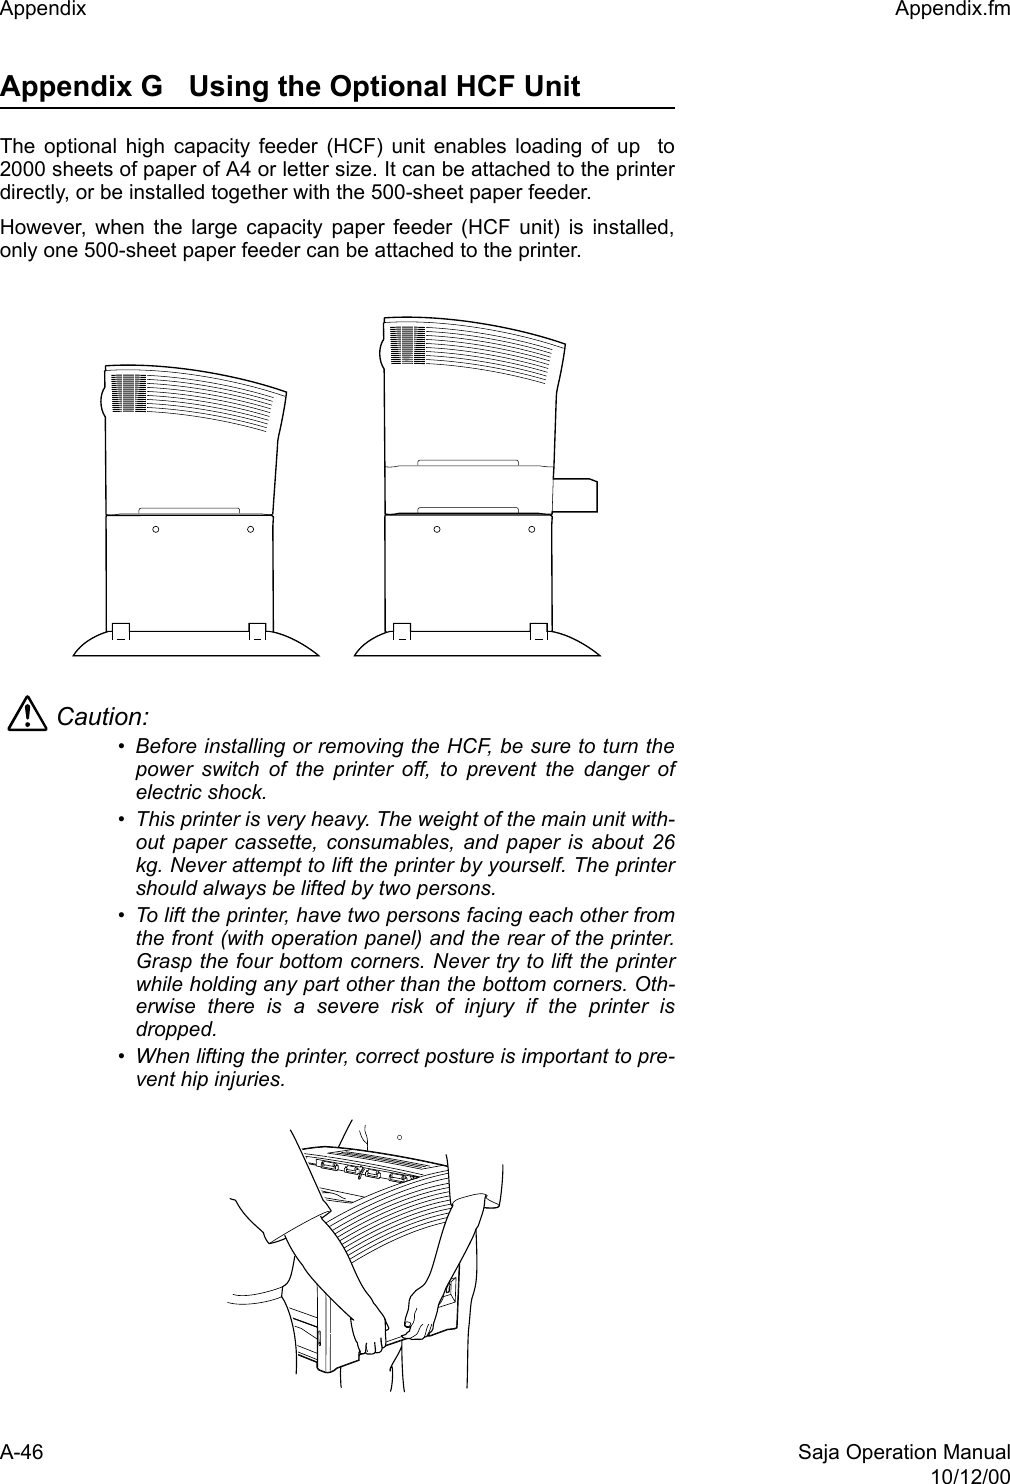
![Saja Operation Manual A-3110/12/00Appendix.fm Appendix Appendix E Using the Optional HCS Unit The optional large capacity stacker, when installed to the printer, can holdup to 1,000 sheets of printouts in the printer, which is handy when doinglarge volume printing.Caution: Before installing or removing the HCS unit, be sure to turnthe power switch of the printer off, to prevent the danger ofelectrick shock.Installing the HCS unitTo install the HCS unit, proceed as described below. 1. Set the power switch on the right side of the printer to [ O ] to turn offthe printer. Then disconnect the power cord from the AC outlet andthe printer. Important: Installing the HCS unit while the printer is turned on mayresult in malfunction.](https://usermanual.wiki/FUJIFILM-Business-Innovation/YIA-7.User-Manual-Part-2/User-Guide-267241-Page-58.png)

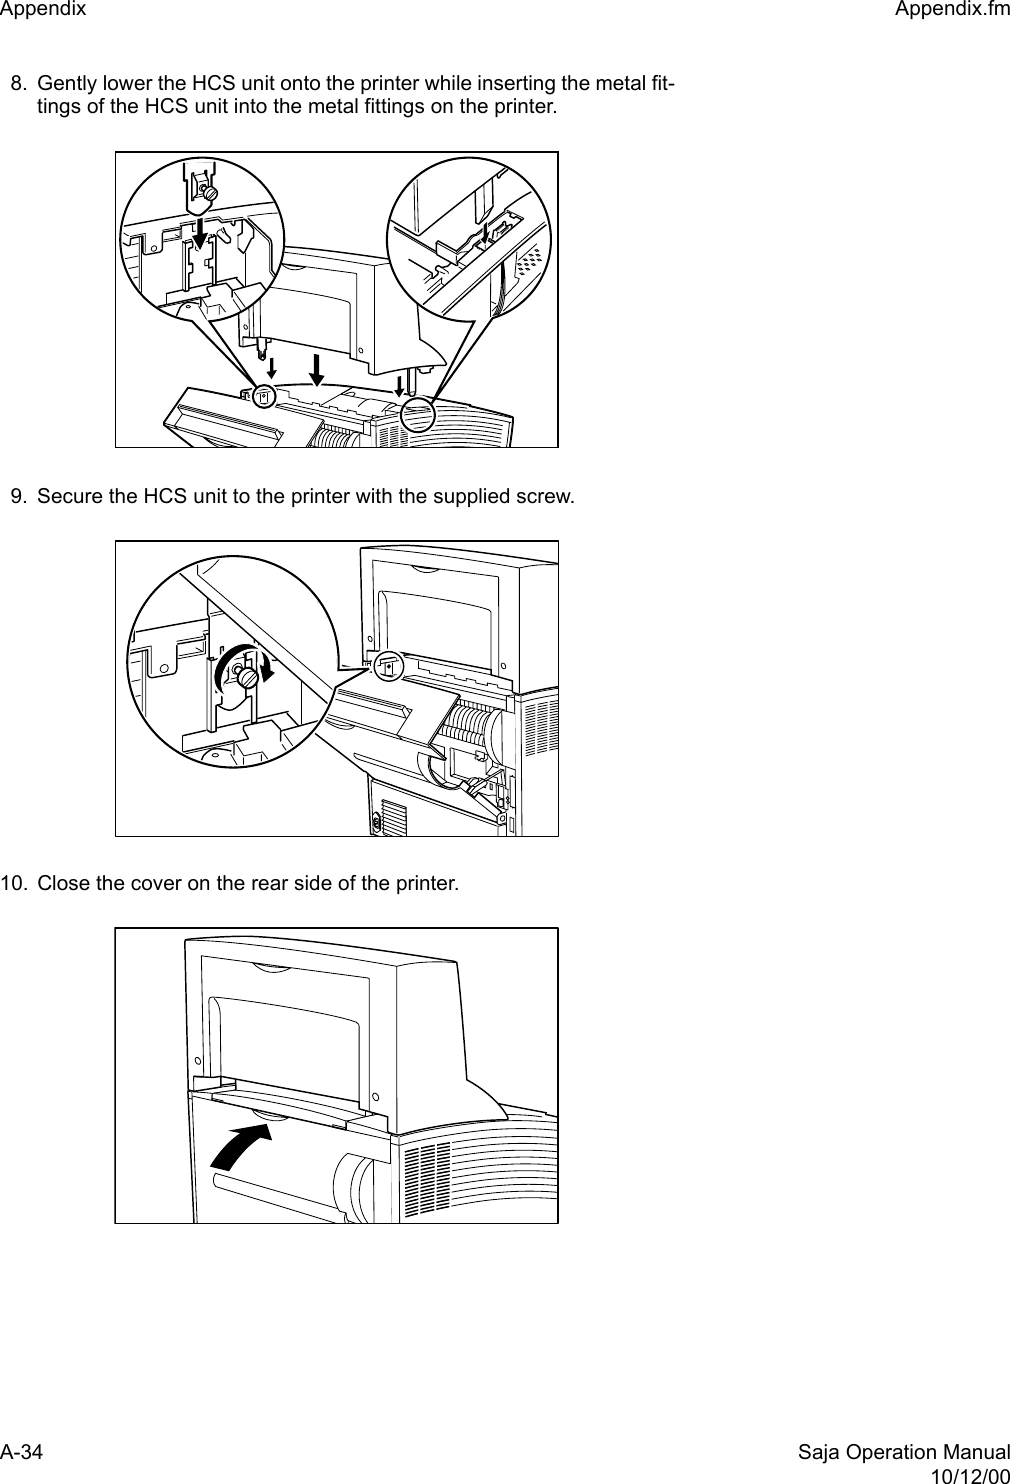
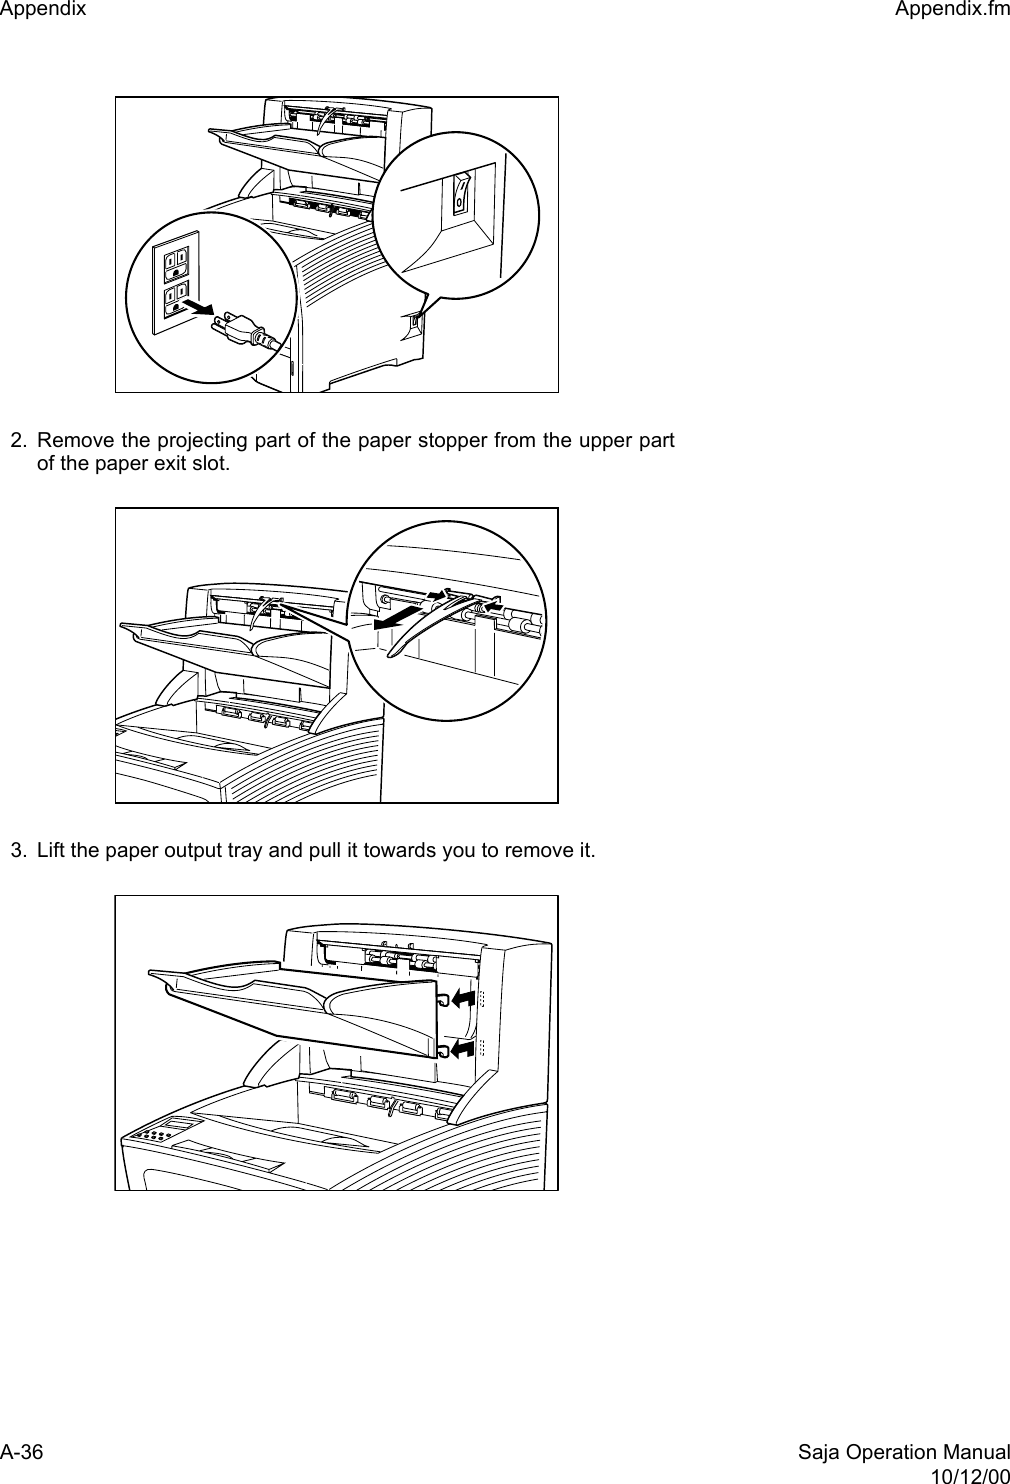
![Saja Operation Manual A-3510/12/00Appendix.fm Appendix 11. Insert the stub on the paper output tray into the hole of the HCS unit tosecure the HCS unit.12. Insert the projecting part of the paper stopper into the hole at theupper part of the paper exist slot.13. Insert the plug of the power cord into the AC outlet. Set the powerswitch on the right side of the printer to [ I ] to turn on the printer.14. Check the display and make sure the printer is ready for printing.Important: If an error message is shown, see “4.3 Error Messages”.Removing the HCS unitTo remove the HCS unit, proceed as described below. 1. Set the power switch on the right side of the printer to [ O ] to turn offthe printer. Then disconnect the power cord from the AC outlet andthe printer. Important: Removing the HCS unit while the printer is turned onmay result in malfunction.](https://usermanual.wiki/FUJIFILM-Business-Innovation/YIA-7.User-Manual-Part-2/User-Guide-267241-Page-62.png)
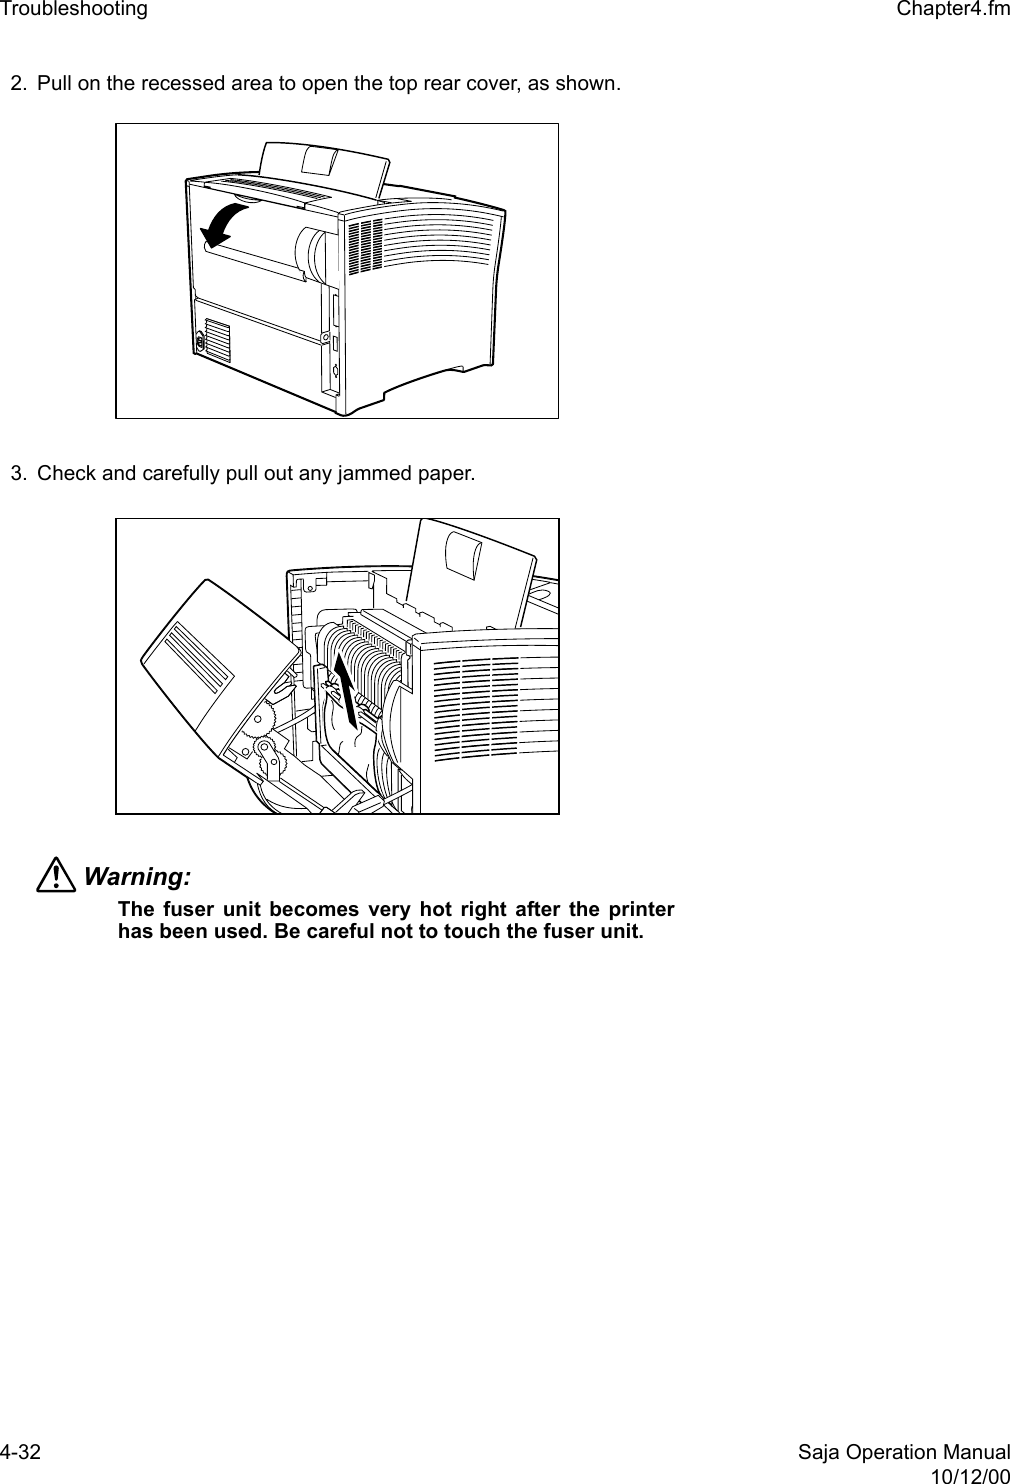
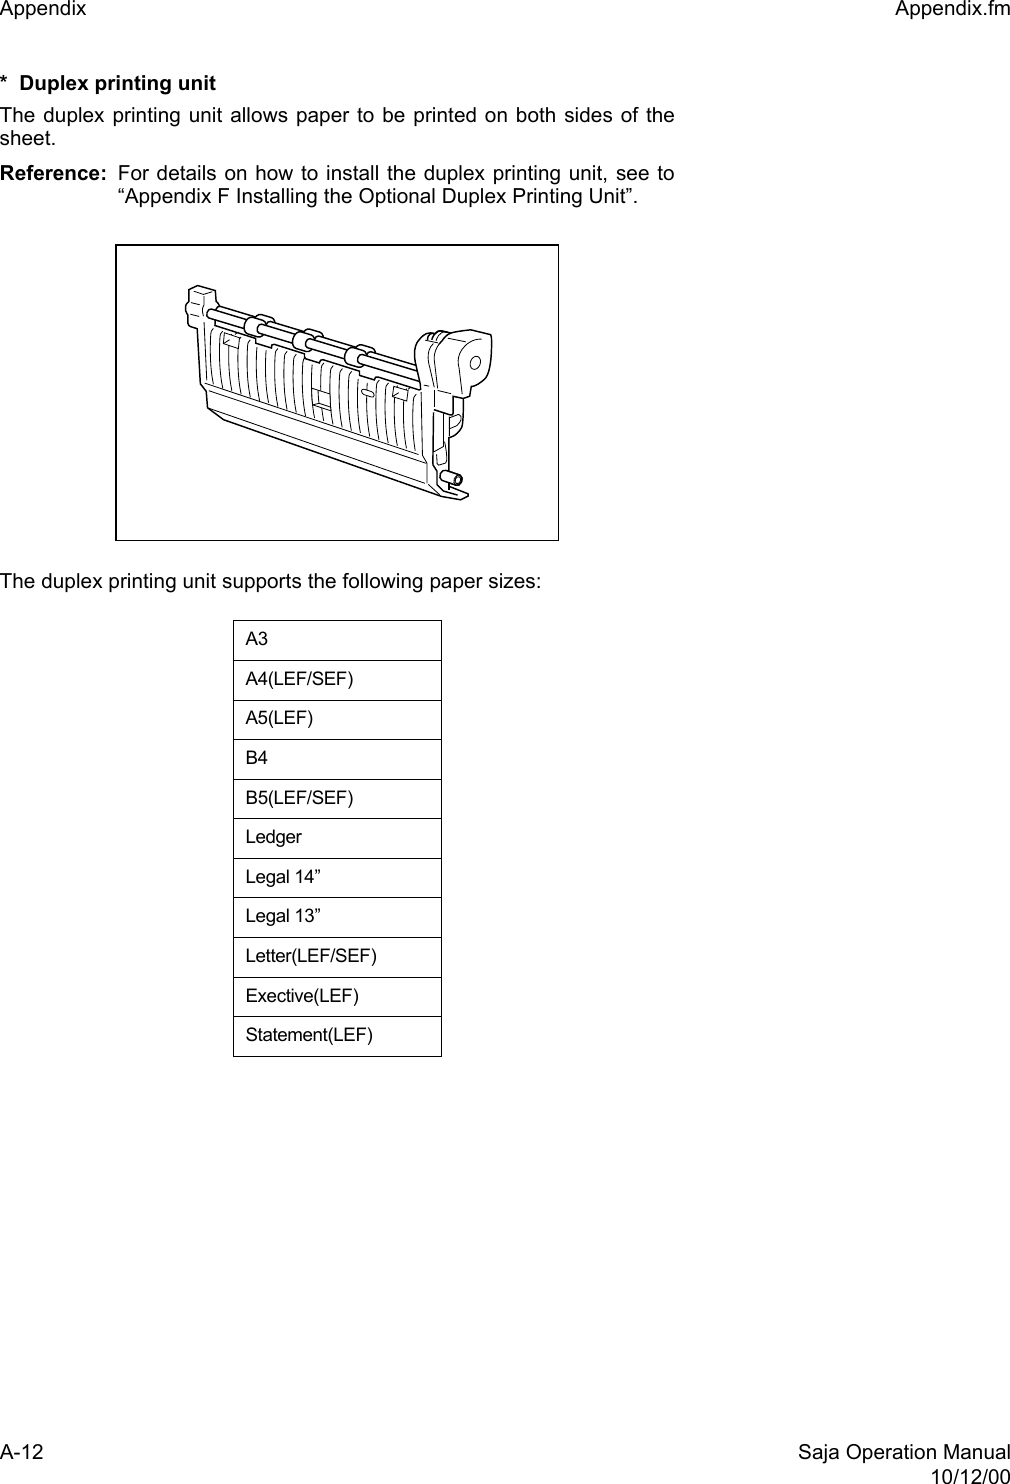
![A-40 Saja Operation Manual10/12/00Appendix Appendix.fmAppendix F Installing the Optional Duplex Printing Unit The optional duplex printing unit allows printing on both sides of thepaper. It supports the following paper sizes:Caution: Before installing or removing the duplex printing unit, be sureto turn the power switch of the printer off, to prevent the dan-ger of electric shock. Installing the duplex printing unitTo install the duplex printing unit, proceed as described below. 1. Set the power switch on the right side of the printer to [ O ] to turn offthe printer. Then disconnect the power cord from the AC outlet. Important: Installing the duplex printing unit while the printer isturned on may result in malfunction.A3A4(LEF/SEF)A5(LEF)B4B5(LEF/SEF)LedgerLegal 14”Legal 13”Letter(LEF/SEF)Exective(LEF)Statement(LEF)](https://usermanual.wiki/FUJIFILM-Business-Innovation/YIA-7.User-Manual-Part-2/User-Guide-267241-Page-67.png)

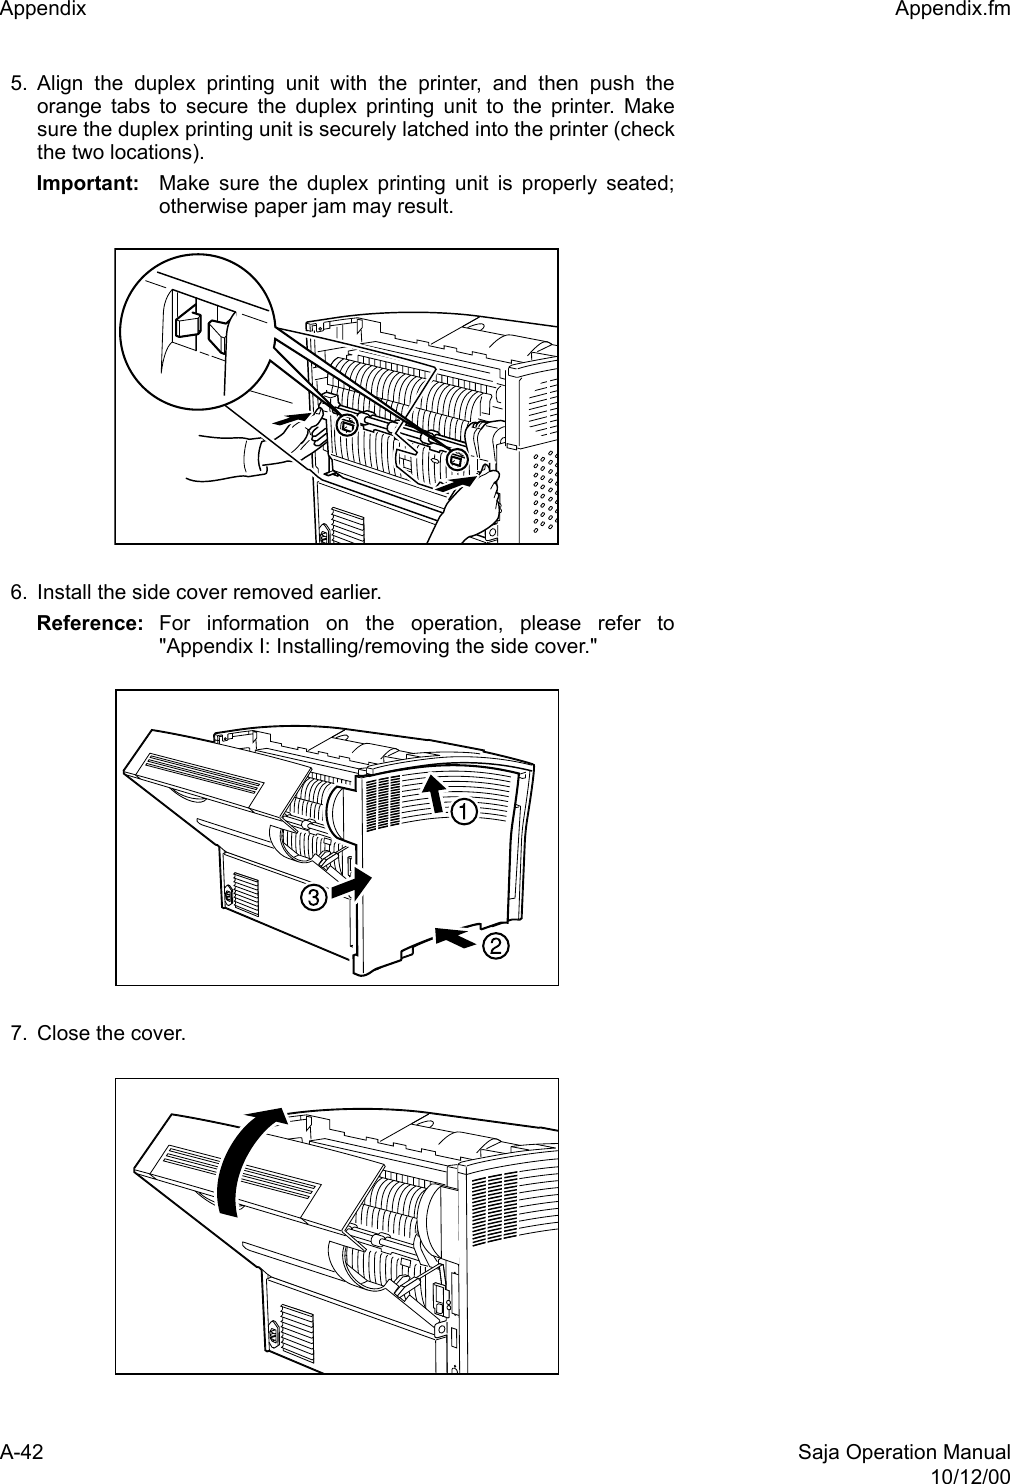
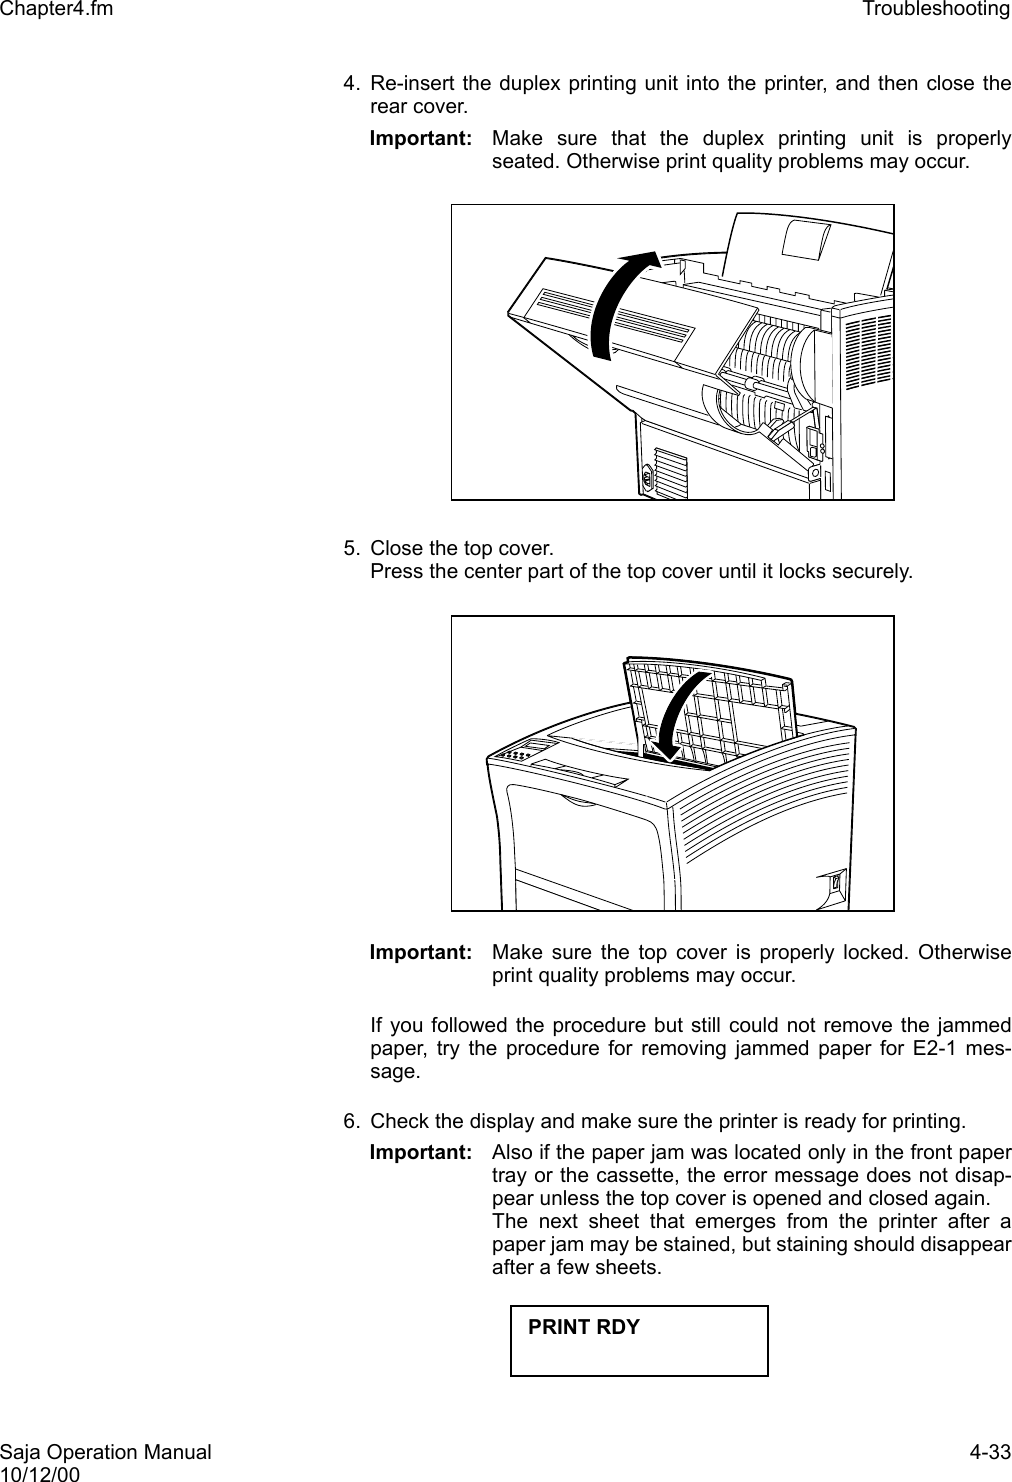
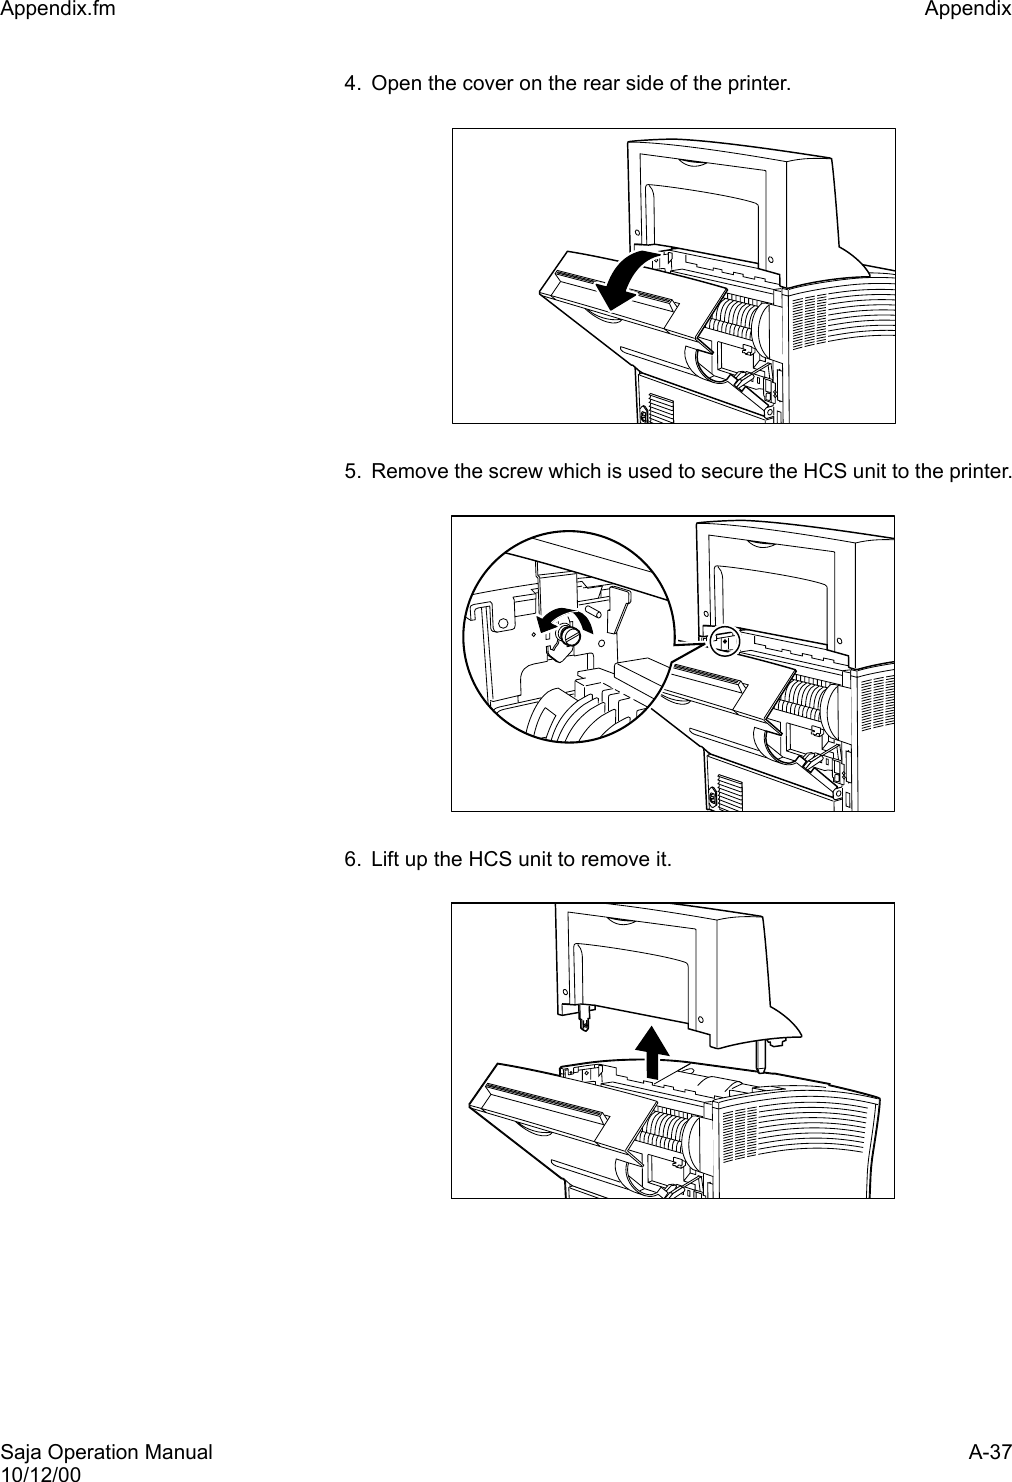
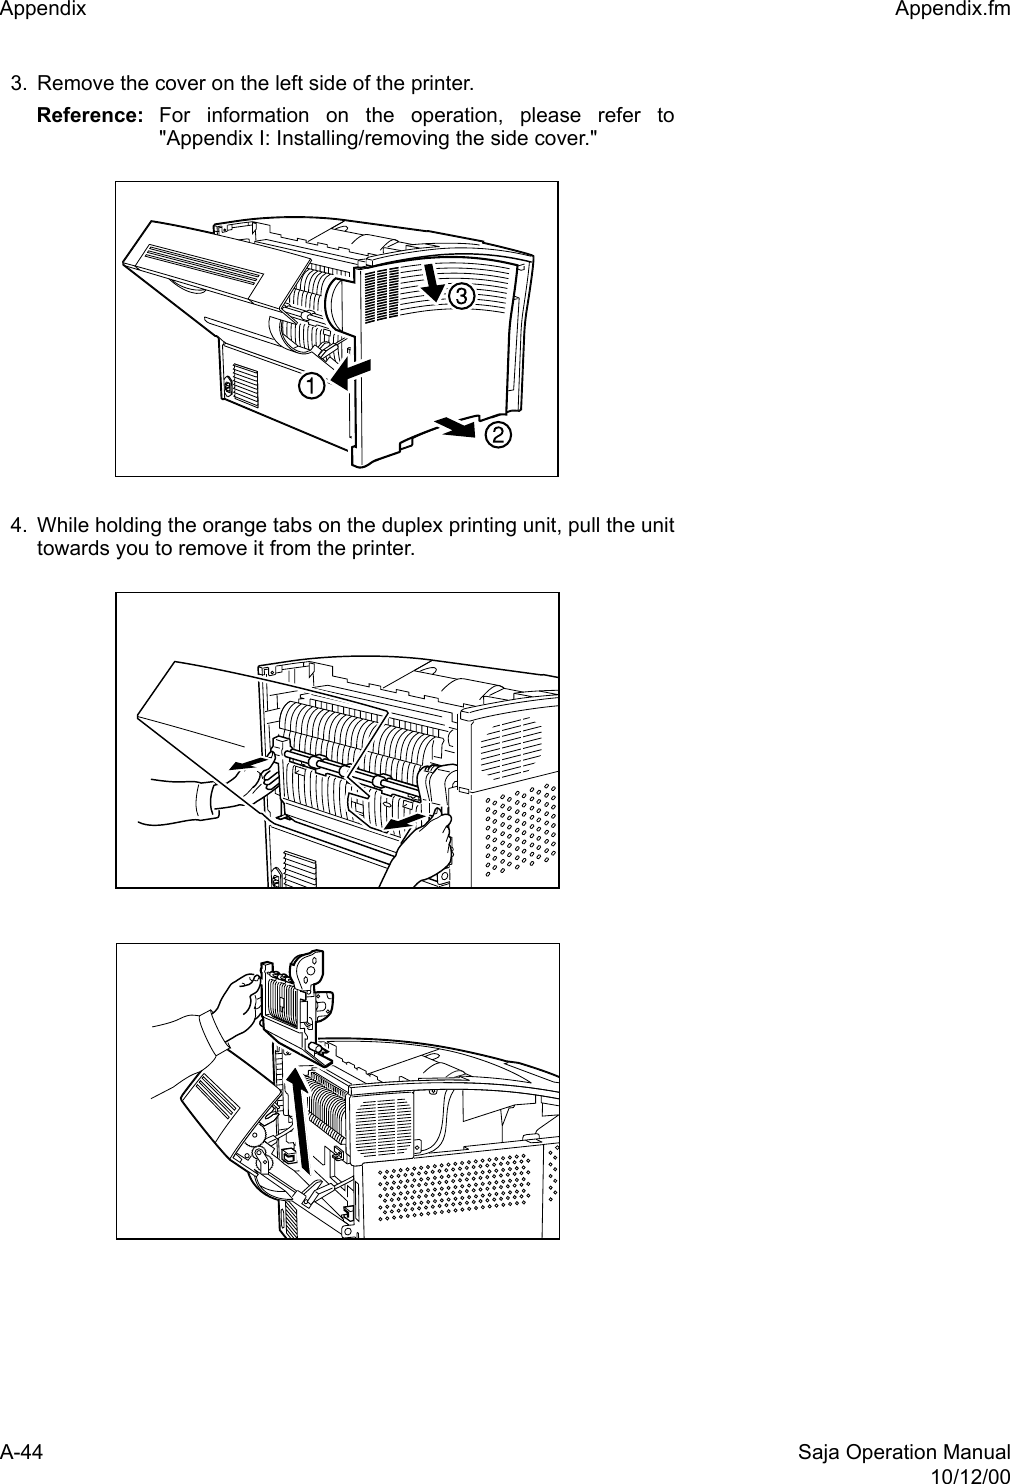
![Saja Operation Manual A-4310/12/00Appendix.fm Appendix 8. Insert the plug of the power cord into the AC outlet. Set the powerswitch on the right side of the printer to [ I ] to turn on the printer.9. Check the display and make sure the printer is ready for printing.Important: If an error message is shown, see “4.3 Error Messages”.Removing the duplex printing unitTo remove the duplex printing unit, proceed as described below. 1. Set the power switch on the right side of the printer to [0] to turn off theprinter. Then disconnect the power cord from the AC outlet. Important: Removing the duplex printing unit while the printer isturned on may result in malfunction.2. Pull on the recessed area on the upper middle part of the rear side ofthe printer, to open the cover.](https://usermanual.wiki/FUJIFILM-Business-Innovation/YIA-7.User-Manual-Part-2/User-Guide-267241-Page-70.png)
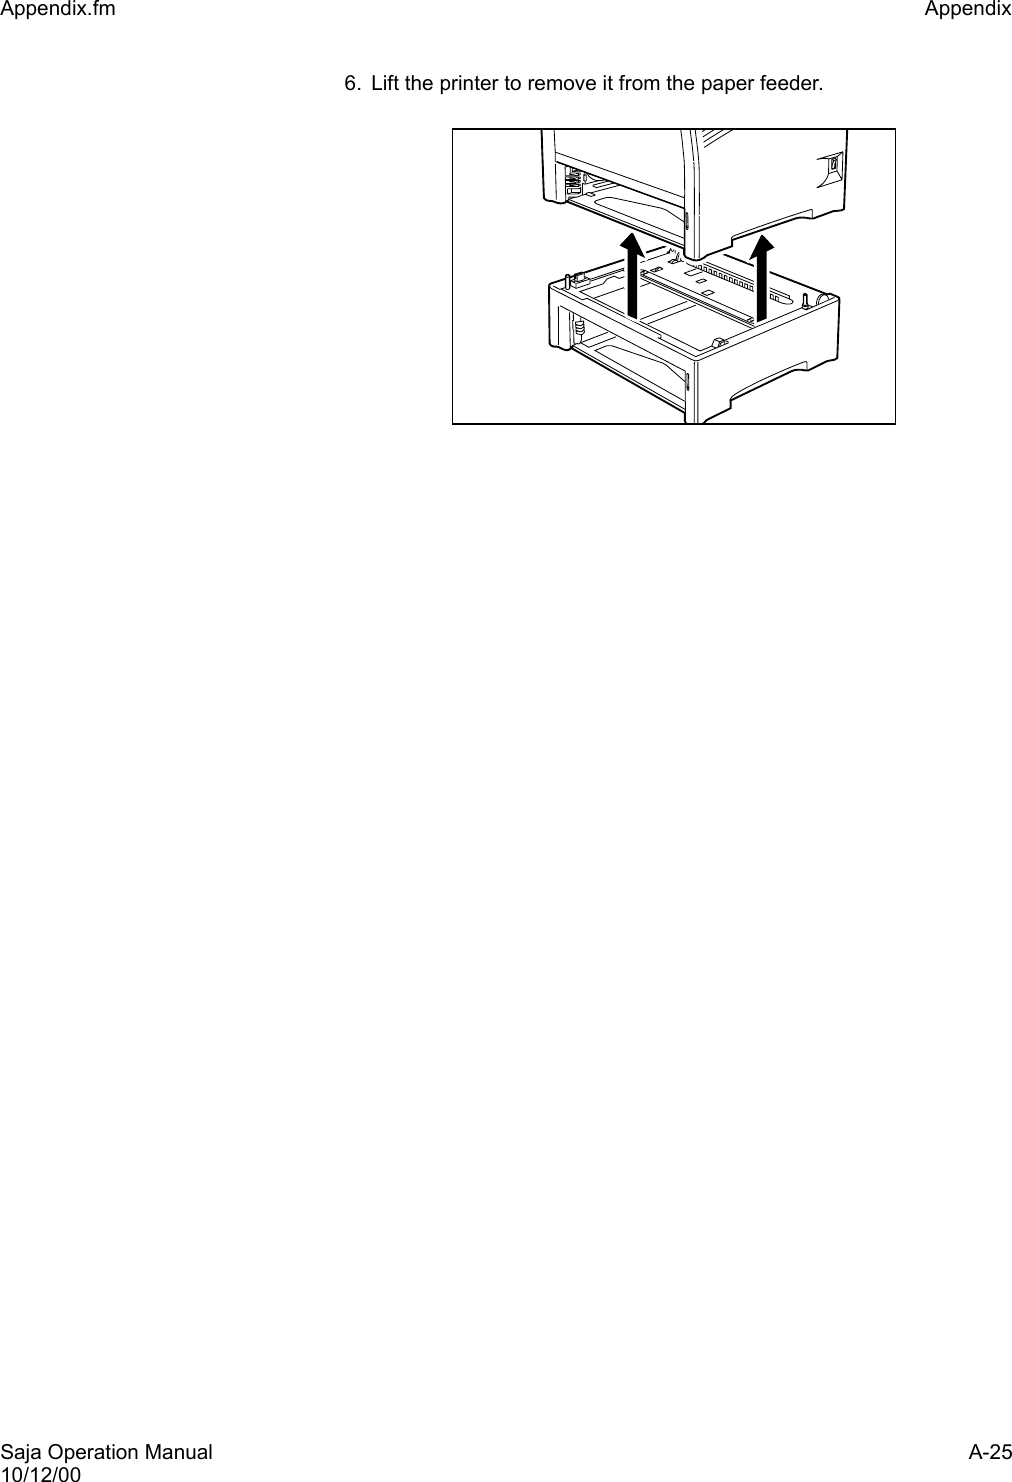
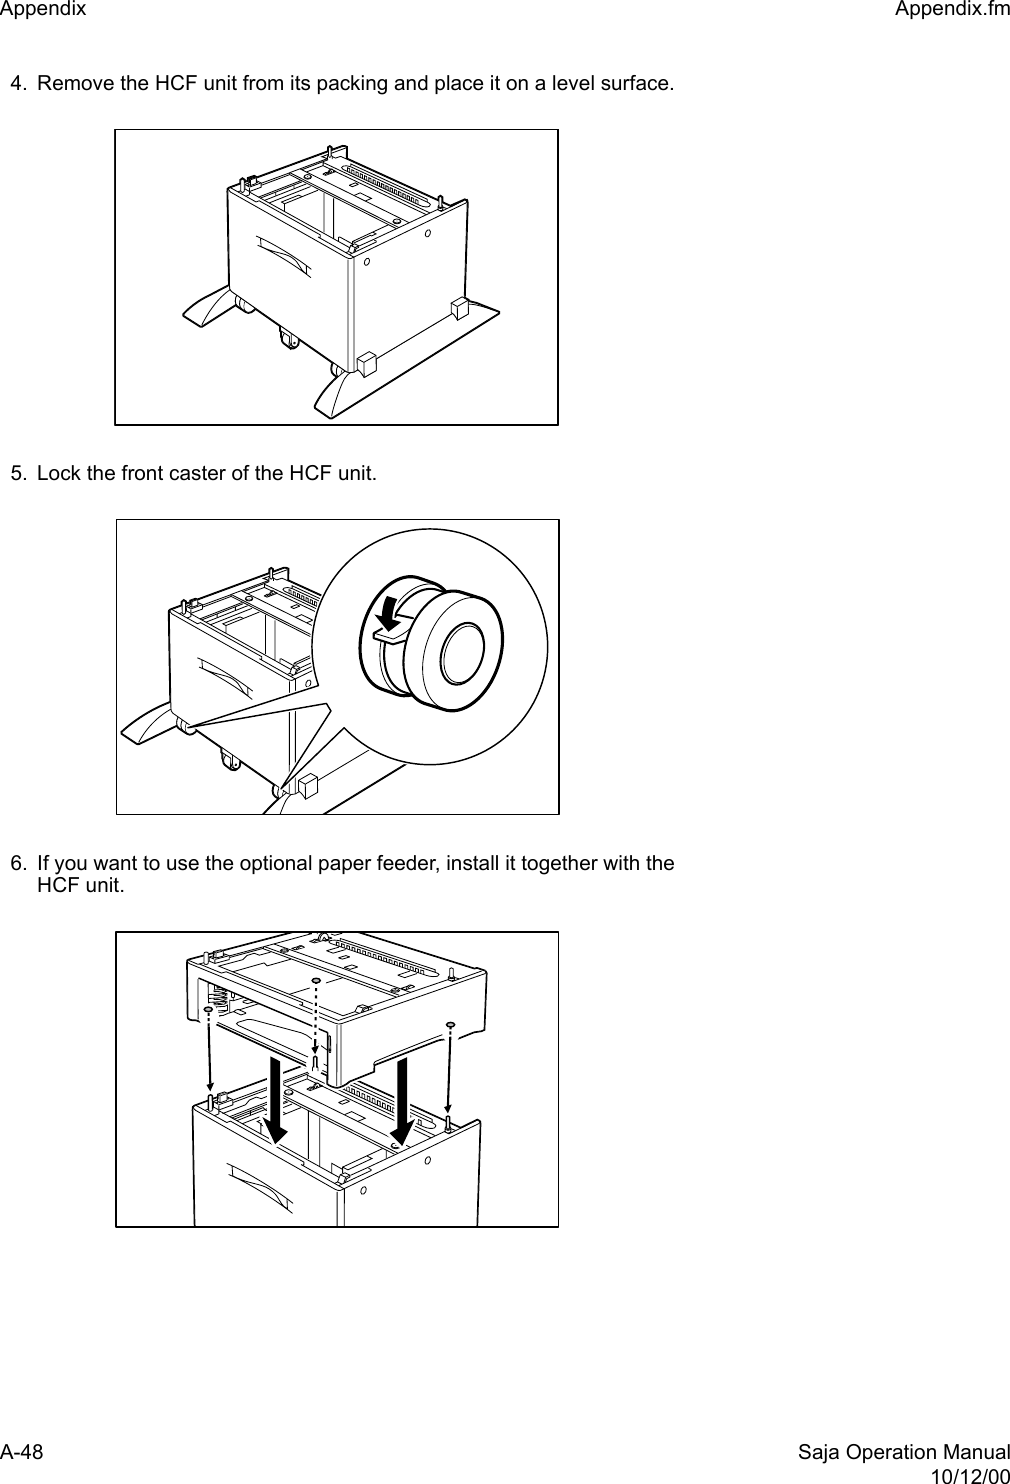
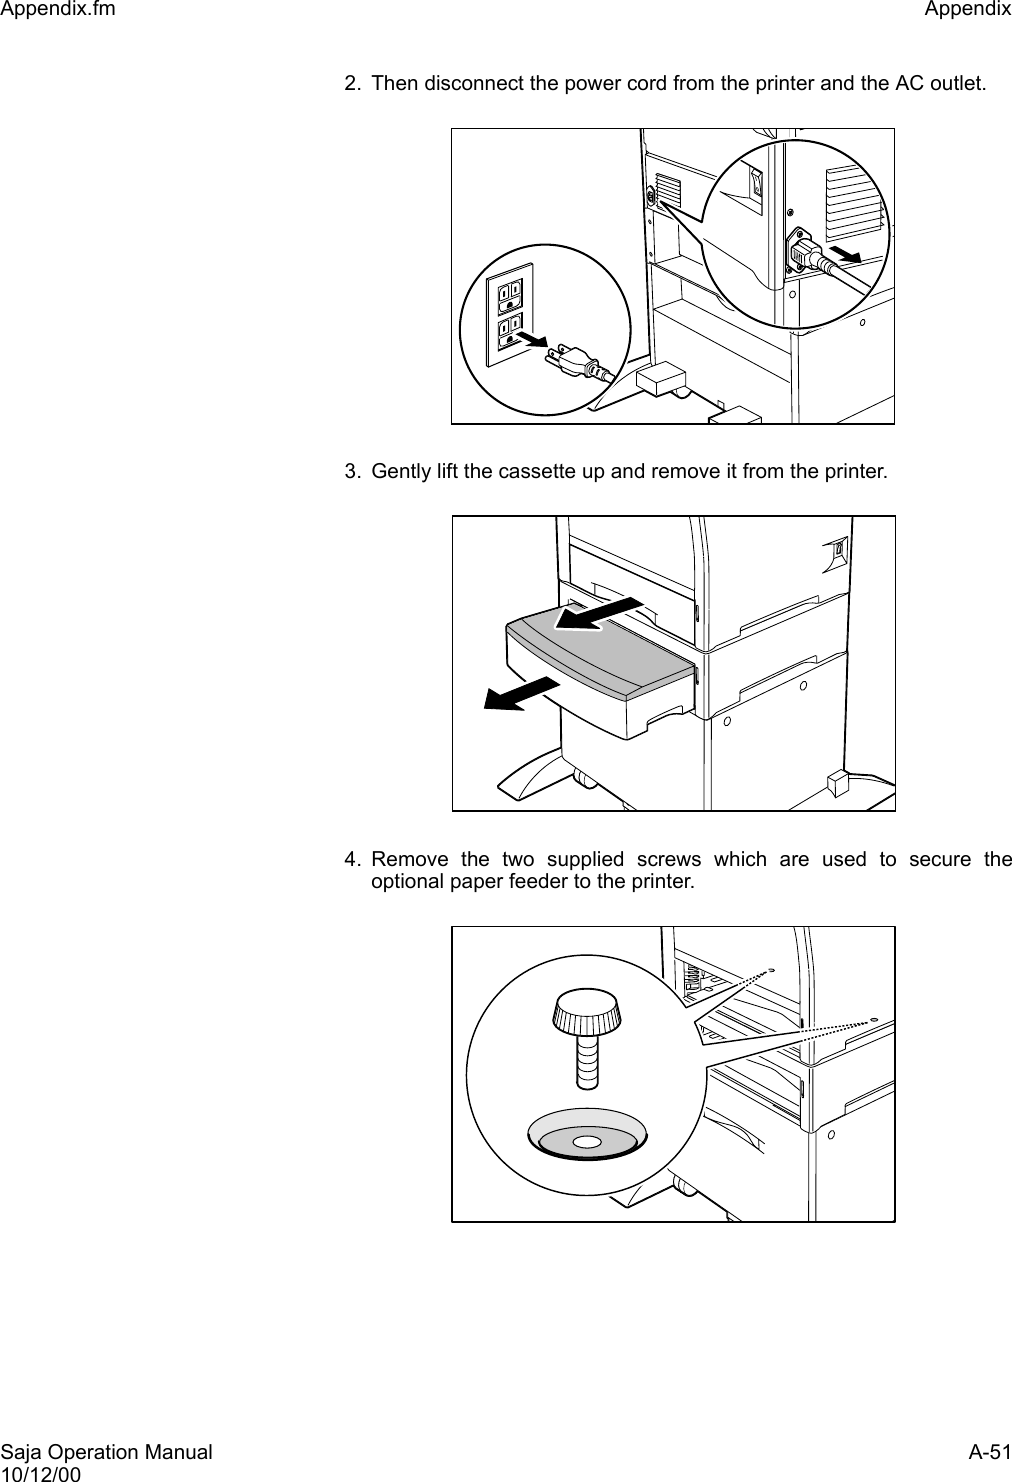
![Saja Operation Manual A-4710/12/00Appendix.fm Appendix Installing the HCF unitTo install the HCF unit, proceed as described below. 1. Set the power switch on the right side of the printer to [ O ] to turn offthe printer. Important: Installing the HCF unit while the printer is turned on mayresult in malfunction. 2. Then disconnect the power cord from the AC outlet and the printer.3. Gently lift the cassette up and remove it from the printer.](https://usermanual.wiki/FUJIFILM-Business-Innovation/YIA-7.User-Manual-Part-2/User-Guide-267241-Page-74.png)

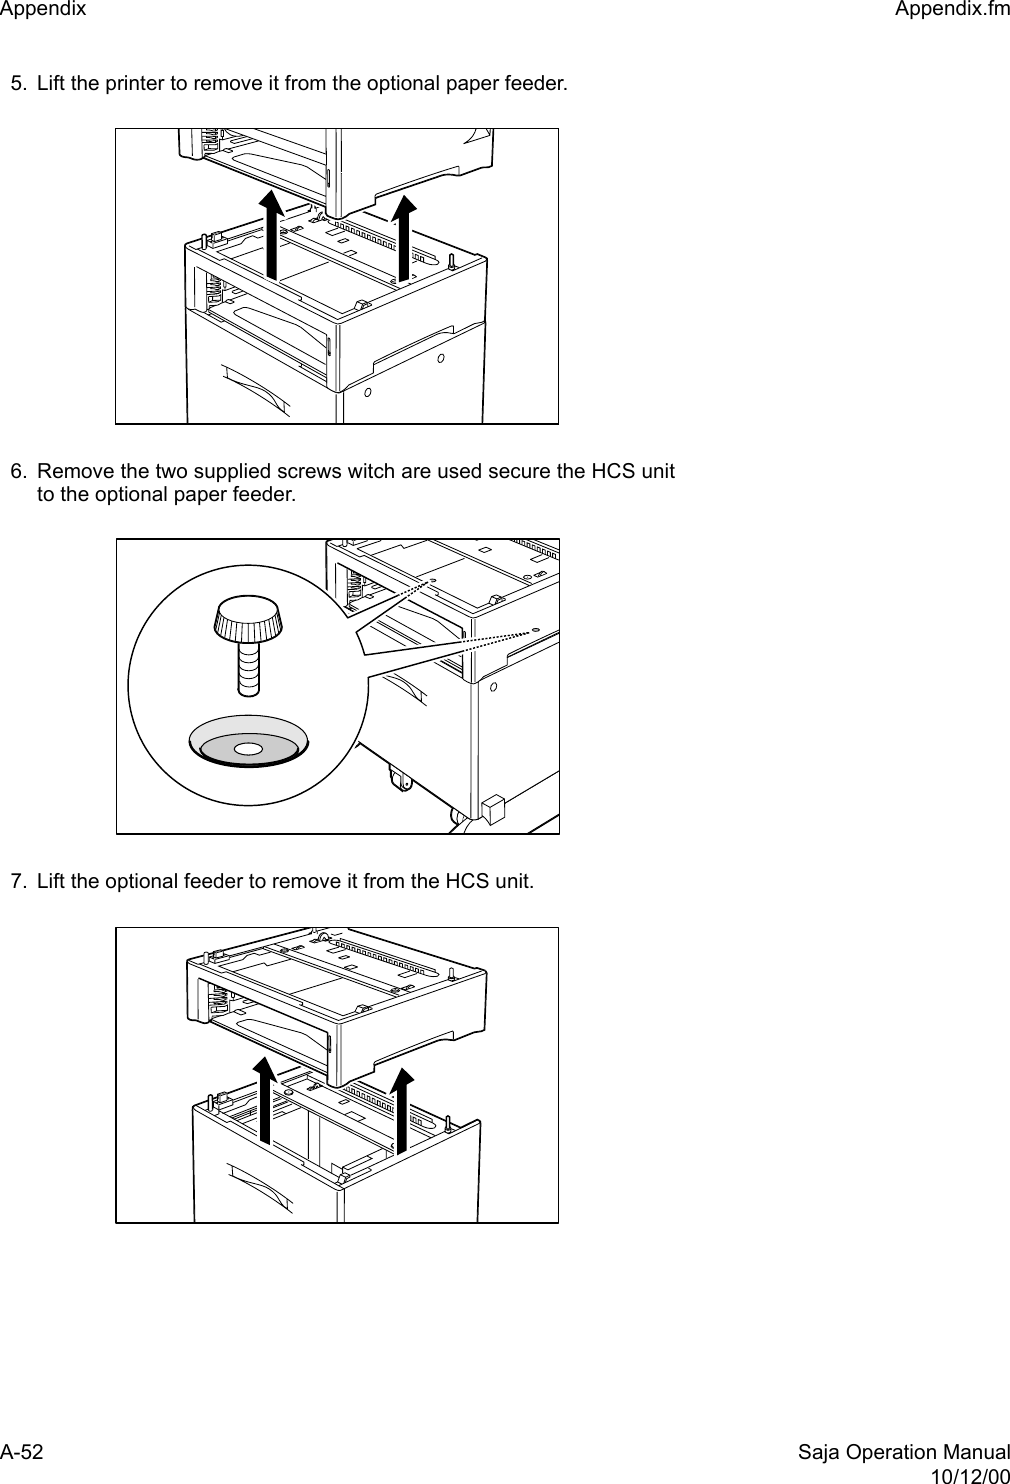
![A-50 Saja Operation Manual10/12/00Appendix Appendix.fm10. Load paper into the HCF unit. Reference: For details on how to load paper, see “Appendix H Load-ing Paper into the HCF Unit”. 11. Insert the cassette completely the printer. Make sure the cassette isproperly seated.12. Insert the plug of the power cord into the AC outlet. Set the powerswitch on the right side of the printer to [ I ] to turn on the printer.Check the display and make sure the printer is ready for printing.Important: If an error message is shown, see “4.3 Error Messages”.Removing the HCF unitTo remove the HCF unit, proceed as described below. 1. Set the power switch on the right side of the printer to [ O ] to turn offthe printer.](https://usermanual.wiki/FUJIFILM-Business-Innovation/YIA-7.User-Manual-Part-2/User-Guide-267241-Page-77.png)

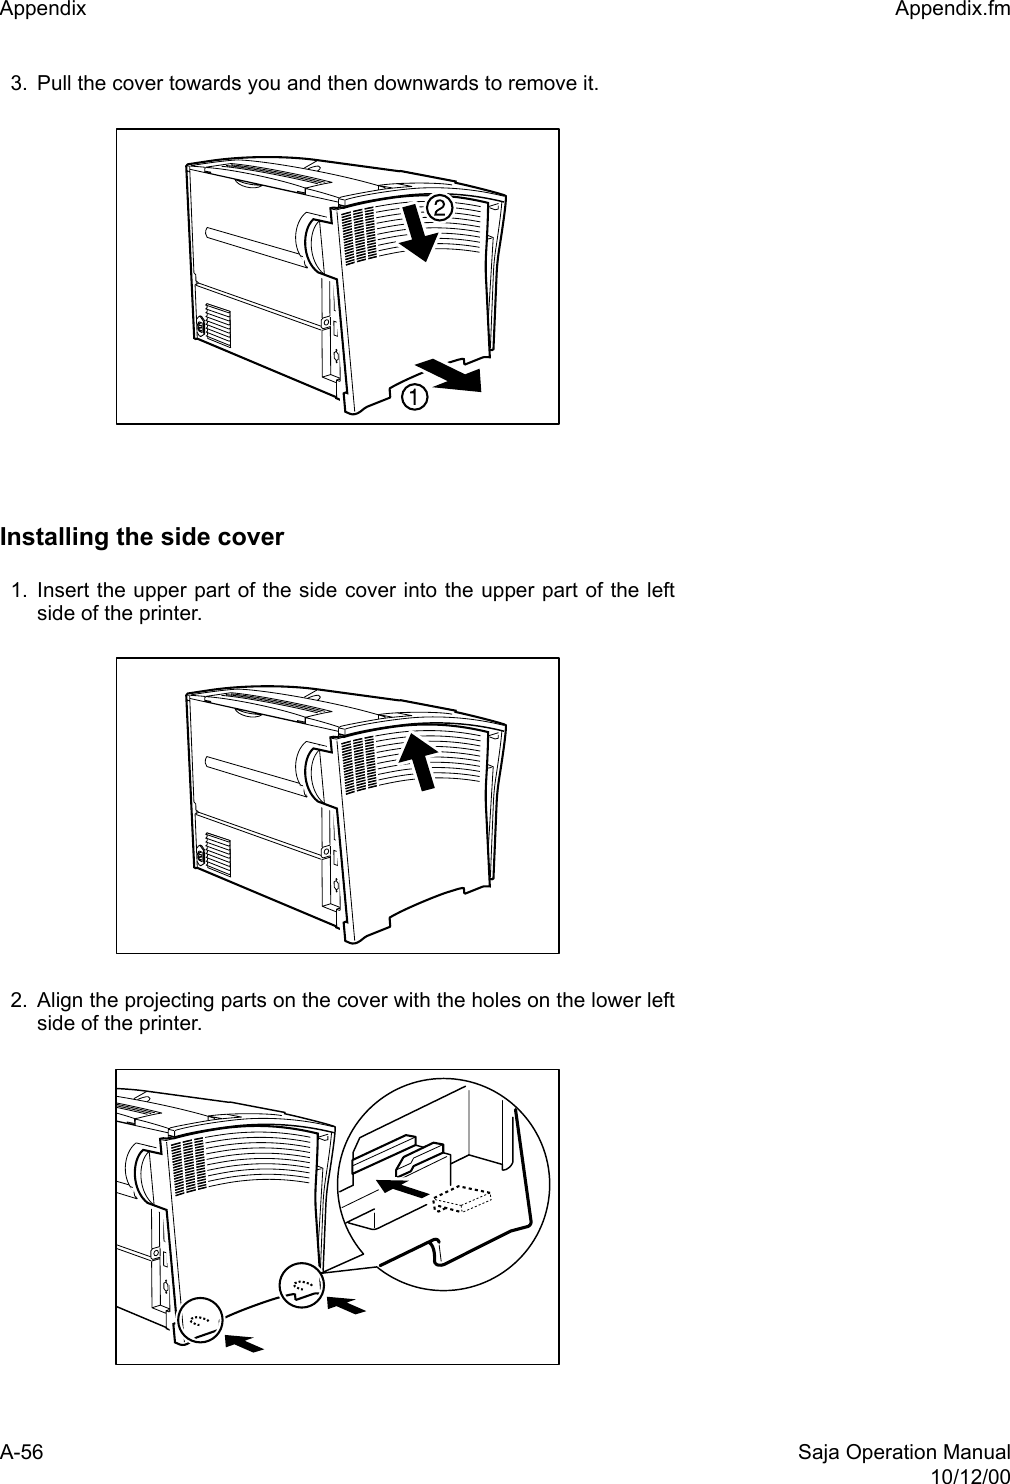
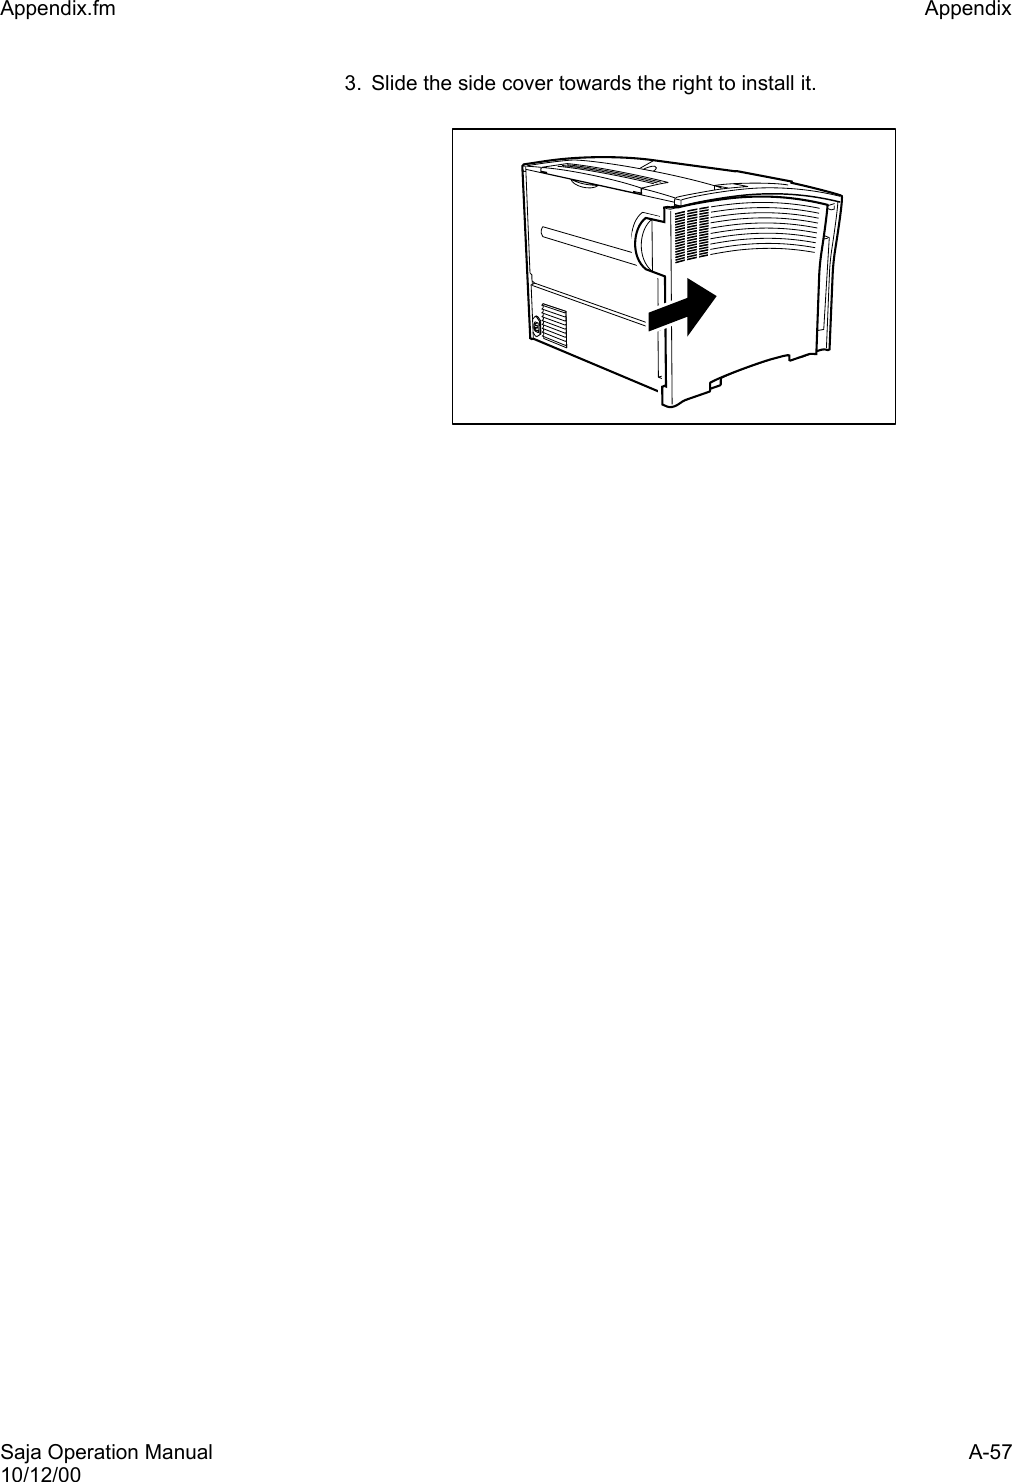
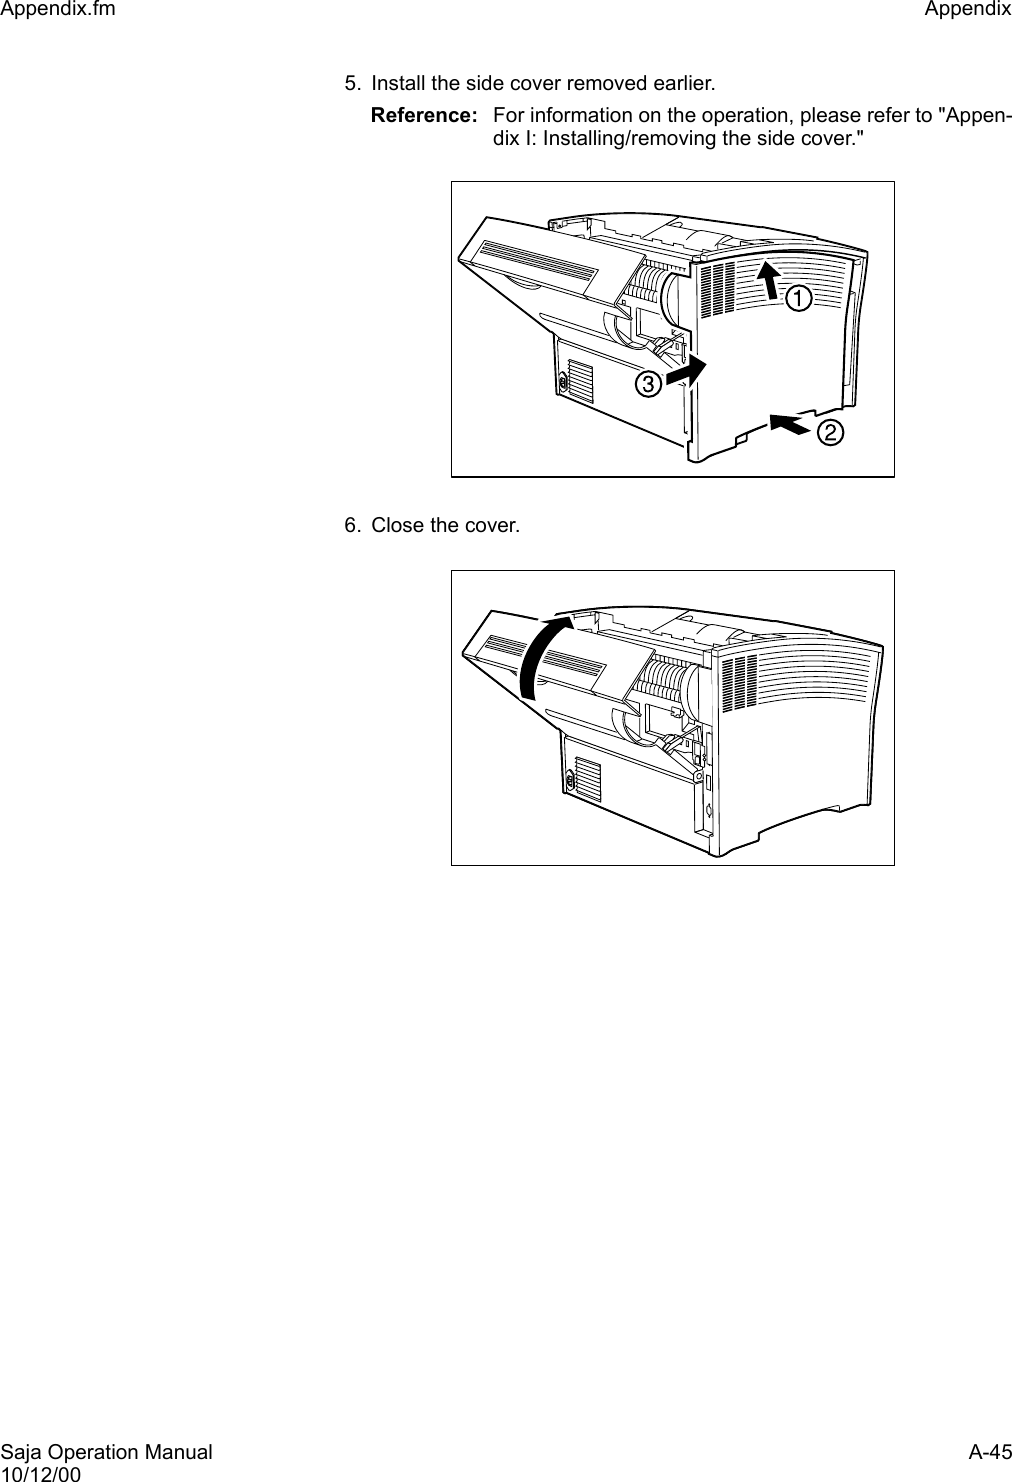
![Saja Operation Manual A-5510/12/00Appendix.fm Appendix Appendix I Installing/removing the side coverWhen installing an option into the printer, you must remove the side cover.The following describes how to install or remove the side cover.Caution: Before installing or removing the option, be sure to turn thepower switch of the printer off, to prevent danger of electricshock.Removing the side cover1. Set the power switch on the right side of the printer to [ O ] to turn offthe printer. Then disconnect the power cord from the AC outlet.Important: Installing the HCF unit while the printer is turned on mayresult in malfunction. 2. Slide the cover on the left side of the printer towards the left.](https://usermanual.wiki/FUJIFILM-Business-Innovation/YIA-7.User-Manual-Part-2/User-Guide-267241-Page-82.png)