First Computer A430 Notebook PC User Manual Chap5
First International Computer Inc Notebook PC Chap5
Contents
Chap 5
Connecting to Peripherals 5
5-1
5Connecting to Peripherals
This chapter describes how you attach peripheral
devices to your notebook. You can attach a printer
or mouse, connect an external monitor and
keyboard, or any other peripheral device. You will
learn how to use these peripheral devices with the
step-by-step instructions depicted in this chapter.
Notebook User Guide
5-2
5.1 Using a Serial Mouse
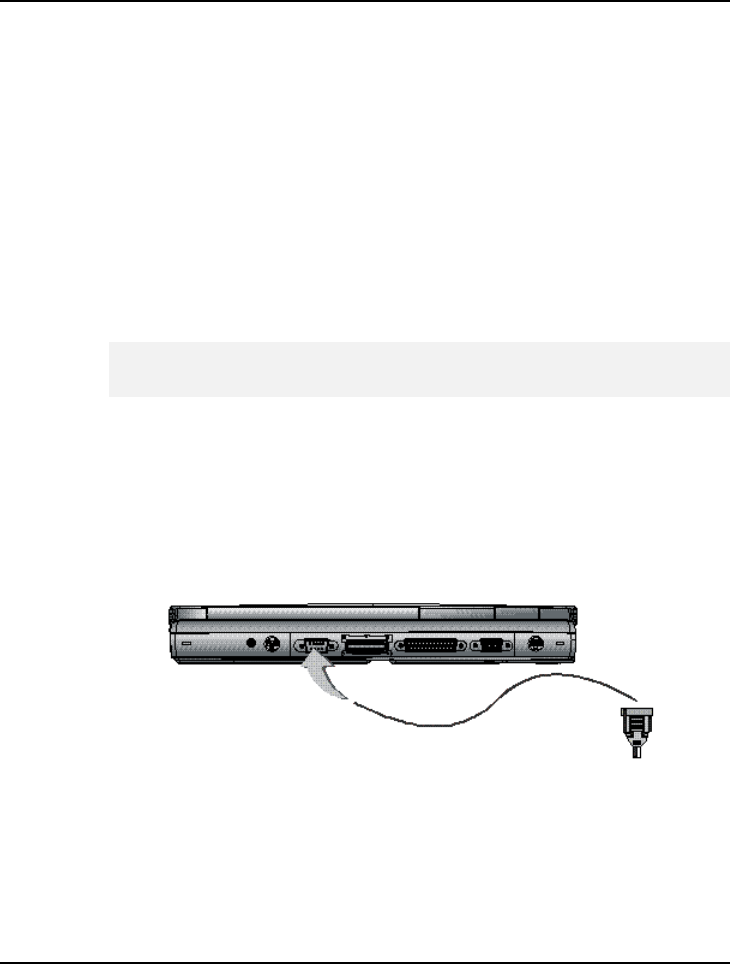
Your computer has one 9-pin male serial port for connecting an external serial
mouse, printer or modem. The serial (RS232) port of your computer is
normally referred to as COM1. When working with your computer on the
desktop, you may want to use an external serial mouse instead of the Glide
Pad. If you want to use a modem as well, we recommend using a
voice/fax/modem PC card through the PCMCIA slot.
+
When you connect a printer, be sure to install the appropriate printer
driver through the Windows Control Panel.
To install an external serial mouse:
1. Turn off your computer.
2. Plug the serial mouse connector to the serial port at the back of your
computer. Secure the connection with the screws provided.
3. Turn on the computer.
4. Click the Start button, then point to Settings, and click Control Panel
when there is another mouse connects to PS/2 port.

Connecting to Peripherals 5
5-3
5. Double-click on the Add/Remove Program icon to appear the Add
New Hardware Wizard.
6. Follow the relative steps when screen shows up to guide you in executing
the specific procedures.
7. When system has rebooted, Windows will automatically detect the serial
mouse.
5.2 Using an External Keyboard (PS/2)
At the back of your computer, you will find the 6-pin mini-DIN PS/2
keyboard and mouse port. This port allows you to connect an external full-
sized PS/2 desktop keyboard as well as an external PS/2 mouse. It is
recommended to use an external PS/2 mouse only if you are not using an
external PS/2 keyboard. Otherwise, you must use the serial port for
connecting a serial mouse as discussed earlier. If you want to use both the
external PS/2 mouse and keyboard, you would need to buy a PS/2 Y-cable.
You can also purchase a keyboard adapter from your computer dealer that
allows you to connect standard 5-pin DIN-type desktop keyboards. This type
of keyboard is widely used by desktop computers compared to PS/2 type.
To connect the external keyboard:
1. Turn off your computer.
2. Connect the PS/2 keyboard directly to the PS/2 port. If you are using 5-
pin DIN-type keyboard, plug the keyboard to the keyboard adapter first
and then to the PS/2 port. Windows 95/98 keyboard are also supported.
3. Turn on your computer. Both the built-in keyboard and the external
keyboard are active and can be used simultaneously.

Notebook User Guide
5-4
+
Do not disconnect or connect the external keyboard when power is on.
Turn off the computer first. You can connect an external keyboard or
keypad only while the system is in Suspend mode.
+
If you connect an external mouse, you must turn off the system.
To connect an external PS/2 mouse, follow the same procedure as above.
Both the PS/2 mouse and the built-in Glide Pad will work at the same time.
5.3 Using the USB Port
USB or Universal Serial Port is a peripheral bus standard developed by
Compaq, DEC, IBM, Intel, Microsoft, NEC and Northern Telecom. Personal
computers equipped with USB will allow computer peripherals to
automatically configure as soon as they are physically attached - without the
need to reboot or run setup. USB will also allow multiple devices to run
simultaneously on a computer, with peripherals such as digital cameras,
scanners, printers, CD-ROM drives, modems, keyboards, telephones, games
devices and monitors acting as additional plug-in sites, or hubs.
USB devices called USB hubs can serve as connection ports for other USB
peripherals. Only one device needs to be plugged into your notebook

Connecting to Peripherals 5
5-5
computer. Additional peripherals can be connected in a daisy chain
configuration where one device is connected to another in a series.
Windows 95 B version (OSR 2.1 release) or Windows 98 will come equipped
with the drivers that allows your PC to recognize USB peripherals.
+
Depending on your operational requirements, you may need to disable the
USB port in order to release system resources to use other devices.
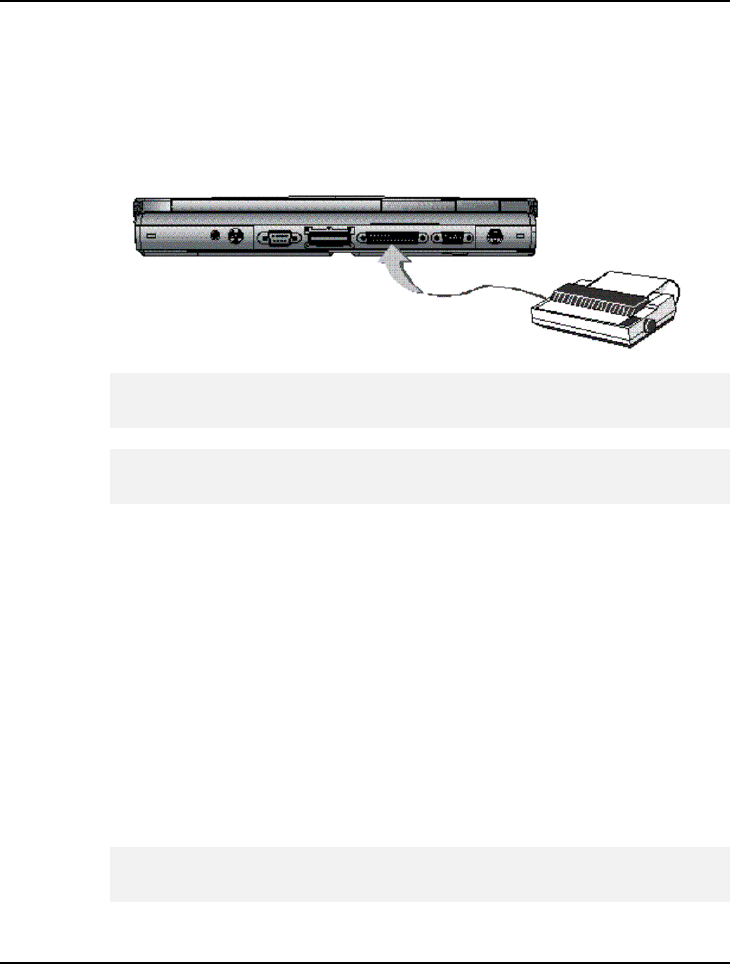
5.4 Connecting a Parallel Printer
The parallel (LPT1) port has a 25-pin female connector at the back of your
computer. You would always connect to this whenever you are going to print
out to a parallel printer.
To connect to a printer:
1. Connect the printer to the parallel port using the 25-pin male connector
cable of the printer. Secure the cable with the screws provided.
2. Align and connect the other end of the cable to the parallel port on the
device. Lock the connector clips.
3. Connect the power cable to the device and a properly grounded wall
outlet.
4. Power on both computer and printer.
5. Check the printer by doing a self-test operation.
6. Set the printer type of your software to recognize the connected printer.
Notebook User Guide
5-6
7. If your printer is not listed in the software you are using, consult your
printer dealer for available drivers or any compatible ones.
8. Press the Online function of the printer.
+
When you connect a printer, be sure to install the appropriate printer
driver through the Windows Control Panel.
+
Check that the device is online before you try to use it. See the
instructions that came with the device for more information.
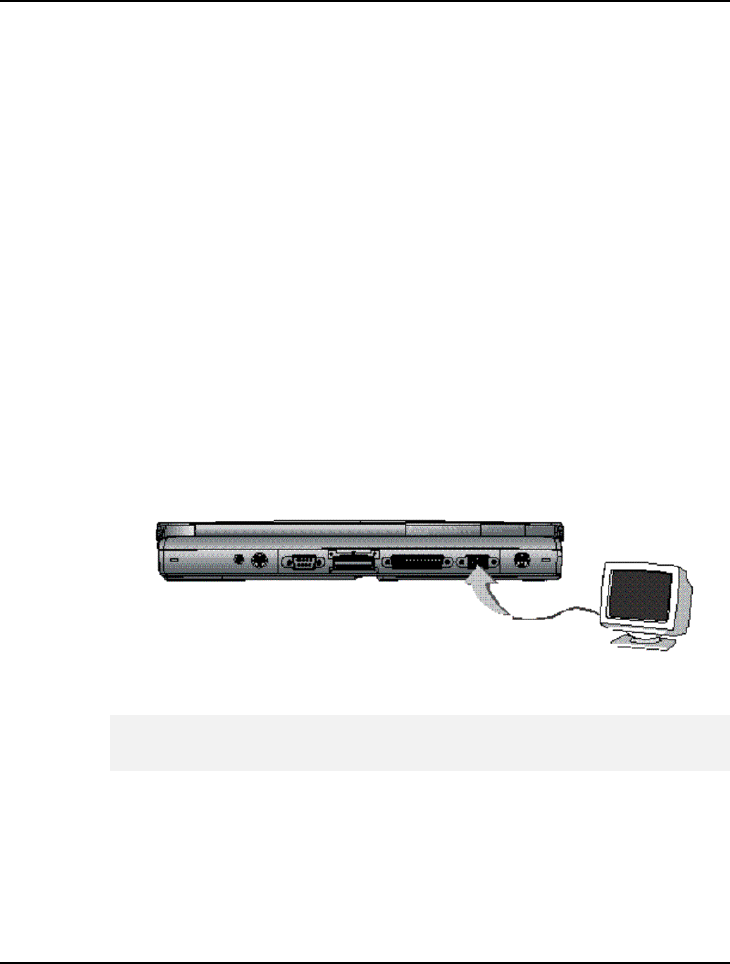
5.5 Using an External Monitor (VGA Port)
Your computer has a 15-pin VGA port for supporting any external VGA
color monitor with maximum display resolution of 1024x768 64K colors or
16-bit high colors. You need a display signal cable (usually provided with the
monitor). One end of the cable must have a 15-pin connector for the system.
To connect an external monitor:
1. Turn off your computer and make sure the monitor power switch is
turned off.
+
The notebook computer must be powered off or suspended while the
monitor is being connected.
Connecting to Peripherals 5
5-7
2. Connect the connector cable of the monitor to the VGA port at the back
of your computer. Secure the cable connection with the screws provided.
3. Connect the monitor power cable and plug it into a properly grounded
wall outlet.
4. Turn the power of the monitor.
5. Turn on your computer. Both the LCD panel and the monitor screen will
show the display. Your computer is set at default to run at simultaneous
display mode.
6. If you only want to show the display on the monitor (CRT) and shut off
the LCD display, you can use the <Fn> + <F3> hot-key to switch
display type between LCD and CRT. Keep pressing the hot-key until you
get the display to CRT only.
+
Refer to Chapter 3 regarding the possible VGA resolutions and how to
change the display properties.
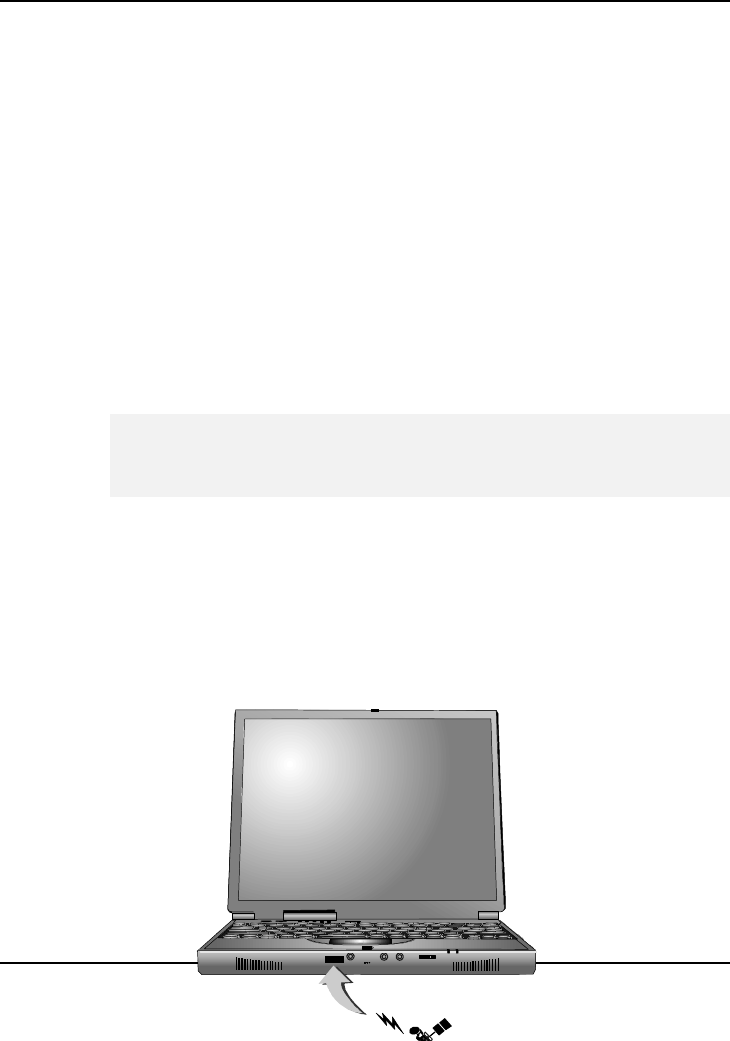
5.6 Using the SIR Port
Your computer is equipped with an industry standard IR port that allows
enhanced wireless connection with infrared built-in devices like PDAs,
Notebook User Guide
5-8
electronic organizers, printers, and portable computers. The IR port is
Infrared Data Association (IrDA) compatible which makes use of the second
COM port or COM2 of your computer. The transfer rates for SIR (Serial
Infrared Standard) is 115.2Kbit/sec.
To connect to another IR equipped device:
1. Properly position both your computer and the target device. Place the
target device in line with your notebook and should be within 80cm (30-
inches) from each other. You should refer to the User Guide of the
target device on how to enable its IR function.
2. Turn on your computer and run the BIOS Setup program. Go to the
Advanced menu and set the Infrared Port to Enabled.
+
Your notebook computer ships with the IR port disabled. The first time
that you use the IR port, you must enable the device through the setup
utility.
3. After setting up both devices to enable IR function, run the application
you wanted to use the IR port.
4. Set the transmission protocol or device to COM2. Make sure that this
does not conflict with any pre-installed fax/modem PC card which is also
configured at COM2.
Connecting to Peripherals 5
5-9
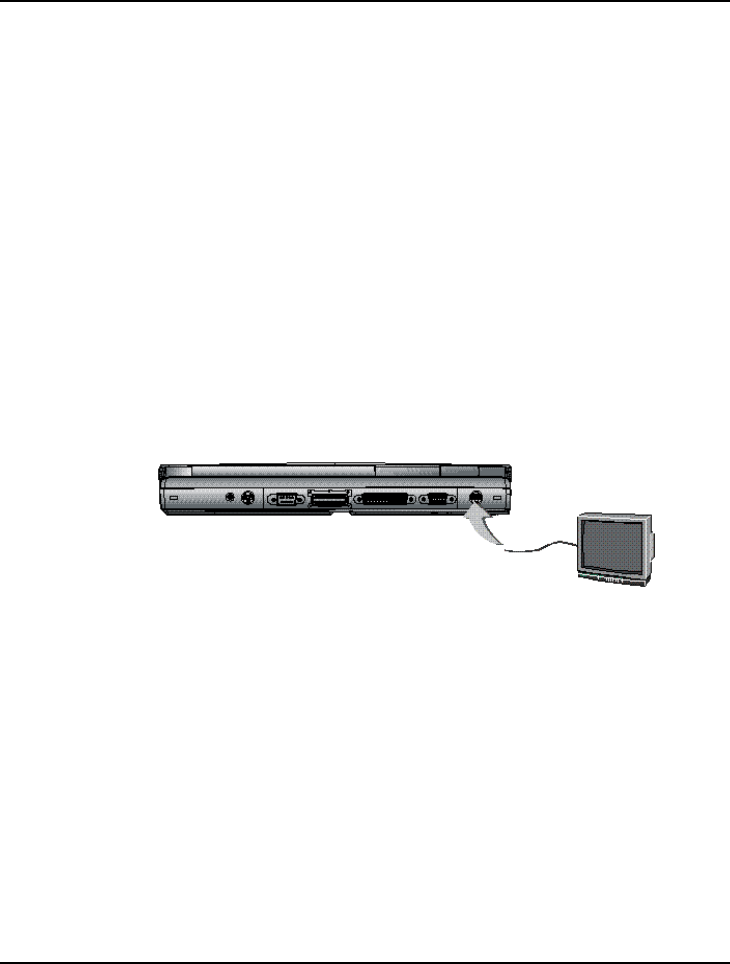
5.7 Using the TV Port
Also found at the back of your computer is one S-Video port.
To display your computer screen on the TV:
1. Turn off your computer and plug one end of the S-Video jack cable to
the end to the input video jack of your television set.
2. Turn on your computer and your television set.
3. Click the Start button, then point to Settings, and click Control Panel.
4. Double-click on the Display icon and point to Setting tab.
5. Double-click Advanced button and point to Displays tab.
6. Choose the TV button then click OK. Windows now automatically detect
the TV port and enable this function.

Notebook User Guide
5-10
5.8 Using the External Audio System
At the front of your computer, you will find the built-in audio ports. You can
connect audio input jacks with microphone and stereo device; and audio
output jack with external speakers, earphone, or headphone for recording and
playing sound.
To connect to a audio jack:
1. Locate the audio port (Microphone, Line-in or Headphones) that you
want to use to the target device.
2. Plug the jack into the port on the front side of the system.
+
Some audio device cable connectors are designed with an icon
representative of the device. When connecting the audio device to your
notebook computer, be sure to match the icon on the cable connector to
the icon on the system port.
+
If you use external speakers and experience the sound distortion or
feedback, please lower the volume. Some factors is caused by too close
locating the microphone and speakers from each other, moving away the
external audio option from the unit may also help.

Connecting to Peripherals 5
5-11
5CONNECTING TO PERIPHERALS ..................................................................1
5.1 USING A SERIAL MOUSE ............................................................................2
5.2 USING AN EXTERNAL KEYBOARD (PS/2)..........................................................3
5.3 USING THE USB PORT...............................................................................4
5.4 CONNECTING A PARALLEL PRINTER...........................................................5
5.5 USING AN EXTERNAL MONITOR (VGA PORT)......................................................6
5.6 USING THE SIR PORT................................................................................7
5.7 USING THE TV PORT.................................................................................9
5.8 USING THE EXTERNAL AUDIO SYSTEM.....................................................10