Flir BelgiumBA VHFGEN1 Fixed Mount VHF marine radio User Manual Ray218 55 Handbook
Raymarine UK Ltd. Fixed Mount VHF marine radio Ray218 55 Handbook
UserManual.wiki
>
Flir BelgiumBA
>
VHFGEN1 User Manual
>
Part2 user handbook
Contents
1.
Part user handbook
2.
Part2 user handbook
3.
Part3 user handbook
Part2 user handbook
Navigation menu
Upload a User Manual
Namespaces
Wiki Guide
HTML
PDF
Info
Views
User Manual
Discussion / Help
Navigation
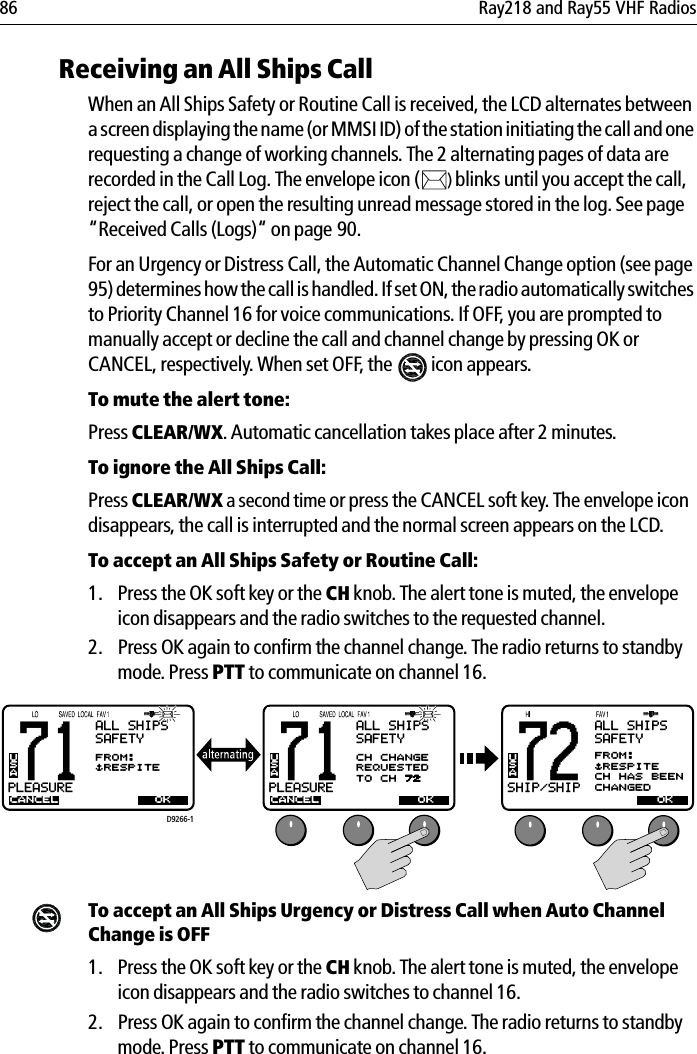
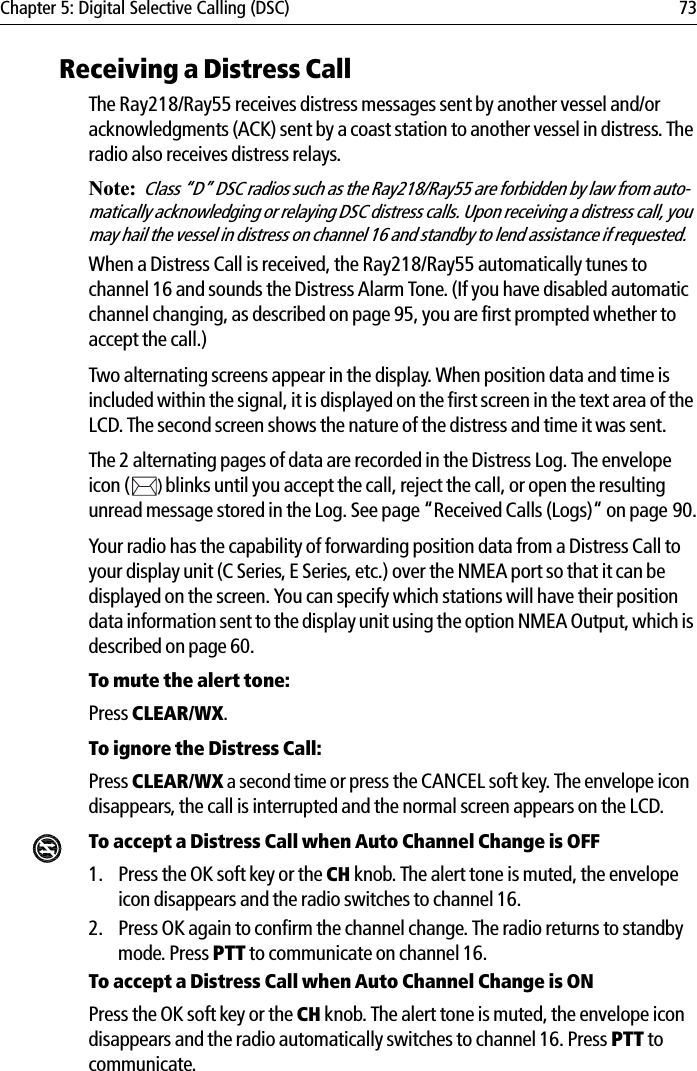
![46 Ray218 and Ray55 VHF Radios Setting the Power Output (HI/LO) The choice of power output is dependent upon the distance of transmission and transmitting conditions. As a part of FCC procedures and marine communications courtesy, initial contact should always be attempted using low power. You should switch to high power only when contact can not be made on low power or in emergency situations. Press the HI/LO soft key to toggle the TX power from LOW (1 watt) to HIGH (25 watts). The corresponding LO or HI indicator appears.You can also press and release the HI/LO–LOC/DIS key on the microphone to toggle the TX power. 71PLEASUREBBDISPLAY MODESELECT1UP CHANNEL2UP CHANNEL[BACK]USA71PLEASUREBBSELECTUSA 27 07.3838N080 04.8499W AM10:33LOC68BSTANDBY72SHIP/SHIPBBUSA68PLEASUREBBDISPLAY MODESELECT1UP CHANNEL2UP CHANNEL[BACK]USA72BSTANDBY68PLEASUREBBUSA71SHIP/SHIPBASELECTUSAVHF OPSSCAN MODEDISPLAY MODEHI/LO POWERSAVE CHANNELWATCH MODED9176-169PLEASUREBBSELECTUSAVHF OPSSCAN MODEDISPLAY MODEHI/LO POWERSAVE CHANNELWATCH MODE69PLEASUREBBBACKUSAHI/LO POWERCHANGE PWRSETTINGHI/LO POWERWATCH MODEHI/LO69PLEASUREBBBACKUSAHI/LO POWERCHANGE PWRSETTINGHI/LO POWERWATCH MODEHI/LOD9177-1](https://usermanual.wiki/Flir-BelgiumBA/VHFGEN1.Part2-user-handbook/User-Guide-772922-Page-3.png)
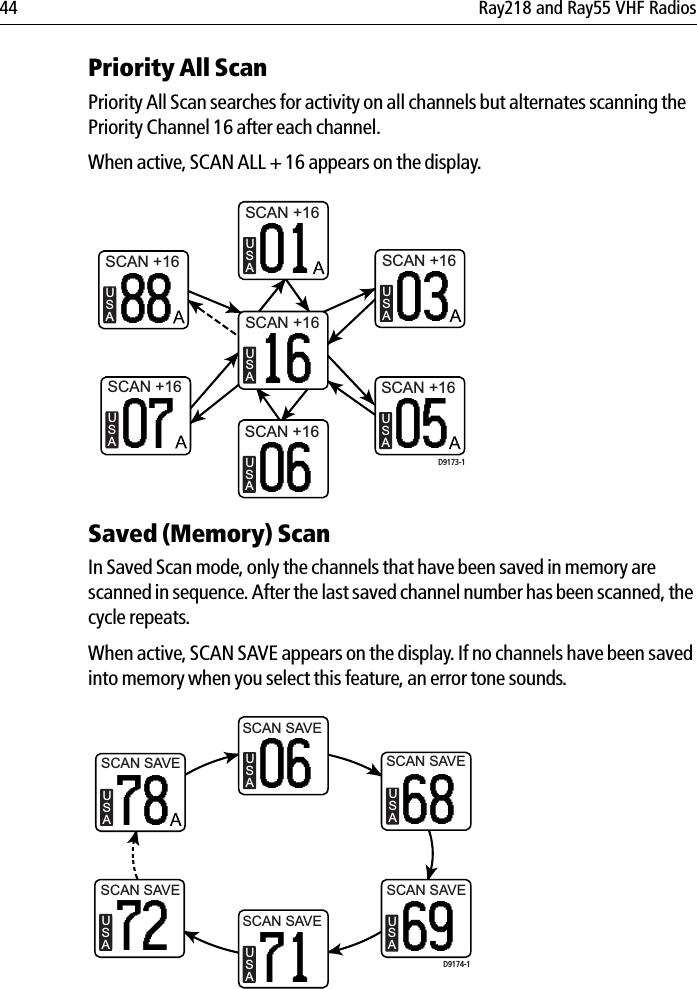
![50 Ray218 and Ray55 VHF Radios Frequency Band The Ray218/Ray55 can transmit and receive all USA, International and Canadian frequencies. This setting determines which channel set is being used. The appropriate indicator is illuminated in the LCD: USA, INT for International, or CAN for Canadian channel sets. D9180-172SHIP/SHIPBSELECTUSAVHF OPSSCAN MODEDISPLAY MODEHI/LO POWERSAVE CHANNELWATCH MODE72SHIP/SHIPBUSAWATCH MODESELECTDUAL WATCHTRI WATCH[BACK]WATCH MODE72SHIP/SHIPBUSA 26 06.0098N080 04.8589W AM10:33LOCEND SAVECLEARDUAL 1672SHIP/SHIPBUSAWATCH MODESELECTDUAL WATCHTRI WATCH[BACK]WATCH MODE72SHIP/SHIPBUSAWATCH MODESELECTDUAL WATCHTRI WATCH[BACK]WATCH MODE72SHIP/SHIPBUSA 26 06.0098N080 04.8589W AM10:33LOCEND SAVECLEARTRI 16+0969PLEASUREBASELECTUSAVHF OPS69PLEASUREBAUSAFREQ BANDSELECTUSAINTERNATNLCANADA[BACK]D9183-169SHIP/SHIPBAINT 50 46.1718N001 17.7189W AM08:53LOCCH06 CH72CH69DISPLAY MODEHI/LO POWERSAVE CHANNELWATCH MODEFREQ BAND](https://usermanual.wiki/Flir-BelgiumBA/VHFGEN1.Part2-user-handbook/User-Guide-772922-Page-7.png)
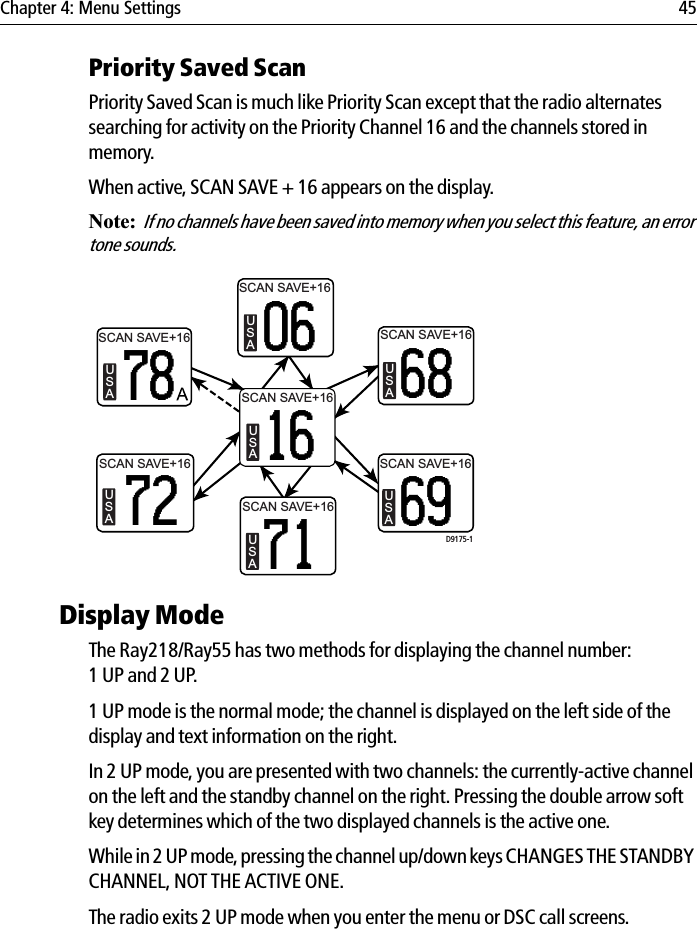
![52 Ray218 and Ray55 VHF RadiosFavorite ChannelWhen in standby mode, the Ray218/Ray55 displays a channel number in each of the three soft key locations. By pressing the corresponding soft key, the radio instantly switches to that channel number. You can select from three separate Favorite Channel groups for a total of 9 channel options for each frequency set. You select which channel group is displayed and edit what channel numbers are assigned.Default channels are as follows:• FAV1: CH67 CH68 CH72 • FAV2: CH71 CH73 CH77 • FAV3: CH06 CH08 CH09 To SELECT which bank of Favorite Channels is displayed:1. From the VHF OPS menu, select FAVORITE CH.2. Highlight the Favorite Channel Bank you wish to be displayed.3. Press the SELECT soft key. Two options appear: SELECT and EDIT.4. Choose the SELECT option.5. Press OK to confirm. Selected favorite channels appear in the soft key bank. 71PLEASUREBASELECTUSAVHF OPS71PLEASUREBAUSAFAVORITE CHSELECTFAV-BANK1FAV-BANK2FAV-BANK3[BACK]71PLEASUREBAUSAFAVORITE CHSELECTFAV-BANK1FAV-BANK2FAV-BANK3[BACK]71PLEASUREBAUSAFAVORITE CHSELECTFAV-BANK1FAV-BANK2FAV-BANK3[BACK]71PLEASUREBAUSAFAV BANK-368 69 71SELECTEDIT[BACK]SELECT71PLEASUREBAUSAFAVORITE CHBACKFAV BANK-3IS SELECTEDPRESS [OK]TO ACCEPTOKD9185-1SAVE CHANNELWATCH MODEFREQ BANDCHANNEL NAMEFAVORITE CH](https://usermanual.wiki/Flir-BelgiumBA/VHFGEN1.Part2-user-handbook/User-Guide-772922-Page-9.png)
![Chapter 4: Menu Settings 53To EDIT Favorite Channels contained within a bank:1. Repeat steps 1–3 above for the SELECT process and highlight the bank you wish to edit.2. Select the EDIT option.3. Use the up/down arrows to highlight which soft key label you wish to edit: LEFT, CENTER or RIGHT.4. Rotate the CH knob to change the channel to the desired value.5. Push in the CH knob to confirm. The new channel selection appears in the edited soft key position for that bank. ShortcutYou can quickly access the Favorite Channel menu item by pressing and holding any of the three channel soft keys in standby mode. EDIT72SHIP/SHIPBAUSAEDIT FAV-368 69 78ABACK72SHIP/SHIPBAUSAACH68 CH78ACH6972SHIP/SHIPBAUSAFAV BANK-368 69 71SELECTSELECTEDIT[BACK]D9186-1Select Channel72SHIP/SHIPBAUSAEDIT FAV-368 69 71BACKPress OK72SHIP/SHIPBAUSAFAVORITE CHSELECTFAV-BANK1FAV-BANK2FAV-BANK3[BACK] 27 07.3838N080 04.8499W AM10:33LOCLEFT: 68CENTER: 69RIGHT: 71PRESS [OK]TO ACCEPTLEFT: 68CENTER: 69RIGHT: 78APRESS [OK]TO ACCEPT71PLEASUREBAUSAFAVORITE CHSELECTFAV-BANK1FAV-BANK2FAV-BANK3[BACK]71PLEASUREBAUSAACH68 CH71CH69D9187-1PRESS and HOLDany soft key 3 secs10152025303540455055 60 5 27 07.3838N080 04.8499W AM10:33LOC](https://usermanual.wiki/Flir-BelgiumBA/VHFGEN1.Part2-user-handbook/User-Guide-772922-Page-10.png)
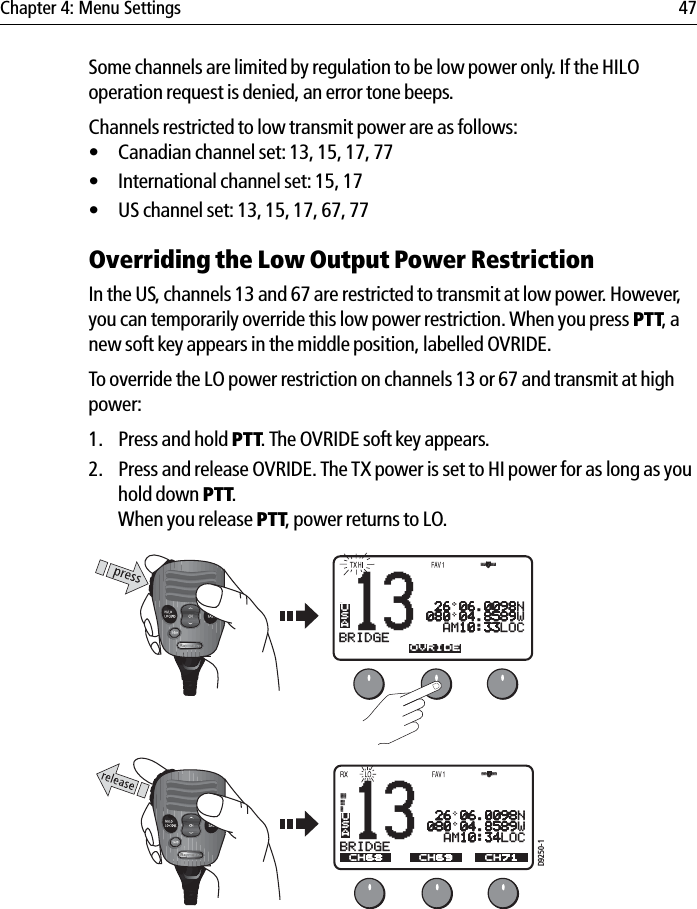
![54 Ray218 and Ray55 VHF RadiosSensitivityUse this setting to switch the transmit power from high to low. Press the L/D soft key t o toggle between full receiver sensitivity (Distant mode) and attenuated receiver sensitivity (Local mode). The LOCAL icon appears while in Local mode and then is removed in Distant mode. 4.3 Hailer/Fog Horn/IntercomThis menu item provides access to three auxiliary functions. These operations require that you have purchased and installed an optional hailer horn.HAIL/FOG/IC is an auxiliary mode. While Hailer, Fog Horn or Intercom operations are active, you cannot send or receive radio calls. The exception is in AUTO FOG mode, between soundings.HailerThe Hailer operation enables the unit to use a Hailer Horn as a loudspeaker. Press and hold PTT to place the unit in Hailer mode. Anything spoken into the handset is amplified and broadcast from the Hailer Horn (but not transmitted over the radio). To adjust the Hailer Horn broadcast volume, use the up/down arrow soft keys while pressing and holding PTT. Release PTT to switch to Listen mode. The Hailer Horn then acts as a directional microphone. Sounds picked up by the Hailer Horn are heard on the radio speaker. To adjust the Hailer Horn broadcast volume, use the up/down arrow soft keys.71PLEASUREBASELECTUSAVHF OPSWATCH MODEFREQ BANDCHANNEL NAMEFAVORITE CHSENSITIVITY71PLEASUREBAUSASENSITIVITYBACKSETLOCALORDISTANT71PLEASUREBAUSAD9248-1L/D BACK L/DSENSITIVITYSETLOCALORDISTANT78PLEASUREUSAHAIL/FOG/ICSELECTHAILERFOGINTERCOM[BACK]A78PLEASUREUSAHAILERENDTALKINGVOL: 10HORN VOLUMEAD9188-1PTT78PLEASUREUSAHAILERLISTENINGPRESS PTTTO TALKENDA](https://usermanual.wiki/Flir-BelgiumBA/VHFGEN1.Part2-user-handbook/User-Guide-772922-Page-11.png)
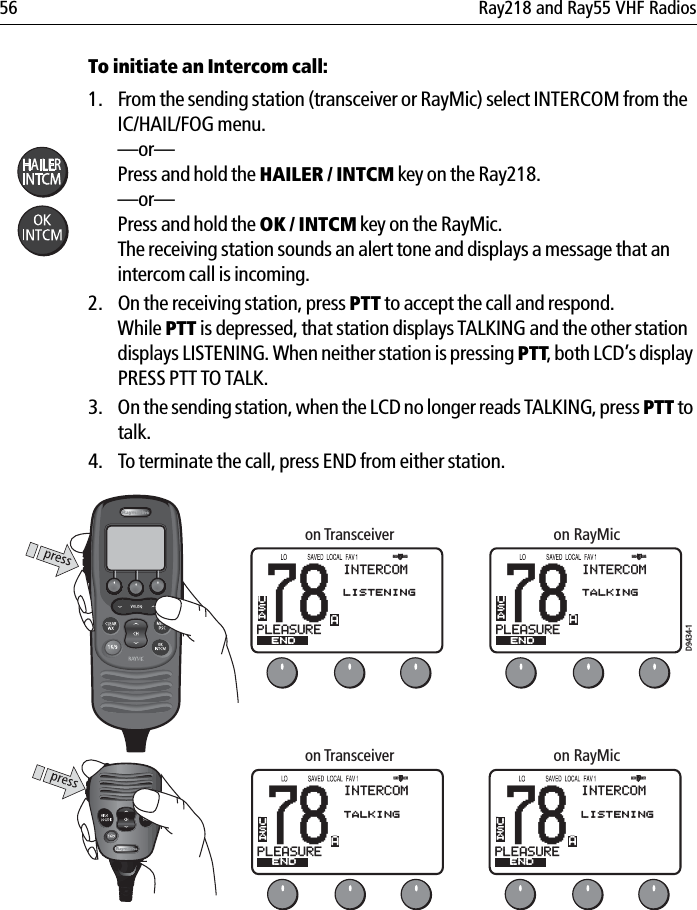
![Chapter 4: Menu Settings 55Fog HornThis operation enables the radio to emit various fog horn tones over a hailer horn speaker. Select one of the following modes, and then press SELECT to enable the selection:MANUAL FOGPressing the PTT switch sounds a continuous 400 Hz tone for as long as you hold the PTT.AUTO FOGSounds a predetermined pattern. Press END soft key or any hard key (CLEAR/WX,HAILER/INTCM, etc.) to quit. Note:Between AUTO Fog Horn soundings, you can make and receive calls.Select one of the following modes, and then press SELECT to enable the selection:• PWR MAKE WY—Power vessel underway• NOT MAKE WY—Power vessel not underway• SAIL/FISHNG—Sailing vessel or any vessel fishing but not trolling• RSTRICT/TOW—Restricted in ability to maneuver or towing another vessel• UNDER TOW—This vessel being towed• AGROUND—Vessel is aground• AT ANCHOR—Vessel is at anchorVolume is controlled by the up/down soft keys.IntercomWhen a RayMic secondary handset is installed on the Ray218/Ray55, Intercom operation enables voice communications between the RayMic and the transceiver. You can initiate the call from either the transceiver or second station. The following illustrates what is displayed when the transceiver initiates the call. D9433-178PLEASUREBUSAHAIL/FOG/ICSELECTA78PLEASUREBUSAINTERCOMCALLINGRAYMICCANCELA78PLEASUREBUSAINTERCOMINCOMINGFROMBASEPRESS PTTTO ACCEPTCANCELAon Transceiver on RayMicAAAHAILERFOGINTERCOM[BACK]](https://usermanual.wiki/Flir-BelgiumBA/VHFGEN1.Part2-user-handbook/User-Guide-772922-Page-12.png)
![58 Ray218 and Ray55 VHF Radios• Use the same process to complete time information. When time data is entered manually, the MAN indicator appears in front of the time, which is displayed in UTC.3. Press DONE soft key when complete. The radio returns to the GPS Setup menu. 4. Select BACK to exit the menu. SettingsYou can also set how some time and position information is displayed on the screen. Make your selection from the options on the list. B72SHIP/SHIPBGPS SETUPSELECTMANUAL POSSETTINGNMEA OUTPUT[BACK]USAB72SHIP/SHIPBMANUAL POS BACKUSA _- --:----N--- --:----W --:--UTCSelect Characters Press OK><B72SHIP/SHIPBMANUAL POS BACKUSA 27 07:3800N080 04:8500W 21:30UTCPRESS DONETO ACCEPT DONE72SHIP/SHIPBAUSAA 27 07.3800N080 04.8500WMAN21:30UTCCH69 CH72CH72D9189-1B72SHIP/SHIPBGPS SETUPSELECTMANUAL POSSETTINGNMEA OUTPUT[BACK]USA69PLEASUREBASELECT SELECTUSAGPS SETUPMANUAL POSSETTINGNMEA OUTPUT[BACK]69PLEASUREBAUSASETTINGLAT/LON DISPTIME DISPLAYTIME OFFSETTIME FORMATCOG/SOGD9425-1SELECT69PLEASUREBAUSASETTINGLAT/LON DISPTIME DISPLAYTIME OFFSETTIME FORMATCOG/SOG](https://usermanual.wiki/Flir-BelgiumBA/VHFGEN1.Part2-user-handbook/User-Guide-772922-Page-15.png)
![60 Ray218 and Ray55 VHF RadiosNMEA OutputWhen Distress Call and Position (lat/lon) information is received from other stations, your Ray218/Ray55 has the capability of forwarding this data to your display unit (C Series, E Series, etc.) over the NMEA port so that it can be displayed on the screen. You can specify which stations will have their position data and Distress Call information sent to the display unit.SEL OUTPUTUse this option to select the stations for which you want incoming position data and Distress Call information to be displayed.1. From the GPS SETUP menu, select NMEA OUTPUT.2. From the NMEA OUTPUT menu, select SEL OUTPUT. 3. Select which vessel’s position data will be forwarded to the display:• ALL STATION. Forward all received position data to the display.• LIST STATION. Send position data from stations that you have selected from a list. If you choose this option, specify the permitted vessels using the SEL STATION option described below.• NONE. Do not forward position data from any station.SEL STATIONIf you enabled LIST STATION in the SEL OUTPUT menu, this option presents a list from which you can select the stations whose data will be forwarded.1. As outlined above in step 3, ensure you have selected LIST STATION from the SEL OUTPUT menu.2. From the NMEA OUTPUT menu, select SEL STATION. The list of stations in your Phone book is displayed.3. Using the up/down arrow soft keys, highlight the first station whose data you want to have forwarded to the display unit.4. Press SELECT. An arrow appears to the left of the station name, indicating that it has been selected.5. Continue until all stations for which you want to allow data to be forwarded have been selected (have an arrow next to the station name).6. Select [BACK] to exit.](https://usermanual.wiki/Flir-BelgiumBA/VHFGEN1.Part2-user-handbook/User-Guide-772922-Page-17.png)
![Chapter 4: Menu Settings 61 68PLEASUREBASELECT SELECT SELECTUSAGPS SETUPMANUAL POSSETTINGNMEA OUTPUT[BACK]68PLEASUREBAUSANMEA OUTPUTSEL OUTPUTSEL STATION[BACK]68PLEASUREBAUSASEL OUTPUTALL STATIONLIST STATIONNONE[BACK]SELECTD9426-168PLEASUREBAUSASEL STATION $AQUAHOLIC$DESTINY $GOOD RX $PURA VIDA[BACK]SELECT68PLEASUREBAUSANMEA OUTPUTSEL OUTPUTSEL STATION[BACK]SELECT68PLEASUREBAUSASEL STATION $AQUAHOLIC$DESTINY $GOOD RX $PURA VIDA[BACK]SEL OUTPUTSEL STATION](https://usermanual.wiki/Flir-BelgiumBA/VHFGEN1.Part2-user-handbook/User-Guide-772922-Page-18.png)
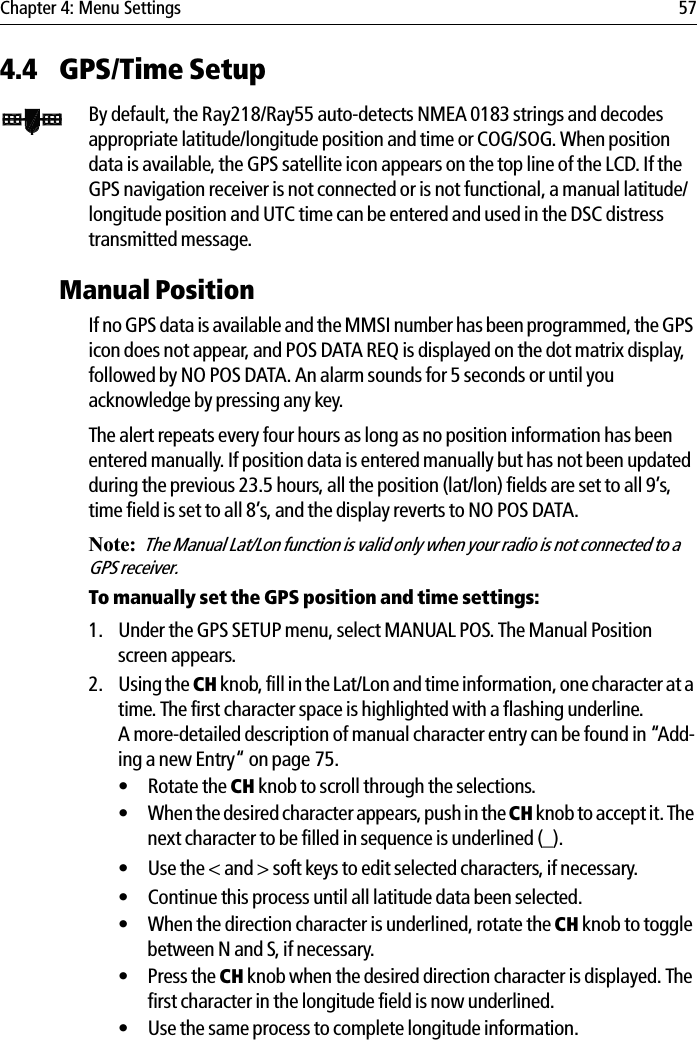
![Chapter 4: Menu Settings 63Key BeepThis setting is used to set the volume of the beep that sounds when a key is pressed. Select LOUD, QUIET or OFF. Signal BarUse this setting to determine whether the signal strength bar is displayed to the left of the channel number. Select from ON or OFF. Bearing ModeThis setting is used to determine how heading data are displayed when COG/SOG is displayed (see page 59). Select MAGNETIC or TRUE. If you select MAGNETIC, an “M” appears. If TRUE is selected, a “T” appears. 68PLEASUREBUSASYSTM CONFIGSELECTBACKLIGHTCONTRASTKEY BEEPSIGNAL BARBEARING MODEA68KEY BEEPLOUDQUIETOFF[BACK]PLEASUREAUSASELECT68KEY BEEPLOUDQUIETOFF[BACK]PLEASUREAUSASELECTD9193-171PLEASUREBUSASYSTM CONFIGSELECTBACKLIGHTCONTRASTKEY BEEPSIGNAL BARBEARING MODEA71PLEASUREAUSASELECTSIGNAL BARONOFF[BACK]71PLEASUREAUSACH71TW 16+09+W01 26 06.0098N080 04.8589W AM11:45LOCD9194-1CH72 CH78AD9195-109CALLINGAUSATW 16+09+W01 26 06.0098N080 04.8589W356 M 12.6KSCH69 CH71 CH7209CALLINGAUSASELECTBEARING MODETRUEMAGNETIC[BACK]09CALLINGBUSASYSTM CONFIGSELECTBACKLIGHTCONTRASTKEY BEEPSIGNAL BARBEARING MODEA](https://usermanual.wiki/Flir-BelgiumBA/VHFGEN1.Part2-user-handbook/User-Guide-772922-Page-20.png)
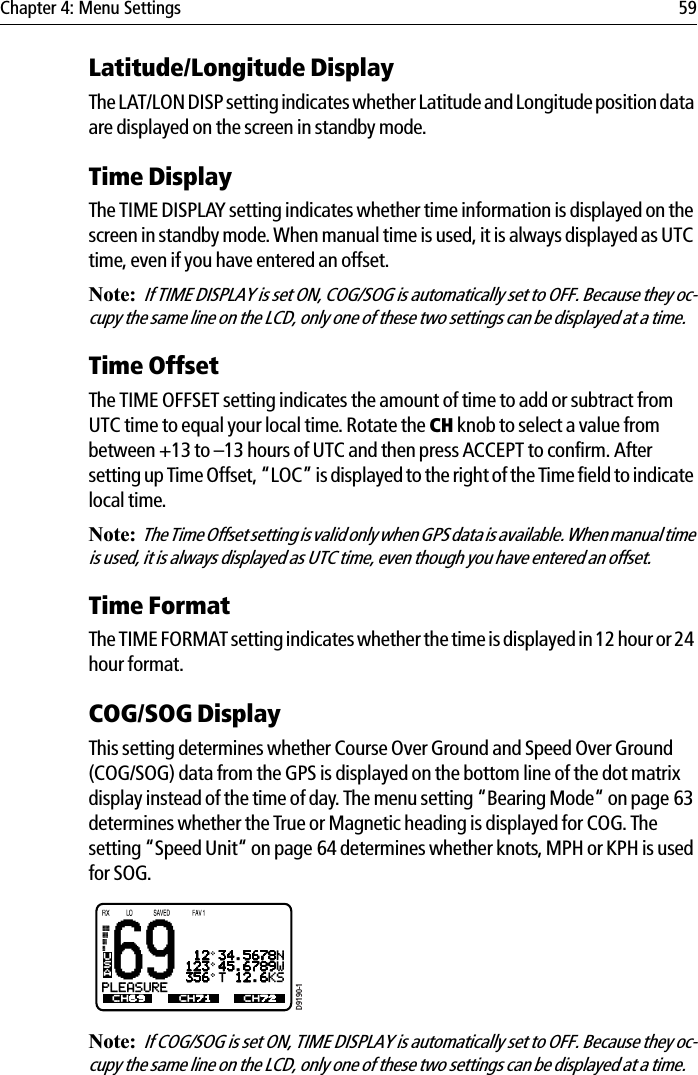
![64 Ray218 and Ray55 VHF RadiosSpeed UnitThis parameter sets the unit for Speed that is used to display all data, including information received from other instruments on the system. System TestThis menu item displays status of four separate conditions:Item Status MeaningGPS OK Valid NMEA signal receivedNO NMEA signal not receivedRAYMIC OK RayMic second station is connectedNO RayMic is not connectedHAILER OK Hailer horn speaker is connectedNO Hailer is not connectedBATTERY OK Battery voltage within nominal limits (10.5–15.8 VDC)NO Battery is below 10.5 VDC or above 15.8VDCDSC OK DSC processor is operating properly.NO DSC processor is not operating properly.69PLEASUREAUSASELECTSPEED UNITKNOTSMPHKPH[BACK]69PLEASUREBUSASYSTM CONFIGSELECTASPEED UNITSYSTEM TESTVERSIONRESET[BACK]69PLEASUREAUSASELECTSPEED UNITKNOTSMPHKPH[BACK]D9196-1](https://usermanual.wiki/Flir-BelgiumBA/VHFGEN1.Part2-user-handbook/User-Guide-772922-Page-21.png)
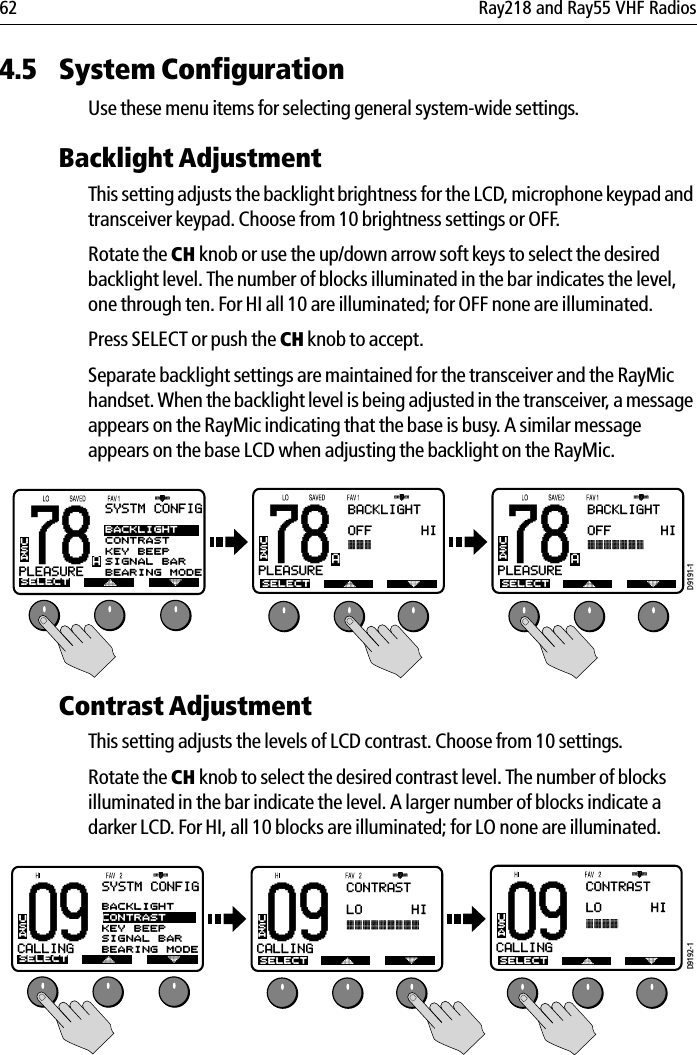
![Chapter 4: Menu Settings 65 Version NumberThis menu item displays the hardware and software versions of your radio.ResetUse this menu item to return your radio to the default factory settings. The following items are reset. All other settings are unaffected.VHF OPS•DISPLAY MODESet to 1 UP CHANNEL.•HI/LO POWERSet to HI.•SAVE CHANNELThe Saved Channel list is cleared.•CHANNEL NAMEThe Long Channel Name list is displayed.•SENSITIVITYSet to DISTANT.GPS SETUP •SETTINGLAT/LON DISP is set ON.TIME DISPLAY is set ON.TIME OFFSET is set to 0.TIME FORMAT is set to 24 HR.COG/SOG is set OFF.• NMEA OUTPUTSEL OUTPUT is set to ALL STATION.71PLEASUREBUSASYSTM CONFIGSELECTASPEED UNITSYSTEM TESTVERSIONRESET[BACK]D9196-171PLEASUREAUSASELECTSYSTEM TESTGPS:RAYMIC:HAILER:BATTERY:OKNONOOKDSC: OK](https://usermanual.wiki/Flir-BelgiumBA/VHFGEN1.Part2-user-handbook/User-Guide-772922-Page-22.png)
![66 Ray218 and Ray55 VHF RadiosSYSTEM CONFIG•KEY BEEPSet to QUIET.•SIGNAL BARSet to ON.•BEARING MODESet to TRUE.•SPEED UNITSet to KNOTS.DSC MENU•RECV’D CALLSAll logs are cleared.•DSC SETUPAUTO CH CHANGE is set ON. 71PLEASUREBUSASYSTM CONFIGSELECTASPEED UNITSYSTEM TESTVERSIONRESET[BACK]D9207-171PLEASUREAUSABACKRESETSYSTEMRESETPRESS RESET TO ACCEPTRESET](https://usermanual.wiki/Flir-BelgiumBA/VHFGEN1.Part2-user-handbook/User-Guide-772922-Page-23.png)

![Chapter 5: Digital Selective Calling (DSC) 75Adding a new Entry1. Select PHONEBOOK from the DSC menu. The list of Phonebook entries appears. Highlight <NEW>. If no entries have yet been entered, this is your only choice.Press SELECT. You are prompted to enter the MMSI number for the new entry. The first character space to be modified is highlighted with a flashing under-line. 2. Rotate the CH knob. The flashing underline is replaced with a numeric charac-ter. Continue rotating the knob to scroll through the selections. When the appropriate number appears, press the CH knob to accept. The next character to be filled in sequence is then underlined. 3. Continue this process until all MMSI digits have been entered. Use the < and > soft keys to edit selected characters, if necessary. B72SHIP/SHIPBDSC MENUSELECTGROUPALL SHIPSPOS REQUESTRECV’D CALLSPHONEBOOK...B72SHIP/SHIPBPHONEBOOK...SELECT<NEW>[BACK]B72PLEASUREBPHONEBOOKBACKNEW ENTRYENTER MMSI:_--------ENTER NAME-----------...D9162-1...B72SHIP/SHIPBPHONEBOOKNEW ENTRYENTER MMSI:3--------ENTER NAME:----------...BACKB72SHIP/SHIPBPHONEBOOKBACKNEW ENTRYENTER MMSI:3_-------ENTER NAME-----------Select Characters Press OKD9209-1......Select CharactersB72SHIP/SHIPBPHONEBOOKNEW ENTRYENTER MMSI:36-------ENTER NAME:----------BACKB72SHIP/SHIPBPHONEBOOKBACKNEW ENTRYENTER MMSI:366123456ENTER NAME-----------Press OKD9210-1](https://usermanual.wiki/Flir-BelgiumBA/VHFGEN1.Part2-user-handbook/User-Guide-772922-Page-32.png)
![76 Ray218 and Ray55 VHF Radios4. When you press the CH knob to accept the final MSSI ID digit, the cursor moves on to the NAME field. The first character in this line is a symbol assigned by the radio, based on the MMSI number you entered.Coast Stations are identified by “00” at the beginning of the station name. If you enter 00 as the leading digits of the MMSI ID, the radio recognizes this as a coast station and automatically enters a tower symbol (&). If you enter a number other than 0 in the initial position of the MMSI ID, an anchor symbol ($) is entered as a prefix to the name, identifying this as a Ship Station.The first character space to be modified is highlighted with a flashing under-line. Using the same procedure as above, rotate the CH knob to select the NAME characters. All alpha and numeric characters are available, as well as 13 symbols: ! # % ’ ( ) : ? / . , + -Press the CH knob to accept. Continue this process until all NAME characters have been entered. 5. When complete, press the DONE soft key to accept. The new entry appears in the list. Editing an Existing Entry1. From the Phonebook, rotate the CH knob or press the [ and ] soft keys until the entry you wish to edit is highlighted.2. Press SELECT. The list of options appear.3. Highlight EDIT and press SELECT.4. Make your changes to the NAME and MMSI ID, using the CH knob.5. When finished, DONE to save your changes. The revised name or MMSI number appears in the list.........Press OKB72SHIP/SHIPBPHONEBOOKNEW ENTRYENTER MMSI:36123456ENTER NAME:$_--------BACKB72SHIP/SHIPBPHONEBOOKNEW ENTRYENTER MMSI:36123456ENTER NAME:$TROPIC-ALBACKSelect CharactersD9252-1......D9400-1B72SHIP/SHIPBPHONEBOOKENTER MMSI:366123456ENTER NAME:$TROPIC-ALPRESS DONEDONEB72SHIP/SHIPBSELECTPHONEBOOK<NEW>[BACK]$TROPIC-ALPress OK](https://usermanual.wiki/Flir-BelgiumBA/VHFGEN1.Part2-user-handbook/User-Guide-772922-Page-33.png)
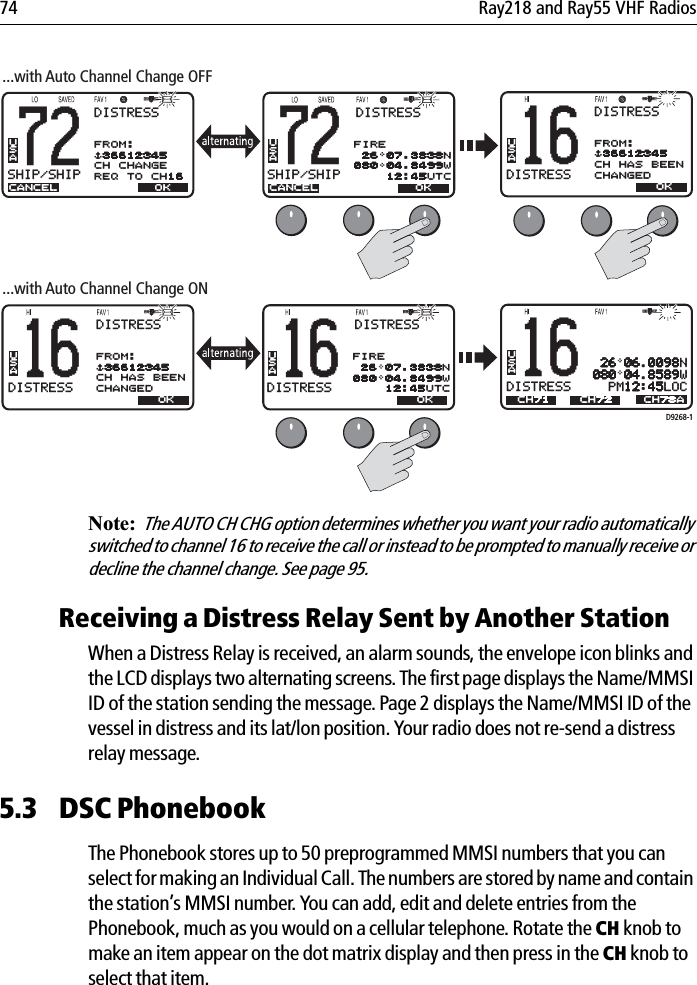
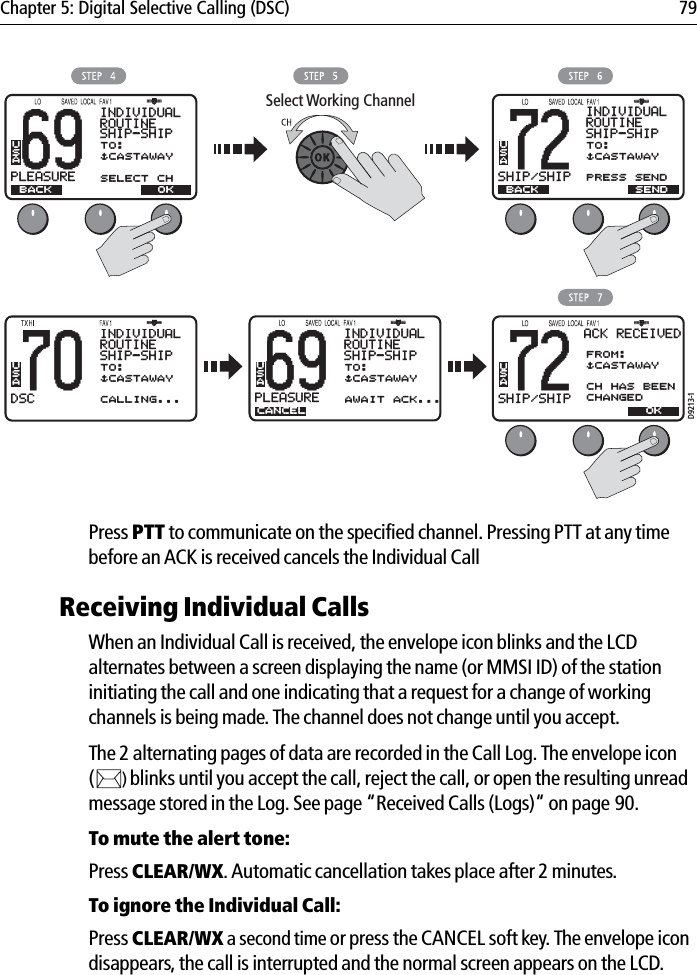
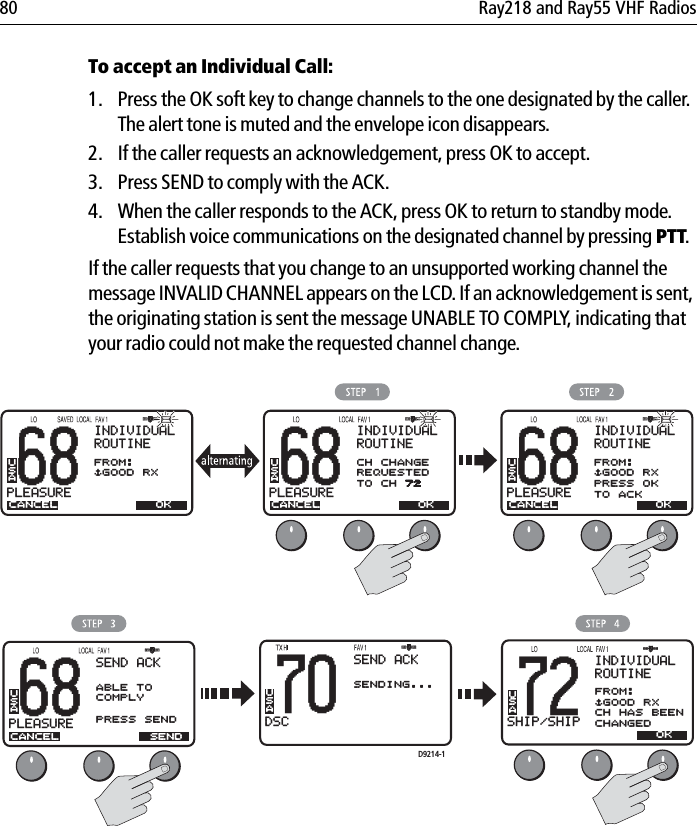
![Chapter 5: Digital Selective Calling (DSC) 77Deleting an Existing Entry1. From the Phonebook, rotate the CH knob or press the [ and ] soft keys until the entry you wish to delete is highlighted.2. Press SELECT. The list of options appear.3. Highlight DELETE and press SELECT again. You are prompted to confirm your selection.4. Press DELETE. The entry is removed from the list.5.4 Individual CallsThe Ray218/Ray55 can make Individual Routine calls.Making DSC Calls to Coast StationsThe examples in this handbook illustrate making DSC calls to Ship Stations. However, the procedures for making Individual Calls to a Coast Station are different. Calls to a Ship Station require that you enter a subsequent working channel chosen from a pre-programmed list offered to you by the Ray218/Ray55. Calls to a Coast Station remove this step from the operating procedures. The Coast Station controls and indicates the subsequent working channel within its acknowledgement.The Ray218/Ray55 automatically detects the correct procedures for you based on the type of MMSI number you enter manually or with or the phonebook. If “00” is detected as the first two characters of the MMSI, Coast Station procedures are implemented automatically.Note:When making a call to a coast station, you will not be asked to select a working channel because that will be provided by the coast station.Transmitting an Individual CallTo make an Individual Call to a ship or coast station, you must select the specific MMSI number to contact and the working channel to be used for the call. The MMSI ID can be entered manually or selected from a Phonebook list of preprogrammed numbers specified using the MENU function, as follows:1. From the DSC menu, rotate the CH knob or press the [ and ] soft keys until INDIVIDUAL is highlighted, and push the CH knob or press SELECT. The Individual Routine menu appears, which displays any Phonebook entries you have saved and <MANUAL> for manual number entry.2. Rotate the CH knob or press the arrow soft keys until the desired individual name is highlighted.3. When the desired name is highlighted, press SELECT.](https://usermanual.wiki/Flir-BelgiumBA/VHFGEN1.Part2-user-handbook/User-Guide-772922-Page-34.png)
![78 Ray218 and Ray55 VHF Radios If using MANUAL MMSI ID entry:Enter the MMSI number using the CH knob. Rotate the CH knob to select each character and then push in the CH knob to accept. The next position to be modified is indicated by a blinking underline. A more-detailed description of manual character entry can be found in “Adding a new Entry“ on page 75. 4. Press OK to initiate the call.5. Rotate the CH knob to select the working channel to be used for the Individual Call and press OK. Select from 06, 08, 09, 10, 13, 16, 17, 67, 68, 69, 71, 72, 73 or 77.Note:Individual Calls to a Coast Station remove this step from the operating proce-dures. The Coast Station controls and indicates the working channel within its ACK.6. Press SEND to transmit the call. The Individual Call is transmitted on channel 70, the radio tunes to the original channel and waits for acknowledgement. During this period you are still able to receive calls. 7. When the acknowledgement is received, the radio automatically switches to the selected working channel and sounds a DSC Call alert ring. Press OK to confirm.69PLEASUREBBDSC MENUSELECTINDIVIDUALGROUPALL SHIPSPOS REQUESTRECV’D CALLSUSA69PLEASUREBBINDIVIDUALROUTINESELECT<MANUAL>$AQUAHOLIC$CASTAWAY$CHILLIN[BACK]USAD9211-169PLEASUREBBINDIVIDUALROUTINEUSA<MANUAL>$AQUAHOLIC$CASTAWAY$CHILLIN[BACK]SELECTD9212-169PLEASUREBBINDIVIDUALROUTINEUSAENTER MMSI:366123456 BACK69PLEASUREBBINDIVIDUALROUTINEUSA<MANUAL>$AQUAHOLIC$CASTAWAY$CHILLIN[BACK]SELECT OKSelect Characters Press OK](https://usermanual.wiki/Flir-BelgiumBA/VHFGEN1.Part2-user-handbook/User-Guide-772922-Page-35.png)
![82 Ray218 and Ray55 VHF Radios8. When complete, press the DONE soft key to accept. The new entry appears in the list.Use the same procedure to edit an existing entry in the list. Transmitting a Group CallTo call another vessel in the group, select the Group Name to contact from the list of numbers described in the preceding section and the working channel to be used for the Group Call. 1. Select GROUP from the DSC menu. 2. Select CALL. The Group entries you have saved appear.3. Highlight the group name you wish to call and press SELECT.4. Press OK to initiate the call.78PLEASUREBADSC MENUSELECTUSA78PLEASUREBAGROUPSELECTUSACALLMY GROUP ID78PLEASUREBAMY GROUP IDUSASELECT[EMPTY 1][EMPTY 2][EMPTY 3][EMPTY 4][EMPTY 5]D9215-178PLEASUREBAUSAGROUP RAYMARINE[EMPTY 2][EMPTY 3][EMPTY 4][EMPTY 5]SELECTSelect Characters Press OKSelect Characters Press OK78PLEASUREBAMY GROUP IDBACKNEW ENTRYGROUP MMSI:_--------GROUP NAME-----------USA78PLEASUREBAMY GROUP IDUSAENTER MMSI:036612345ENTER NAME RAYMARINEPRESS DONEDONE78PLEASUREBAMY GROUP IDNEW ENTRYGROUP MMSI:036612345GROUP NAME _---------USABACKINDIVIDUALGROUPALL SHIPSPOS REQUESTRECV’D CALLS](https://usermanual.wiki/Flir-BelgiumBA/VHFGEN1.Part2-user-handbook/User-Guide-772922-Page-39.png)
![Chapter 5: Digital Selective Calling (DSC) 835. Rotate the CH knob to select the working channel to be used for the call.6. Press SEND to transmit the Group Call.The Group Call is transmitted on channel 70, and the radio tunes to the desig-nated working channel to be used for the Group Call.7. Press OK to confirm that the working channel has been changed. .Receiving Group CallsThe Ray218/Ray55 can receive Group Routine Calls from anyone in your prearranged group.When a Group Call is received, the LCD alternates between a screen displaying the name (or MMSI ID) of the station in the group initiating the call and one indicating that a request for a change of working channels is being made.69PLEASUREBBDSC MENUSELECTUSA69PLEASUREBBGROUPSELECTCALLMY GROUP IDUSAD9216-169PLEASUREBBGROUPROUTINEUSA RAYMARINE SEAWATCH[EMPTY 3][EMPTY 4][EMPTY 5]SELECT69PLEASUREBTO: SEAWATCHSELECT CHGROUPROUTINEUSA70DSCBTO: SEAWATCHCALLING...GROUPROUTINE72SHIP/SHIPBUSATO: SEAWATCHTX COMPLETECH HAS BEENCHANGEDGROUPROUTINEUSA BACK OK72SHIP/SHIPBTO: SEAWATCHPRESS SENDGROUPROUTINEUSA BACK SEND OK72SHIP/SHIPBUSACH68 27 07.3838N080 04.8499W PM12:45LOCCH69 CH78AINDIVIDUALGROUPALL SHIPSPOS REQUESTRECV’D CALLS](https://usermanual.wiki/Flir-BelgiumBA/VHFGEN1.Part2-user-handbook/User-Guide-772922-Page-40.png)
![Chapter 5: Digital Selective Calling (DSC) 855.6 All Ships CallsAn All Ships Call sends out a message to all stations within range. The Ray218/Ray55 can make All Ships Safety Calls for advisory alerts and Urgency Calls when assistance is required but life is not in danger. For example, you might send a Safety Call to warn others there is a large floating object that may be a hazard to navigation. A sample Urgency Call might be that you have an illness or an accident on board. The All Ships Call is made on channel 70, and then the radio automatically switches to channel 16 at high power for voice communications.Transmitting an All Ships Call1. Select ALL SHIPS from the DSC menu.2. Select the type of call you wish to make: URGENCY or SAFETY.3. Press SEND to transmit the call. The call is transmitted on channel 70, and then the radio tunes to channel 16 at high power.4. Press OK to reconfirm the All Ships Call. The radio returns to standby mode.Press PTT to communicate on channel 16. D9218-109CALLINGBBDSC MENUSELECTUSA09CALLINGBBALL SHIPSSELECTUSAURGENCYSAFETY[EMPTY]70DSCBBALL SHIPSURGENCYCALLING...USA16DISTRESSBBALL SHIPSURGENCYUSATX COMPLETECH HAS BEENCHANGEDOK16DISTRESSBBALL SHIPSURGENCYUSACANCELPRESS SENDSEND16DISTRESSBBUSA 26 06.0098N080 04.8498W AM10:33LOCCH68 CH72CH71INDIVIDUALGROUPALL SHIPSPOS REQUESTRECV’D CALLS](https://usermanual.wiki/Flir-BelgiumBA/VHFGEN1.Part2-user-handbook/User-Guide-772922-Page-42.png)