Fuji Film 02000004 DIGITAL CAMERA User Manual 00 LX23 OM 200 EN 01 indb
Fuji Film Corporation DIGITAL CAMERA 00 LX23 OM 200 EN 01 indb
UserManual.wiki
>
Fuji Film
>
02000004 User Manual
05 (Short-Term Confidential) User Manual
Navigation menu
Upload a User Manual
Namespaces
Wiki Guide
HTML
PDF
Info
Views
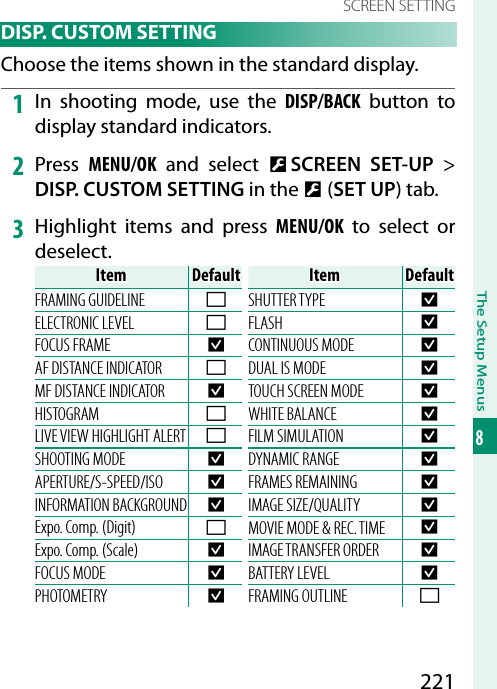
User Manual
Discussion / Help
Navigation