Fujitsu Client Computing WL0026 62205ANHMW WLAN IN PORTABLE LIFEBOOK T SERIES User Manual Claw T731 UG
Fujitsu Limited 62205ANHMW WLAN IN PORTABLE LIFEBOOK T SERIES Claw T731 UG
Contents
- 1. User Manual 1
- 2. User Manual 2
- 3. User Manual 3
User Manual 2

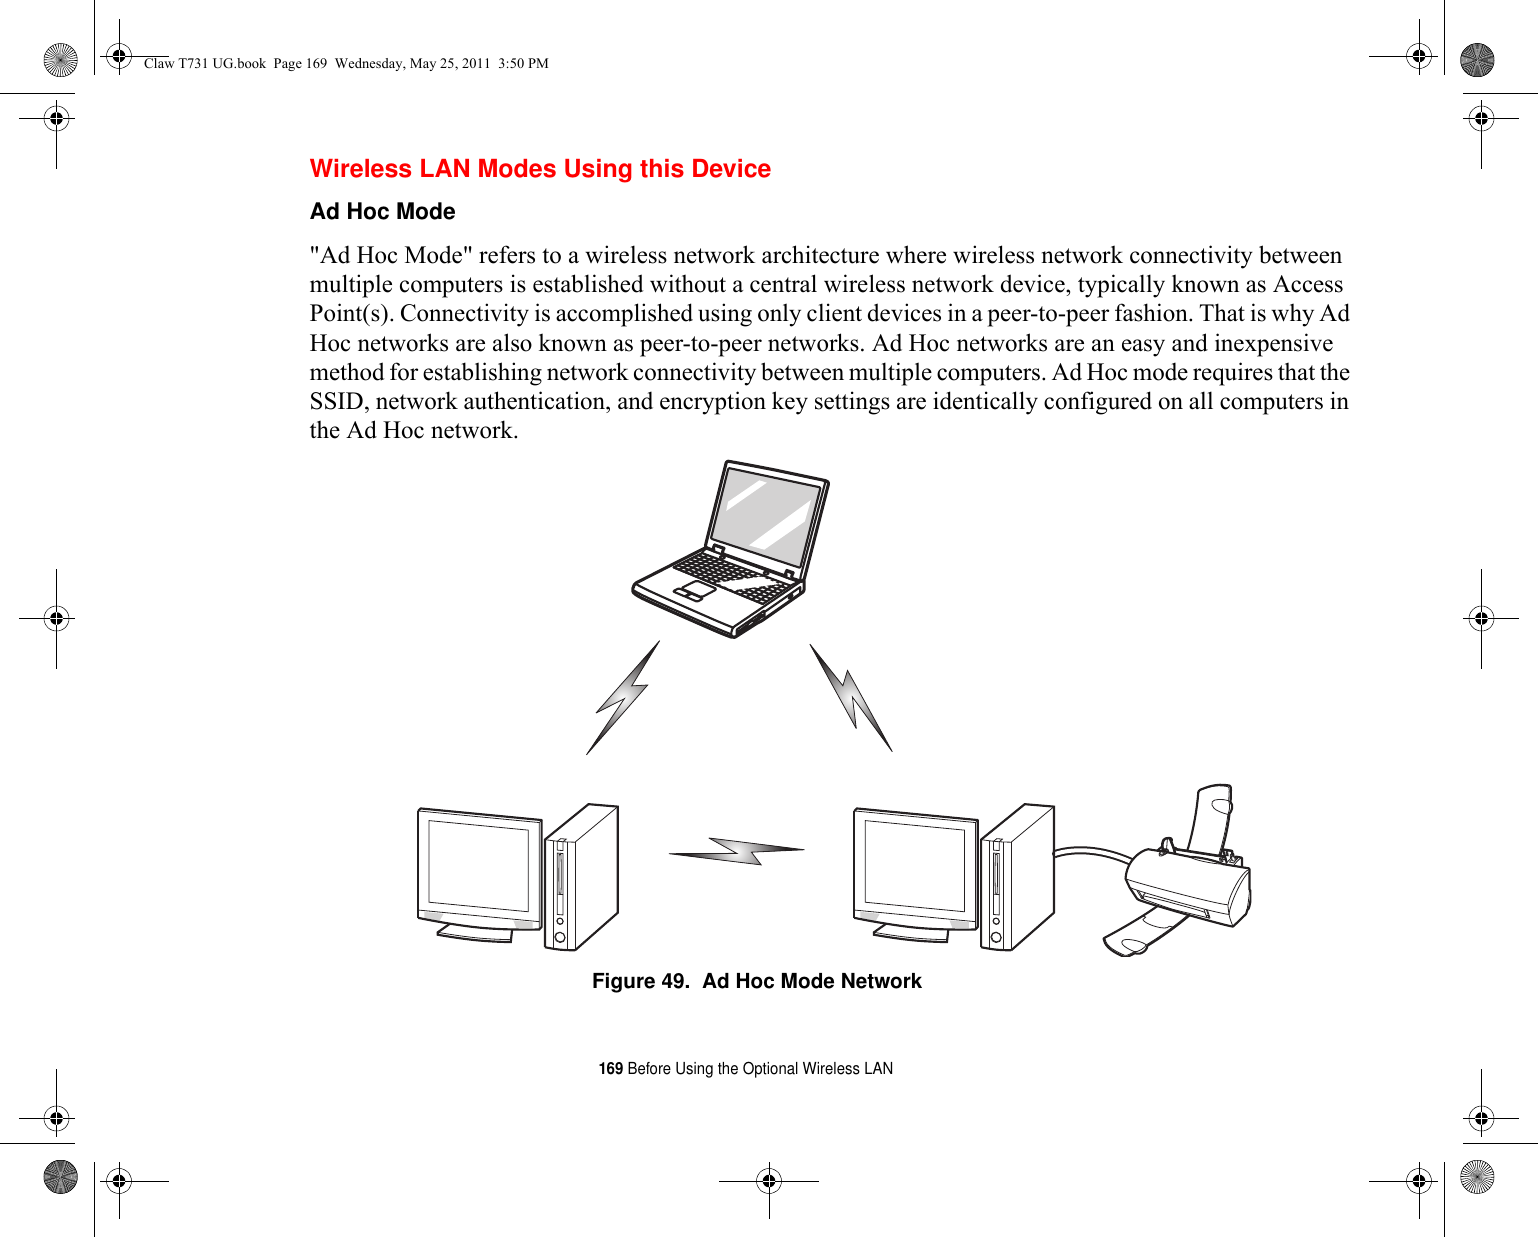
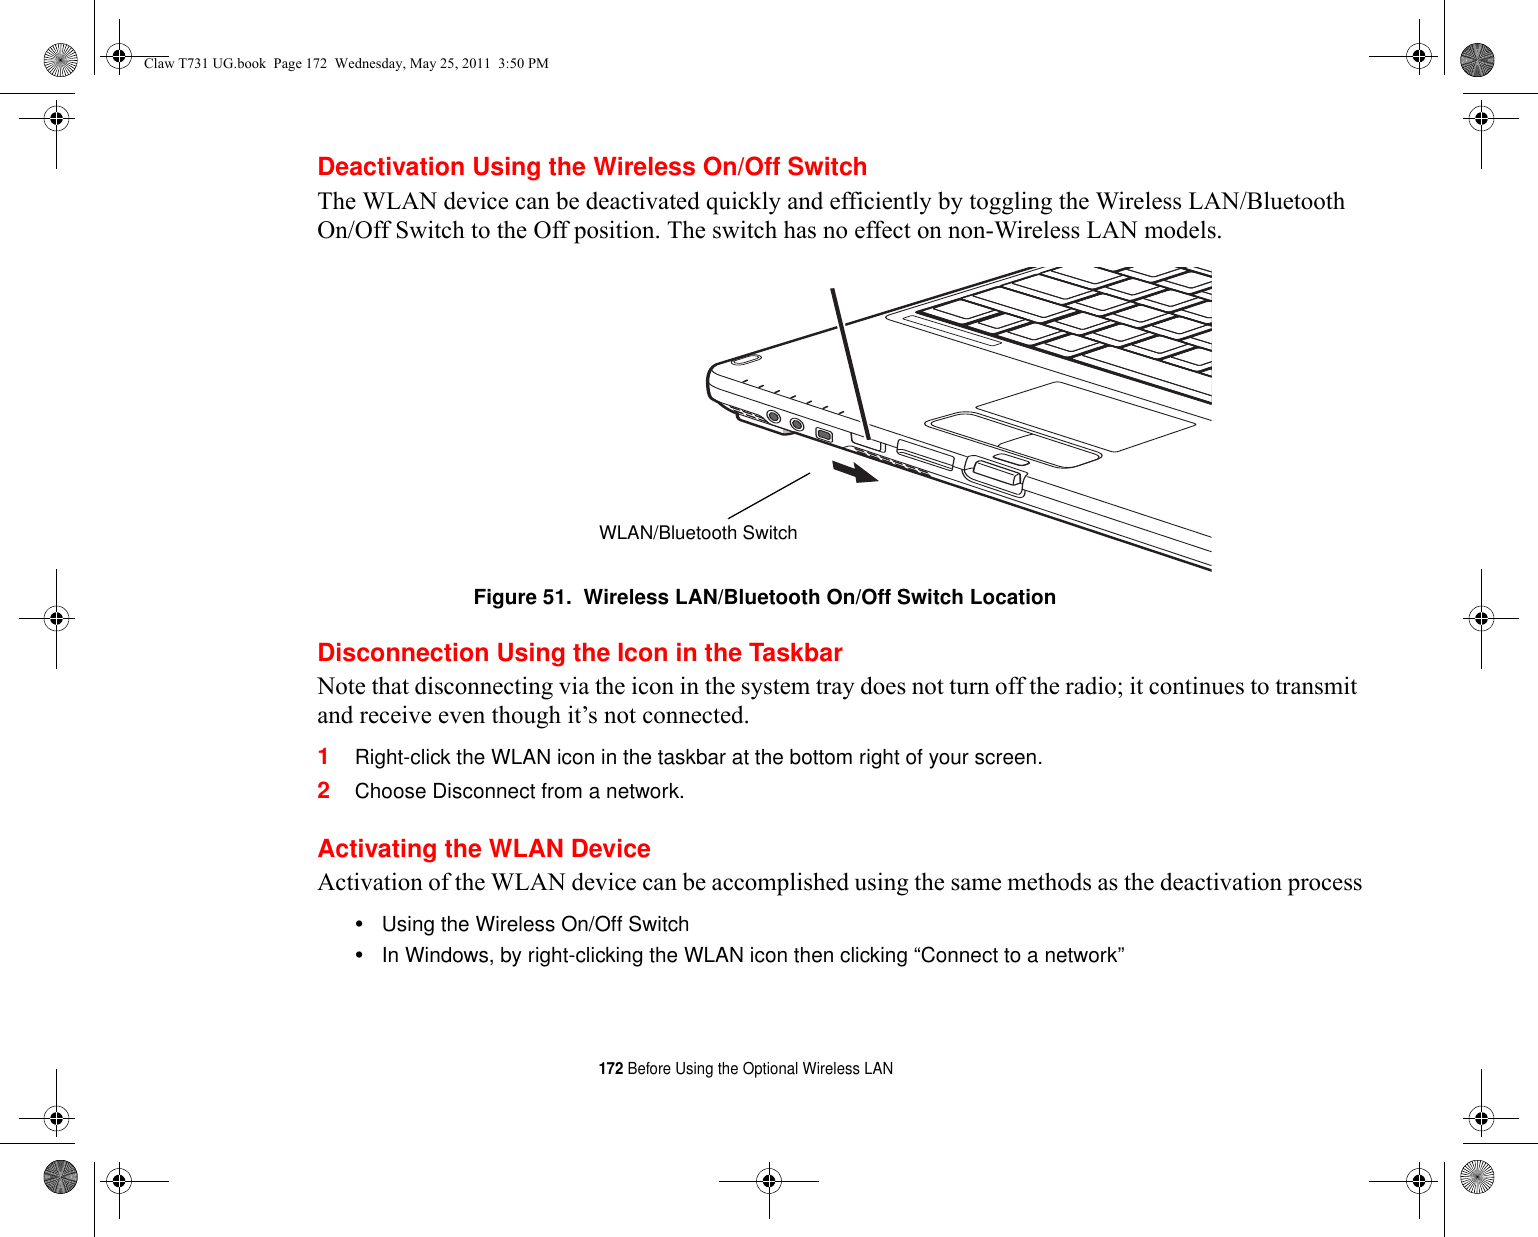
![173 Configuring the Wireless LANConfiguring the Wireless LANThe WLAN device can be configured to establish wireless network connectivity using the software that is built into Windows. Support for most industry standard security solutions is contained in this software.Pre-defined parameters will be required for this procedure. Please consult with your network administrator for these parameters:Configuring the WLAN 1Click the Start button, then select Control Panel.2If the Control Panel is not in Classic View, select Classic View from the left panel. Double-click the Network Connections icon.3Double-click on the Wireless Network Connection icon.4Click on [View Wireless Networks]5Choose a wireless network.6Click [Connect].7Enter the Network Key, if required.8Enter any required information. It may be necessary to consult with your network administrator for some of the information.9If you require assistance, go to [Start] -> Help and Support -> Networking and the Web. Select the main topic in which you are interested, then type in relevant keywords in the Search box.Connection to the networkAfter you have configured your computer, you can connect to an active network by performing the following steps:1Click on the WLAN icon in the system tray.2Select “Connect to a network”.3Select a network from the list that appears, and click the [Connect] button.After you have configured your computer, you can connect to an active network by clicking on the Wireless Network icon in the system tray:Claw T731 UG.book Page 173 Wednesday, May 25, 2011 3:50 PM](https://usermanual.wiki/Fujitsu-Client-Computing/WL0026.User-Manual-2/User-Guide-1477640-Page-39.png)
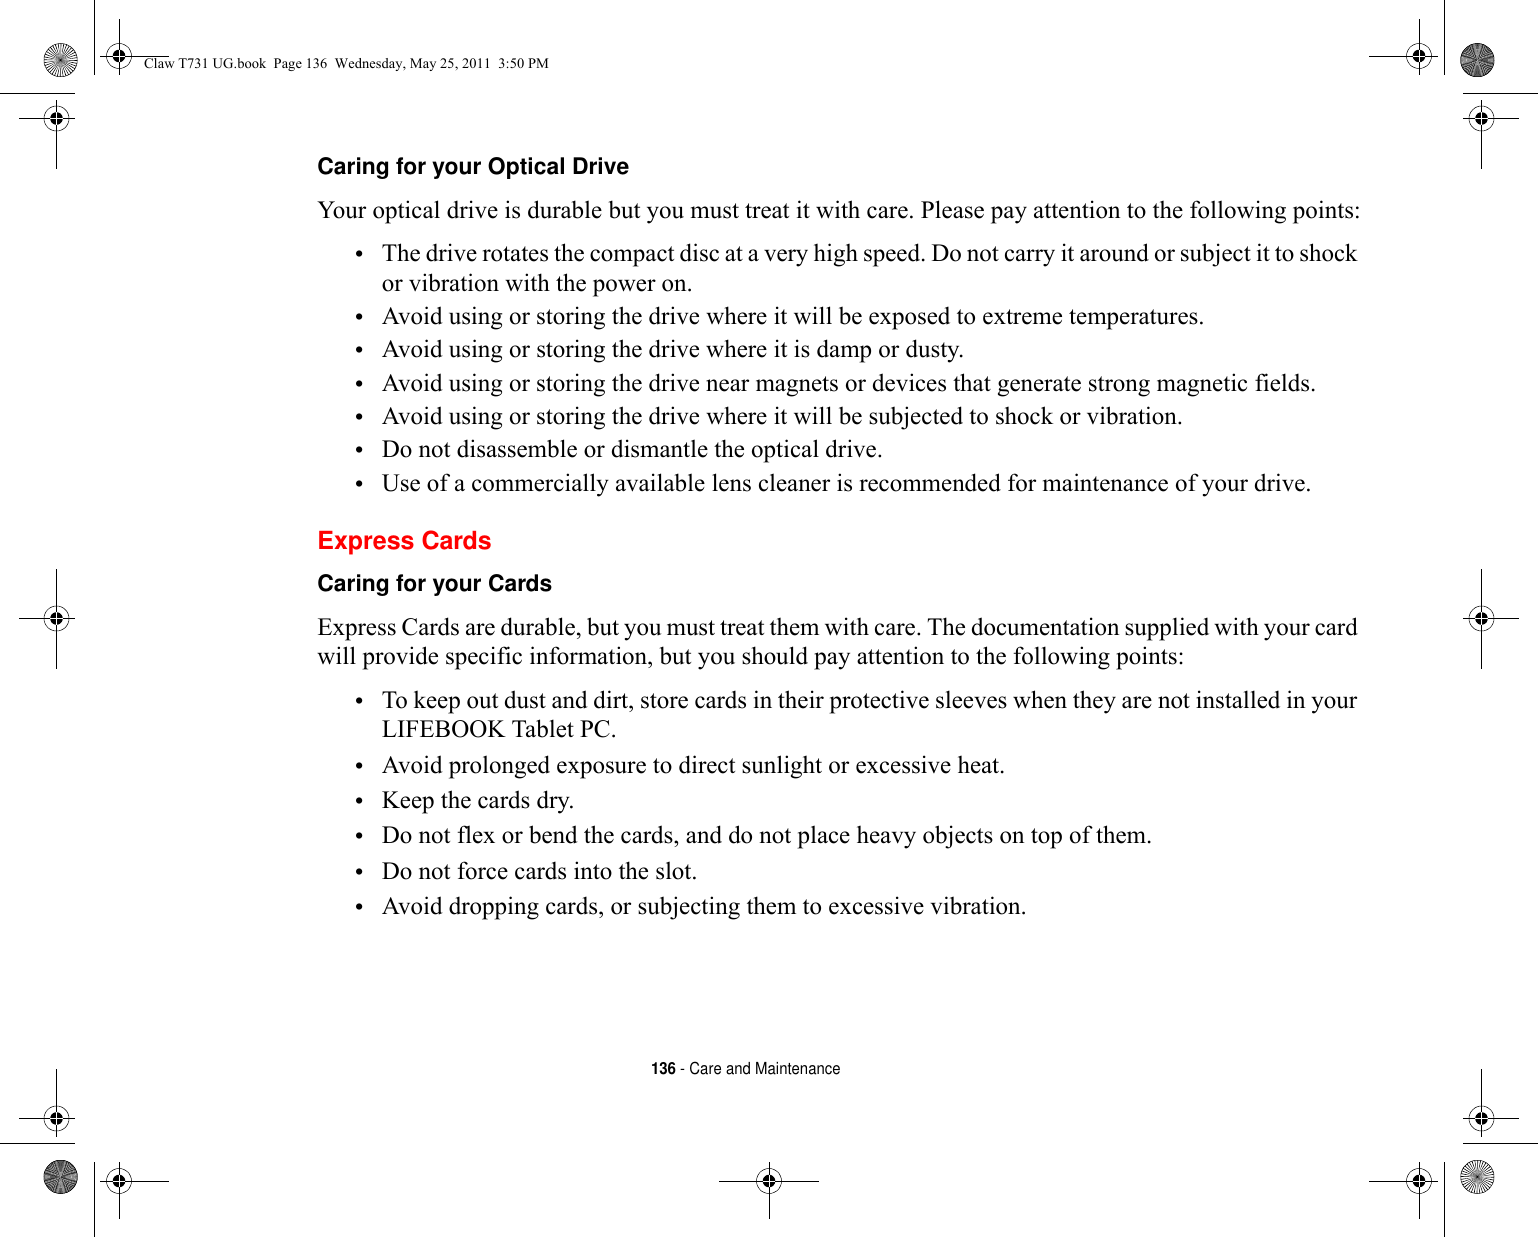
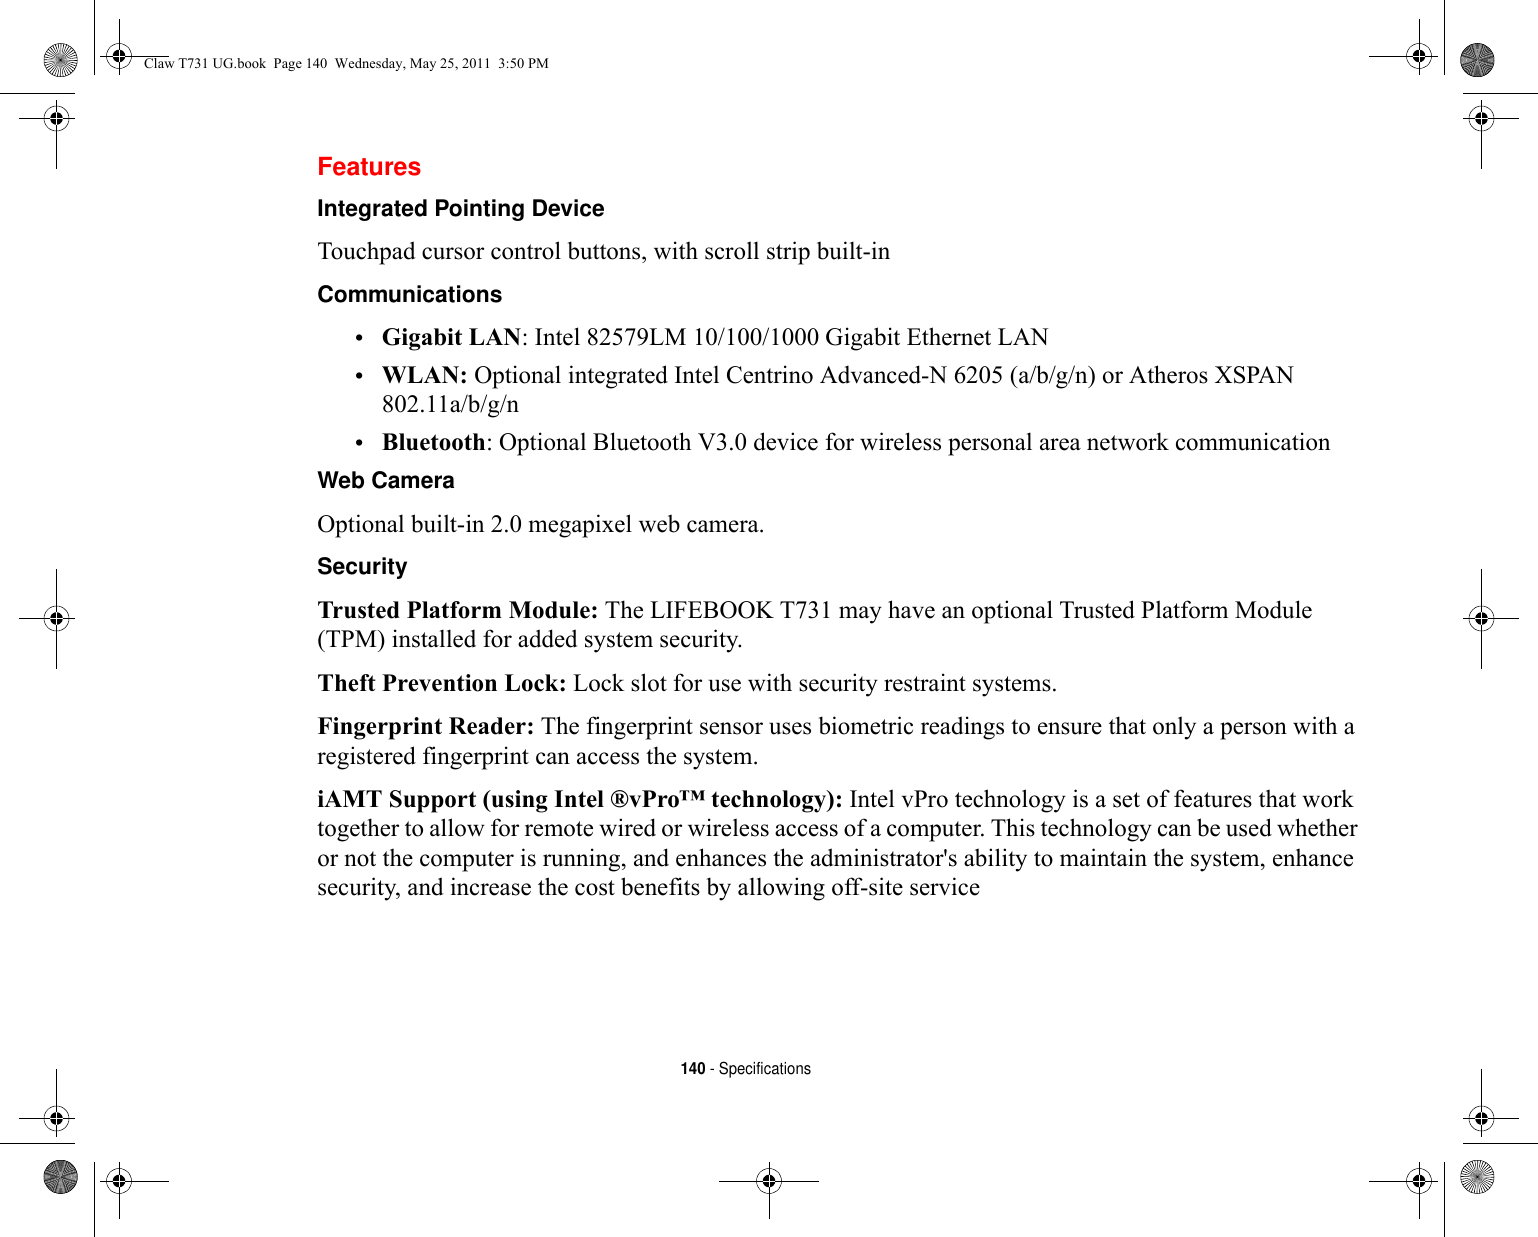
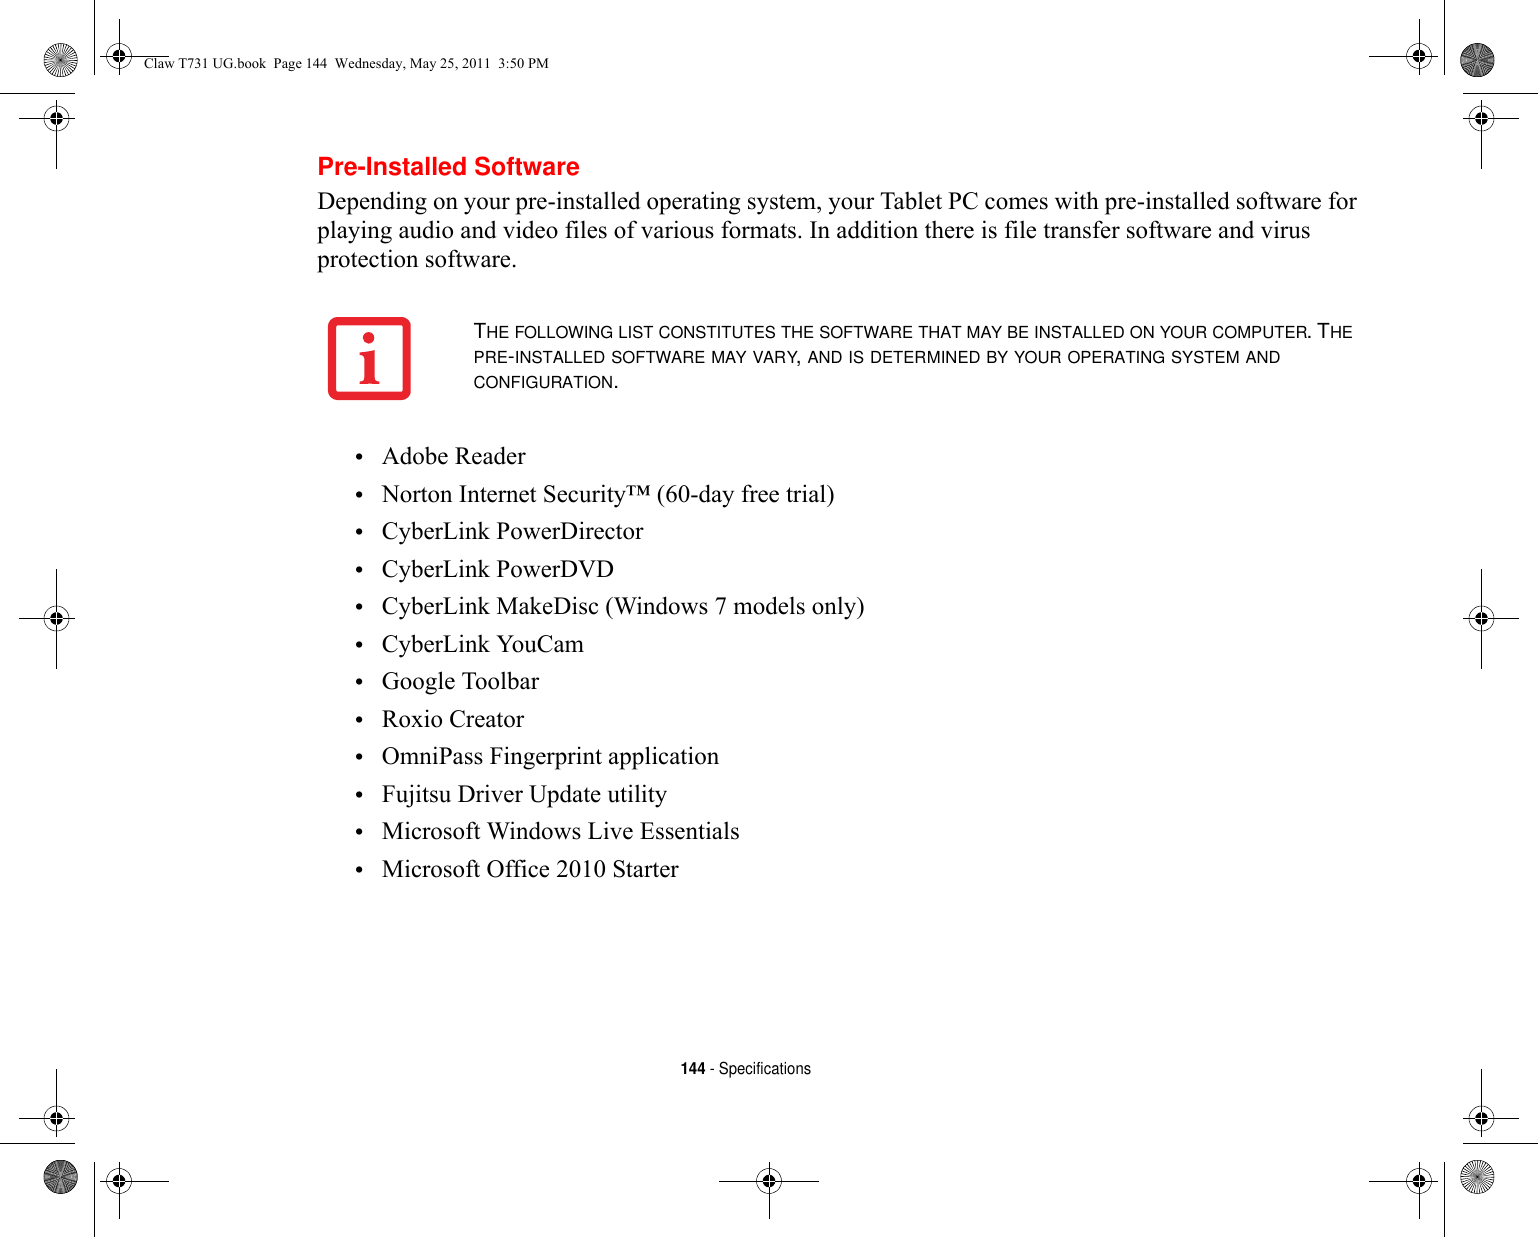
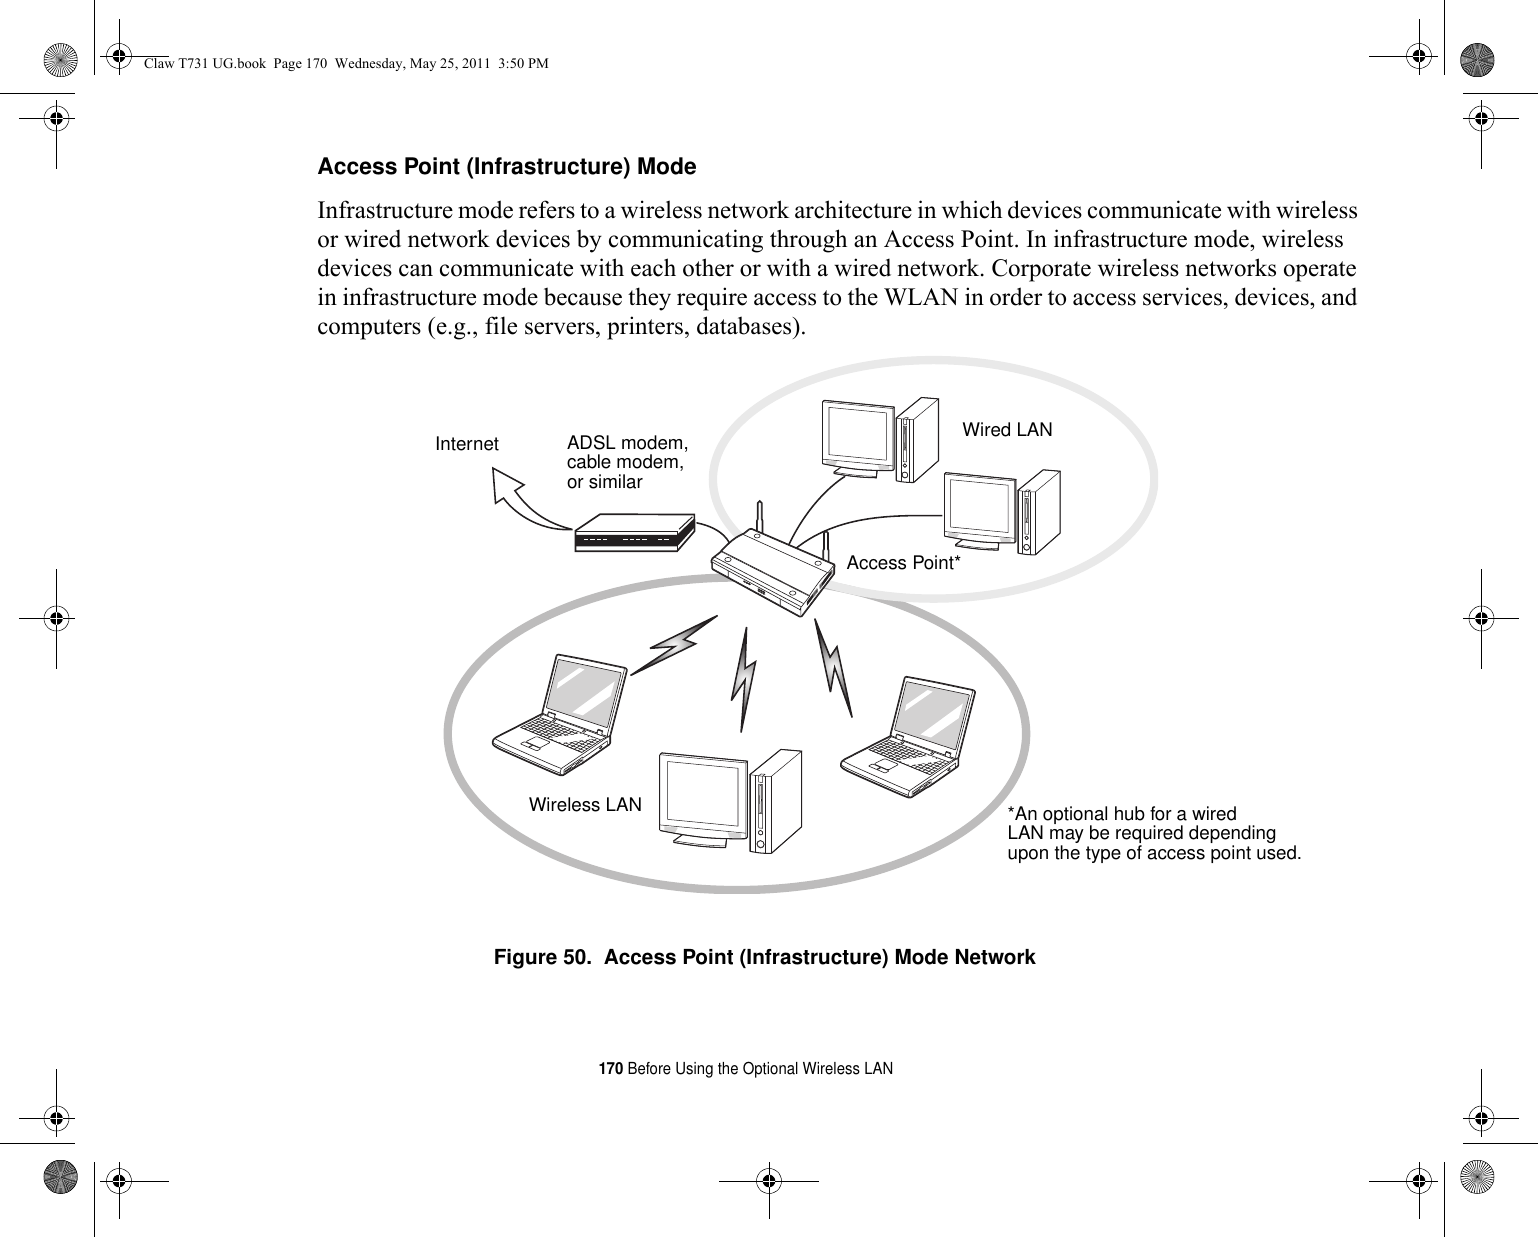
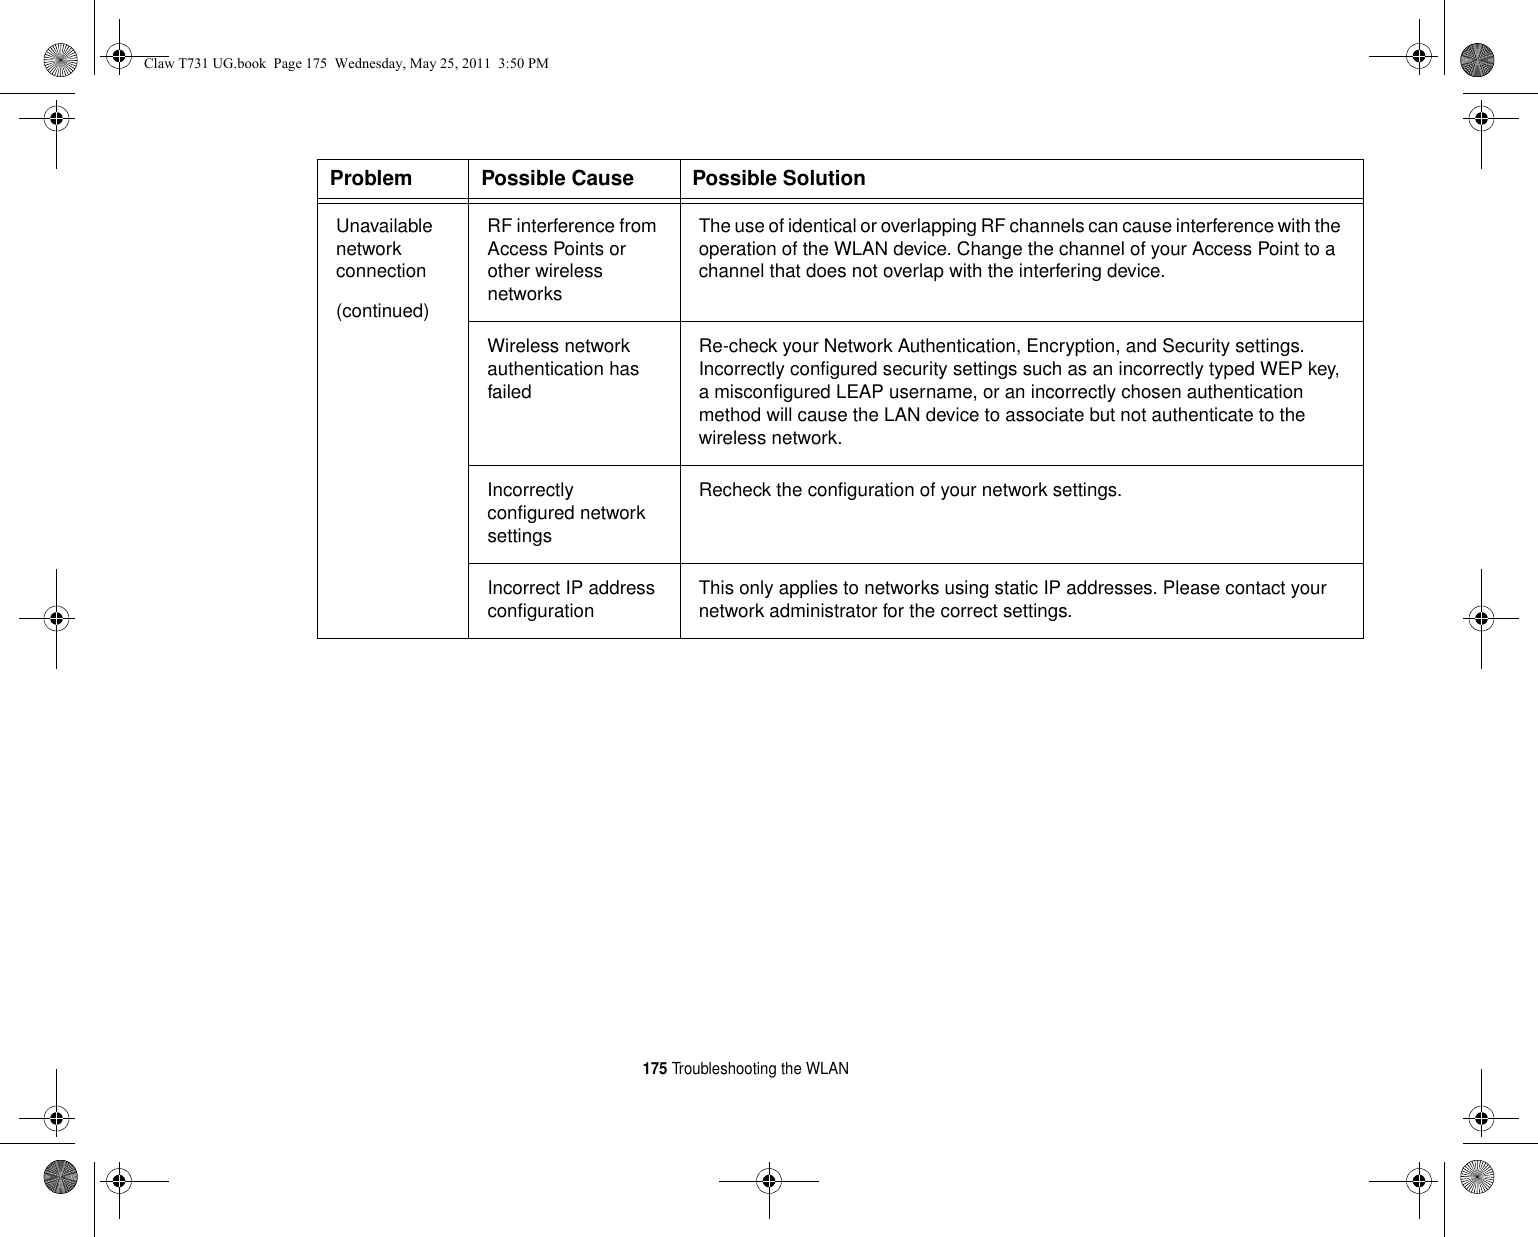
![174 Troubleshooting the WLANTroubleshooting the WLANTroubleshootingCauses and countermeasures for troubles you may encounter while using your wireless LAN are described in the following table. If you are unfamiliar with the steps required, consult your System Administrator or go to [Start] -> Help and Support -> Networking and the WebProblem Possible Cause Possible SolutionUnavailable network connectionIncorrect network name (SSID) or network keyAd hoc connection: verify that the network names (SSID’s) and network keys (WEP) of all computers to be connected have been configured correctly. SSID’s and WEP key values must be identical on each machine.Access Point (Infrastructure) connection: set network name (SSID) and network key to the same values as those of the access point. Set the Network Authentication value identically to that of the Access Point. Please consult your network administrator for this value, if necessary. Weak received signal strength and/or link qualityAd hoc connection: Retry connection after shortening the distance to the destination computer or removing any obstacles for better sight.Access Point (Infrastructure) connection: Retry connection after shortening the distance to the access point or removing any obstacles for better transmission.The WLAN device has been deactivated or disabledCheck if the wireless switch is turned On. Go to Start -> Control Panel, and double-click on Windows Mobility Center. If the wireless network is off, click the [Turn wireless on] button. The computer to be connected is turned offCheck if the computer to be connected is turned ON.Claw T731 UG.book Page 174 Wednesday, May 25, 2011 3:50 PM](https://usermanual.wiki/Fujitsu-Client-Computing/WL0026.User-Manual-2/User-Guide-1477640-Page-40.png)

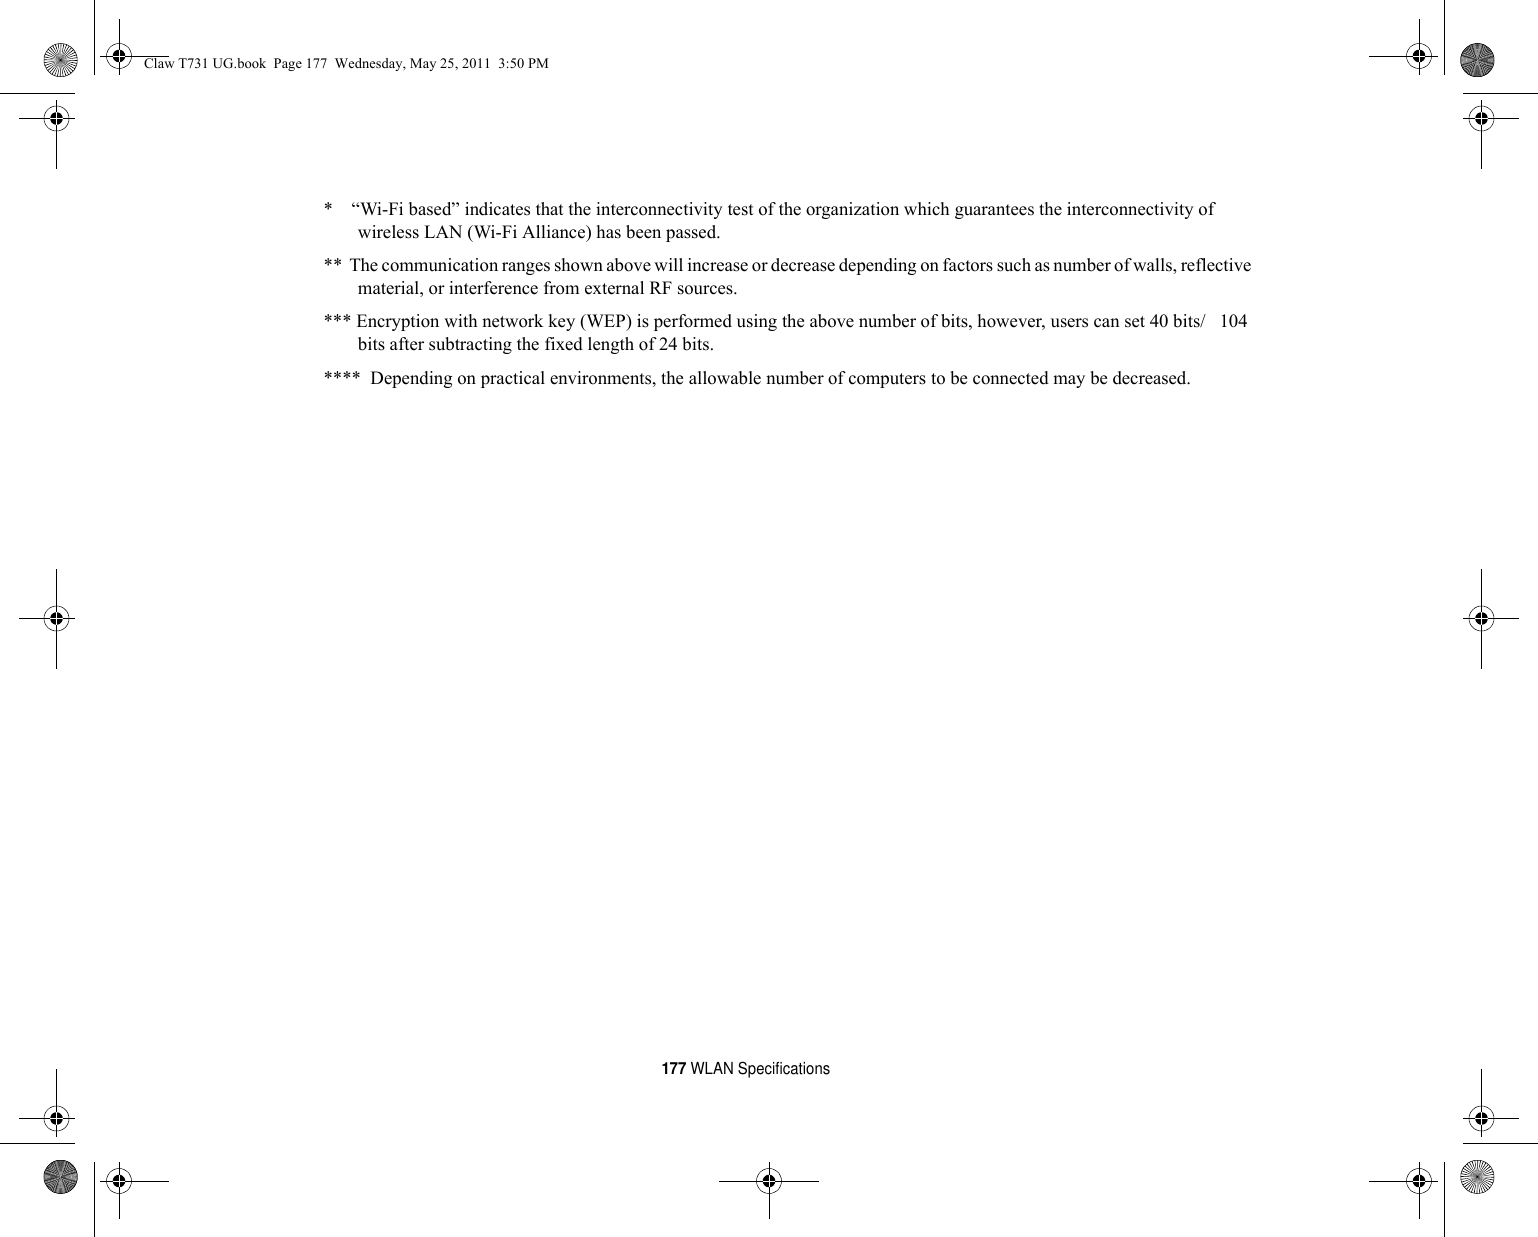
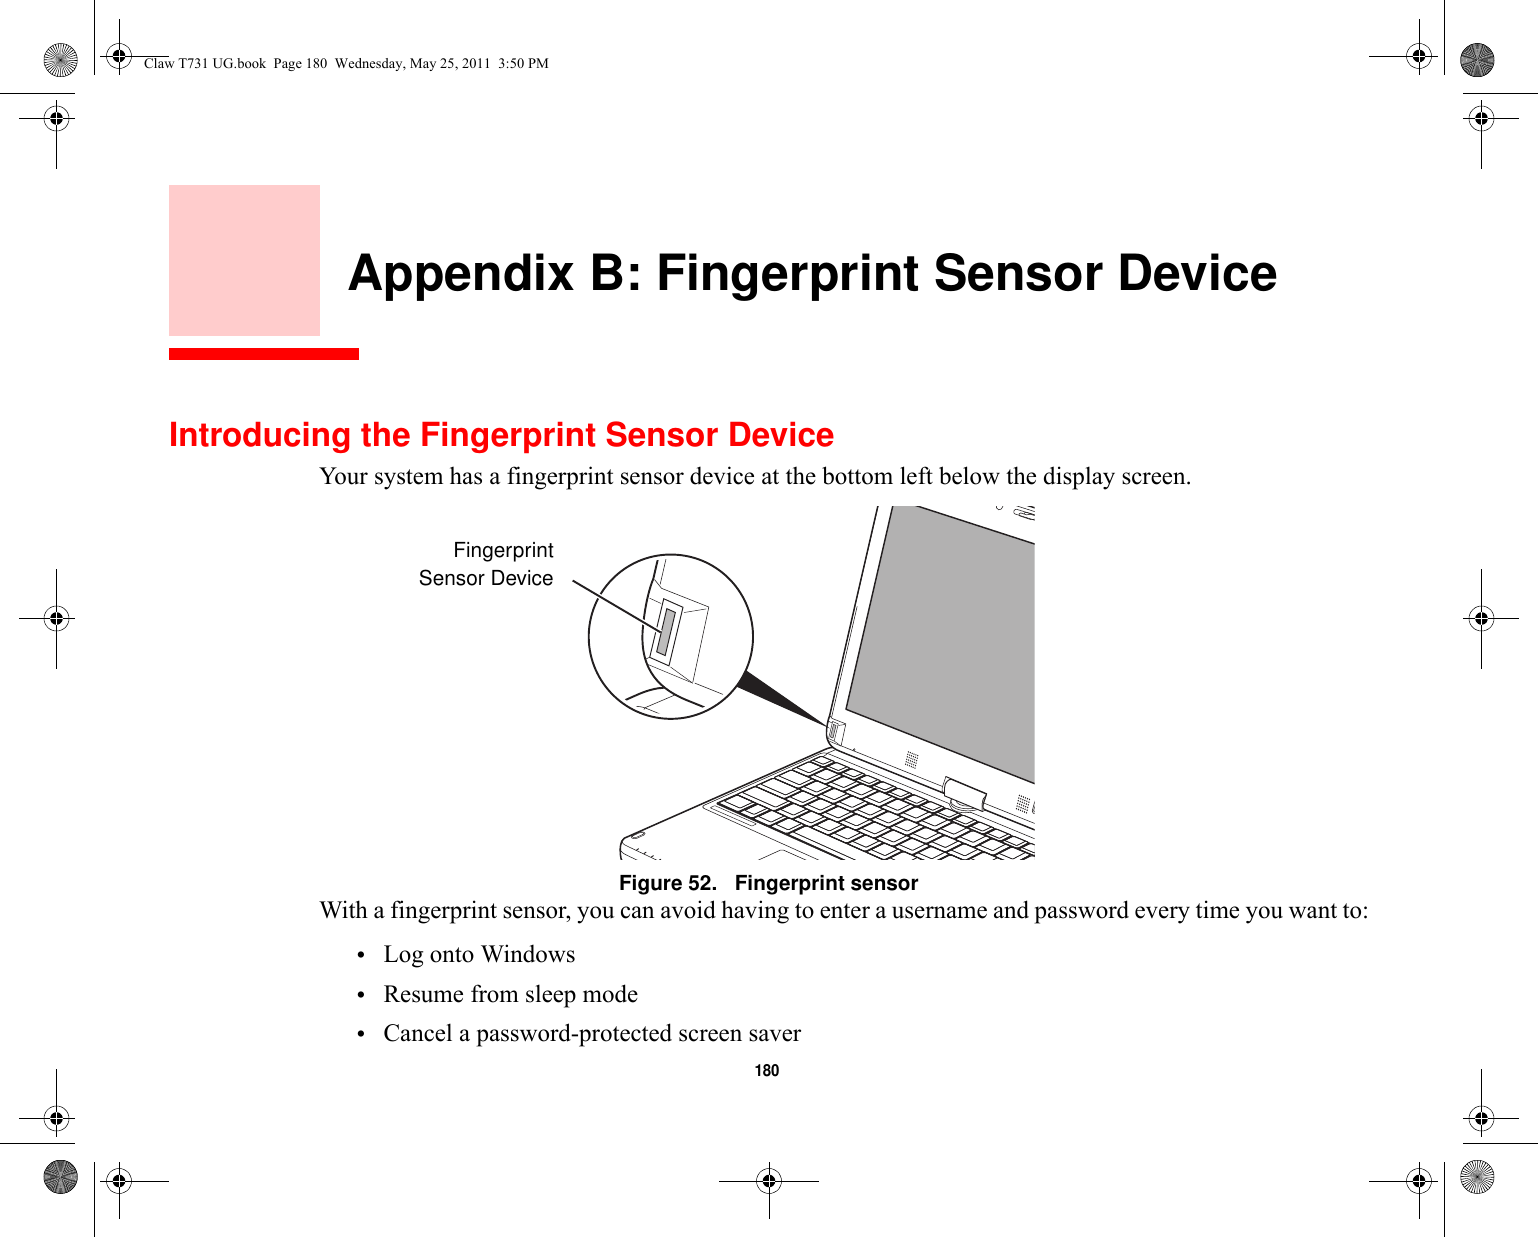
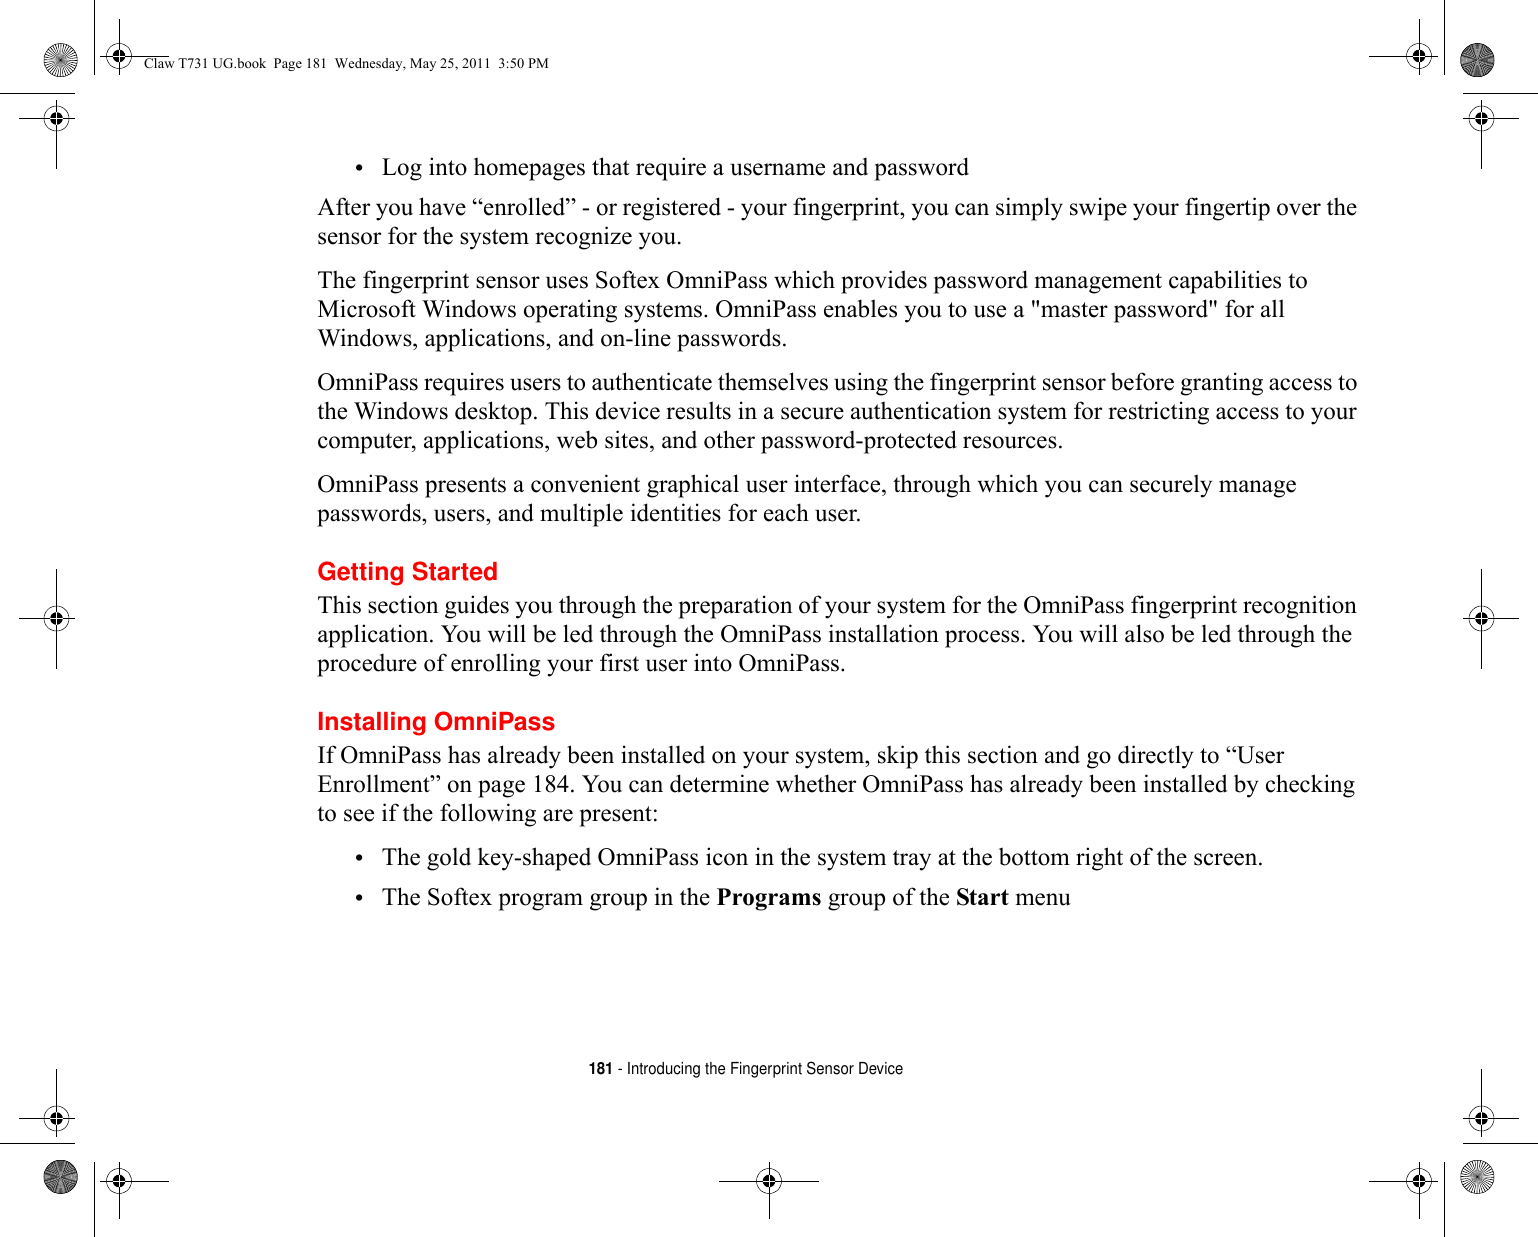

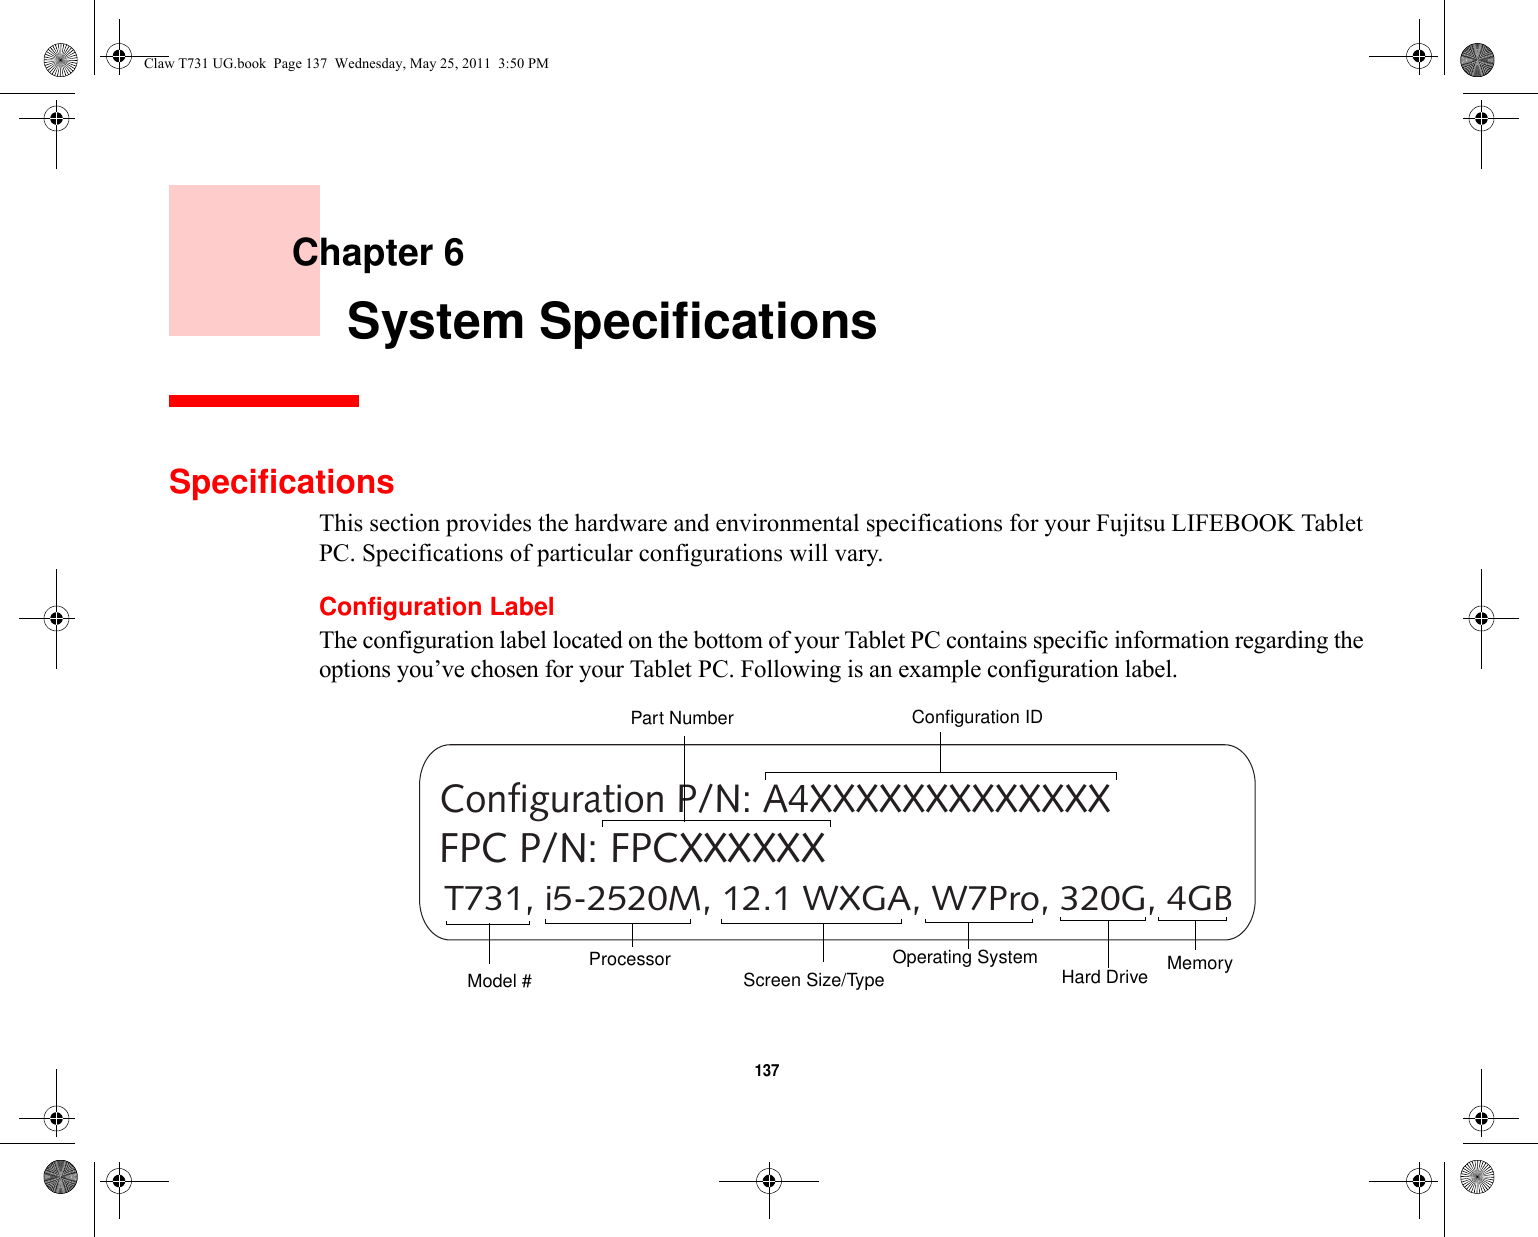
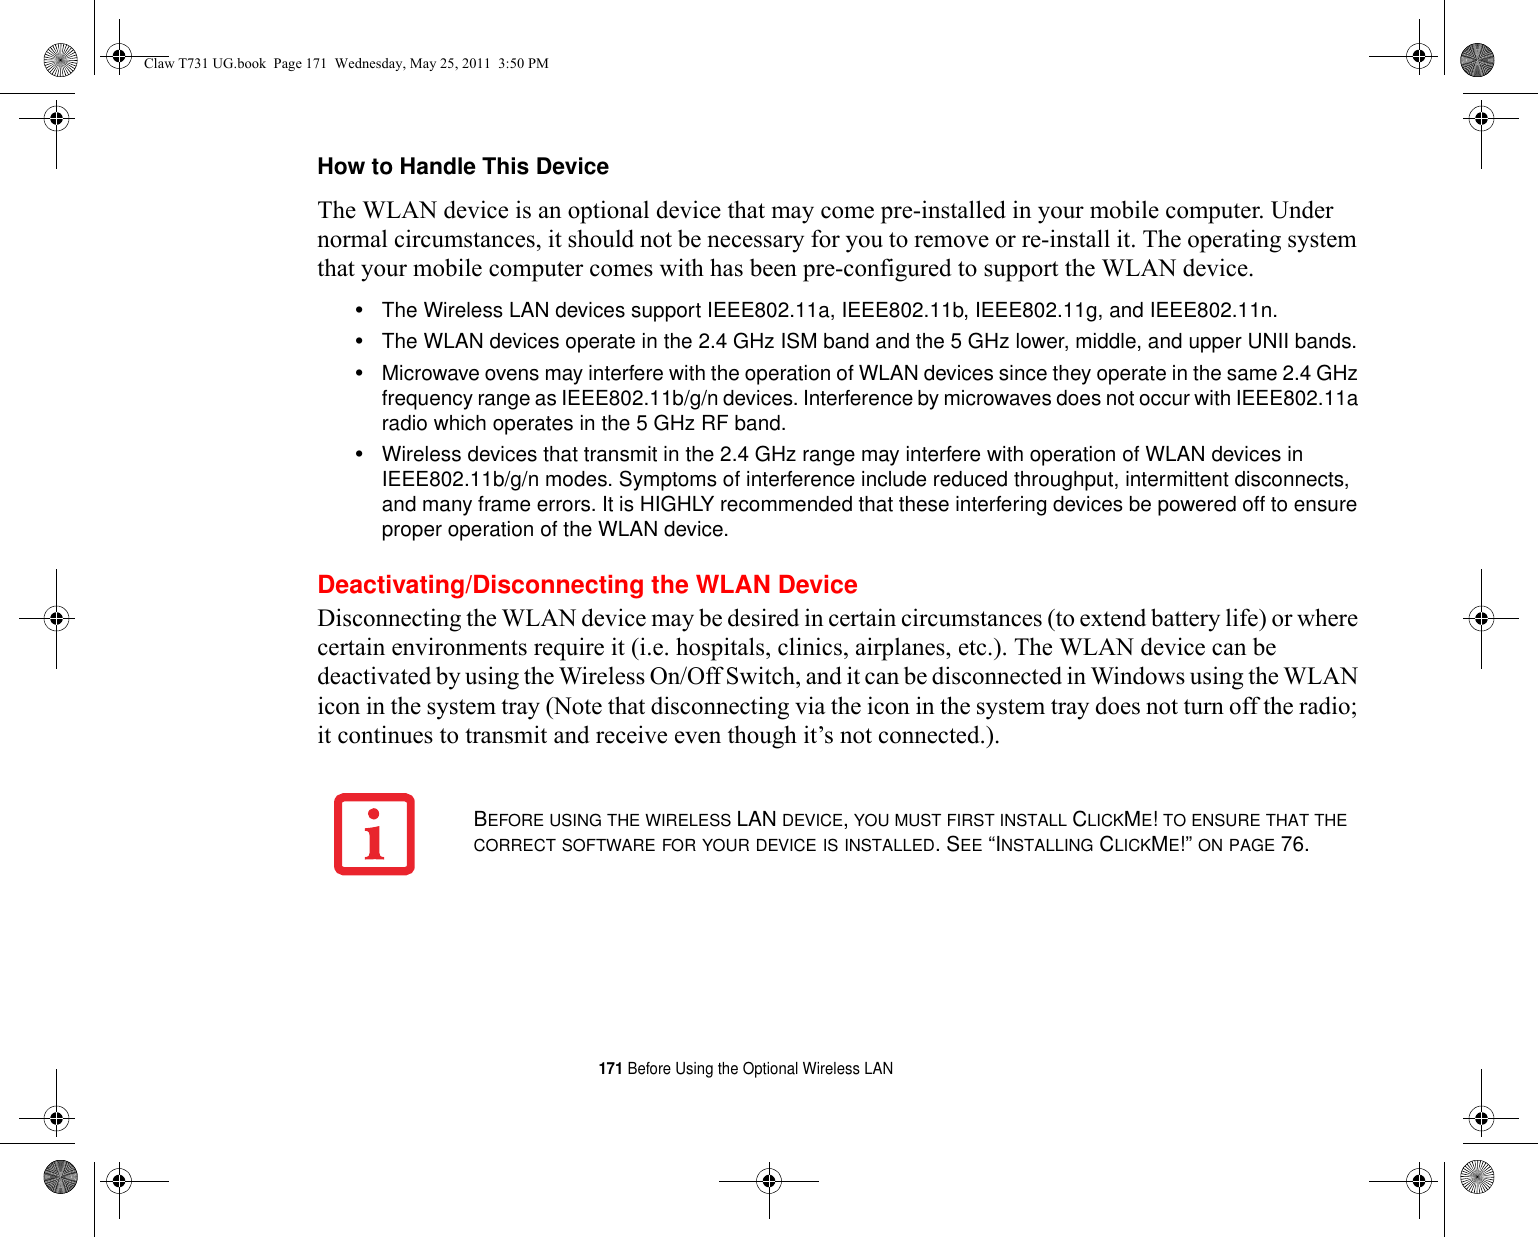
![184 - Introducing the Fingerprint Sensor DeviceUser EnrollmentBefore you can use any OmniPass features you must first enroll a user into OmniPass.Master Password Concept Computer resources are often protected with passwords. Whether you are logging into your computer, accessing your email, e-banking, paying bills online, or accessing network resources, you often have to supply credentials to gain access. This can result in dozens of sets of credentials that you have to remember.During user enrollment a "master password” is created for the enrolled user. This master password “replaces” all other passwords for sites you register with OmniPass. Example: A user, John, installs OmniPass on his system (his home computer) and enrolls an OmniPass user with username “John_01” and password “freq14”. He then goes to his webmail site to log onto his account. He inputs his webmail credentials as usual (username “John_02” and password “lifebook”), but instead of clicking [Submit], he directs OmniPass to Remember Password. Now whenever he returns to that site, OmniPass will prompt him to supply access credentials. John enters his OmniPass user credentials (“John_01” and “freq14”) in the OmniPass authentication prompt, and he is allowed into his webmail account. He can do this with as many web sites or password protected resources he likes, and he will gain access to all those sites with his OmniPass user credentials (“John_01” and “freq14”). This is assuming he is accessing those sites with the system onto which he enrolled his OmniPass user. OmniPass does not actually change the credentials of the password protected resource. If John goes to another computer without he OmniPass account to access his webmail, he would need to enter his original webmail credentials (“John_02” and “lifebook”) to gain access. If he attempts his OmniPass user credentials on a system other than a system he’s enrolled on, he will not gain access.THE ENROLLMENT PROCEDURE ASSUMES YOU HAVE NO HARDWARE AUTHENTICATION DEVICES OR ALTERNATE STORAGE LOCATIONS THAT YOU WISH TO INTEGRATE WITH OMNIPASS. IF YOU DESIRE SUCH FUNCTIONALITY, CONSULT THE APPROPRIATE SECTIONS OF THIS DOCUMENT.Claw T731 UG.book Page 184 Wednesday, May 25, 2011 3:50 PM](https://usermanual.wiki/Fujitsu-Client-Computing/WL0026.User-Manual-2/User-Guide-1477640-Page-50.png)
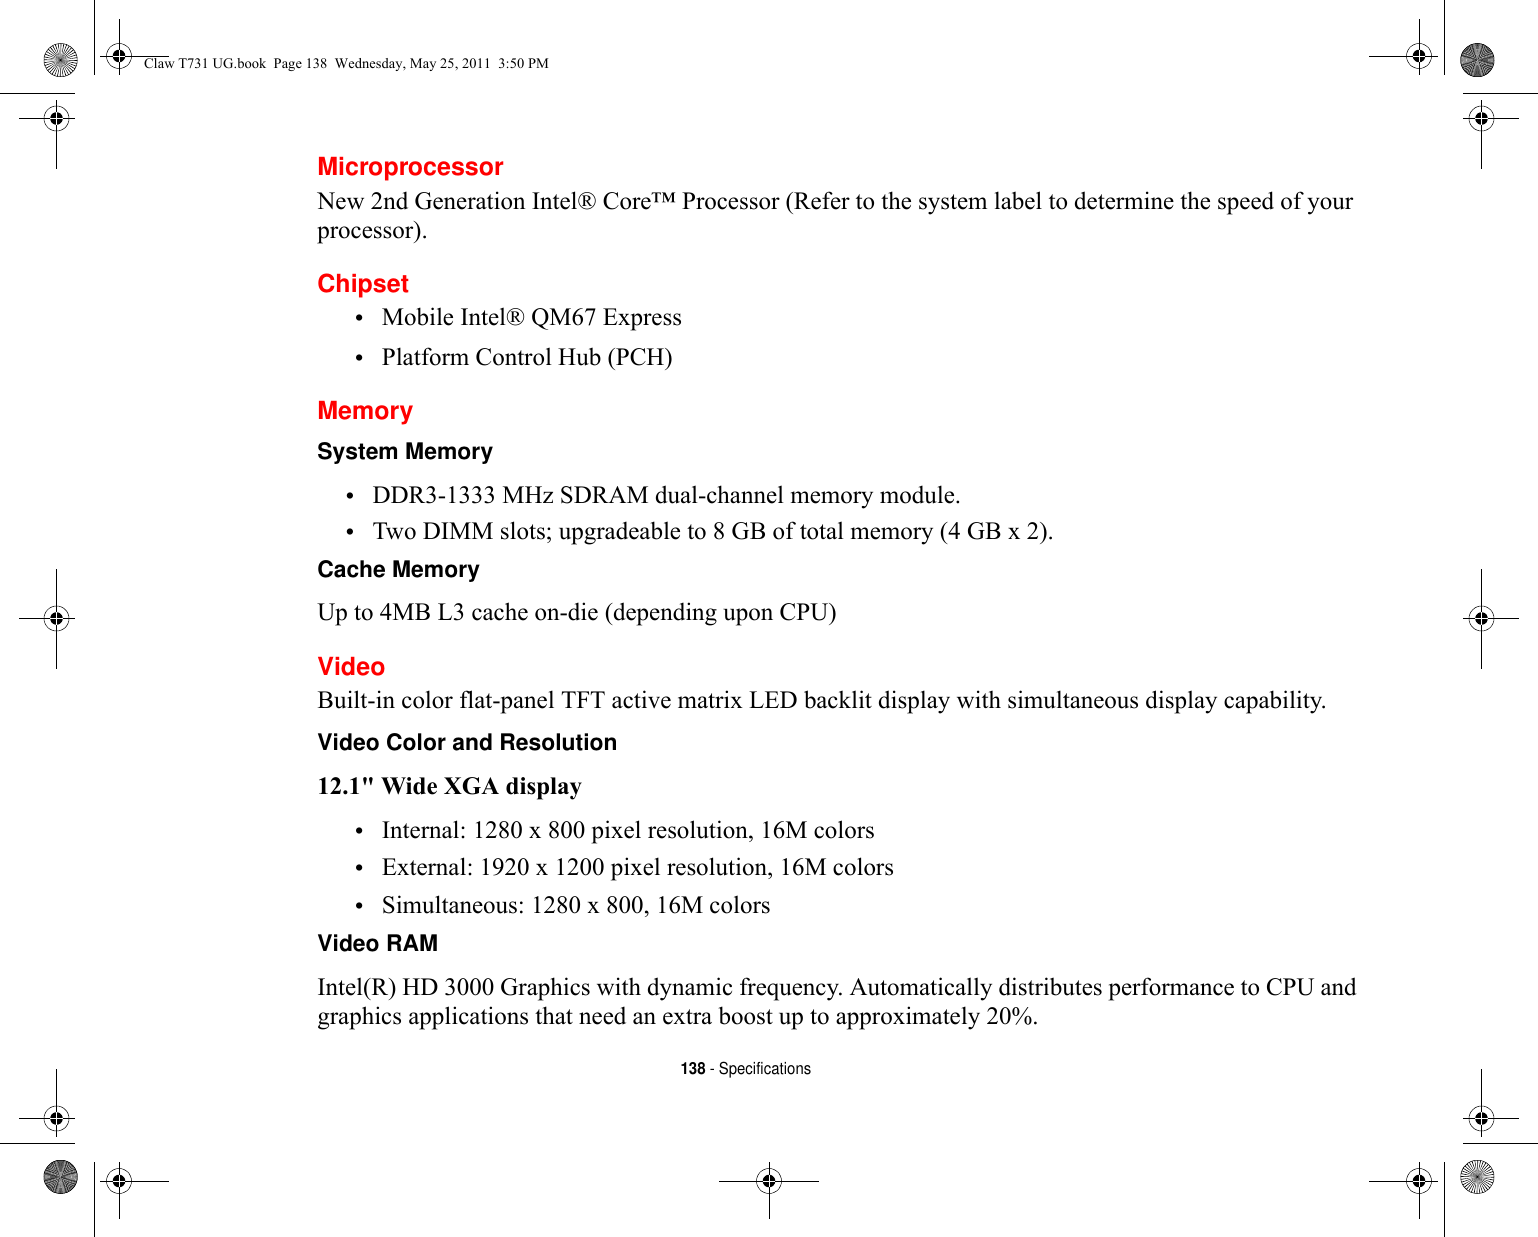
![185 - Introducing the Fingerprint Sensor DeviceBasic Enrollment The Enrollment Wizard will guide you through the process of enrolling a user. Unless you specified otherwise, after OmniPass installation the Enrollment Wizard will launch on Windows login. If you do not see the Enrollment Wizard, you can bring it up by clicking Start on the Windows taskbar; select Programs; select Softex; click OmniPass Enrollment Wizard.1Click Enroll to proceed to username and password verification. By default, the OmniPass Enrollment Wizard enters the credentials of the currently logged in Windows user.2Enter the password you use to log in to Windows. This will become the “master password” for this OmniPass user. In most cases, the Domain: value will be your Windows computer name. In a corporate environment, or when accessing corporate resources, the Domain: may not be your Windows computer name. Click [Next] to continue.3In this step OmniPass captures your fingerprint. Refer to “Enrolling a Fingerprint” on page 185 for additional information.4Next, choose how OmniPass notifies you of various events. We recommend you keep Taskbar Tips on Beginner mode taskbar tips and Audio Tips on at least Prompt with system beeps only until you get accustomed to how OmniPass operates. Click [Next] to proceed with user enrollment. You will then see a Congratulations screen indicating your completion of user enrollment.5Click [Done] to exit the OmniPass Enrollment Wizard. You will be asked if you’d like to log in to OmniPass with your newly enrolled user; click [Yes].Enrolling a Fingerprint Enrolling a fingerprint will increase the security of your system and streamline the authentication procedure. You enroll fingerprints in the OmniPass Control Center. With an OmniPass user logged in, double-click the system tray OmniPass icon. Select the User Settings tab and click Enrollment under the User Settings area. Click Enroll Authentication Device and authenticate at the authentication prompt to start device enrollment.Claw T731 UG.book Page 185 Wednesday, May 25, 2011 3:50 PM](https://usermanual.wiki/Fujitsu-Client-Computing/WL0026.User-Manual-2/User-Guide-1477640-Page-51.png)
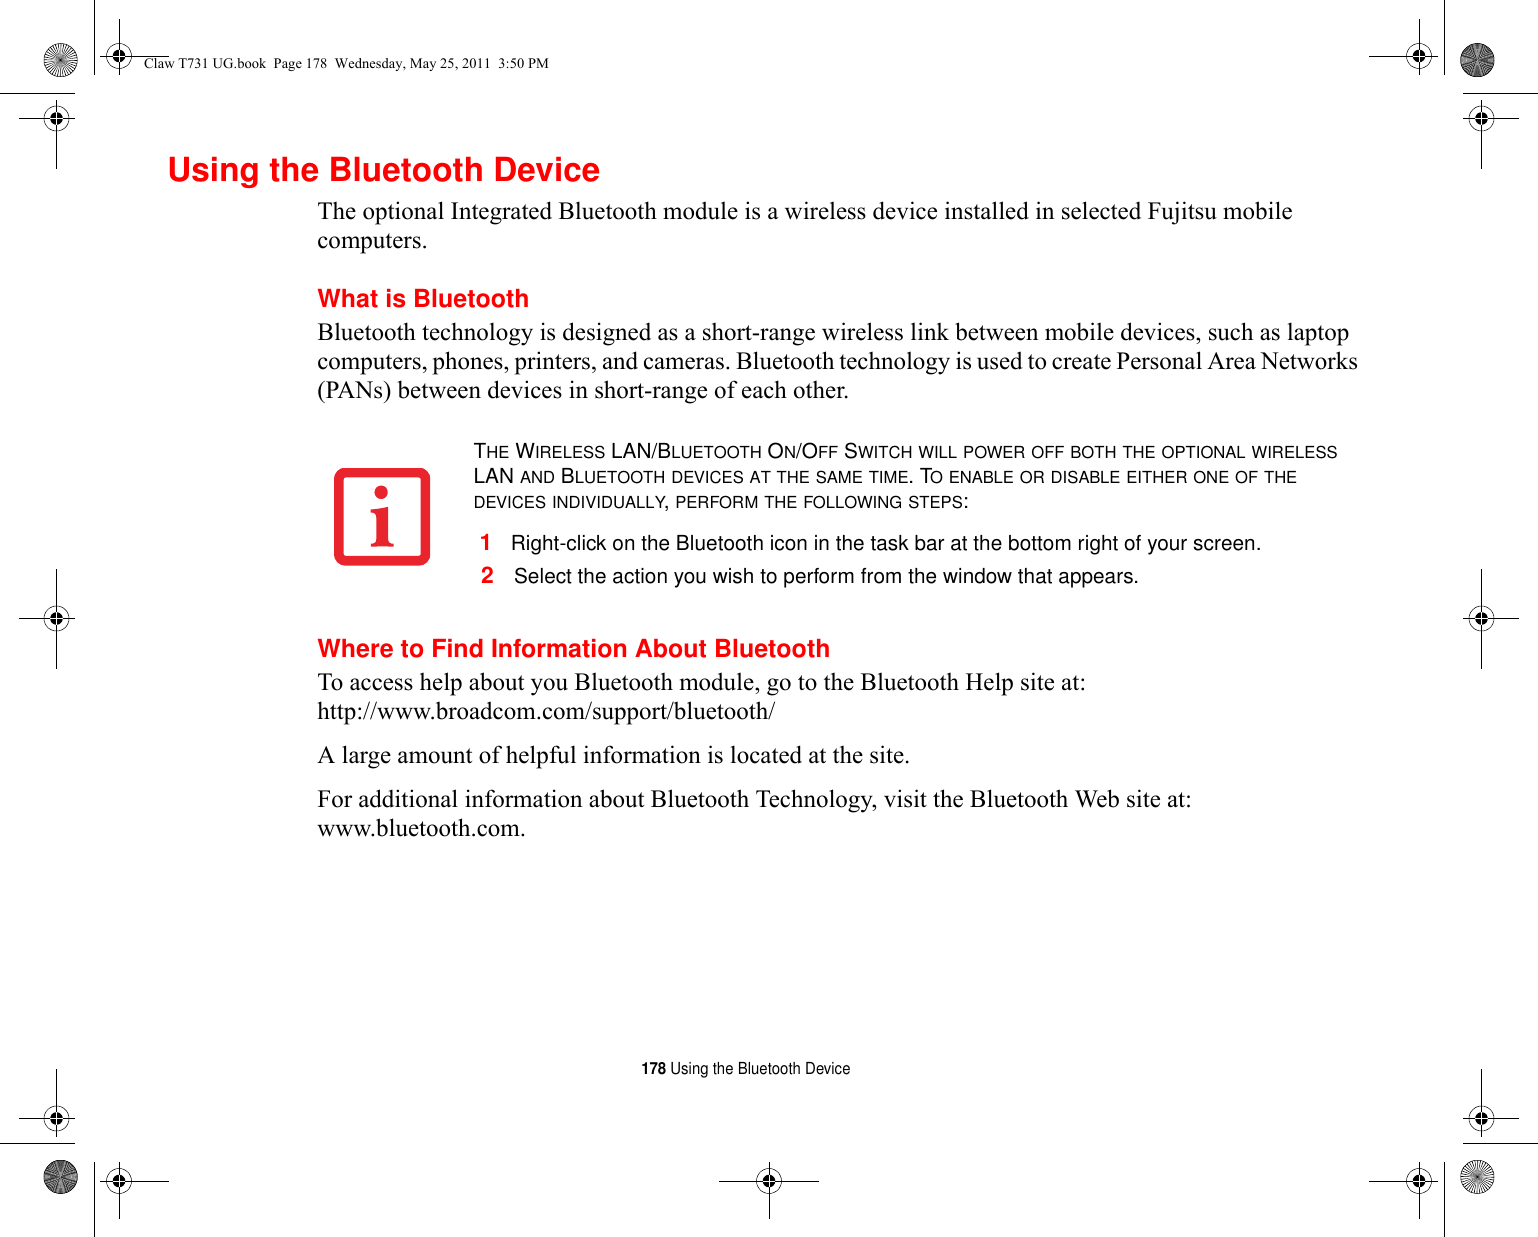
![186 - Introducing the Fingerprint Sensor Device1During initial user enrollment, you will be prompted to select the finger you wish to enroll. Fingers that have already been enrolled will be marked by a green check. The finger you select to enroll at this time will be marked by a red arrow. OmniPass will allow you re-enroll a finger. If you choose a finger that has already been enrolled and continue enrollment, OmniPass will enroll the fingerprint, overwriting the old fingerprint. Select a finger to enroll and click [Next].2It is now time for OmniPass to capture your selected fingerprint. It may take a several capture attempts before OmniPass acquires your fingerprint. Should OmniPass fail to acquire your fingerprint, or if the capture screen times out, click [Back] to restart the fingerprint enrollment process. Your system has a “swipe” fingerprint sensor. A swipe sensor is small and resembles a skinny elongated rectangle. To capture a fingerprint, gently swipe or pull your fingertip over the sensor (starting at the second knuckle) towards yourself. Swiping too fast or too slow will result in a failed capture. The Choose Finger screen has a [Practice] button; click it to practice capturing your fingerprint. When you are comfortable with how your fingerprint is captured, proceed to enroll a finger.3Once OmniPass has successfully acquired the fingerprint, the Verify Fingerprint screen will automatically appear. To verify your enrolled fingerprint, place your fingertip on the sensor and hold it there as if you were having a fingerprint captured. Successful fingerprint verification will show a green fingerprint in the capture window and the text Verification Successful under the capture window.Using OmniPassYou are now ready to begin using OmniPass. Used regularly, OmniPass will streamline your authentications.Password Replacement You will often use the password replacement function. When you go to a restricted access website (e.g., your bank, your web-based email, online auction or payment sites), you are always prompted to enter your login credentials. OmniPass can detect these prompts and you can teach OmniPass your login credentials. The next time you go to that website, you can authenticate with your fingerprint to gain access.Claw T731 UG.book Page 186 Wednesday, May 25, 2011 3:50 PM](https://usermanual.wiki/Fujitsu-Client-Computing/WL0026.User-Manual-2/User-Guide-1477640-Page-52.png)
![187 - Introducing the Fingerprint Sensor DeviceOmniPass Authentication Toolbar After installing OmniPass and restarting, you will notice a dialog you have not seen before at Windows Logon. This is the OmniPass Authentication Toolbar, and it is displayed whenever the OmniPass authentication system is invoked. The OmniPass authentication system may be invoked frequently: during Windows Logon, during OmniPass Logon, when unlocking your workstation, when resuming from sleep or hibernate, when unlocking a password-enabled screensaver, during password replacement for remembered site or application logins, and more. When you see this toolbar, OmniPass is prompting you to authenticate.The Logon Authentication window indicates what OmniPass-restricted function you are attempting. The icons in the lower left (fingerprint and key) show what authentication methods are available to you. Selected authentication methods are highlighted while unselected methods are not. When you click the icon for an unselected authentication method, the authentication prompt associated with that method is displayed.When prompted to authenticate, you must supply the appropriate credentials: an enrolled finger for the fingerprint capture window or your master password for the master password prompt (the key icon).Remembering a Password OmniPass can remember any application, GUI, or password protected resource that has a password prompt.Using the following procedure, you can store a set of credentials into OmniPass. These credentials will then be linked to your “master password” or fingerprint.Go to a site that requires a login (username and password), but do not log in yet. At the site login prompt, enter your username and password in the prompted fields, but do not enter the site (do not hit [Enter], [Submit], [OK], or Login). Right-click the OmniPass system tray icon and select Remember Password from the submenu. The Windows arrow cursor will change to a golden key OmniPass cursor. Click the OmniPass cursor in the login prompt area, but don’t click [Login] or [Submit].Claw T731 UG.book Page 187 Wednesday, May 25, 2011 3:50 PM](https://usermanual.wiki/Fujitsu-Client-Computing/WL0026.User-Manual-2/User-Guide-1477640-Page-53.png)
![188 - Introducing the Fingerprint Sensor DeviceAssociating a Friendly Name After clicking the OmniPass key cursor near the login prompt, OmniPass will prompt you to enter a “friendly name” for this site. You should enter something that reminds you of the website, the company, or the service you are logging into. In its secure database, OmniPass associates this friendly name with this website.Additional Settings for Remembering a Site When OmniPass prompts you to enter a “friendly name” you also have the opportunity to set how OmniPass authenticates you to this site. There are three effective settings for how OmniPass handles a remembered site.The default setting is Automatically click the “OK” or “Submit” button for this password protected site once the user is authenticated. With this setting, each time you navigate to this site OmniPass will prompt you for your master password or fingerprint authentication device. Once you have authenticated with OmniPass, you will automatically be logged into the site. Less secure is the option to Automatically enter this password protected site when it is activated. Do not prompt for authentication. Check the upper box to get this setting, and each time you navigate to this site OmniPass will log you into the site without prompting you to authenticate.If you uncheck both boxes in Settings for this Password Site, OmniPass will prompt you for your master password or fingerprint authentication device. Once you have authenticated with OmniPass your credentials will be filled in to the site login prompt, but you will have to click the website [OK], [Submit], or [Login] button to gain access to the site. THIS SETTING IS MORE CONVENIENT IN THAT WHENEVER YOU GO TO A SITE REMEMBERED WITH THIS SETTING, YOU WILL BYPASS ANY AUTHENTICATION PROCEDURE AND GAIN INSTANT ACCESS TO THE SITE. BUT SHOULD YOU LEAVE YOUR SYSTEM UNATTENDED WITH YOUR OMNIPASS USER LOGGED IN, ANYONE USING YOUR SYSTEM CAN BROWSE TO YOUR PASSWORD PROTECTED SITES AND GAIN AUTOMATIC ACCESS.Claw T731 UG.book Page 188 Wednesday, May 25, 2011 3:50 PM](https://usermanual.wiki/Fujitsu-Client-Computing/WL0026.User-Manual-2/User-Guide-1477640-Page-54.png)

![191 - Introducing the Fingerprint Sensor DeviceTo add a new identity, click New Identity or double-click Click here to add a new identity. Name the new identity and click [OK], then click [Apply]. You can now switch to the new identity and start remembering passwords.To delete an identity, highlight the identity you want to delete and click [Delete Identity], then [Apply].To set the default identity, highlight the identity you want as default and click [Set as Default]; click [Apply] to ensure the settings are saved. If you log in to OmniPass with a fingerprint device, you will automatically be logged in to the default identity for that OmniPass user. You can choose the identity with which you are logging in if you login using "master password".Choosing User Identity during Login To choose your identity during login, type your username in the User Name: field. Press [Tab] and see that the Domain: field self-populates. Click the Password: field to bring the cursor to it, and you will see the pull-down menu in the Identity: field. Select the identity to login as, then click OK.Switch User Identity To switch identities at any time, right-click the OmniPass system tray icon and click Switch User Identity from the submenu. The Switch Identity dialog will appear. Select the desired identity and then click OK.Identities and Password Management On the Manage Passwords interface of the Vault Management tab of the OmniPass Control Center, there is a pull-down selection box labeled, Identity. This field lets you choose which identity you are managing passwords for. When you select an identity here, only those password protected dialogs that are associated with that identity are shown. You can perform all the functions explained in “Password Management” on page 190.WHEN YOU DELETE AN IDENTITY, ALL OF ITS ASSOCIATED REMEMBERED SITES AND PASSWORD PROTECTED DIALOGS ARE LOST.Claw T731 UG.book Page 191 Wednesday, May 25, 2011 3:50 PM](https://usermanual.wiki/Fujitsu-Client-Computing/WL0026.User-Manual-2/User-Guide-1477640-Page-57.png)
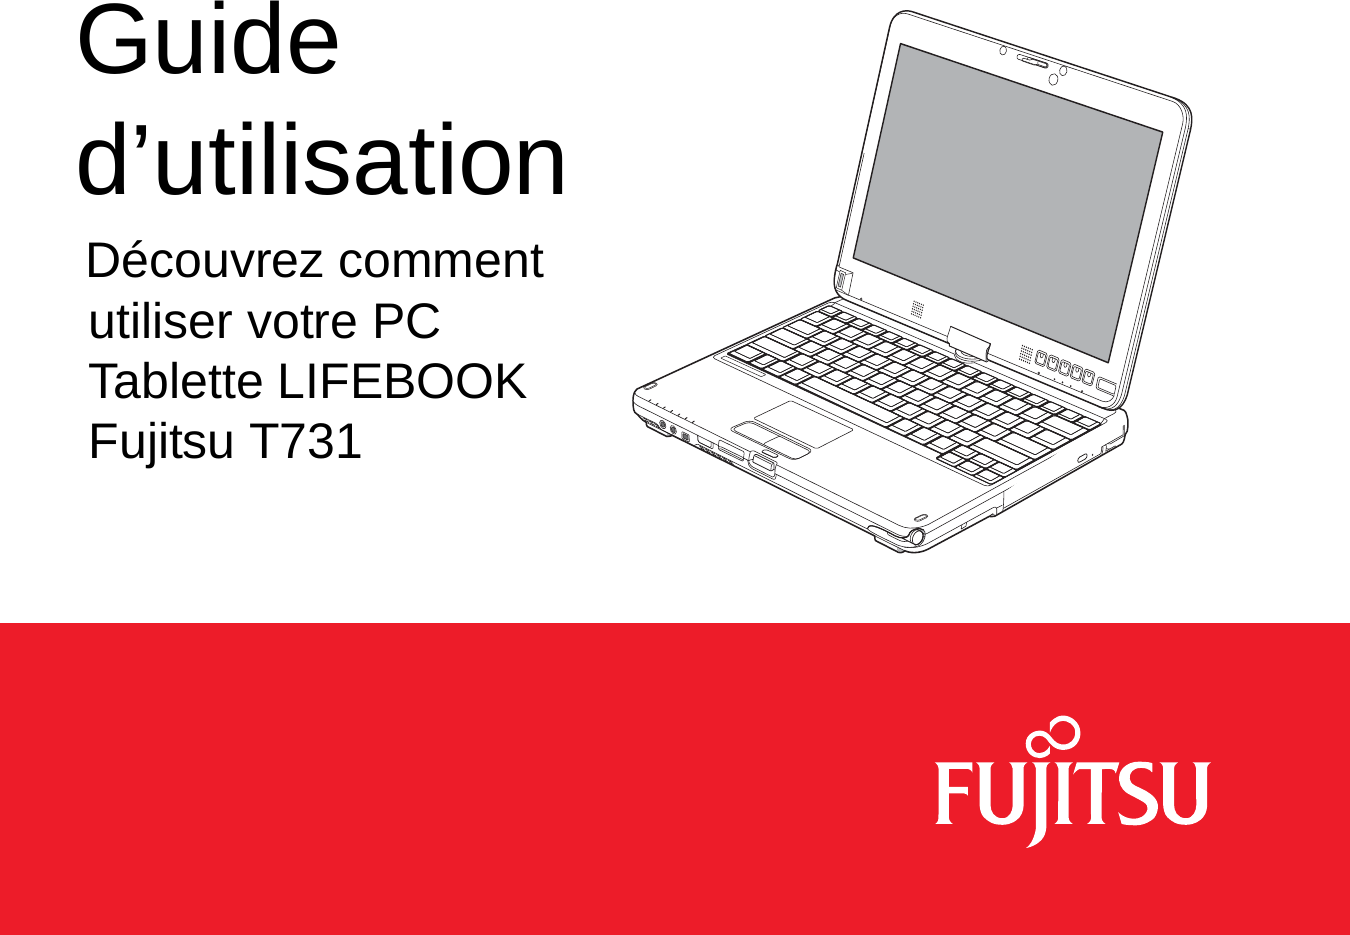


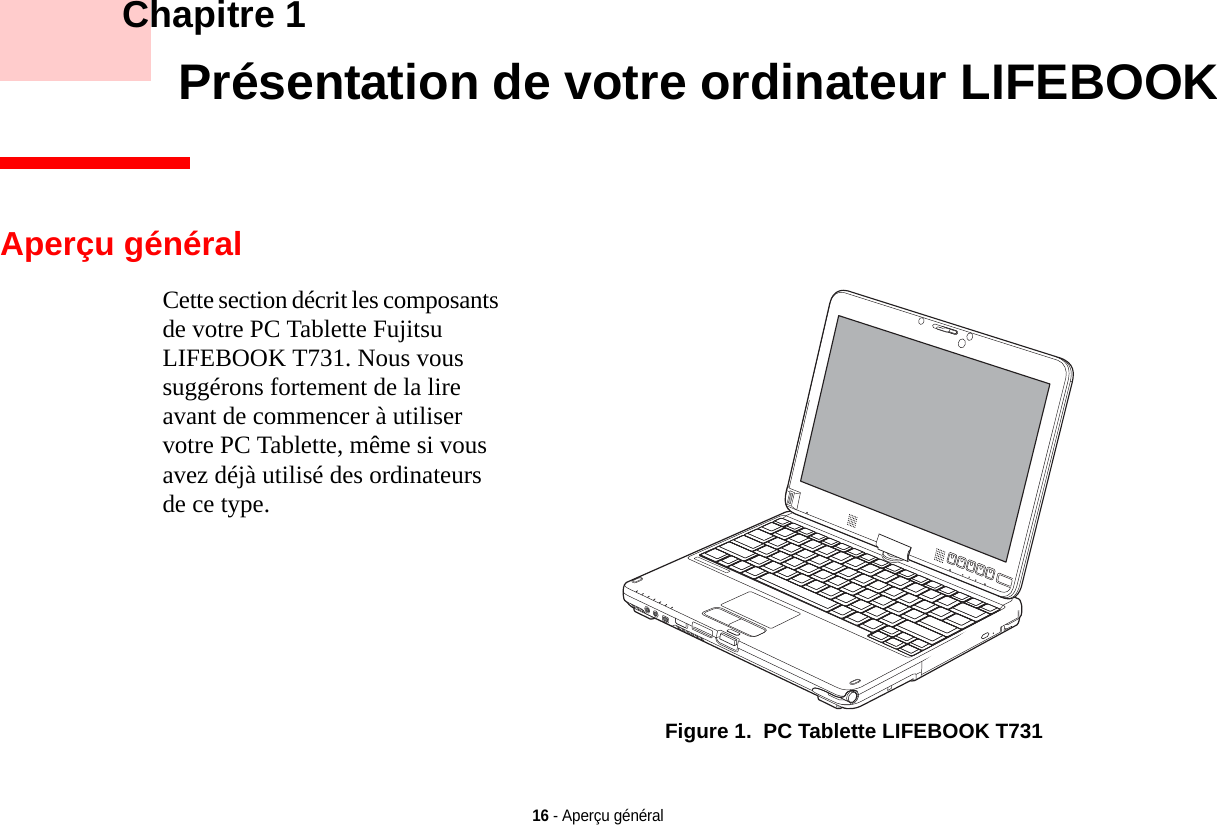
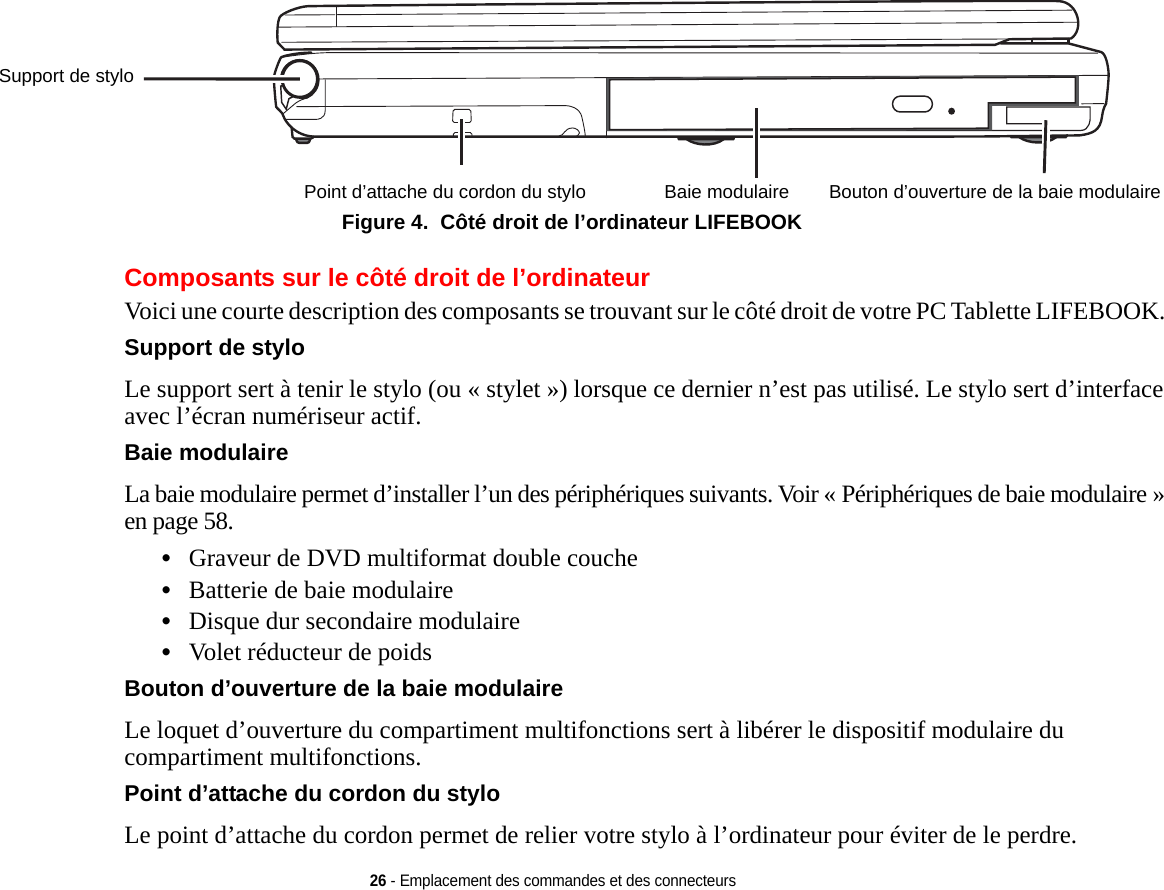
![13 - À propos de ce guide PréfaceÀ propos de ce guideLe PC Tablette LIFEBOOK Série T731 de la société Fujitsu America est un ordinateur compact, mais puissant. Il peut être utilisé en configuration d’ordinateur portable classique, avec un clavier, ou en configuration tablette, avec un stylet. Son fonctionnement est assuré par un nouveau processeur Intel® Core™ de deuxième génération et son écran intégré en couleurs est doté d'un numériseur actif ou d’un numériseur double disponible en option, vous permettant d’avoir la puissance d’un ordinateur de bureau dans un système portatif et polyvalent.Ce manuel présente le mode d’emploi du PC Tablette LIFEBOOK T731 et de ses logiciels intégrés. Conventions utilisées dans ce guideLes touches du clavier et à l’écran apparaissent entre crochets. Exemple : [Fn], [F1], [Échap], [Entrée] et [Ctrl].Le texte contient plusieurs renvois vers des pages contenant des informations supplémentaires sur un sujet quelconque. (« Voir Procédure d’installation en page 43 »). Remarque : tous les renvois sont reliés aux éléments concernés, il vous suffit donc de cliquer sur le lien et vous serez automatiquement redirigé(e) vers l’élément ou la page en question.Les éléments des menus à l’écran sont indiqués en caractères gras. Exemple : « Cliquez sur Menu Fujitsu, puis faites votre sélection. »](https://usermanual.wiki/Fujitsu-Client-Computing/WL0026.User-Manual-2/User-Guide-1477640-Page-81.png)
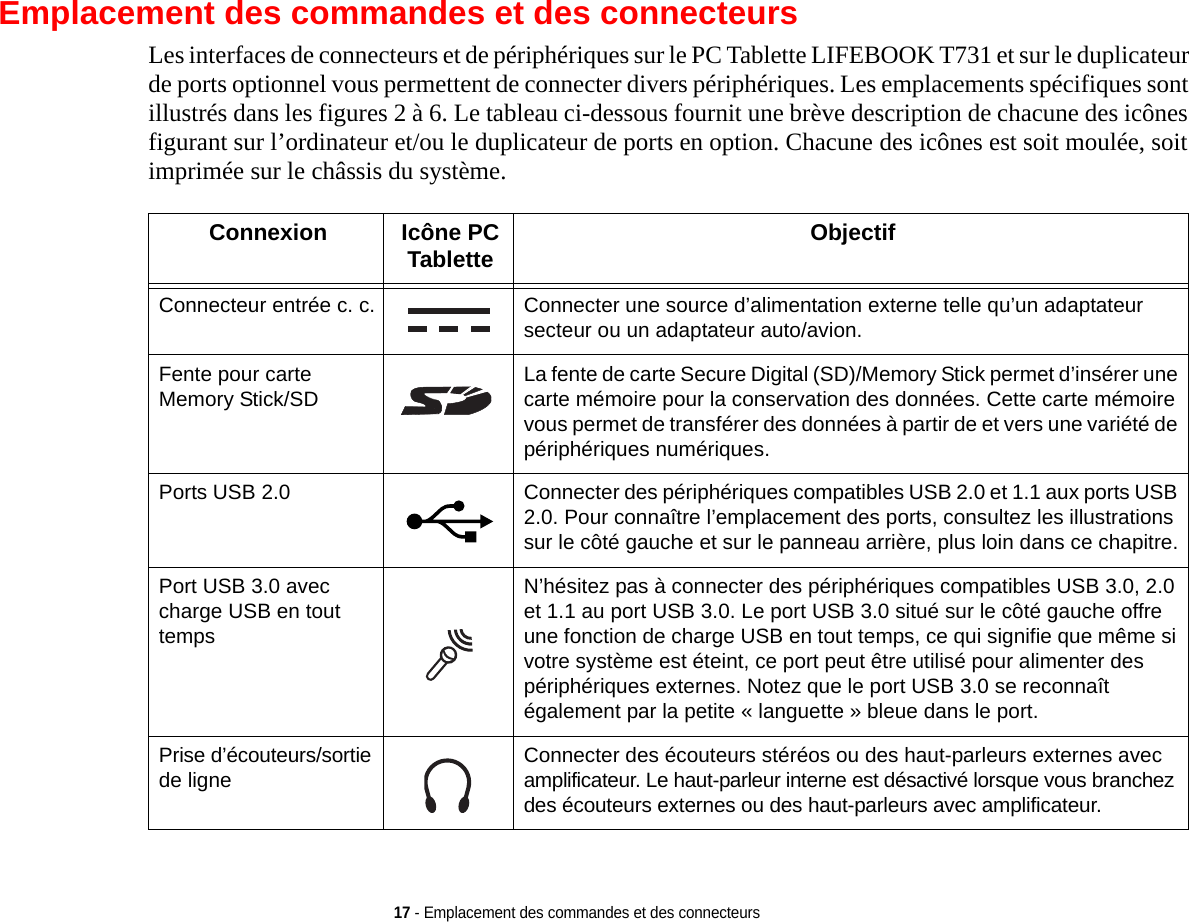
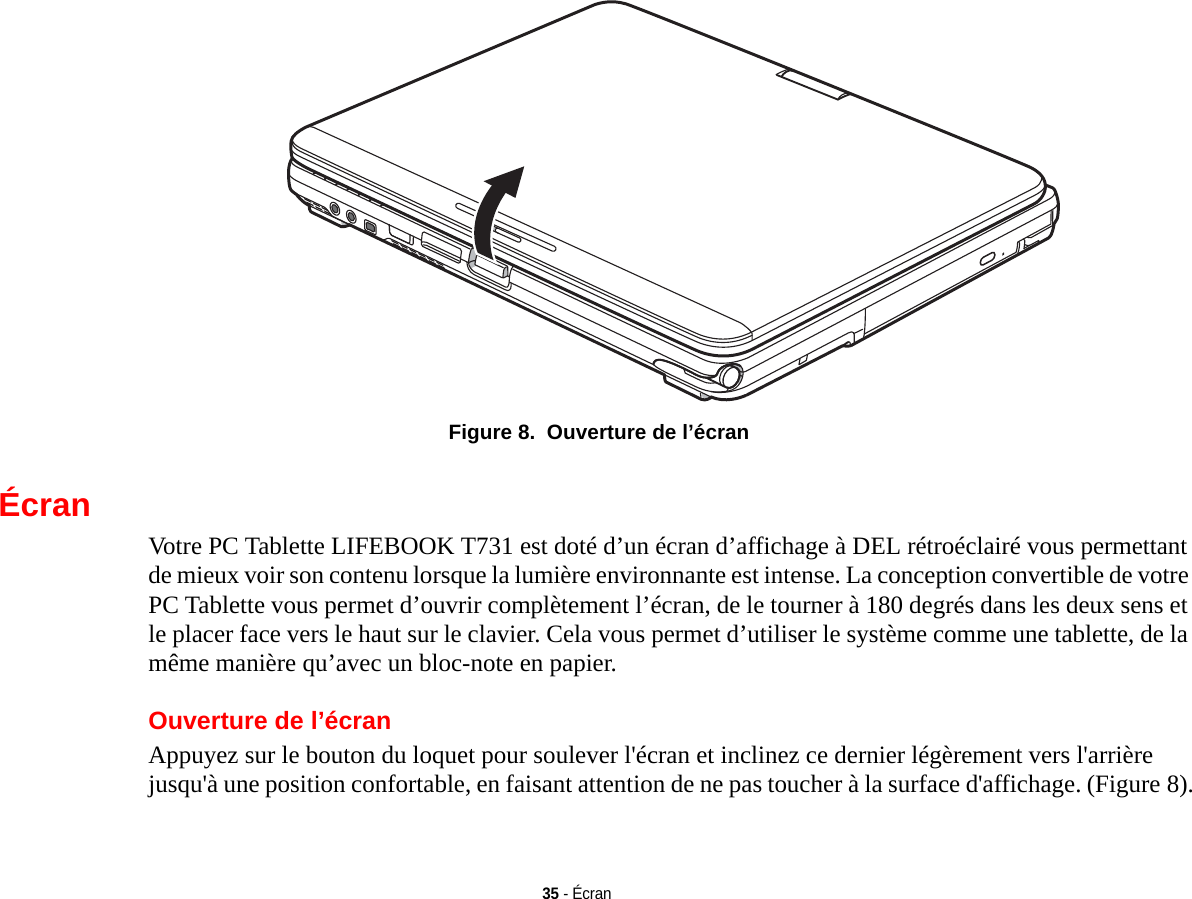
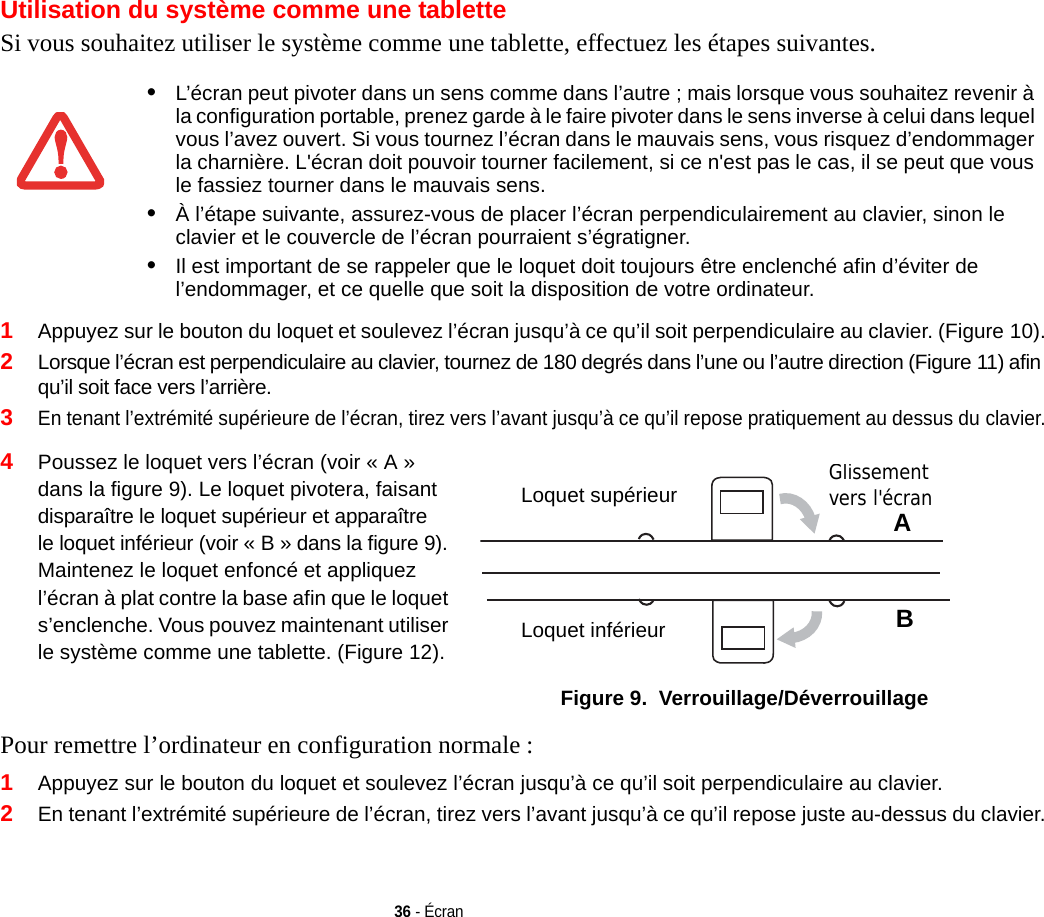
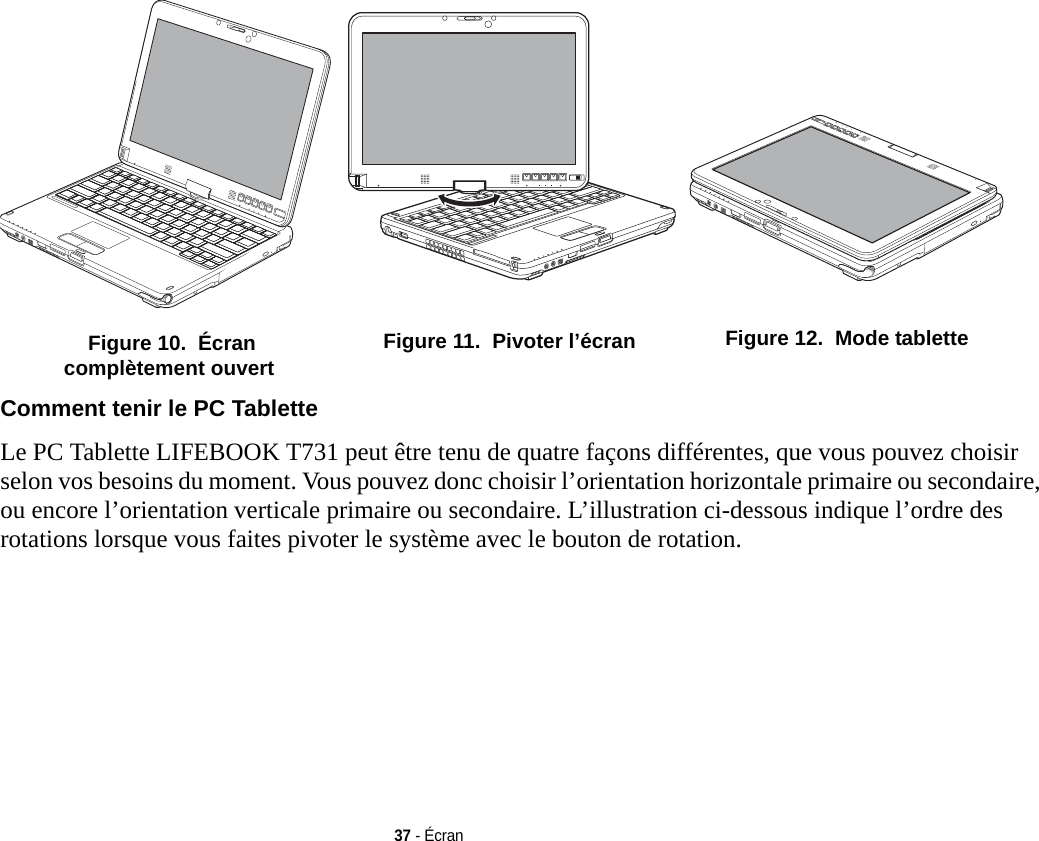
![38 - Écran.Orientation horizontaleprimaire Figure 13. Orientations du PC Tablette en mode tabletteRéglage de la luminosité de l’écranLorsque vous avez allumé votre PC Tablette, vous pouvez régler la luminosité de l’écran à un niveau de visionnement plus confortable. Vous pouvez ajuster la luminosité de trois façons : avec le clavier, avec l’utilitaire de gestion de l’alimentation, avec le menu Fujitsu. Utilisation du clavier Si vous réglez la luminosité en vous servant du clavier, vous modifiez les paramètres du système (c.-à-d., le paramétrage réalisé avec les touches de fonction modifient automatiquement les paramètres de luminosité dans les paramètres de la tablette et du stylo). •[Fn+F6] : Appuyez plusieurs fois sur cette combinaison de touches pour diminuer la luminosité de votre écran.•[Fn+F7] : Appuyez plusieurs fois sur cette combinaison de touches pour augmenter la luminosité de votre écran.Orientation verticaleprimaire Orientation horizontalesecondaire Orientation verticalesecondaire](https://usermanual.wiki/Fujitsu-Client-Computing/WL0026.User-Manual-2/User-Guide-1477640-Page-106.png)
![39 - ÉcranRemarque : le changement de luminosité avec la touche [Fn] est temporaire. Lors d’une reprise ou d’un redémarrage, il faudra les réinitialiser si cette méthode a été utilisée.Utilisation de la Gestion de l'alimentation pour contrôler la luminosité de l'écran (Windows 7) Dans Windows 7 : Pour régler la luminosité avec l'utilitaire de gestion de l'alimentation sous Windows 7 : Cliquez sur Démarrer - Panneau de configuration. Dans Affichage par :, sélectionnez un des affichages par icônes. Sélectionnez Écran puis cliquez sur Régler la luminosité dans le panneau de gauche. Sous Sélectionner un régime d'alimentation, choisissez le régime que vous souhaitez. Faites glisser la barre Luminosité de l’écran : vers la gauche ou la droite selon votre préférence.Utilisation du menu Fujitsu pour régler la luminosité Pour régler la luminosité en vous servant du menu Fujitsu, cliquez sur l’icône Menu Fujitsu de la barre de tâches dans le coin inférieur droit de l’écran. Double-cliquez sur l’icône Centre de mobilité Windows, puis double-cliquez sur l’icône située à côté de Luminosité de l’écran. Réglez la luminosité en faisant glisser le bouton sur la position On battery (Alimentation batterie) ou Plugged in (Alimentation secteur).Activation/Désactivation du capteur de lumière ambiante (Windows 7 seulement)Les ordinateurs fonctionnant avec le système d’exploitation Windows 7 sont dotés d’un capteur de lumière ambiante (juste en dessous du commutateur d’alimentation/veille/reprise) qui mesure automatiquement l’environnement lumineux. Si l’environnement est très éclairé, la luminosité de l’écran ACL augmentera pour faciliter la lecture. Au contraire, dans la pénombre, la luminosité de l’écran diminuera automatiquement.Le capteur de lumière peut être activé ou désactivé à partir du Panneau de configuration, comme suit :LORSQUE VOUS EMPLOYEZ UNE ALIMENTATION SECTEUR, L’ÉCRAN UTILISE PAR DÉFAUT LE NIVEAU DE LUMINOSITÉ LE PLUS ÉLEVÉ. LORSQUE VOUS EMPLOYEZ UNE ALIMENTATION SUR BATTERIE, L’ÉCRAN UTILISE PAR DÉFAUT UN NIVEAU DE LUMINOSITÉ MOYEN.PLUS LA LUMINOSITÉ EST ÉLEVÉE, PLUS L’ORDINATEUR CONSOMME D’ÉNERGIE ET PLUS LA LONGÉVITÉ DE VOTRE BATTERIE SERA RÉDUITE. SI VOUS DÉSIREZ MAXIMISER LA LONGÉVITÉ DE LA BATTERIE, RÉGLEZ LA LUMINOSITÉ AU PLUS BAS NIVEAU POSSIBLE.](https://usermanual.wiki/Fujitsu-Client-Computing/WL0026.User-Manual-2/User-Guide-1477640-Page-107.png)
![40 - Écran1Ouvrez le Panneau de configuration et cliquez sur Affichage par : puis sélectionner la taille des icônes souhaitée.2Cliquez sur l’icone Capteurs d’emplacement et autres.3Pour activer ou désactiver le capteur de lumière, cochez ou décochez la case située dans la colonne « Activé ».4Pour de plus amples informations sur le capteur de lumière, cliquez sur l'icône du Capteur de lumière présente dans la colonne des Capteurs à droite de l'icône pour ouvrir la fenêtre des Propriétés.5Dans la fenêtre « Propriétés du capteur », vous pouvez modifier la description du capteur, désinstaller le capteur ou encore activer ou désactiver les utilisateurs sélectionnés.•Pour modifier la description du capteur, cliquez sur le bouton [Modifier la description], saisissez les nouveaux éléments, puis cliquez sur le bouton [OK].•Pour limiter le nombre d’utilisateurs ayant accès aux capteurs, cliquez sur Modifier les accès aux capteurs, puis cochez ou libérez la case située à côté de l’utilisateur auquel vous souhaitez autoriser ou refuser l’accès.•Pour désinstaller le capteur, cliquez sur Désinstaller ce capteur.](https://usermanual.wiki/Fujitsu-Client-Computing/WL0026.User-Manual-2/User-Guide-1477640-Page-108.png)

![42 - Clavier•Pavé numérique : Certaines touches de votre ordinateur portable remplissent une double fonction, servant à la fois de caractère standard et de touche numérique ou mathématique. Pour passer du caractère standard à la fonction numérique, utilisez la touche [Verr num].•Touches de curseur : Votre clavier contient quatre touches fléchées permettant de déplacer le curseur ou le point d’insertion vers la droite, vers la gauche, vers le haut ou vers le bas, dans les fenêtres, dans les applications et dans les documents. •Touches de fonction : Les touches [F1] à [F12] s’utilisent avec la touche [Fn] pour exécuter des actions spéciales, selon le programme en cours d’utilisation. •Touches Windows : Ces touches fonctionnent de concert avec votre système d’exploitation Windows et produisent le même résultat que si vous cliquiez sur le menu Démarrer à l’écran ou avec le bouton droit de votre pointeur.Pavé numérique Certaines touches du clavier remplissent une double fonction en servant de touche standard et de touche numérique. Pour utiliser la fonction numérique de ces touches, appuyez sur [Verr num]. Pour désactiver la fonction numérique, appuyez de nouveau sur la même touche. Lorsque cette fonction est activée, vous pouvez saisir des chiffres de 0 à 9, exécuter des additions ( + ), des soustractions ( - ), des multiplications ( * ) et des divisions ( / ), ainsi que saisir des décimales ( , ) en vous servant des touches de fonction désignées du pavé numérique. Les fonctions secondaires des touches du pavé numérique sont indiquées sur leur face avant. Touches Windows Votre PC Tablette LIFEBOOK comporte deux touches Windows, soit une touche [Démarrer] et une touche [Application]. La touche [Démarrer] affiche le menu Démarrer. Ce bouton fonctionne un peu comme le bouton de menu Démarrer de votre écran La touche [Application] fonctionne comme le bouton droit de votre souris et affiche un menu de raccourcis s’appliquant à l’élément sélectionné. (Pour plus d’informations sur les touches Windows, veuillez consulter l’Aide Windows et la documentation de soutien disponible dans le menu Démarrer.)](https://usermanual.wiki/Fujitsu-Client-Computing/WL0026.User-Manual-2/User-Guide-1477640-Page-110.png)
![43 - ClavierTouches de curseur Les touches de curseur sont les quatre touches fléchées qui permettent de déplacer le curseur vers le haut, vers le bas, vers la gauche et vers la droite dans les applications. Dans les programmes tels que l’Explorateur Windows, elles servent à déplacer la « mise en évidence » (sélectionne l’élément suivant en haut, en bas, à gauche ou à droite). Touches de fonction Votre PC Tablette LIFEBOOK comporte 12 touches de fonction, F1 à F12. Les fonctions affectées à ces touches varient selon l’application. Pour les connaître, consultez la documentation du logiciel utilisé. •La touche [Fn] permet d’accéder à des fonctions supplémentaires de votre PC Tablette. Elle est toujours utilisée conjointement avec une autre touche. •[Fn+F3] : Maintenez [Fn] enfoncée et appuyez sur [F3] pour activer ou désactiver la fonction Silence.•[Fn+F4] : Maintenez la touche [Fn] enfoncée et appuyez sur [F4] pour activer ou désactiver la fonction Quick Point. Veuillez prendre note que la combinaison de touches [Fn+F4] fonctionne uniquement lorsque le paramètre Manual Setting (Configuration manuelle) est sélectionné dans le BIOS. (Voir « Utilitaire de configuration du BIOS » en page 78.)•[Fn+F6] : Gardez la touche [Fn] enfoncée et appuyez plusieurs fois sur [F6] pour diminuer la luminosité de l’écran.•[Fn+F7] : Gardez la touche [Fn] enfoncée et appuyez plusieurs fois sur [F7] pour augmenter la luminosité de l’écran.•[Fn+F8] : Si vous appuyez plusieurs fois sur [F8] tout en maintenant la touche [Fn] enfoncée, vous réduirez le volume sonore de votre système.•[Fn+F9] : Si vous appuyez plusieurs fois sur [F9] tout en maintenant la touche [Fn] enfoncée, vous augmenterez le volume sonore de votre système.•[Fn+F10] : Gardez la touche [Fn] enfoncée et appuyez sur [F10] pour changer l’emplacement de l’affichage vidéo. L’ordre des emplacements dépend du type de périphérique(s) vidéo connecté(s) au système. Chaque fois que vous appuyez sur ces touches, vous passez au choix suivant.•Si vous avez un écran à tube cathodique externe, l’ordre sera le suivant : écran interne -> écran cathodique externe -> affichage simultané -> écran interne.](https://usermanual.wiki/Fujitsu-Client-Computing/WL0026.User-Manual-2/User-Guide-1477640-Page-111.png)
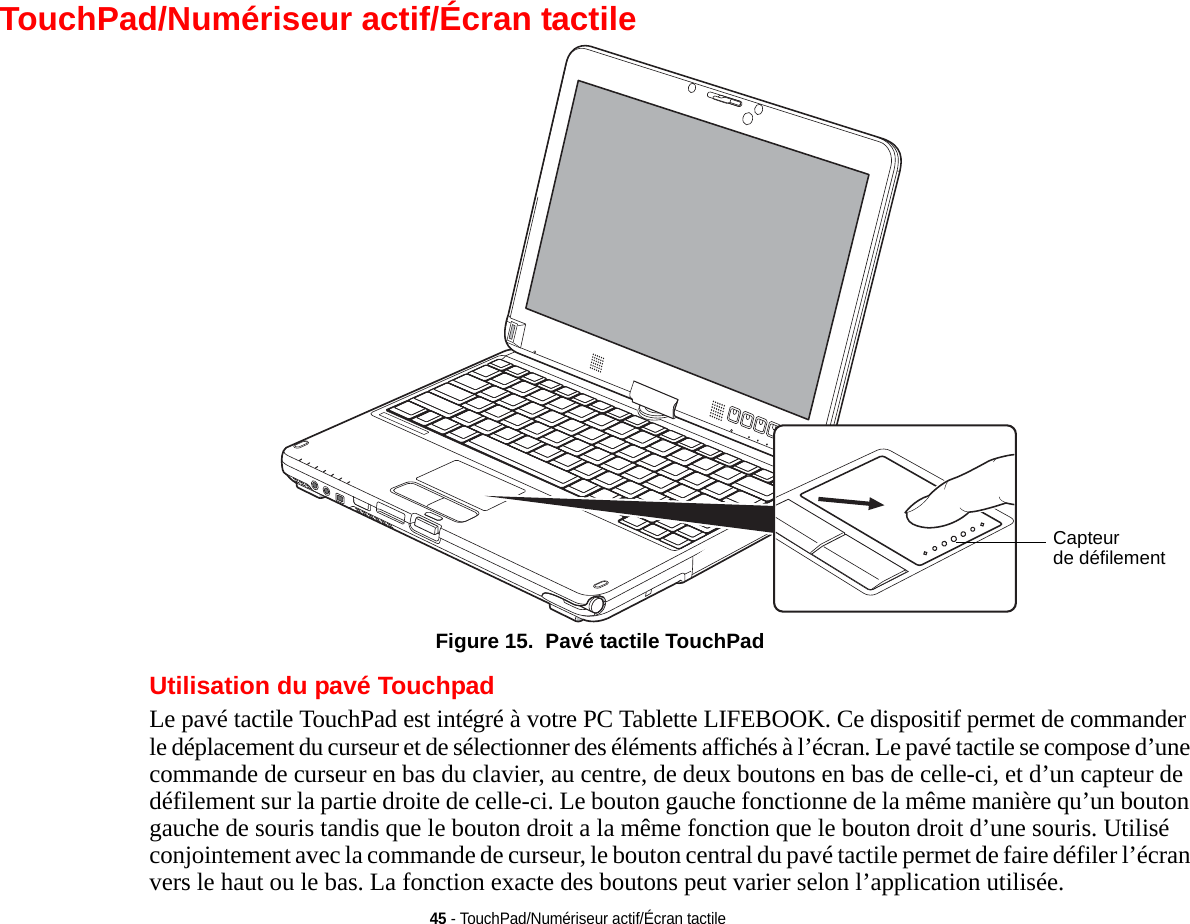
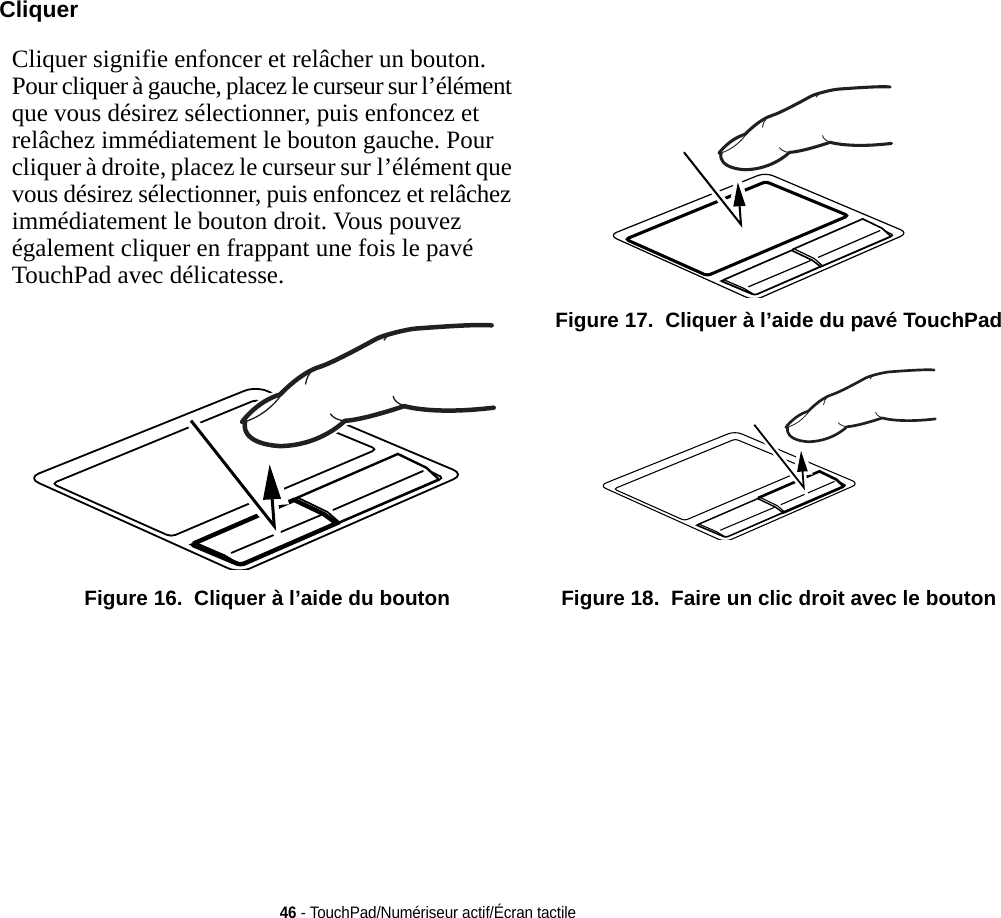

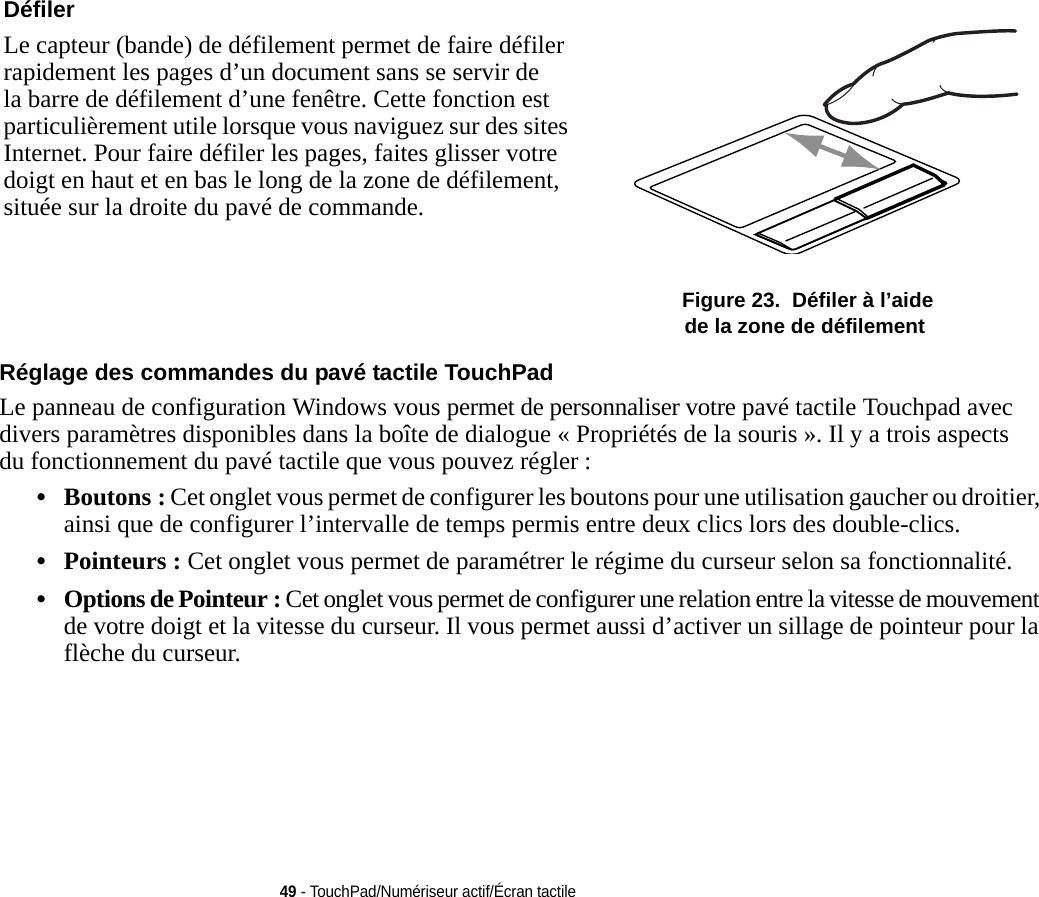
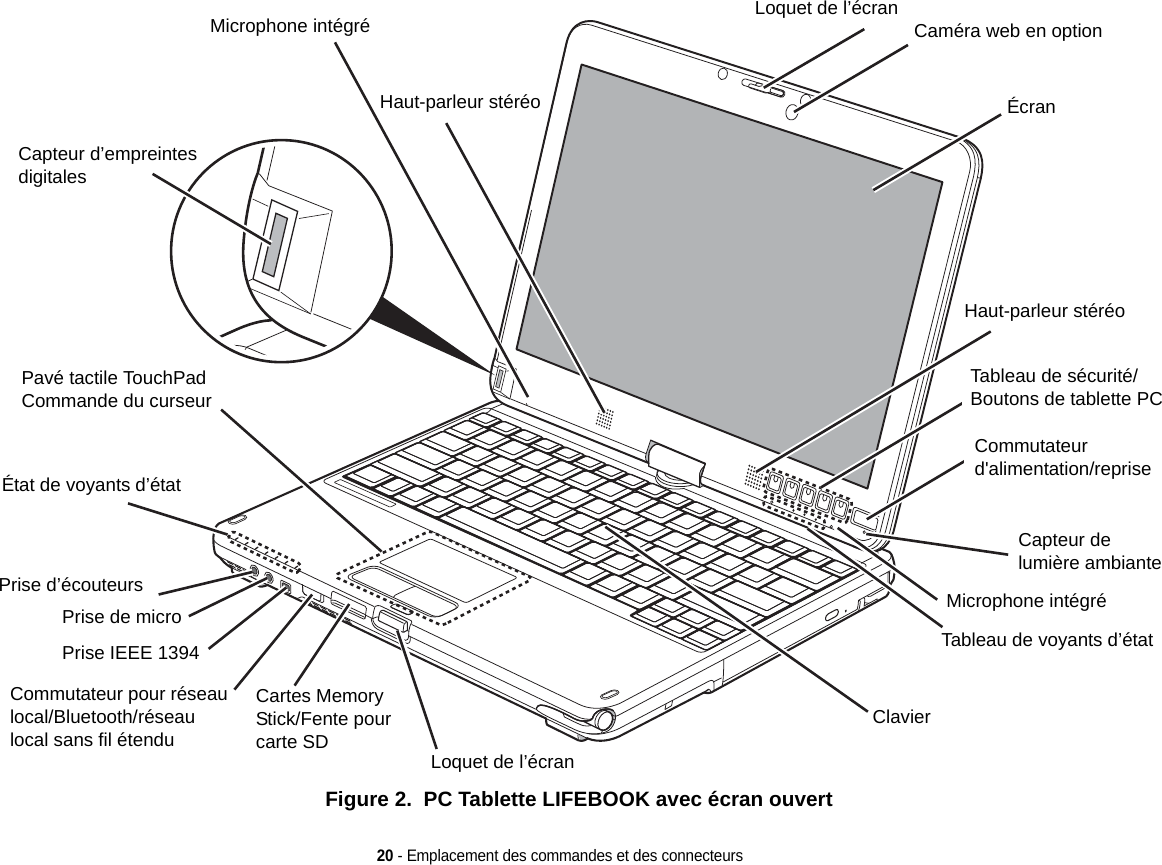
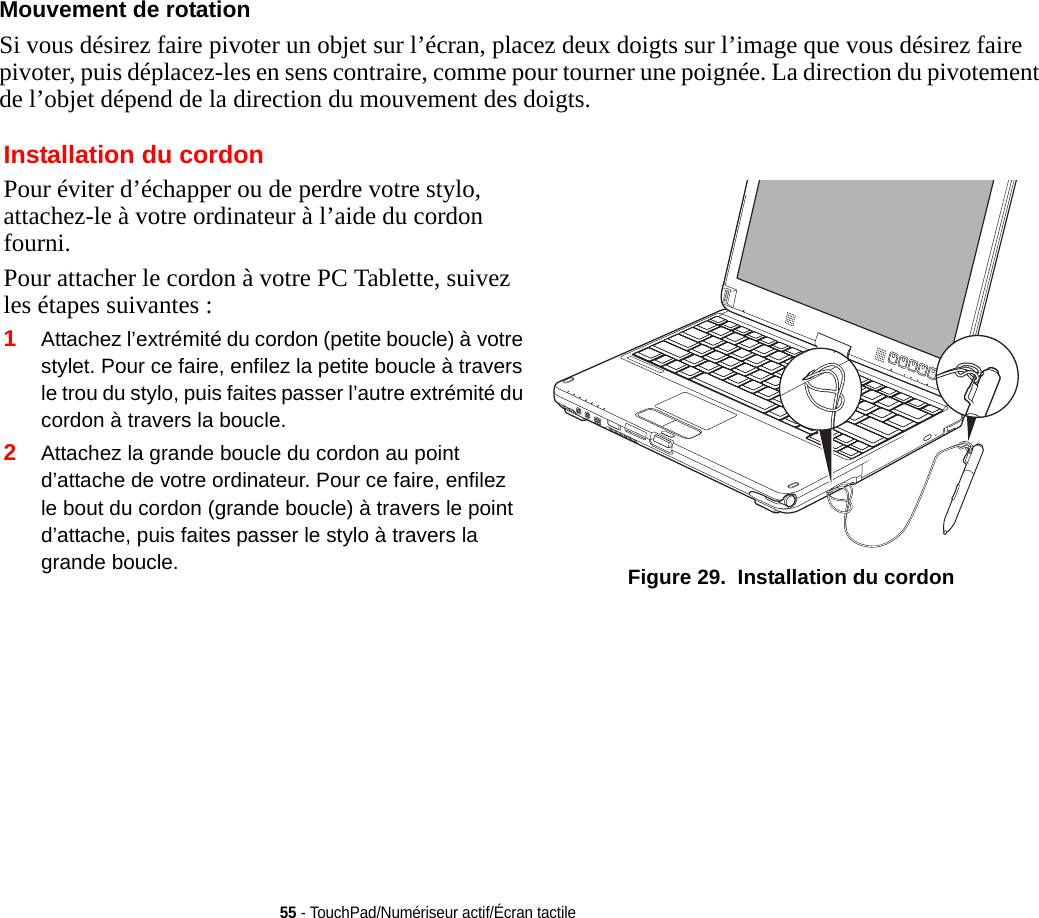
![Cliquer sur l’écran numériseur actif Pour cliquer du gauche, touchez l’objet que vous voulez sélectionner, puis soulevez immédiatement le bout du stylet. Figure 25. Cliquer sur l’écran numériseur actif Figure 26. Faire un clic droit sur l’écran numériseurFaire un clic droit sur l’écran numériseur Pour faire un clic droit, maintenez le devant du bouton du stylet enfoncé en tapotant sur l’écran. Pour changer les paramètres pour la fonction de clic à droite, allez à Démarrer -> Panneau de configuration -> Paramètres d’entrée et du stylet. Dans l’onglet des Options de stylet, sélectionnez « Appuyer et maintenir », puis cliquez sur le bouton [Paramètres].51 - TouchPad/Numériseur actif/Écran tactile](https://usermanual.wiki/Fujitsu-Client-Computing/WL0026.User-Manual-2/User-Guide-1477640-Page-119.png)
![53 - TouchPad/Numériseur actif/Écran tactileÉtalonner l’écran numériseur Pour assurer une correspondance précise entre le curseur et le stylet, vous devez exécuter l’Utilitaire d’étalonnage de l’écran tactile avant d’utiliser l’écran tactile pour la première fois. Faites de même si vous avez modifié la résolution de l’écran et/ou l’orientation.Pour exécuter l’utilitaire d’étalonnage sous Windows 7 :1Cliquez sur Démarrer -> Panneau de configuration.2Double-cliquez sur l’icône Paramètres PC Tablette, puis sélectionnez l’onglet Écran.3Cliquez sur le bouton [Étalonner].4Réglez l’écran de votre portable à un angle confortable, puis repérez le symbole (+) dans le coin supérieur gauche de l’écran.5En vous servant du stylet, touchez fermement l’écran directement sur le symbole (+). Soulevez le stylet de l’écran et la cible se déplacera vers une position différente sur l’écran.6Répétez l’étape 5 jusqu’à ce que vous ayez sélectionné tous les symboles (+).7Une fois cette opération terminée, appuyez sur le bouton [OK]. 8Touchez le stylet sur plusieurs points de l’écran pour vérifier qu’il est bien étalonné. Si vous n’êtes pas satisfait de l’étalonnage de l’écran, appuyez sur le bouton [Étalonner] pour recommencer.LORSQUE VOUS TAPOTEZ SUR L’ÉCRAN PENDANT L’ÉTALONNAGE, N’UTILISEZ PAS DE FORCE EXCESSIVE. SI VOUS UTILISEZ UNE FORCE EXCESSIVE, VOUS RISQUEZ D’ENDOMMAGER L’ÉCRAN DEL ET/OU L’ÉCRAN TACTILE.](https://usermanual.wiki/Fujitsu-Client-Computing/WL0026.User-Manual-2/User-Guide-1477640-Page-121.png)
![57 - Réglage du volumeRéglage du volumeVotre PC Tablette Fujitsu LIFEBOOK est doté de plusieurs commandes de volume fonctionnant en interaction. Réglage du volumeLe volume peut être réglé de plusieurs manières :•Vous pouvez aussi ajuster et couper/remettre le volume avec l’icône de volume dans la zone de notification.•Le volume peut également être réglé avec les touches de fonction [F8] et [F9]. Si vous appuyez plusieurs fois sur [F8] tout en maintenant la touche [Fn] enfoncée, vous réduirez le volume sonore de votre système. Si vous appuyez plusieurs fois sur [F9] tout en maintenant la touche [Fn] enfoncée, vous augmenterez le volume sonore de votre PC Tablette.•Gardez la touche [Fn] enfoncée et appuyez sur la touche [F3] pour couper le son. Pour rétablir le son, appuyez de nouveau sur [Fn+F3].•Le volume peut aussi être réglé avec les commandes de volume proposées par diverses applications.•Certains périphériques audio pouvant être connectés à votre système sont dotés de commandes de volume.Chaque commande de volume ci-dessus impose une limite supérieure s’appliquant aux autres commandes. Nous vous recommandons d’essayer les différentes commandes pour découvrir le réglage vous convenant le mieux.LES APPLICATIONS POUVANT REPRODUIRE DES FICHIERS AUDIO PROPOSENT ÉGALEMENT LEUR PROPRE COMMANDE DE VOLUME (COMMANDE LOGICIELLE). SI VOUS INSTALLEZ UN PÉRIPHÉRIQUE AUDIO EXTERNE DOTÉ D’UNE COMMANDE DE VOLUME INDÉPENDANTE, LA COMMANDE DE VOLUME DE L’APPAREIL ET LA COMMANDE DE VOLUME LOGICIELLE FONCTIONNERONT EN INTERACTION. VOUS DEVEZ TOUTEFOIS SAVOIR QUE SI VOUS COUPEZ LE VOLUME AVEC LA COMMANDE LOGICIELLE, LA COMMANDE DE VOLUME EXTERNE SERA ÉGALEMENT DÉSACTIVÉE.](https://usermanual.wiki/Fujitsu-Client-Computing/WL0026.User-Manual-2/User-Guide-1477640-Page-124.png)
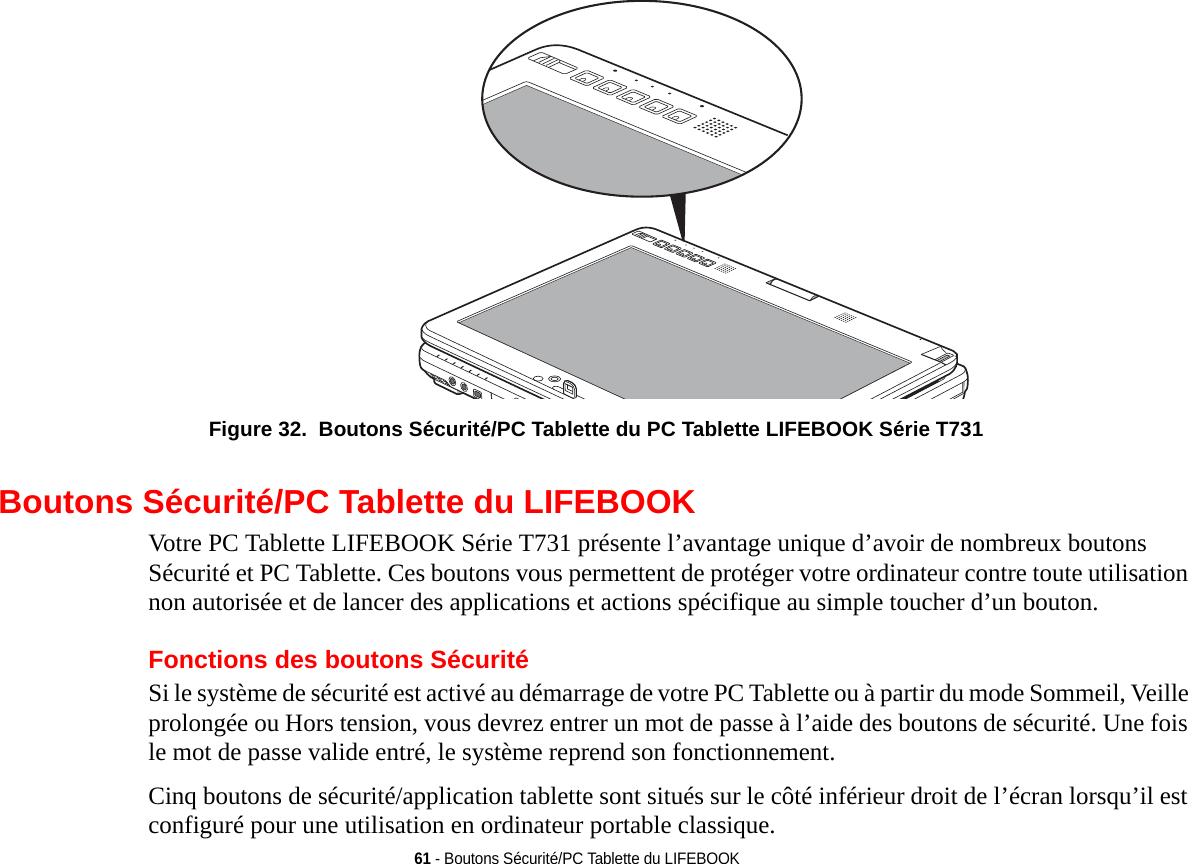
![62 - Boutons Sécurité/PC Tablette du LIFEBOOKLes cinq boutons sont utilisés pour l’activation des fonctions de sécurité. Quatre des boutons sont utilisés pour entrer un mot de passe et le cinquième l’est en tant que bouton d’Entrée. Pour plus d’informations sur chacun des boutons Sécurité, consultez Tableau 1.Icône du bouton État du système Fonction du tableau de sécuritéPré-démarrage ou reprise à partir du mode Veille Bouton de sécurité 1Bouton de sécurité 2Bouton de sécurité 3Bouton de sécurité 4Bouton de sécurité [Entrée] Tableau 1. Fonctions des boutons du tableau de sécuritéFonctions des boutons de pré-identificationLes cinq boutons peuvent tous être utilisés pour la phase d’identification préalable à l’ouverture d’une session Windows (càd avant que l’écran d’identification Windows ne s’affiche). Quatre de ces boutons ont une fonction secondaire. Pour plus d’informations sur les fonctions de pré-identification, consultez Tableau 2.<Tab>/<Shift><Tab> Lorsque le système est en phase de pré-identification, la touche [Page suivante] agit comme la touche de tabulation [Tab].Si vous appuyez sur le bouton [Fn] tout en appuyant sur la touche [Page suivante] et en relâchant, vous exécuterez la même action qu’avec la combinaison [Shift]+[Tab].](https://usermanual.wiki/Fujitsu-Client-Computing/WL0026.User-Manual-2/User-Guide-1477640-Page-129.png)
![63 - Boutons Sécurité/PC Tablette du LIFEBOOK<Entrée>/<Échap> Lorsque le système est en phase de pré-identification, la touche [Page précédente] agit comme la touche [Entrée].Icône de bouton État du système Fonctions PC Tablette Fonctions secondaires(Fn + Bouton)Pré-démarrage (écran d’identification Windows affiché) <[Tab]> <Shift><Tab><[Entrée]> <[Échap]>Faire tourner l’écran AucuneSert à appeler la fonction secondaire AucuneCombinaison [Ctrl+Alt+Suppr] Aucune Tableau 2. Fonctions des boutons PC Tablette pendant la pré-identificationSi vous appuyez sur le bouton [Fn] tout en appuyant sur la touche [Page précédente] et en la relâchant, vous exécuterez la même action qu’avec la combinaison [Échap].Rotation d’écran La fonction de rotation d’écran devrait normalement être utilisée seulement lorsque le système est configuré en tablette. Lorsque vous souhaitez utiliser la tablette comme livre électronique, par exemple, vous pourriez utiliser l’orientation verticale ; lorsque vous accédez aux feuilles de calculs ou quand vous utilisez le système comme un portable, vous utiliseriez normalement l’orientation horizontale.Lorsque le système est placé en configuration tablette, l’orientation change automatiquement au mode vertical par défaut.](https://usermanual.wiki/Fujitsu-Client-Computing/WL0026.User-Manual-2/User-Guide-1477640-Page-130.png)
![64 - Boutons Sécurité/PC Tablette du LIFEBOOKSi vous appuyez sur la touche [Rotation d’écran] lorsque le système est en pré-démarrage, l’orientation de l’écran change de Verticale à Horizontale ou d’Horizontale à Verticale.Bouton Fonction / Utilitaire du Menu Fujitsu Le bouton [Fonction] s’utilise en conjonction avec les autres boutons d’application pour fournir des fonctionnalités additionnelles. Référez-vous aux détails spécifiques plus haut.Fonctions des boutons de post-identificationLes cinq boutons peuvent tous être utilisés une fois l’identification Windows effectuée. Quatre de ces boutons ont une fonction secondaire. Pour plus d’informations sur les fonctions de post-identification, consultez le Tableau 3.Bouton [Page suivante / Application A] Lorsque vous appuyez sur la touche [Page suivante] pendant que le système fonctionne, chaque pression de la touche défilera l’écran vers le bas d’un écran. Cela vous permet de naviguer rapidement à travers de larges documents.Lorsque vous appuyez sur la touche [Fn] tout en appuyant et relâchant la touche [Page suivante/Application A], vous démarrez automatiquement tout programme attibué à cette touche. L’application par défaut de ce bouton est la Calculatrice. Si vous désirez sélectionner une application différente pour cette touche, reportez-vous à « Modification des fonctions des boutons PC Tablette » en page 67.L'ORIENTATION PAR DÉFAUT DE L'ÉCRAN PEUT ÊTRE CHANGÉE EN OUVRANT LE PANNEAU DE CONFIGURATION, EN DOUBLE-CLIQUANT SUR L'ICÔNE COMMANDS DU PC TABLETTE FUJITSU, PUIS EN SÉLECTIONNANT LES PARAMÈTRES VOULUS DANS LES PROPRIÉTÉS D'AFFICHAGE. APRÈS AVOIR MODIFIÉ LES PARAMÈTRES, SAUVEGARDEZ-LES.](https://usermanual.wiki/Fujitsu-Client-Computing/WL0026.User-Manual-2/User-Guide-1477640-Page-131.png)
![65 - Boutons Sécurité/PC Tablette du LIFEBOOKBouton [Page précédente / Application B] Lorsque vous appuyez sur le bouton [Page précédente] pendant que le système fonctionne, chaque pression du bouton fait défiler l’écran vers le haut d’un écran à la fois. Cela vous permet de naviguer rapidement à travers de larges documents.Lorsque vous appuyez sur la touche [Fn] tout en appuyant et relâchant la touche [Page précédente/ Application B], vous démarrez automatiquement tout programme attibué à cette touche. L’application par défaut pour ce bouton est Journal MS. Reportez-vous à Voir « Modification des fonctions des boutons PC Tablette » en page 67 pour attribuer une application différente à cette touche.Icône du bouton État du système Fonctions PC Tablette principales Fonctions secondaires (Fn + Bouton)Post-démarrage (bureau Windows affiché) Page suivante Application A définie par l’utilisateur(Par défaut = calculatrice)Page précédente Application B définie par l’utilisateur(Par défaut = Journal MS)Rotation d’écran Changement d’affichage :1. Écran interne uniquement2. CRT (rayons cathodiques) uniquement3. Affichage mixteUtilisation de la fonction secondaire Utilitaire de menu FujitsuCombinaison [Ctrl+Alt+Suppr] Aucune Tableau 3. Fonctions des boutons PC Tablette pendant la post-identification](https://usermanual.wiki/Fujitsu-Client-Computing/WL0026.User-Manual-2/User-Guide-1477640-Page-132.png)
![66 - Boutons Sécurité/PC Tablette du LIFEBOOKBouton Rotation de l’écran/Changement d’affichage La fonction de rotation d'écran devrait normalement être utilisée seulement lorsque le système est configuré en tablette. Lorsque vous souhaitez utiliser la tablette comme livre électronique, par exemple, vous pourriez utiliser l'orientation verticale; lorsque vous accédez aux feuilles de calculs ou quand vous utilisez le système comme un portable, vous utiliseriez normalement l'orientation horizontale.Lorsque le système est placé en configuration tablette, l'orientation change automatiquement au mode vertical par défaut. Pour désactiver ou réactiver la fonction de rotation automatique, sélectionnez Démarrer > Tous les programmes > Utilitaire de pivotement automatique, puis choisissez la fonction désirée.Lorsque vous appuyez sur la touche [Rotation d’écran / Changement d’affichage], l’orientation de l’écran du système change de Verticale à Horizontale ou d’Horizontale à Verticale. Le fait d’appuyer sur la touche [Fn] puis d’appuyer sur le bouton [Rotation de l’écran] en gardant la première enfoncée fera alterner l’affichage d’un mode à l’autre, comme suit : écran intégré seulement, écran externe seulement, les deux.Bouton Fonction / Utilitaire du Menu Fujitsu Le bouton [Fonction] s’utilise en conjonction avec les autres boutons d’application pour fournir des fonctionnalités additionnelles. Référez-vous aux détails spécifiques plus haut.Appuyez deux fois sur le bouton [Fn] et vous verrez apparaître l’utilitaire de menus Fujitsu sur votre écran, vous permettant de modifier certains paramètres du système.L'ORIENTATION PAR DÉFAUT DE L'ÉCRAN PEUT ÊTRE CHANGÉE EN OUVRANT LE PANNEAU DE CONFIGURATION, EN DOUBLE-CLIQUANT SUR L'ICÔNE COMMANDS DU PC TABLETTE FUJITSU, PUIS EN SÉLECTIONNANT LES PARAMÈTRES VOULUS DANS LES PROPRIÉTÉS D'AFFICHAGE. APRÈS AVOIR MODIFIÉ LES PARAMÈTRES, SAUVEGARDEZ-LES.](https://usermanual.wiki/Fujitsu-Client-Computing/WL0026.User-Manual-2/User-Guide-1477640-Page-133.png)
![67 - Boutons Sécurité/PC Tablette du LIFEBOOKCombinaison [Ctrl+Alt+Suppr] Si vous appuyez sur le bouton [Ctrl-Alt-Del] pendant au moins 8 millisecondes, l’écran d’identification ou le gestionnaire des tâches Windows apparaîtra.Modification des fonctions des boutons PC TabletteLes boutons Applications A et B peuvent être changés pour lancer un programme ou effectuer une tâche que vous choisissez. Par défaut, le bouton Application A lance la Calculatrice et le bouton Application B, le Journal MS.Pour lancer différentes applications ou amener les boutons Applications A et B à effectuer une tâche spécifique :1Dans le Panneau de configuration, cliquez sur l’icône « Paramètres des boutons tablette ». 2Sélectionnez l’onglet Boutons tablette et, dans la liste, cliquez sur le bouton que vous souhaitez modifier.3Cliquez sur [Changer] et ouvrez la liste déroulante dans le champ Press :.4Sélectionnez l’action que vous voulez voir le bouton effectuer. Si vous voulez lancer un programme, cliquez sur [Lancer une Application] puis naviguez vers l’emplacement du programme.5Cliquez sur [OK], puis cliquez à nouveau sur [OK]. Les boutons effectueront maintenant les actions que vous leur avez assignées.Configuration du tableau de sécurité LIFEBOOKLorsque vous recevez votre PC Tablette LIFEBOOK, l’application du tableau de sécurité est préinstallée, mais sans aucun mot de passe défini. Les rubriques suivantes décrivent en détail le tableau de sécurité et la façon de configurer, de changer ou de supprimer des mots de passe.Boutons numérotés Utilisez ces boutons pour entrer votre mot de passe.Bouton Entrée Après avoir entré les codes numérotés, appuyez sur ce bouton pour enregistrer le mot de passe dans le PC Tablette.](https://usermanual.wiki/Fujitsu-Client-Computing/WL0026.User-Manual-2/User-Guide-1477640-Page-134.png)
![68 - Boutons Sécurité/PC Tablette du LIFEBOOKMots de passeDes mots de passe d’utilisateur et de superviseur peuvent être définis sur l’ordinateur. Afin de faciliter la gestion des systèmes, le mot de passe de superviseur est habituellement le même sur tous les PC Tablette d’un groupe de travail, d’un bureau ou d’une entreprise. Toutefois, les ordinateurs individuels utilisés dans un environnement de groupe ne devraient pas utiliser un mot de passe commun. Un mot de passe se compose de une à cinq frappes de bouton, suivies du bouton Entrer. Une frappe valide peut faire intervenir un seul bouton ou jusqu’à quatre boutons simultanément. Voici des exemples de frappes valides : •Bouton [4] enfoncé seul•Boutons [2] et [3] enfoncés en même temps•Boutons [1], [2] et [4] enfoncés en même temps•Boutons [1], [2], [3] et [4] enfoncés en même tempsVoici maintenant des mots de passe valides. Les codes entre accolades ({ }) font intervenir plus d’un bouton. •{[2]+[3]}, [1], [Entrée]•[4], [Entrée]•{[1]+[3]}, {[2]+[3]+[4]}, [1], [4], [2], [Entrée]Définition des mots de passe Lorsque le portable est expédié de l’usine, aucun mot de passe n’est défini. Vous avez le choix de le laisser tel quel ou de définir un mot de passe de superviseur et d’utilisateur. Vous devez définir le mot de passe de superviseur avant celui de l’utilisateur. •LE MOT DE PASSE DU SUPERVISEUR PERMET DE CONTOURNER LE MOT DE PASSE D’UTILISATEUR AU CAS OÙ CE DERNIER SERAIT OUBLIÉ. UTILISÉ SEUL, LE MOT DE PASSE DE SUPERVISEUR NE VERROUILLE PAS LE SYSTÈME.•LES DEUX MOTS DE PASSE (SUPERVISEUR ET UTILISATEUR) DOIVENT ÊTRE DÉFINIS POUR QUE LE TABLEAU DE SÉCURITÉ FONCTIONNE.](https://usermanual.wiki/Fujitsu-Client-Computing/WL0026.User-Manual-2/User-Guide-1477640-Page-135.png)