Fujitsu Isotec 015M33324A Dot Matrix Printer User Manual FUJITSU DL7400
Fujitsu Isotec Limited Dot Matrix Printer FUJITSU DL7400
UserManual.wiki
>
Fujitsu Isotec
>
015M33324A User Manual
>
Users Manual 1
Contents
1.
Users Manual 1
2.
Users Manual 2
3.
Users Manual 3
Users Manual 1
Navigation menu
Upload a User Manual
Namespaces
Wiki Guide
HTML
PDF
Info
Views
User Manual
Discussion / Help
Navigation


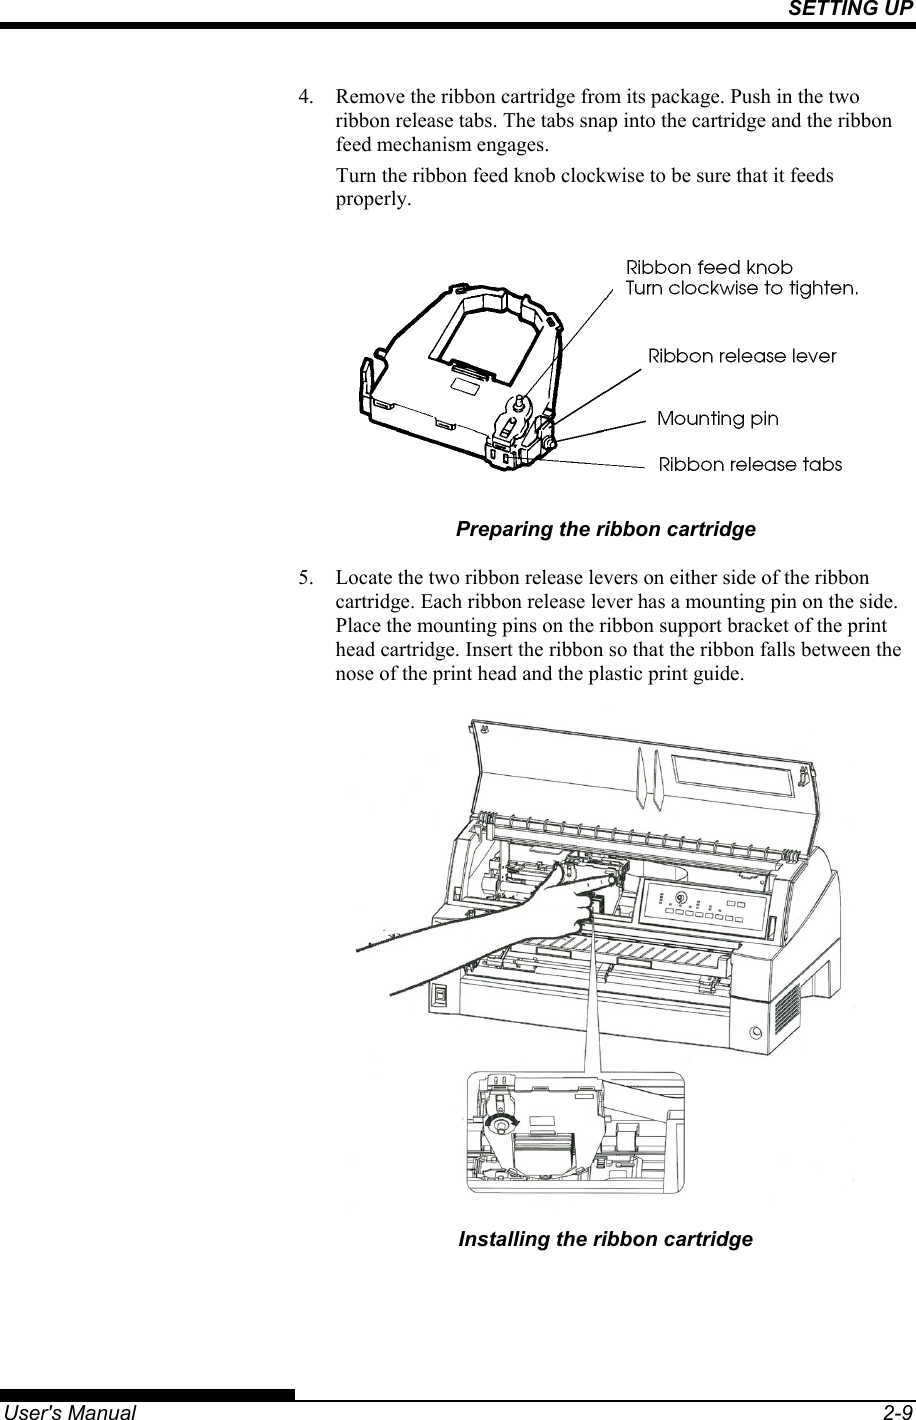
![SETTING UP User's Manual 2-11 Mounting and removing the tractor unit Tractor unit at the front [Removing the tractor unit] Raise the cut sheet table. While pressing the lock levers of the tractor frames located on both sides of the tractor unit, lift out the tractor unit to remove it. [Mounting the tractor unit] 1) Position the U-shaped slots on both sides of the tractor unit over the guide pins of the printer unit. (To set the tractor unit in position, line it up with the groove of the left guide pin. The right guide pin has no groove). 2) Push down the shaft at the front of the tractor unit until it locks with an audible click. (Do not press the lock levers when pushing down the shaft.)](https://usermanual.wiki/Fujitsu-Isotec/015M33324A.Users-Manual-1/User-Guide-709503-Page-41.png)
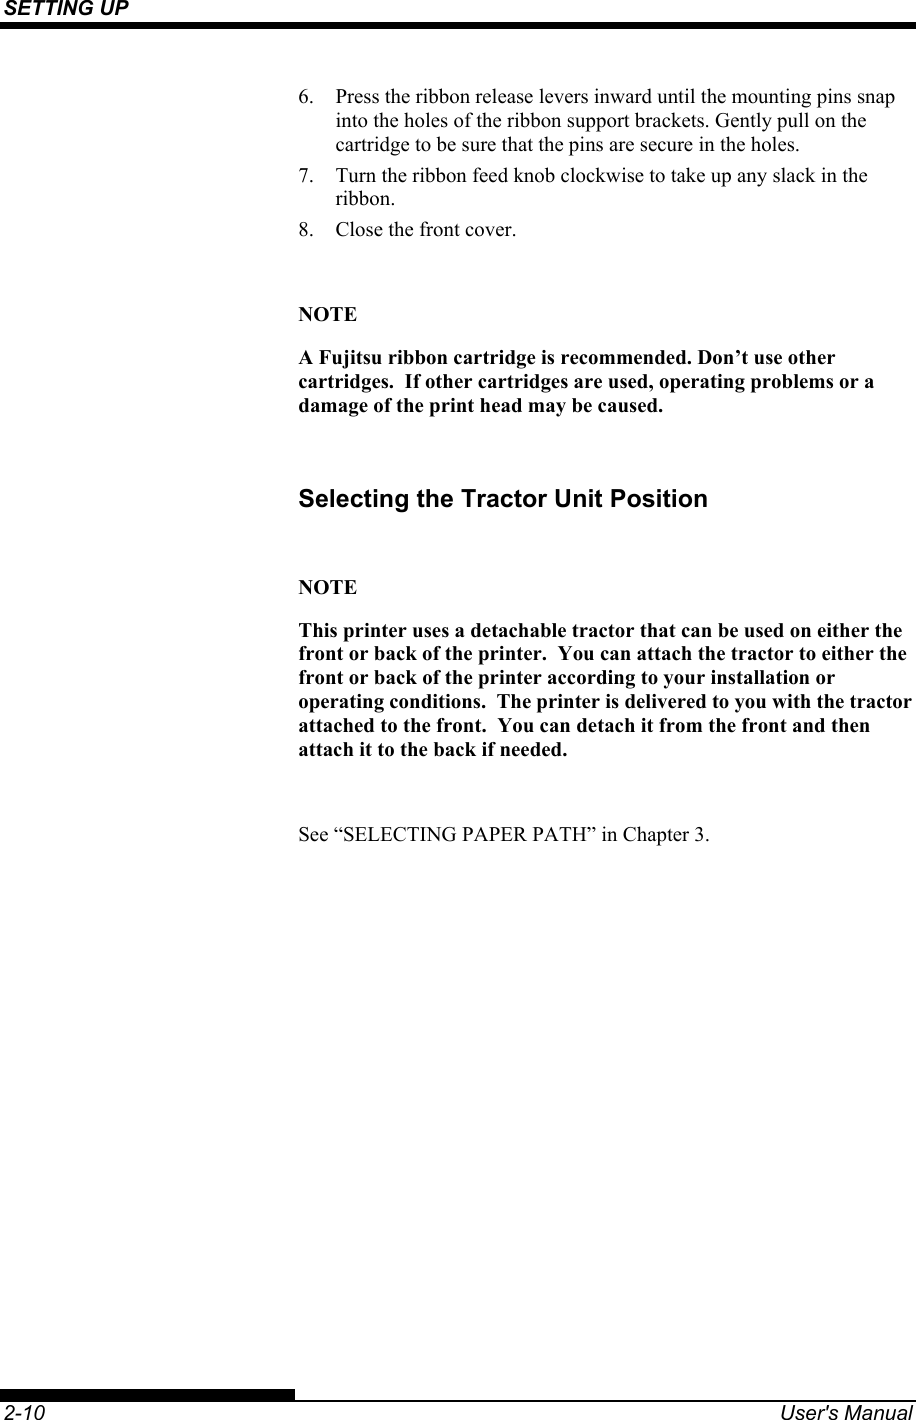
![SETTING UP 2-12 User's Manual 3) Verify that the hooks on both sides of the tractor unit are securely hooked onto guide pin 2 as shown in the following figure. Tractor unit at the rear [Removing the tractor unit] While pressing the lock levers of the tractor frames located on both sides of the tractor unit, lift out the tractor unit to remove it.](https://usermanual.wiki/Fujitsu-Isotec/015M33324A.Users-Manual-1/User-Guide-709503-Page-42.png)
![SETTING UP User's Manual 2-13 [Mounting the tractor unit] 1) Position the U-shaped slots on both sides of the tractor unit over the guide pins of the printer unit. (To set the tractor unit in position, line it up with the groove of the left guide pin. The right guide pin has no groove). 2) Push down the shaft at the front of the tractor unit until it locks with an audible click. (Do not press the lock levers when pushing down the shaft.) 3) Verify that the hooks on both sides of the tractor unit are securely hooked onto guide pin 2 as shown in the following figure.](https://usermanual.wiki/Fujitsu-Isotec/015M33324A.Users-Manual-1/User-Guide-709503-Page-43.png)