Futaba R7003SB-24G Radio Control User Manual
Futaba Corporation Radio Control
UserManual.wiki
>
Futaba
>
R7003SB 24G User Manual
User Manual
Navigation menu
Upload a User Manual
Namespaces
Wiki Guide
HTML
PDF
Info
Views
User Manual
Discussion / Help
Navigation
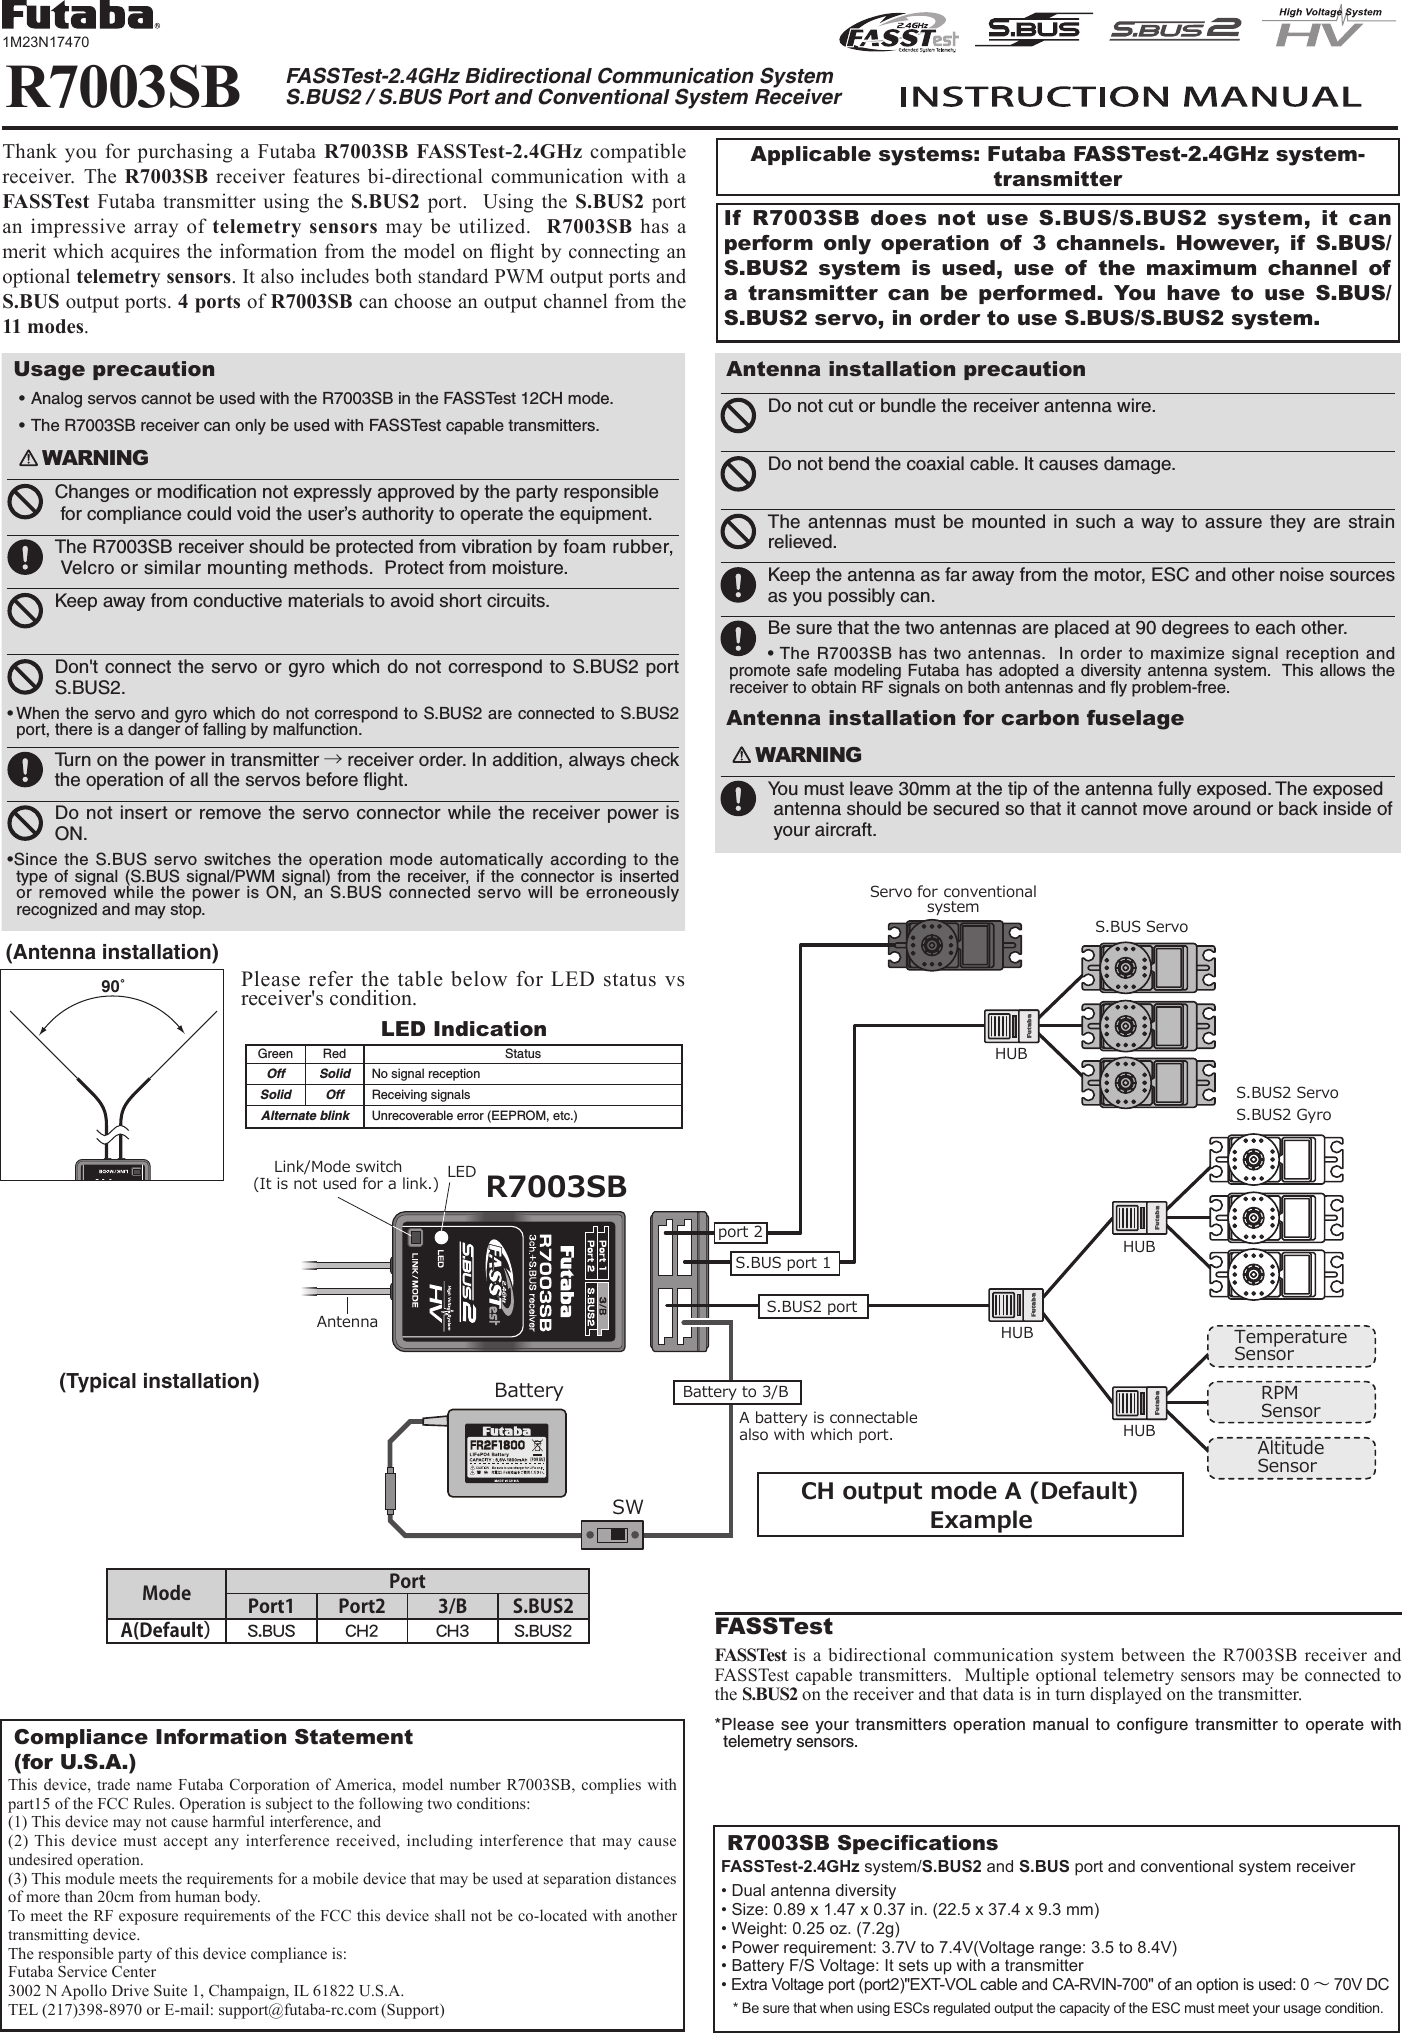
![WARNING Do not perform the linking procedure while the motor's main wire connected or the engine is operating as it may result in serious injury. Whenthelinkingiscomplete,pleasecyclethereceiverpowerandensurethe receiver is properly linked to the transmitter. Pleasepowerupyoursysteminthisorder.Transmitterrst,followedbythereceiver. IftheR7003SBreceiverwaspreviouslylinkedtoanothertransmitter,makesure that transmitter is not operating while linking the receiver to the new transmitter. WARNING Don't touch wiring. * There is a danger of receiving an electric shock. Don'tconnecttoExtraVoltagebeforeturningonareceiver. WhennotusingEXT-VOL,"EXT-VOLMode"isturnedOFF. Don'tconnectEXT-VOLCABLEotherthanport2ofR7003SB.FUTABA CORPORATION1080 Yabutsuka, Chosei-mura, Chosei-gun, Chiba-ken, 299-4395, JapanPhone: +81 475 32 6982, Facsimile: +81 475 32 6983Link to the transmitterEasy Link ID allows FASSTest receivers to link to compatible transmitter without pressing the link button on the receiver. 1Bringthetransmitterandthereceiverclosetoeachother,within20inches(halfmeter).2 Turnonthetransmitter.Placethetransmitterintothereceiverlinkingmode.3Turnonthereceiver.4 WhentheLEDofthereceiverchangesfromblinkingredtosolid green, linking is complete.* Refer to the transmitters operation manual for complete details on how to place the transmitter into the linking mode.*If there are many FASSTest systems turned on in close proximity, your receiver might have difcultyestablishing a link to your transmitter. This is a rare occurrence. However, should another FASSTesttransmitter/receiverbelinkingatthesametime,yourreceivercouldlinktothewrongtransmitter.Thisisvery dangerous if you do not notice this situation. In order to avoid the problem,we strongly recommend you to double check whether your receiver is really under control by your transmitter. *IftheSystemTypeofthetransmitterischanged,thereceiverwillneedtobere-linkedtothetransmitter.*Linkisrequiredwhenanewmodelismadefromamodelselection. < How to change R7003SB into "EXT-VOL Mode" >1 Turnonthereceiver. LED lights up red. [TransmitterisalwaysOFF]2 PressandholdtheMode/Linkbuttonfor5secondsto10seconds.*It becomes the mode which makes a mistake in exceeding 10 seconds. In that case, carry out power supply OFF and redo.3TheLEDshouldnowbeearlyblinkinggreen.Mode/Linkbuttonisreleased.4 EachpressoftheMode/Linkbuttonadvancesthereceivertothenextmode.5 Whenyoureachthemodethatyouwishtooperatein,pressandholdtheMode/Linkbuttonformorethan2seconds.6 WhenLEDblinksingreenwithred,itisthecompletionofamodechange.7 PleasecyclethereceiverpoweroffandbackonagainafterchangingtheEXT-VOLMode.Mode External voltage measurement LED blinkServo Mode(Default) OFF Green 1 timeEXT-VOL Mode ON Green 2 timeMeasurement of Extra VoltagR7003SB can display the voltage of a receiver battery on a transmitter. Furthermore, the following procedures are required in order to display the voltage of another battery (Drive battery etc.).1TheoptionaladapterforCA-RVIN-700ispurchased.2 R7003SBischangedinto"EXT-VOLMode"inthefollowing procedure.*If"EXT-VOLMode"isused,theport2cannotbeusedastheservoCH. 3 According to the manual of CA-RVIN-700, battery wiring is branched and it connects.4OnesideofEXT-VOLCABLEisconnectedtotheport2ofR7003SB.Channel ModesThe R7003SB is capable of changing its channel allocations as described in the table below. Please choose the mode which suited the use in the following procedure from the 11 modes.1PressandholddowntheLink/ModebuttonontheR7003SBreceiver. [TransmitterisalwaysOFF]2 TurnthereceiveronwhileholdingdowntheLink/Modebutton.Afterpowerup,the button can be released.3TheLEDshouldnowbeblinkingredwithgreen.4 EachpressoftheMode/Linkbuttonadvancesthereceivertothenextmode.[RefertoCHModetableshownbelow.]5 When you reach the mode that you wish to operate in, press and hold theMode/Linkbuttonformorethan2seconds.6 WhenLEDblinksingreenwithred,itisthecompletionofamodechange.7 Please cycle the receiver power off and back on again after changing the ChannelMode.*5secondsafterthereceiverON,LEDshowsCHMode.S.BUS2S.BUS2 extends S.BUS and supports bidirectional communication. Sensors are connected to the S.BUS2 port.*Only S.BUS2 capable devices may be connected to the S.BUS2 port. Standard S.BUSservosandgyrosshouldnotbeconnectedtotheS.BUS2port.R7003SB CH Mode table©FUTABA CORPORATION 2012, 10 (1)Mode Port LED blinkPort1 Port2 3/B S.BUS2A(Default) S.BUSCH2CH3S.BUS2 Red 1 timeBS.BUS2 Red 2 timeCS.BUS S.BUS Red 3 timeDCH1Red 4 timeES.BUS2Green 1 timeFCH4 Green 2 timeGCH2 Green 3 timeHCH1 CH5 Green 4 timeICH2 CH7 Red and Green 1 timeJCH4 CH8 Red and Green 2 timeKCH11 CH12 Red and Green 3 timePort S.BUS ServoS.BUS GyroS.BUS2 ServoS.BUS2 Gyro Telemetry sensorS.BUS ○ ○ ×S.BUS2 × (*) ○ ○R7003SB[ Example: Connecting GYA431 to R7003SB CH Mode G ](GYA431 is used for the aileron of an airplane)CH4Rudder servoCH6 2nd Aileron servoCH2Elevator servoPort 1Port 2S.BUS23/B CH1Aileron servoBattery CH3Throttle servoGYA431HUBWhen using the R7003SB Receiver with the GYA430, GYA431 and CGY750The following table corresponds to the gyro's functions. A port can be used effectively. The servo which a gyro controls is connected to a gyro.* Please refer to the description of each gyro manual.Gyro control CH CH ModeRudder D,EElevator FAileron GElevator+Rudder HAileron+Rudder IAileron+Elevator JAileron+Elevator+Rudderor CGY750 KS.BUS Gyro Goup tablewith external power input must be less than 70VTo Motor Controller or ServoBranchFuseBlack lineRed lineMotorControllerEXT-VOL CABLE(It is attached to R7003SB.) (Option)EXT-VOL CABLEto Port2*It changes into EXT-VOL ModeR7003SBto MotorEXT-VOLPower Battery or another power supplyfor servos*It connects with reference to the manual of CA-RVIN-700.](https://usermanual.wiki/Futaba/R7003SB-24G/User-Guide-1832917-Page-2.png)