Futaba T6EXA-72 6 Channel Aircraft Radio Control User Manual 6EXA2
Futaba Corporation 6 Channel Aircraft Radio Control 6EXA2
Futaba >
Contents
- 1. Users Manual Part 1
- 2. Users Manual Part 2
- 3. Users Manual Part 3
- 4. Users Manual Part 4
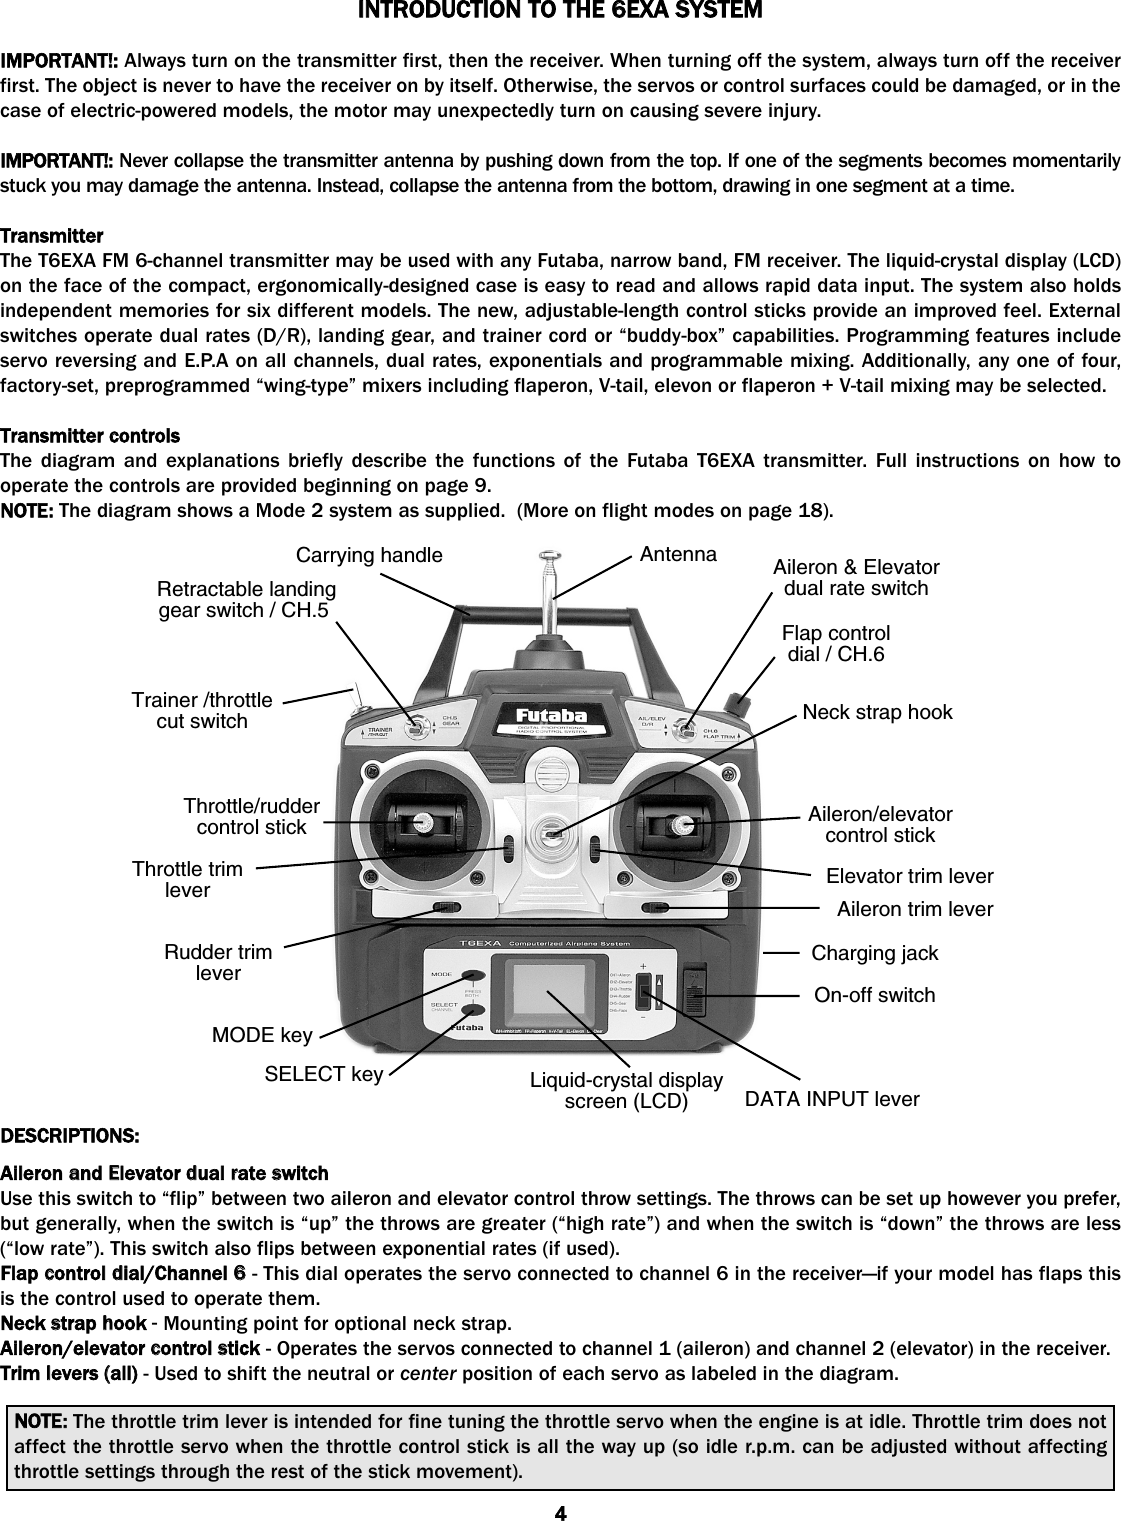
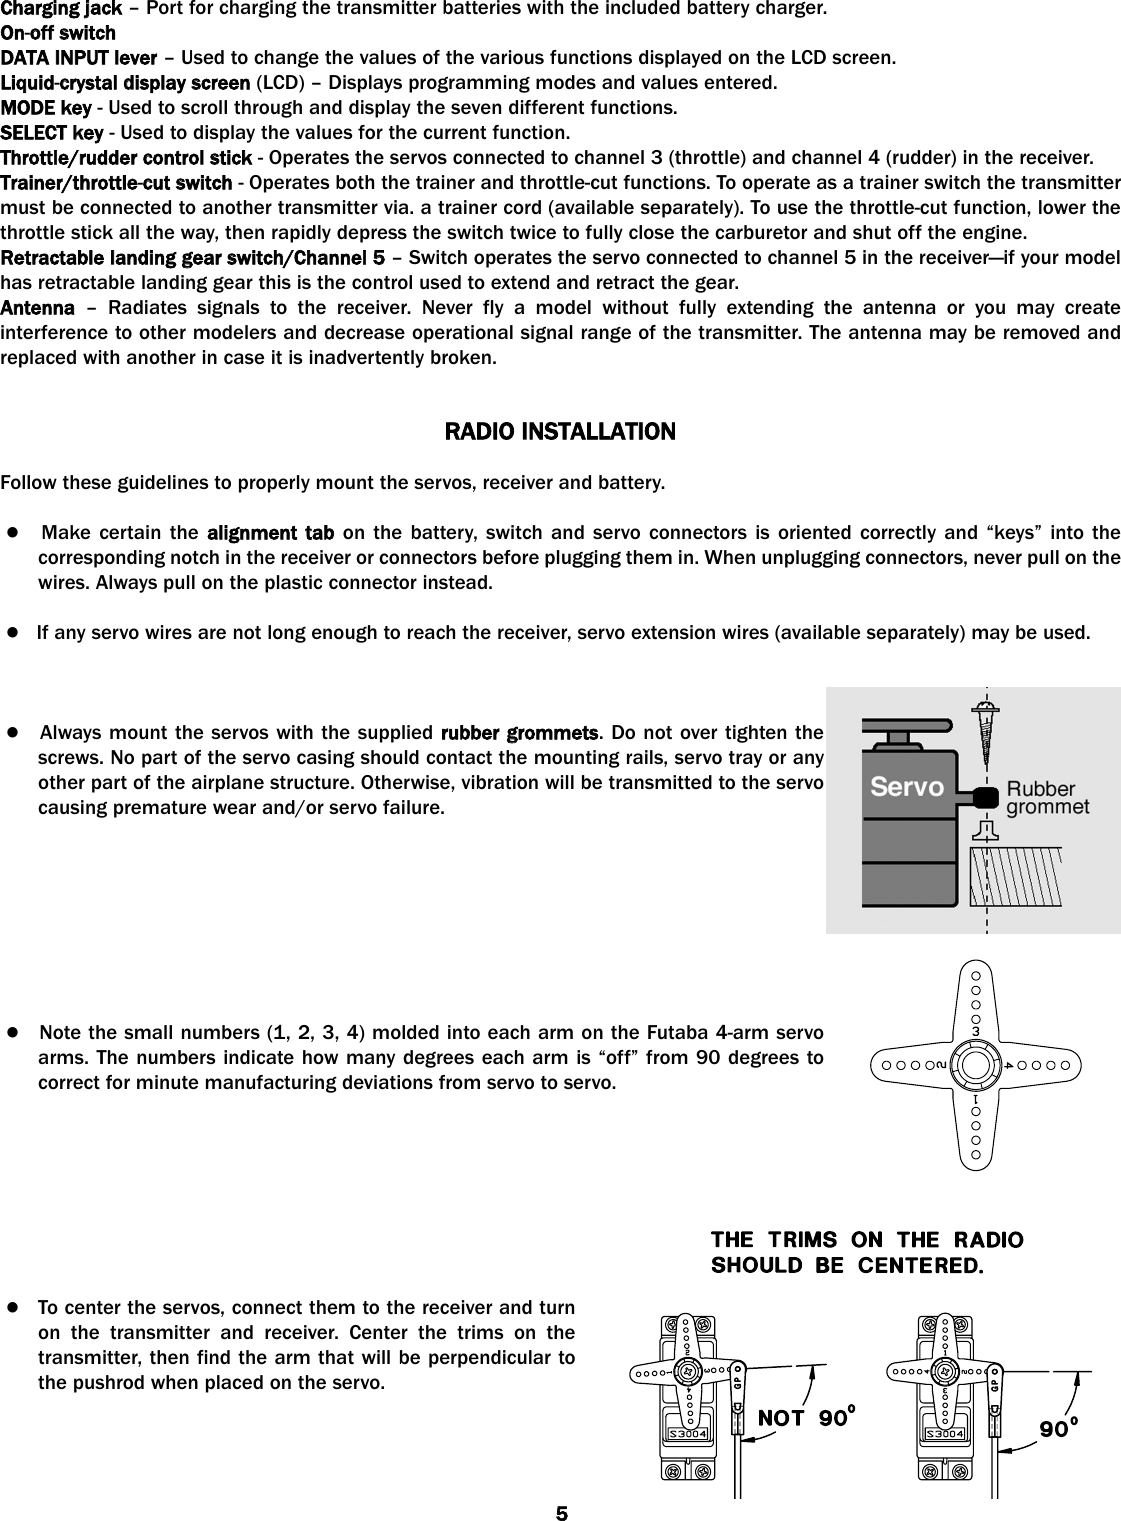
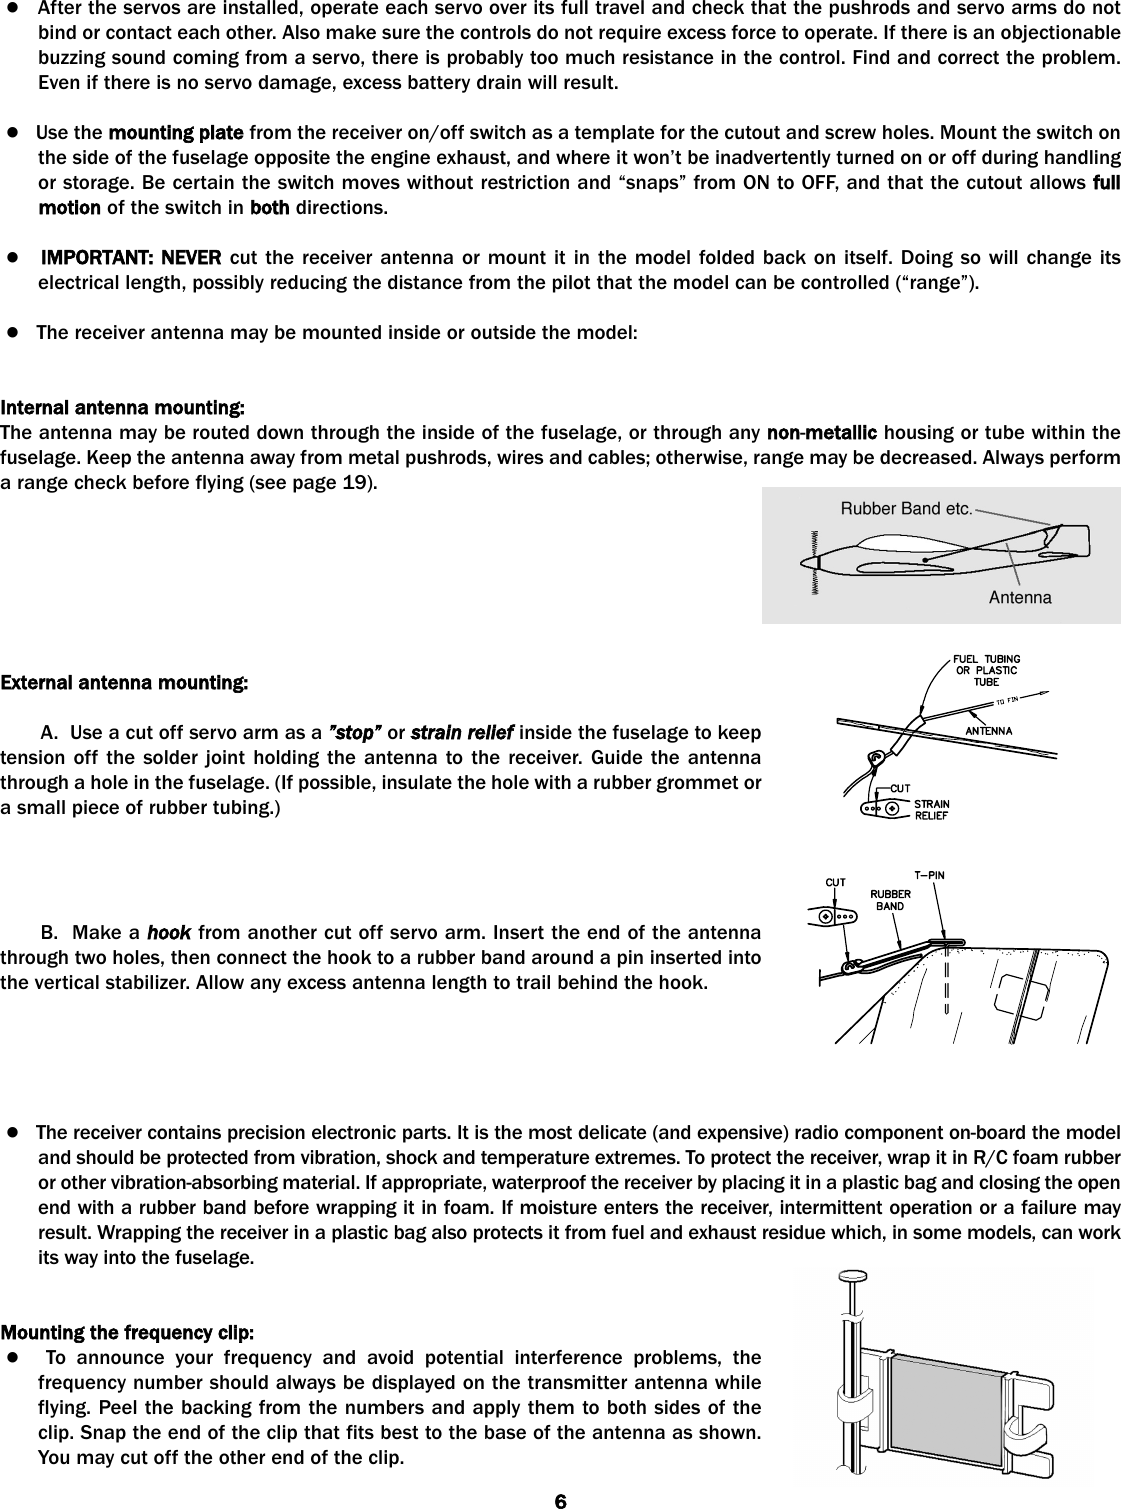
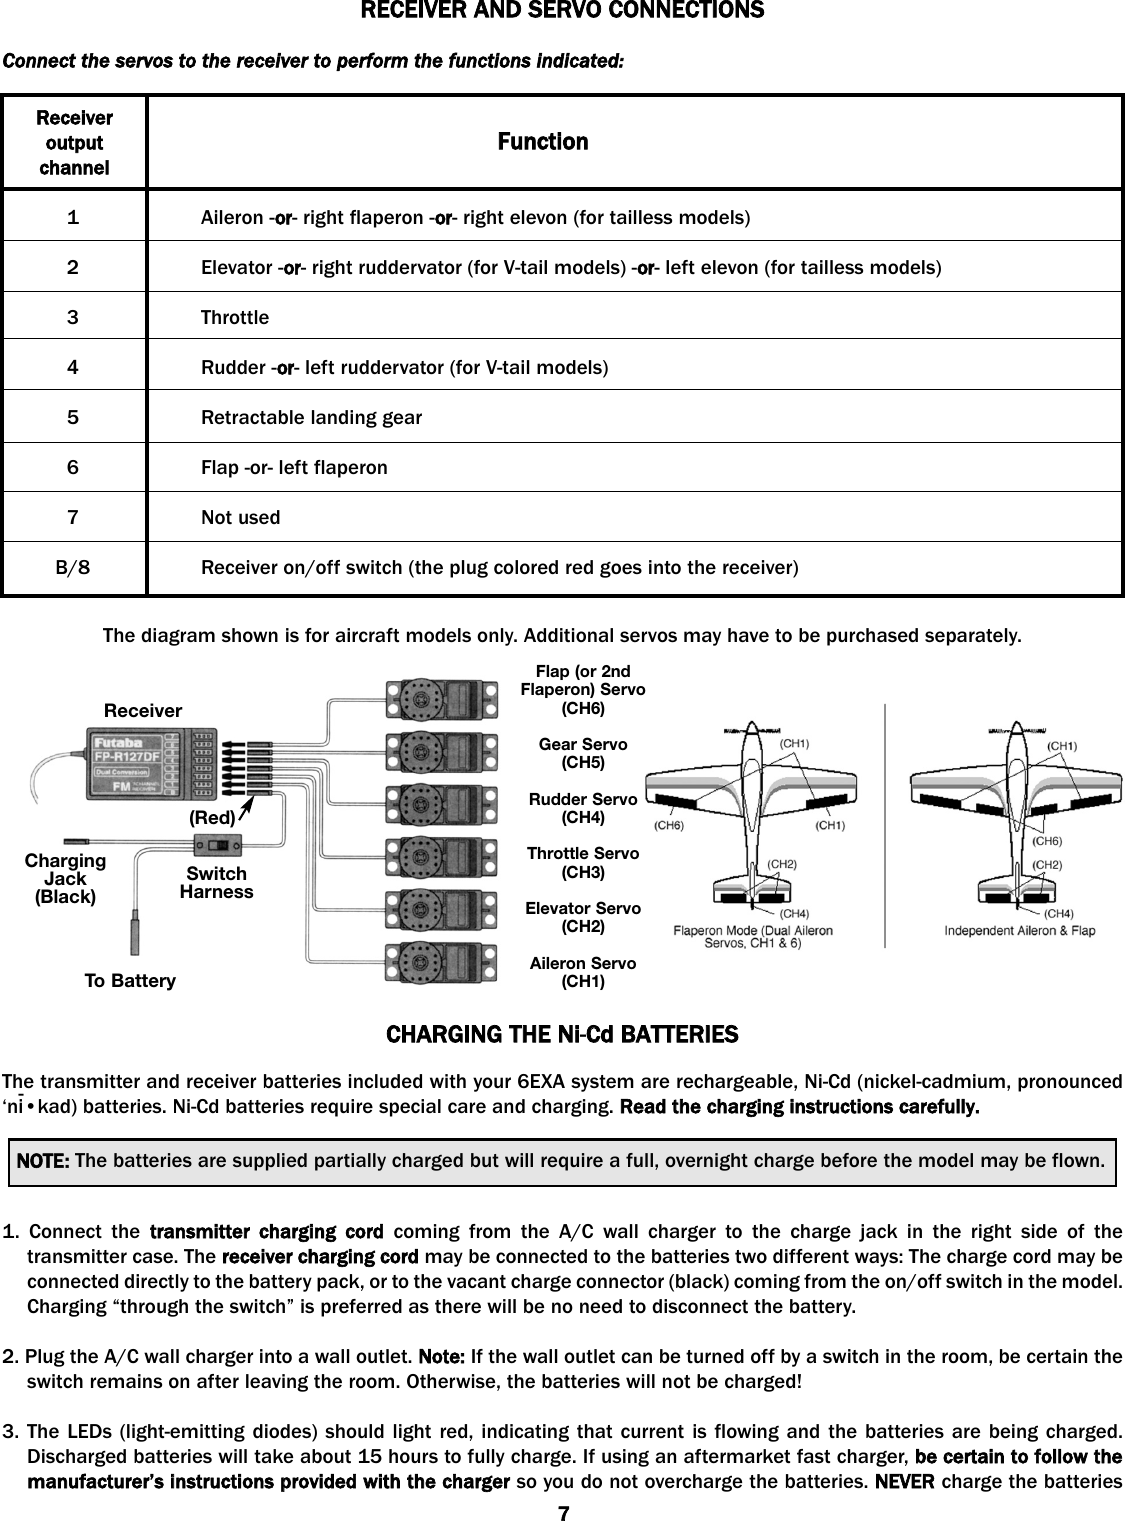
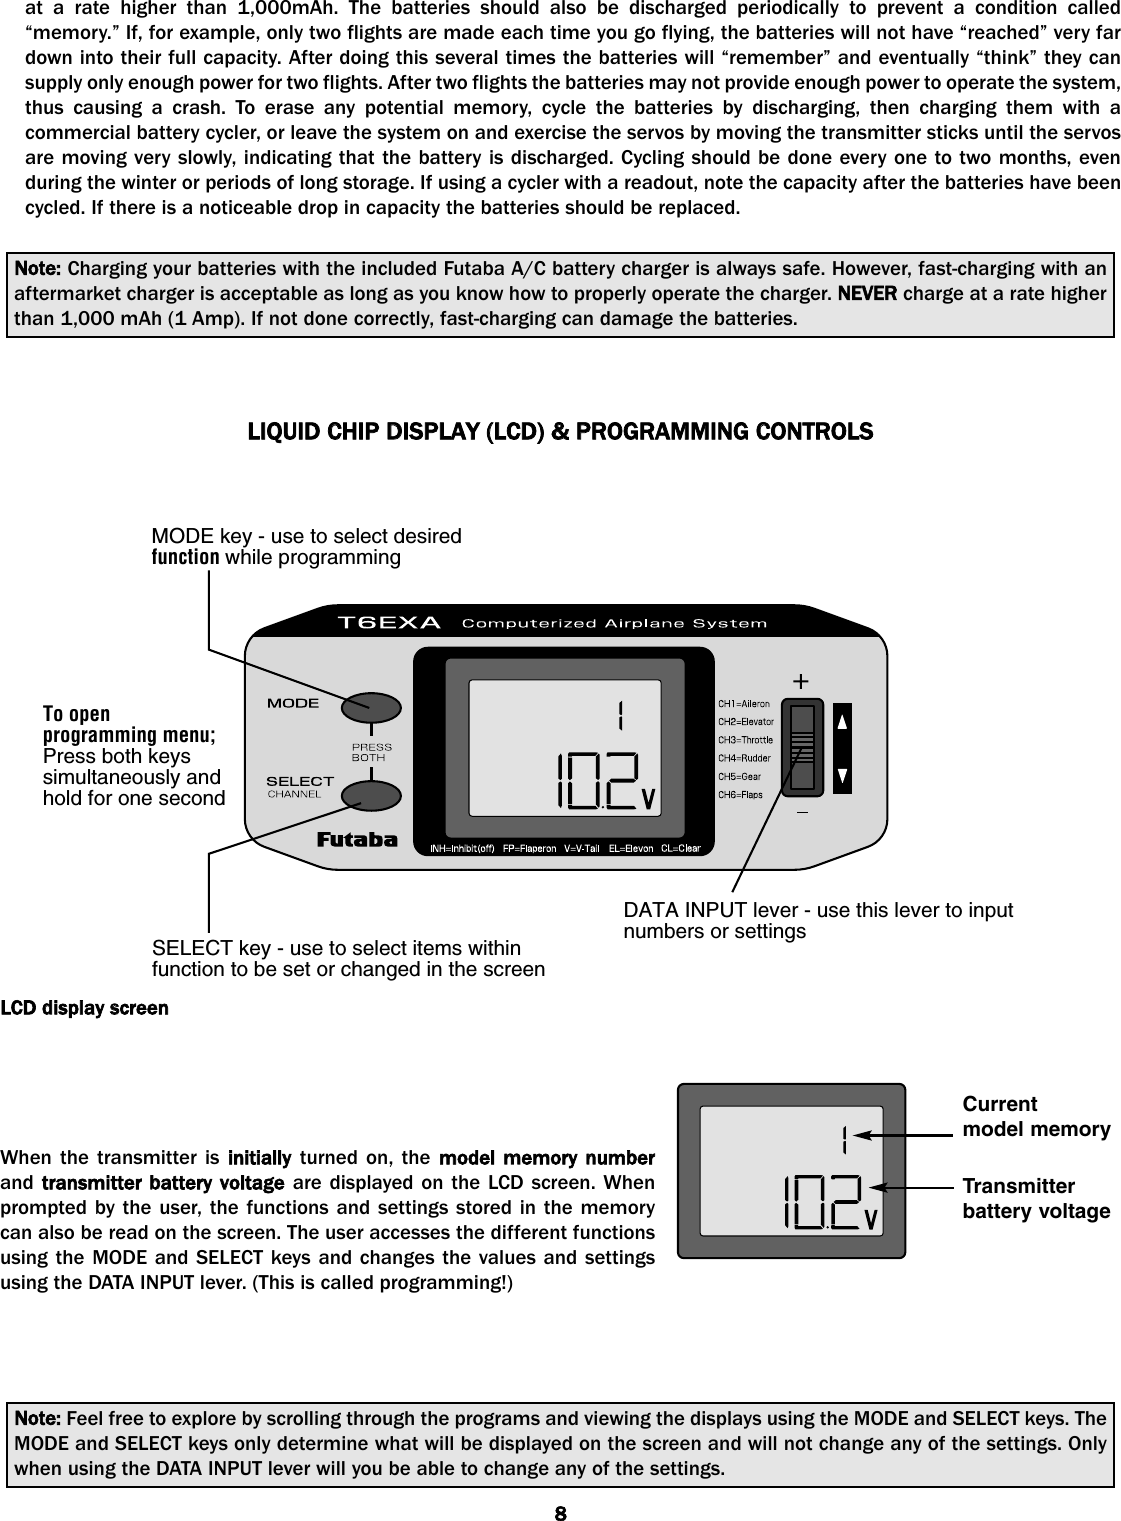
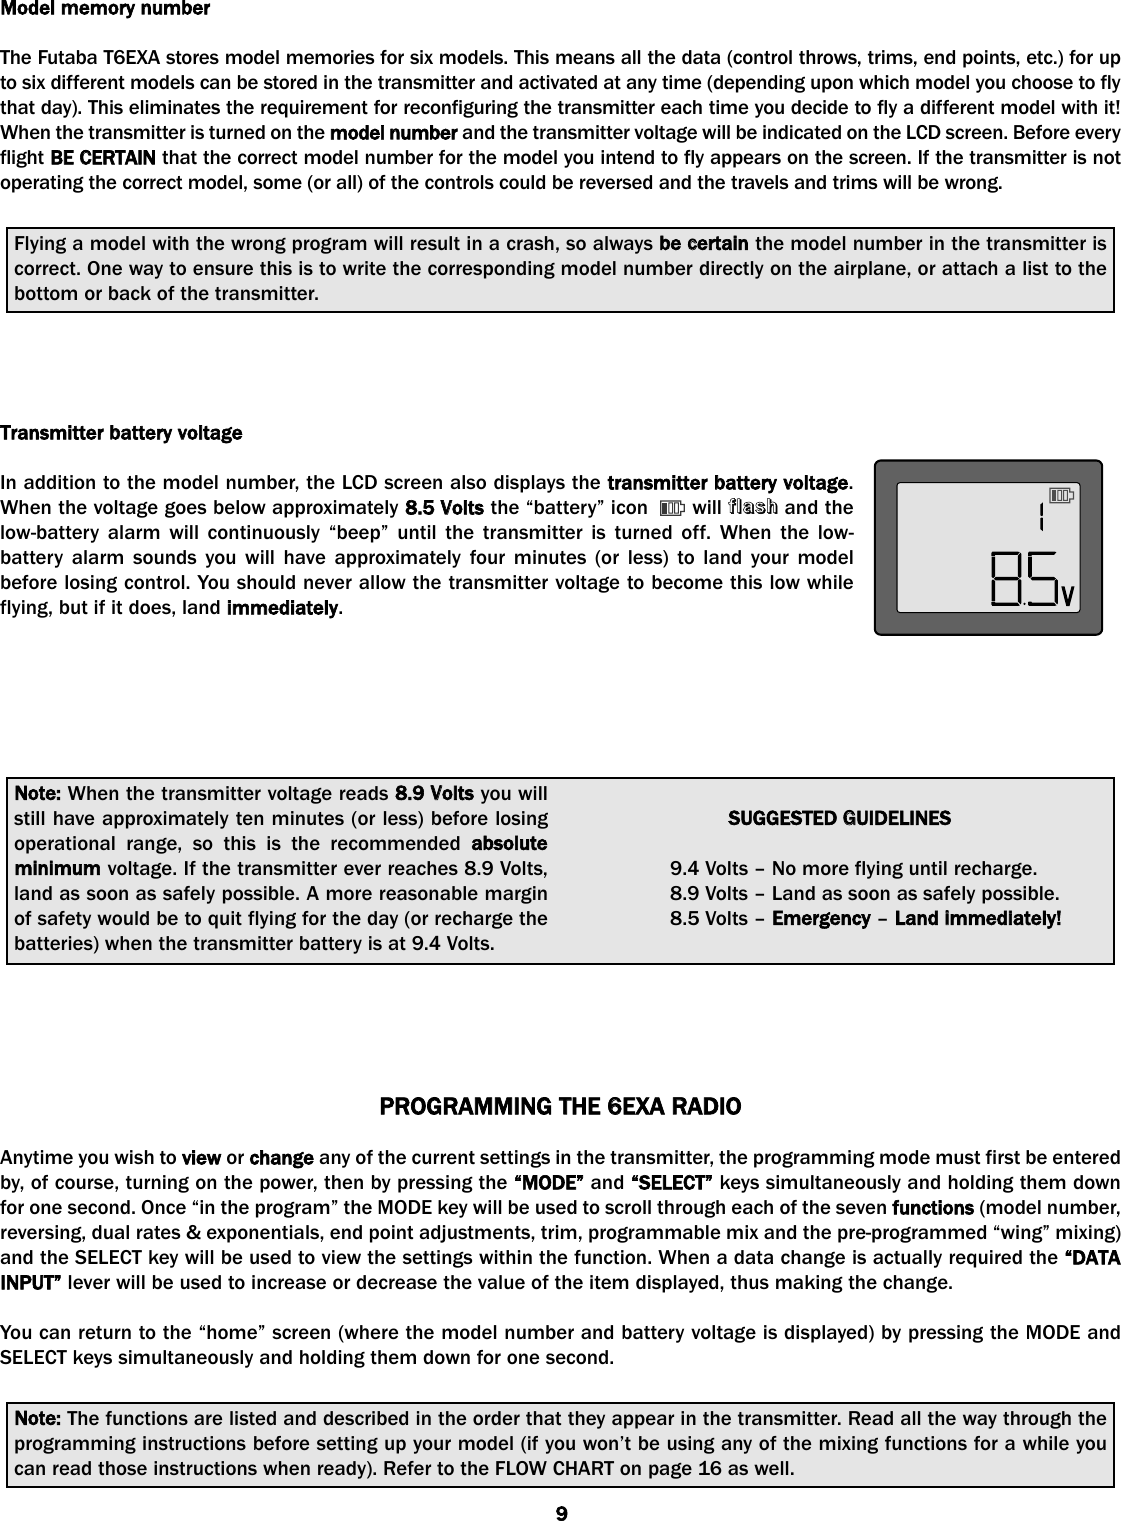
Users Manual Part 2