Futaba T6EXA-72 6 Channel Aircraft Radio Control User Manual 6EXA2
Futaba Corporation 6 Channel Aircraft Radio Control 6EXA2
Futaba >
Contents
- 1. Users Manual Part 1
- 2. Users Manual Part 2
- 3. Users Manual Part 3
- 4. Users Manual Part 4
Users Manual Part 3
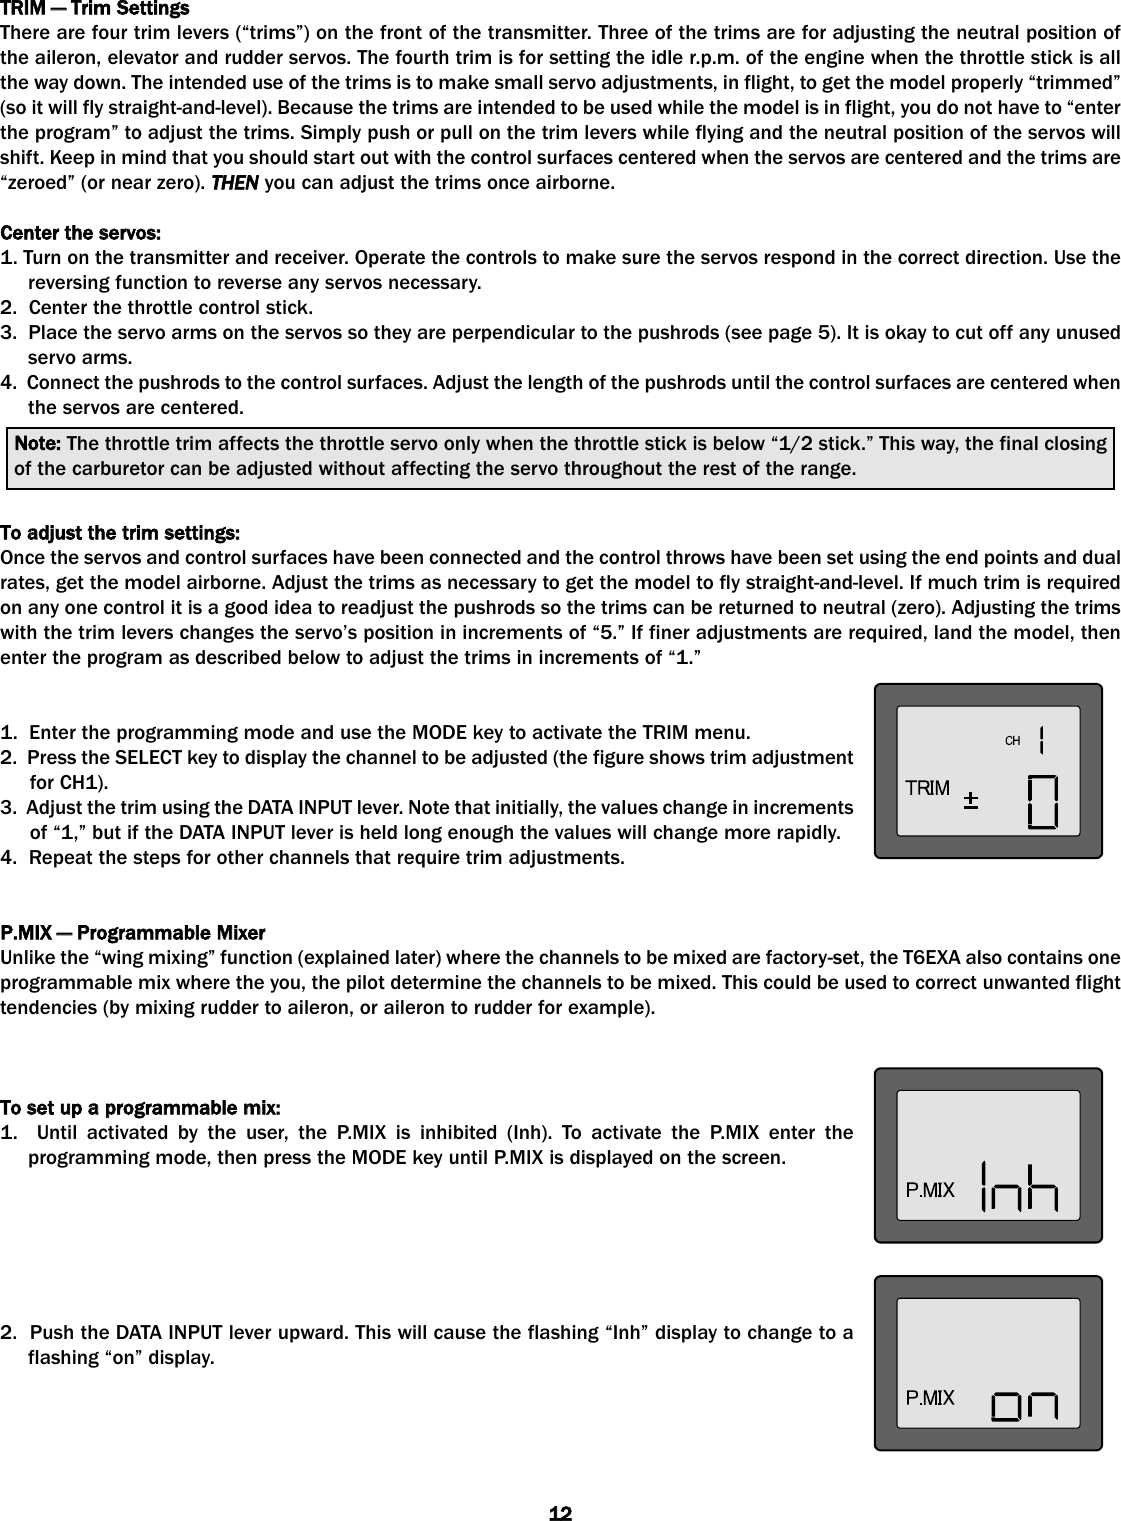

![FLOW CCHART6EXA FFUNCTIONSSimultaneously Press the “MODE” and “SELECT” keys and hold them down for one second to enter the programming mode.Press the keys again (or turn off the transmitter) to exit the programming mode.16Stick Mode(Screen at Startup)To enter or leave Programming Mode,press MODE and SELECT keyssimultaneously for one second.To change the Stick Mode, turn onthe transmitter holding MODE andSELECT keys down simultaneously.Use the DATA INPUT lever to displaythe desired stick mode.(press MODE and SELECT keys for one second)MODE keyMODE keySELECT keyDATA INPUTlever[CH 2-5][CH 2-5][CH 2-3][Model 2-5]](https://usermanual.wiki/Futaba/T6EXA-72.Users-Manual-Part-3/User-Guide-311490-Page-7.png)
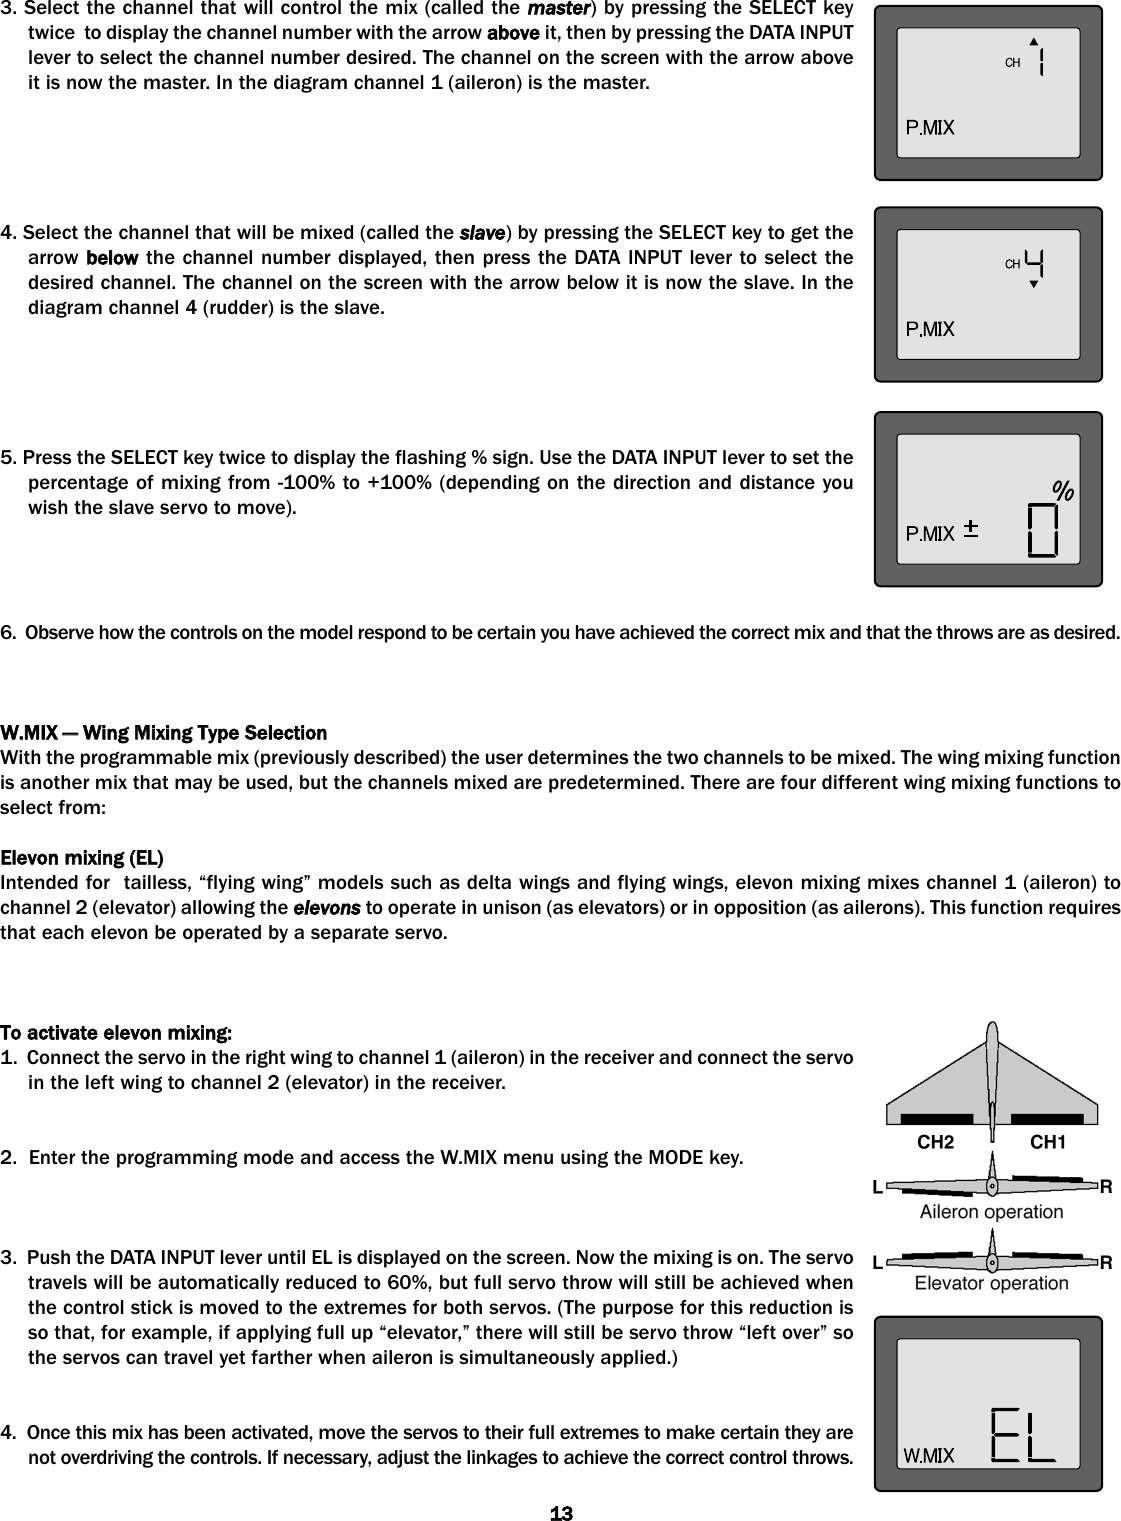
![FUTABA AACCESSORIES AAND RREPLACEMENT PPARTSREPLACEMENT PPARTSACCESSORIES Flight ppacks – since your Futaba 6EXA transmitter holds memories for up to six models, there is no need to purchase a complete radiosystem (including the transmitter) for every model you fly. Available separately, Futaba Flight Packs contain a receiver, servos, switch,battery and all servo mounting hardware. Consult your dealer or the Futaba Service Center for specific contents and order numbers.Receiver ccrystals:The receiver frequency may be changed as long as it remains within the “low” and “high” band frequency range. If your receiver is onany channel from 11 through 35, it is a “low band” receiver and the frequency may be changed to any other channel from 11 through35 without having to perform any other service. Simply purchase a crystal on the desired channel, then replace the existing crystal inyour receiver with the new one. If your receiver is on any channel from 36 through 60, it is a “high band” receiver and the frequencymay be changed to any other channel from 36 through 60. To order a receiver crystal, replace the “**” in the order numbers belowwith the required channel number. (To order a receiver crystal on channel 30, order FUTL5730.)FM Dual Conversion 72 MHz low bband (channels 11 – 35) receiver crystal – FUTL57**FM Dual Conversion 72 MHz high bband (channels 36 – 60) receiver crystal – FUTL58**Note: Should you ever wish to change the transmitter frequency, the transmitter must be sent to the Futaba Service Center for retuning.FTA-8 Neck strap .......................................................FUTM5692NR-4K 4.8 Volt, 250 mAh receiver battery ...........FUTM1210NR-4B 4.8 Volt, 1,000 mAh receiver battery........FUTM1380NR-4F 4.8 Volt, 1,500 mAh receiver battery ........FUTM1285AEC-3 8” [200mm] Servo Extension ......................FUTM3910AEC-14 8” [200mm] Heavy Duty Servo Extension (for digital servos) .....................................................FUTM4140AEC-11 16” [400mm] Servo Extension .................FUTM3955AEC-15 16” [400mm] H.D. Servo Extension (for digital servos) .....................................................FUTM4145AEC-16 Dual H.D. Servo Extension (Y-connector, for digital servos)...............................FUTM4135AEC-13 Dual Servo Extension (Y-connector) .........FUTM4135SR-10 Dual Servo Reverser .....................................FUTM4150Trainer Box transmitter.............................................FUTM4375(if using with 6EXA transmitter use the MD-TC trainer cord)MD-TC trainer cord ....................................................FUTM4420MM-TC trainer cord....................................................FUTM4415ANT-5 Transmitter antenna......................................FUTM5040NR-4J 4.8 Volt, 600 mAh receiver battery ............FUTM1280NT-8F 600B 9.6 Volt, 600 mAh Transmitter battery .................................FUTM1440SWH-13 Switch Harness w/charge plug ...............FUTM4370FSH-6X 4-arm servo arm..........................................FUTM2030FSH-6S 6-arm servo arm..........................................FUTM2010FSH-32 Servo mounting screws (10) .....................FUTM2250MODEL DDATA RRECORDING SSHEET(Make copies before using)Model nname _________________________Model NNo. 1 • 2 • 3 • 4 • 5 • 6MENU FFUNCTION CH 11CH 22CH 33CH 44CH 55CH 66REVERSE Servo Reverse N • R N • R N • R N • R N • R N • RD/R Dual Rate settings ▲ % ▼ %▲ % ▼ %E.P.A End Point Adjust ▲ % ▼ %▲ % ▼ %▲ % ▼ %▲ % ▼ %▲ % ▼ %▲ % ▼ %TRIM Trims ± ± ± ±D/R Exponential Settings ▲± %▼± %▲± %▼± %MIXING SSETTINGSP.MIX Programmable Mixer INH • ON Master Channel ___ Slave Channel ___ Rate ± __ %W.MIX Wing Mixer Type INH • ON FP(flaperon) • v(v-tail) • FPv(flaperon + v-tail) • EL(elevon)](https://usermanual.wiki/Futaba/T6EXA-72.Users-Manual-Part-3/User-Guide-311490-Page-11.png)