Futaba T6EXA-72 6 Channel Aircraft Radio Control User Manual 6EXA2
Futaba Corporation 6 Channel Aircraft Radio Control 6EXA2
Futaba >
Contents
- 1. Users Manual Part 1
- 2. Users Manual Part 2
- 3. Users Manual Part 3
- 4. Users Manual Part 4
Users Manual Part 3
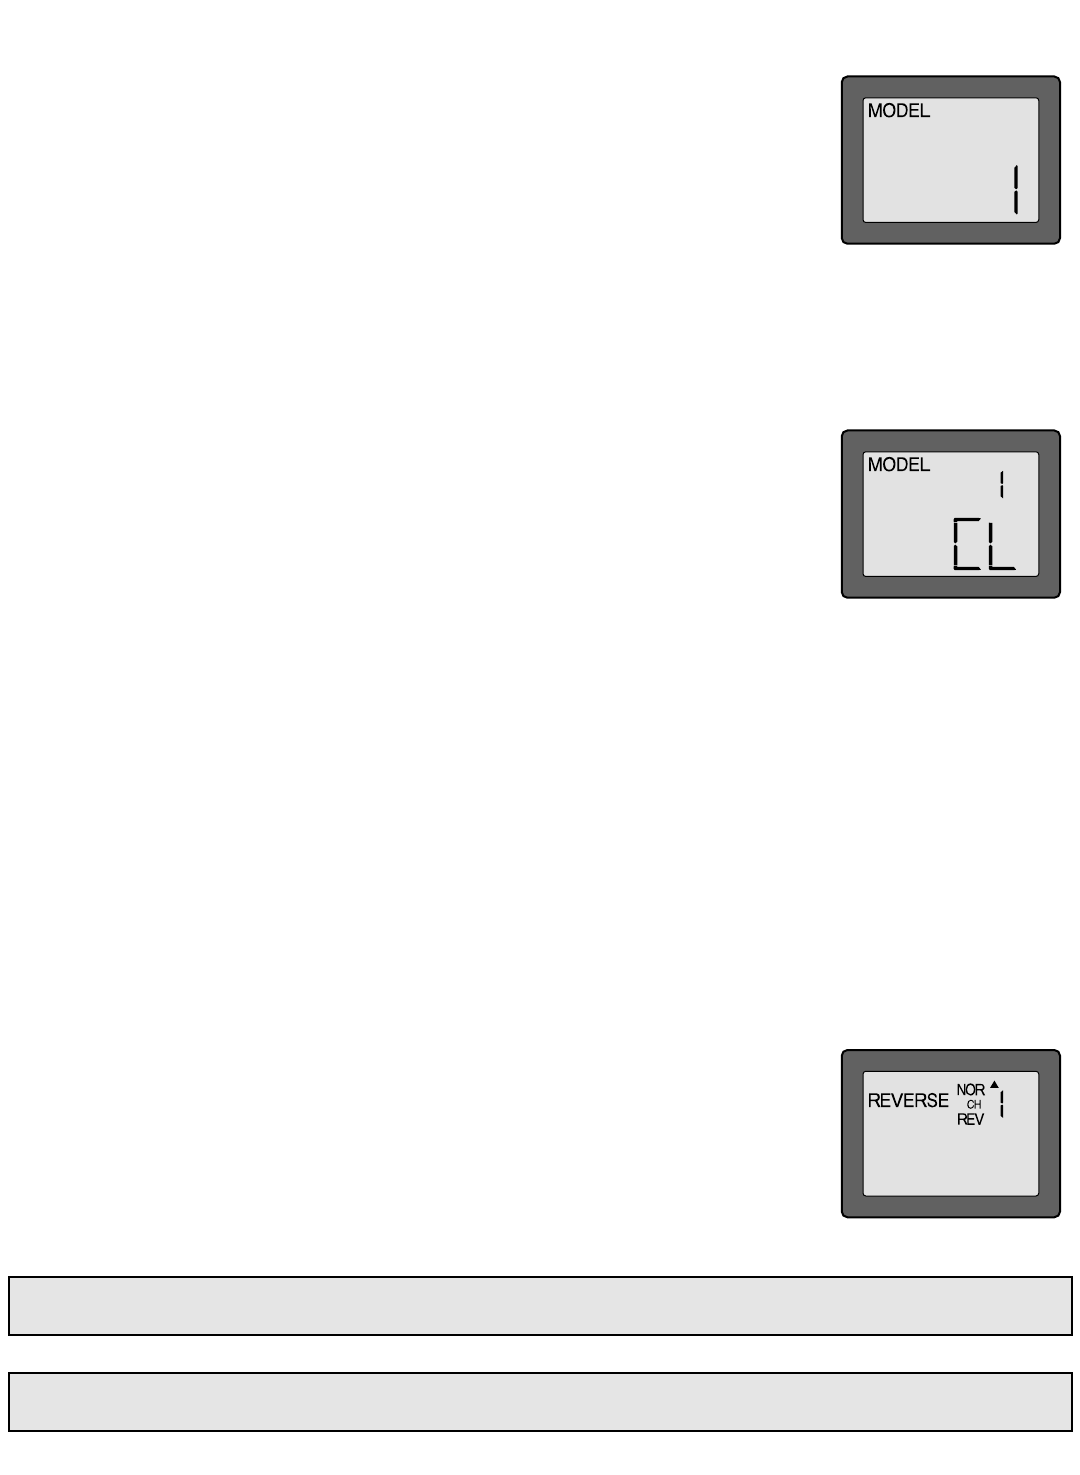
MODEL —— MModel SSelect/Data RReset
Model sselect ffunction
Access the Model Select function in the programming mode (by pressing the MODE and SELECT
keys simultaneously and holding them down for one second). The number for the current, active
model will be blinking. To activate a different model memory press the DATA INPUT lever until
the desired model number appears. Now the model has been selected. All programming inputs
from this point forward will affect only the model number on the screen (until another model
number is selected).
Data rreset ffunction
All the data for any model memory can be reset to the original, factory defaults. Often this function is done to get a “fresh start”
and clear the memory before inputting new model settings.
To rreset ddata:
1. Access the Model Select function in the programming mode (by pressing the MODE and
SELECT keys simultaneously and holding them down for one second). Use the DATA INPUT
lever to select the model memory you wish to reset.
2. Once the desired model number is displayed on the screen, press the SELECT key. A “CL” will
appear on the screen.
3. Press the DATA INPUT up or down for two seconds to clear and reset the memory. Now the
data for this model has been reset to the original, factory defaults.
CAUTION: Resetting the current model memory will permanently erase ALL programming
information for that model. The data cannot be recovered (unless you recorded it on a Model Data Recording Sheet in the back
of this manual). Do not reset the model unless certain you want to flush-out that memory and start from scratch.
When actually setting up a model you should have the model in front of you with the power on so you can actually see the
effects of your programming inputs and measure the control throws.
REVERSE —— SServo RReversing
The servo reversing function is used to change the direction that a servo responds to a control input from the transmitter (stick,
dial or switch). After using the reversing function, check all the controls on the model to be ccertain they are operating in the
correct direction and that you did not inadvertently reverse a servo other than the one intended. Reversing the wrong servo (and
not checking the response of the controls before each flight) may be the most common cause of a crash!
To rreverse aa sservo:
1. Enter the programming mode and use the MODE key to access the REVERSE function.
2. Use the SELECT key to select the channel you wish to reverse. The active channel number will be displayed in the upper, right
corner of the screen.
3. Push the DATA INPUT lever down to reverse the servo (REV), or push the lever up to make the
servo operate normally (NOR). The arrow will indicate the condition of the servo (normal or
reversed). In the diagram channel 1 (aileron) is “normal” (not reversed).
4. Use the SELECT key to display other channels to be reversed.
D/R —— DDual RRates/Exponential SSettings
The aileron and elevator dual rates on the 6EXA are simultaneously activated by the dual rate
switch. The amount of travel decrease for each control may be set between 0% and 100% of the
values set for the end points (explained in End Point Adjustment on page 11).
Note: When performing initial model setup, the E.P.A.s should be set prior ttosetting the dual rates. When setting the E.P.A.s
for the first time on a new model, the dual rates should be set to 100%.
Note: It is possible to set a dual rate value to zero, thus causing no response from that channel. If the dual rates are
inadvertently set to zero, a crash could result.
10
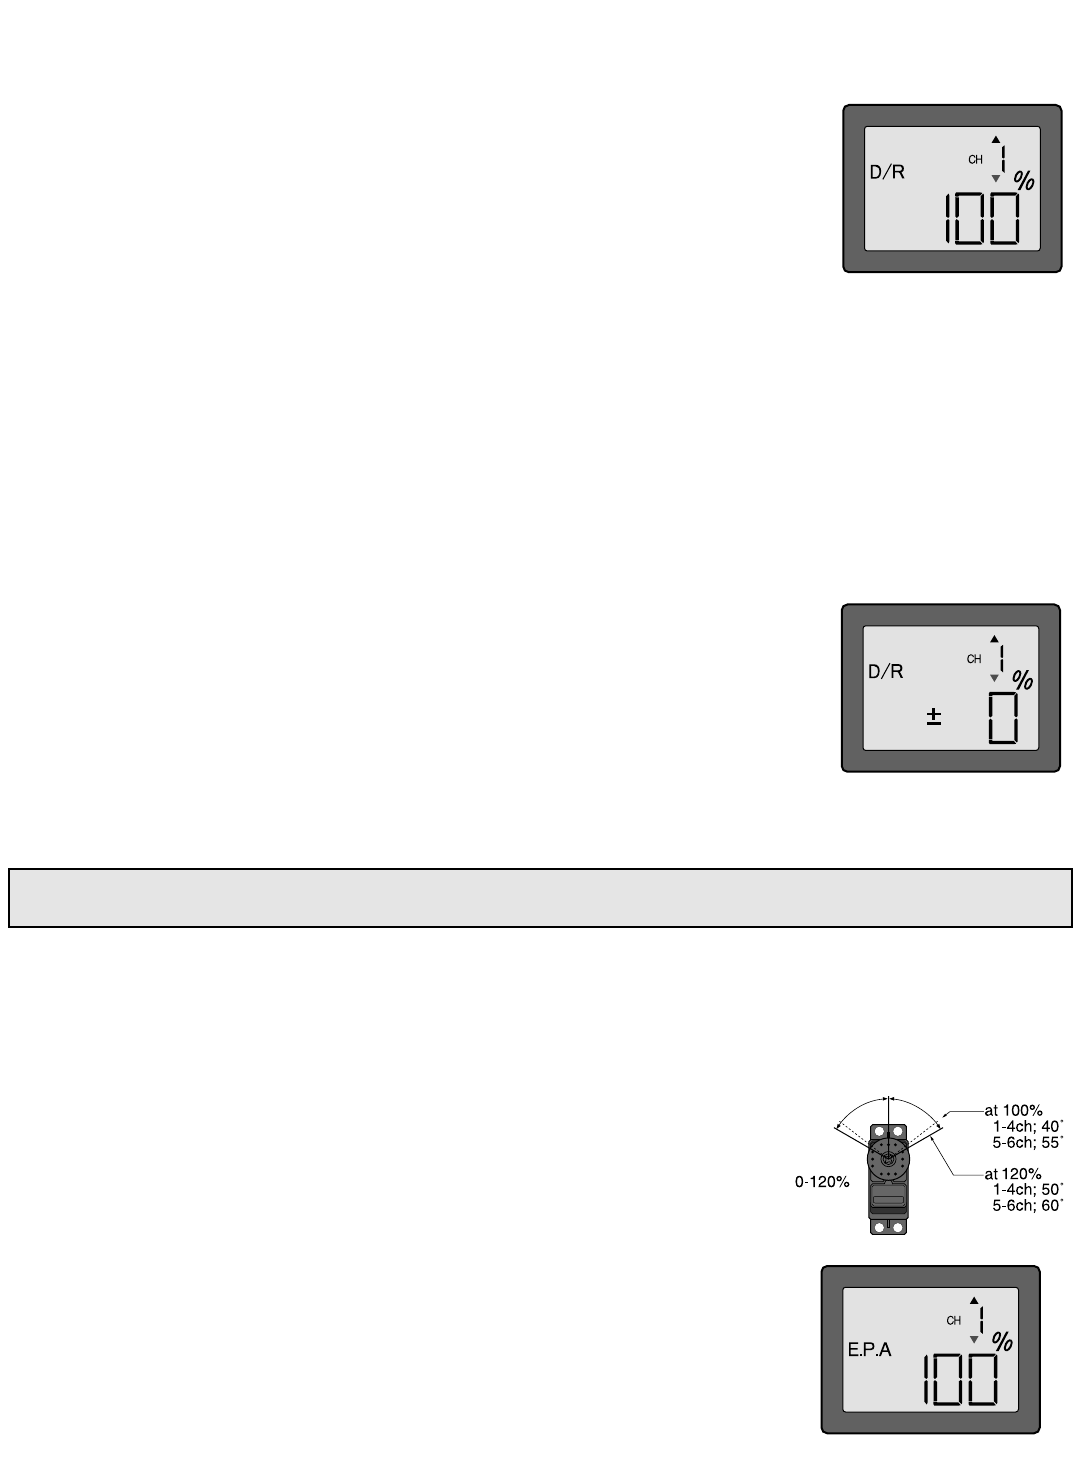
Dual RRate SSettings
To sset tthe ddual rrates:
1. Enter the programming mode. Access the D/R screen with the MODE key.
2. Select the channel to be adjusted (1-aileron, 2-elevator) by pressing the SELECT key until the
desired channel number appears on the screen. Note: If a + or a – appears next to the number,
you have pressed the SELECT key too many times and displayed the values for the
exponentials (explained later). Press the SELECT key to return to the dual rate values.
3. Place the dual rate switch in the desired position for the value you wish to change. (Generally,
pilots prefer to have the switch in the “up” position for the high rate, and in the “down” position
for the low rate.)
4. Change the dual rate value using the DATA INPUT lever until the desired control throw is
achieved. If you wish to change the control throw when the switch is in the other position as
well, flip the switch, then use the DATA INPUT lever to change the throw.
5. Repeat the procedure for the other dual rate (channel 2-elevator).
Exponential SSettings
The “exponentials” are in the same function as the dual rates. (Pressing the MODE key will take you to the next function which
is End Point Adjustments). The same as dual rates, “expos” can be set for both switch positions. Negative exponential (-)
decreases initial servo movement. Positive exponential (+) increases initial servo movement. The exponential “curve” may be
set anywhere between -100% and +100%.
To sset tthe eexponentials:
1. Enter the programming mode, then select the channel (1-aileron, 2-elevator) you wish to set
by pressing the SELECT key. The active channel number will be displayed on the screen with
a + or a - next to the number (initially, the value will read ± 0)
2. Position the dual rate switch where desired for the value you wish to change.
3. Enter the amount of exponential with the DATA INPUT lever. (As stated above, an exponential
value with a “-” in front of it makes the initial servo movement less, or “softer.”)
4. Flip the switch to the other position to enter the exponential value for that switch position.
5. Repeat for the settings on the other channel.
E.P.A —— EEnd PPoint AAdjustment
The E.P.A. function is designed to “fine tune” the servo throws in cases where changing the pushrod hookup will not achieve
the correct throw. The pushrods should first be connected to the servo arms and control horns so the correct, or near correct
control surface throw will be achieved. THEN the E.P.A.s may be used to make small changes in the servo throw until the
desired control throw is achieved. The control throws should be set up so that the “end points” are as near to 100% as possible.
If the E.P.A. values must be set below 70% or above 120% to get the desired throw, you
should strongly consider changing the pushrod connections so the values can be set closer
to 100%. (When the E.P.A. is set to 100% the maximum servo throw for channels 1, 2, 3 &
4 is approximately 40° and approximately 55° for channels 5 & 6.)
To sset tthe eend ppoints:
1. Enter the programming mode and use the MODE key to access the E.P.A screen. The channel
number being adjusted will appear on the screen and the % symbol will be flashing.
2. To change the RIGHT aileron throw move the aileron stick to the right, then push the DATA
INPUT lever up or down to change the value and the throw.
3. Move the stick to the left and use the DATA INPUT lever to change the LEFT aileron throw.
4. Use the SELECT key to display the other channels and set the other end points. Notice
that moving the stick (or switch or dial) from one end to the other changes the value
displayed and the position of the arrow for that “end” of the control input.
Note: Since changing the “end points” will also change the dual rates, the end points should be set prior to setting the dual
rates. If you set the dual rates first, and then go back and change the end points, the dual rate throws will also change.
11
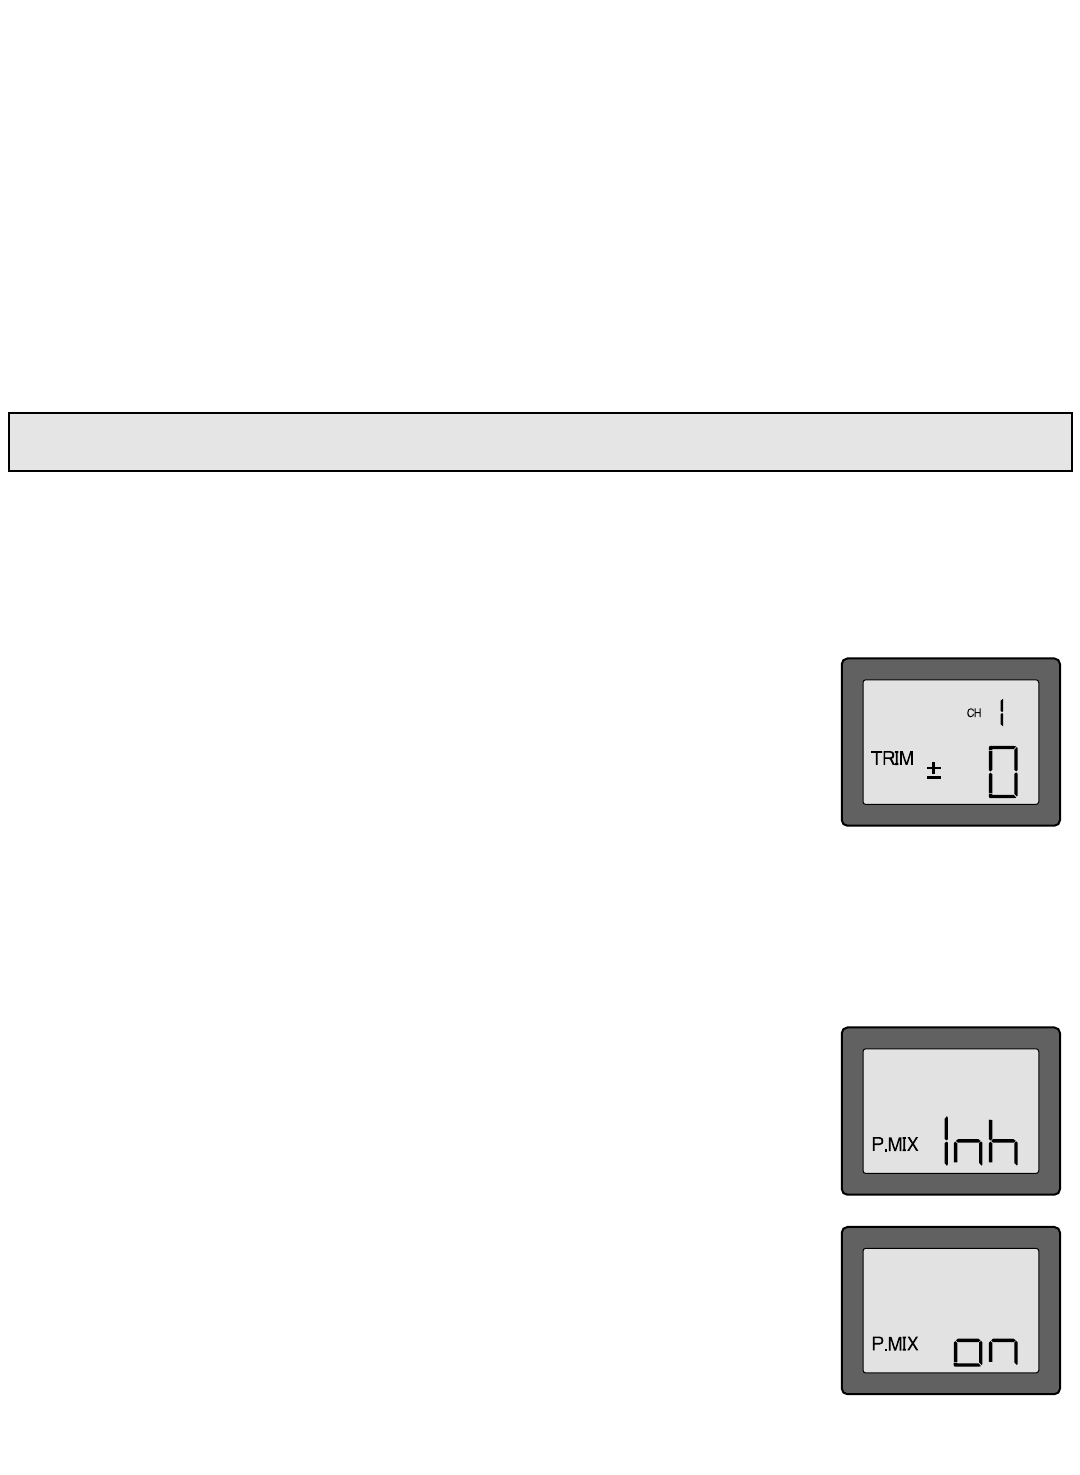
TRIM —— TTrim SSettings
There are four trim levers (“trims”) on the front of the transmitter. Three of the trims are for adjusting the neutral position of
the aileron, elevator and rudder servos. The fourth trim is for setting the idle r.p.m. of the engine when the throttle stick is all
the way down. The intended use of the trims is to make small servo adjustments, in flight, to get the model properly “trimmed”
(so it will fly straight-and-level). Because the trims are intended to be used while the model is in flight, you do not have to “enter
the program” to adjust the trims. Simply push or pull on the trim levers while flying and the neutral position of the servos will
shift. Keep in mind that you should start out with the control surfaces centered when the servos are centered and the trims are
“zeroed” (or near zero). THEN you can adjust the trims once airborne.
Center tthe sservos:
1. Turn on the transmitter and receiver. Operate the controls to make sure the servos respond in the correct direction. Use the
reversing function to reverse any servos necessary.
2. Center the throttle control stick.
3. Place the servo arms on the servos so they are perpendicular to the pushrods (see page 5). It is okay to cut off any unused
servo arms.
4. Connect the pushrods to the control surfaces. Adjust the length of the pushrods until the control surfaces are centered when
the servos are centered.
To aadjust tthe ttrim ssettings:
Once the servos and control surfaces have been connected and the control throws have been set using the end points and dual
rates, get the model airborne. Adjust the trims as necessary to get the model to fly straight-and-level. If much trim is required
on any one control it is a good idea to readjust the pushrods so the trims can be returned to neutral (zero). Adjusting the trims
with the trim levers changes the servo’s position in increments of “5.” If finer adjustments are required, land the model, then
enter the program as described below to adjust the trims in increments of “1.”
1. Enter the programming mode and use the MODE key to activate the TRIM menu.
2. Press the SELECT key to display the channel to be adjusted (the figure shows trim adjustment
for CH1).
3. Adjust the trim using the DATA INPUT lever. Note that initially, the values change in increments
of “1,” but if the DATA INPUT lever is held long enough the values will change more rapidly.
4. Repeat the steps for other channels that require trim adjustments.
P.MIX —— PProgrammable MMixer
Unlike the “wing mixing” function (explained later) where the channels to be mixed are factory-set, the T6EXA also contains one
programmable mix where the you, the pilot determine the channels to be mixed. This could be used to correct unwanted flight
tendencies (by mixing rudder to aileron, or aileron to rudder for example).
To sset uup aa pprogrammable mmix:
1. Until activated by the user, the P.MIX is inhibited (Inh). To activate the P.MIX enter the
programming mode, then press the MODE key until P.MIX is displayed on the screen.
2. Push the DATA INPUT lever upward. This will cause the flashing “Inh” display to change to a
flashing “on” display.
Note: The throttle trim affects the throttle servo only when the throttle stick is below “1/2 stick.” This way, the final closing
of the carburetor can be adjusted without affecting the servo throughout the rest of the range.
12
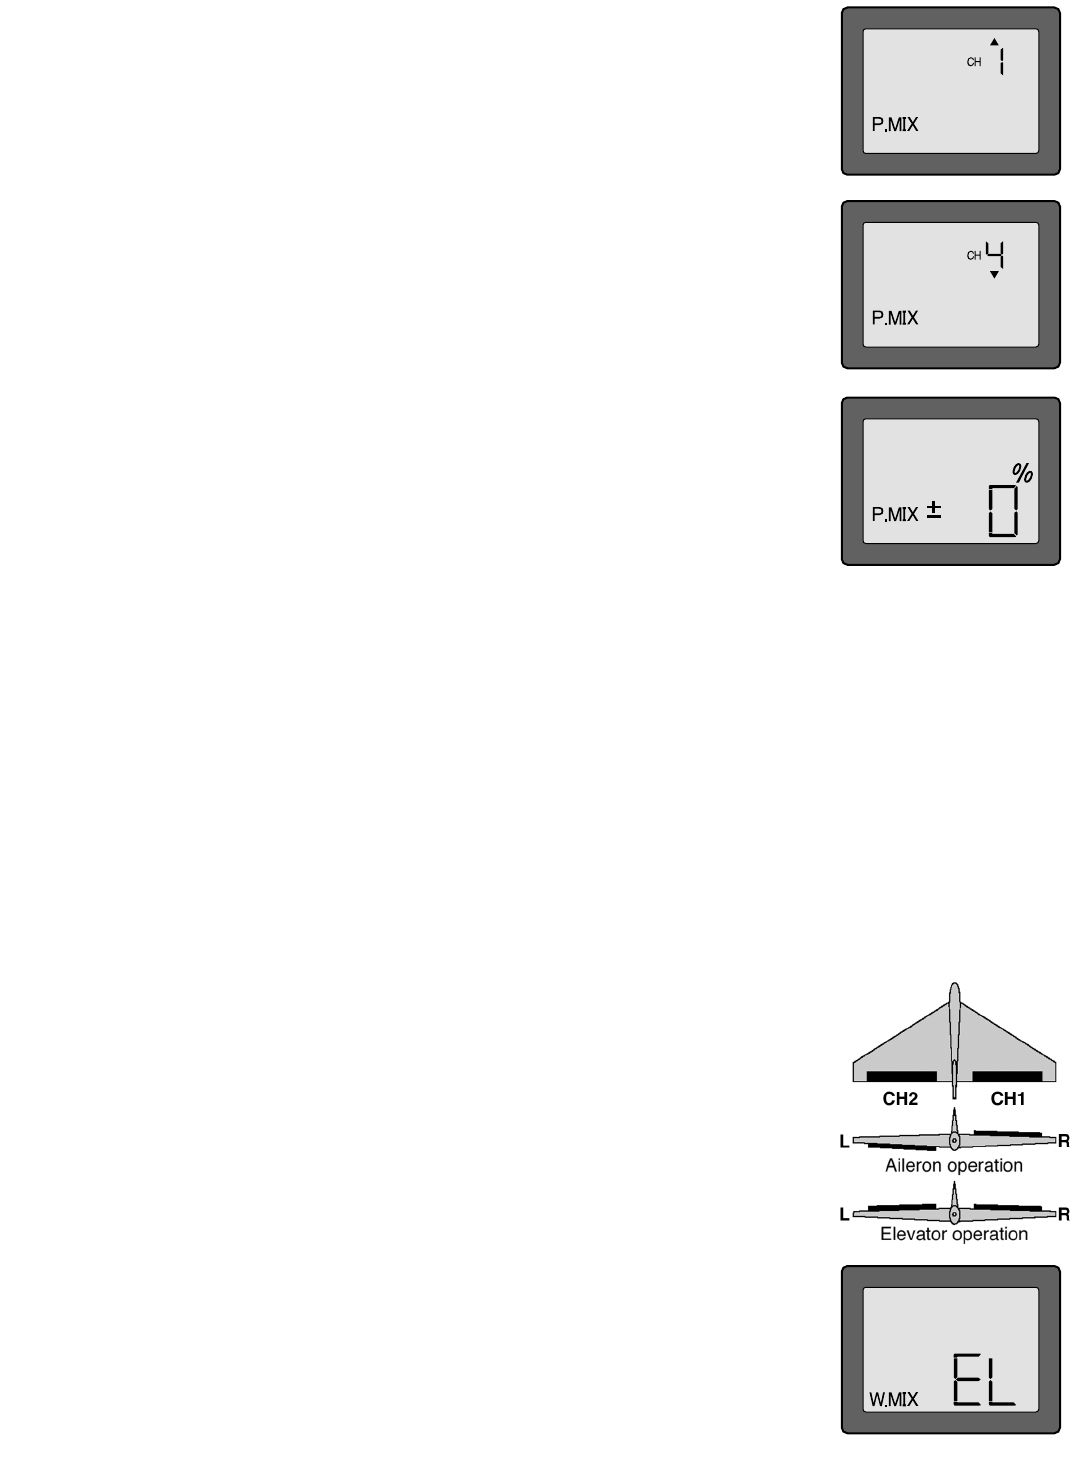
3. Select the channel that will control the mix (called the master) by pressing the SELECT key
twice to display the channel number with the arrow above it, then by pressing the DATA INPUT
lever to select the channel number desired. The channel on the screen with the arrow above
it is now the master. In the diagram channel 1 (aileron) is the master.
4. Select the channel that will be mixed (called the slave) by pressing the SELECT key to get the
arrow below the channel number displayed, then press the DATA INPUT lever to select the
desired channel. The channel on the screen with the arrow below it is now the slave. In the
diagram channel 4 (rudder) is the slave.
5. Press the SELECT key twice to display the flashing % sign. Use the DATA INPUT lever to set the
percentage of mixing from -100% to +100% (depending on the direction and distance you
wish the slave servo to move).
6. Observe how the controls on the model respond to be certain you have achieved the correct mix and that the throws are as desired.
W.MIX —— WWing MMixing TType SSelection
With the programmable mix (previously described) the user determines the two channels to be mixed. The wing mixing function
is another mix that may be used, but the channels mixed are predetermined. There are four different wing mixing functions to
select from:
Elevon mmixing ((EL)
Intended for tailless, “flying wing” models such as delta wings and flying wings, elevon mixing mixes channel 1 (aileron) to
channel 2 (elevator) allowing the elevons to operate in unison (as elevators) or in opposition (as ailerons). This function requires
that each elevon be operated by a separate servo.
To aactivate eelevon mmixing:
1. Connect the servo in the right wing to channel 1 (aileron) in the receiver and connect the servo
in the left wing to channel 2 (elevator) in the receiver.
2. Enter the programming mode and access the W.MIX menu using the MODE key.
3. Push the DATA INPUT lever until EL is displayed on the screen. Now the mixing is on. The servo
travels will be automatically reduced to 60%, but full servo throw will still be achieved when
the control stick is moved to the extremes for both servos. (The purpose for this reduction is
so that, for example, if applying full up “elevator,” there will still be servo throw “left over” so
the servos can travel yet farther when aileron is simultaneously applied.)
4. Once this mix has been activated, move the servos to their full extremes to make certain they are
not overdriving the controls. If necessary, adjust the linkages to achieve the correct control throws.
13
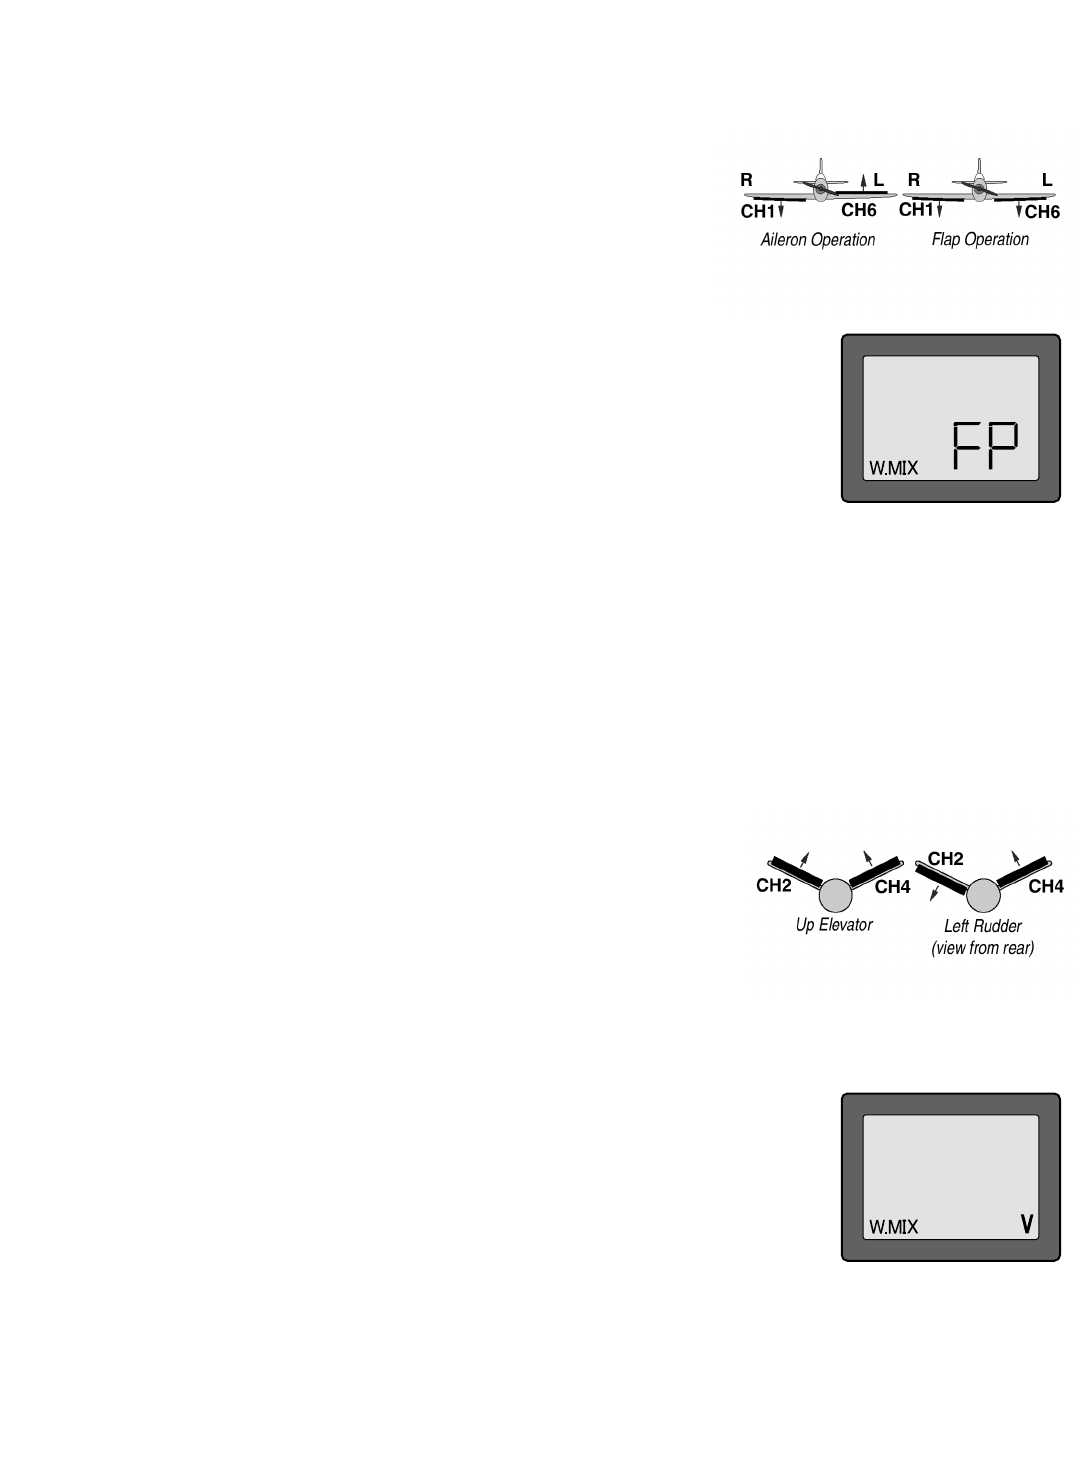
Flaperon mmixing ((FP)
This function allows the ailerons to be used both as ailerons and as flaps. The flap control dial (CH 6) operates the flap function.
To use flaperon mixing both ailerons must be operated by separate servos.
To aactivate fflaperon mmixing:
1. Connect the aileron servo in the right wing to channel 1 (aileron) in the receiver
and connect the aileron servo in the left wing to channel 6 (flaps) in the receiver.
2. Enter the programming mode and access the W.MIX menu using the MODE key.
3. Push the DATA INPUT lever until FP is displayed on the screen. Now the mixing is on. The servo
travels will automatically be reduced to 60% and 40%, but full servo throw will still be
achieved when the aileron stick and the flap control dial are moved to their full extremes.
4. Once this mix has been activated, move the servos to their full extremes to make certain they are not overdriving the
controls. If necessary, adjust the linkages to achieve the correct control throws.
V-ttail mmixing ((v)
Intended for V-tail aircraft (such as a Beechcraft Bonanza), V-tail mixing allows the ruddervators to operate both as rudders and
elevators. The same as the other mixes, V-tail mixing requires that each ruddervator be operated by a separate servo.
To aactivate VV-ttail mmixing:
1. Connect the left ruddervator servo to channel 2 (elevator) in the receiver and connect
the right ruddervator servo to channel 4 (rudder) in the receiver.
2. Enter the programming mode and access the W.MIX menu using the MODE key.
3. Push the DATA INPUT lever until “v” is displayed on the screen. Now the mixing is on. The servo
travels will be automatically reduced to 60%, but full servo throw will still be achieved when
the elevator stick and rudder stick are moved to their extremes.
4. Once this mix has been activated, move the servos to their full extremes to make certain they
are not overdriving the controls. If necessary, adjust the linkages to achieve the correct
control throws.
14

Flaperon ++ vv-ttail mmixing ((FPv)
This mixing function is used when both V-ttail mixing and flaperon mixing are required.
To aactivate FFlaperon ++ VV-ttail mmixing:
1. Connect the left ruddervator servo to channel 2 (elevator) in the receiver and connect the right ruddervator servo to channel
4 (rudder) in the receiver.
2. Connect the aileron servo in the right wing to channel 1 (aileron) in the receiver and connect the aileron servo in the left
wing to channel 6 (flaps) in the receiver.
3. Enter the programming mode and access the W.MIX menu using the MODE key.
4. Push the DATA INPUT lever until FPv is displayed on the screen. Check all the control throws to make certain there is no
binding at the extremes and that the throws are as desired. Adjust any linkages necessary to set the correct throws.
Note: Reversing either of the servos involved with any of the mixing functions will reverse that servo, and that servo only—
not both servos involved in the mix. To reverse both servos, each must be reversed separately. This applies to programmable
mixing and wing mixing.
15
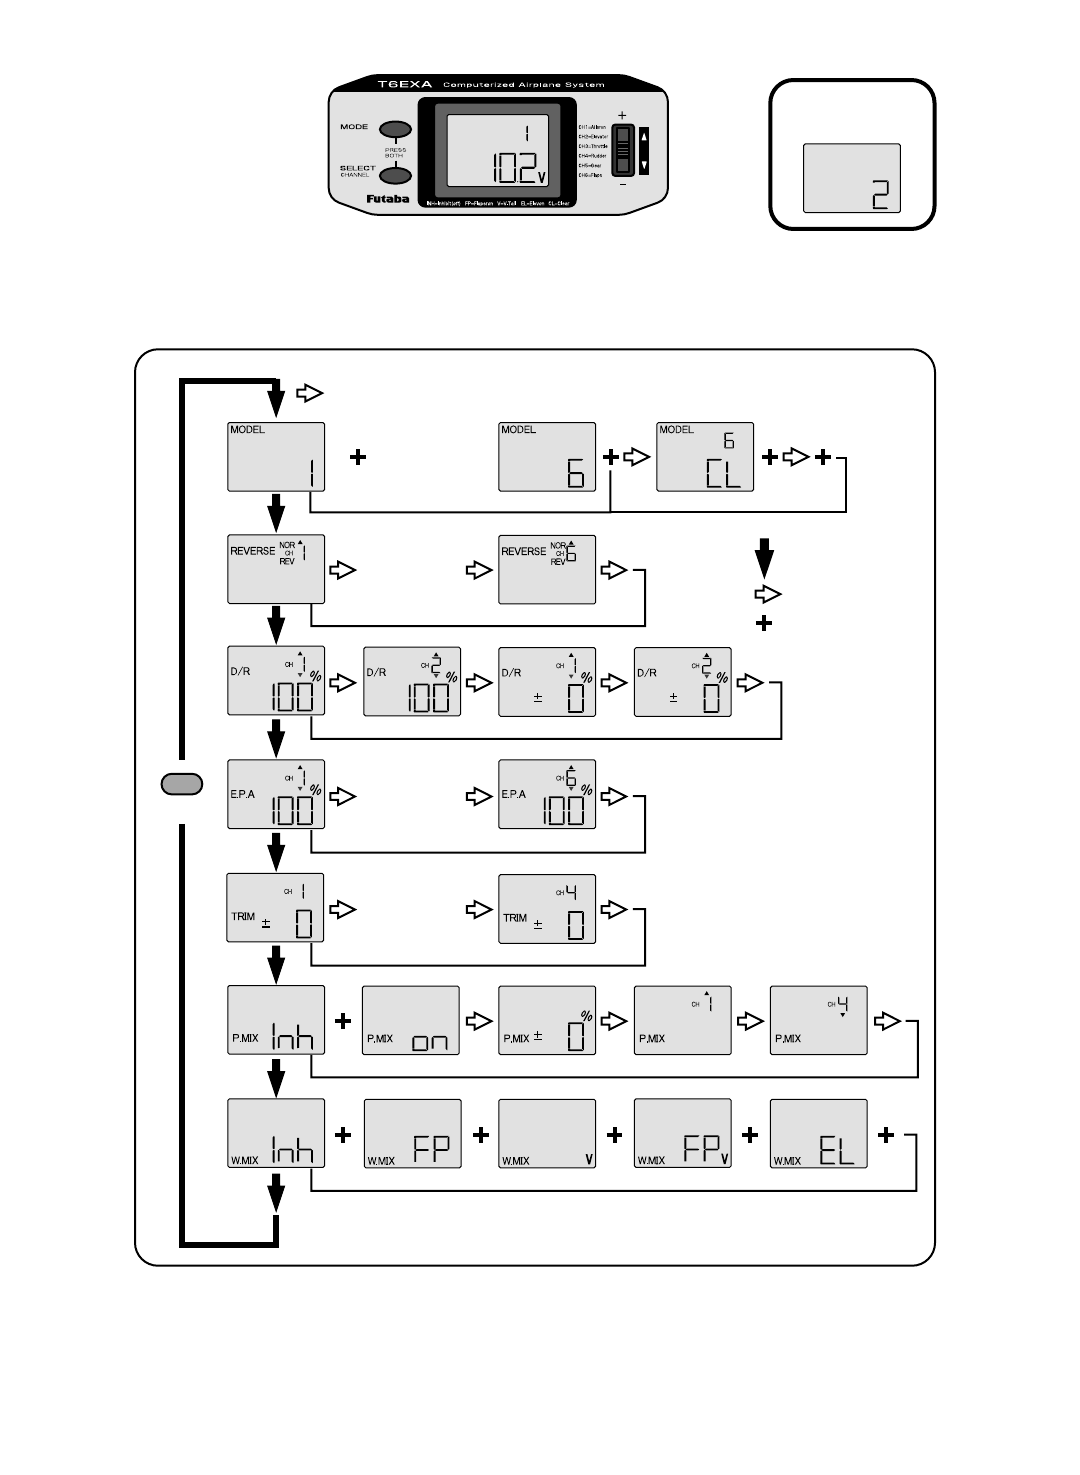
FLOW CCHART
6EXA FFUNCTIONS
Simultaneously Press the “MODE” and “SELECT” keys and hold them down for one second to enter the programming mode.
Press the keys again (or turn off the transmitter) to exit the programming mode.
16
Stick Mode
(Screen at Startup)
To enter or leave Programming Mode,
press MODE and SELECT keys
simultaneously for one second.
To change the Stick Mode, turn on
the transmitter holding MODE and
SELECT keys down simultaneously.
Use the DATA INPUT lever to display
the desired stick mode.
(press MODE and SELECT keys for one second)
MODE key
MODE key
SELECT key
DATA INPUT
lever
[CH 2-5]
[CH 2-5]
[CH 2-3]
[Model 2-5]
OTHER 66EXA FFUNCTIONS
Trainer sswitch
To utilize the trainer function, the appropriate trainer cord (available separately) and a second Futaba transmitter (usually provided by
your flight instructor or R/C club) will be required. When two radios are connected with the trainer cord, they are both capable of
operating the model, but it’s usually best for the instructor to hold the radio that has been setup for the plane to be flown (as it is
already programmed to fly the model). When the instructor holds the trainer switch on his radio, the student will have control. When
the instructor wishes to regain control he simply releases the switch. Then he will have immediate, full control.
If connecting the 6EXA to another 6EXA with the small, square “micro” trainer jack, use the “Micro to Micro (MM-TC) trainer
cord (FUTM4415). If connecting the 6EXA to Futaba radios with the larger, round, “DIN” connector, use “Micro to DIN” (MD-TC)
trainer cord (FUTM4420). The T6EXA transmitter may be connected to another T6EXA, or any 4VF, 6VA Skysport, FF6 - 9, or 9Z
series transmitter.
To uuse tthe ttrainer ccord:
1. It is best for the instructor to use the transmitter that is already set up for the model to be flown.
2. If the student’s radio has PCM/PPM capability, set it to PPM.
3. If the student’s radio has a plug-in RF module, remove the module.
4. Collapse the student’s antenna and fully extend the instructor’s antenna.
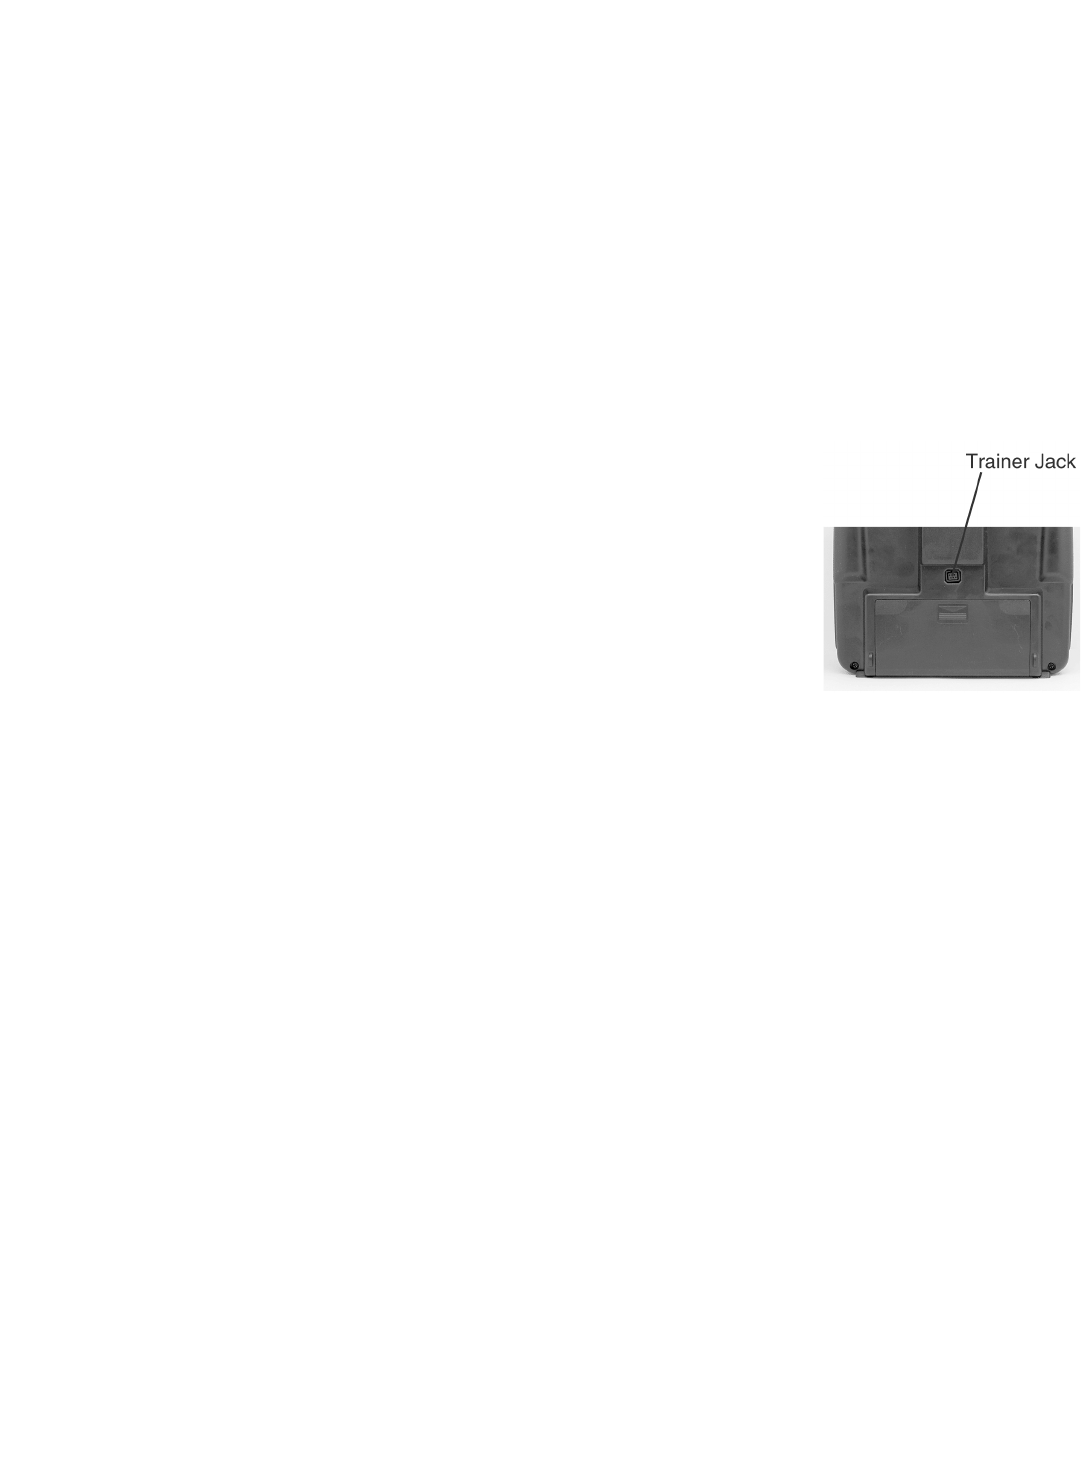
5. With the transmitters off, connect the trainer cord to both radios. (On the 6EXA the trainer
jack is in the center of the rear of the case.) Do not force the plug into the transmitter and note
that the plug is “keyed” so it can go in only one way.
6. Turn on the instructor’s transmitter. DO NNOT turn on the student’s transmitter—it will automatically “power up,” but will not
transmit a signal. Set the servo reversing and trims of the student’s radio to match that of the instructor’s.
7. Turn on the receiver switch in the model. Depress the trainer switch on the instructor’s radio. Use the student’s radio to
operate the controls (ailerons, elevator, rudder, etc.) and observe how they respond. Make any adjustments necessary to the
student’s transmitter to get the controls to respond correctly.
8. Check to see that the trims are in “sync” by toggling the trainer switch back and forth a few times. The controls on the model
should remain stationary. If the controls do not remain stationary, this indicates that the trim settings on the student’s radio
do not match those on the instructor’s radio. Adjust the student’s trims as necessary.
Note: When the instructor initially depresses the trainer switch on his transmitter, there will be a one-second delay before the
student takes control. In most situations this momentary delay will go unnoticed.
Throttle-ccut ffunction
The throttle-cut function is intended to be used for shutting off the engine. The engine can be conveniently shut off by rapidly
pressing, then releasing the trainer/throttle-cut switch twice in succession. The throttle-cut feature prevents inadvertently
shutting off of the engine when lowering the throttle stick all the way (such as when coming in for a landing or taxiing). Throttle-
cut works only when the throttle stick is down. To set up throttle-cut, turn on the transmitter and receiver. Actuate the throttle-
cut function by rapidly depressing, then releasing the switch twice. Observe the momentary position of the carburetor barrel
on the engine. It should be fully closed (thus shutting off the engine). If necessary, use the throttle E.P.A. (channel 3) to fully
close the carburetor barrel when the throttle-cut is activated. Now use the throttle trim to open the carburetor barrel so the
engine will idle at the desired R.P.M. when the throttle stick is all the way down.
Optional FFlap ccontrol llever (supplied)
When the flaperon mixing function is activated, the optional flap ccontrol llever can be used to set maximum flap deflection by
mechanically limiting the dial. This will prevent inadvertently retracting the flaps beyond their full, “up” position. To use the flap
control lever, turn the flap dial until the flaps are retracted (up). Place the flap control lever over the dial so that the arm is
contacting the transmitter case. This will limit rotation of the dial so the flaps cannot go up any farther.
17
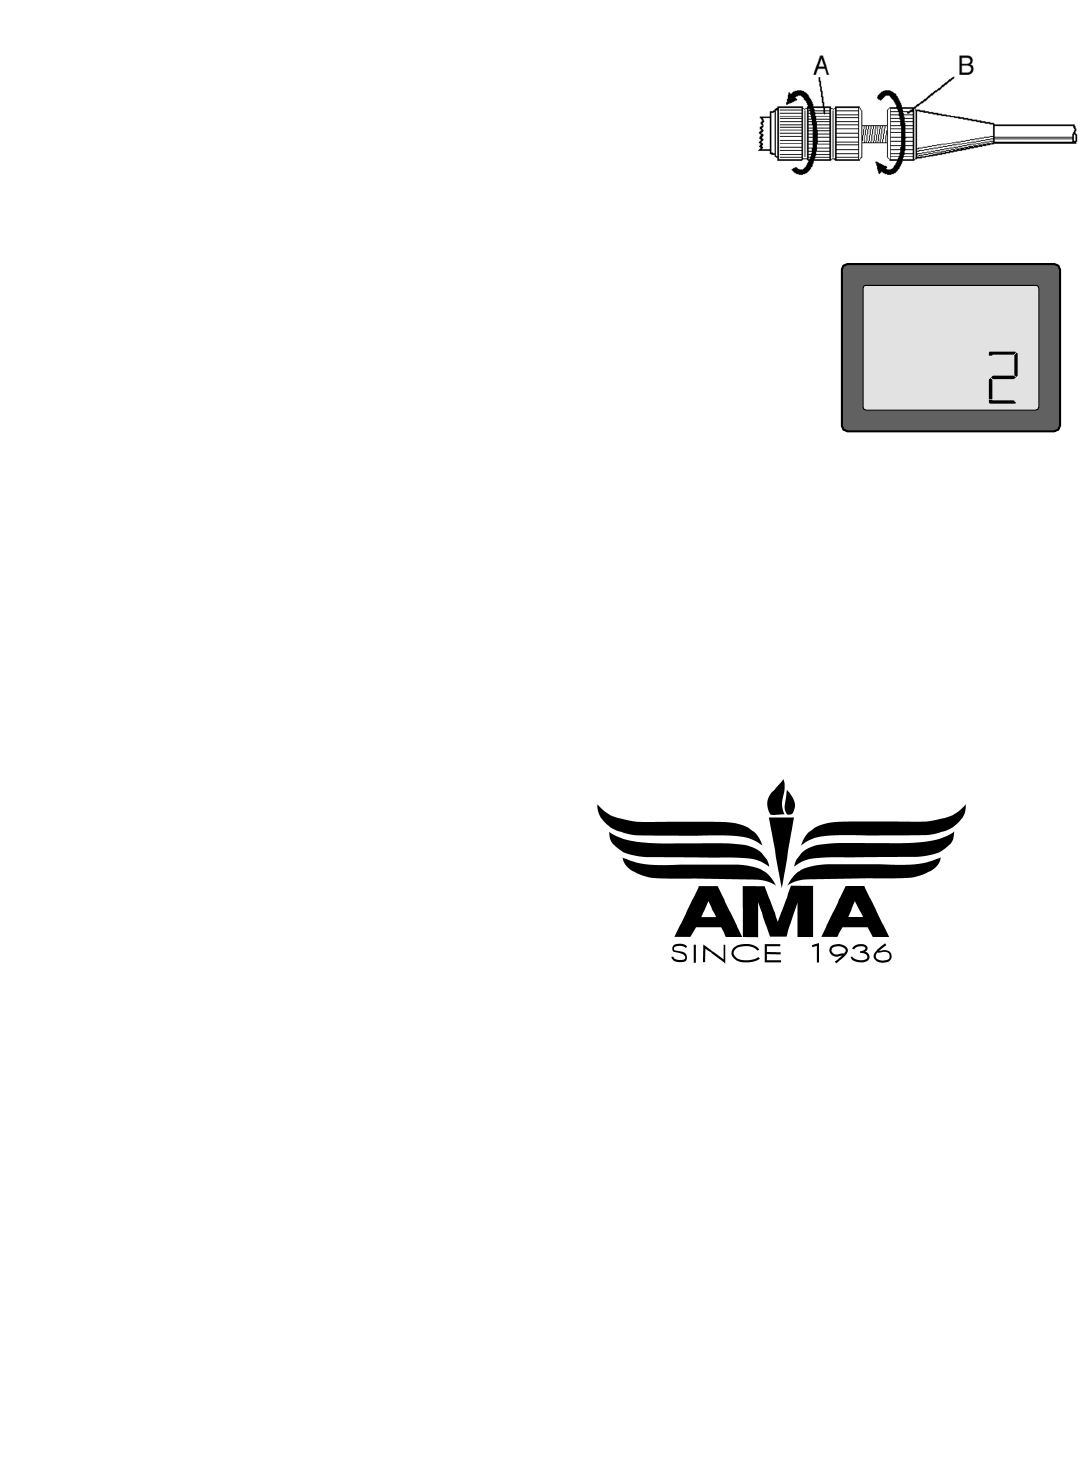
Adjustable-llength ccontrol ssticks
The control stick length is adjustable to make the transmitter more comfortable to
hold and operate. To adjust the length, hold the locking ppiece ((B) and turn the stick
tip ((A) counterclockwise. Turn the locking piece B up or down to lengthen or shorten
the stick. When the length is suitable, lock the stick in position by turning locking
piece B counterclockwise.
Changing tthe 66EXA sstick mmode
The transmitter may be operated in four different stick “modes” (1, 2, 3 & 4). The modes
determine the functions that will be operated by control sticks. Currently, the transmitter is in
“mode 2” and should be left in mode 2 unless you are an experienced flyer and have learned to
fly in a different mode. In mode 2, the right control stick operates the aileron and elevator and
the left stick operates the rudder and throttle. This is how 99% of Americans fly their models.
To change the mode, simultaneously depress the MODE and SELECT keys, then turn on the power. The current mode will appear
on the LCD screen. Push the DATA INPUT lever up or down to change the mode. If a mode is selected that moves the throttle
control to the right stick, the throttle detent mechanism will have to be moved as well. This can be done by the Futaba Service
Center. (See page 2)
FLYING SSAFETY GGUIDELINES
Find aa ssuitable fflying ssite
If you are a beginning modeler and not yet a member of an R/C club, joining a club and flying at a site specifically intended for
R/C model aircraft is highly rrecommended. In addition to joining a club, we strongly recommend joining the AMA (Academy of
Model Aeronautics). AMA membership is required to fly at AMA clubs. There are over 2,500 AMA-chartered clubs across the
country. Among other benefits, the AMA provides insurance to its members who fly at sanctioned sites and events. Additionally,
training programs and instructors are available at AMA club sites to help you get started the right way. Contact the AMA at the
address or toll-free phone number below:
Academy oof MModel AAeronautics
5151 East Memorial Drive
Muncie, IN 47302-9252
Tele. (800) 435-9262
Fax (765) 741-0057
Or via the Internet at: http://www.modelaircraft.org
IMPORTANT: If you do insist on flying on your own, you must be aware of your proximity to R/C club sites. If there is an R/C site
within six miles of where you are flying, and if you are operating your model on the same frequency as somebody else, there
is a strong possibility that one or both models will crash due to radio interference. There is great potential for an out-of-control
model to cause property damage and/or severe personal injury. We strongly urge you to fly at an R/C club site where frequency
control is in effect so you can be confident you will be the only one flying on your channel.
Charge tthe bbatteries
Second to the pilot’s flight skills, one of the most important factors that can determine a model’s longevity is the state-of-
charge of the batteries—especially the on-board receiver pack. Inadequate charging and failing to monitor a battery’s voltage
may lead to low battery power, causing loss of control and a crash. To avoid this, always charge the batteries the night before
you go flying. If ever uncertain how much “charge” is left in a battery, it is wiser to err on the side of caution, rather than trying
to get in one last flight! Due to the number of factors that determine receiver battery power consumption (such as the number
and type of servos in your model, the type of flying you do, how much resistance is built into the controls, the size of the model,
etc.), it is not possible to recommend how many flights one can get on a charge. The best way to monitor battery power and
calculate how much flight time you have left is to use a volt meter to check the batteries after each flight. This can be done
through the battery charging plug coming from the switch. There are many small, hand-held volt meters available specially
intended for R/C use. The Hobbico®Digital Voltmeter MKIII™(HCAP0356) is one such unit. An on-board volt meter mounted
directly on the model (HCAP0330) can also be used.
18

FLIGHT PPREPARATION
Flight
preparation
is
to
be
done
at
the
flying
field.
If you are an inexperienced pilot, be certain your flight instructor performs these following checks with you.
Check tthe ccontrols
1. Get the frequency clip from the frequency control board at your flying site.
2. Mount the wing to the fuselage. Turn on the transmitter, then the receiver (remember to do this in reverse order when turning
off the system). Be certain the correct model memory matching the model you will be flying is the one on the LCD screen.
3. Operate and observe the controls. Look for inadvertent movement and listen for abnormal servo sounds. If problems are
noted, correct them before flying. Look for binding pushrods or servo arms or pushrods that interfere with each other.
4. One at a time, operate each control on the airplane using the sticks on the transmitter to make certain each control is
responding correctly. This must be done before every flight. (There are several types of malfunctions that can be discovered by
performing this elementary task, thus saving your model!)
Range ccheck tthe rradio
A range check must be performed before the first flight of a new model. It is not necessary to do a range check before every
flight (but is not a bad idea to perform a range check before the first flight of each day). A range check is the final opportunity
to reveal any radio malfunctions, and to be certain the system has adequate operational range.
1. Turn on the transmitter, then the receiver. Leave the transmitter antenna all the way down. Walk away from the model while
simultaneously operating the controls. Have an assistant stand by the model and signal what the controls are doing to confirm
that they operate correctly. You should be able to walk approximately 20 - 30 paces from the model without losing control or
seeing “jitter” in the servos.
2. If everything operates correctly, return to the model. Set the transmitter in a safe, yet accessible location so it will be within
reach after starting the engine. Be certain the throttle stick is all the way down, then start the engine. Perform another range
check with your assistant holding the plane and the engine running at various speeds. If the servos jitter or move inadvertently,
there may be a problem. Do nnot fly the plane! Look for loose servo connections or binding pushrods. Also be certain you are
the only one on your frequency, and that the battery has been fully charged.
4. When ready to fly, remember to fully extend the transmitter antenna. Avoid pointing the antenna directly at the model as
the signal is weakest in that direction.
Do nnot ffly iin tthe rrain!
Moisture may enter the transmitter through the antenna or stick openings and cause erratic operation or loss of control. If you
must fly in wet weather during a contest, be sure to cover the transmitter with a plastic bag or other waterproof cover.
MODEL DDATA RRECORDING SSHEET
After finalizing the programming for each model, fill out the values and settings in the Model DData RRecording SSheets in the
back of the manual. The data sheets will serve as a backup in case a program is ever lost or inadvertently reset, or in case you
have to intentionally reset a program to make room for another model. Make additional copies before filling out the sheets.
IMPORTANT: Your radio control system transmits a signal on a certain frequency. Be certain you know what the frequency
is. This is expressed as a two-digit number (42, 56, etc.), and can be found on the container the transmitter came in and is
also located on the transmitter and receiver. There are several different frequencies, but there is still a chance that someone
else at the flying field may be on the same frequency as you. Two models can never be operated at the same time on the
same frequency—no matter what the modulation (AM, FM, PCM). If you turn on your transmitter while another person is
flying on the same frequency, a crash will result. NEVER turn on your transmitter until you have permission from your
instructor, and until you have possession of the frequency clip used for frequency control at the flying site.
19

FUTABA AACCESSORIES AAND RREPLACEMENT PPARTS
REPLACEMENT PPARTS
ACCESSORIES
Flight ppacks – since your Futaba 6EXA transmitter holds memories for up to six models, there is no need to purchase a complete radio
system (including the transmitter) for every model you fly. Available separately, Futaba Flight Packs contain a receiver, servos, switch,
battery and all servo mounting hardware. Consult your dealer or the Futaba Service Center for specific contents and order numbers.
Receiver ccrystals:
The receiver frequency may be changed as long as it remains within the “low” and “high” band frequency range. If your receiver is on
any channel from 11 through 35, it is a “low band” receiver and the frequency may be changed to any other channel from 11 through
35 without having to perform any other service. Simply purchase a crystal on the desired channel, then replace the existing crystal in
your receiver with the new one. If your receiver is on any channel from 36 through 60, it is a “high band” receiver and the frequency
may be changed to any other channel from 36 through 60. To order a receiver crystal, replace the “**” in the order numbers below
with the required channel number. (To order a receiver crystal on channel 30, order FUTL5730.)
FM Dual Conversion 72 MHz low bband (channels 11 – 35) receiver crystal – FUTL57**
FM Dual Conversion 72 MHz high bband (channels 36 – 60) receiver crystal – FUTL58**
Note: Should you ever wish to change the transmitter frequency, the transmitter must be sent to the Futaba Service Center for retuning.
FTA-8 Neck strap .......................................................FUTM5692
NR-4K 4.8 Volt, 250 mAh receiver battery ...........FUTM1210
NR-4B 4.8 Volt, 1,000 mAh receiver battery........FUTM1380
NR-4F 4.8 Volt, 1,500 mAh receiver battery ........FUTM1285
AEC-3 8” [200mm] Servo Extension ......................FUTM3910
AEC-14 8” [200mm] Heavy Duty Servo Extension
(for digital servos) .....................................................FUTM4140
AEC-11 16” [400mm] Servo Extension .................FUTM3955
AEC-15 16” [400mm] H.D. Servo Extension
(for digital servos) .....................................................FUTM4145
AEC-16 Dual H.D. Servo Extension
(Y-connector, for digital servos)...............................FUTM4135
AEC-13 Dual Servo Extension (Y-connector) .........FUTM4135
SR-10 Dual Servo Reverser .....................................FUTM4150
Trainer Box transmitter.............................................FUTM4375
(if using with 6EXA transmitter use the MD-TC trainer cord)
MD-TC trainer cord ....................................................FUTM4420
MM-TC trainer cord....................................................FUTM4415
ANT-5 Transmitter antenna......................................FUTM5040
NR-4J 4.8 Volt, 600 mAh receiver battery ............FUTM1280
NT-8F 600B 9.6 Volt,
600 mAh Transmitter battery .................................FUTM1440
SWH-13 Switch Harness w/charge plug ...............FUTM4370
FSH-6X 4-arm servo arm..........................................FUTM2030
FSH-6S 6-arm servo arm..........................................FUTM2010
FSH-32 Servo mounting screws (10) .....................FUTM2250
MODEL DDATA RRECORDING SSHEET
(Make copies before using)
Model nname _________________________
Model NNo. 1 • 2 • 3 • 4 • 5 • 6
MENU FFUNCTION CH 11CH 22CH 33CH 44CH 55CH 66
REVERSE Servo Reverse N • R N • R N • R N • R N • R N • R
D/R Dual Rate settings ▲ % ▼ %▲ % ▼ %
E.P.A End Point Adjust ▲ % ▼ %▲ % ▼ %▲ % ▼ %▲ % ▼ %▲ % ▼ %▲ % ▼ %
TRIM Trims ± ± ± ±
D/R Exponential Settings ▲± %▼± %▲± %▼± %
MIXING SSETTINGS
P.MIX Programmable Mixer INH • ON Master Channel ___ Slave Channel ___ Rate ± __ %
W.MIX Wing Mixer Type INH • ON FP(flaperon) • v(v-tail) • FPv(flaperon + v-tail) • EL(elevon)