GIANT NEOSTRACK GPS enabled cycling computer User Manual neostrack QSG 20161121
Giant Manufacturing Co., Ltd. GPS enabled cycling computer neostrack QSG 20161121
GIANT >
Users Manual
EN
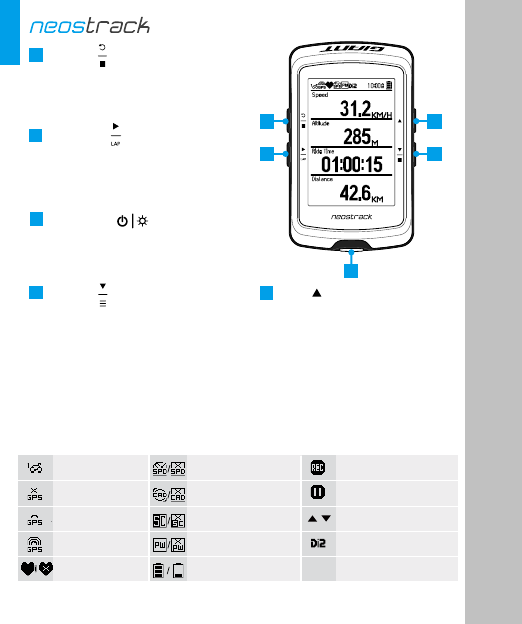
Icon Description
No Signal (not fixed)
Weak Signal (fixed)
Bike 1-7
Strong Signal (fixed)
Log Record in Progress
Cadence Sensor
active / inactive
Speed Sensor
active / inactive
Power Status
Heart Rate Sensor
active / inactive
Recording is paused
Current speed is faster/
slower than average speed
/
4
5
3
2
1
Power Sensor
active / inactive Di2 Sensor Active
Combo Sensor
active / inactive
•
•
•
4PAGE ( )
In free cycling mode, long press to return
to Main Menu.
In Meter view, press to switch meter
In Menu, press to move down to scroll
through menu options.
• When recording, long press to enter into
Shortcut Menu.
screen page.
•
•
1BACK ( )
Press to return to the previous page or
cancel an operation.
When recording, press to pause recording.
Press it again to stop recording.
( )
•
•
•
2LAP/OK
In Menu, press to enter or confirm a
selection.
When recording, press to mark the lap.
In free cycling*, press to start recording.
5
•
•
UP ( )
In Meter view, press to switch
meter screen page.
In Menu, press to move up to
scroll through menu options.
( )
•
•
•
3ON/OFF
Press and hold to turn the device off.
Press to turn the device on.
Press to turn on/off backlight.
* Free cycling is a mode with no recording. neostrack syncs with the movement of bicycles.
It starts when you start pedaling, allowing you to view real time data without recording.
1
English
繁中
簡中
Français
Language
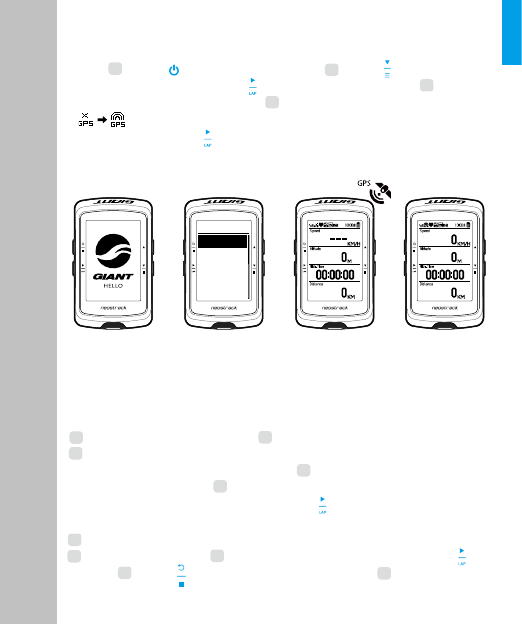
Before first use, please charge your device for at least 4 hours. To
begin 1. Press to turn on the device. 2. Press to select the
display language and press to confirm the selection. 3. Device
will search for satellite signals. 4. After GPS signal is fixed *,
( ) just ride on and enjoy your workout in free cycling mode,
and to record, press to start recording.
* To get GPS acquisition, please take the device to an open sky outdoor environment.
With Track feature, you can plan trip via neostracker App, use
pervious rides from History or download gpx tracks online.
Plan Trip via Giant neostracker App
1. Download neostracker app. 2. Sign up / log in on neostracker app.
3. Tap Plan Trip to start planing trip by putting pins on map or
entering locations in the slide menu. 4. Download the planned trip
to the device via Sync. 5. In the Main Menu, select Track > Route
and select the planned track and press to start following the track.
From device History
1. In the Main Menu, select History > View to select the desired tracks.
2. Select Create Track 3. Enter a name of the track and press to
save it. 4. Press to be back to the Main Menu. 5. Select Track
Track
Step 4Step 3Step 2Step 1
Getting Started
EN
2

With the access to the internet, your neostrack computer automatically
updates GPS data, uploads recorded tracks, downloads planned trips
from app server and checks for available firmware update.
It is required to add your device to your Giant neostracker account before
syncing data for the first time. To add. 1. Scan the QR code labeled on
the device securing paperboard inside the box with your smartphone to
download neostracker App. 2. After neostracker App is installed,
please sign up for an account. 3. In the app, tap “Scan Now” to scan the
same QR code labeled on the device securing paperboard to add its
UUID to your neostracker App account (or go to neostracker App:
Setup > My Setup > Device Manager later). 4. If a “successfully added!”
message pops up on the neostracker App, you have successfully added
your device to your neostracker account. If not, please tap “Retry” to
scan again or enter the 16 digit device UUID number on the back of your
device manually.
EN
Sync (WLAN)
Sync Data to / from Giant neostracker App
> Route and select the saved track and press to start following
the track.
From 3rd Party Websites
1. Download gpx files to your computer. 2. Use USB cable to connect
the device to the computer. 3.Copy the gpx files from your computer
and paste to the Add Files folder of the device. 4. Remove USB cable.
5. In the Main Menu, select Track > Route and press to start
following the track.
To perform Sync, please first go to your device: Setup > Network >
Connect to set a wireless network connection, then go to Sync in the
main menu and let your computer smartly guide you through the syncing
process.
Note:
● Firmware updates usually take longer to download and install, select
NO if you prefer to update it on your next sync.
3
Sensor Pair
In the Main Menu, select Setup>Bike Data>Bike 1>Sensors>
Heart Rate,Speed,Cadence,Speed/CAD,Power,Di2>More>Rescan
Share Your Tracks via USB
1.Connect the device to your computer via USB cable. 2. Select fit files
from Giant folder in the device. 3. Upload files to popular training sites
including STRAVA, Training Peaks, Endomondo, Map My Ride, Fit
track and many more.
EN
Reset Neostrack
Long press all three keys ( / / )
at the same time to reset the device.
Note:
Please go to corp.brytonsport.com > Support > Download
to download User’s Manual.
Item Description
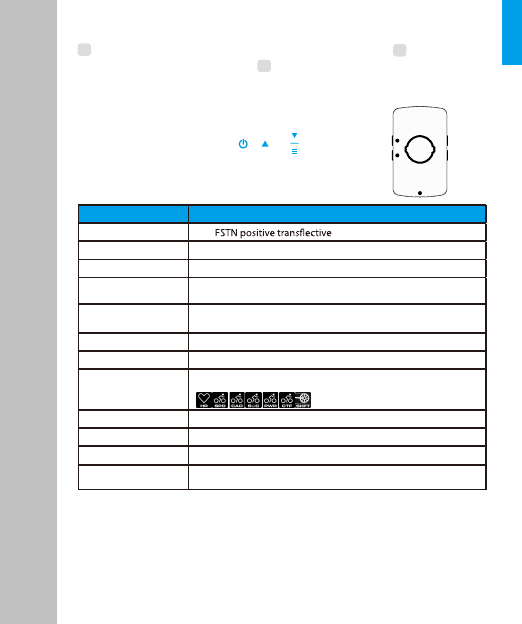
Display 2.6" dot-matrix LCD
Physical Size 92.9 x 57 x 20.3 mm
Weight 78g
Operating
Temperature
-10°C ~ 50°C
Battery Charging
Temperature 0°C ~ 40°C
Battery Li polymer rechargeable battery
Battery Life 33 hours with open sky
GPS Integrated high-sensitivity GPS receiver with embedded antenna
ANT+™
IEEE 802.11 b/g/n
Wireless Local
Area Network
Featuring certied wireless ANT+™ connectivity.Visit
www.thisisant.com/directory for compatible products
Water Resistant
BLE Smart Bluetooth smart wireless technology with embedded antenna
Withstand immersion in water up to 1meter for up to 30 minutes
Specication
4
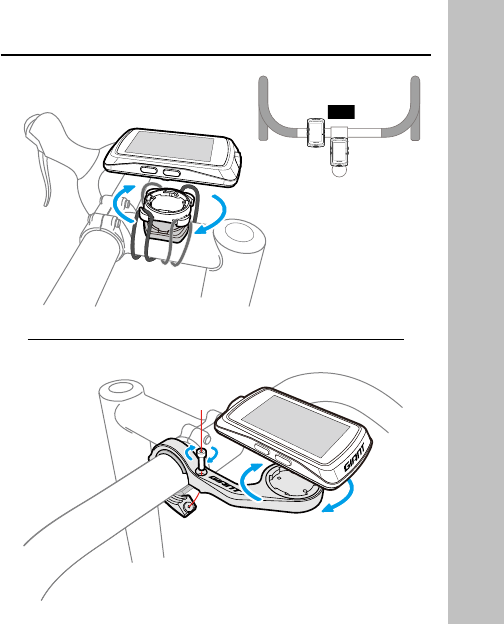
Installation
or
Federal Communication Commission Interference Statement
This equipment has been tested and found to comply with the limits for a Class B
digital device, pursuant to Part 15 of the FCC Rules. These limits are designed to
provide reasonable protection against harmful interference in a residential installation.
This equipment generates, uses and can radiate radio frequency energy and, if not
installed and used in accordance with the instructions, may cause harmful interference
to radio communications. However, there is no guarantee that interference will not
occur in a particular installation. If this equipment does cause harmful interference to
radio or television reception, which can be determined by turning the equipment off
and on, the user is encouraged to try to correct the interference by one of the
following measures:
. Reorient or relocate the receiving antenna.
. Increase the separation between the equipment and receiver.
. Connect the equipment into an outlet on a circuit different from that to which the
receiver is connected.
. Consult the dealer or an experienced radio/TV technician for help.
FCC Caution: To assure continued compliance, any changes or modifications not
expressly approved by the party responsible for compliance could void the user's
authority to operate this equipment. (Example - use only shielded interface cables
when connecting to computer or peripheral devices).
FCC Radiation Exposure Statement
This equipment complies with FCC RF radiation exposure limits set forth for an
uncontrolled environment. This equipment should be installed and operated with
a minimum distance of 1.5 centimeters between the radiator and your body.
This transmitter must not be co-located or operating in conjunction with any other
antenna or transmitter.
The antennas used for this transmitter must be installed to provide a separation
distance of at least 1.5 cm from all persons and must not be co-located or operating
in conjunction with any other antenna or transmitter.
This device complies with Part 15 of the FCC Rules. Operation is subject to the
following two conditions:
(1) This device may not cause harmful interference, and (2) This device must accept
any interference received, including interference that may cause undesired operation.
Industry Canada Statement
This device complies with Industry Canada licence-exempt RSS standard.
Operation is subject to the following two conditions: (1) this device may not cause
interference, and (2) this device must accept any interference, including interference
that may cause undesired operation of the device.
Le présent appareil est conforme aux CNR d'Industrie Canada applicables aux
appareils radio exempts de licence. L'exploitation est autorisée aux deux conditions
suivantes : (1) l'appareil ne doit pas produire de brouillage, et (2) l'utilisateur de
l'appareil doit accepter tout brouillage radioélectrique subi, même si le brouillage est
susceptible d'en compromettre le fonctionnement.
IC Radiation Exposure Statement:
This equipment complies with IC RSS-102 radiation exposure limit set forth for an
uncontrolled environment. This equipment should be installed and operated
with minimum distance 1.5 cm between the radiator and your body.
Cet équipement est conforme aux CNR-102 d'Industrie Canada. Cet équipement
doit êtreinstallé et utilisé avec une distance minimale de 1.5 centimètres entre
le radiateur et votrecorps. Cet émetteur ne doit pas être co-localisées ou opérant
en conjonction avec autreantenne ou émetteur. Les antennes utilisées pour cet
émetteur doivent être installés etfournir une distance de séparation d'au moins
1.5 centimètre de toute personne et doit pas être co-située ni fonctionner en
conjonction avec une autre antenne ou émetteur.