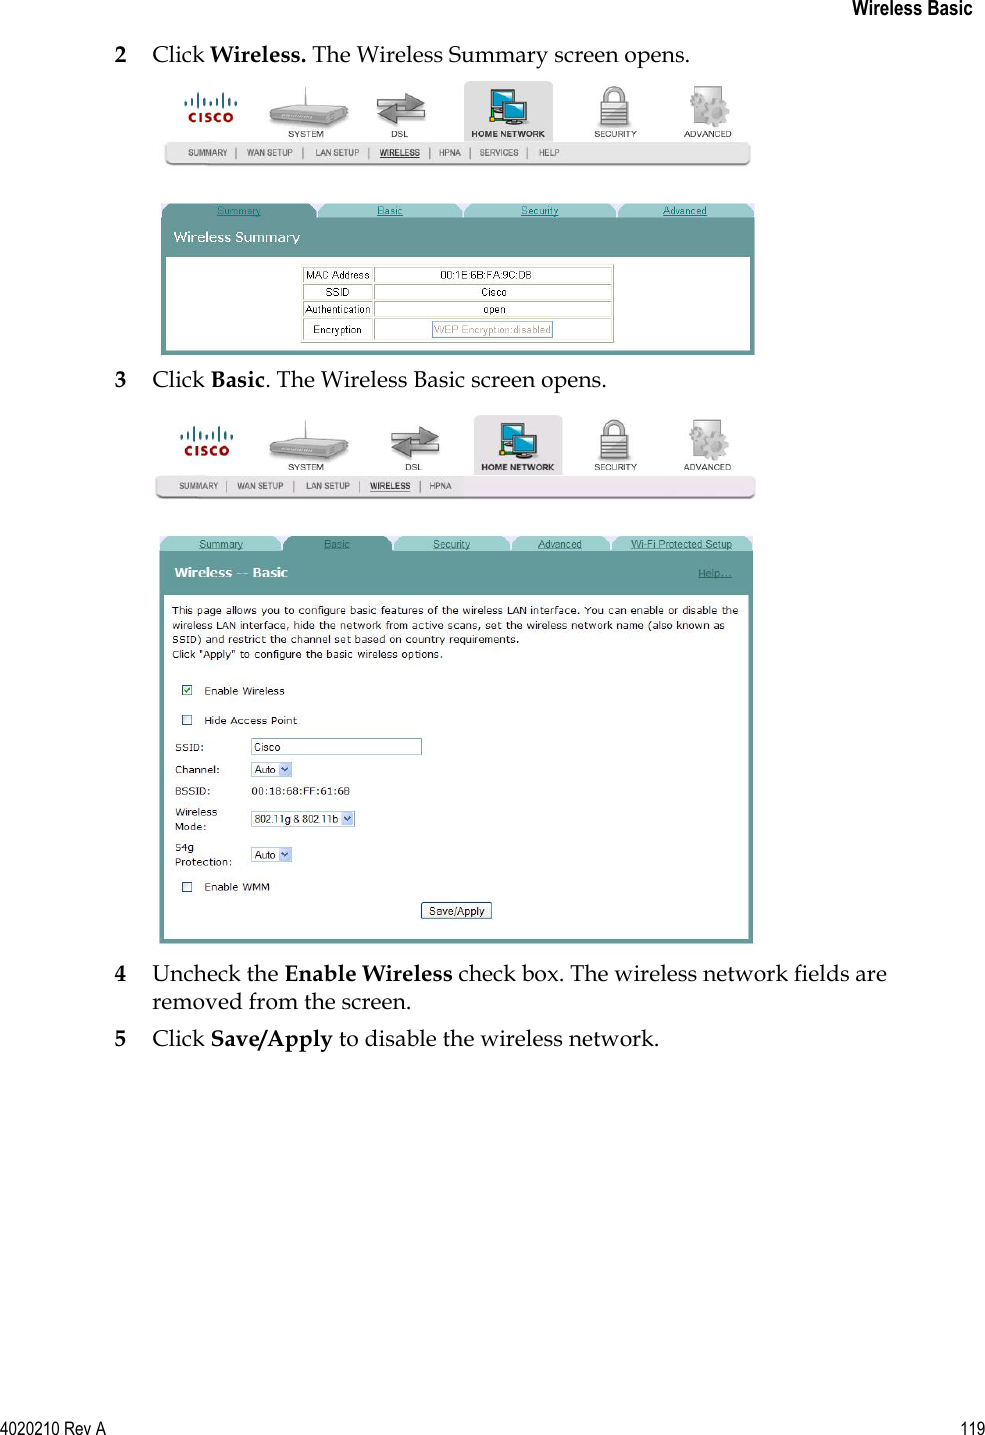
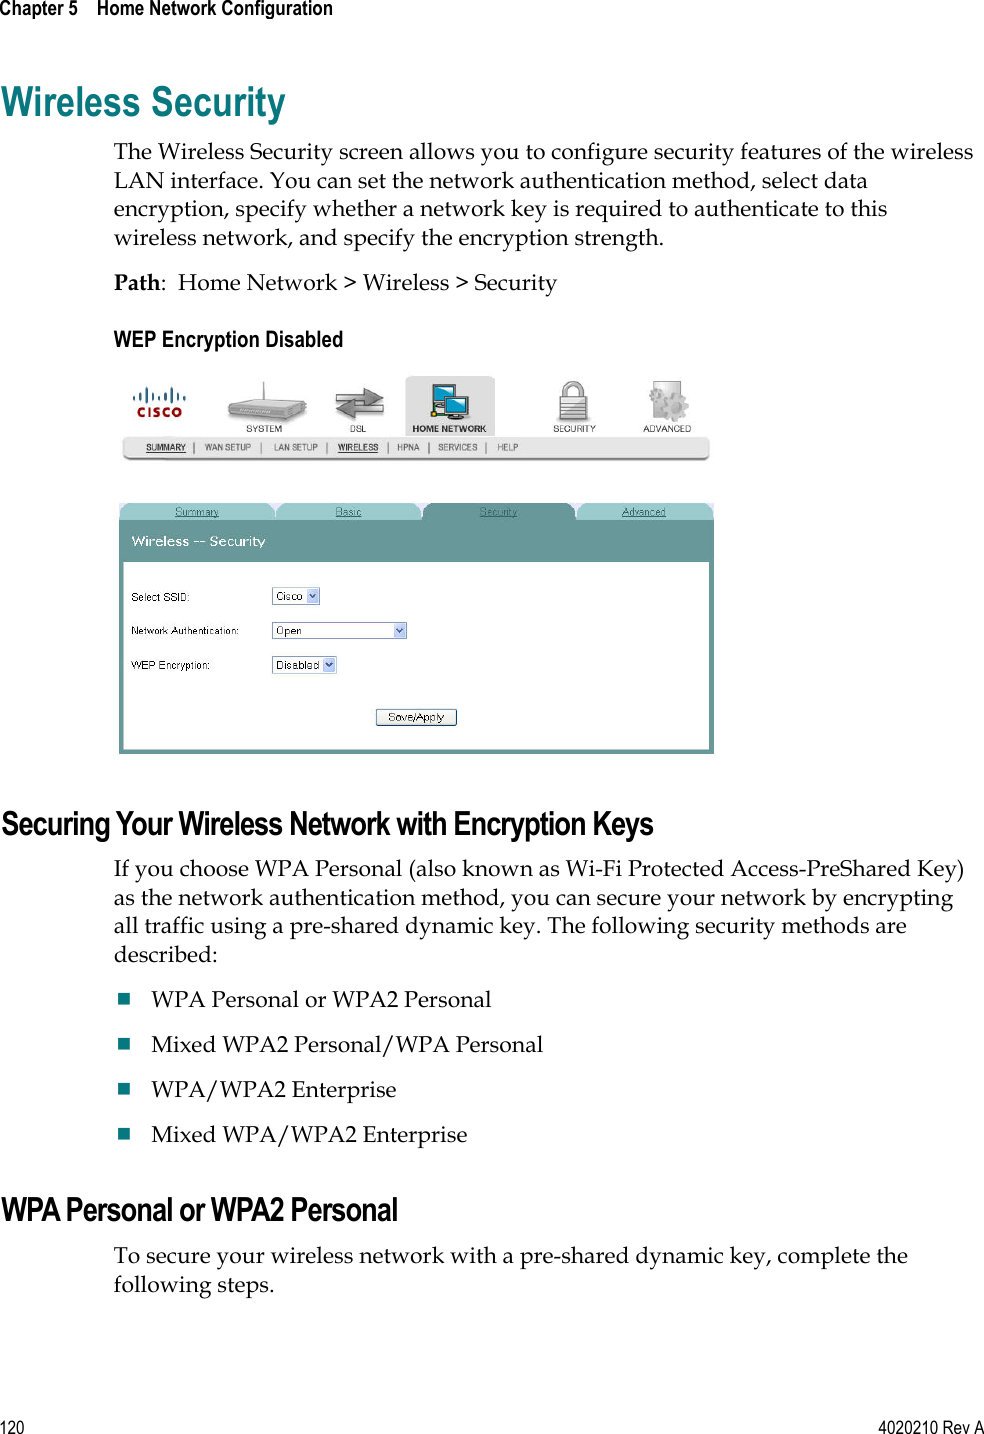
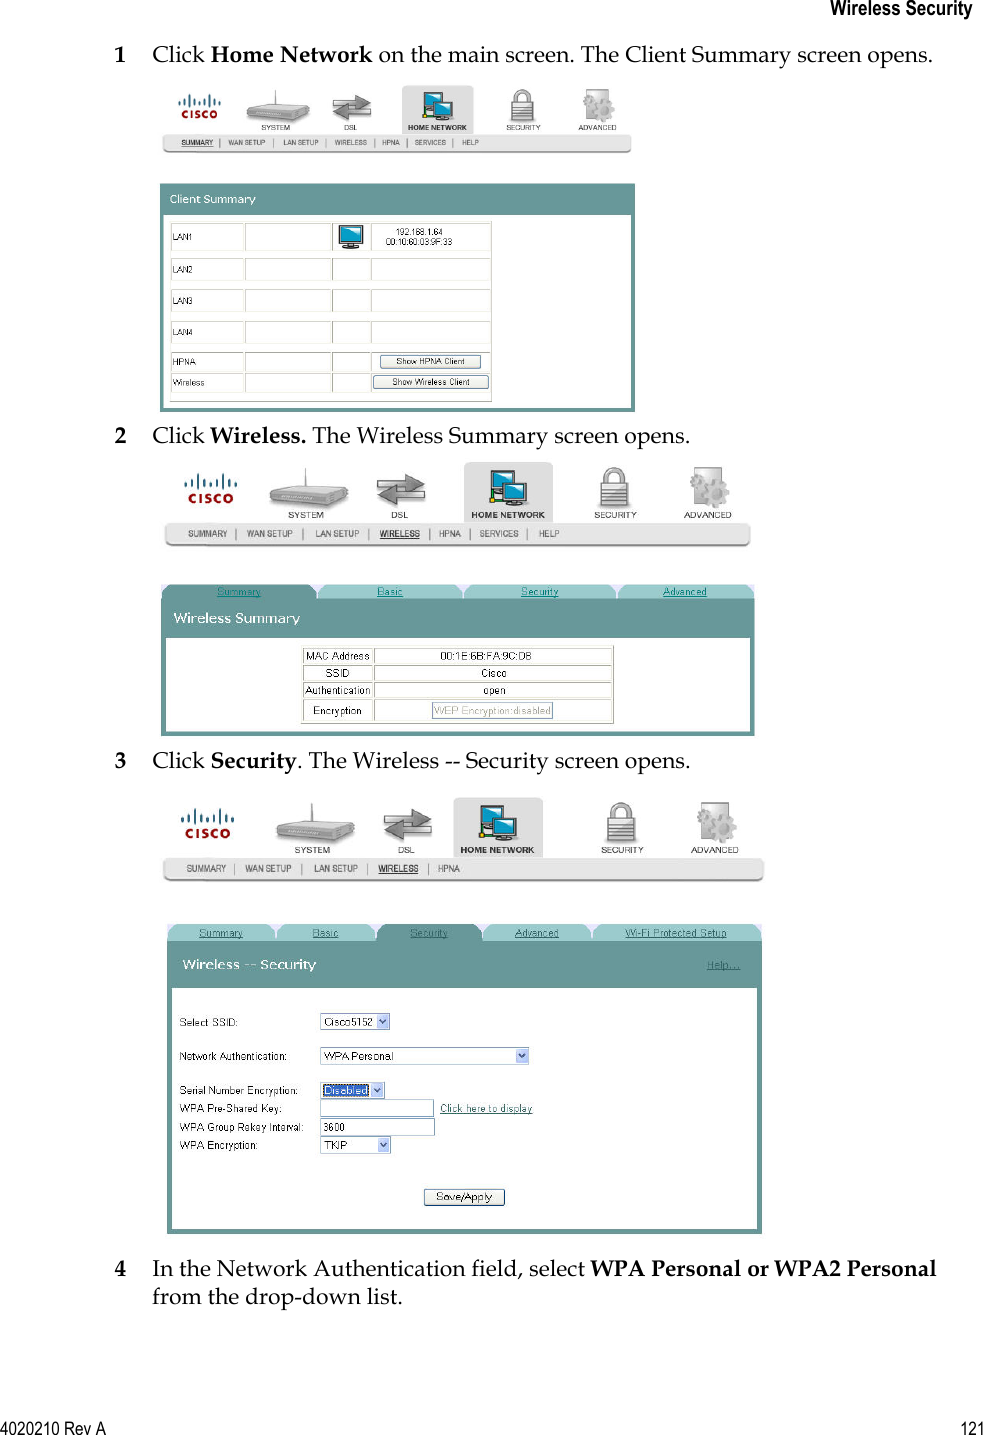
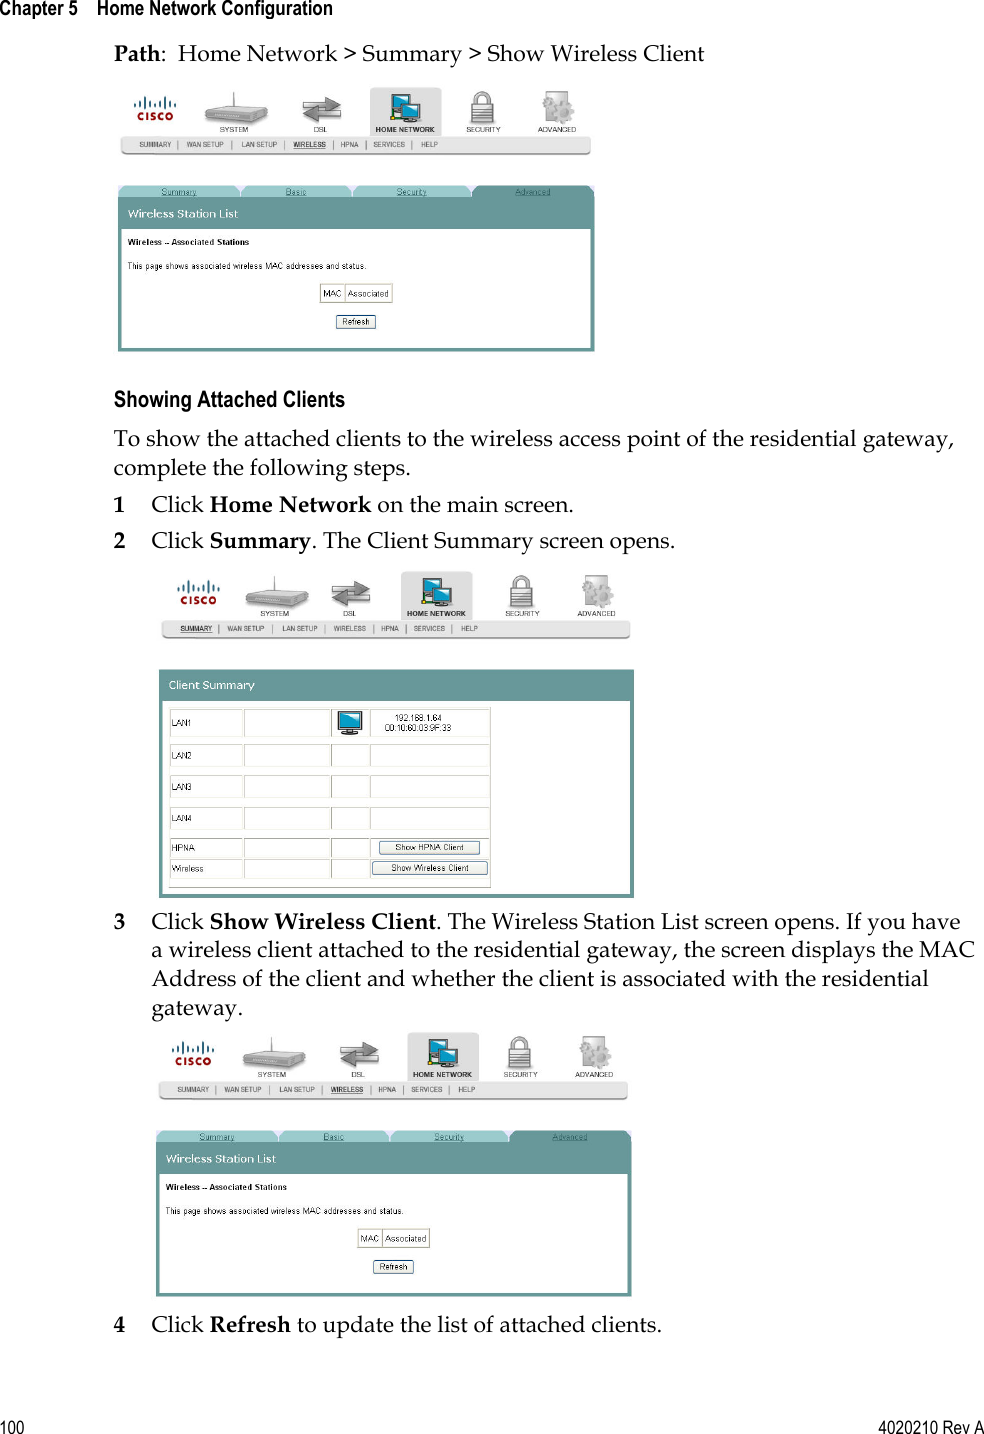
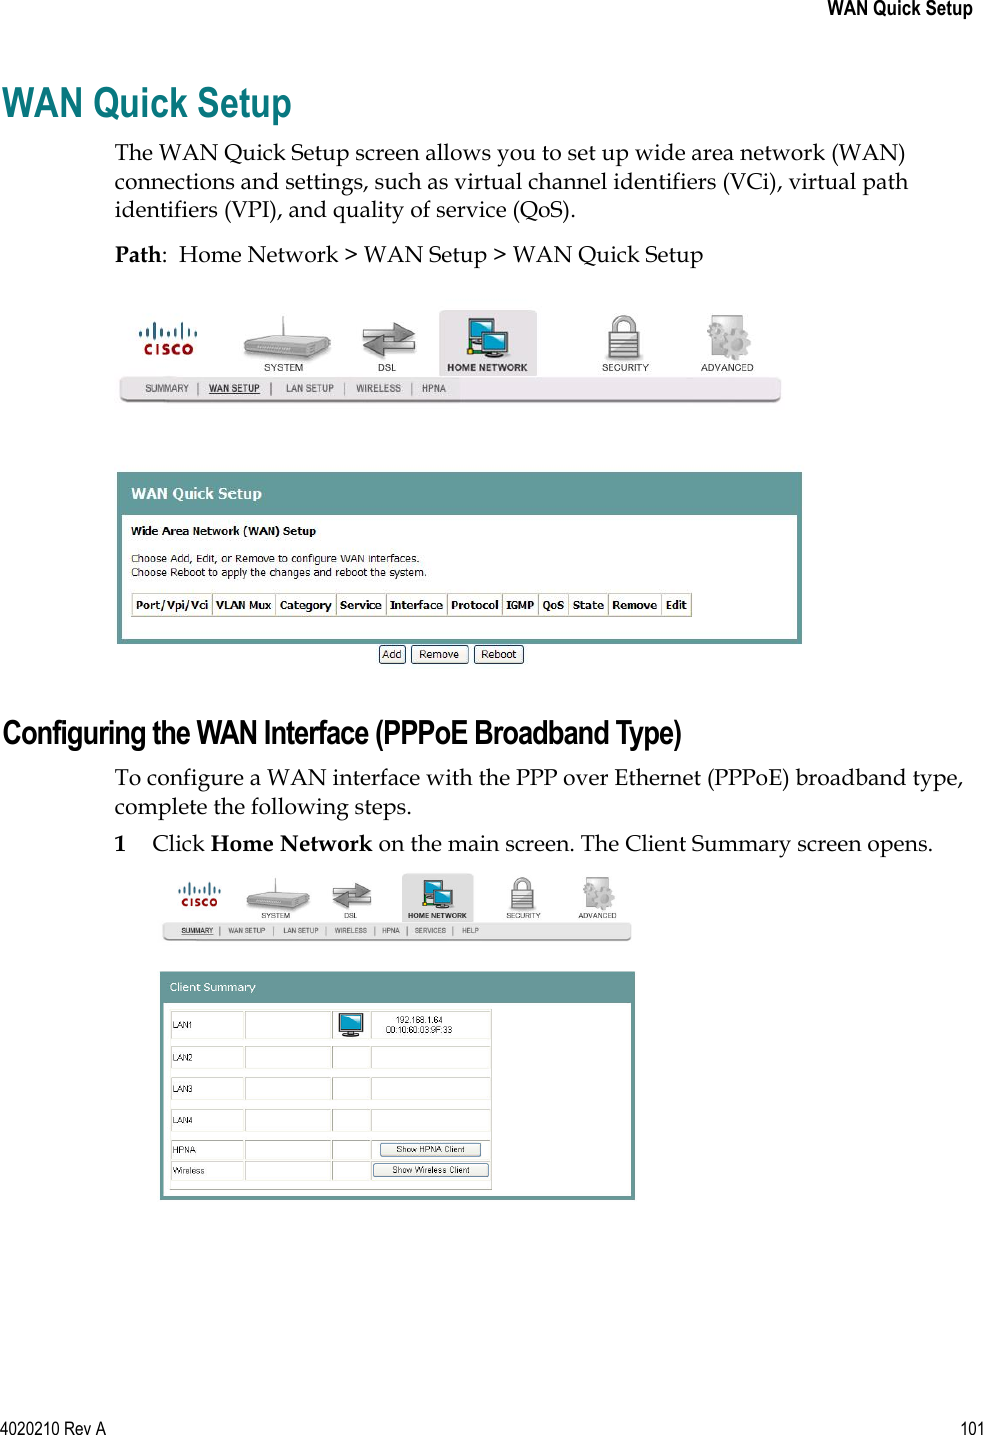
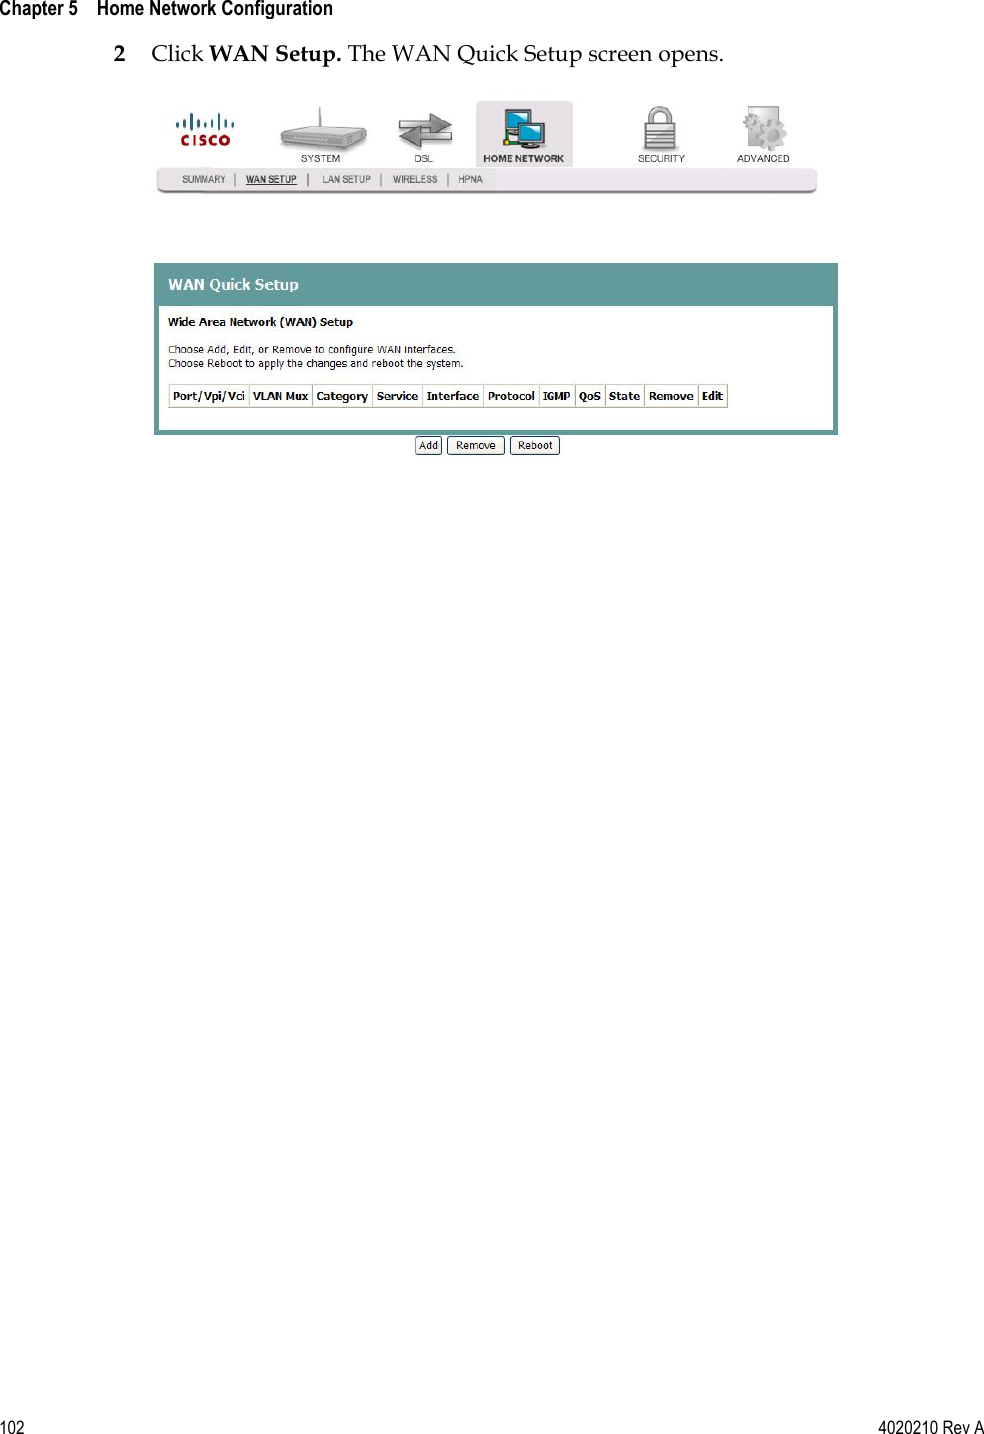
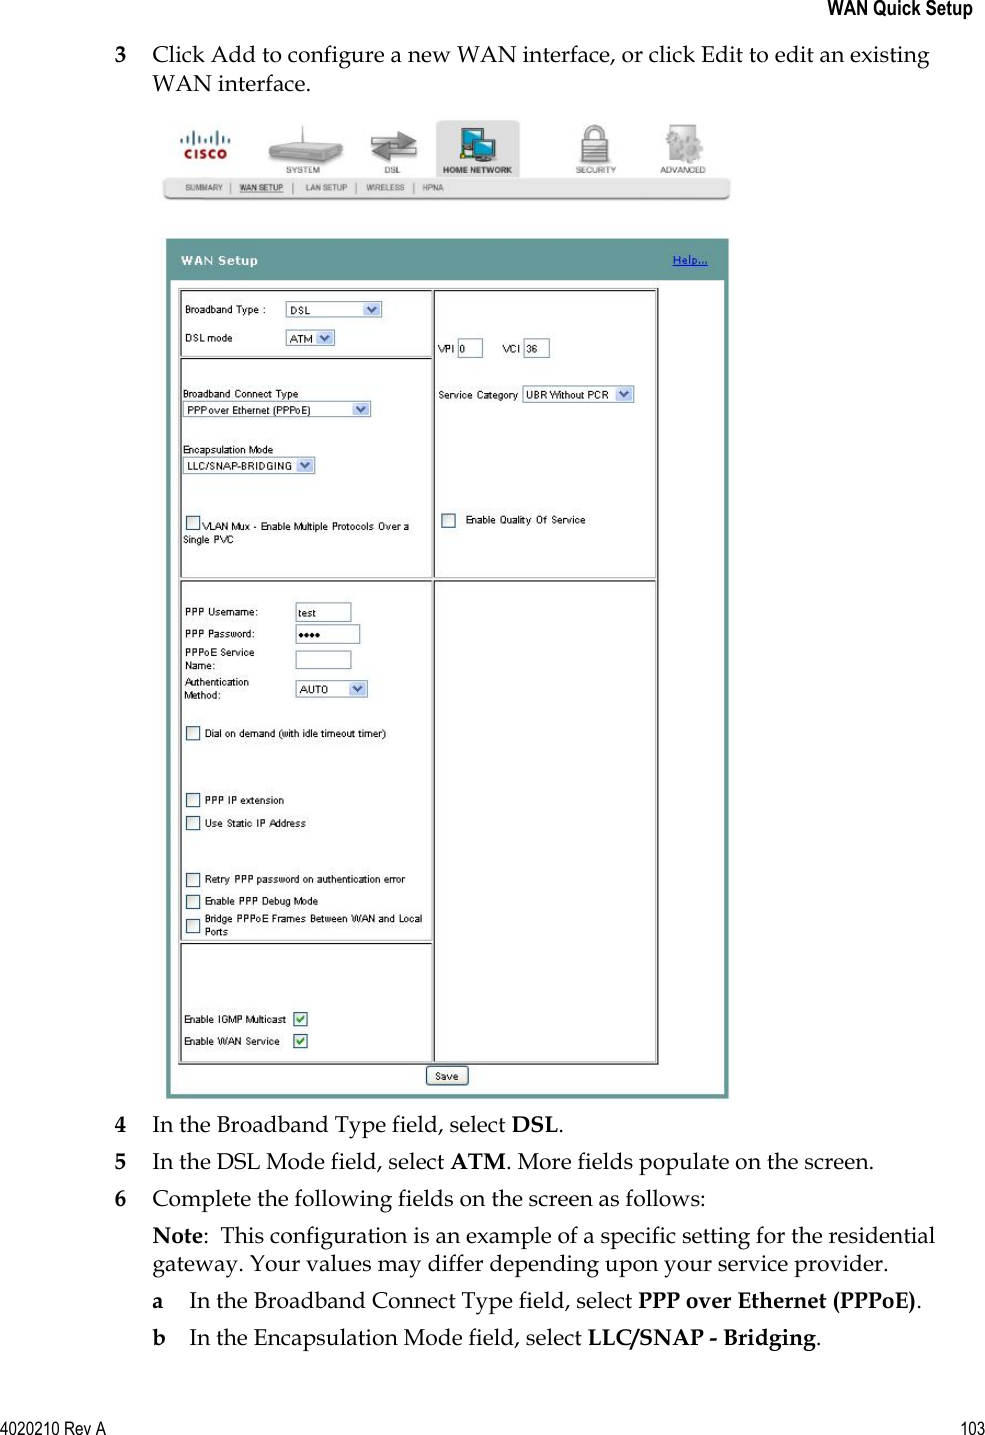
GemTek Technology ADV981119G ADSL2+ Residential Gateway User Manual Cisco 4020210A
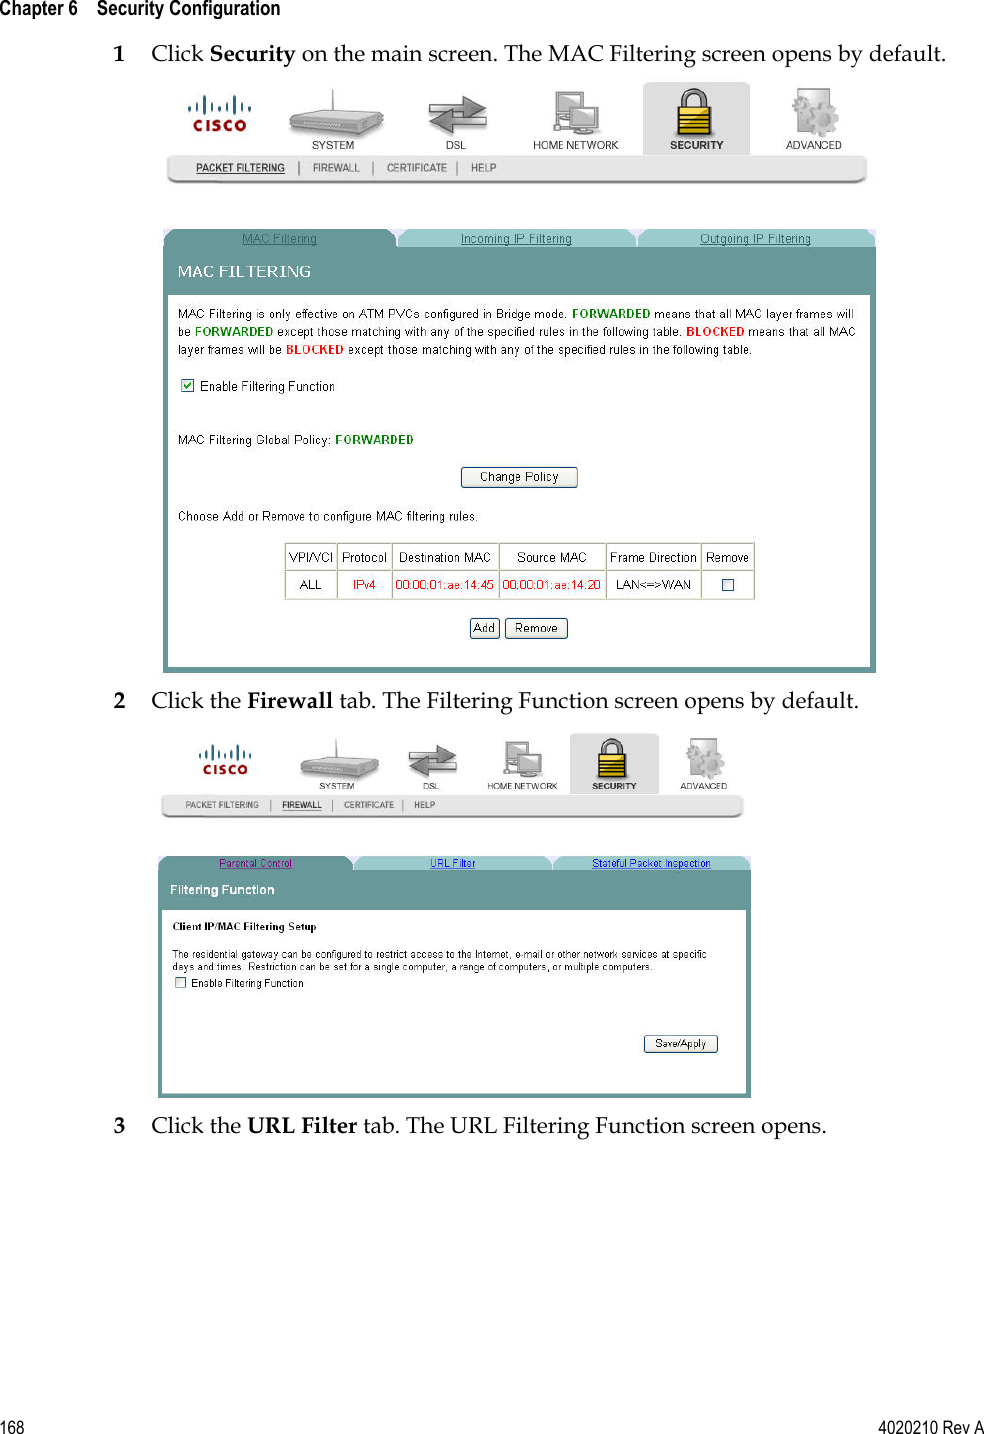
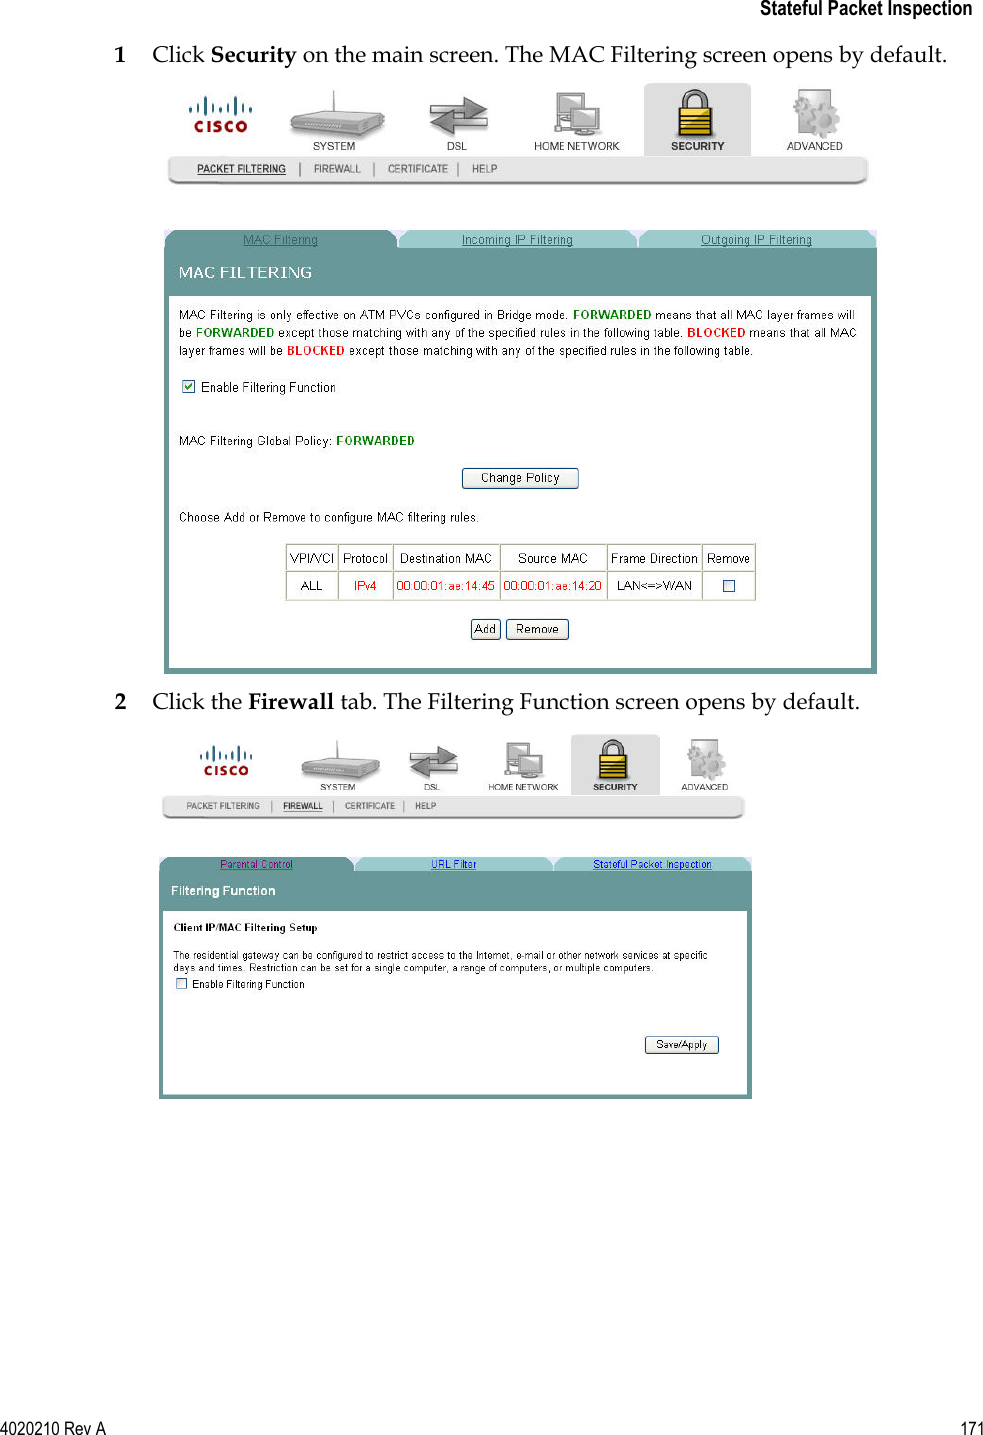
Gemtek Technology Co., Ltd. ADSL2+ Residential Gateway Cisco 4020210A
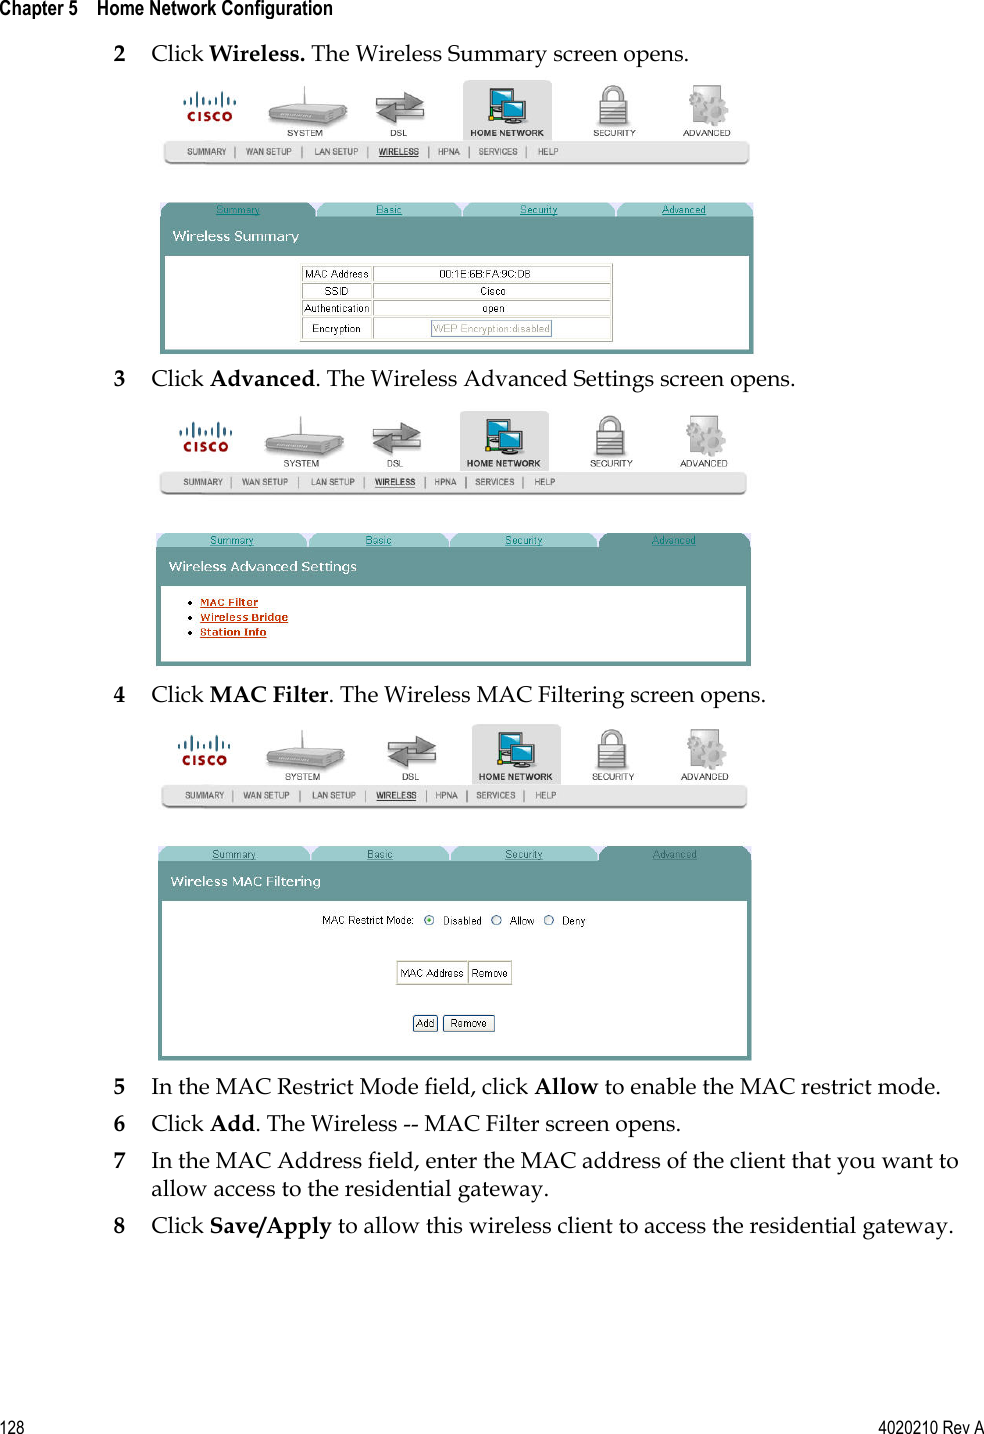
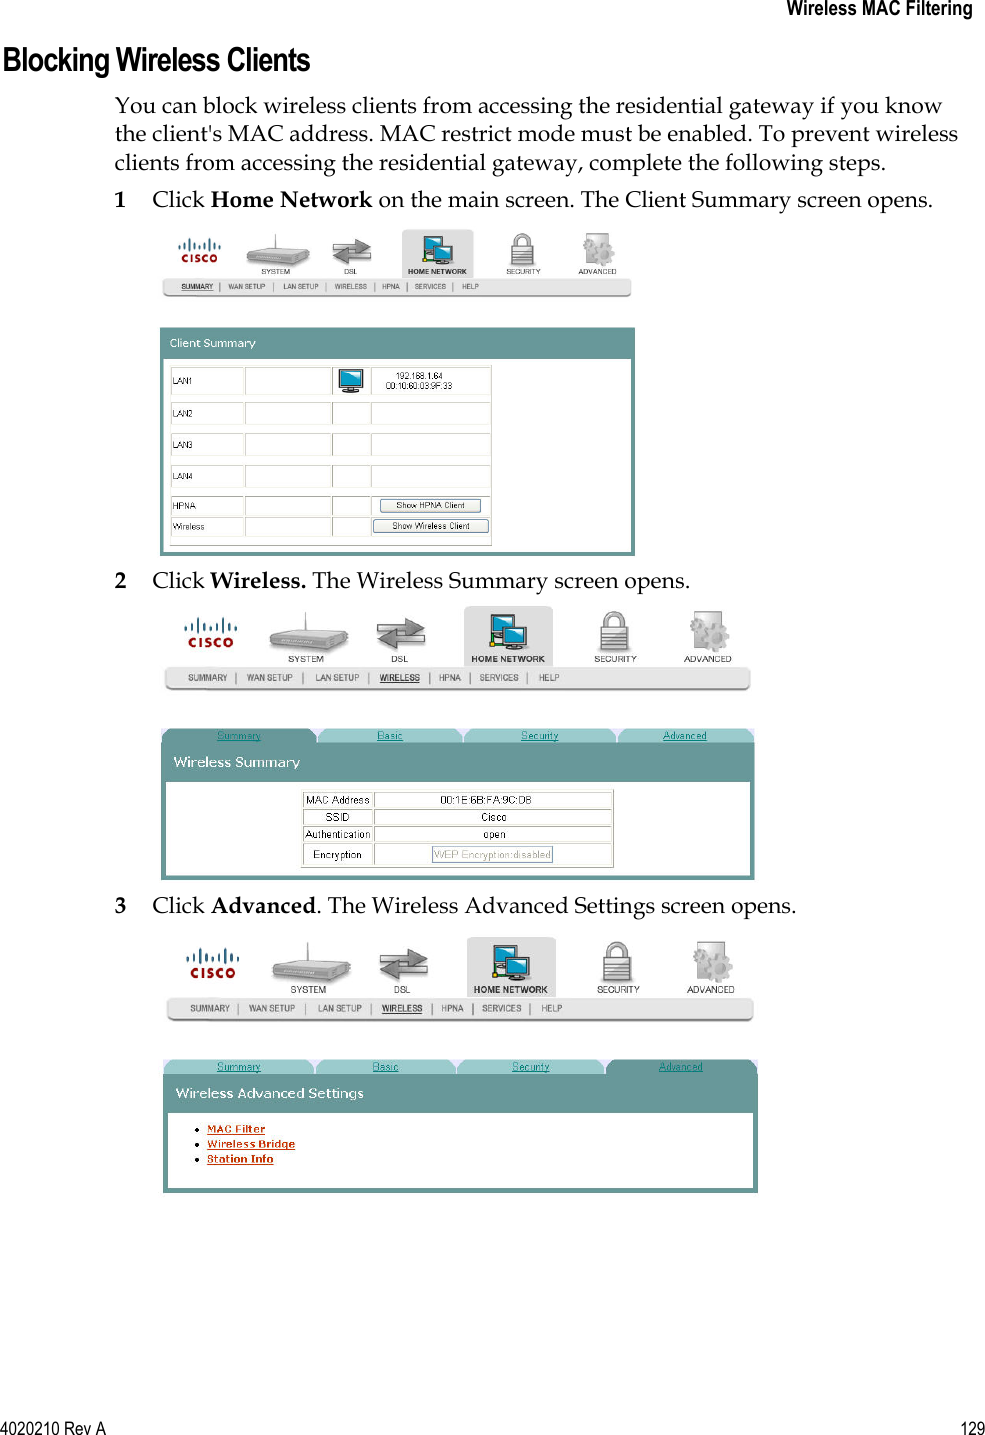
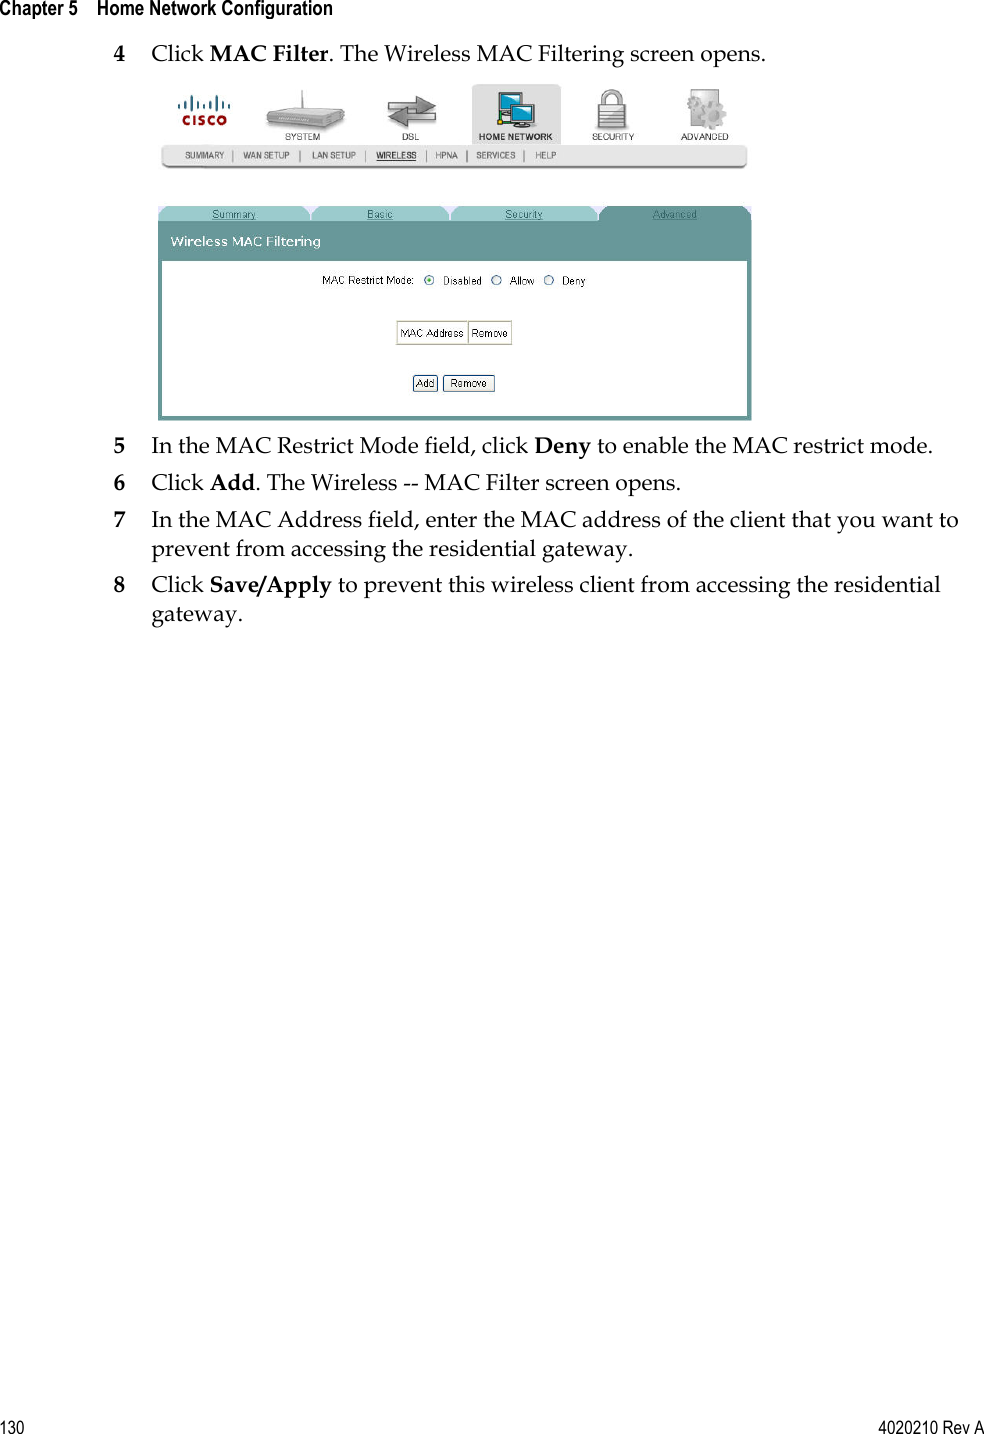
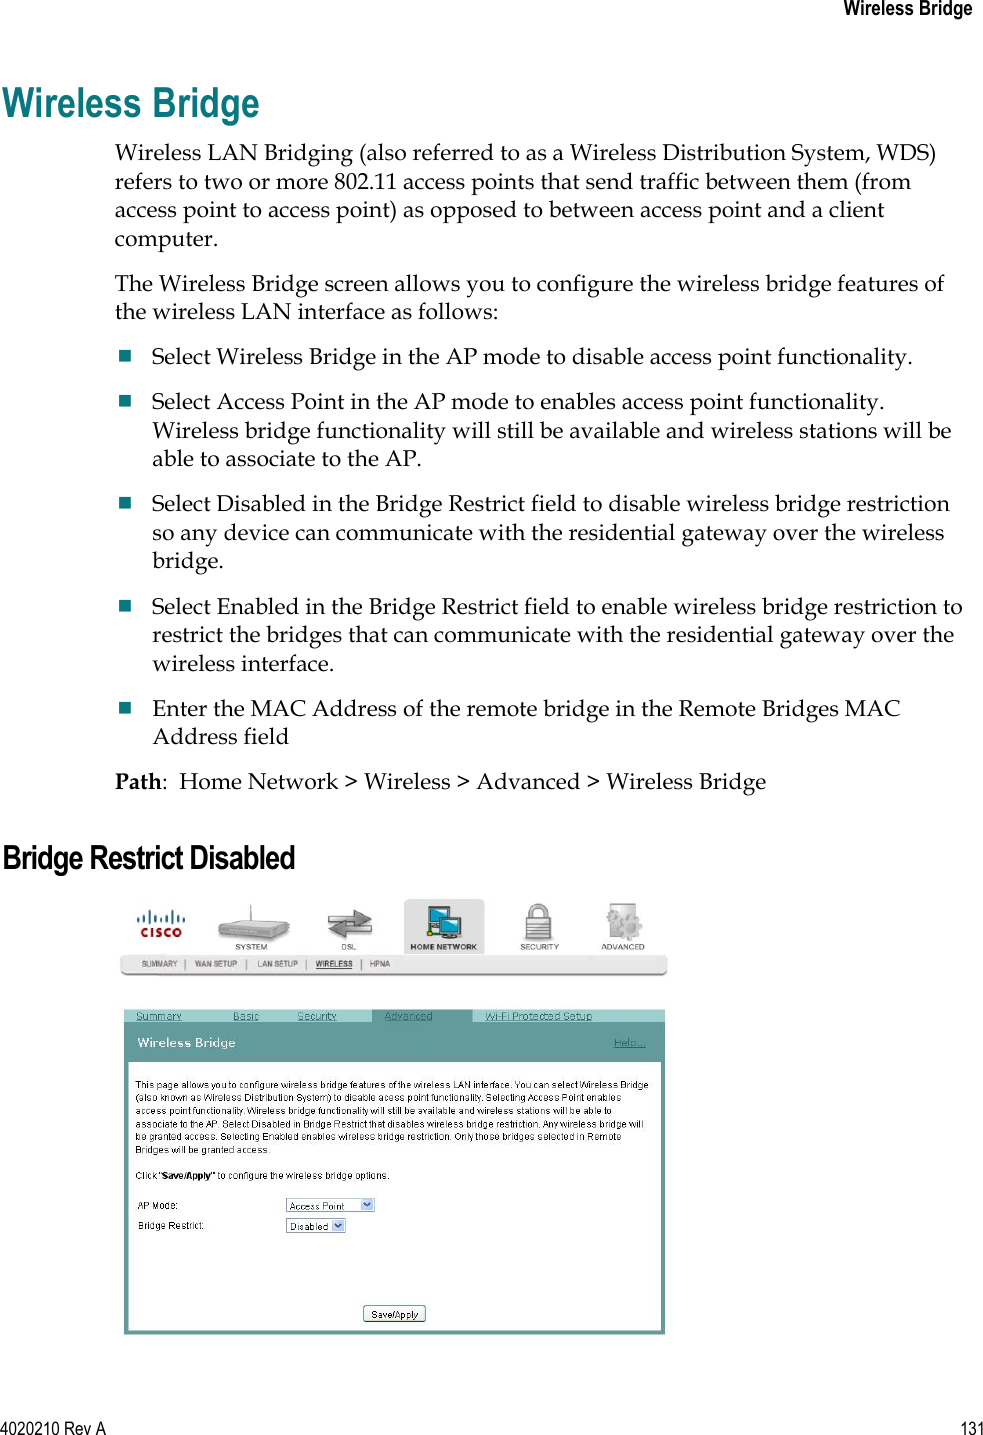
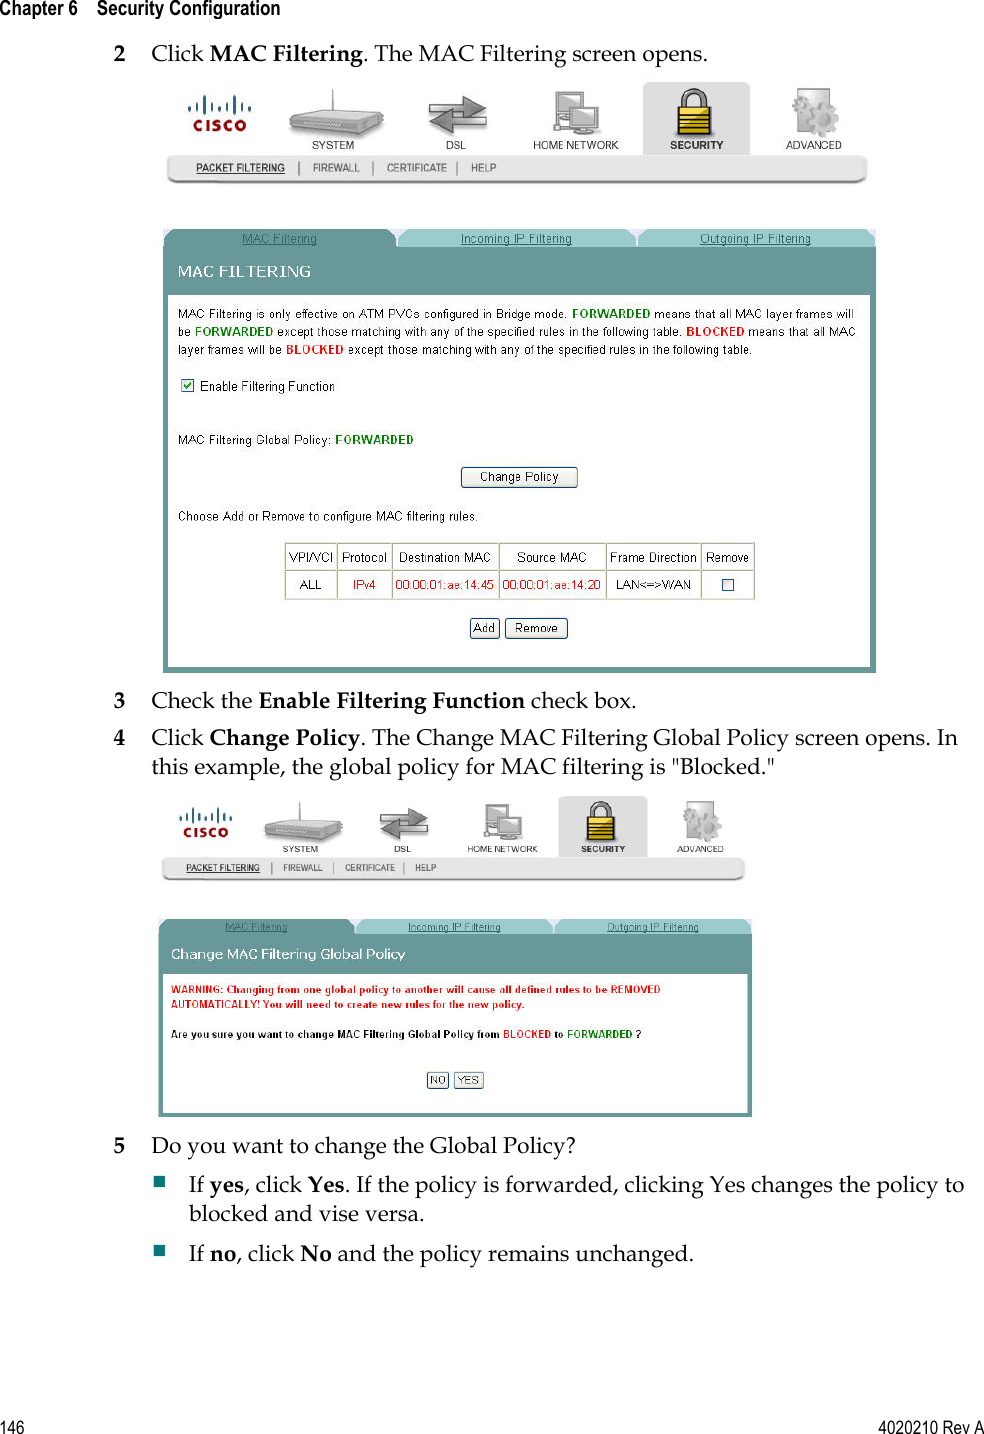
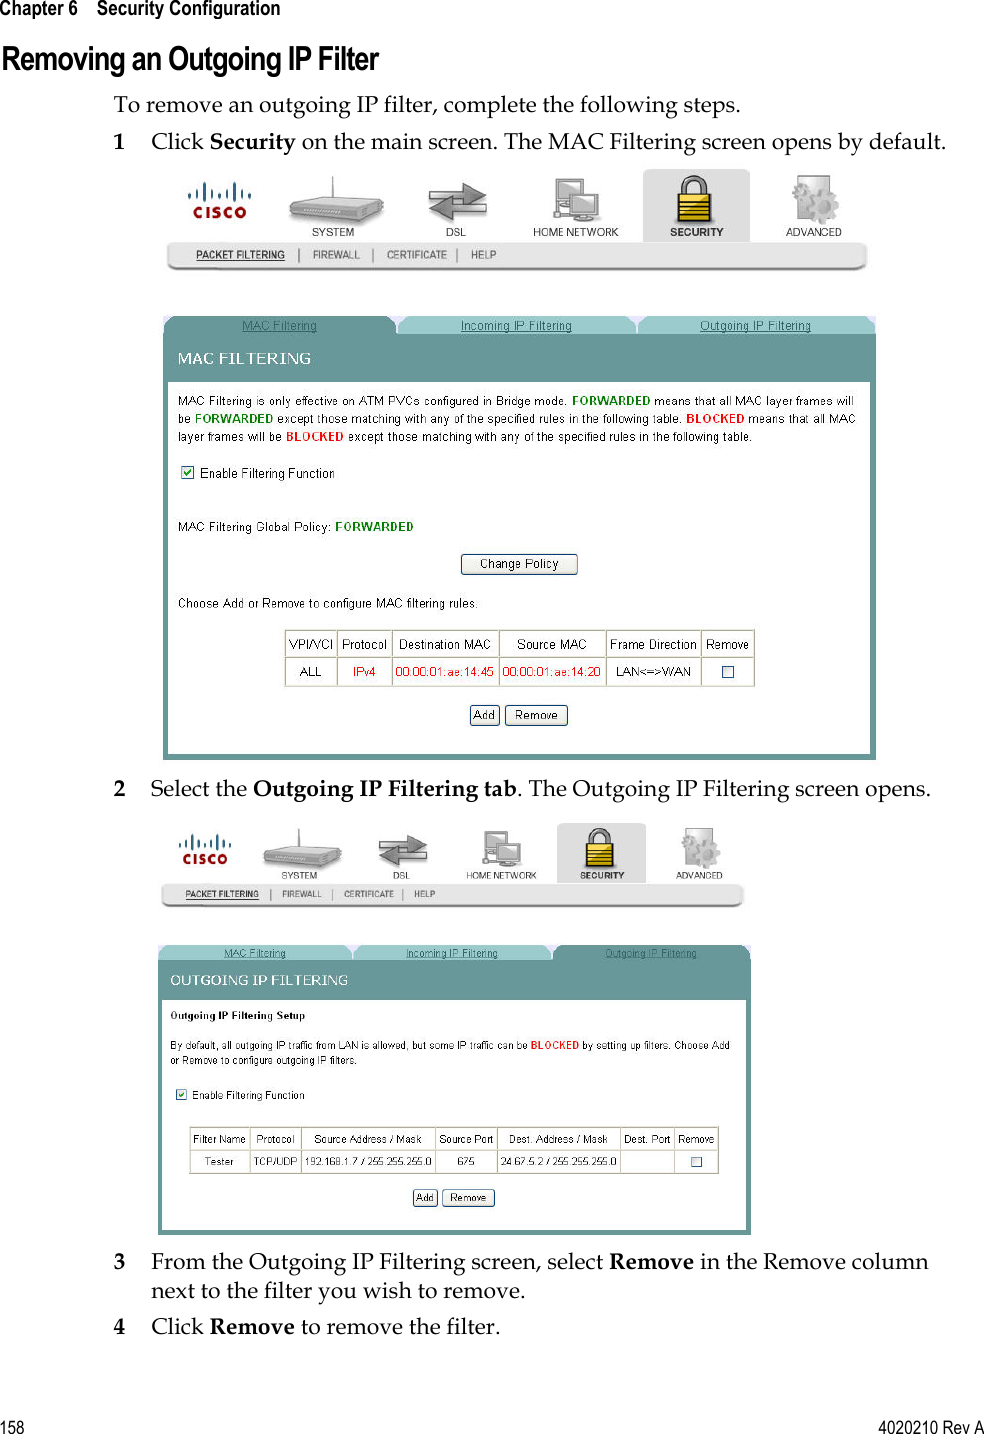
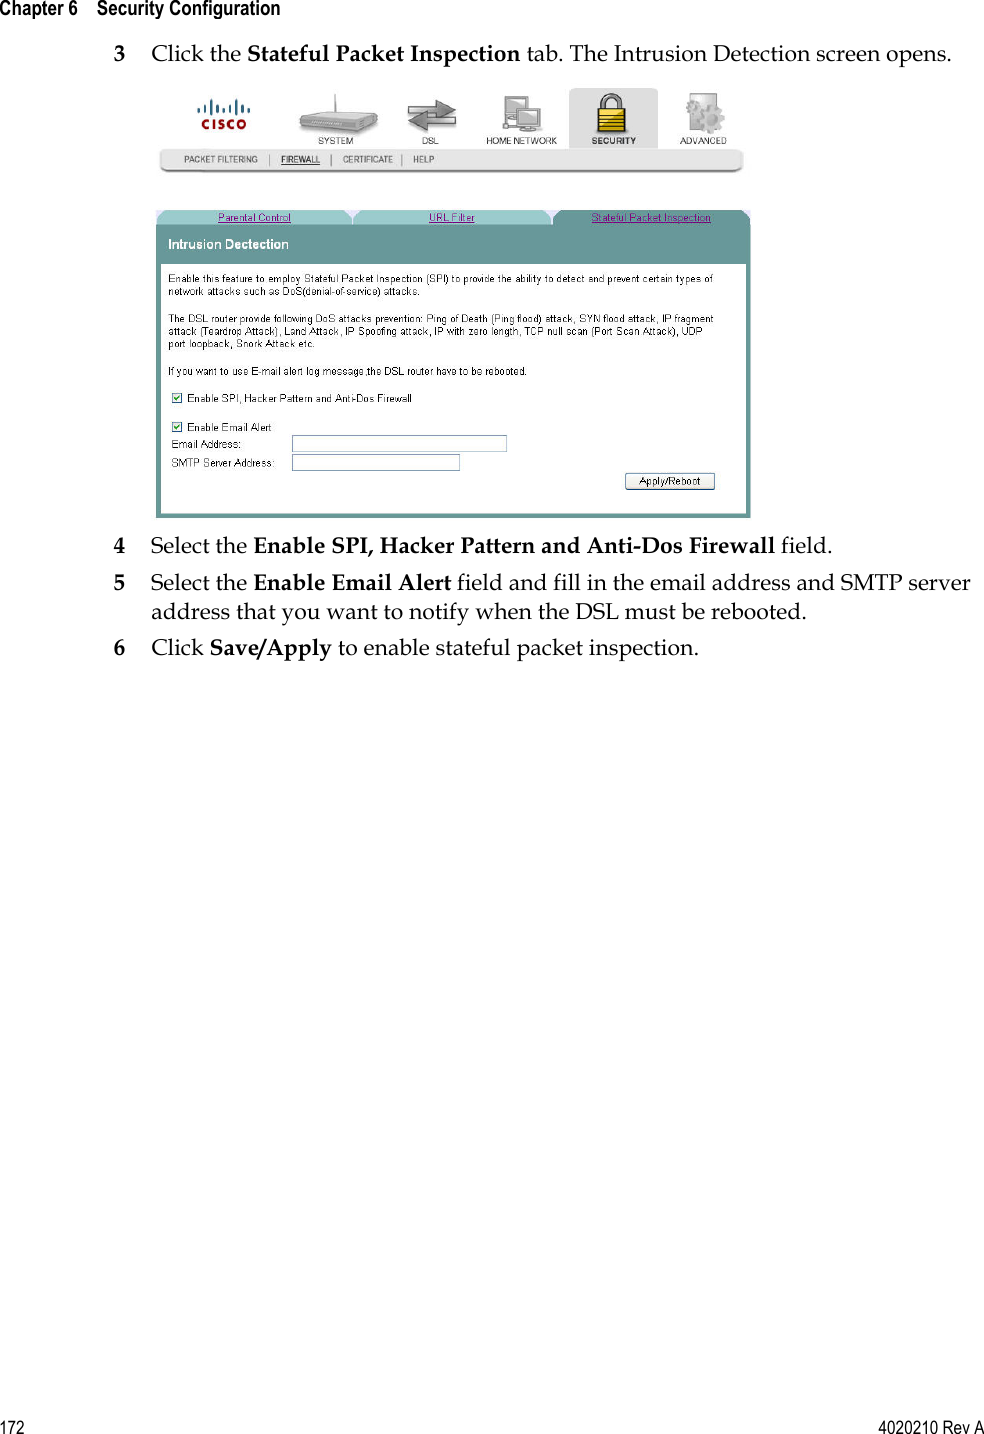
UserManual.wiki
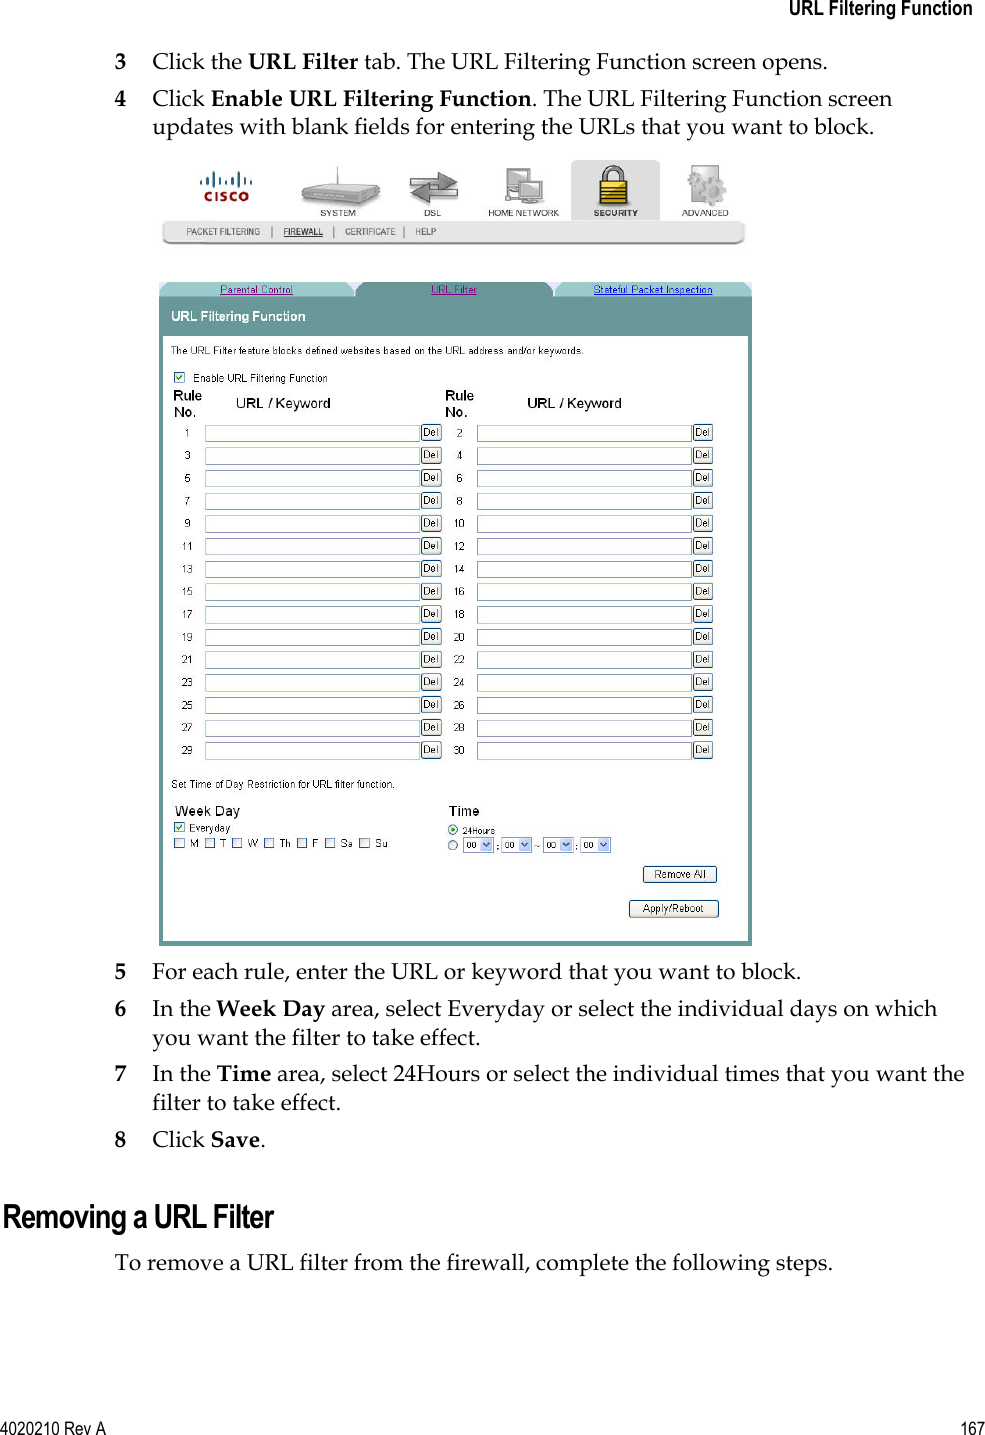
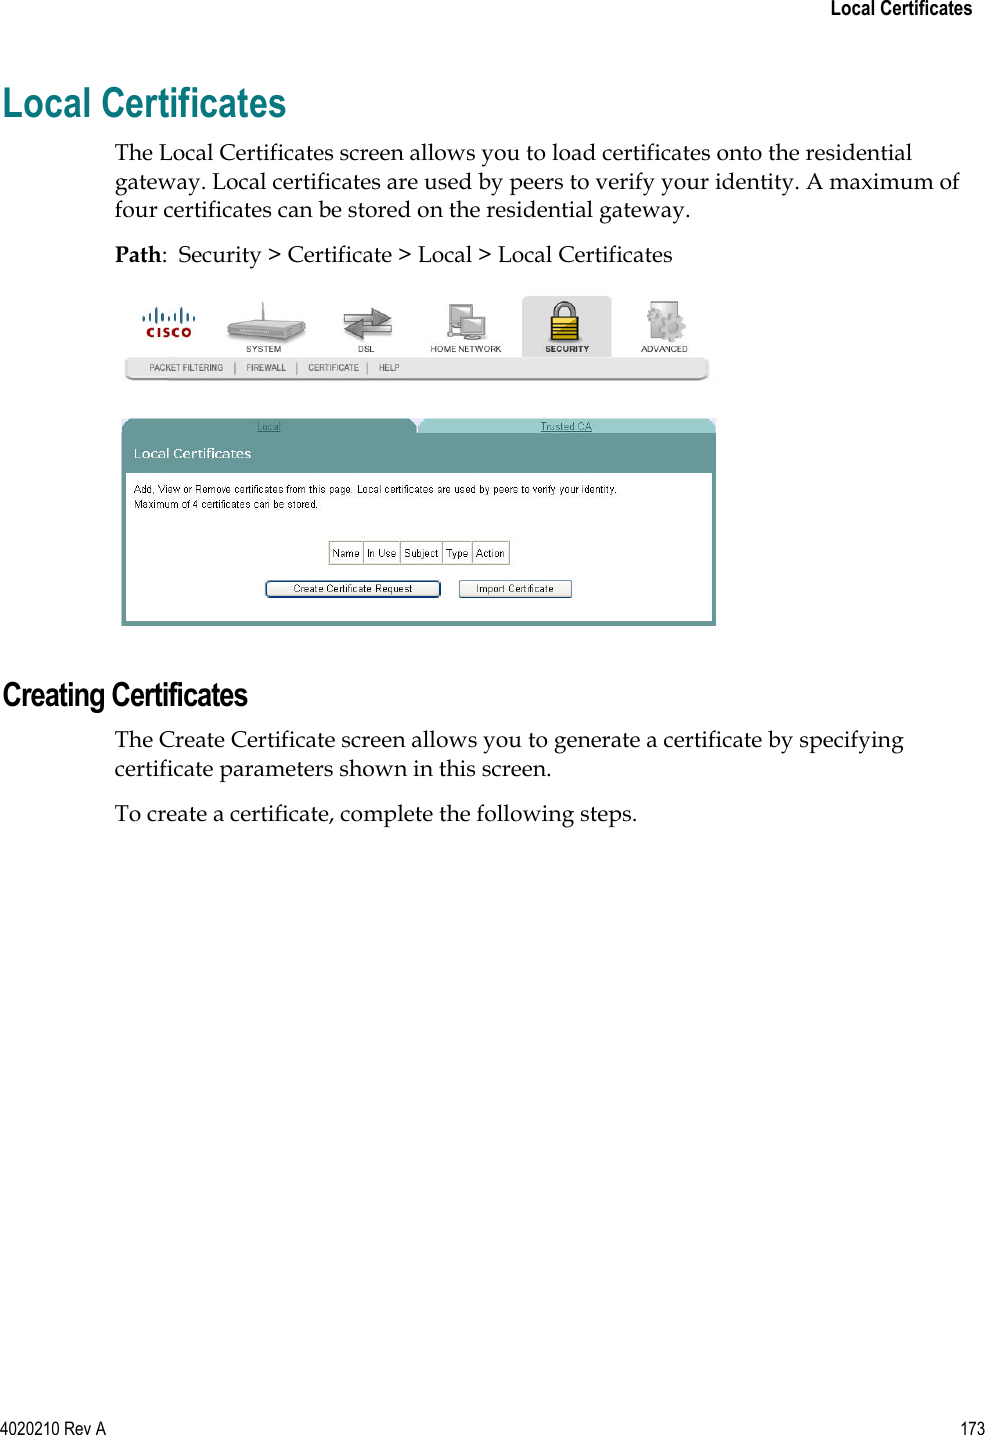
>
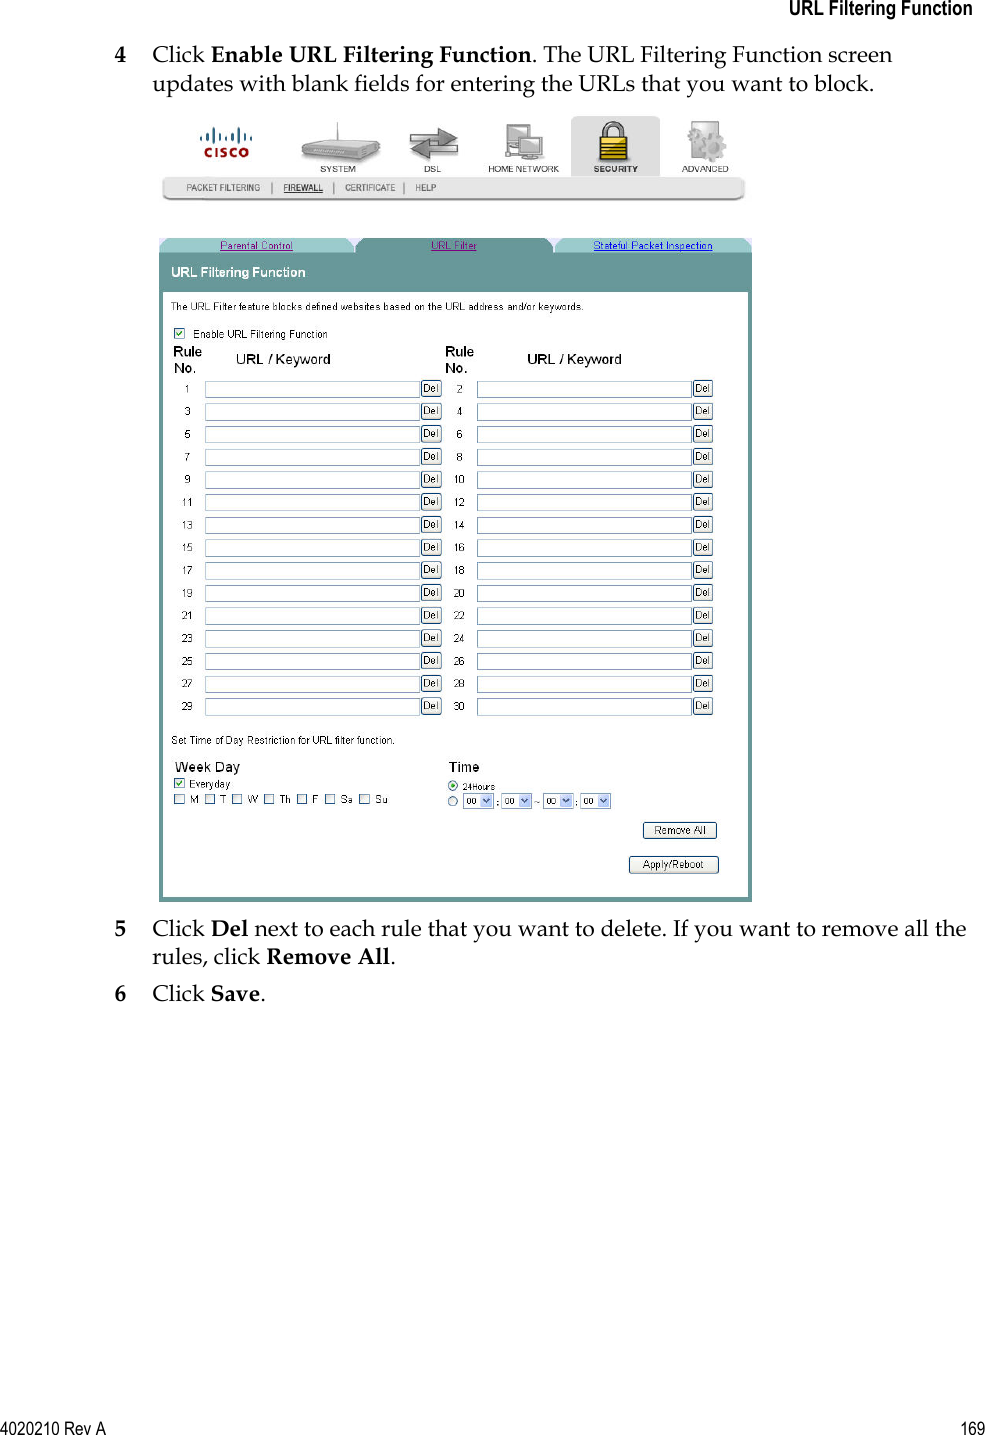
GemTek Technology
>
ADV981119G User Manual
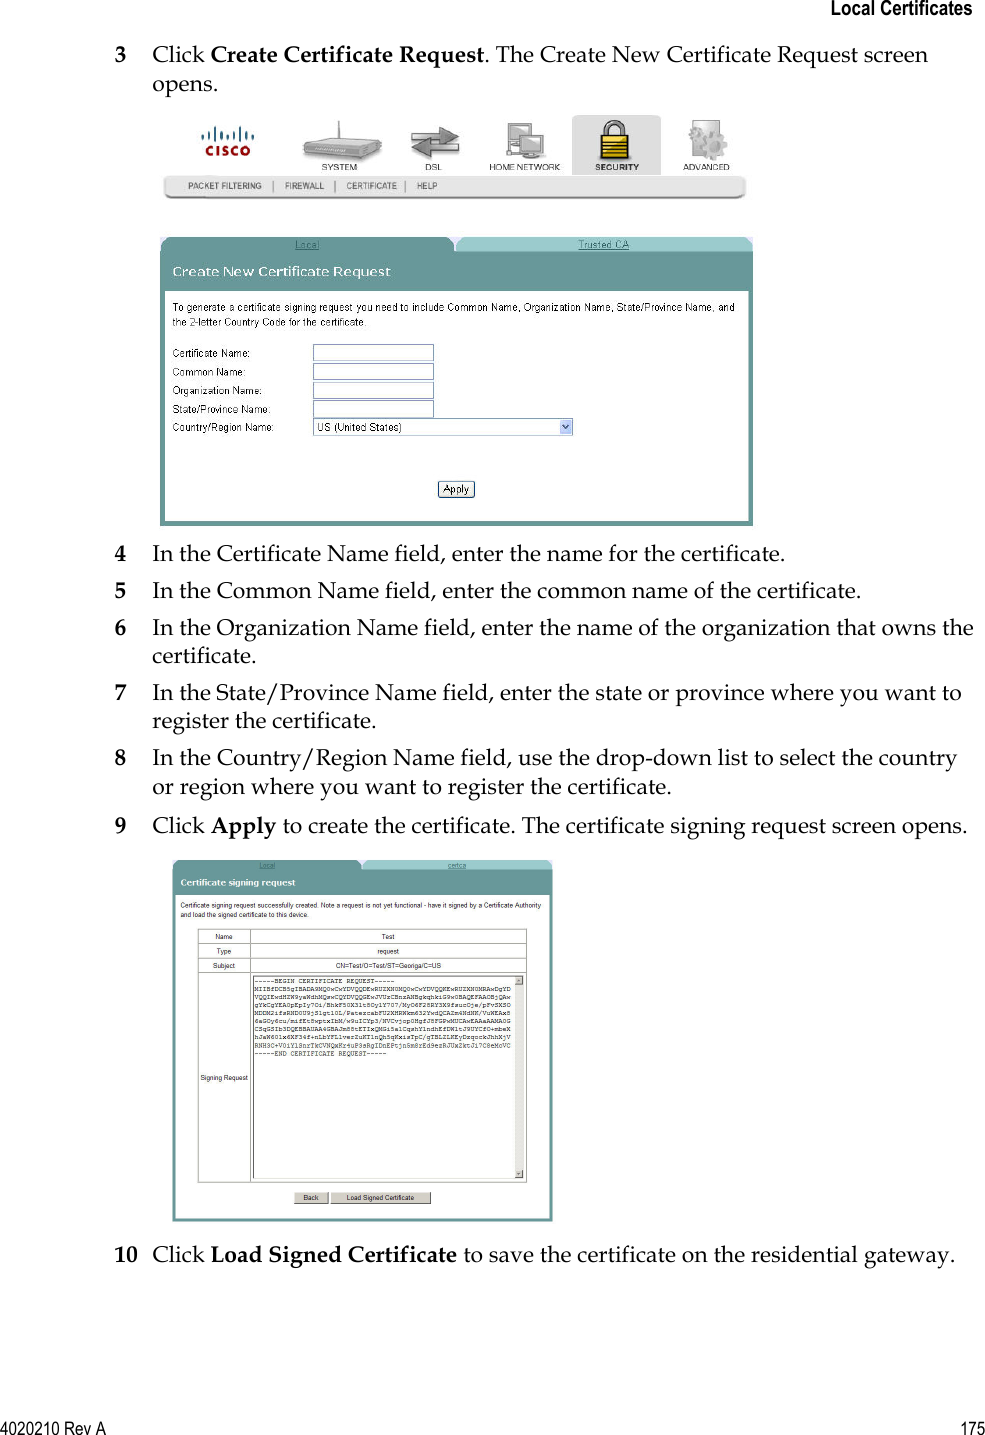
>
Manual Part 3
Contents
1.
Manual Part 1
2.
Manual Part 2
3.
Manual Part 3
4.
Manual Part 4
Manual Part 3
Navigation menu
Upload a User Manual
Namespaces
Wiki Guide
HTML
PDF
Info
Views
User Manual
Discussion / Help
Navigation
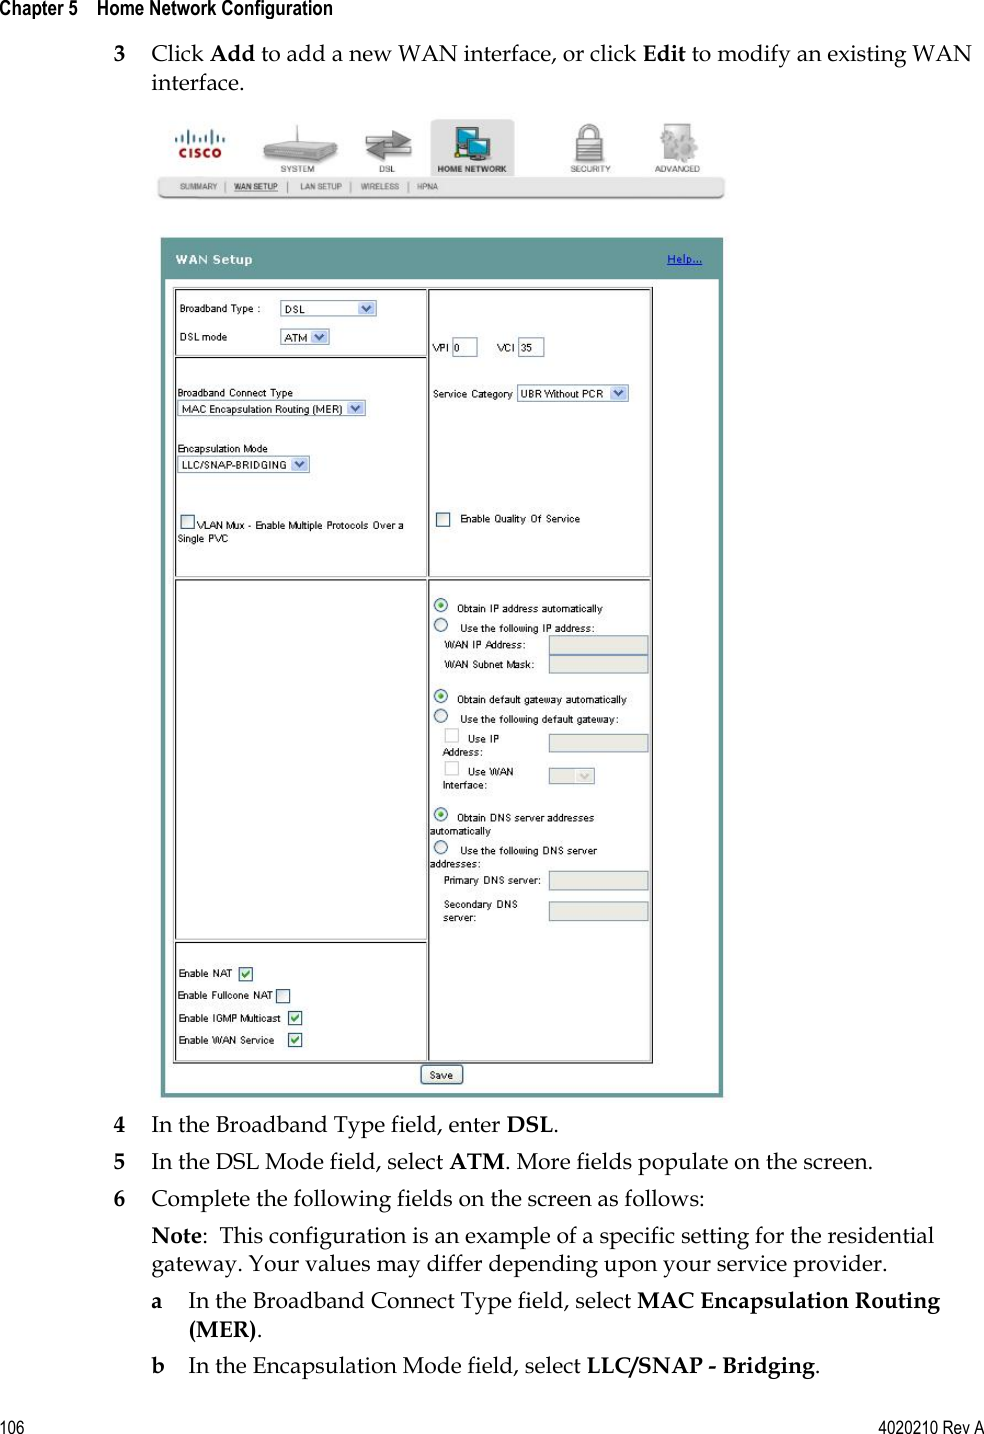
![WAN Quick Setup 4020210 Rev A 107 c Select the VLAN Mux - Enable Multiple Protocols Over a Single PVC check box, if applicable. d In the VLAN ID[0-4095]: field, enter an ID for the VLAN. Values are: 0 to 4095. e In the VPI field, enter the virtual path identifier (VPI). Values are: 0 to 65535. f In the VCI field, enter the virtual channel identifier (VCI). Values are: 0 to 65535. g In the Service Category field, select UBR Without PCR. h Select the Enable Quality of Service check box, if applicable. i Select the Obtain an IP address automatically option. j Select the Obtain default gateway automatically option. k Select the Obtain DNS server addresses automatically option. l Select Enable NAT. m Select the Enable IGMP Multicast check box. n Select the Enable WAN Service check box. 7 Click Save. The system returns to the previous screen. 8 Click Reboot. This action reboots the residential gateway so that the WAN setup configuration takes effect.](https://usermanual.wiki/GemTek-Technology/ADV981119G.Manual-Part-3/User-Guide-1218026-Page-9.png)