Gigaset Communications DX800A DECT Basestation with Bluetooth User Manual Saturn
Gigaset Communications GmbH DECT Basestation with Bluetooth Saturn
UserManual.wiki
>
Gigaset Communications
>
DX800A User Manual
User Manual EN
Navigation menu
Upload a User Manual
Namespaces
Wiki Guide
HTML
PDF
Info
Views
User Manual
Discussion / Help
Navigation
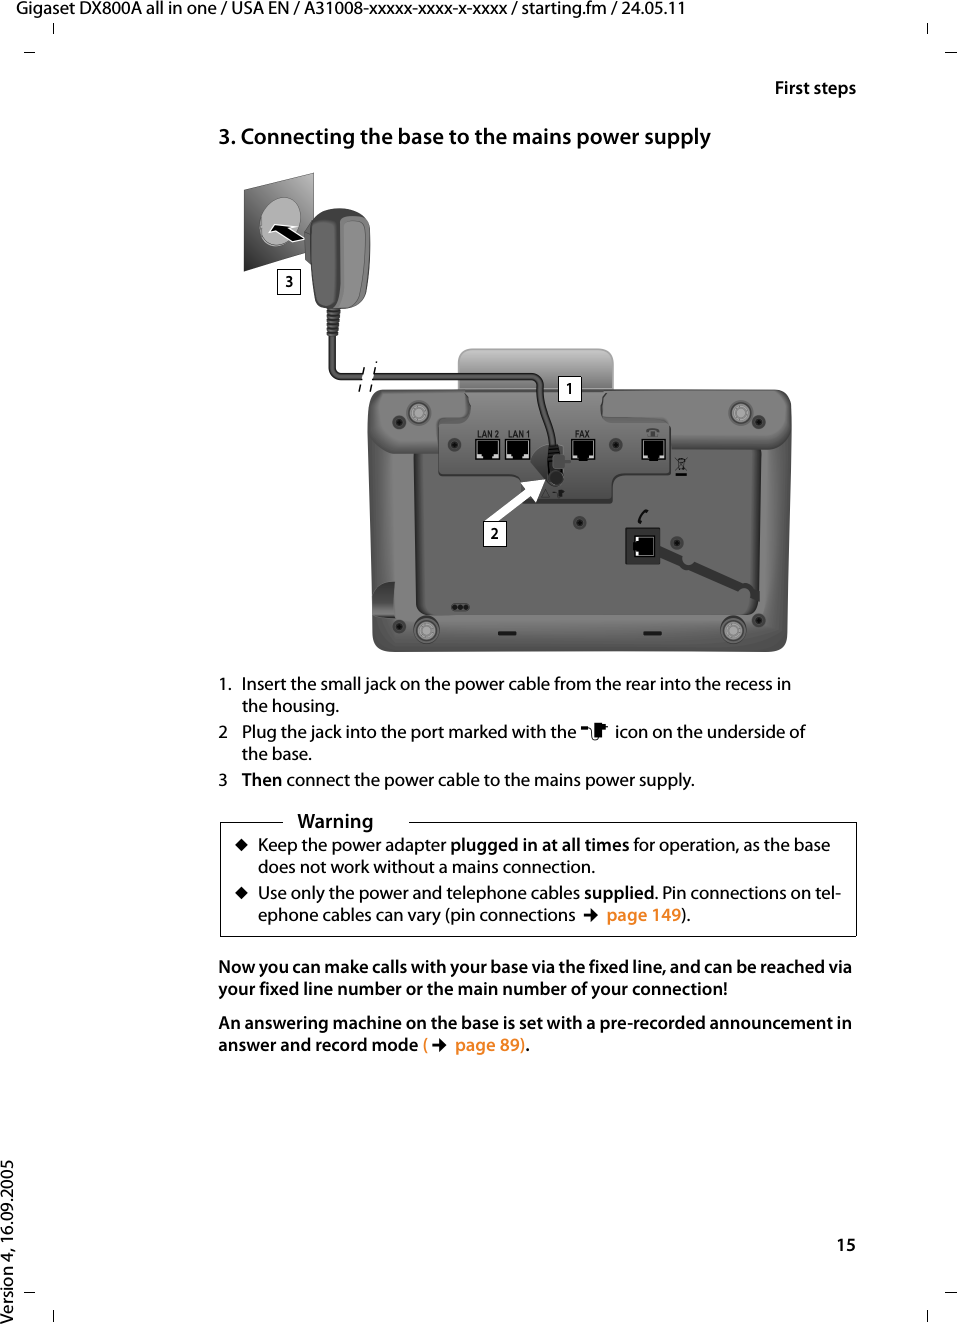
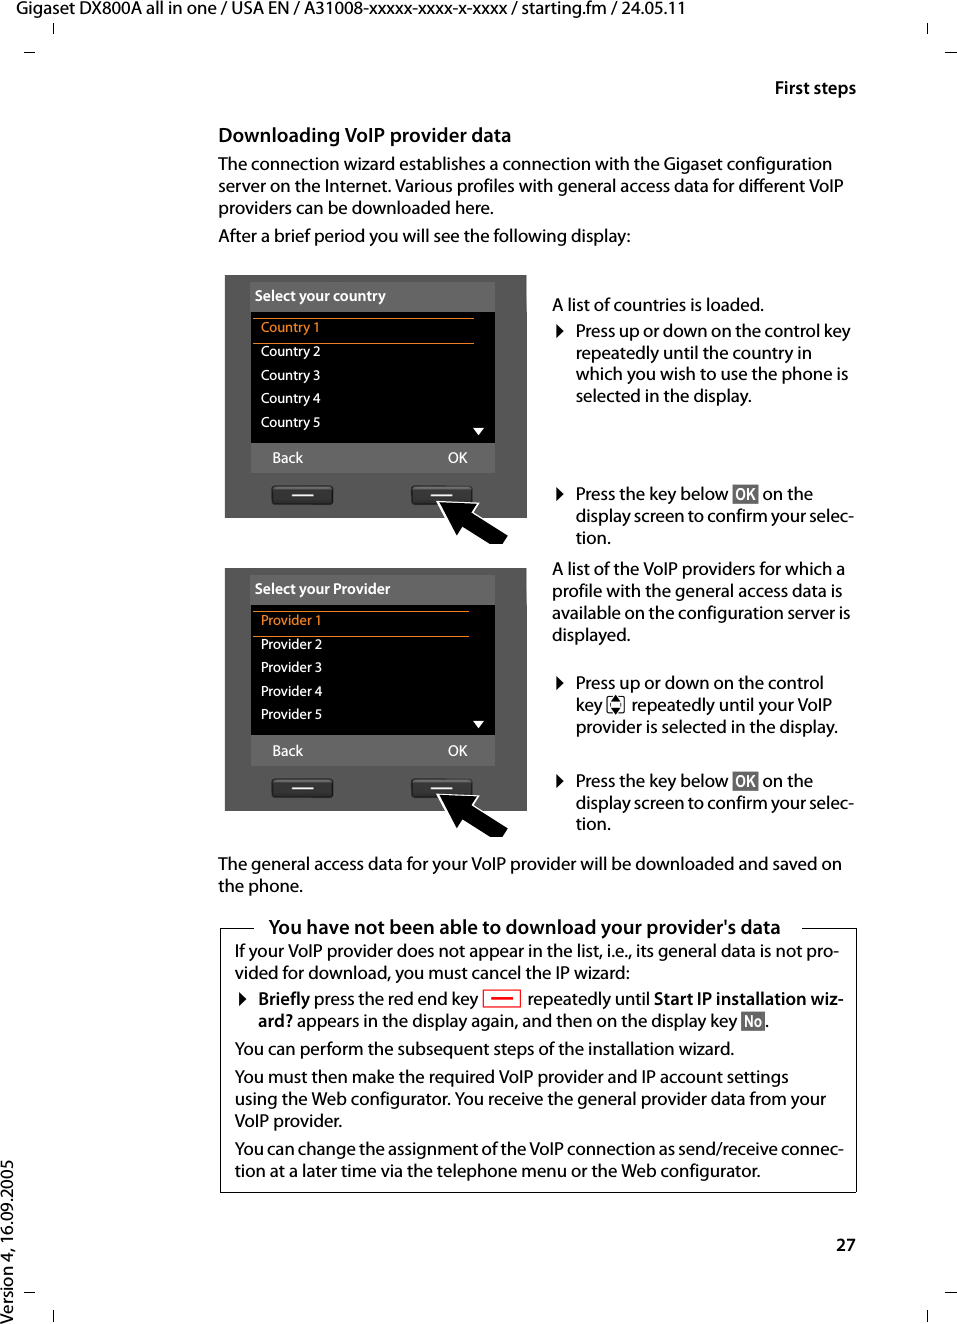
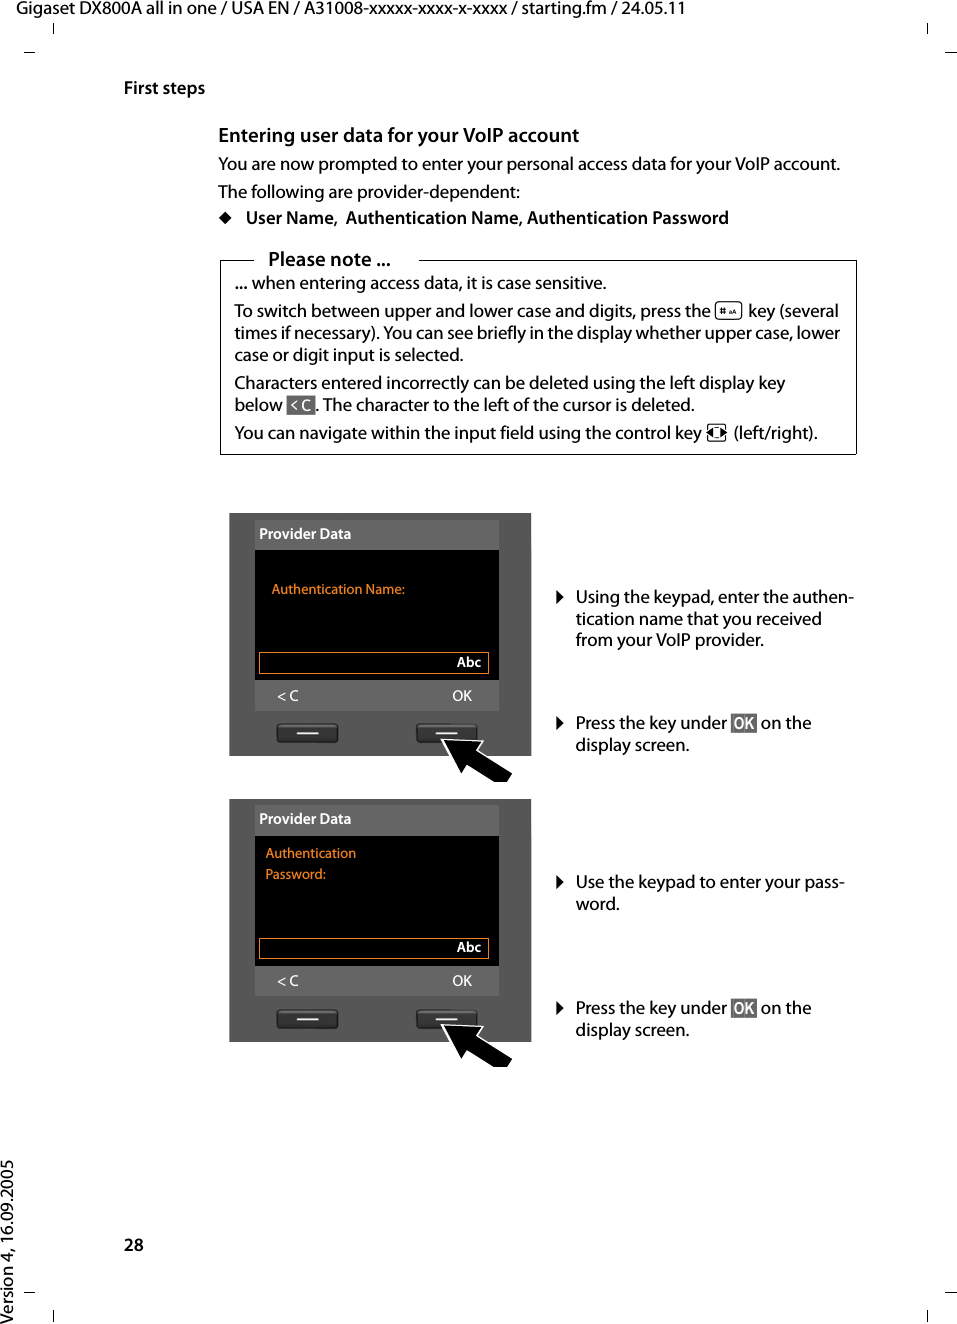
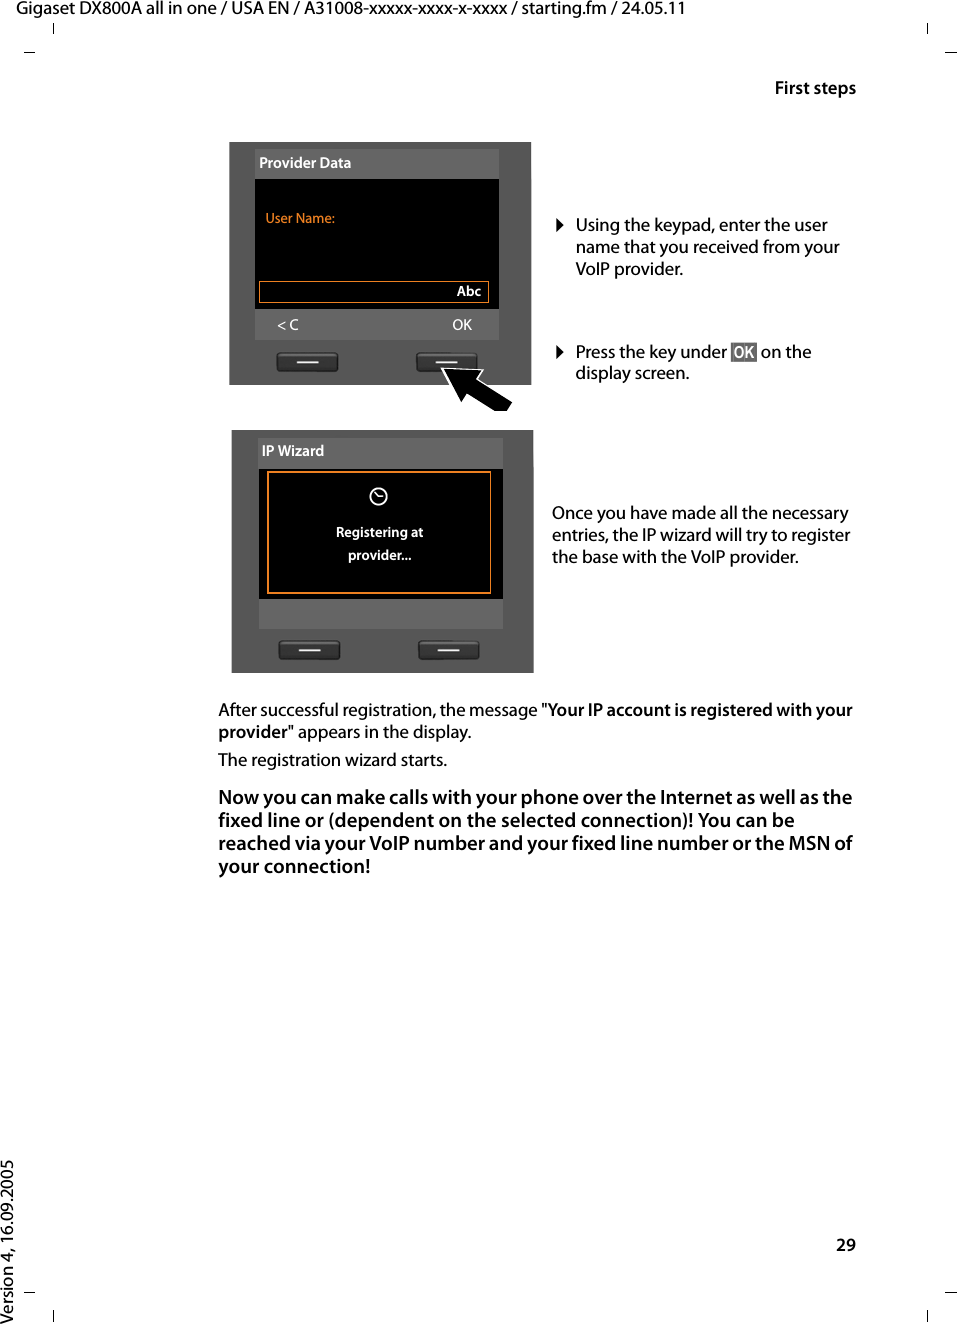
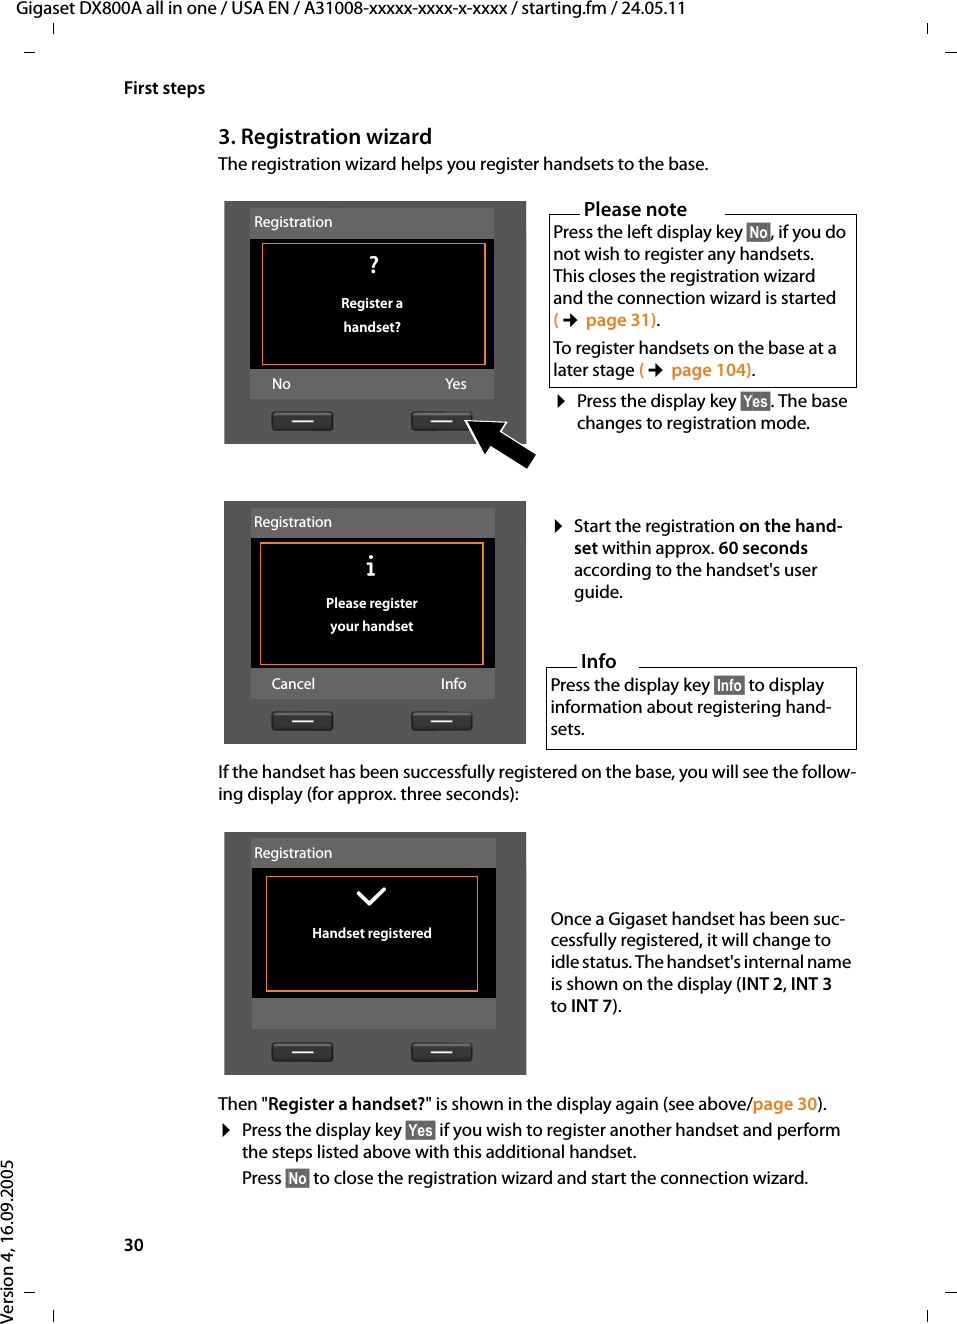
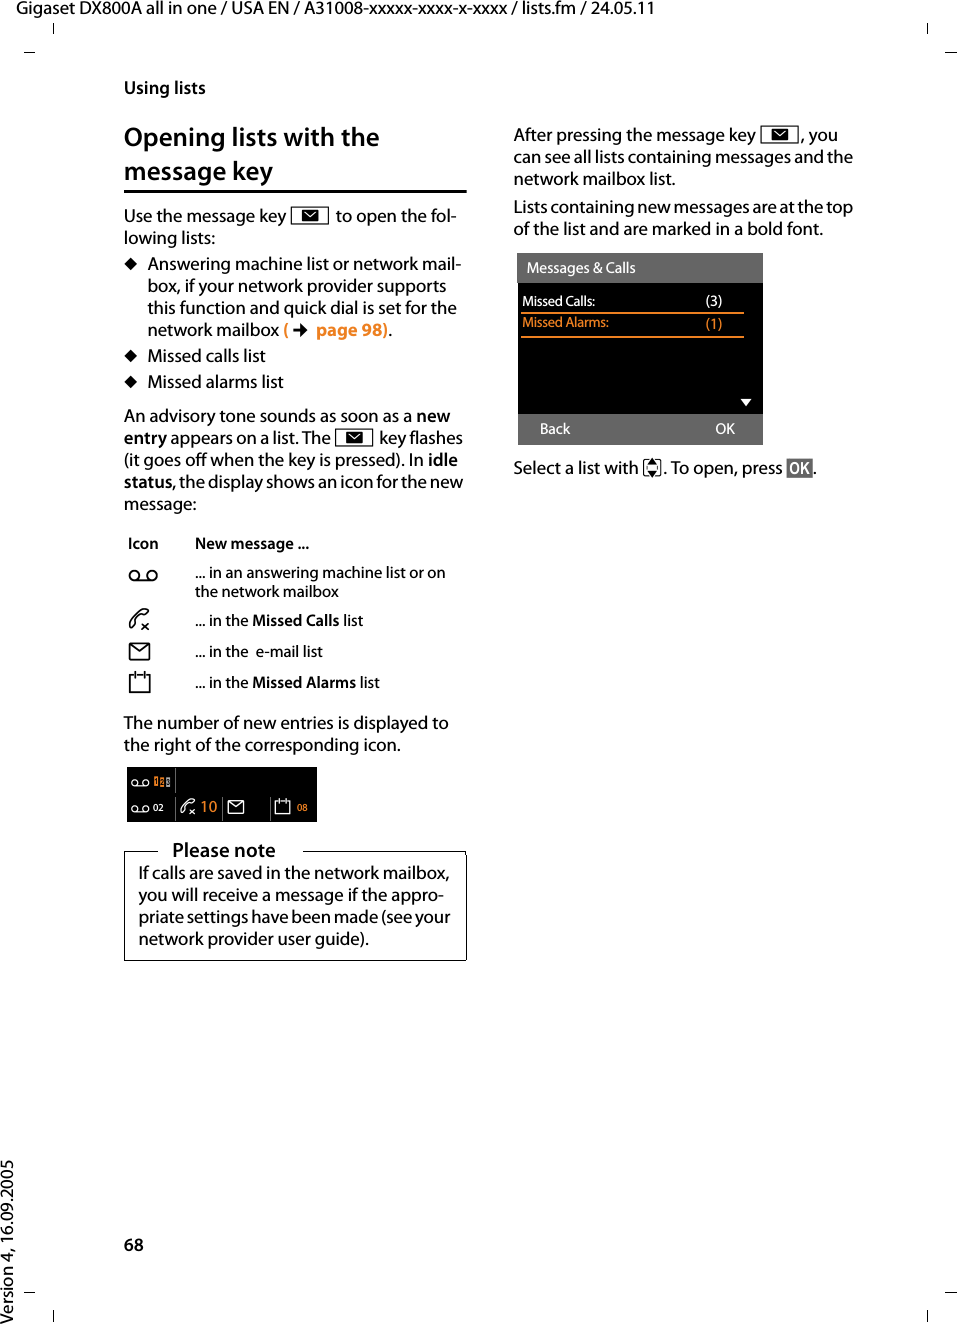
![14First stepsGigaset DX800A all in one / USA EN / A31008-xxxxx-xxxx-x-xxxx / starting.fm / 24.05.11Version 4, 16.09.20052. Connecting the base to the telephone network 1. Pass one end of the phone cable from behind through the recess in the housing. – Use the 8-pin cable with 2 mini western jacks 8/8 if you wish to connect the phone to the network (¢page 10, cable 5). – Use the TAE connection cable with RJ11 plug to connect to the analogue fixed line (¢page 10, cable 6). 2 Plug the telephone cable into the port marked with the ] icon on the under-side of the base. 3 Then connect the telephone cable to the fixed line connection. 3b21Underside of the base3aYour Gigaset telephone automatically detects which line it is connected to and the installation wizard later prompts you to make all the necessary settings for the current connection (¢page 18).](https://usermanual.wiki/Gigaset-Communications/DX800A/User-Guide-1552330-Page-16.png)
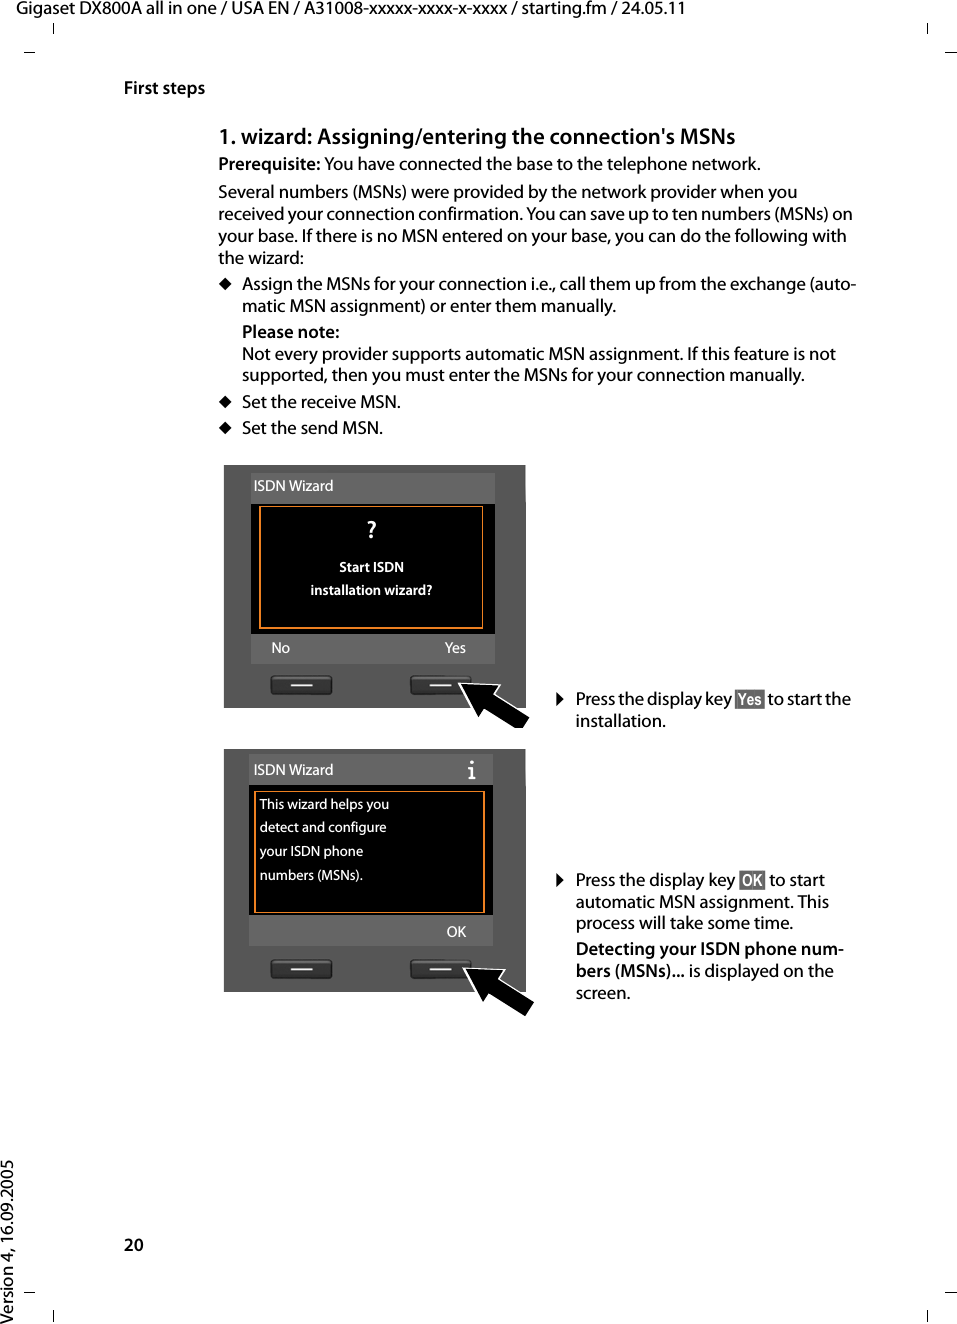
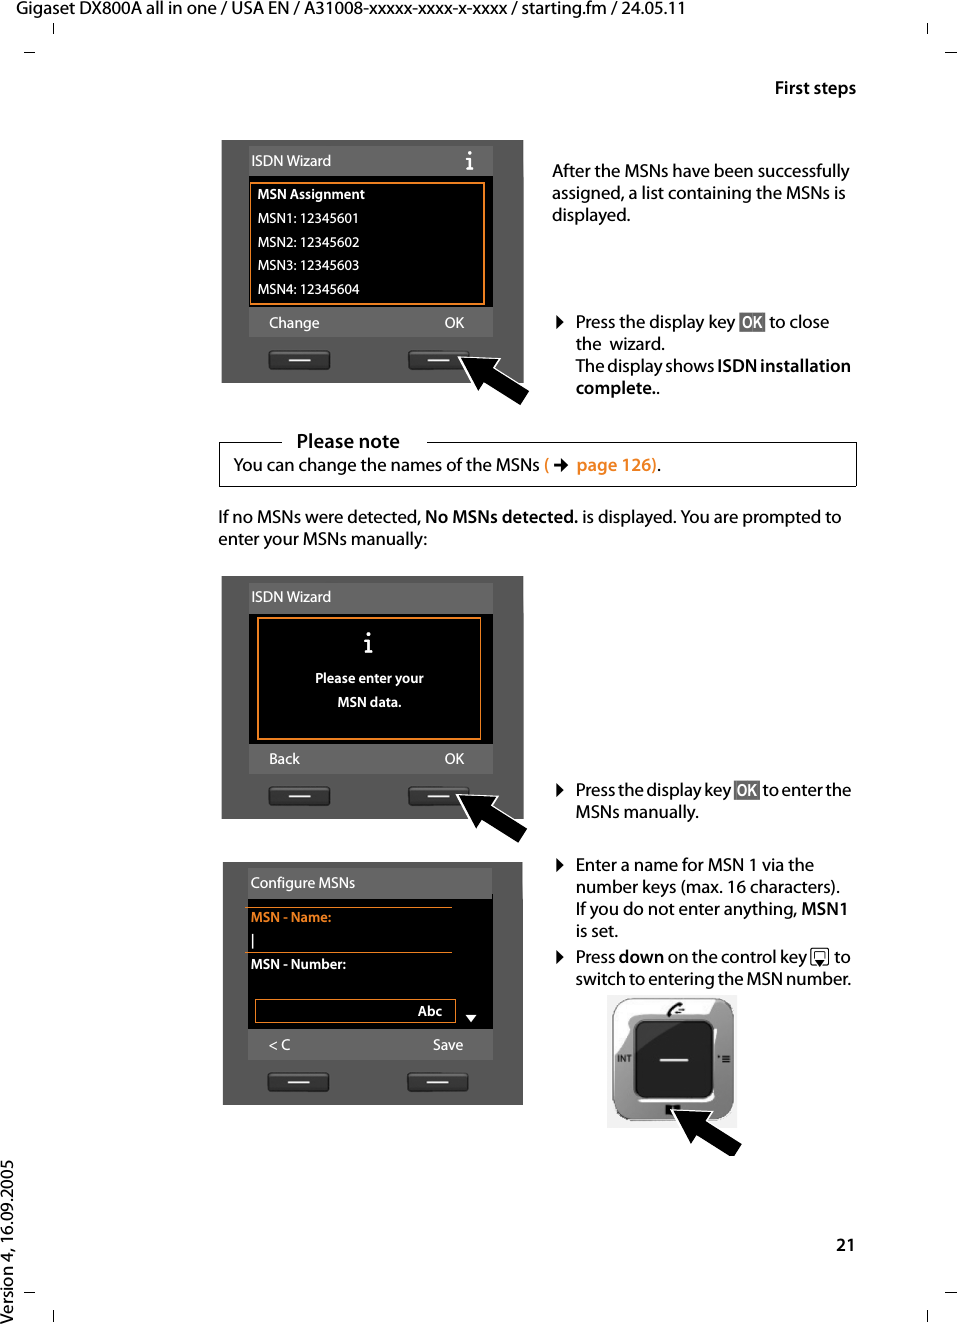
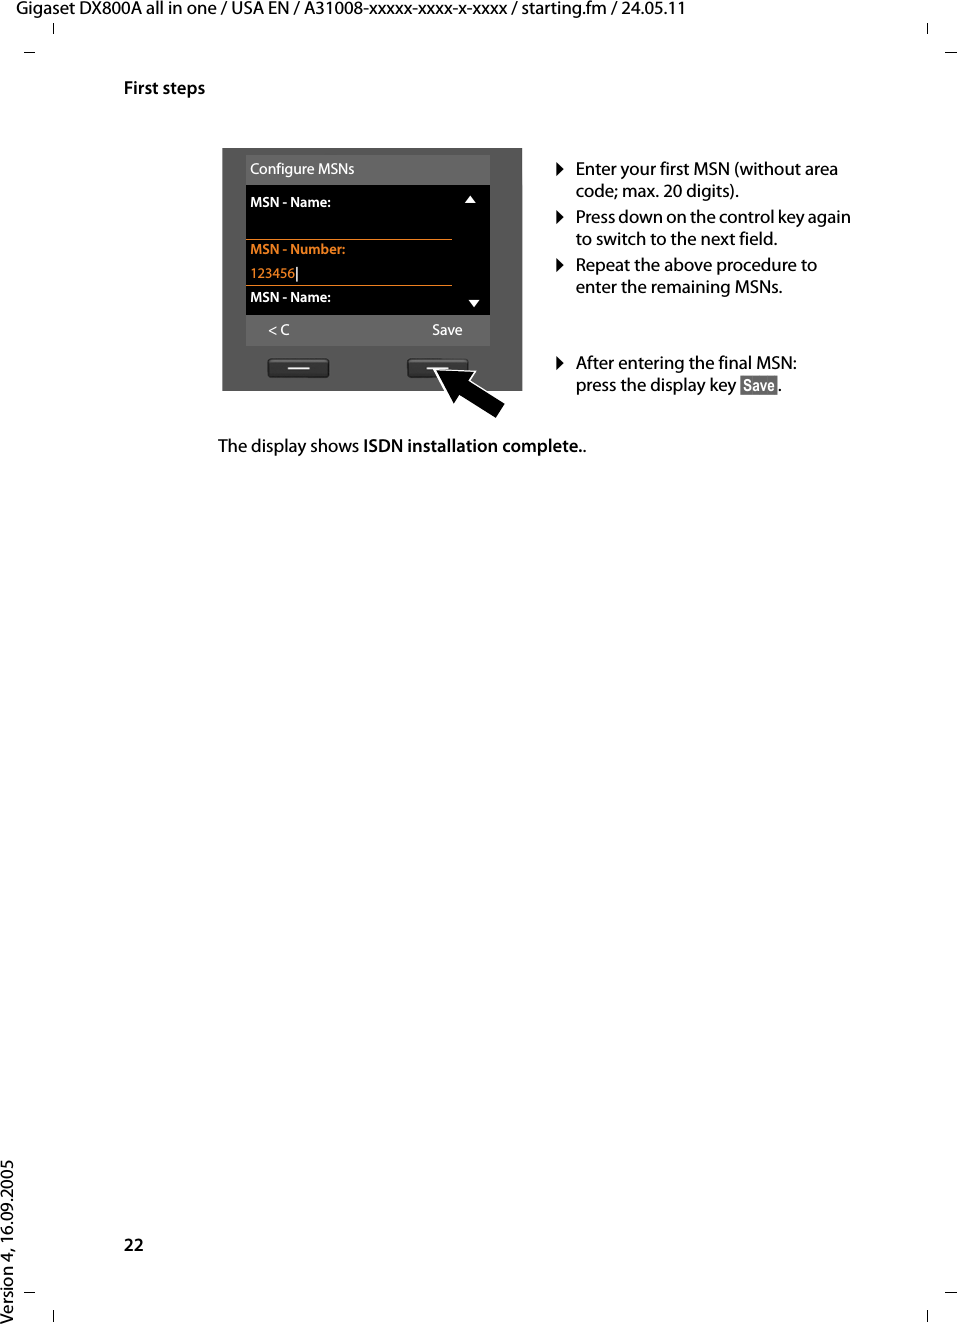

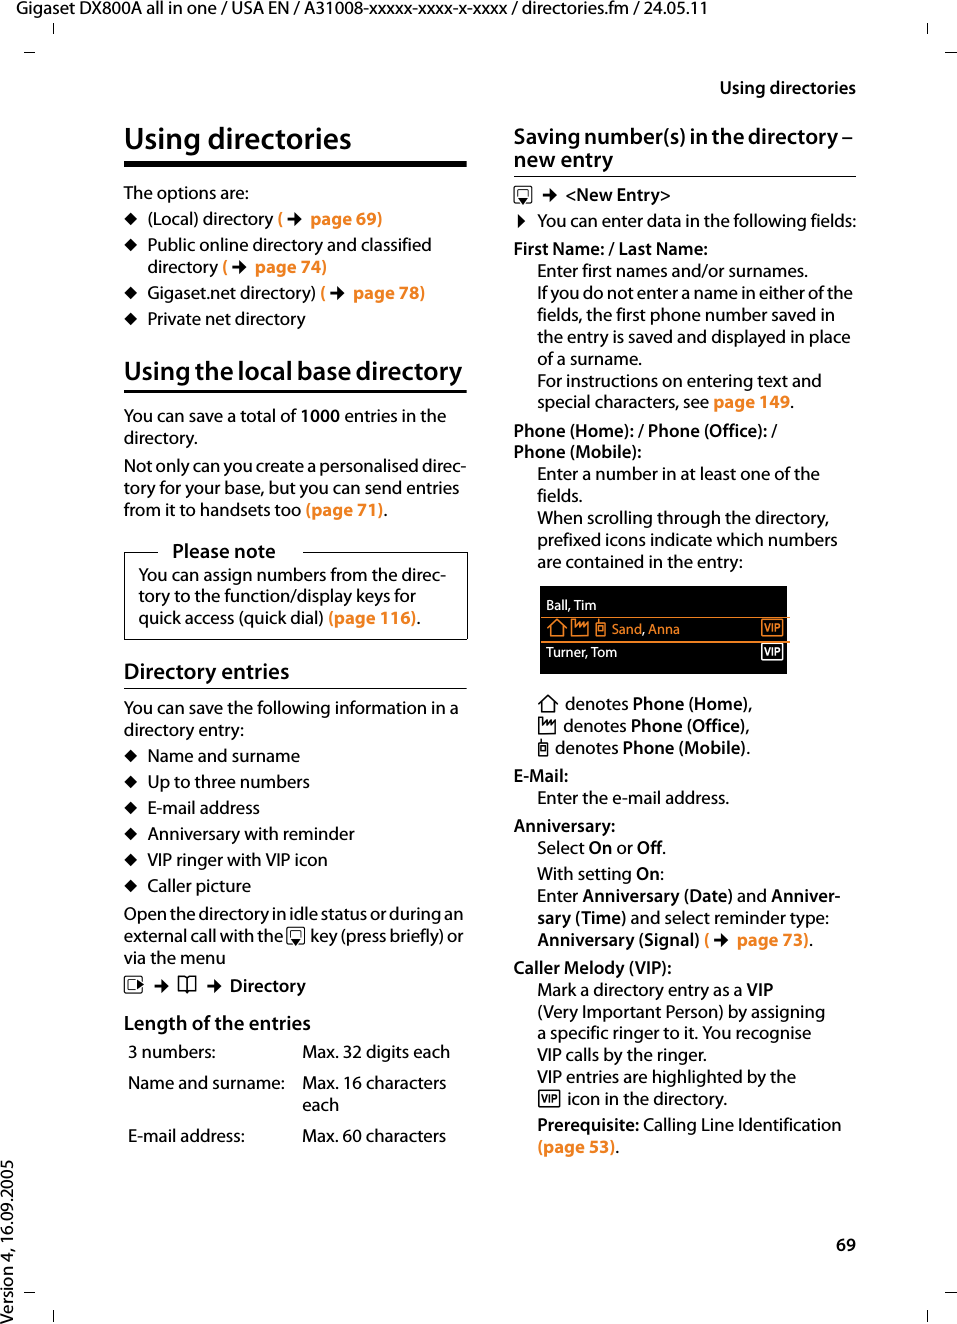


![124Configuring the system settingsGigaset DX800A all in one / USA EN / A31008-xxxxx-xxxx-x-xxxx / settings.fm / 24.05.11Version 4, 16.09.2005¤You can enter data in the following fields:Date:Enter day, month and year as an 8-digit number via the keypad. e.g., QM42Q for 07/14/2011.Time:Enter the hours and minutes in 4-digit format via the keypad, e.g., QM5for 07:15 am. ¤If necessary, press the display key §am/pm§ to switch between am and pm. ¤Press the display key §Save§ to save the settings. Protecting against unauthorised accessProtect the base system settings with a PIN known only to you. You have to enter the system PIN if you register or de-register a handset, change local network settings, per-form a firmware update or reset the phone to default settings.Changing the system PINYou can change the base's 4-digit system PIN (default setting: 0000) to a 4-digit PIN known only by you.Setting a system PIN facilitates remote oper-ation of the answering machine (¢page 95). v ¢ÏSettings ¢System ¢System PIN~If necessary, enter the current system PIN for the base and press §OK§.~ Enter new system PIN.§OK§ Press the display key.Setting your own area codeTo transfer phone numbers (e.g., in vCards), it is essential that your area code (interna-tional and local area code) is saved on the base.Some of these numbers are already preset.v ¢ÏSettings ¢Telephony ¢Area CodesCheck that the (pre)set area code is correct.¤You can enter data as follows:qSelect/change input field. rNavigate in the input field.ÑIf necessary, delete number: Press the display key.~Enter number.§Save§ Press the display key.Example:Please noteIt is especially necessary to set the inter-national code if you connect a GSM mobile to the base via Bluetooth. Phone numbers transferred from the GSM net-work always include the international access code, even for calls within a coun-try.If, for example, you later wish to call back the caller from a call list via one of your phone's connections, the international code is withheld for national phone calls. Area CodesInternational code:00 - 1Local area code:0 - [ ]Info Save](https://usermanual.wiki/Gigaset-Communications/DX800A/User-Guide-1552330-Page-126.png)


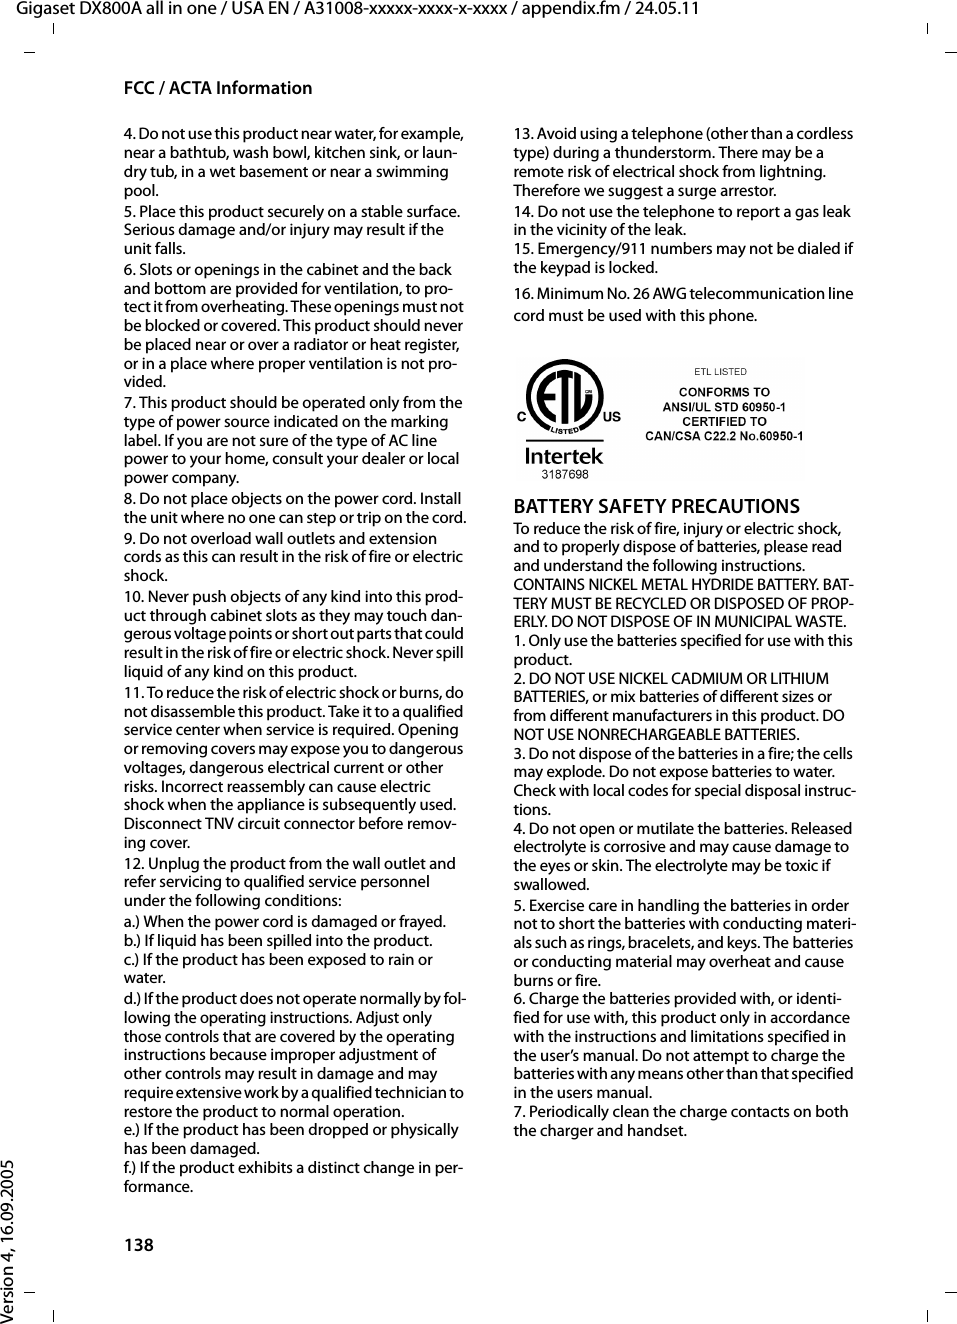

![156AppendixGigaset DX800A all in one / USA EN / A31008-xxxxx-xxxx-x-xxxx / appendix.fm / 24.05.11Version 4, 16.09.2005This General Public License does not permit incor-porating your program into proprietary programs. If your program is a subroutine library, you may consider it more useful to permit linking proprie-tary applications with the library. If this is what you want to do, use the GNU Lesser General Public License instead of this License. GNU Lesser General Public License (LGPL)Version 2.1, February 1999 Copyright (C) 1991, 1999 Free Software Founda-tion, Inc. 59 Temple Place, Suite 330, Boston, MA 02111-1307 USA Everyone is permitted to copy and distribute ver-batim copies of this license document, but chang-ing it is not allowed. [This is the first released version of the Lesser GPL. It also counts as the successor of the GNU Library Public License, version 2, hence the version number 2.1.] PreambleThe licenses for most software are designed to take away your freedom to share and change it. By contrast, the GNU General Public Licenses are intended to guarantee your freedom to share and change free software--to make sure the software is free for all its users. This license, the Lesser General Public License, applies to some specially designated software packages – typically libraries – of the Free Soft-ware Foundation and other authors who decide to use it. You can use it too, but we suggest you first think carefully about whether this license or the ordinary General Public License is the better strat-egy to use in any particular case, based on the explanations below.When we speak of free software, we are referring to freedom of use, not price. Our General Public Licenses are designed to make sure that you have the freedom to distribute copies of free software (and charge for this service if you wish); that you receive source code or can get it if you want it; that you can change the software and use pieces of it in new free programs; and that you are informed that you can do these things.To protect your rights, we need to make restric-tions that forbid distributors to deny you these rights or to ask you to surrender these rights. These restrictions translate into certain responsi-bilities for you if you distribute copies of the library or if you modify it.For example, if you distribute copies of the library, whether gratis or for a fee, you must give the recipients all the rights that we gave you. You must make sure that they, too, receive or can get the source code. If you link other code with the library, you must provide complete object files to the recipients, so that they can relink them with the library after making changes to the library and recompiling it. And you must show them these terms so they know their rights.We protect your rights with a two-step method: (1) we copyright the library, and (2) we offer you this license, which gives you legal permission to copy, distribute and/or modify the library.To protect each distributor, we want to make it very clear that there is no warranty for the free library. Also, if the library is modified by someone else and passed on, the recipients should know that what they have is not the original version, so that the original author's reputation will not be affected by problems that might be introduced by others. Finally, software patents pose a constant threat to the existence of any free program. We wish to make sure that a company cannot effectively restrict the users of a free program by obtaining a restrictive license from a patent holder. Therefore, we insist that any patent license obtained for a version of the library must be consistent with the full freedom of use specified in this license. Most GNU software, including some libraries, is covered by the ordinary GNU General Public License. This license, the GNU Lesser General Pub-lic License, applies to certain designated libraries, and is quite different from the ordinary General Public License. We use this license for certain libraries in order to permit linking those libraries into non-free programs. When a program is linked with a library, whether statically or using a shared library, the combina-tion of the two is legally speaking a combined work, a derivative of the original library. The ordi-nary General Public License therefore permits such linking only if the entire combination fits its criteria of freedom. The Lesser General Public License permits more lax criteria for linking other code with the library. We call this license the "Lesser" General Public License because it does Less to protect the user's freedom than the ordinary General Public License. It also provides other free software developers Less of an advantage over competing non-free programs. These disadvantages are the reason we use the ordinary General Public License for many libraries. However, the Lesser license provides advantages in certain special circumstances.](https://usermanual.wiki/Gigaset-Communications/DX800A/User-Guide-1552330-Page-158.png)