Grandstream Networks GVC3200 Full HD Video Conferencing System User Manual x0001
Grandstream Networks, Inc. Full HD Video Conferencing System x0001
UserManual.wiki
>
Grandstream Networks
>
GVC3200 User Manual
>
User manual part 2
Contents
1.
Users Manual
2.
User manual part 1
3.
User manual part 2
User manual part 2
Navigation menu
Upload a User Manual
Namespaces
Wiki Guide
HTML
PDF
Info
Views
User Manual
Discussion / Help
Navigation

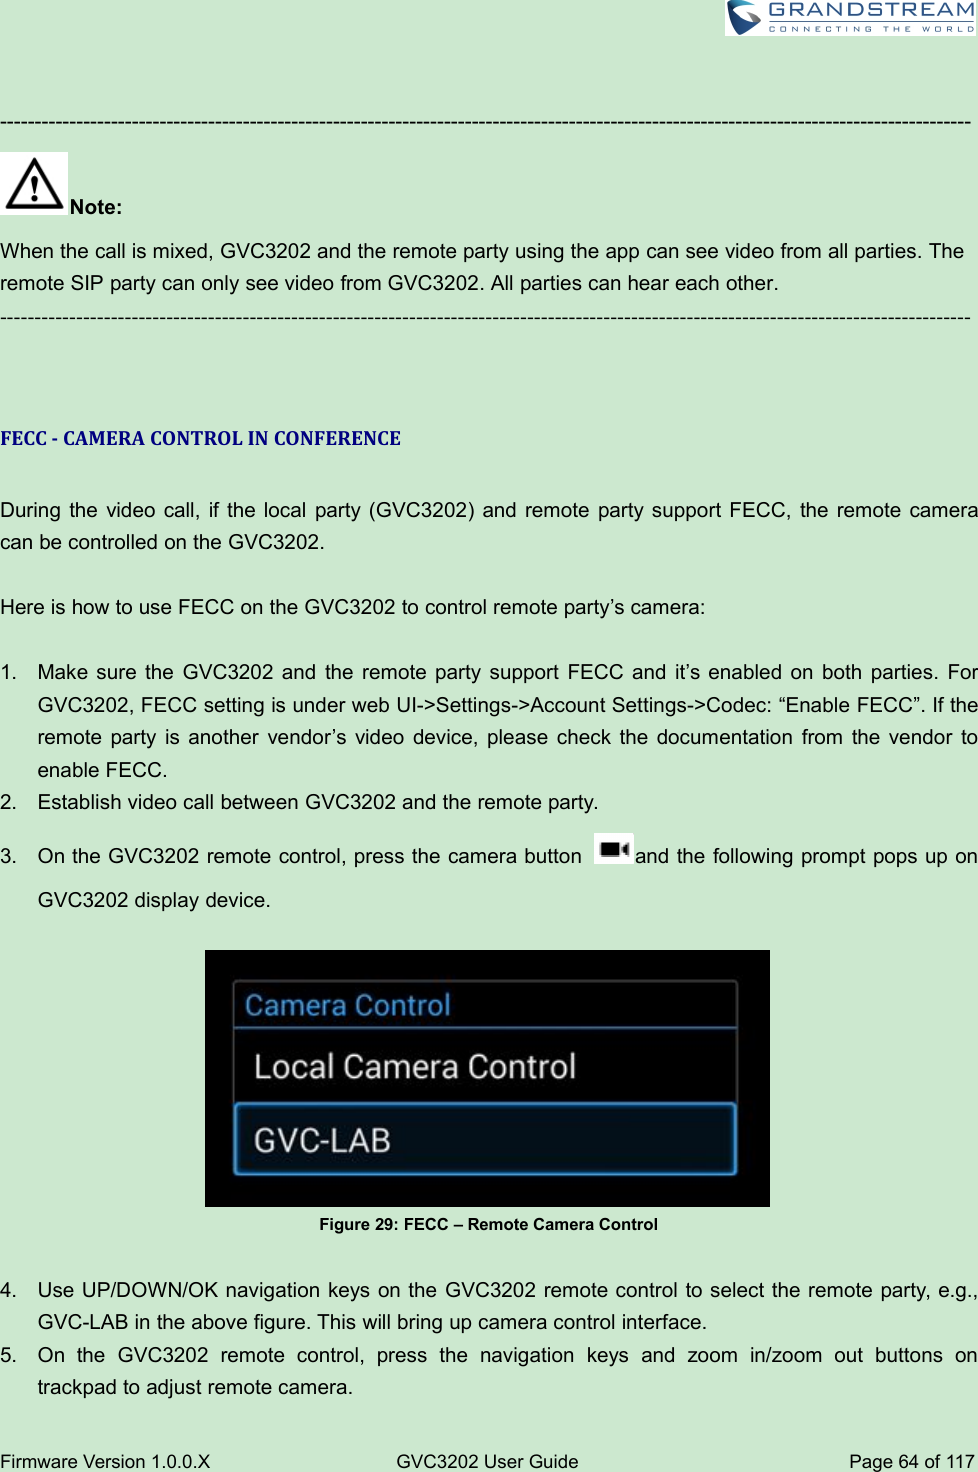
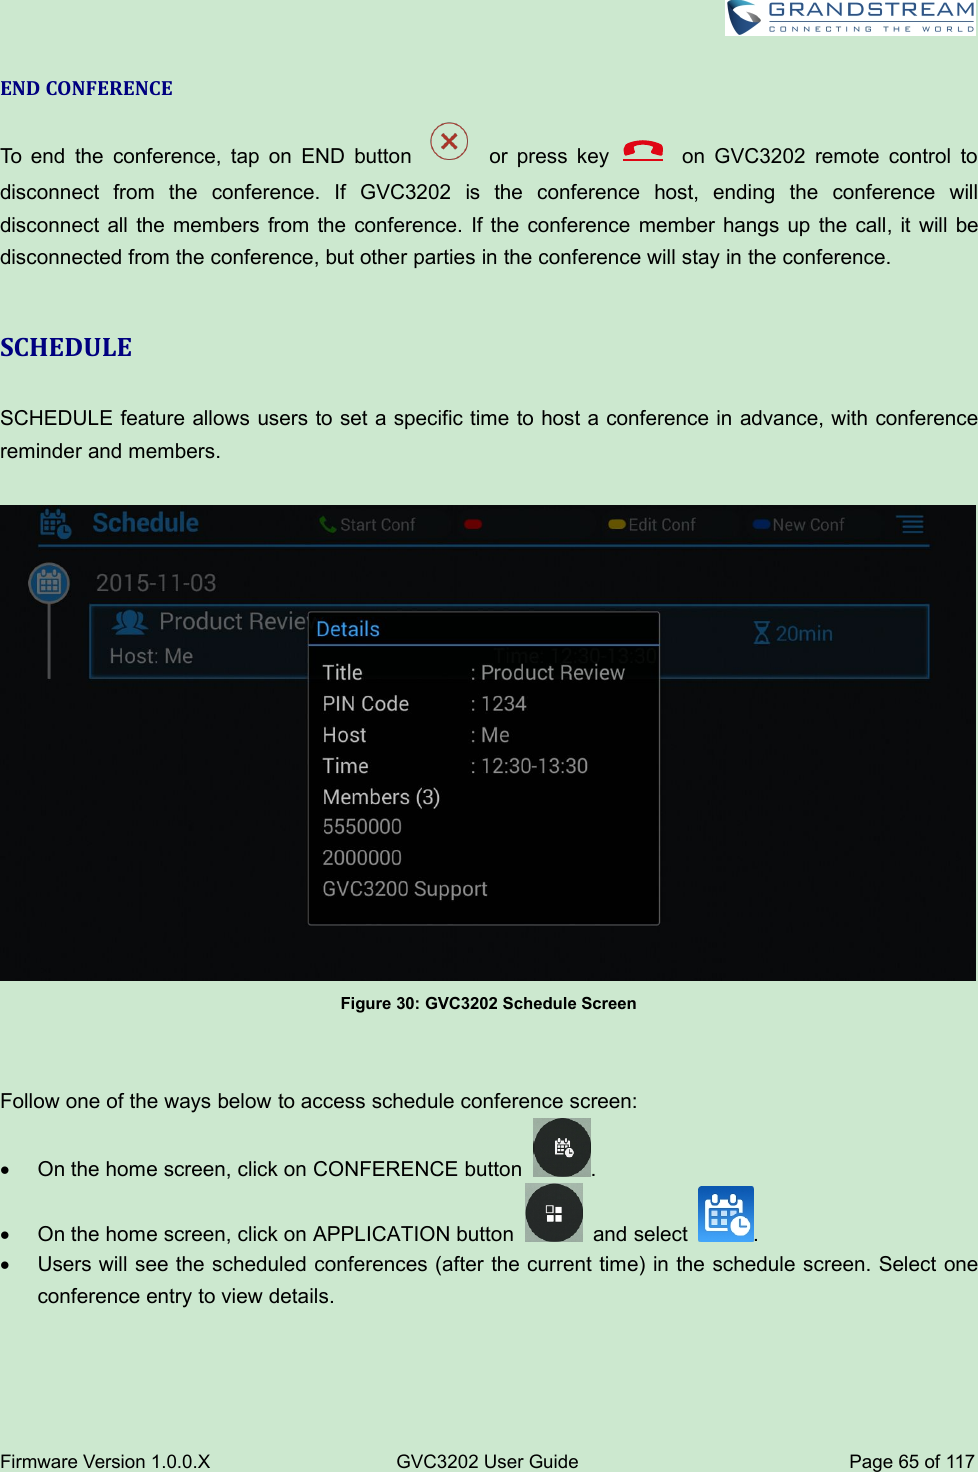

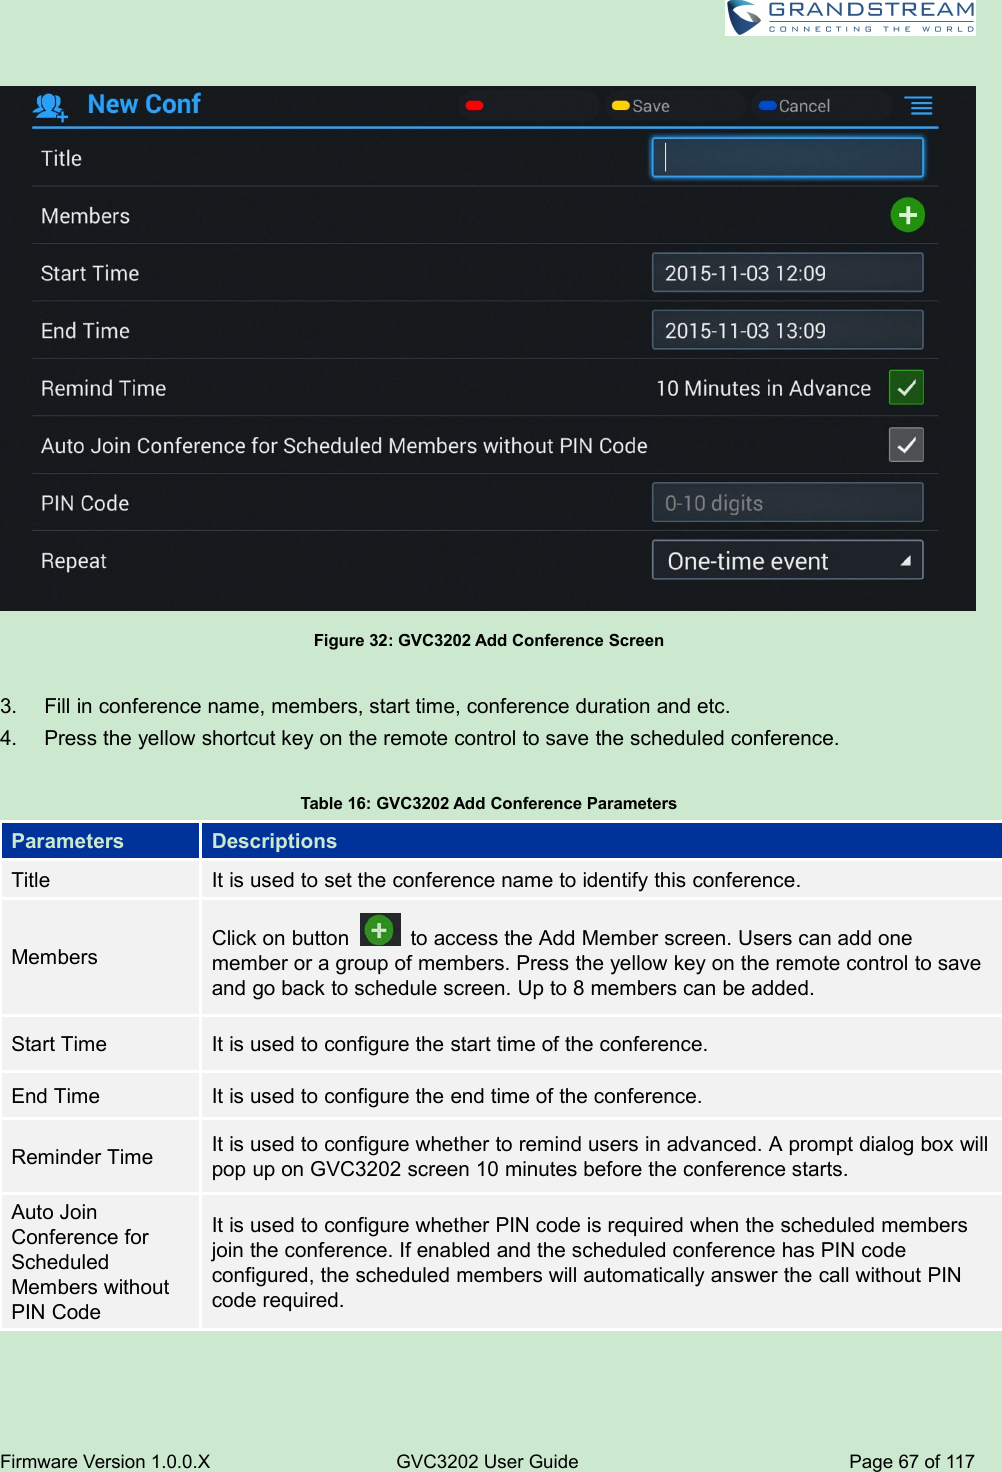
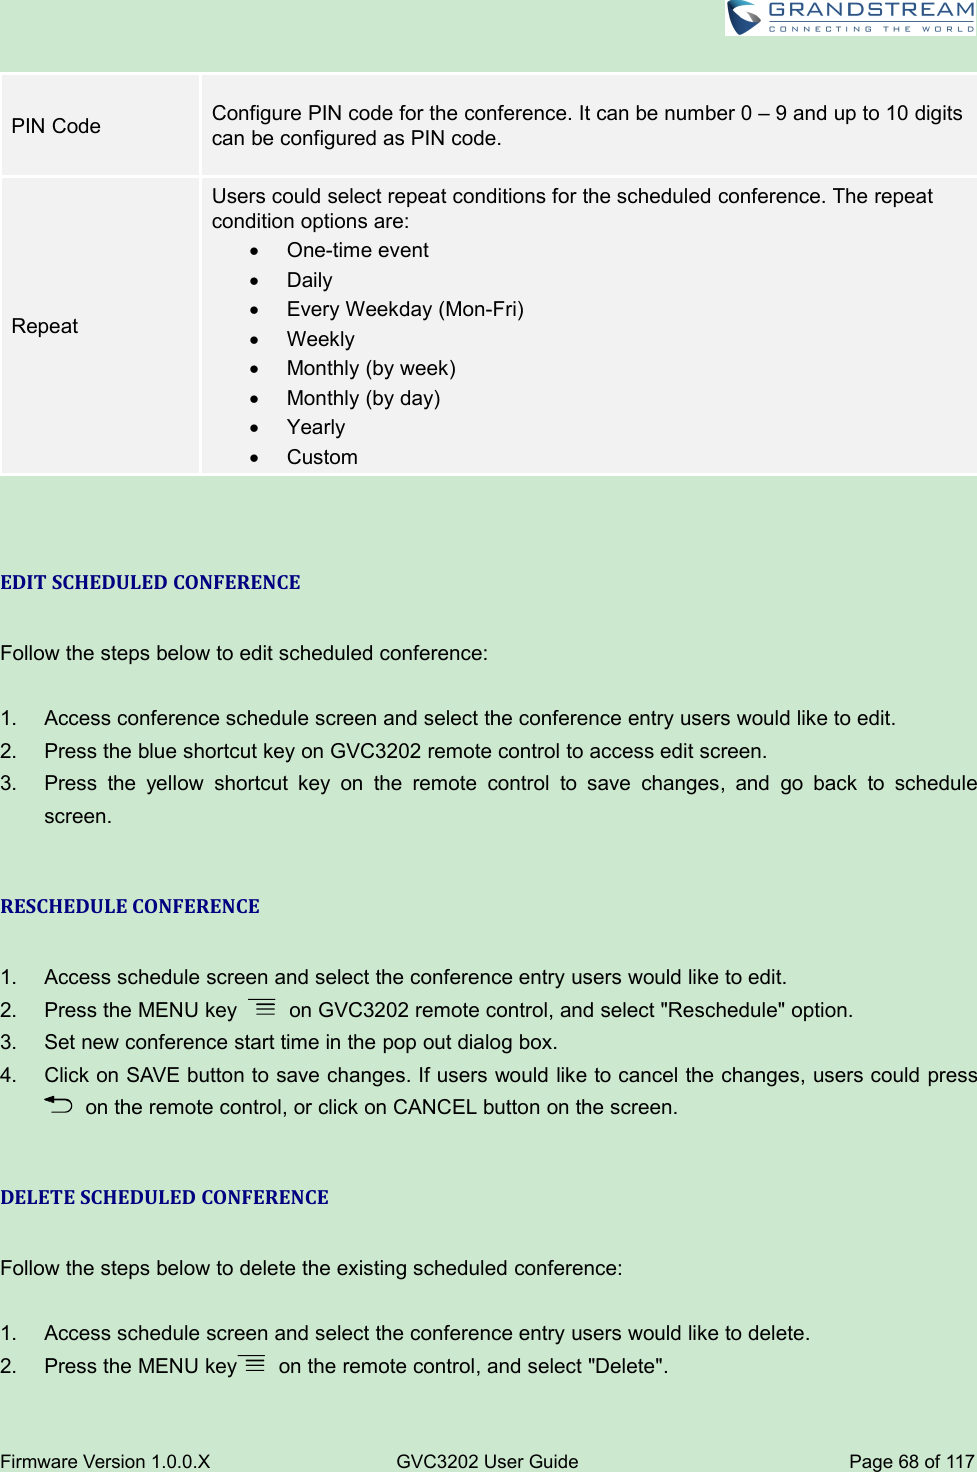
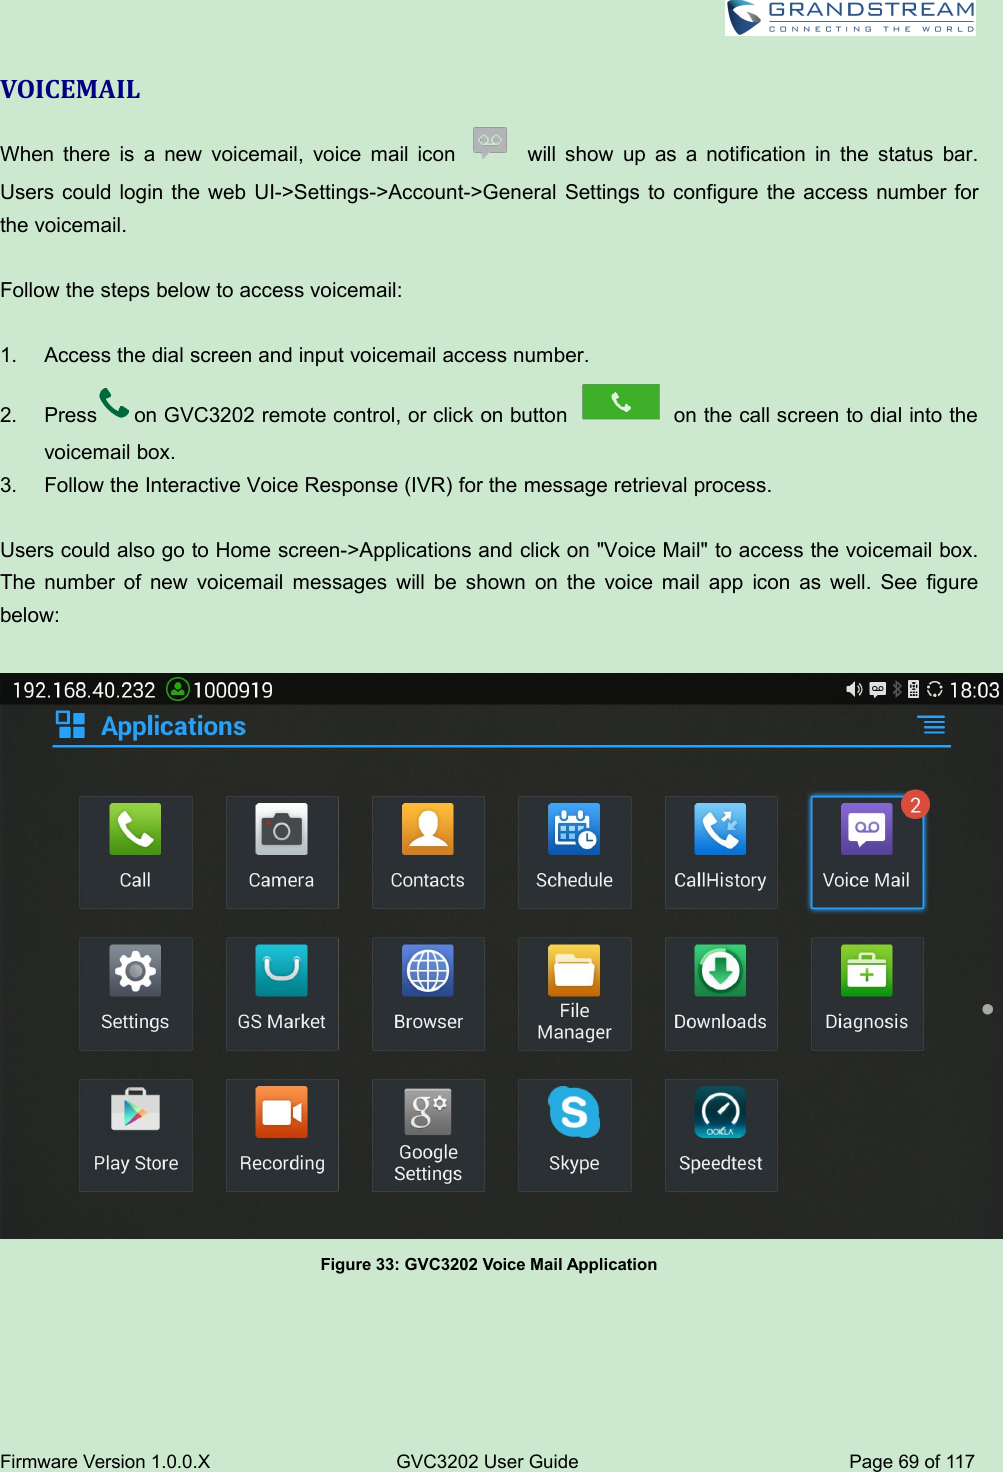
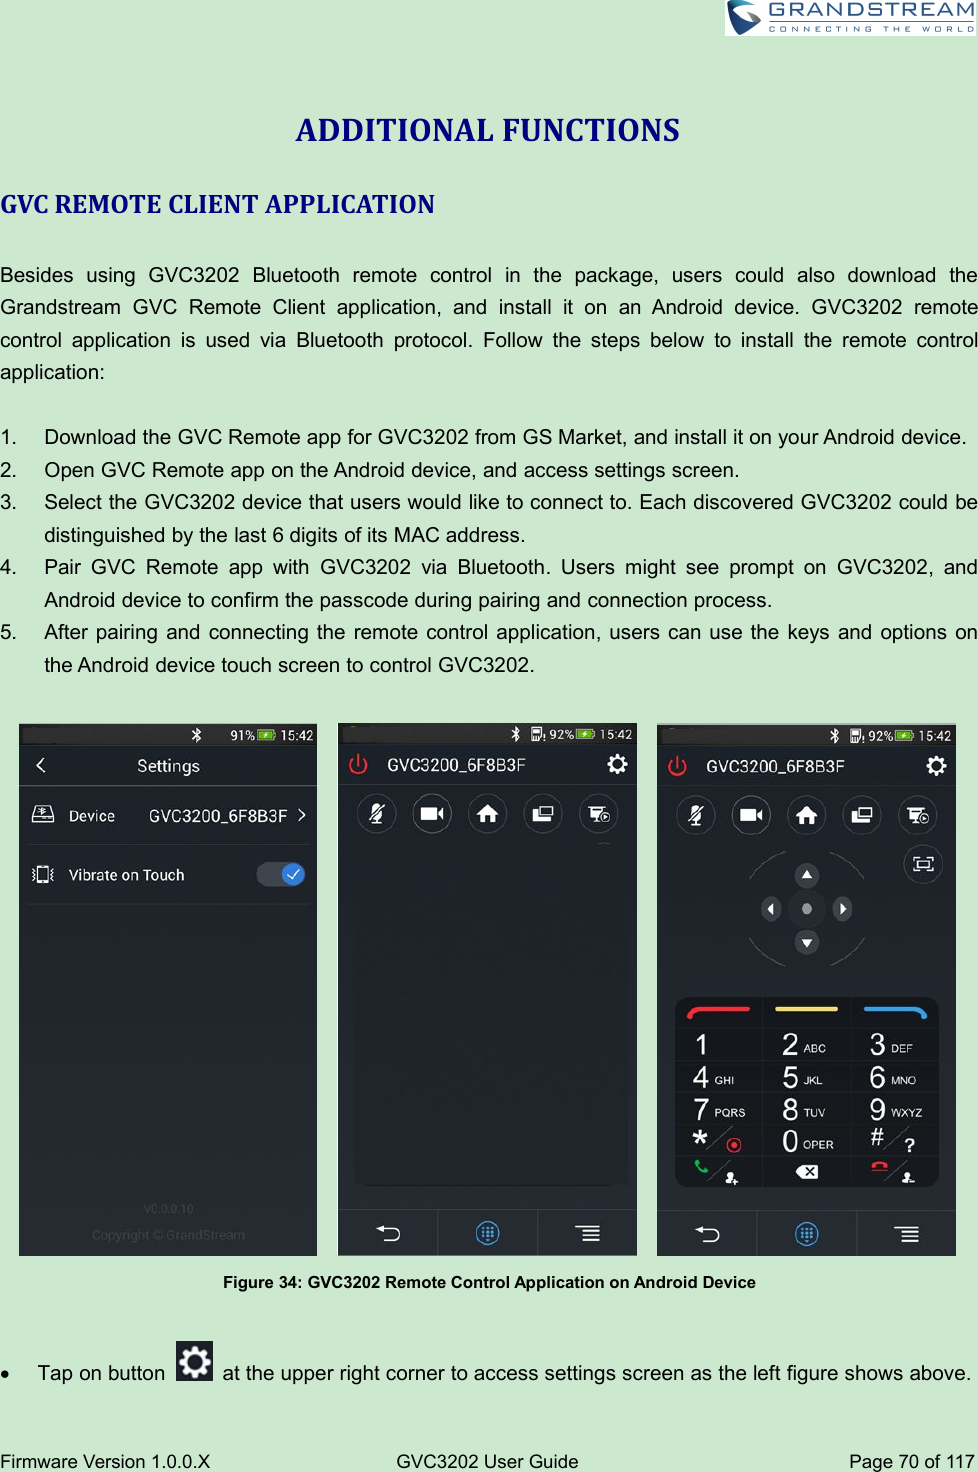
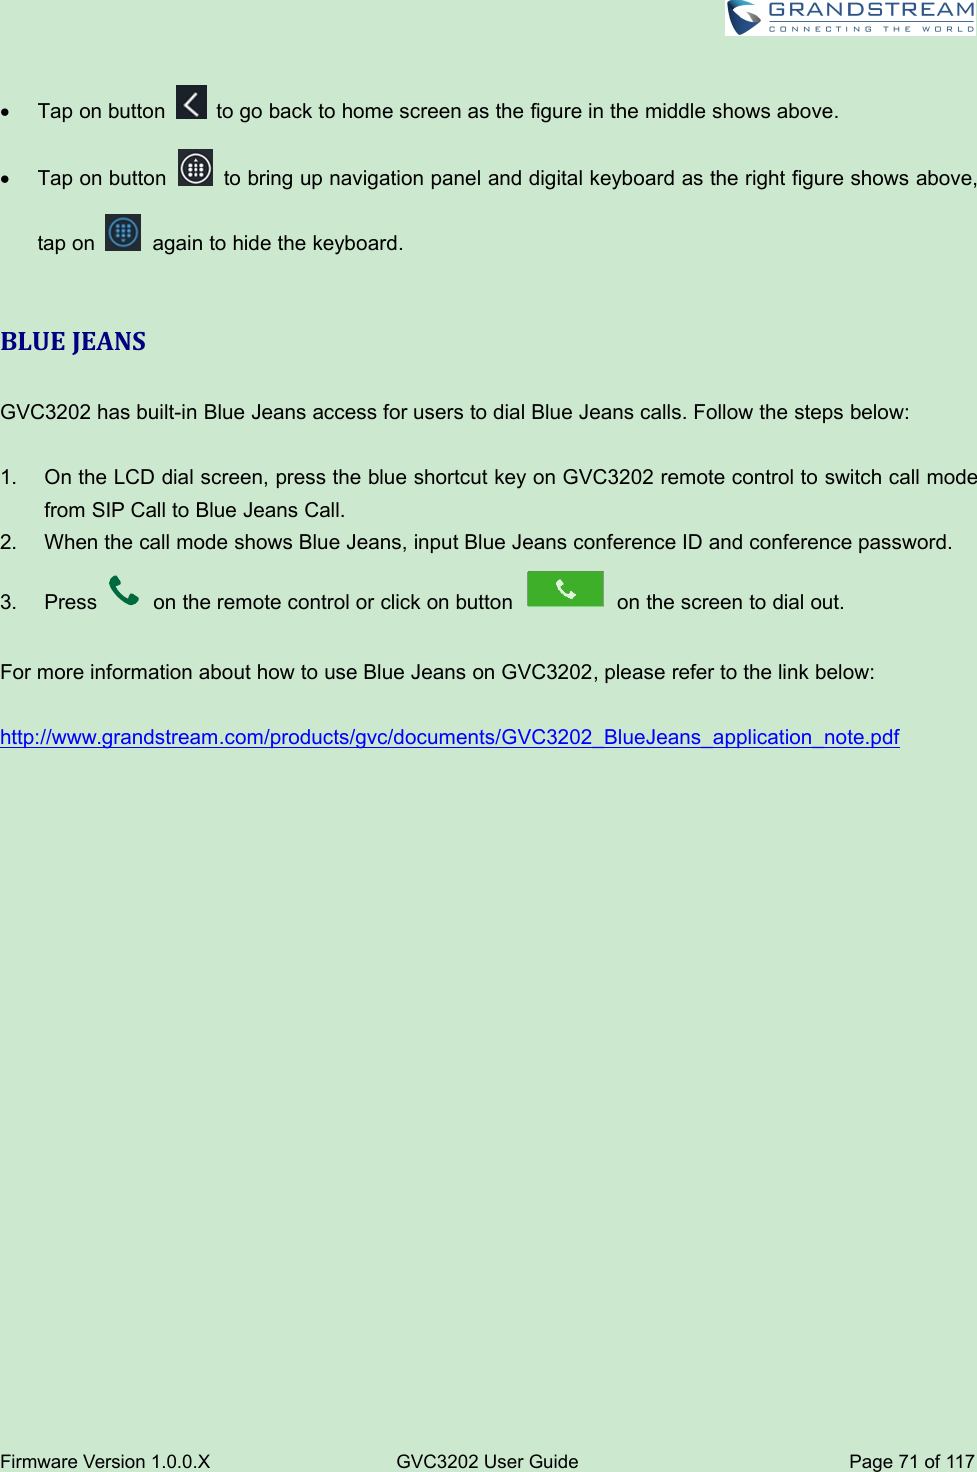
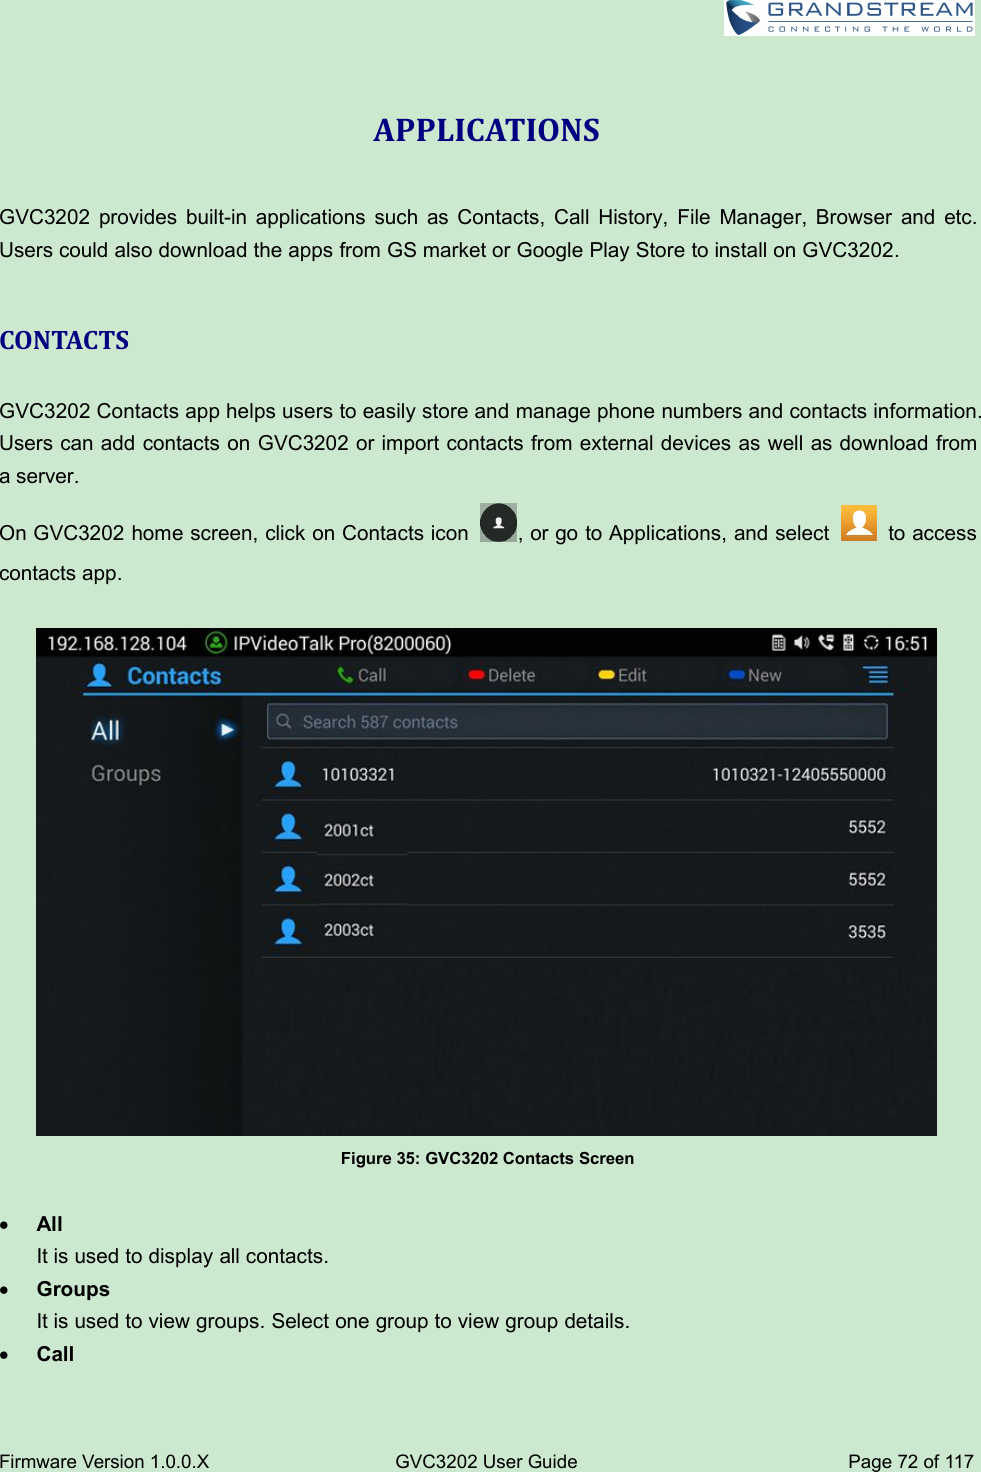
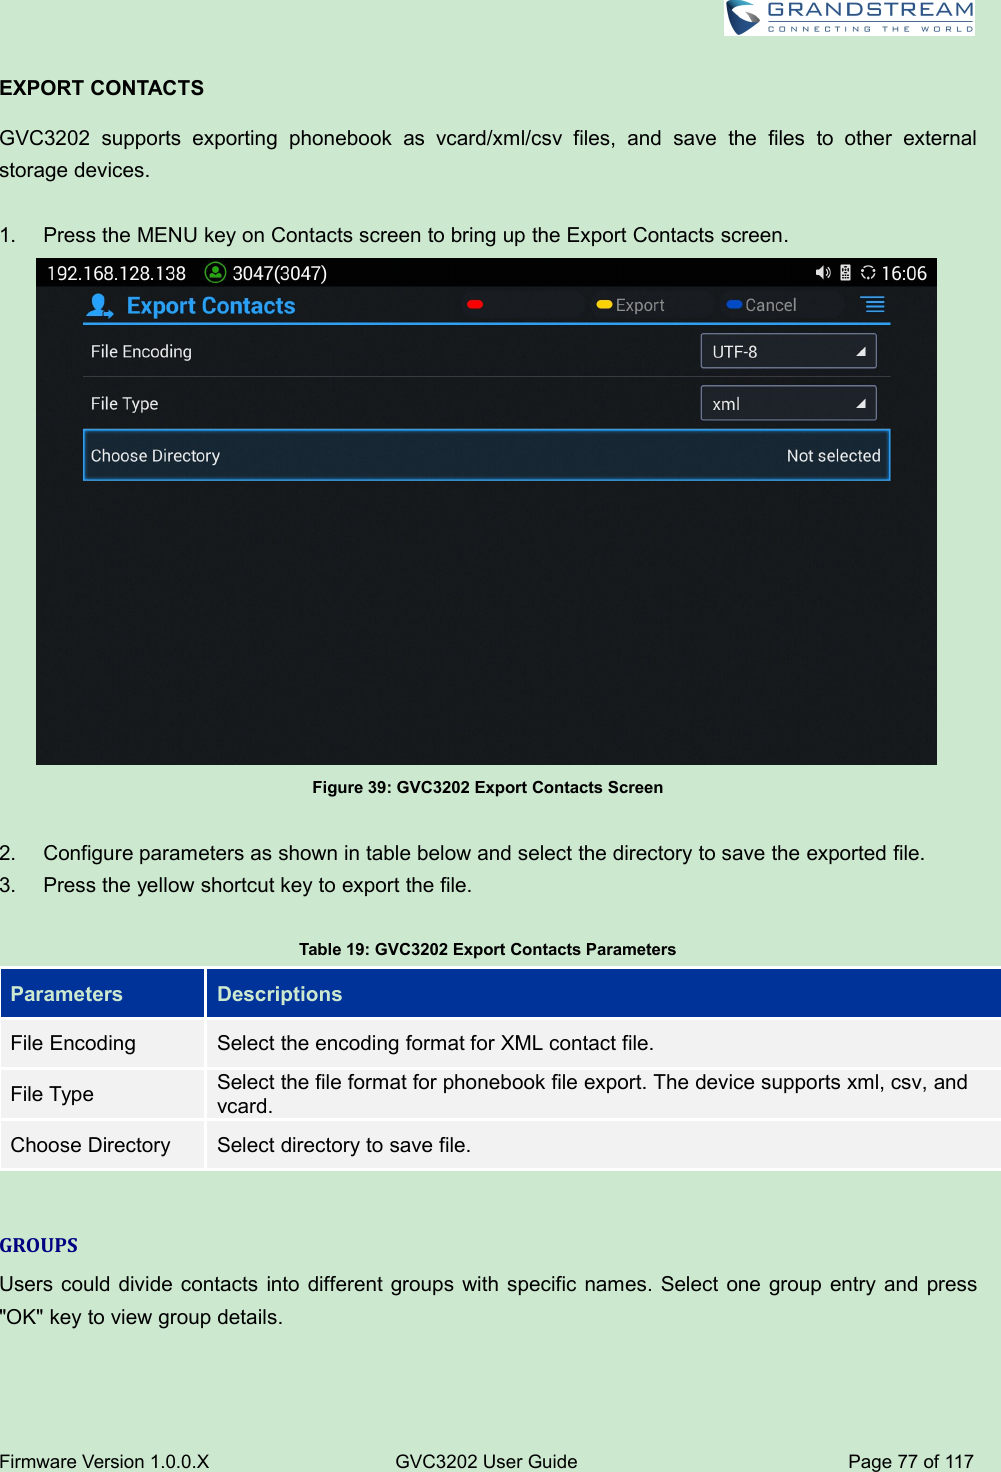
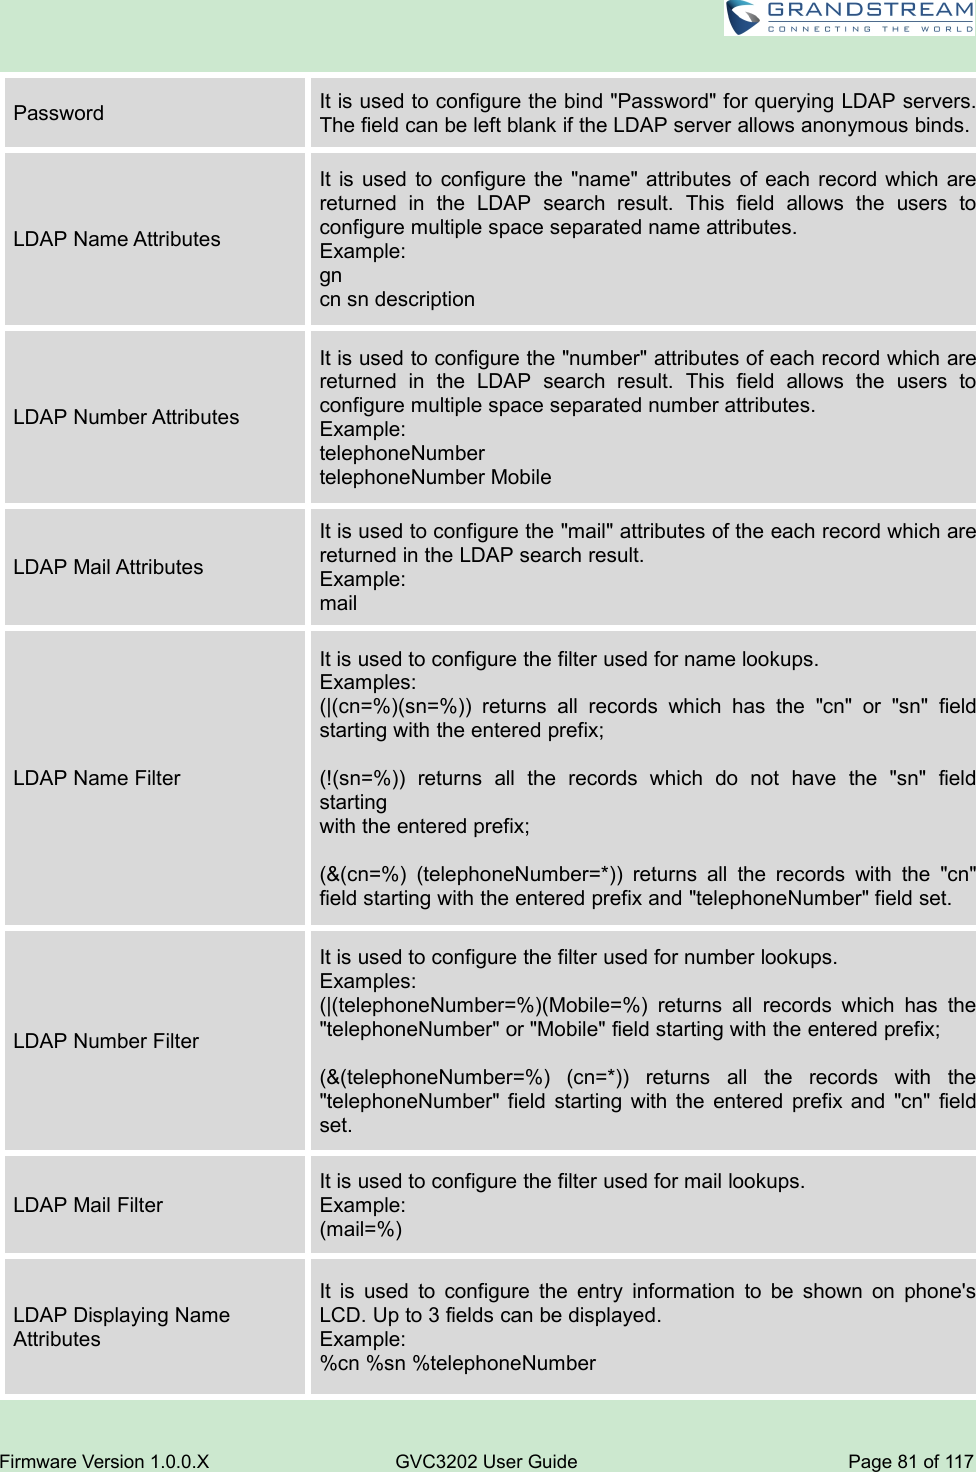
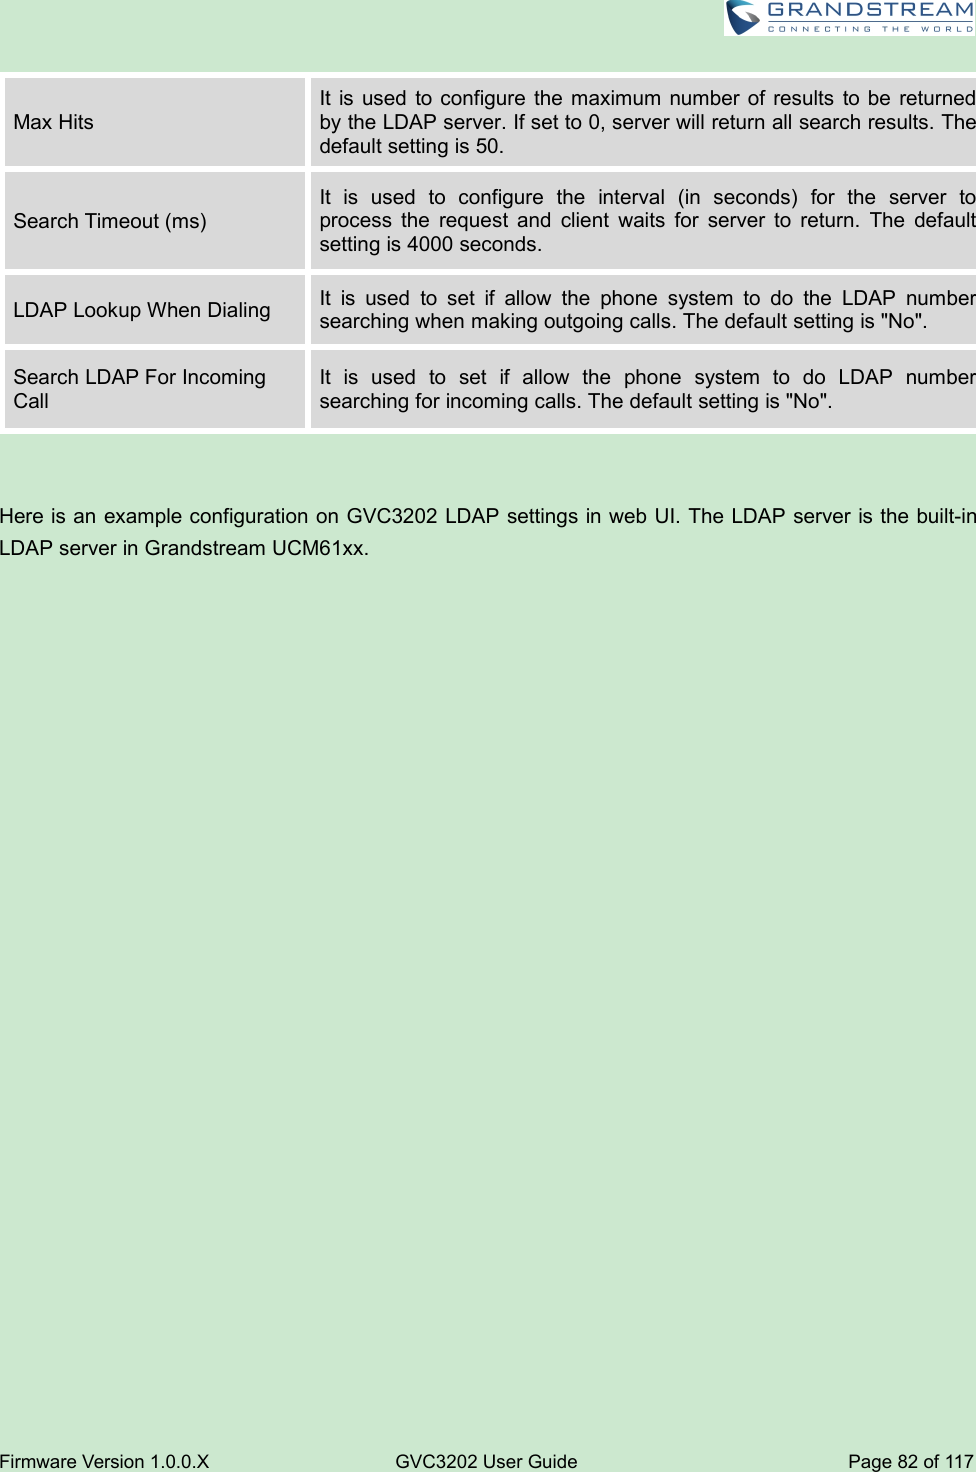
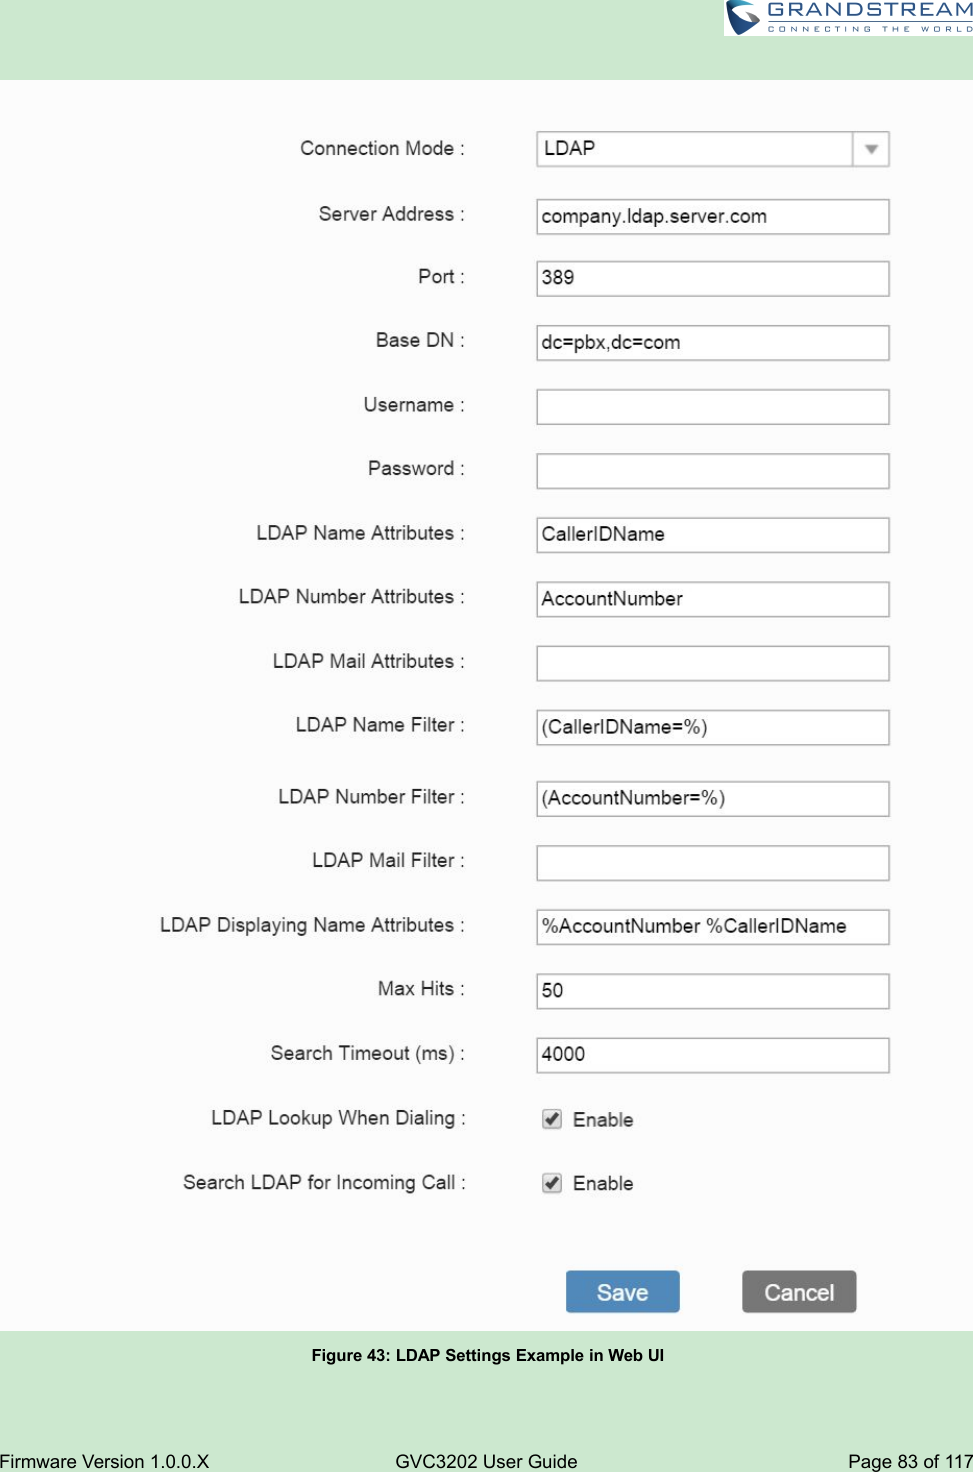
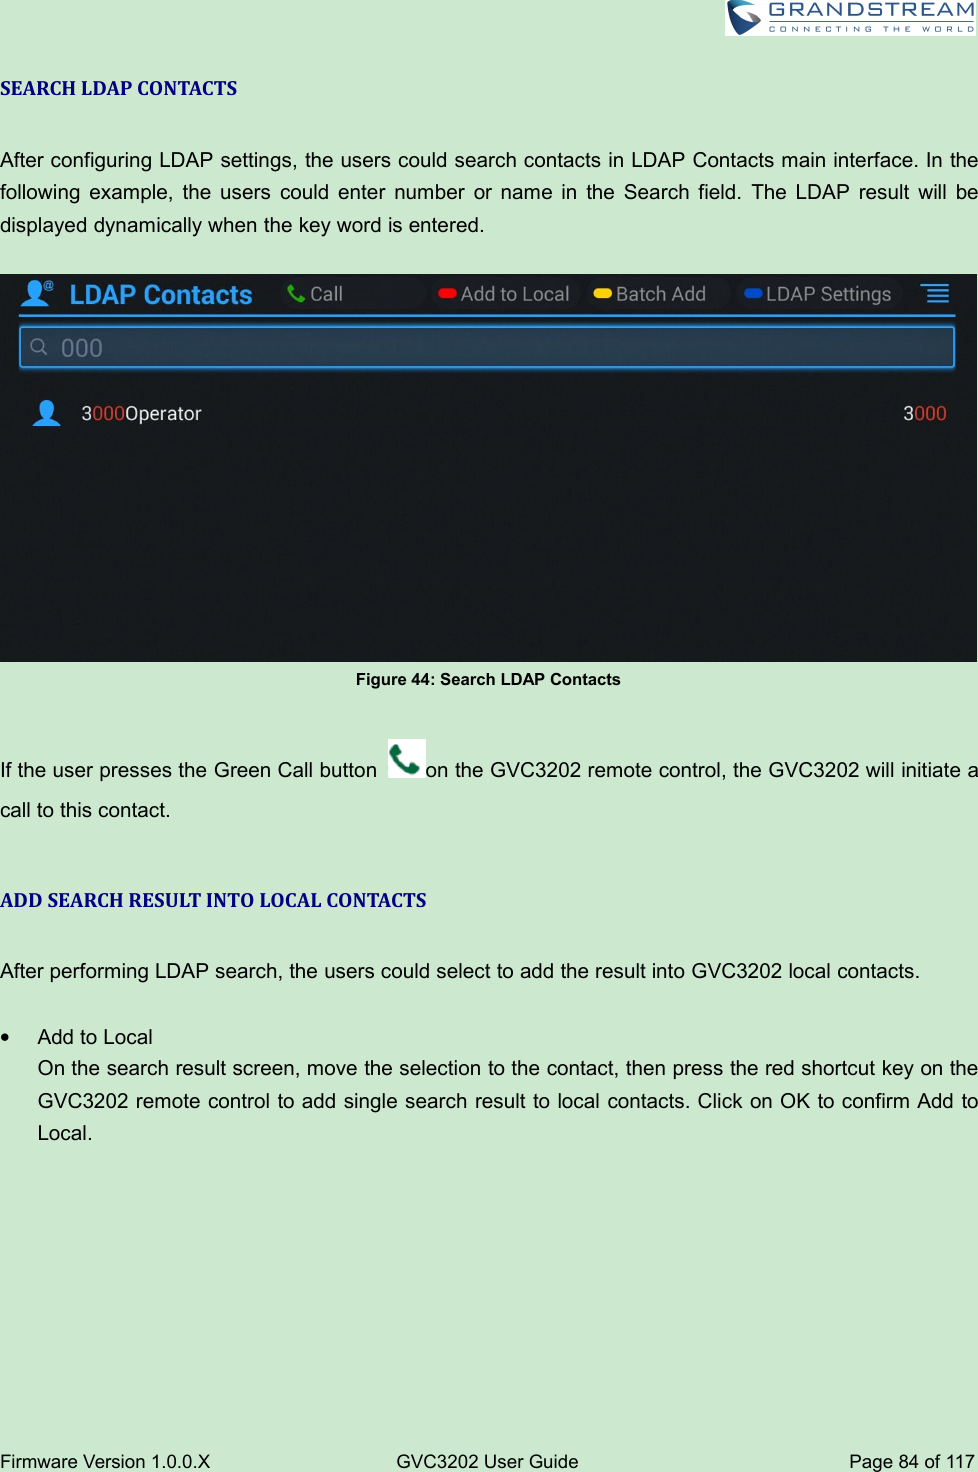
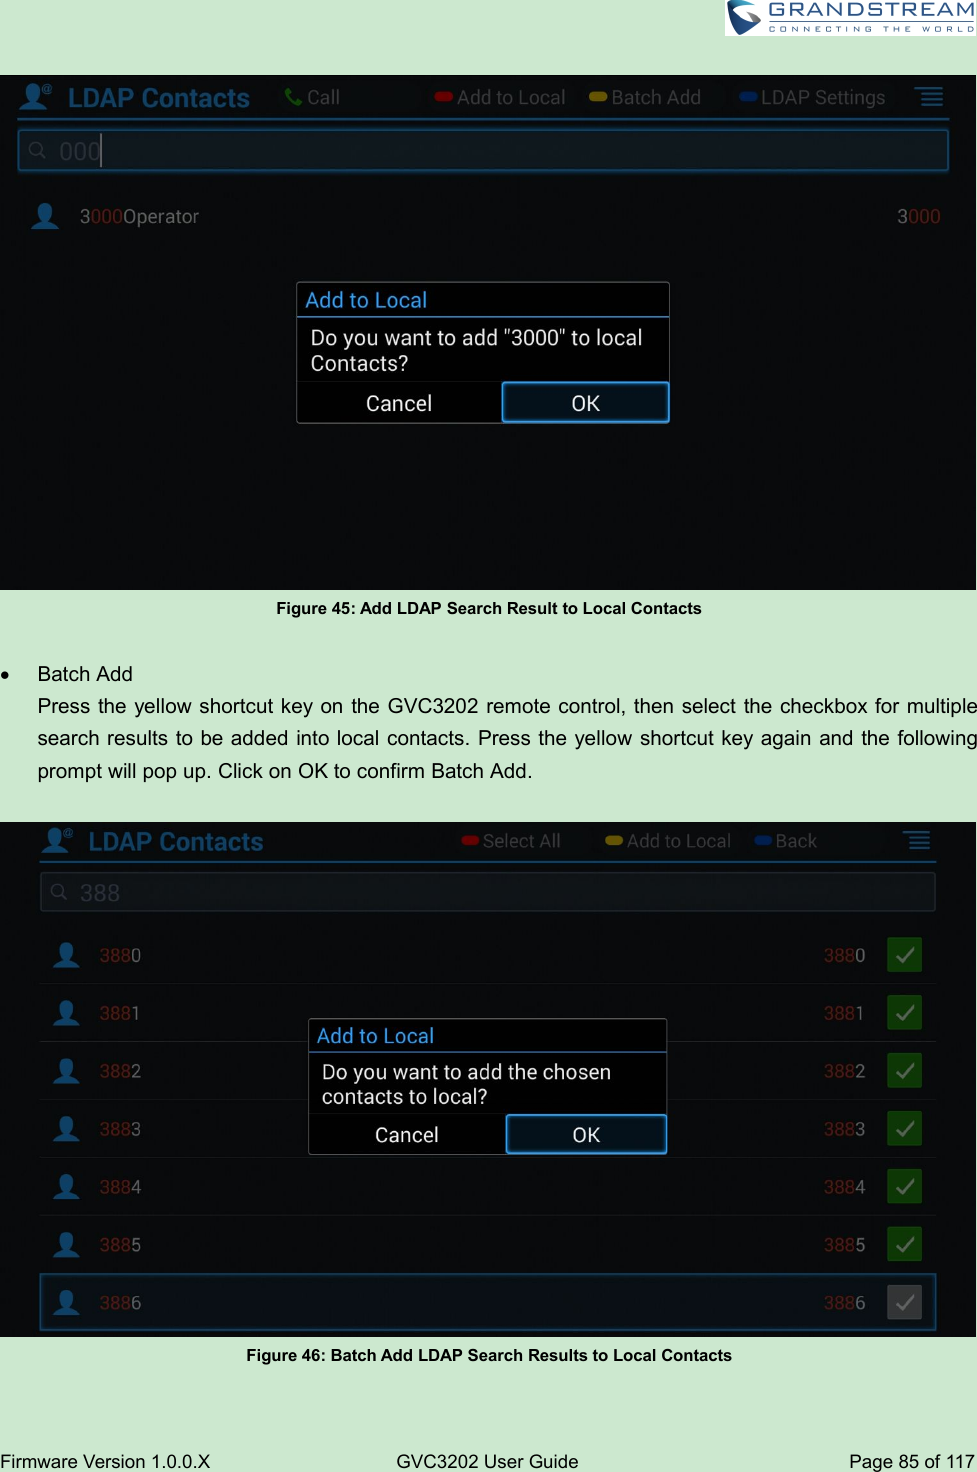
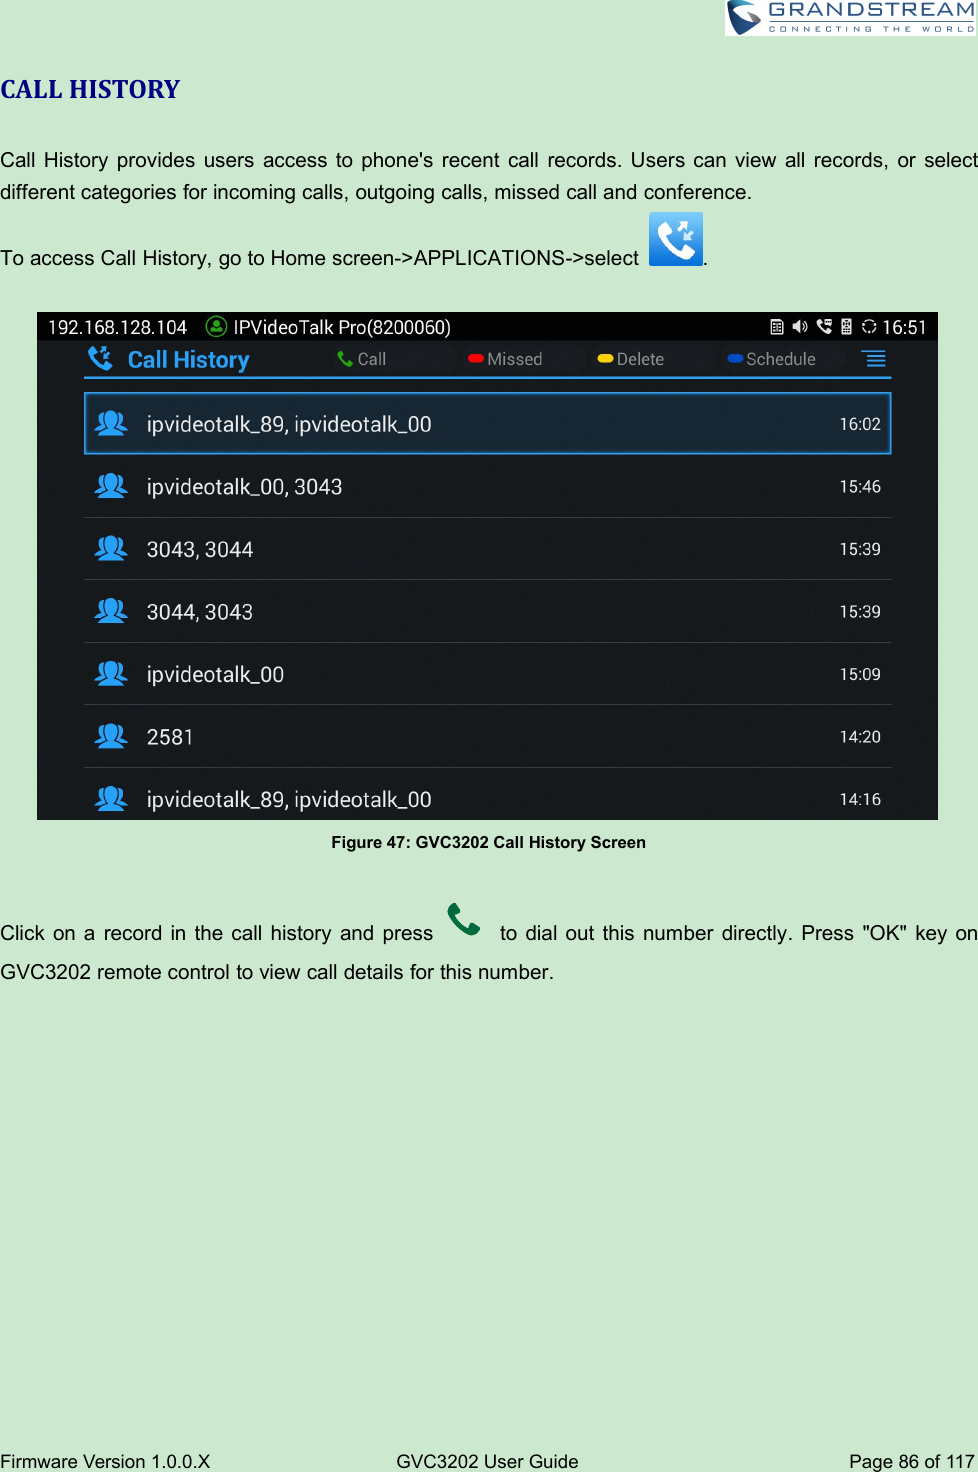
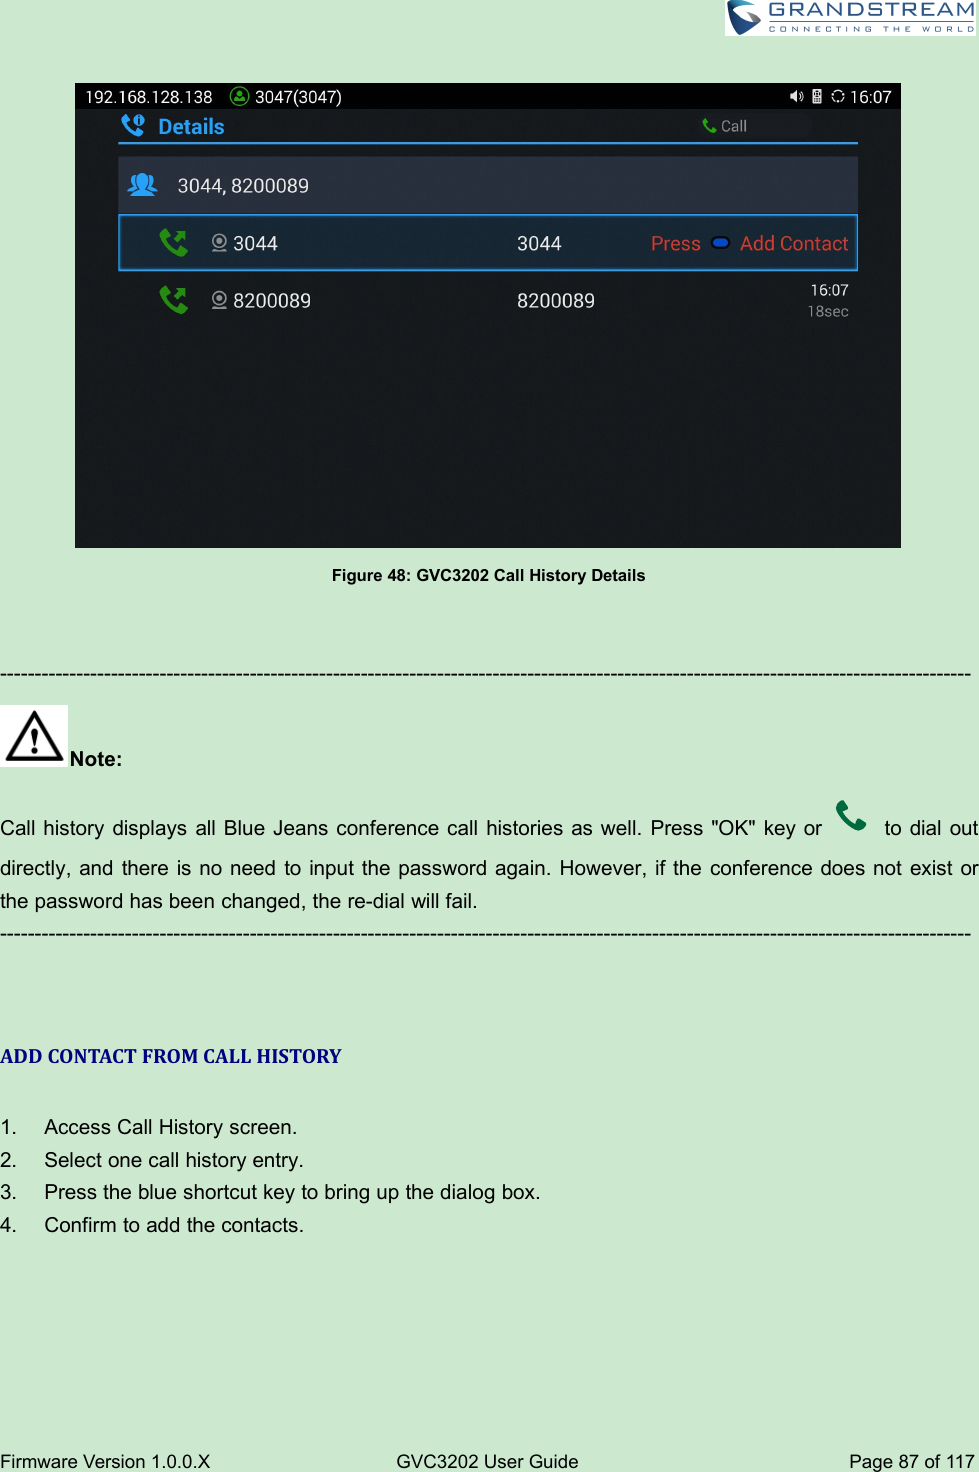
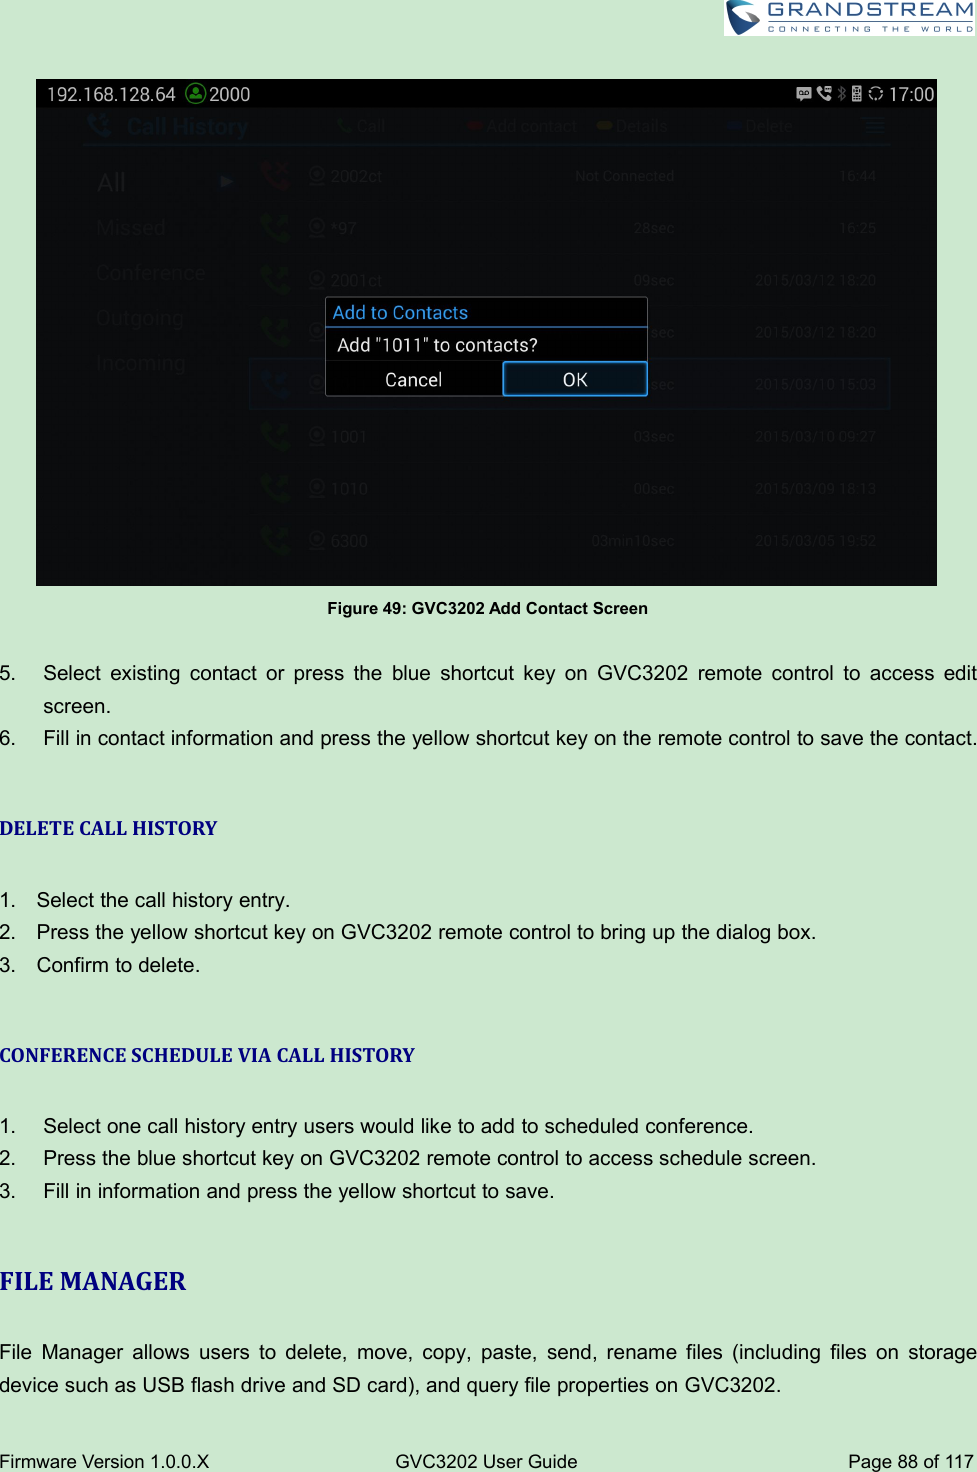
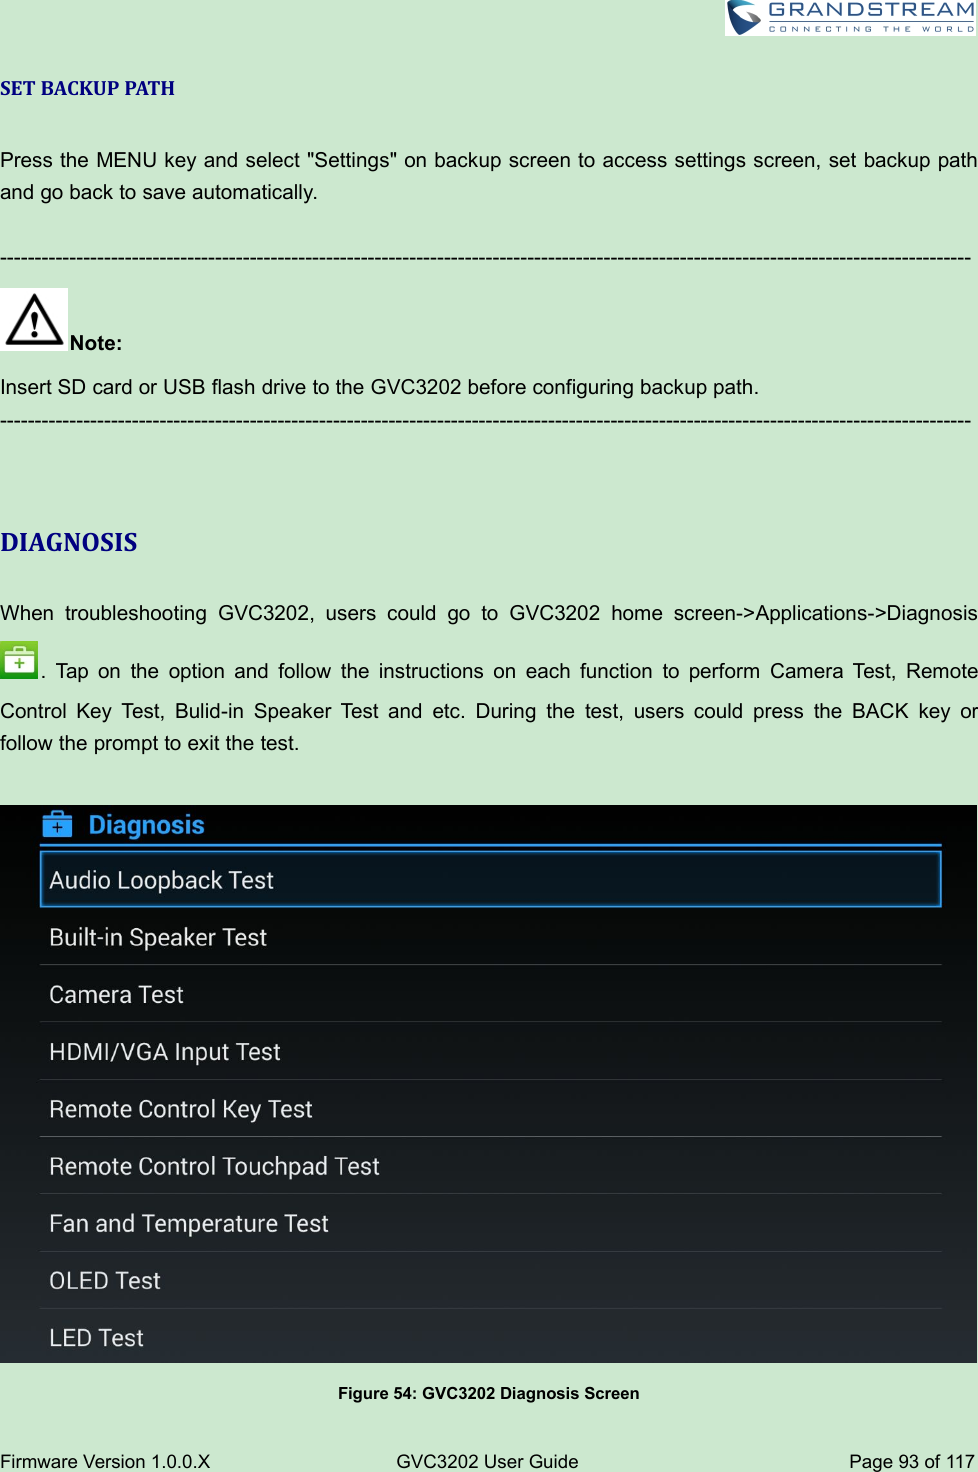

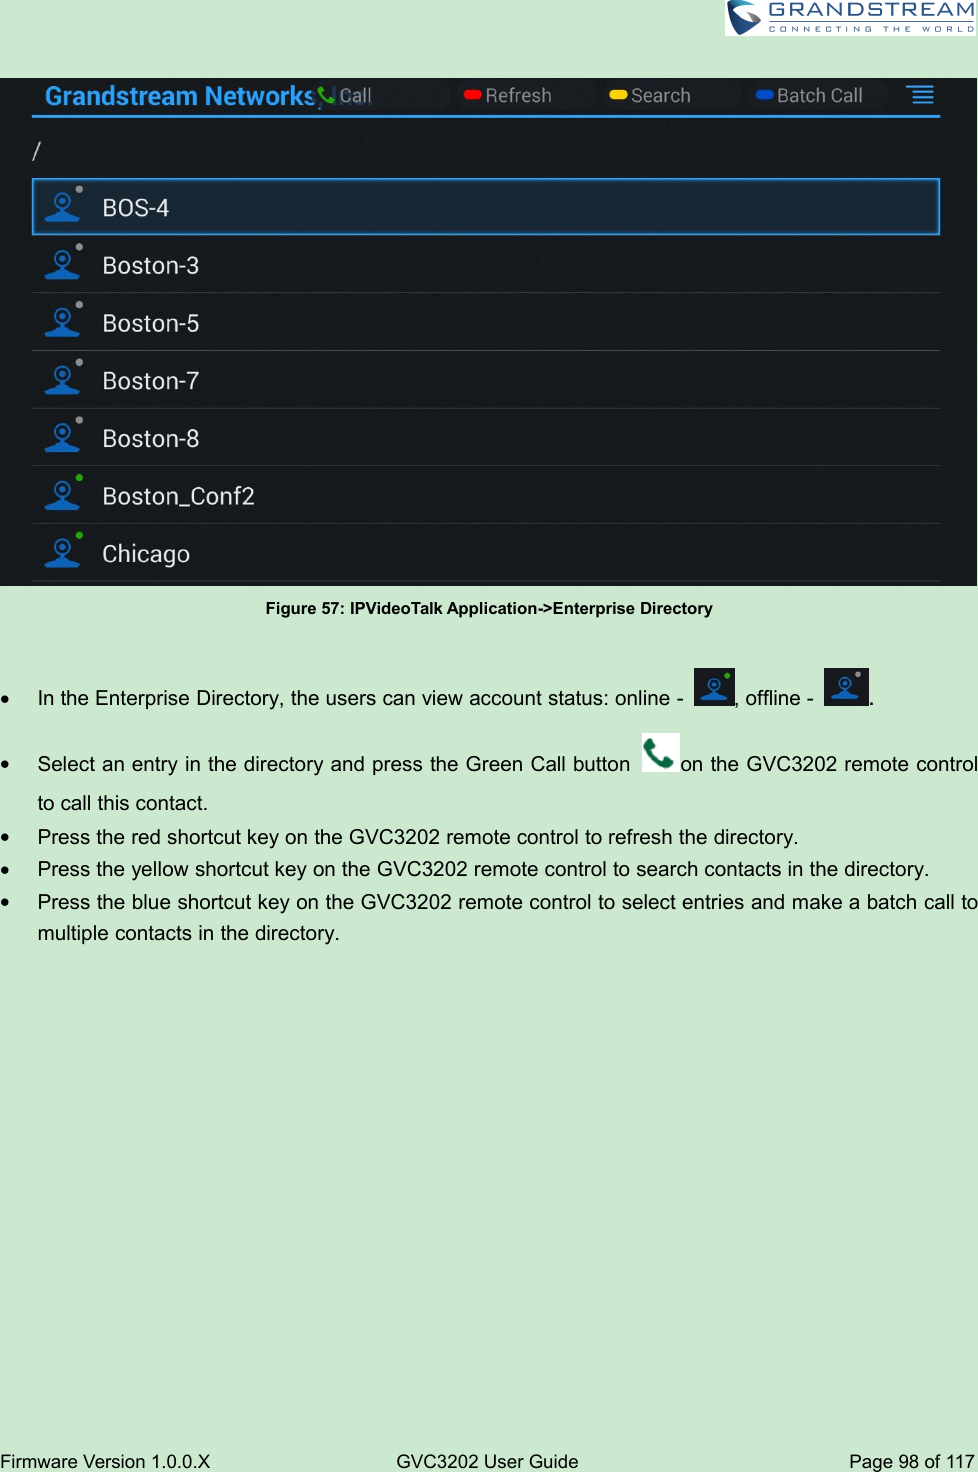

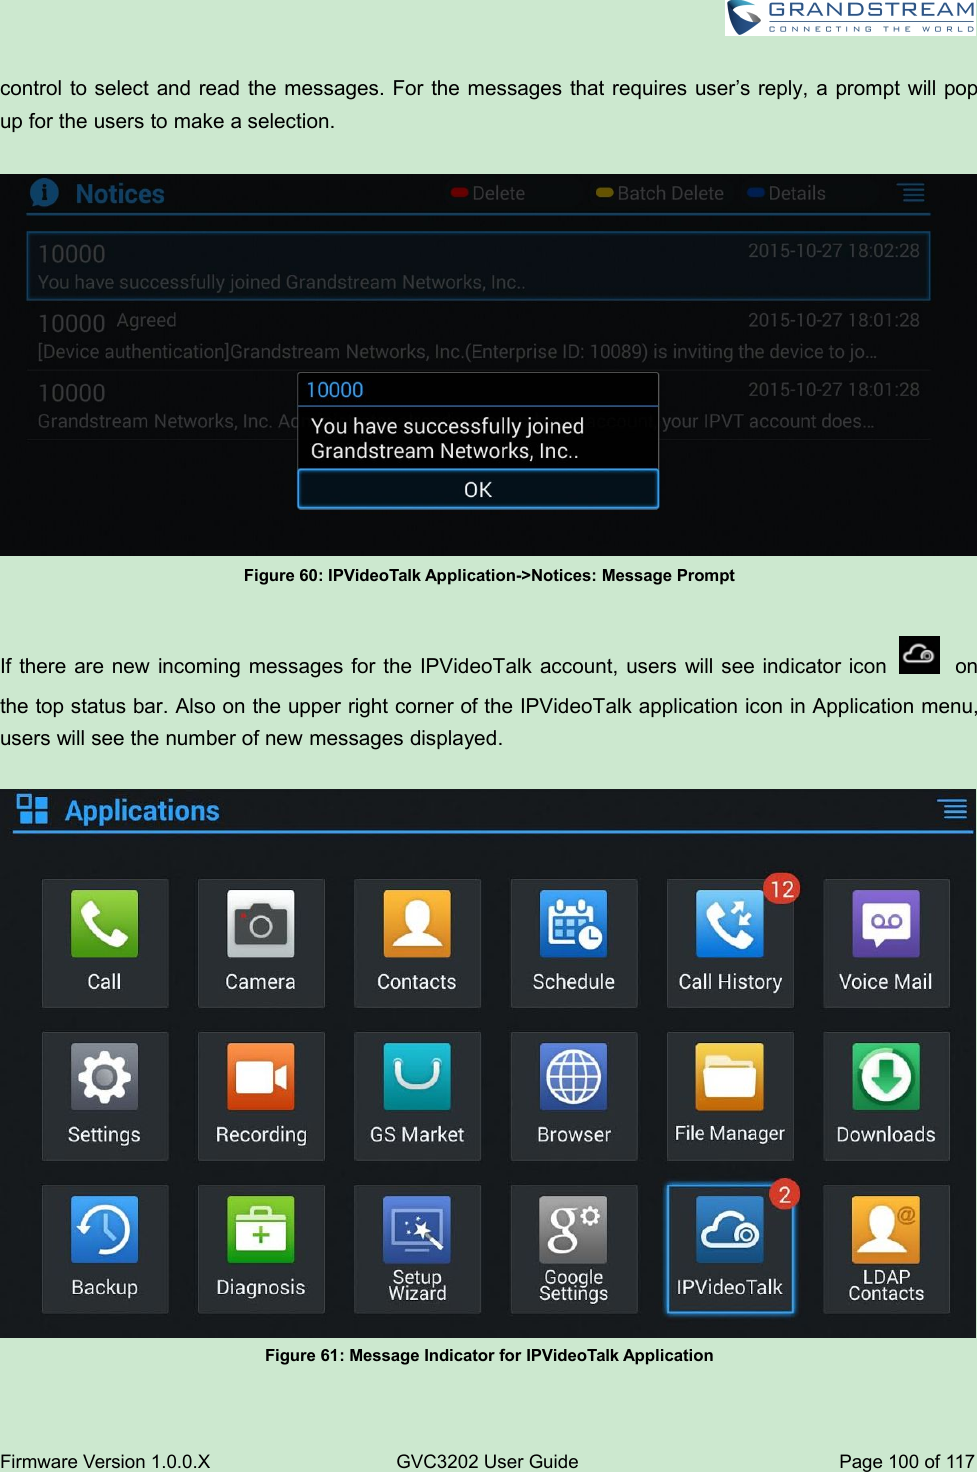
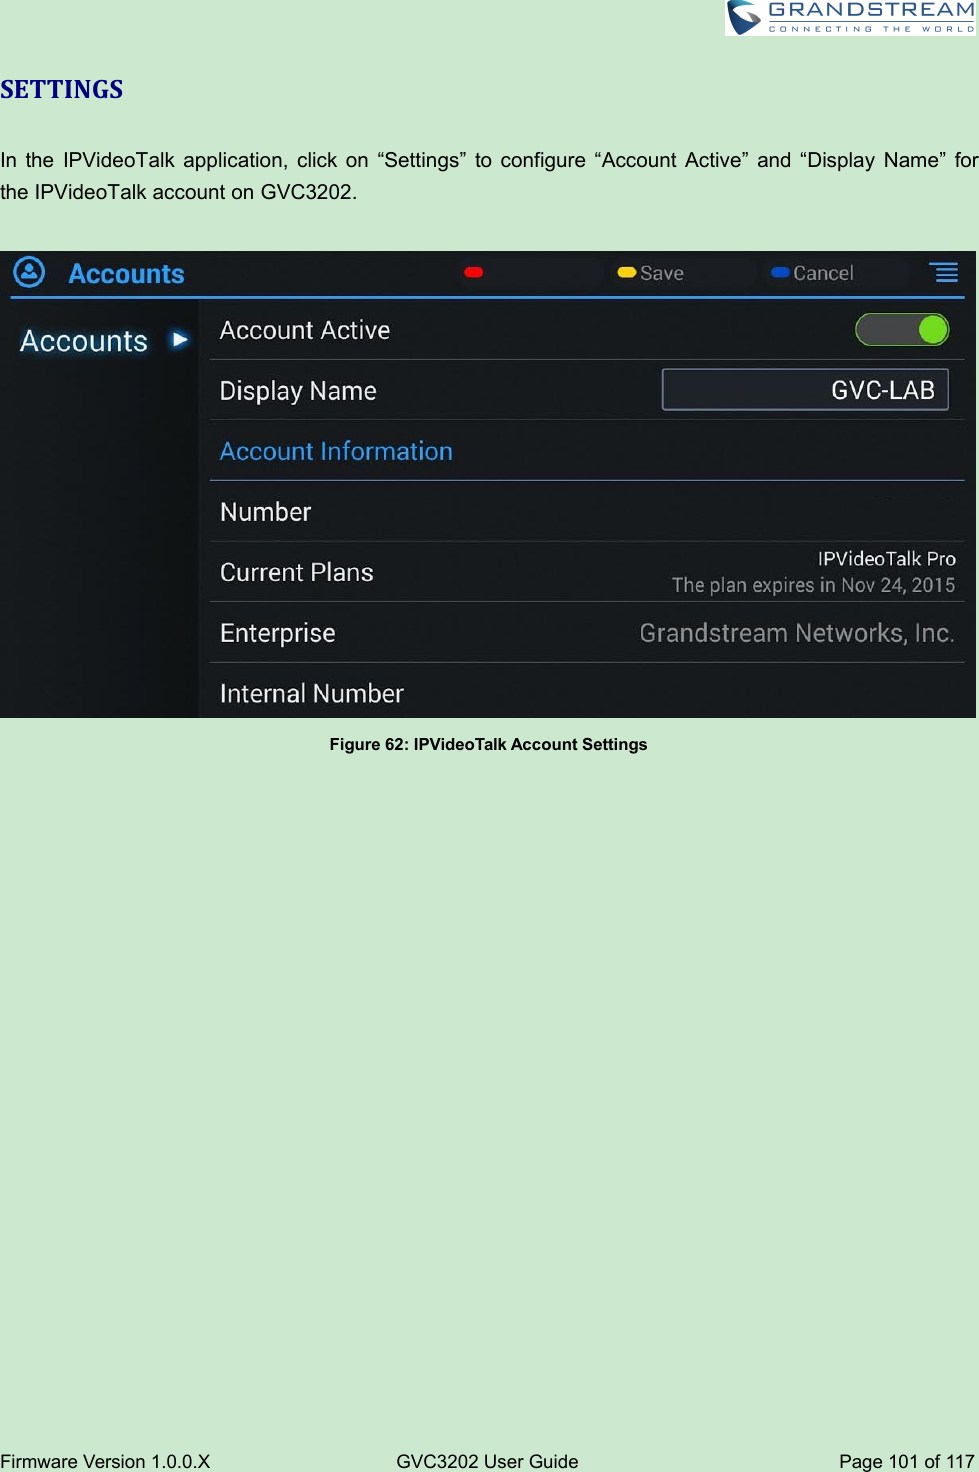

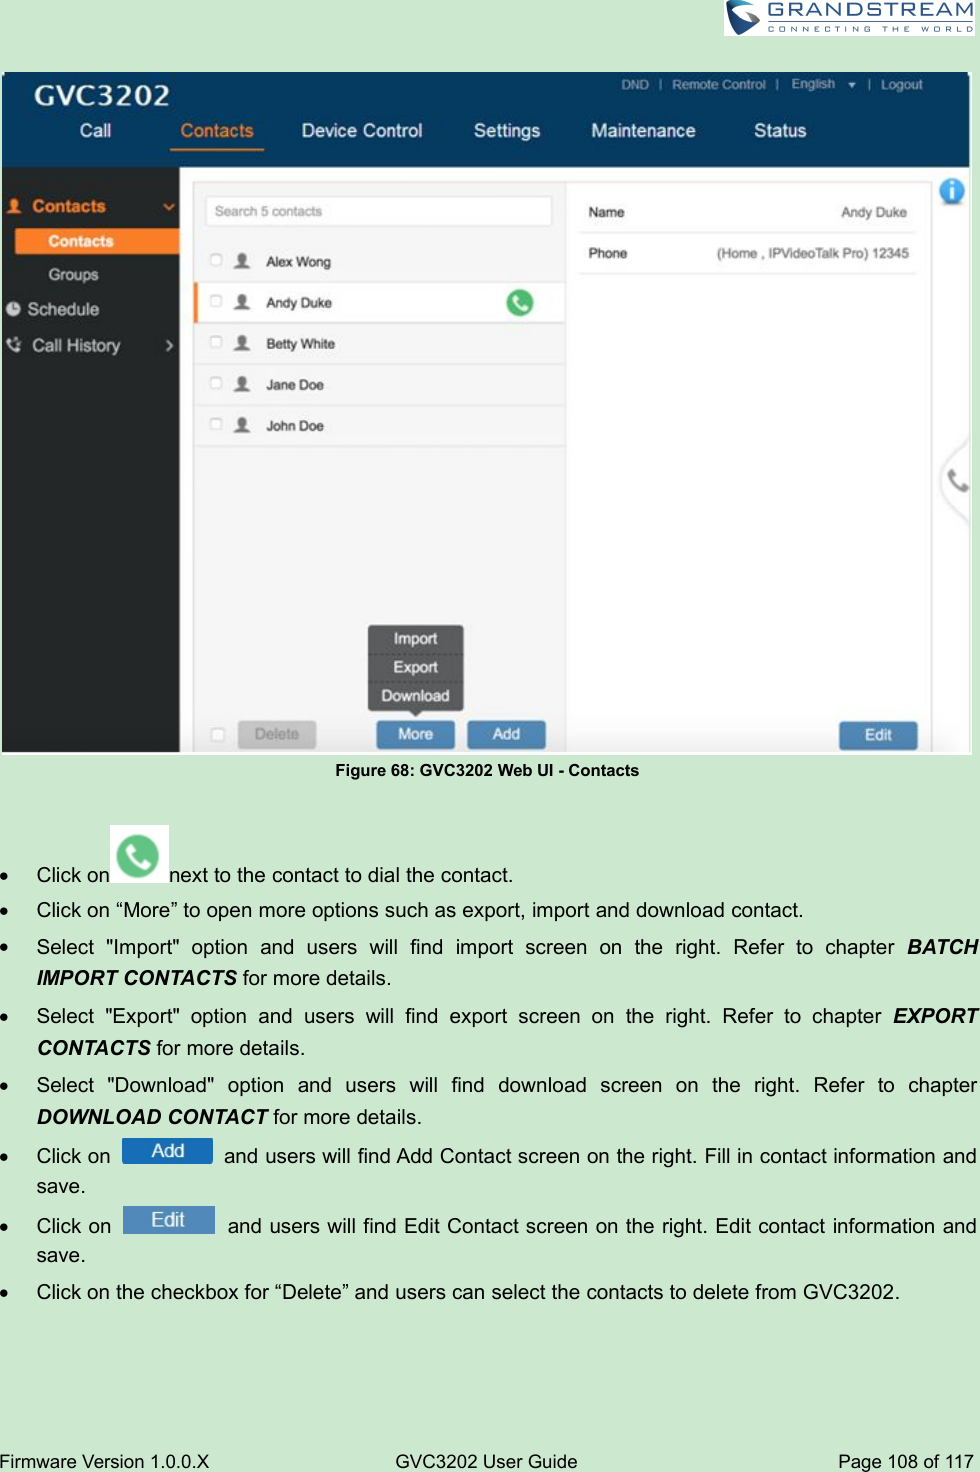
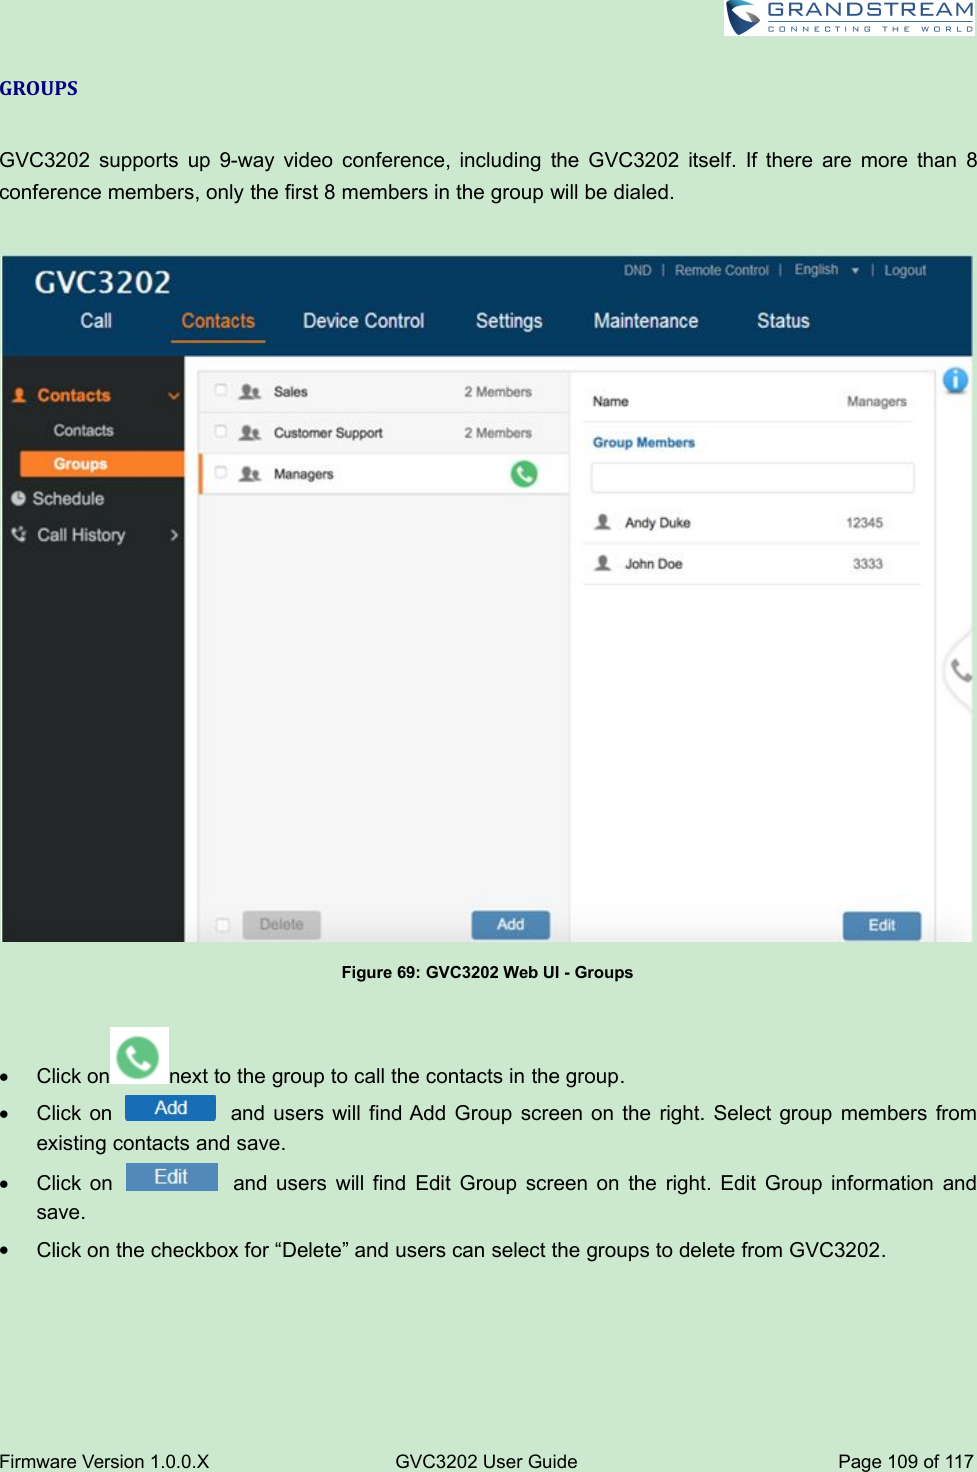
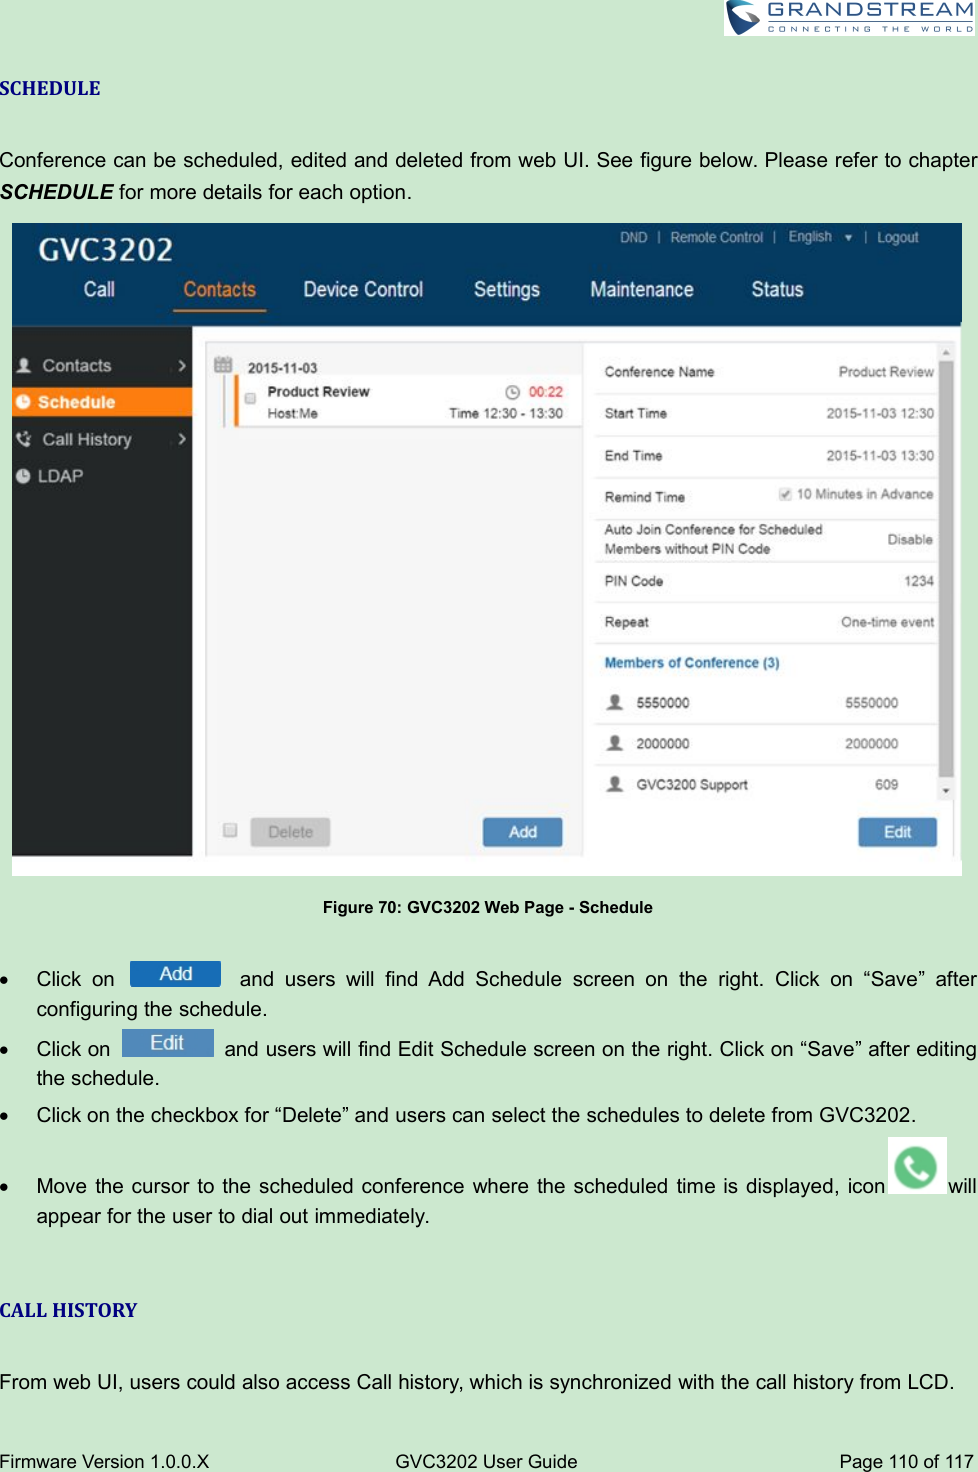
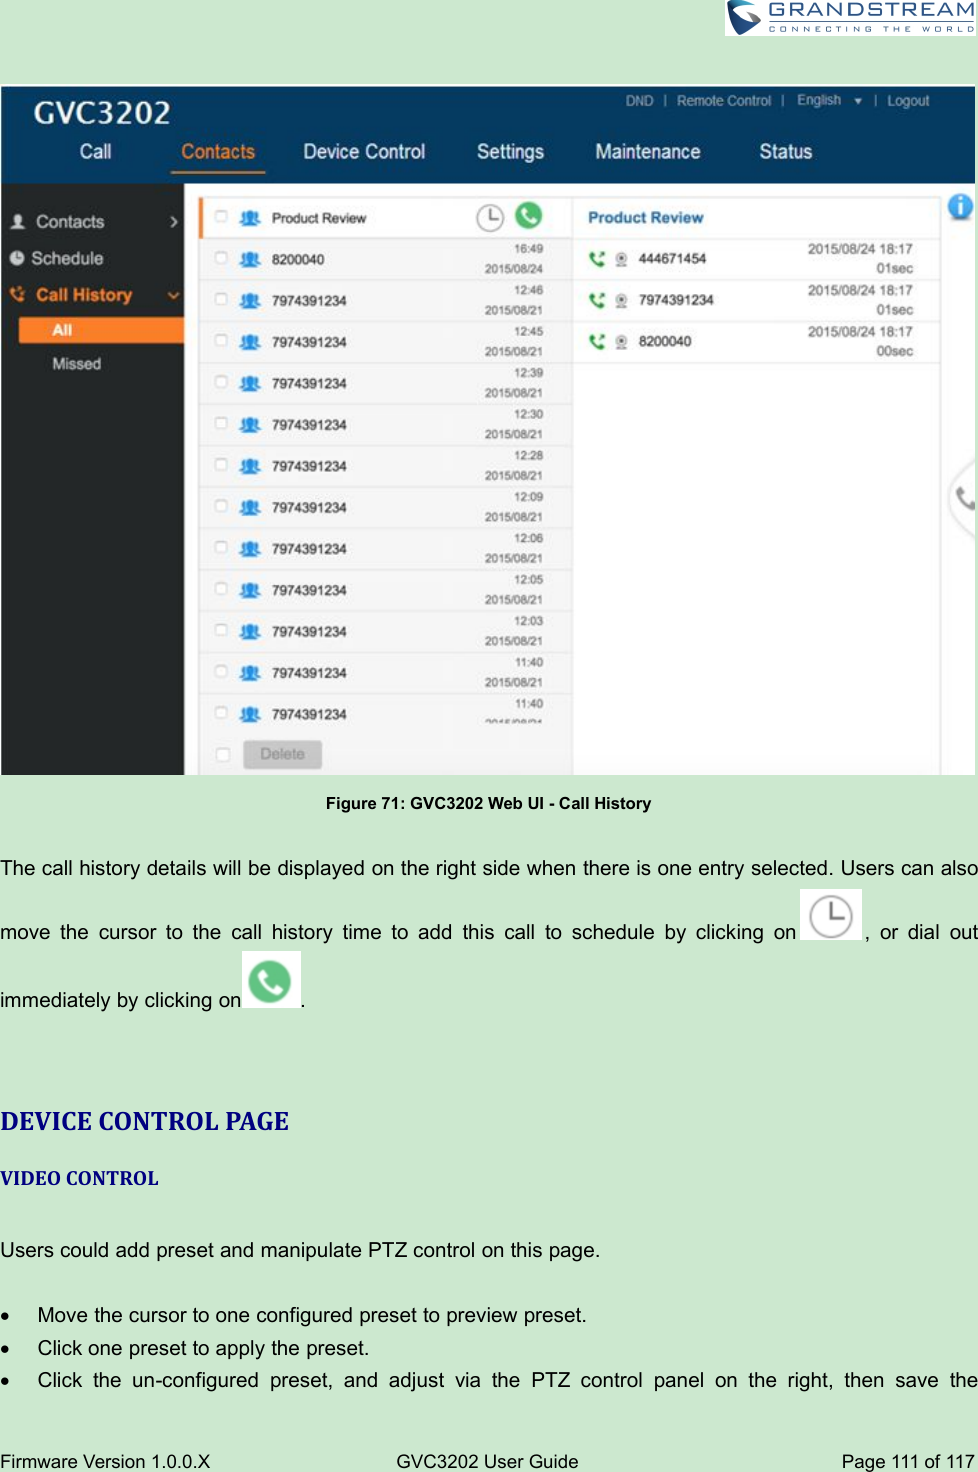
![Firmware Version 1.0.0.XGVC3202 User GuidePage 113 of 117Audio DeviceSelect the audio device that the GVC3202 will use for audio input and output duringcall or playing media. The options are “Auto”, “Bluetooth”, “USB” and “HDMI”.AutoGVC3202 will automatically detect whether any USB, Bluetooth or HDMIdevices are connected. If only one of them is connected, it will be used as theaudio device. If two or three are connected, the priority is“Bluetooth”>”USB”>”HDMI”.BluetoothThe Bluetooth audio device will be used for audio input and output.USBThe USB audio device will be used for audio input and output.HDMIThe audio input comes from the built-in MIC in GVC3202 and the audio outputcomes from HDMI.The default settings is "Auto".Call ProgressTones:Ring Back ToneBusy ToneReorder ToneConfirmation ToneCall-waiting ToneUsing these settings, users can configure ring or tone frequencies based onparameters from the local telecom provider. By default, they are set to the NorthAmerican standard.Frequencies should be configured with known values to avoid uncomfortable highpitch sounds.Syntax: f1=val, f2=val [,c=on1/off1[-on2/off2[-on3/off3]]];(Frequencies are in Hz and cadence on and off are in 10ms)ON is the period of ringing ("On time" in ‘ms’) while OFF is the period of silence. Inorder to set a continuous ring, OFF should be zero. Otherwise, it will ring ON ms anda pause of OFF ms and then repeat the pattern. Up to three cadences aresupported.Ring Back Tone:Users can configure ring back tone which is the tone the caller will hear before thecallee answers the call. The default value: f1=440@-19,f2=480@-19,c=2000/4000;Busy Tone:Users can configure busy tone which will be heard if the callee is busy or on DND.The default value: f1=480@-24,f2=620@-24,c=500/500;Reorder Tone:Users can configure reorder tone which will be heard when the call fails to beestablished such as wrong account number is dialed, or the call is timed out. Thedefault value: f1=480@-24,f2=620@-24,c=250/250;](https://usermanual.wiki/Grandstream-Networks/GVC3200.User-manual-part-2/User-Guide-2856440-Page-54.png)