HTC CAVA100 Smart Phone User Manual Book Cavalier Generic English Manual indb
HTC Corporation Smart Phone Book Cavalier Generic English Manual indb
UserManual.wiki
>
HTC
>
CAVA100 User Manual
>
User manual 2
Contents
1.
User manual 1
2.
User manual 2
User manual 2
Navigation menu
Upload a User Manual
Namespaces
Wiki Guide
HTML
PDF
Info
Views
User Manual
Discussion / Help
Navigation

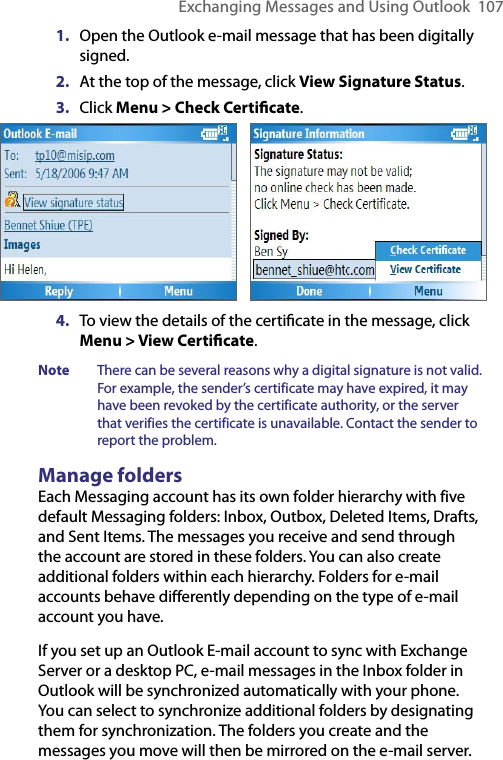
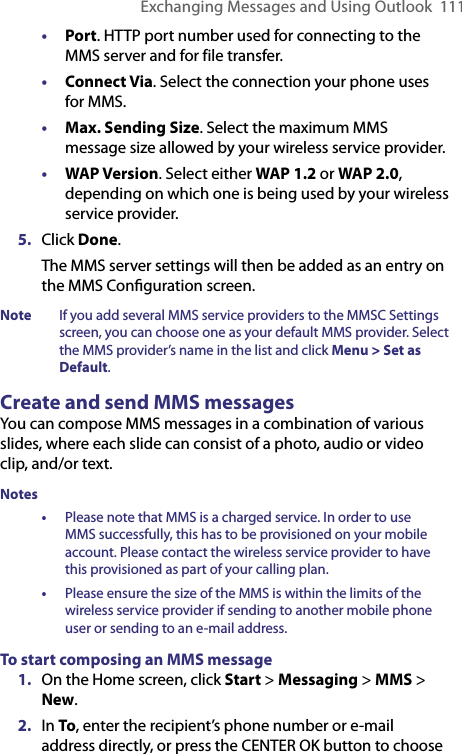
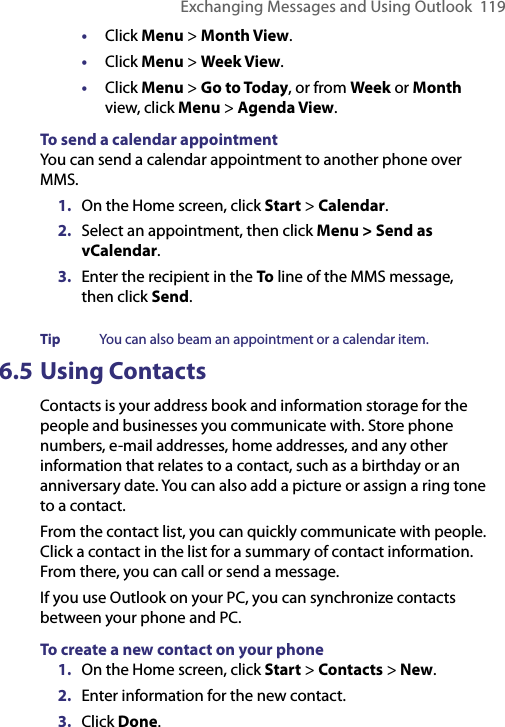
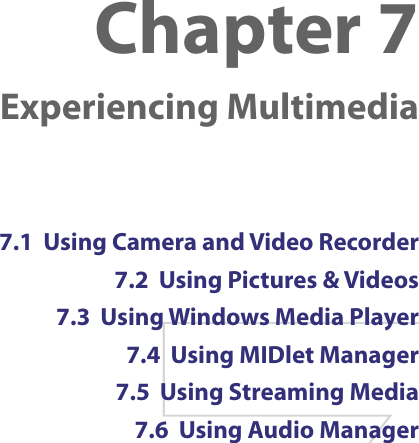
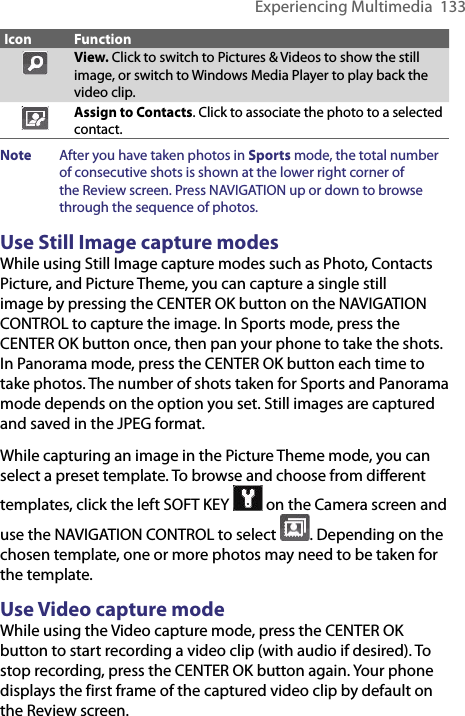
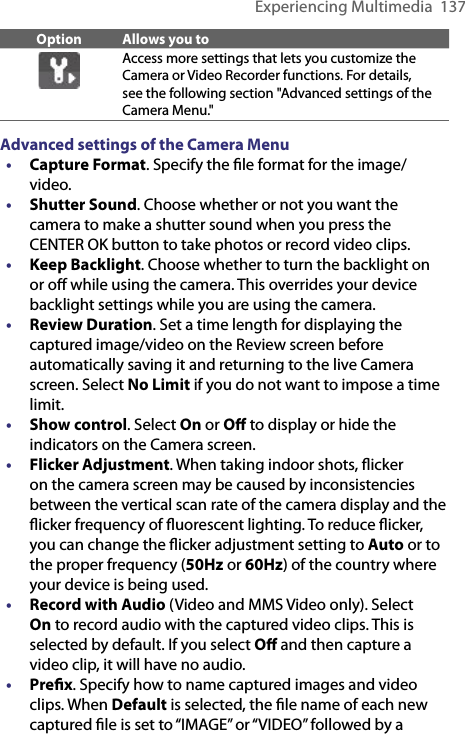
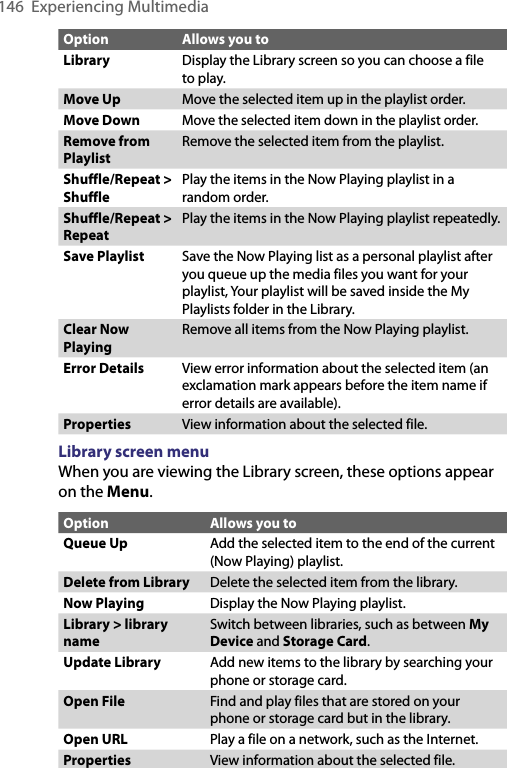
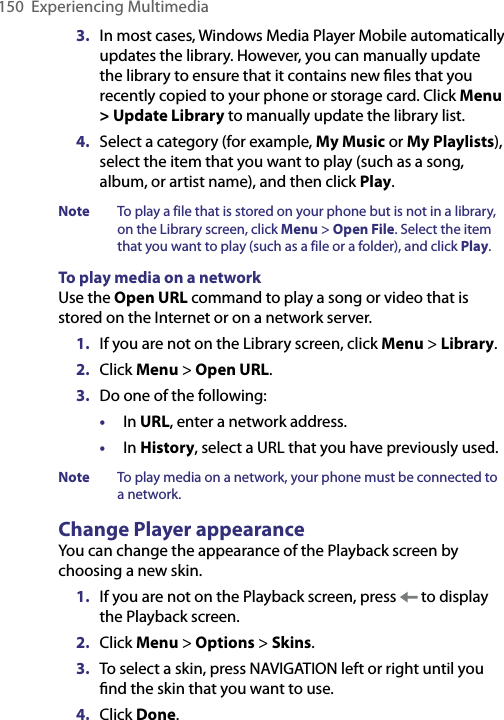
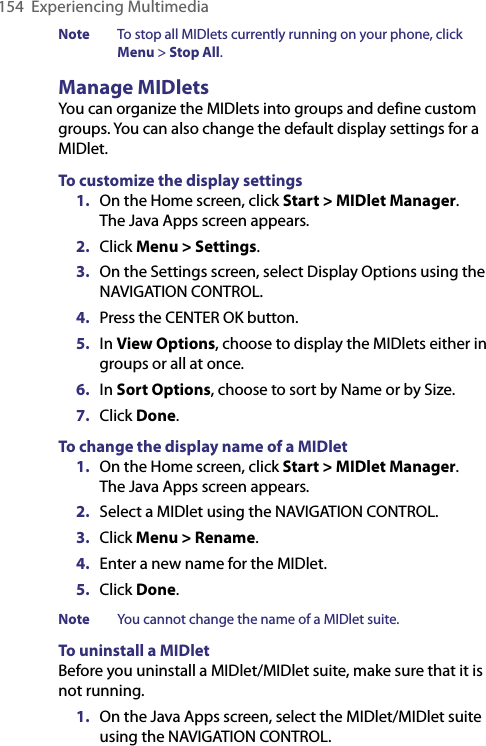
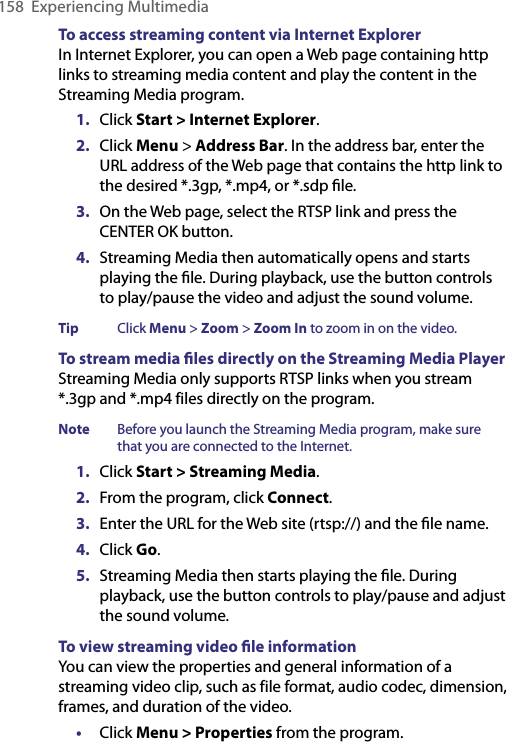
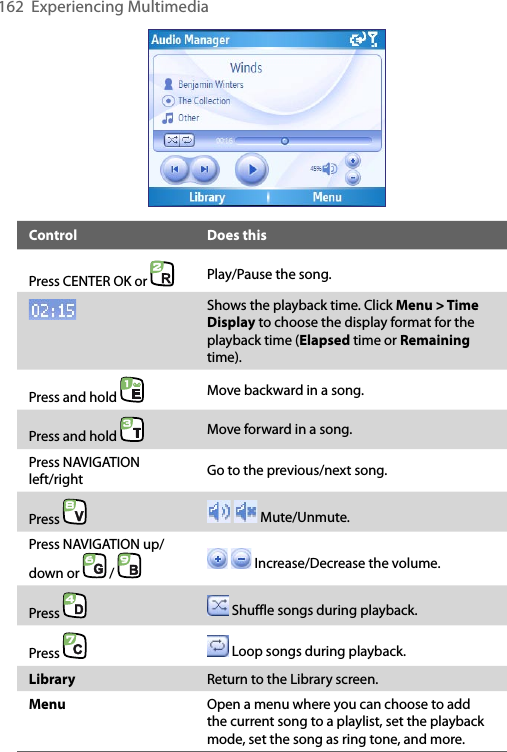
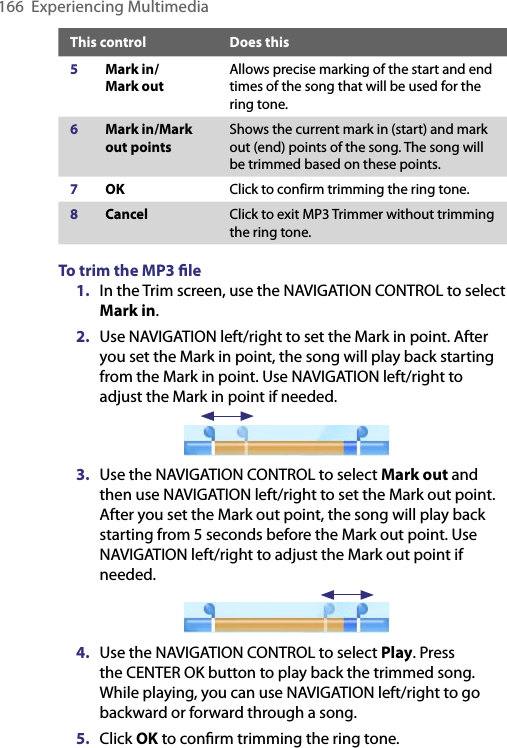
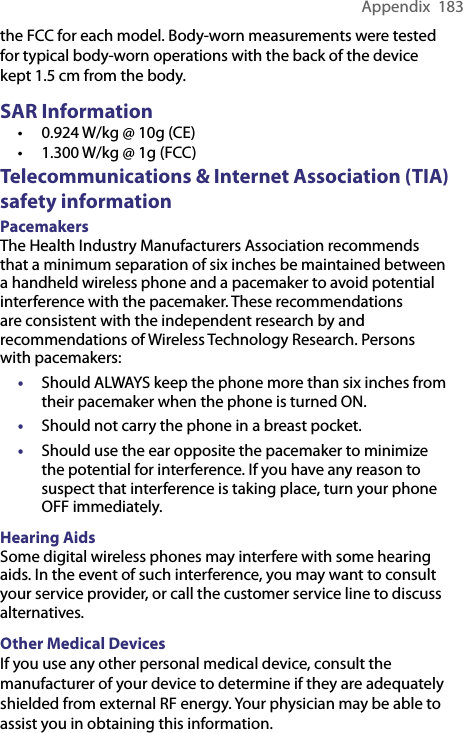
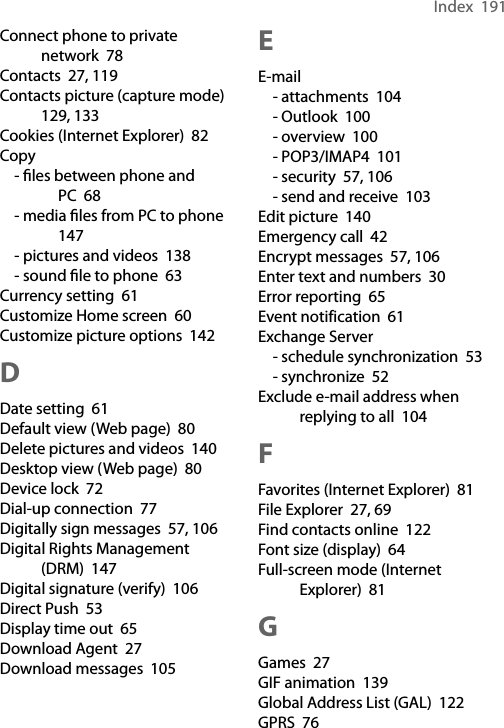
![130 Experiencing MultimediaCamera mode icons and indicatorsThe Camera [Photo] screen 2138794 5 6101 Capture mode. Indicates the current capture mode.2 Zoom-ratio. Indicates the current zoom ratio. Press NAVIGATION up or down to increase or decrease the zoom level.3 Camera Settings. Click the left SOFT KEY to open the Camera Settings screen.4 Exposure Value (EV). Allows you to adjust the exposure value from -2 EV to +2 EV (increments of 0.5) by pressing NAVIGATION left or right. 5 White Balance. Indicates the current white balance setting. : Auto; : Daylight; : Night; : Incandescent; : Fluorescent.6 Self-timer. Indicates the current self-timer setting while capturing images. Click the left SOFT KEY > > Self-timer to select the self-timer setting (Off, 2 seconds, or 10 seconds).](https://usermanual.wiki/HTC/CAVA100.User-manual-2/User-Guide-787345-Page-32.png)
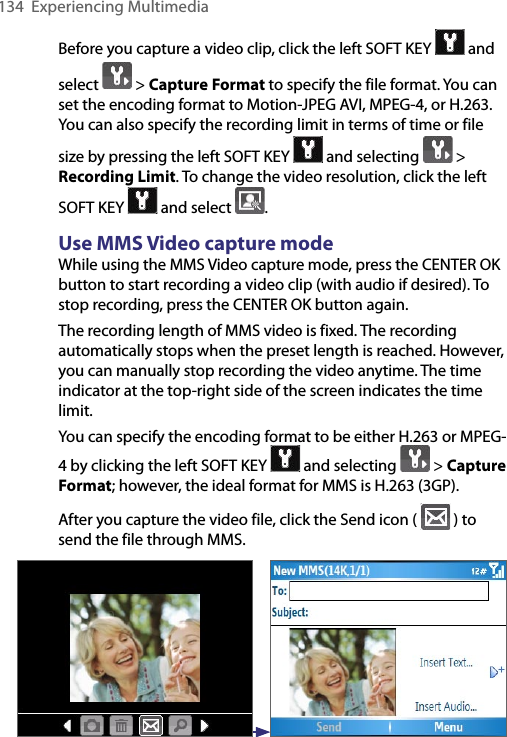
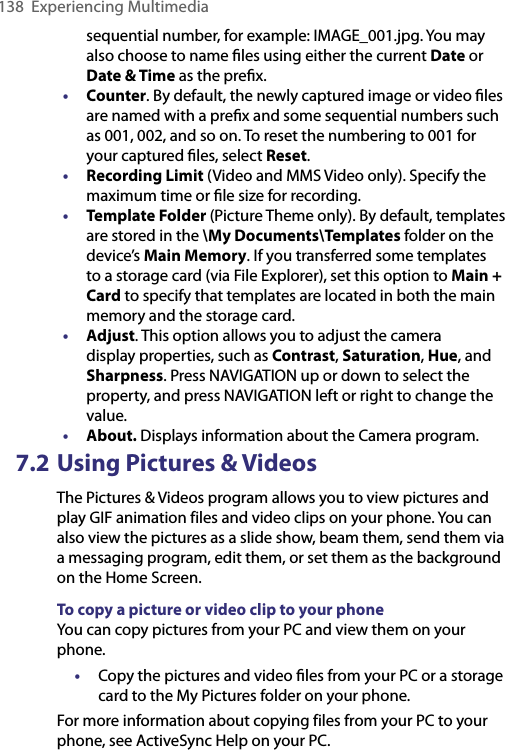
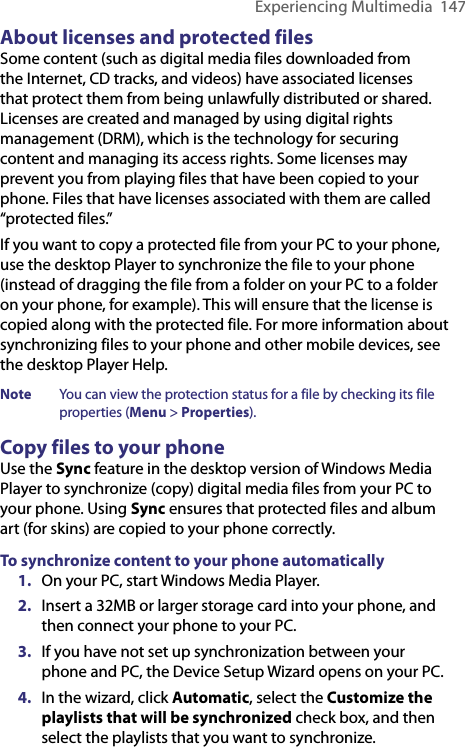
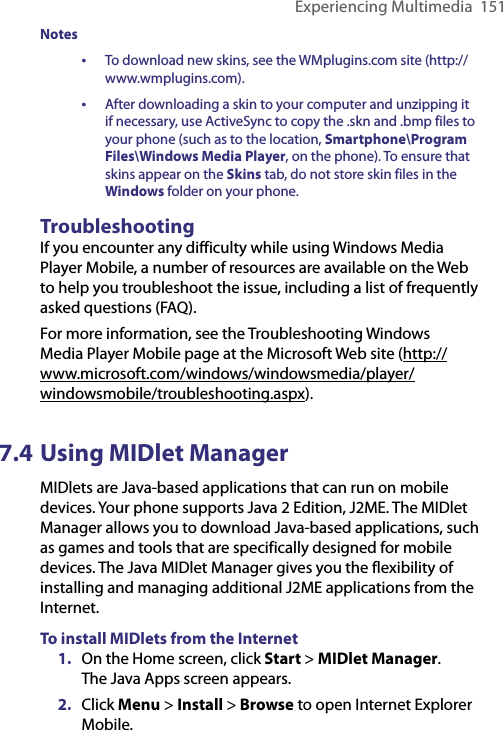
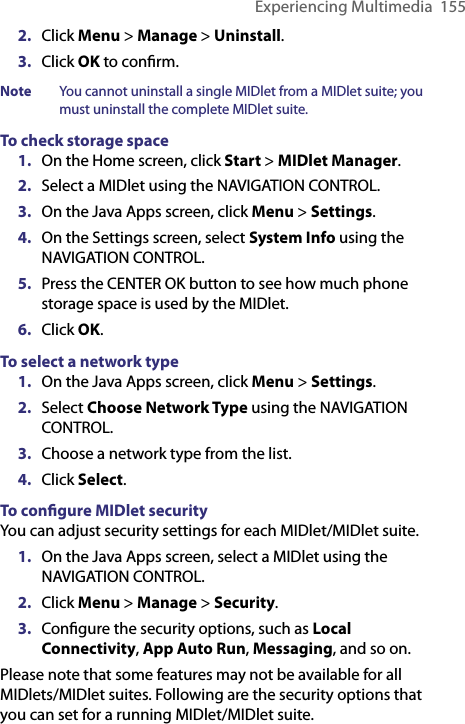
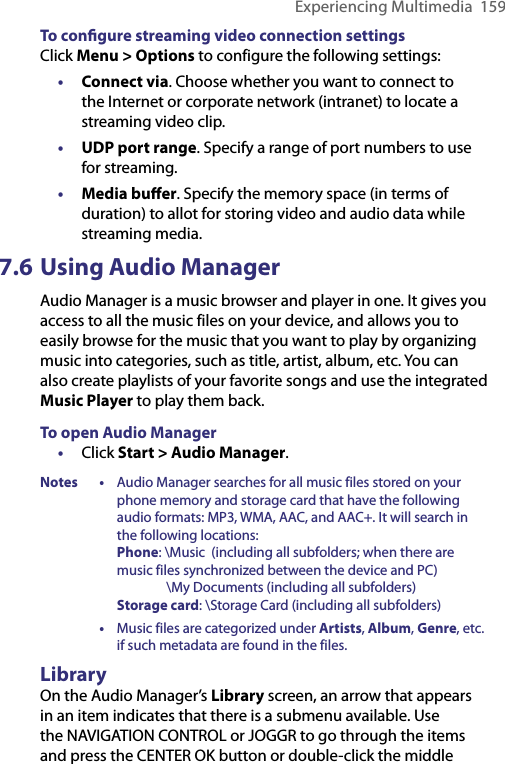
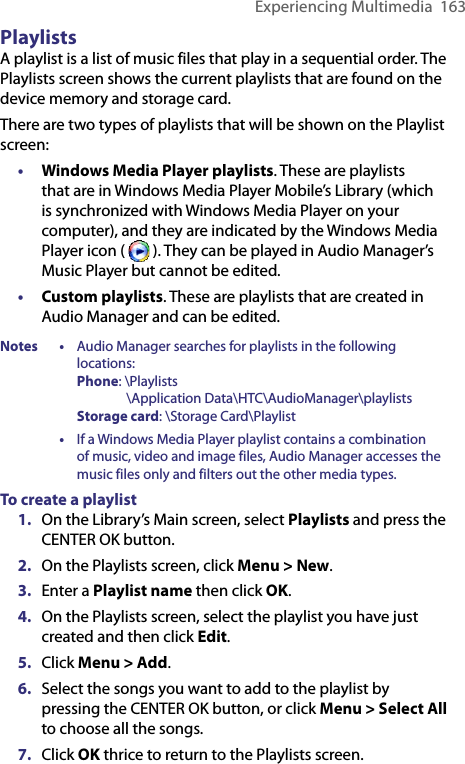
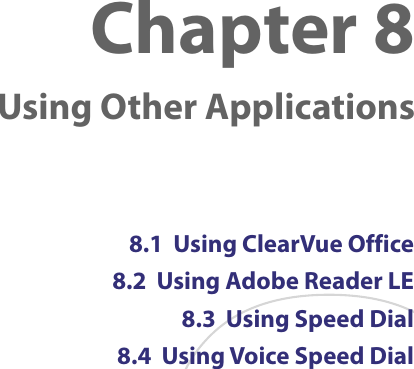
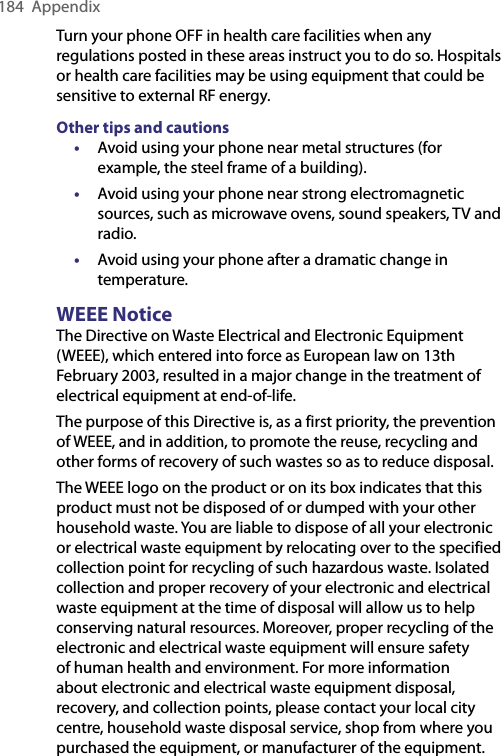
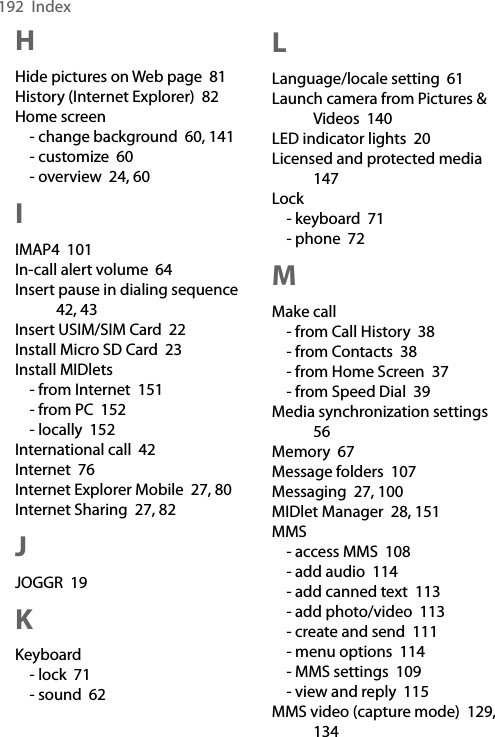
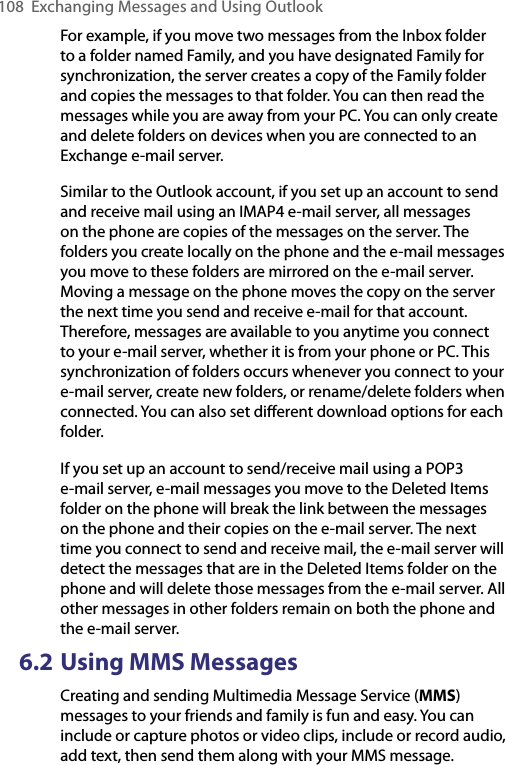
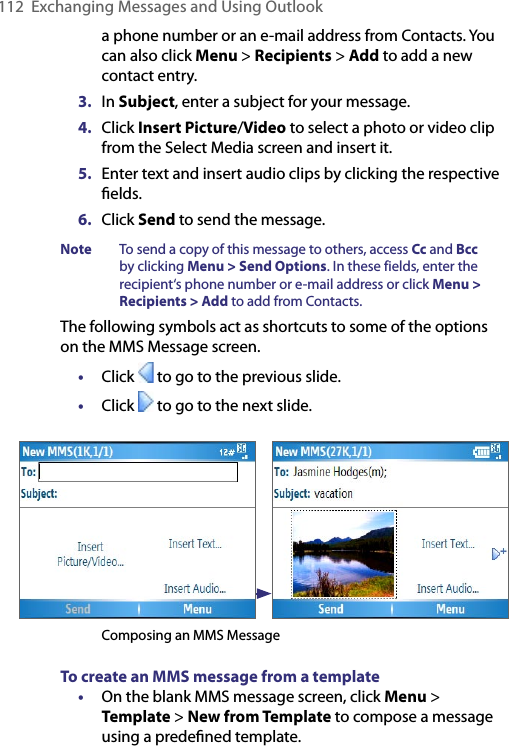
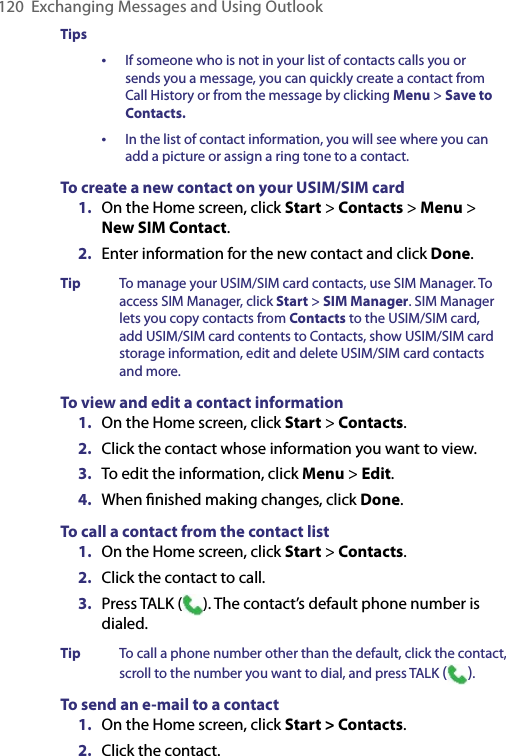
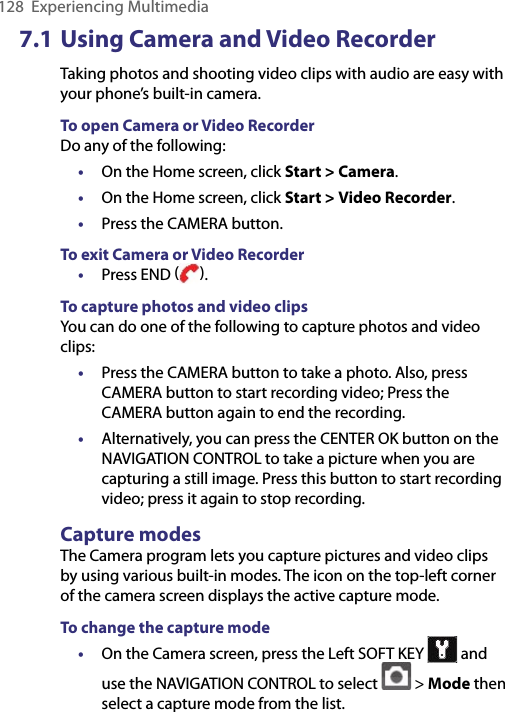
![Experiencing Multimedia 1317 Picture Viewer. Click the right SOFT KEY to view the picture or video in Pictures & Videos.8 Remaining Information Indicator. In Photo, Contacts Picture, Picture Theme, Panorama and Sports, this shows the remaining, available shots of pictures that you can take based on current settings. In Video and MMS Video modes, this shows the remaining duration that can be recorded. While recording video, this shows the recorded duration.9 Storage. Indicates where the captured images and video clips will be saved. The icon indicates the phone’s main memory; the icon indicates the storage card.10 Resolution. Indicates the current image or video size based on the resolution you chose. For the list of available resolutions, see “Use zooming.”The Camera [Video] screen The Recording Status indicator shows a red, blinking indicator while video recording is in progress.Recording Status](https://usermanual.wiki/HTC/CAVA100.User-manual-2/User-Guide-787345-Page-33.png)
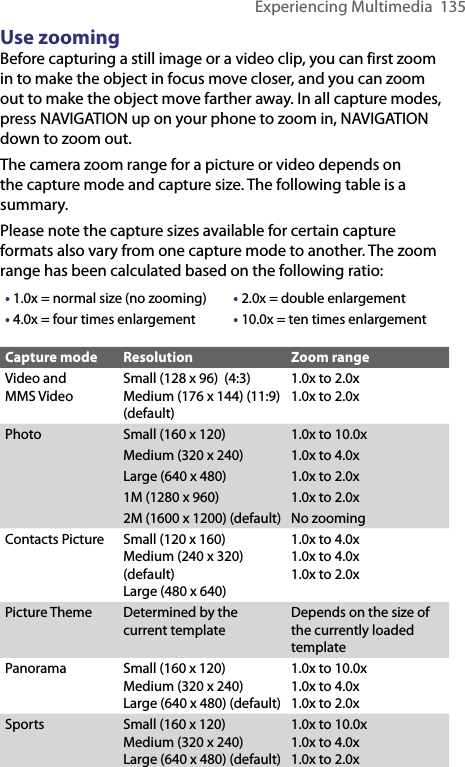
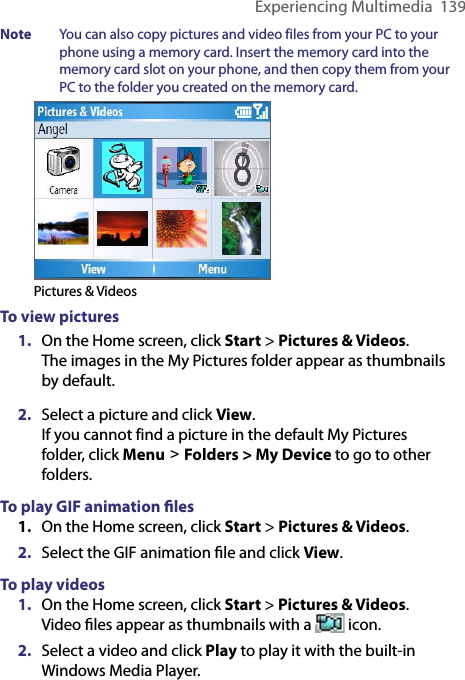
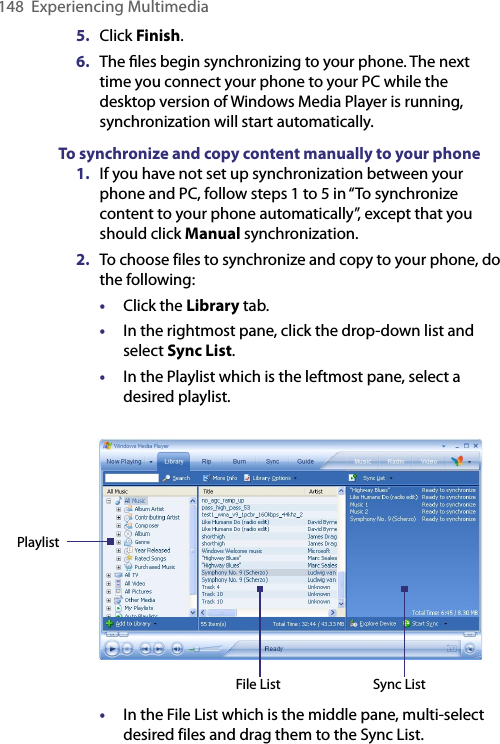
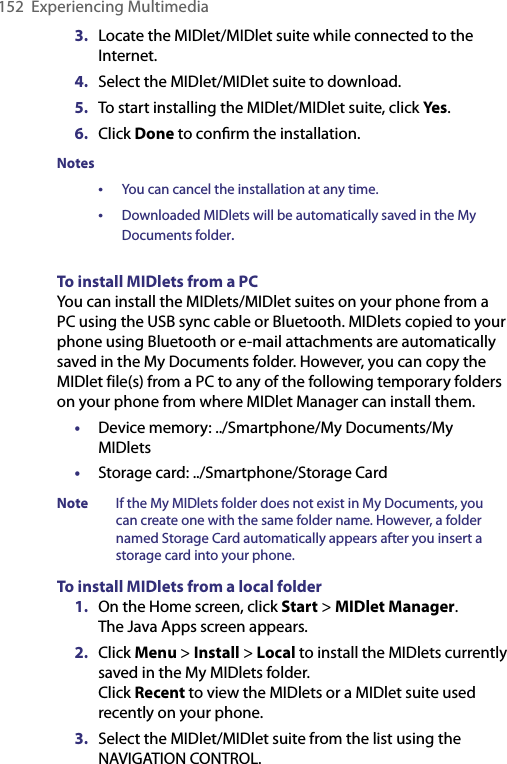
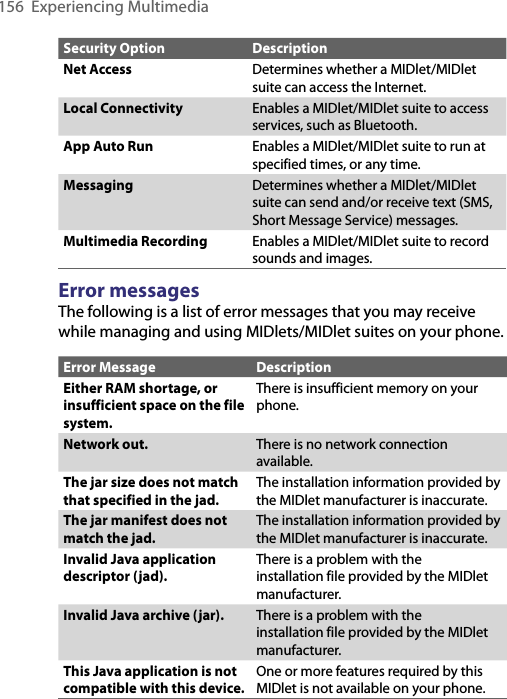
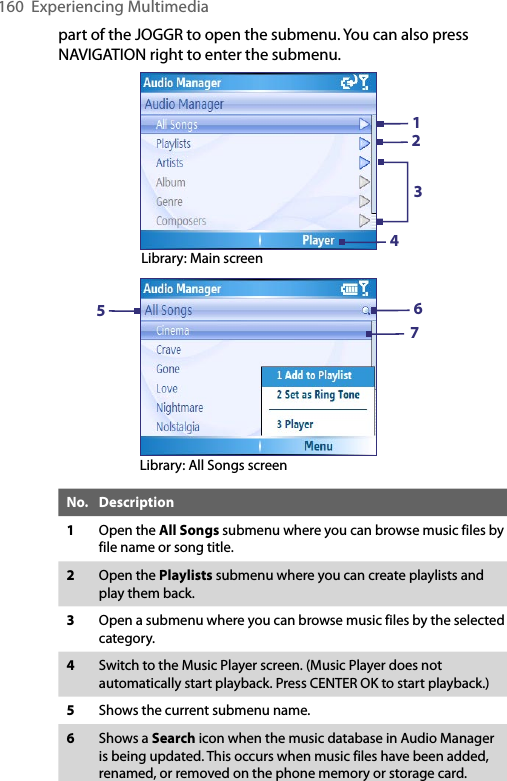
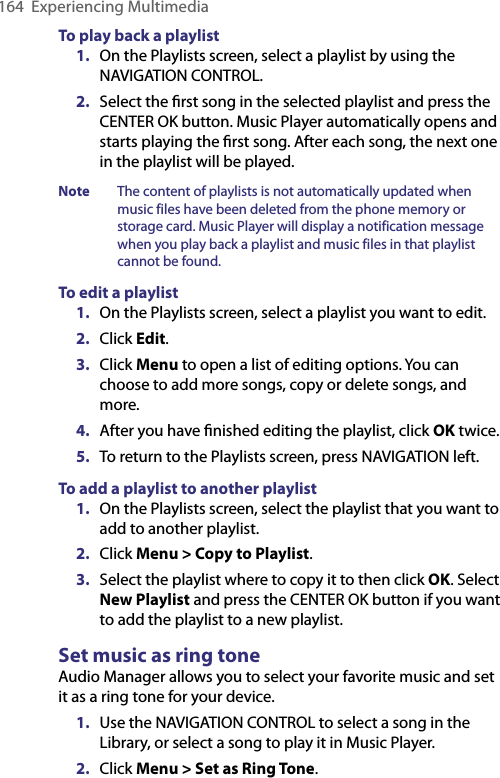
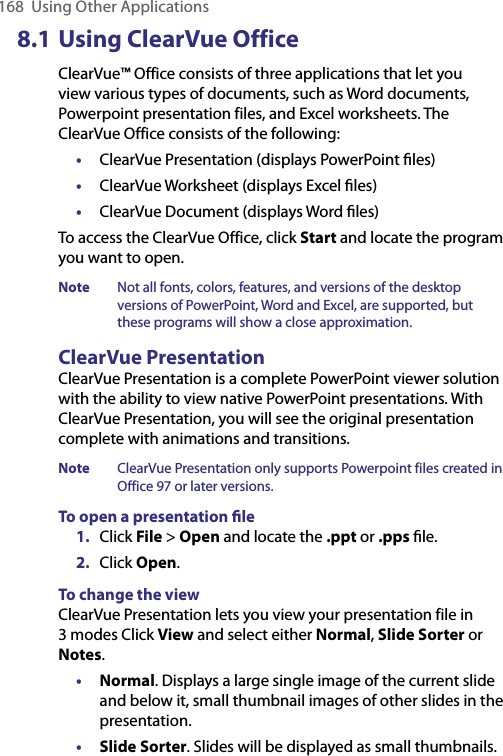
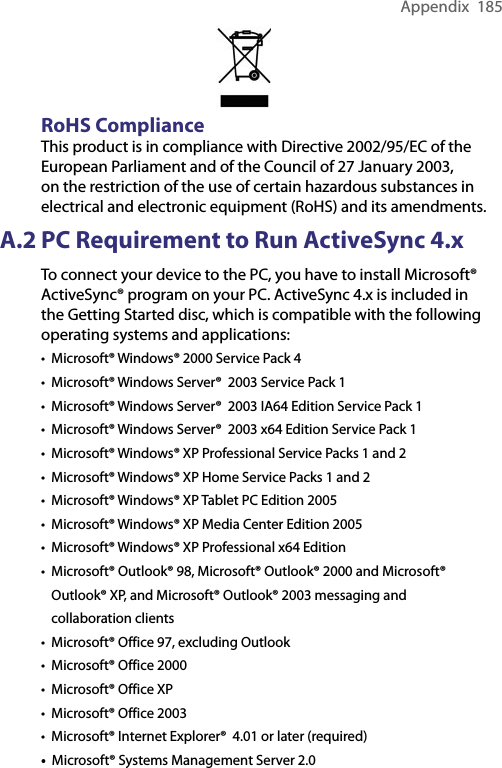
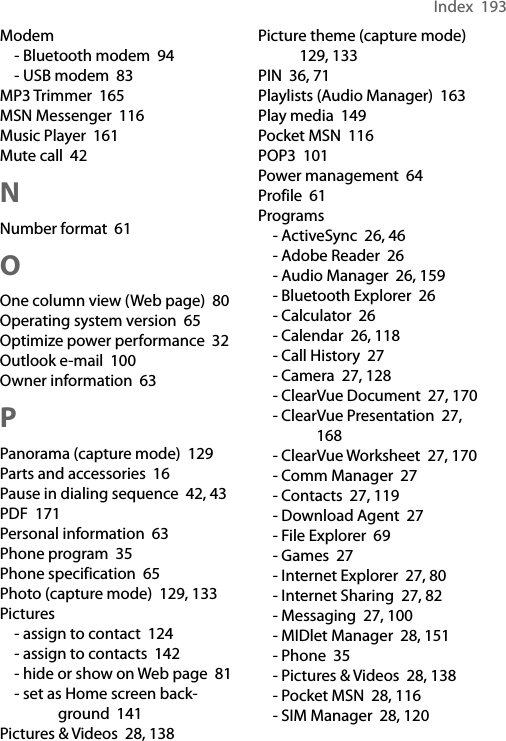
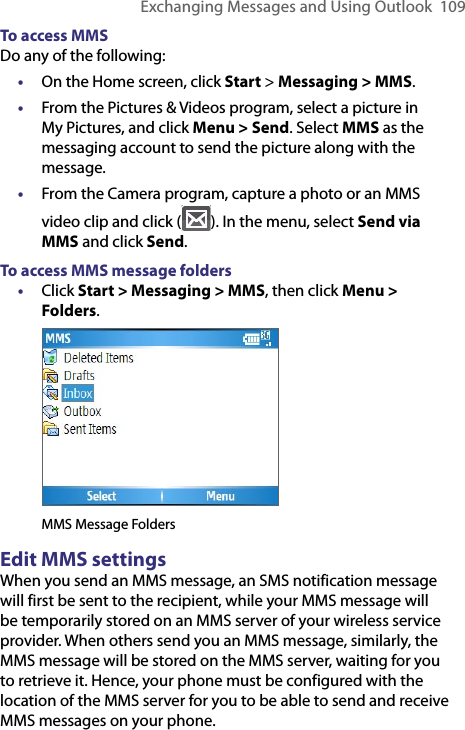
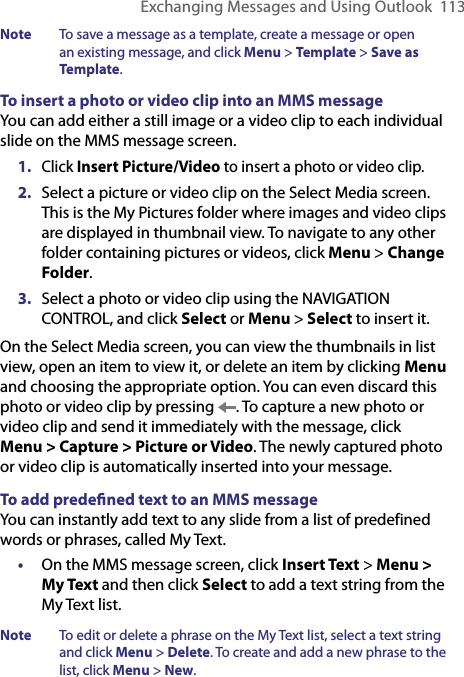
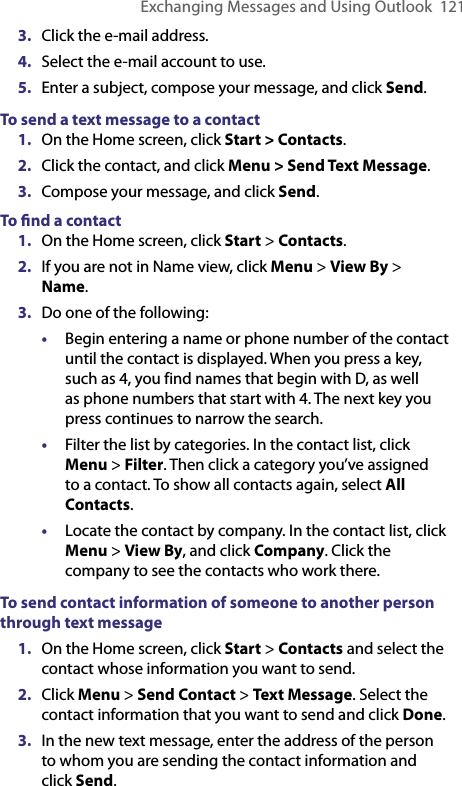
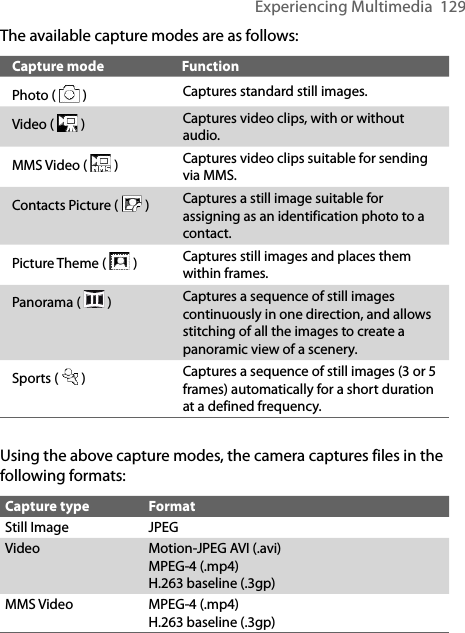
![132 Experiencing MultimediaThe Camera [Picture Theme] screen Progress IndicatorIn Picture Theme, Panorama, and Sports modes, this shows the total number of consecutive shots.The Review screenAfter capturing image or recording video, the Review screen appears allowing you to decide the action for the image/video.Photo, Video, MMS Video, Panorama and Picture Theme modesContacts Picture modeSports modeIcon FunctionBack. Click to go back to Camera screen.Delete. Click to remove the captured image or video clip.Send. Click to send the captured image or video clip to someone via e-mail or MMS.](https://usermanual.wiki/HTC/CAVA100.User-manual-2/User-Guide-787345-Page-34.png)